I’ve been having a blast showing some fun winter crafts, like these farmhouse cotton stems and sweater covered vases.
Our house is beginning to look a lot like… WINTER 🙂 ! All of the Christmas decor has been organized, packed up and put up in the attic for now.

In attempt to make the house not feel too bare after Christmas is over, I wanted to make some special winter DIYs. We even created a special winter tablescape.
Since we have about 3 feet of snow outside currently, we decided to bring some of the snow inside with these popsicle stick snowflakes for the walls.
Now after I showed these to my husband when I was finished, he admitted to me that he was a little nervous when I told him I was going to make some snowflakes out of popsicle sticks. He said that in his head he was thinking to himself…”oh no, she’s doing a kid’s craft”.
But after the popsicle stick snowflakes were all done and hung up on the walls, he confessed that they turned out a lot better than he imagined and he liked them! 🙂
This popsicle stick snowflakes tutorial contains affiliate links, but nothing that I wouldn’t wholeheartedly recommend anyway! Read my full disclosure here.
Supplies for the popsicle stick snowflakes
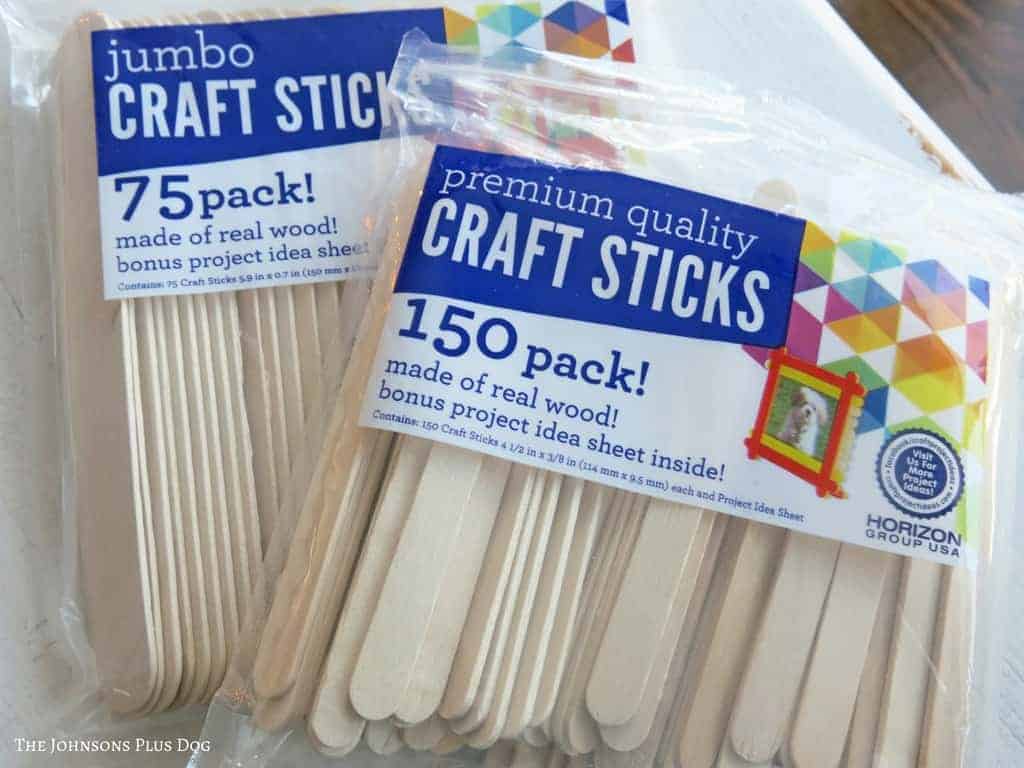
- Wooden Craft Sticks – Jumbo Size
- Wooden Craft Sticks – Regular Size
- Wooden Craft Sticks – Mini Size (optional)
- White Paint – I used some white chalk paint I had on hand, but you could use just normal white acrylic paint
- Hot Glue (or 3-in-1 glue) – The 3-in-1 glue is a little easier to move around while you’re putting it together because it takes about 10 seconds or so to set, whereas hot glue is a little more immediate. I used both and they both work good!
- To attach to the wall – Velcro Command Strip or a Command Hook with fishing line
What popsicle stick size do you use to make snowflakes?
You’re going to want to start with a bunch of wooden craft sticks. I used both the jumbo size and the regular size popsicle sticks from Walmart. The jumbo size ones were used for the center structure of the popsicle stick snowflake.
My wonderful in-laws were in town after Christmas when I was working on these and my mother-in-law jumped in and helped out.
After we finished making them, she ended up finding some mini size wooden craft sticks too that are awesome for the smaller more intricate details of the snowflakes.
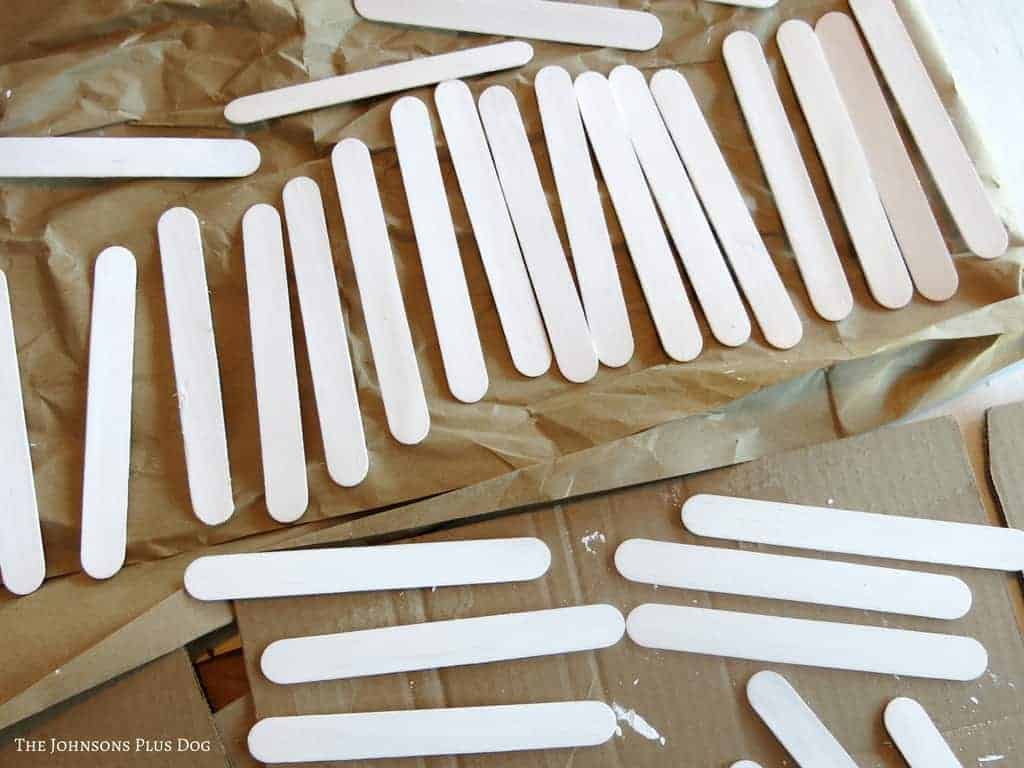
Step 1. Paint popsicle sticks white.
I started by painting all of the wooden sticks white.
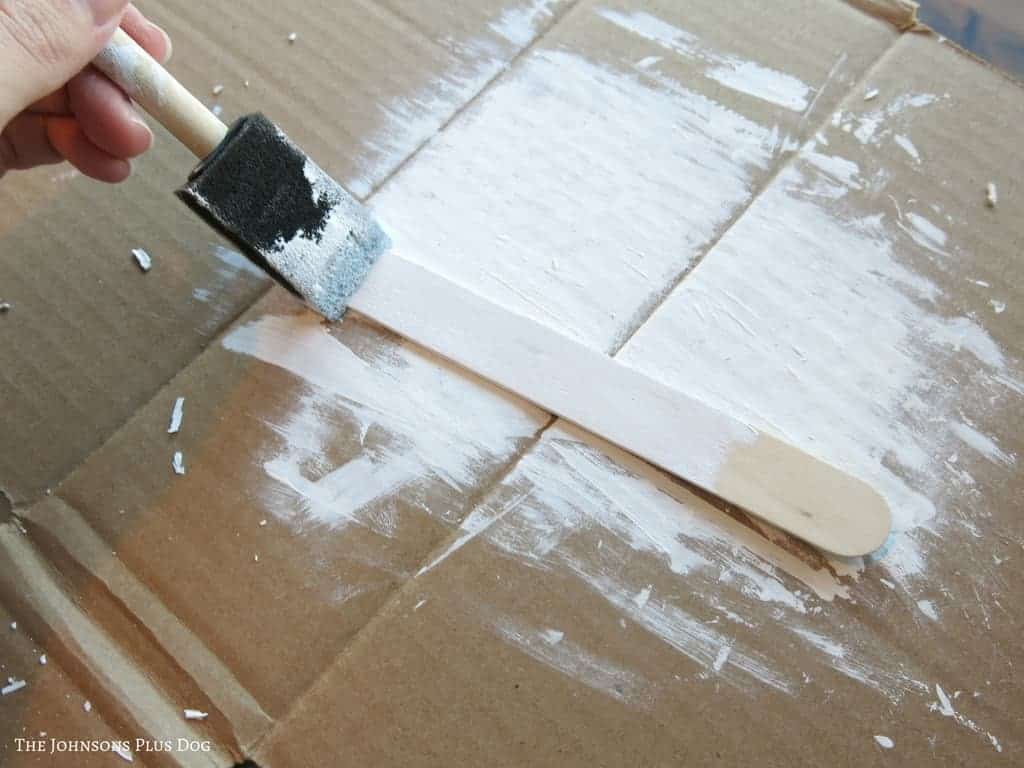
Alternatively, you could paint them after you put the snowflake together… you could even spray paint them afterward instead too.
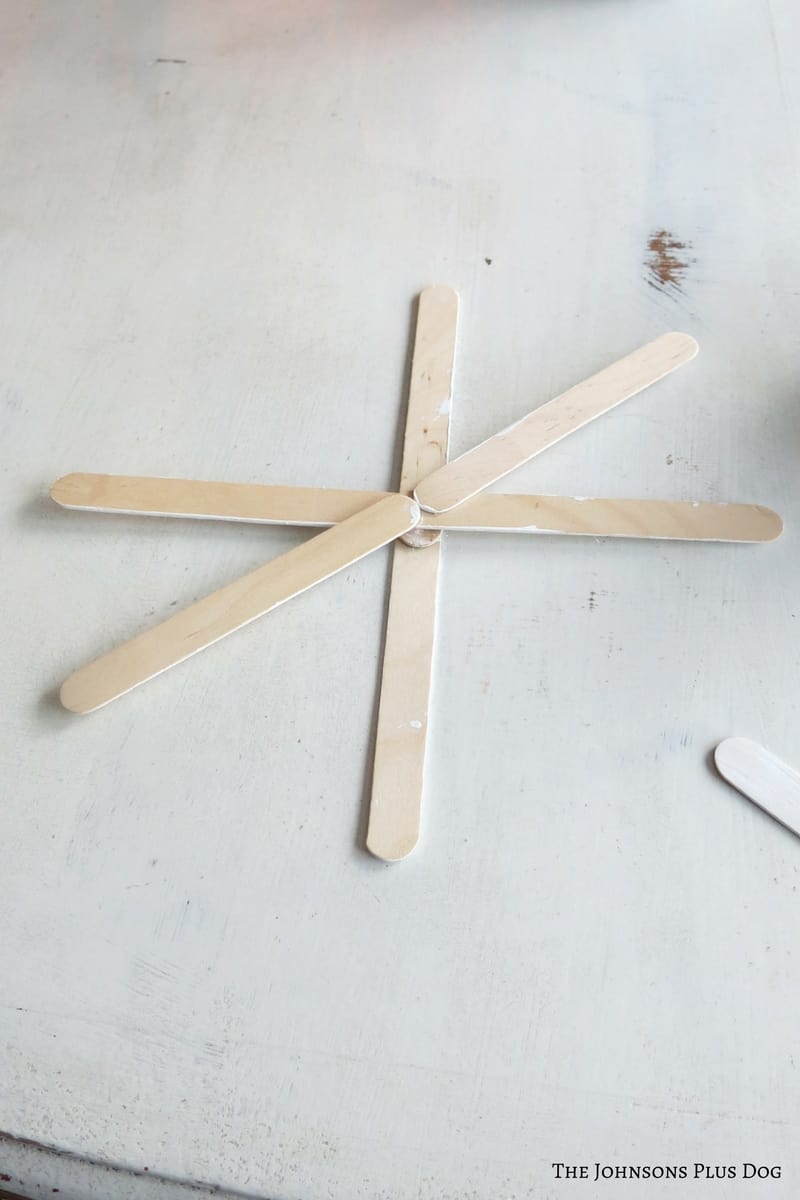
Step 2. Assemble main structure of snowflake.
Next you’ll put the main structure of the snowflake together with the jumbo wooden sticks. You’ll overlap the popsicle sticks slightly and glue.

We found it pretty difficult to line up the snowflakes with 6 points (3 main sticks crossing each other). It was much easier to make the snowflakes with the 8 points (4 main sticks in the middle). It was a lot easier to make those geometrically accurate, so I’d recommend starting with those.

Step 3. Plan out snowflake design.
Once you get the main structure of the craft stick snowflake built, it works best to layout the rest of the detail so you have a plan in place.
Step 4. Glue together rest of popsicle sticks for snowflake.
After you lay it out, you just glue the smaller craft sticks on with the hot glue for your snowflake details.
Step 5. Hang craft stick snowflakes on wall.
To attach the snowflakes to the wall, I both attached a command velcro strip on the back of one. The other ones were hung with a command hook and then I attached the snowflakes with fishing line.

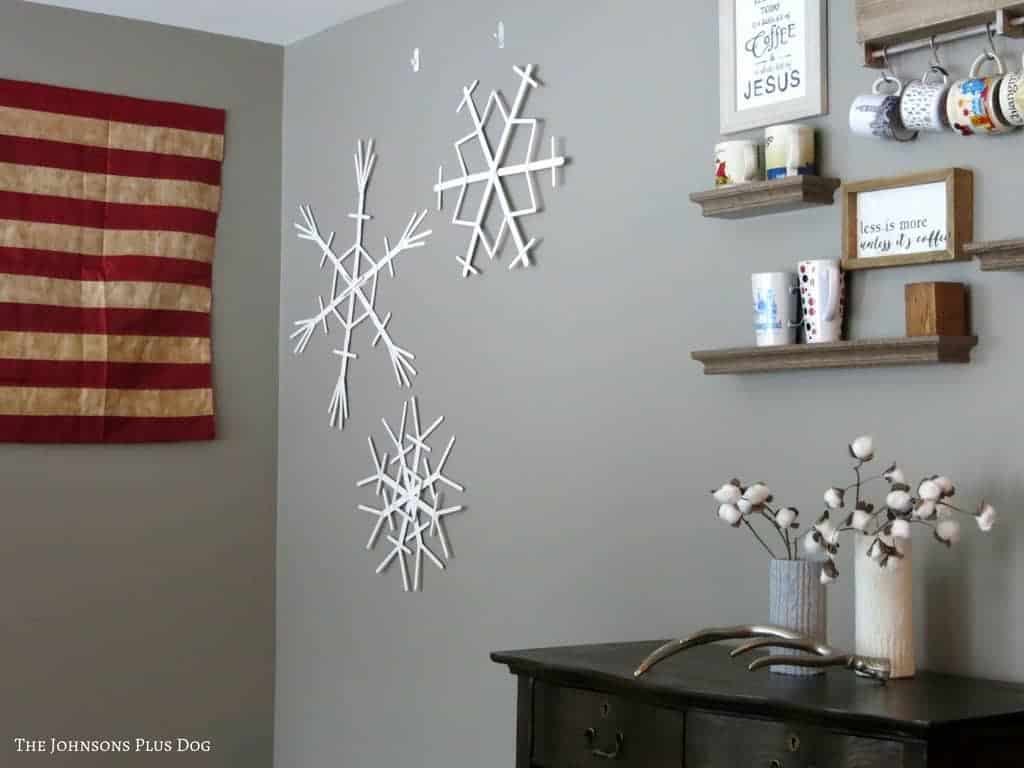
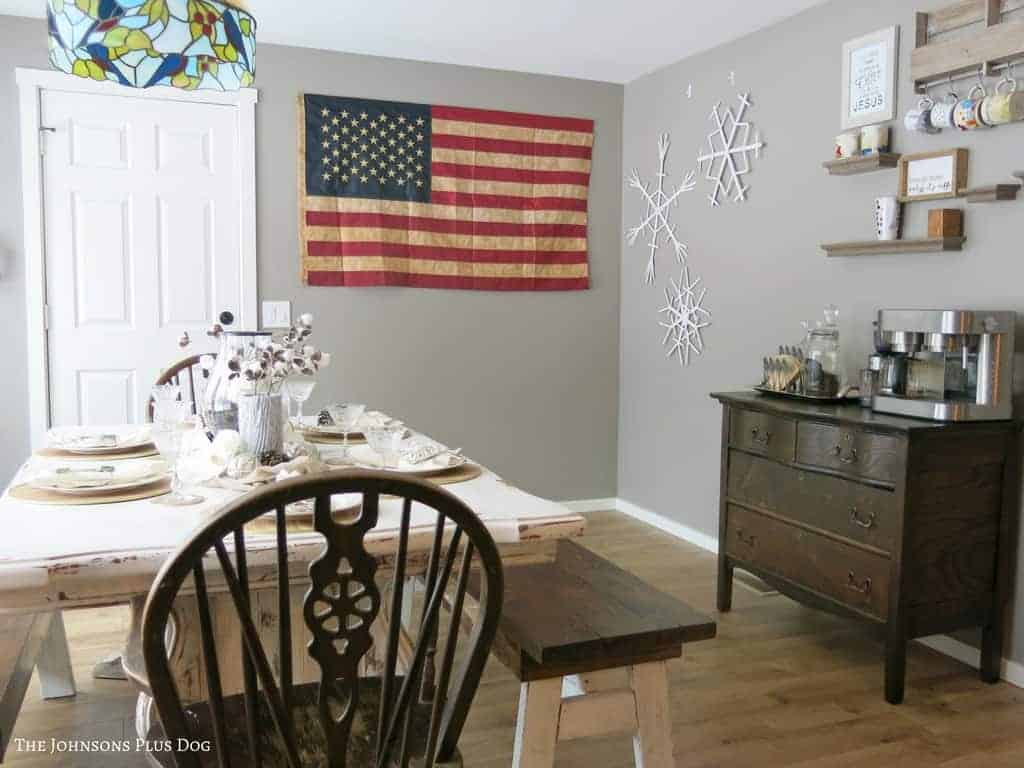
I love the fun and festive touch the cute popsicle stick snowflakes add to our dining room… also there’s a sneak peek at our farmhouse winter tablescape.

How to Make Popsicle Stick Snowflakes
These popsicle stick snowflakes are perfect winter crafts for kids (and adults!) that you can display in your home. They add a ton of dramatic winter spirit to decorate a big open wall or as winter window decorations.
Materials
Tools
- Hot Glue Gun
- Paint Brush
Instructions
- Paint the wooden craft sticks sticks.
- Put the main structure of the snowflake together.
- Layout the rest of the detail.
- Glue the popsicle sticks together.
- Hang posicle stick snowflake on wall.


They are so beautiful! What a fantastic diy idea!
Thanks Krysti, I had so much fun making these!
These are adorable! And I love that all three of them are in a different pattern. Pinning! – Amy @ http://thegiftedgabber.com/
Thanks so much Amy!
These are pretty and very unique! They’re a lot bigger than I expected when I first clicked on it (expecting popsicle stick size). I see you did use smaller craft sticks in your design – of course, they could be used by themselves to make smaller snowflakes, too. I would also paint the backs so I could hang them loosely (from ceiling or wall) AND add a dusting of white or silver glitter to make them twinkle a little bit (I gotta have some bling!) like real snowflakes! To bling them even more, you could add little crystals or gem shapes to the intersecting points and to the center. Thanks for the inspiration!
Thanks so much!! 🙂 Yes, one of the things I love about this DIY is that you can really get creative with them! Big or small, simple or bedazzled, on the wall or in a window! I’m so glad that you were inspired. I’d love to know how they turn out if you make them! Hope you have a great day!