
How To Make A DIY Vintage Wood Riser That Looks Old
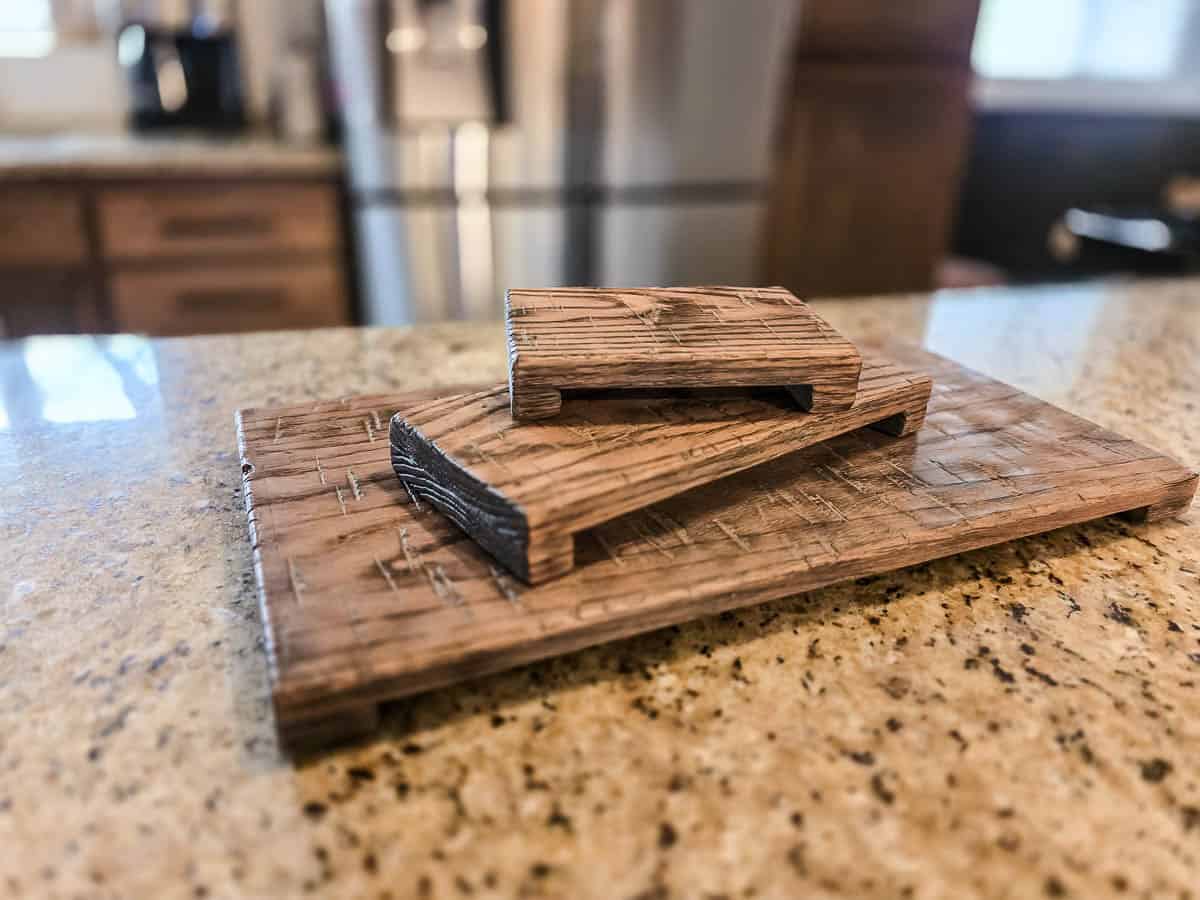
Learn how to make a DIY vintage wood riser that looks authentically aged. Easy tutorial for creating rustic charm with a simple build!
Thank you to DAP for sponsoring this DIY vintage wood riser project! All opinions are entirely my own. This post also contains affiliate links, but nothing that I wouldn’t recommend wholeheartedly. Read my full disclosure here.
This all started when I was craving some more cozy vibes in our kitchen. It’s been a while since we’ve touched the room, so I started dreaming up a little makeover. One thing that I knew I wanted for kitchen styling was some wood risers that looked old – sort of like we made the beams in the adjacent dining room.
When I explained the concept to Logan, he was excited that it was something simple because those beams took him FOREVER. We had a foolproof method of how to make the wood look authentically old, so we planned to use the same idea but on a much smaller scale.
If you love the look of aged wood decor, this DIY vintage wood riser is right up your alley. It’s the perfect mix of rustic charm and everyday function—plus, it’s a super simple build. Let’s make something pretty (and practical) that looks like it’s been around forever.
New 2-in-1 Wood Glue & Filler

For this project, we are trying out DAP Weldwood’s new 2-in-1 Wood Glue and Filler. Yes, you read that right. They have combined the wood glue and the wood filler into one product. Talk about a game changer! This saves an extra step of going back and filling in your joints with wood filler after they have dried.
Any wood glue that spills out of the edges of your joint can be wiped clean and then is sandable, stainable, and paintable. It worked great for attaching the feet of my riser trays. This new product made assembly a breeze, and let me tell you… It’s a total time saver.
How To Make Aged Wooden Risers: Step-by-Step Tutorial
Supplies & materials you’ll need
Step 1. Distress wood
The first step is to distress your wood for the wooden riser so that it looks vintage!
I have a super detailed blog post that walks you through the easiest way to make wood look old, if you want to check it out.
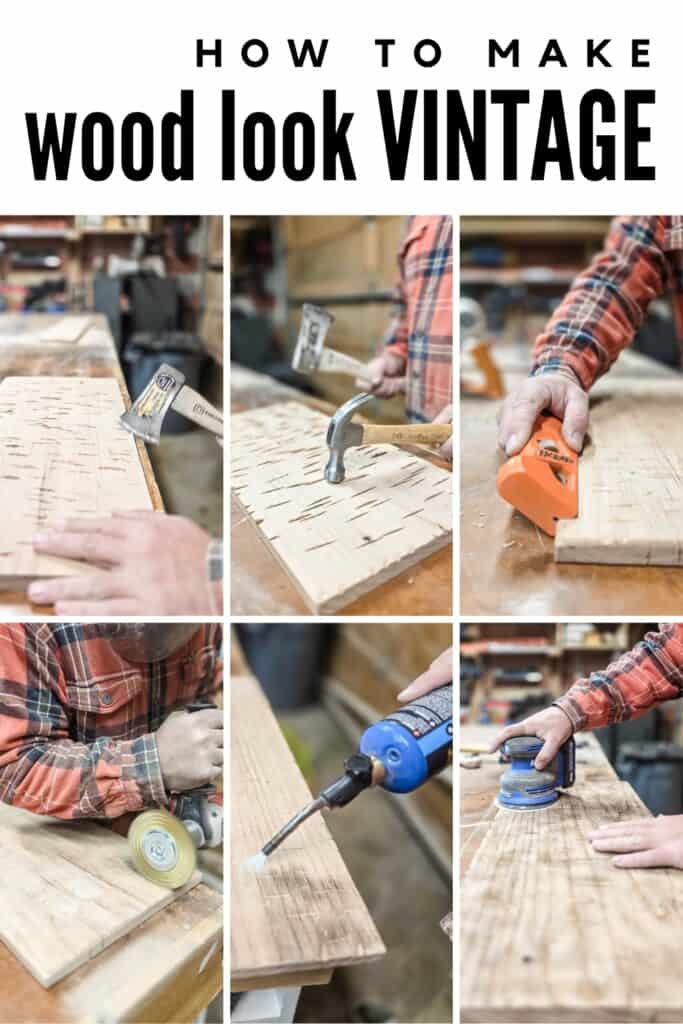
But here’s a summary of what you’ll do to the wood for the wood pedestals:
- Chop wood with a hatchet, carefully swinging at about a 45-degree angle in one direction to make deep cuts.
- Dent the wood with a hammer all over the board. Feel free to use different hammers for variety.
- Punch a nail into the wood several times.
- Run a wire wheel on a drill over the entire surface of the wood. It will dig out the wood in between the grains to give it that vintage look. *This is the most important step to make it look rustic, so don’t skip it!*
- Plane the edges of the wood with a small corner easing planer.
- Use a propane torch on the wood to expose the wood grain more, moving lightly and quickly.
- Lightly sand with an orbital sander and 220-grit sandpaper. Remember, just lightly…you’re not getting rid of the aged look, but to make sure there are no pieces that will leave splinters on your hands.
Note: Feel free to use whatever type of wood you want for this. We went with oak wood because it has a strong grain pattern, which just adds to that aged look. It is also a hardwood, so the wood trays will be durable!
Here’s what the wood will look like after you are done distressing.

Step 2. Cut wood

The next step is to cut the wood down to size. Use a miter saw to make the cuts.
- For the larger riser, we used 1 1/2″ legs cut from the 2′ board, so the finished width was 21″.
- For the medium tray, I wanted a finished width of 12″ to hold two canisters so we used 1″ legs.
- The smallest tray used the leftover wood from that 2′ 1×6 board after the 14″ was used up on the medium tray. The smallest wood riser has a finished width of 8″.

Step 3. Attach legs
Since the trays won’t get a lot of wear being just a decorative piece, you only need to glue the legs onto the bottom of the riser.

We tried the new DAP Weldwood 2-in-1 wood glue and wood filler, and it worked perfectly. We were able to combine two steps here and didn’t need to come back with wood filler after we added the legs.
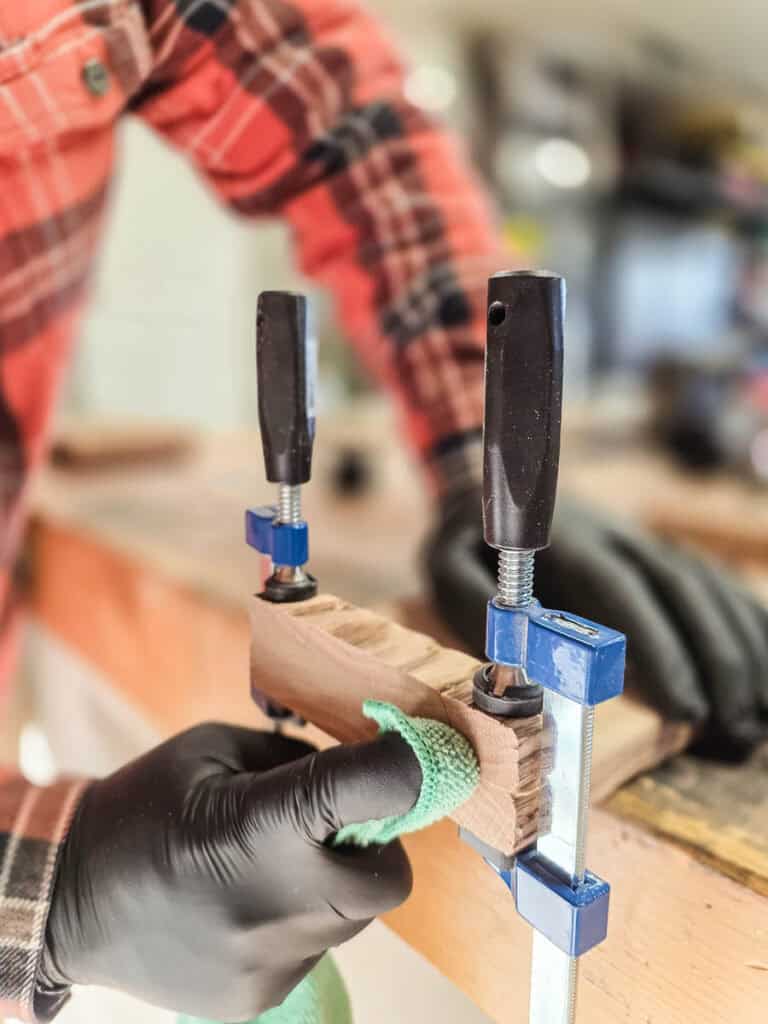

Spread the wood glue into place, add legs, wipe any excess glue off with a damp rag, and secure with clamps for 24 hours.
Step 4. Distress ends
After the glue is dry, don’t forget to come back and distress the cut ends of the wood where the legs were attached.
We recommend doing this distressing after the legs are attached so the distressing is able to go across the two boards, which helps make them look more cohesive.
Step 5. Stain wood table riser


Add wood stain of your choice and wipe off excess with a clean cloth. We used this stain color, which matches our wood beams in the dining room. I love the brown and gray undertones.
Step 6. Seal with wax

The last step is the seal the wood risers with finishing paste. Apply using a wax brush in circular motions. The paste has a matte finish, which looks great.


Seriously, you could put these cute wood pedestal trays just about anywhere. On the coffee table with a candle, on your kitchen counters to round up the essentials (like I did), on your kitchen island to decorate, or as a centerpiece on your dining room table. The small one is the perfect size for the bathroom, holding the jar of soap. These DIY vintage wood riser trays are so versatile!

The raised platform trays also make great DIY wood gifts – whether it be a birthday gift for a good friend or a hostess gift for a holiday party. Just tie some pretty ribbon around and voila.

Even if you didn’t want to distress the wood like we did, you could use the same concept on new wood and use the 2-in-1 wood glue to attach your feet.
And there you have it—a simple DIY project that looks anything but simple. These vintage-style wood risers add instant character wherever you place them. Thanks to the new 2-in-1 wood glue & filler, the build was quick, clean, and solid. Grab your tools and make a few—because trust me, you’ll want more than one.