
DIY Disposable Flatware & Paper Plate Holder
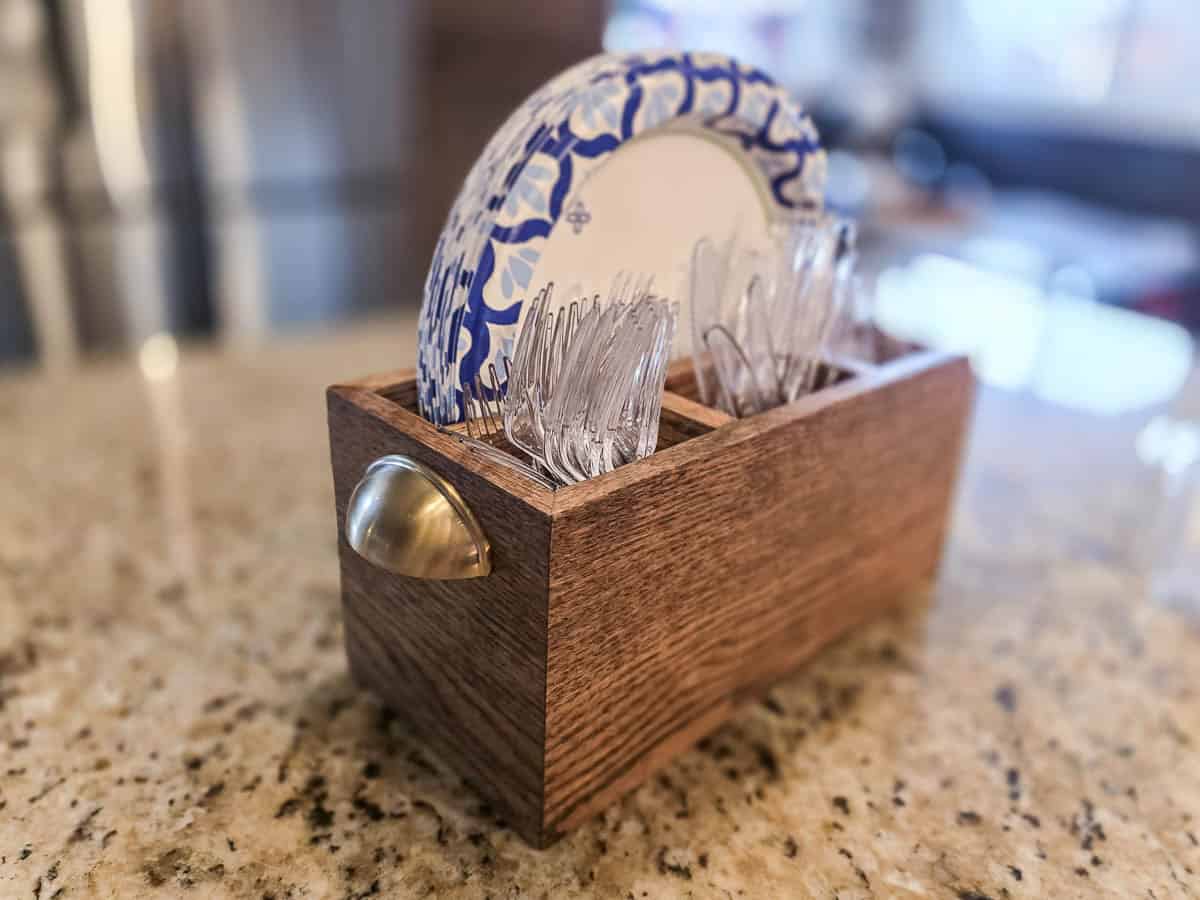
Thank you to Kreg for sponsoring this paper plate holder project! All opinions are entirely my own. This post also contains affiliate links, but nothing that I wouldn’t recommend wholeheartedly. Read my full disclosure here.
When you’re hosting a crowd, the last thing you want is digging through cabinets or washing extra dishes all night. This DIY paper plate holder keeps everything stored neatly and easy to grab when family shows up hungry.
With a big family, I’m all about shortcuts that actually help—especially ones that keep dishes from piling up when everyone’s over.

Kreg’s New Dowel Jig
Kreg is definitely known for its pocket hole jigs and, honestly, nine times out of ten, we are using pocket hole joinery on our woodworking projects. But there’s some projects where it isn’t the best solution.
So we are thrilled that Kreg has now come out with some other jigs using other joinery techniques, like loose tenon and dowels!
For this project we were trying out their brand new dowel jig and it worked so great for this little paper plate holder! It is a great solution for these small project where pocket holes won’t fit or it is too tight to get a drill in to drive the pocket hole screws.
Wooden Paper Plate Holder: Step-by-Step Tutorial
Tools and materials you’ll need
Follow along with our easy step-by-step tutorial and don’t forget to get the free woodworking plans so you can have a full cut list with all of the dimensions and details you’ll need to build one for yourself!
Video Tutorial
YouTube video coming soon!
Step 1: Cut the wood

Cut all pieces to size using the cut list in the woodworking plans, which can be downloaded here.
- We used the Kreg Adaptive Cutting System, which made repeat cuts fast (great if you’re making multiples).
- Use a table saw to cut the groove for the bottom panel
- Use a miter saw for the mitered edges
Step 2: Drill dowel holes

Dry fit all pieces and mark dowel locations. Drill holes using a Kreg dowel jig and the included index pins for even spacing.
- Hole locations in the plans are approximate
- All joinery in this project uses dowels, except the mitered corners
Step 3: Sand

Sand all pieces with 120-grit sandpaper using an orbital sander.
Step 4: Attach utensil dividers

Glue and dowel the two utensil dividers to the long back piece first.
- Add glue to the holes
- Insert dowels
- Tap dividers into place with a rubber mallet
Step 5: Add plate divider

Attach the plate divider to the tops of the utensil dividers using the pre-drilled dowel holes.
Step 6: Add plate supports

Install the diagonal plate supports at the bottom corners of the plate divider.
- Use the pre-drilled dowel holes
- Keep mitered edges flush with the wood edge
Step 7: Install bottom panel

Apply wood glue and slide the ¼” bottom panel into the groove on the long side.
Step 8: Attach short sides

Glue and dowel both short sides in place.
- Make sure the bottom panel stays seated in the groove
- Glue mitered corners and clamp right away
Step 9: Attach front long side

Attach the front long side to the plate supports using glue and dowels.
- Glue and clamp the corner miters immediately
- Clamp the entire piece, checking miter alignment
- Let dry for 24 hours
This is what it should look like at this point…

Step 10: Final sand and fill

Remove clamps and sand with 120-grit, then 220-grit.
Fill any gaps with stain-matching wood filler. Let dry and sand smooth.
Step 11: Stain and seal

Stain in your chosen color (we used this wood stain).
Seal with several light coats of spray lacquer.
Step 12: Attach handles
Install cup handles on the sides. Done.


This paper plate holder slides right out of the cabinet and straight onto the counter, ready for hosting. Fewer dishes, less cleanup, and less chaos.

It also makes a great DIY Christmas gift (even a great hostess gifts)—just pair it with holiday-themed plates and cutlery for a practical gift that’ll get used year after year.
If you want to build this DIY paper plate & flatware caddy, we’ve done all the hard stuff for you! All you need to do is hop over the Kreg’s website! At the bottom of the tutorial there, you’ll see a link to download the free plans to get all of the detailed measurements and a cut list!