How to Install an Attic Ladder

Is your garage filled to the brim with holiday decorations? Childhood belongings? Just…stuff? Ever wanted more space but just didn’t know where to start?
Learn how to install an attic ladder to get those decorations and belongings up and out of sight.
Table of Contents

We have all been here before right? No matter how many Goodwill trips we make, garage sales we have, dump runs we take, or creative organization solutions, the garage is still full.
Sometimes the only solution here is to go UP! And that is up into your attic.
Just think about all of the untapped potential storage space you have in your attic. But you want to be sure you have easy access if you’re going to take advantage of that storage space. All you need to do is install an attic ladder.
In this tutorial, we’re going to walk you through the entire process of installing an aluminum attic ladder.
Keep in mind that your specific ladder or exact model may be different, so please refer to your manufacturer’s instructions in addition to this tutorial.
This tutorial for how to install an attic ladder contains affiliate links, but nothing that I wouldn’t recommend wholeheartedly. Read my full disclosure here.
Supplies needed to install an attic ladder:
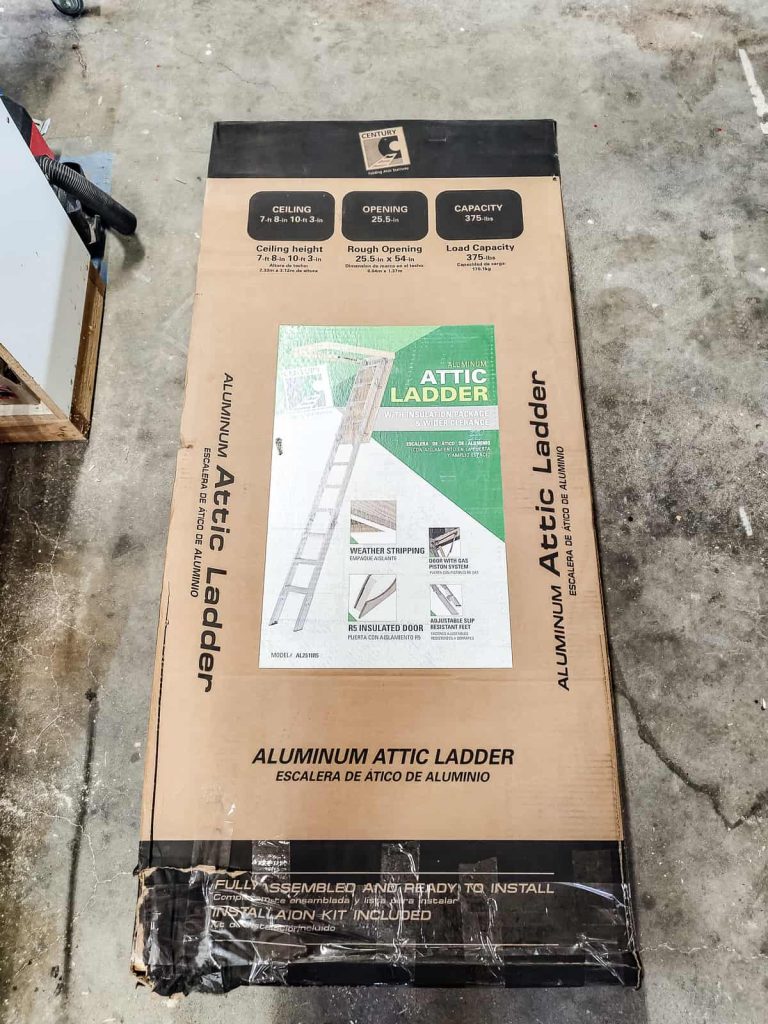
- Attic ladder, this is the one we used
- 2″ x 10″ x 8′ Doug Fir
- 6- 2×10 Joist Hanger
- Scrap lumber
- 2 1/2″ Wood Screws
- Impact Driver
- Speed Square
- Tape Measure
- Pencil
- Floor Jack
- Hack Saw
- Circular Saw
Step 1. Pick a spot to install your attic ladder and purchase a ladder
This may seem simple, but choosing the right spot to put your new ladder is probably one of the most important steps you can take before you install an attic ladder.
Of course, if you have an existing attic access hatch – you can use that! But in our case, we were adding new access to our attic to create additional storage.
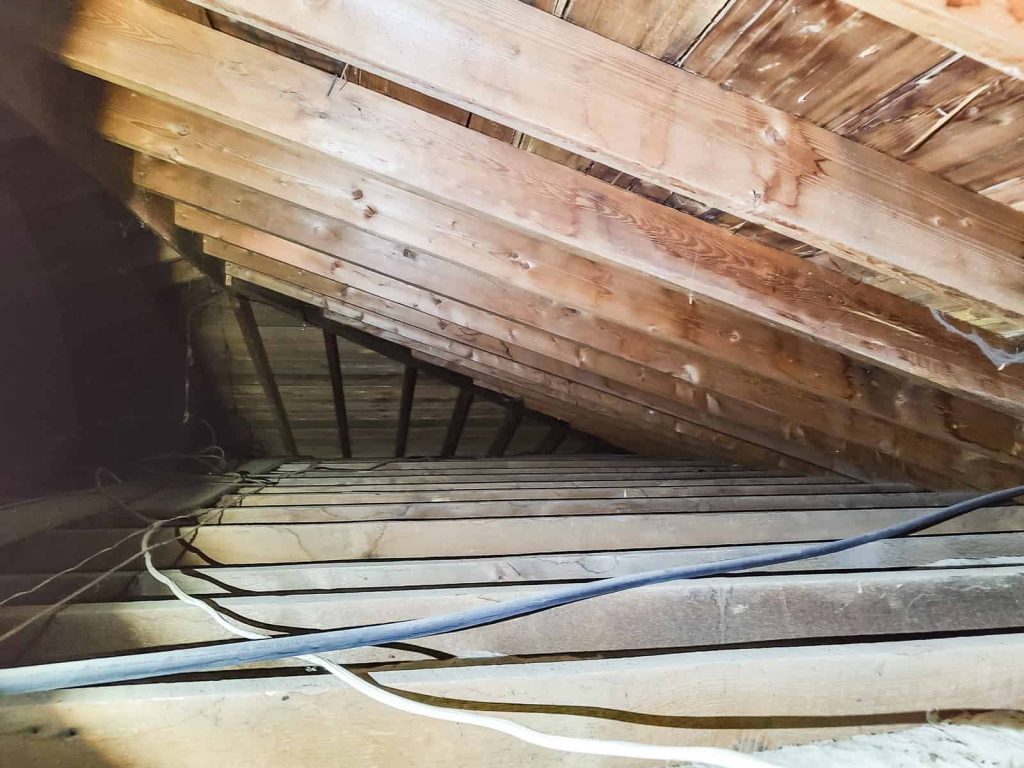
A lot depends on how your attic roof system is built, what type of framing is up there, and where your walkways are. You may need to pop your head up into the attic space to do a visual inspection to see what you’re working with.
We opted to put our attic ladder in the garage. The garage is a great place to put an attic ladder because it is a place that is not air-conditioned. That way it doesn’t require extensive sealing and insulation covers.
If you’re putting your attic ladder indoors, you’re going to want to look for a ladder that has better energy efficiency to prevent air leakage from and to the attic into your living space.
You need A LOT of space, not only for the hole in the ceiling but also for the ladder to unfold. Keep in mind that attic ladder doors aren’t recommended for tight spaces! When you buy the attic ladder be sure you have enough room for the rough opening and for the attic door and ladder to fold down.
Both the packaging and the instructions that come with your attic ladder should clearly tell you exactly how much available space is needed for the hole in the ceiling and open space on the ground for the ladder to fold down. Use your tape measure to make sure you have adequate room. This is important to double-check so you get the right ladder for your space.
The last measurement you’ll need to make is how tall your ceiling is. Grab a measuring tape and determine the distance from the floor to the ceiling – this is your ceiling height. Attic ladders only fit certain ceiling heights and are the last measurement you’ll need.
When selecting your attic ladder, keep in mind the load capacity of the ladder. We opted for the most we could get at our local big box store since we were going to be storing a lot of heavy objects. Our general rule is usually that it is better to be safe than sorry. Also, the ladder will be more durable if it is made to handle say 375 pounds vs 275 pounds or even 225 pounds! Seems like a good choice, right?
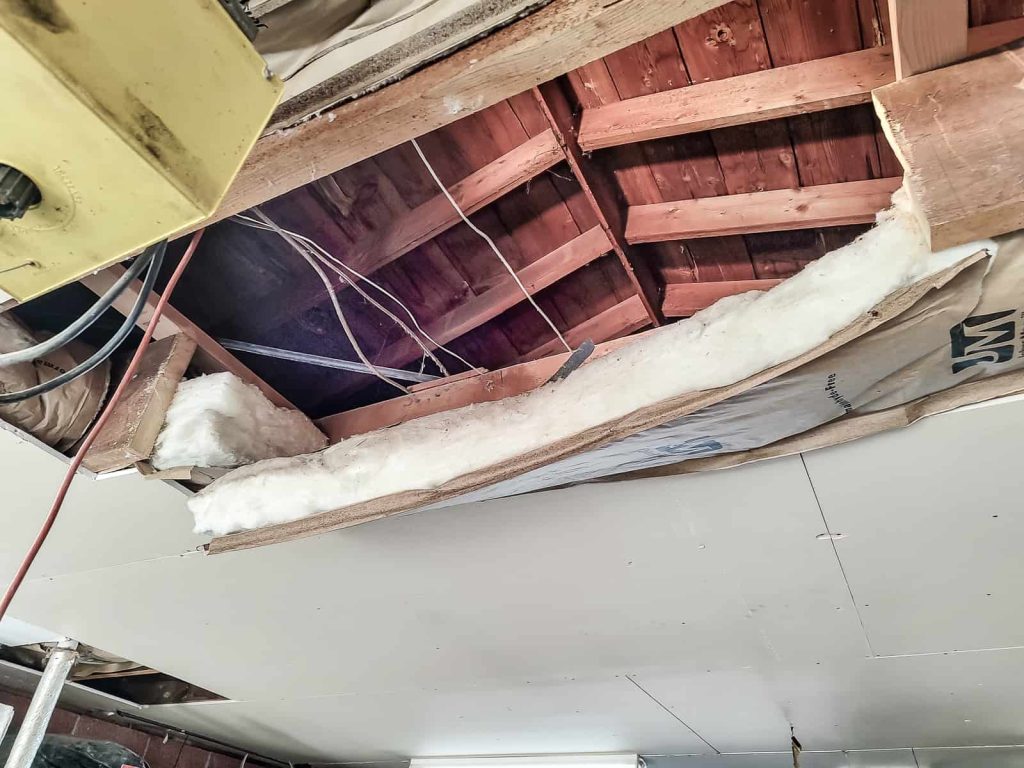
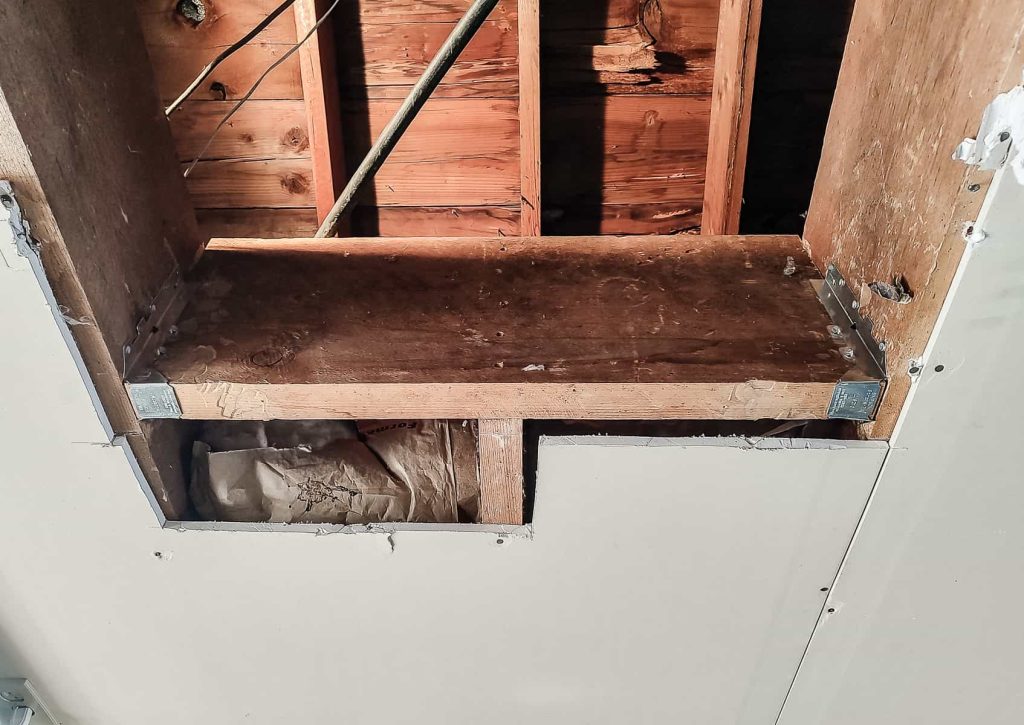
Step 2. Prepare the rough opening for the attic ladder

Ideally, you don’t have to remove attic joists to install your attic ladder but you may. Chances are you will have to adjust some joists though because the rough opening (R.O.) is quite significant for an attic ladder and it probably won’t fit in between the existing ceiling joists. For an R.O. that doesn’t need joist removal, you only need to just add headers.
Remove a joist
We needed to remove a joist to accommodate the attic opening in our garage.
Before you go removing joists, you definitely want to check first to make sure they are not load-bearing. If you aren’t sure, the best way is to, of course, pay someone to figure out if you can remove a joist. The last thing you want is to have your roof cave in, right?
To remove a non-load-bearing joist, simply measure out the R.O. and then add 2×4 support boards on top of your joists in the attic secured with 2 1/2″ wood screws.
Cut the section of the joist you need to remove with a circular saw. Remove the cut piece of the joist.
Add header
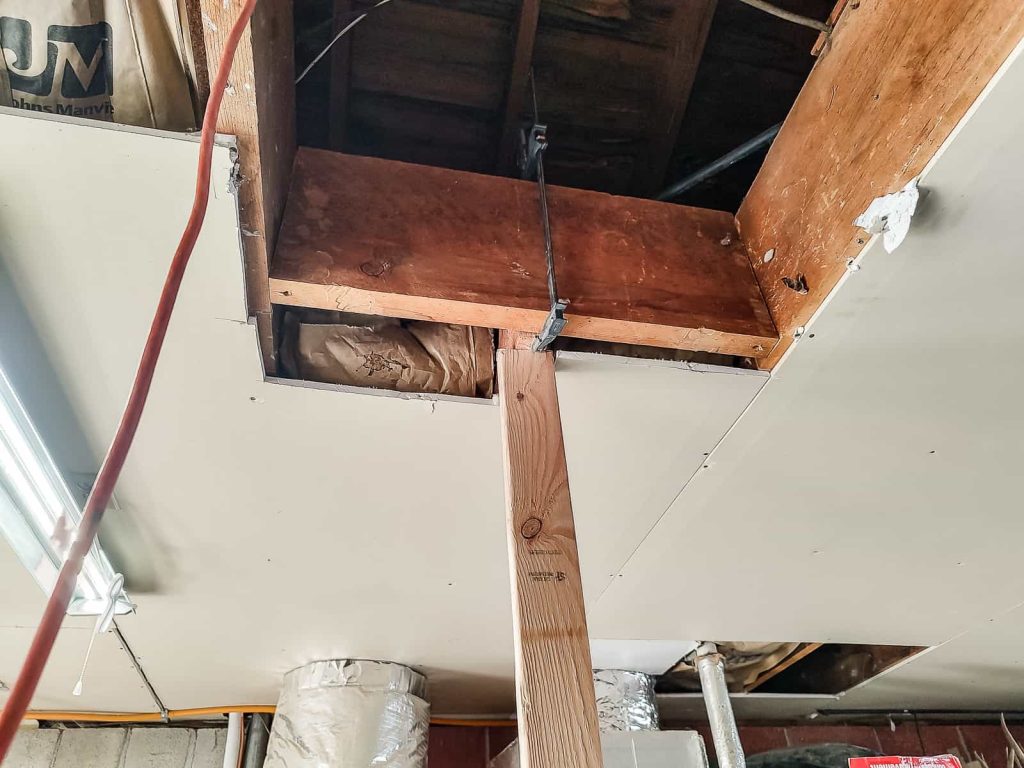
Next, you’ll add headers between the two existing joists on either side of the cut you made with 2 1/2″ wood screws in each corner screwed at an angle.
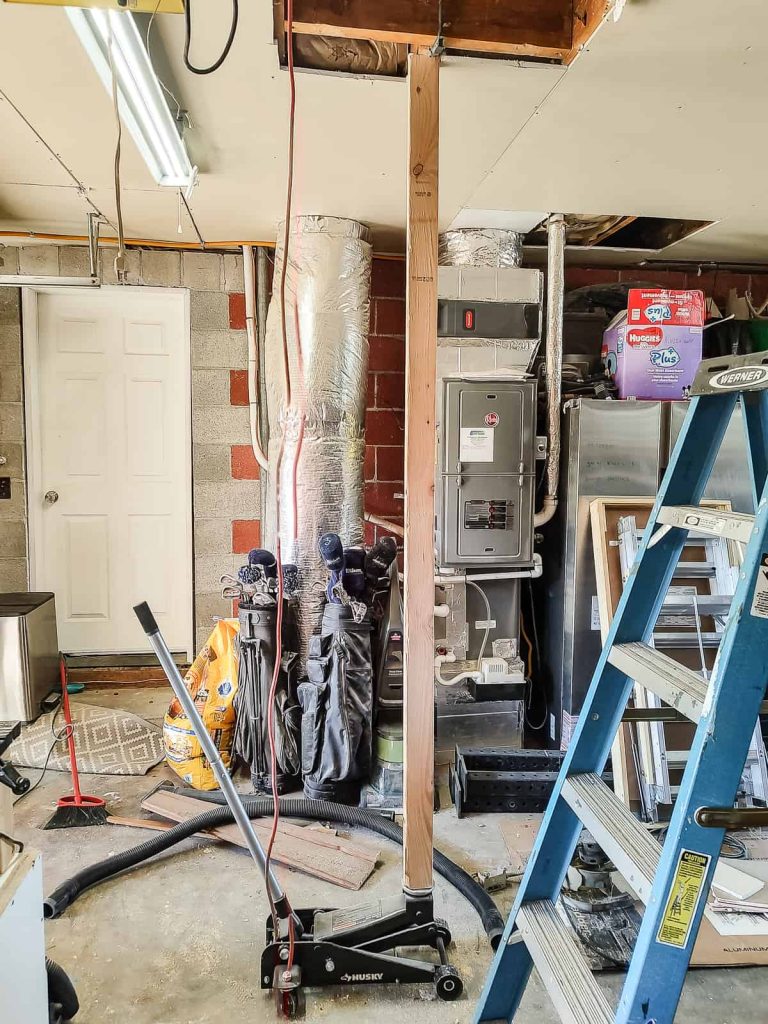
The 2×4 support boards you added may or may not be enough to keep the cut joists flush with the new header board you’re adding. If it is sagging at all, you can do what we did and jack it up with a vertical 2×4 and a floor jack. This, along with a clamp or two, will hold it in place while you attach the header.
Add joist hangers
Once the header is screwed into place, add joist hangers to each corner.
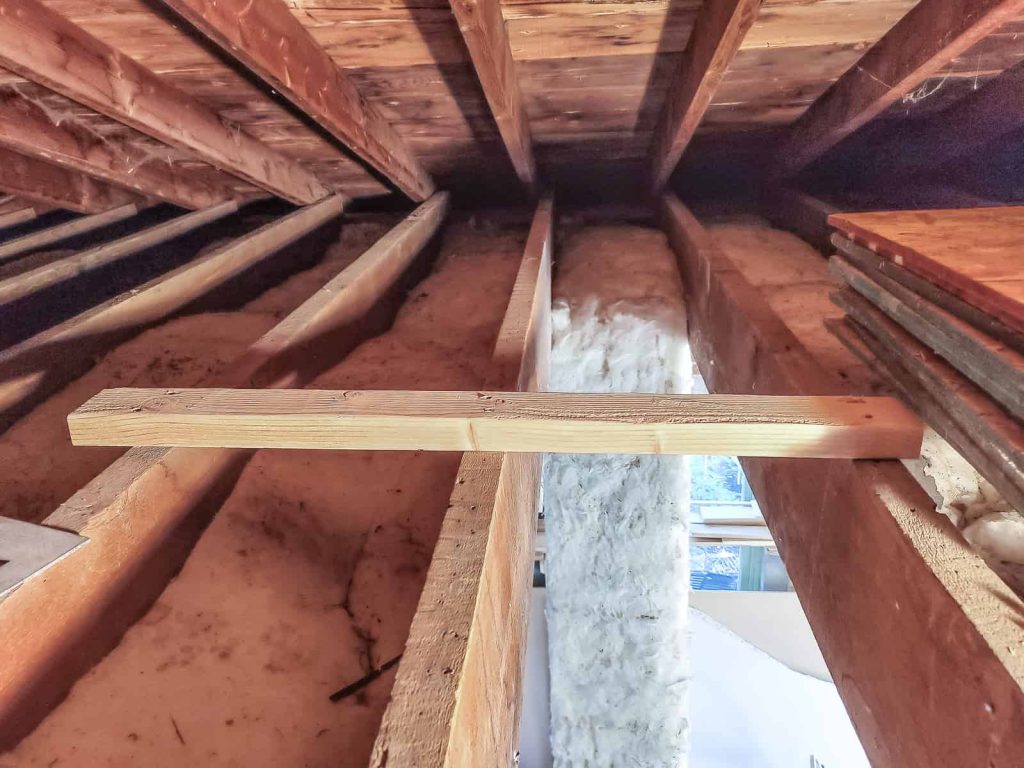
Add stringer
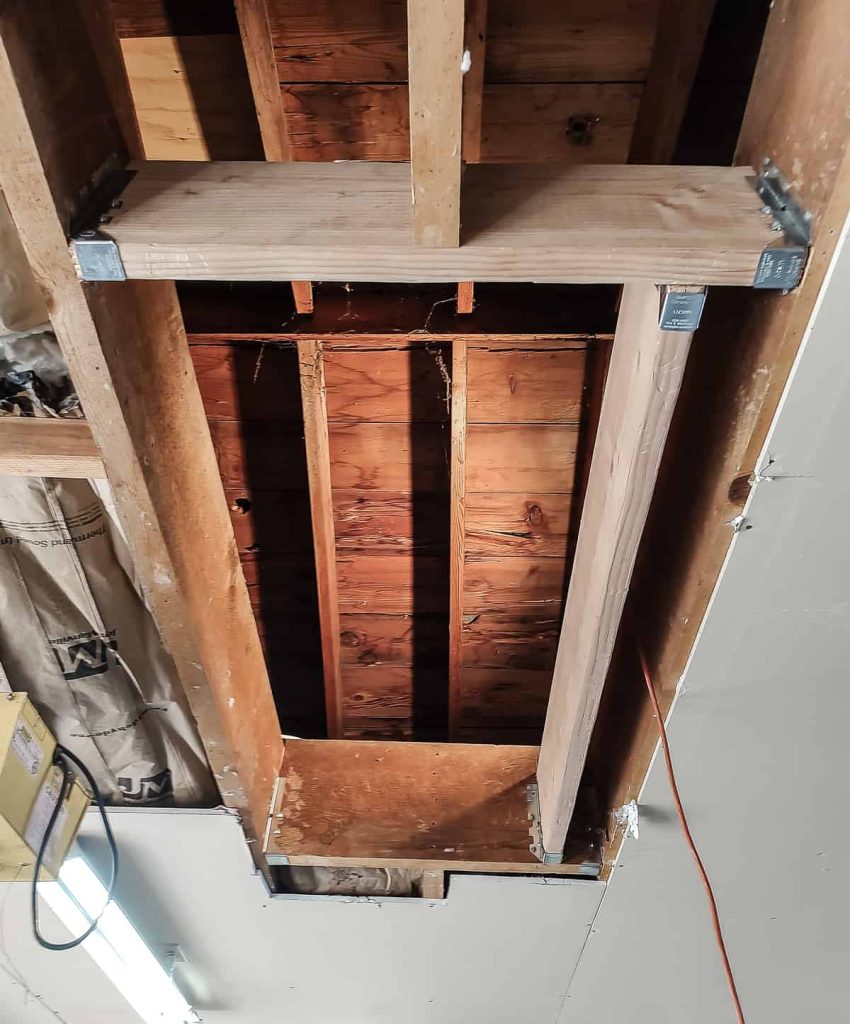
Once your headers are secured with joist hangers, you’ll add a stringer to complete the R.O. for the new attic ladder.
A stringer is long the piece on the right that completes the box for the R.O. Attach is at the correct measurement so that the box inside matches the exact R.O. that your ladder requires. Use joist hangers on each corner to secure.
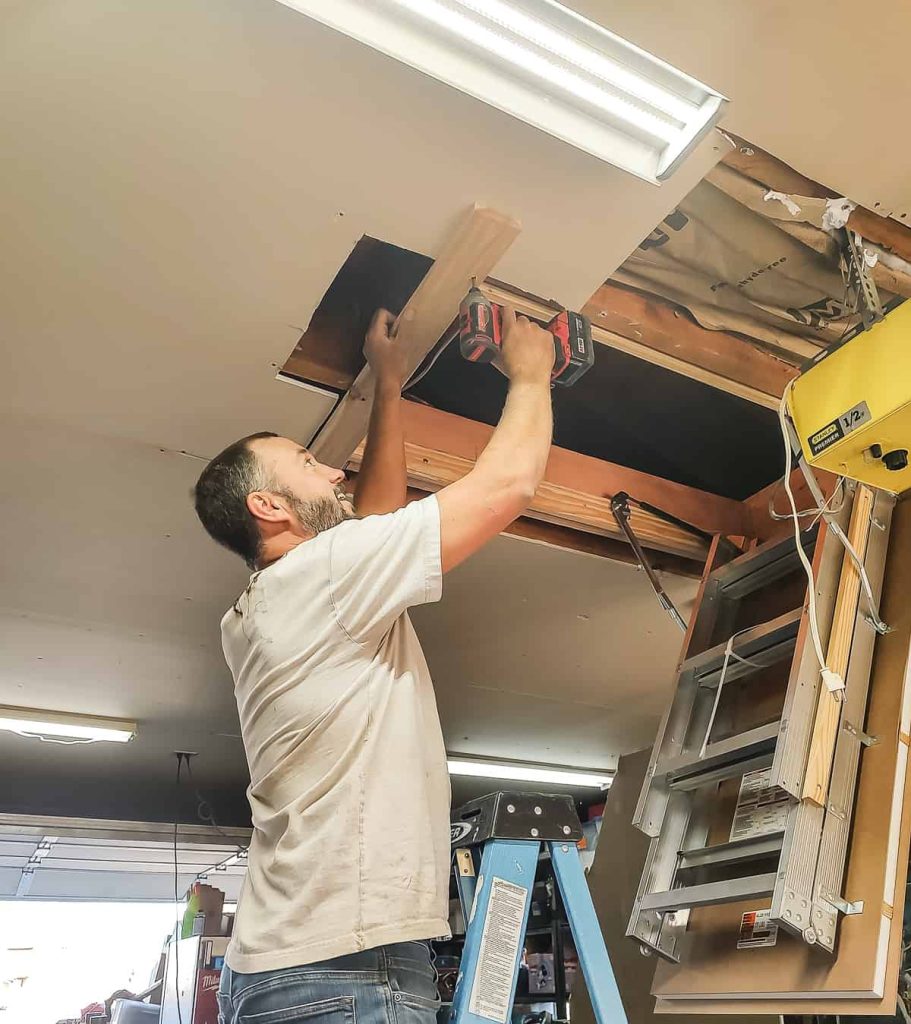
Step 3. Add support boards to the ceiling
The first thing you’ll notice when you learn how to install an attic ladder is the ladder itself is very heavy. The ladder frame also fits very snugly in the R.O. so you have to install a couple of support boards to rest the ladder on while installing. You’ll take these temporary support boards off later after the ladder is attached.
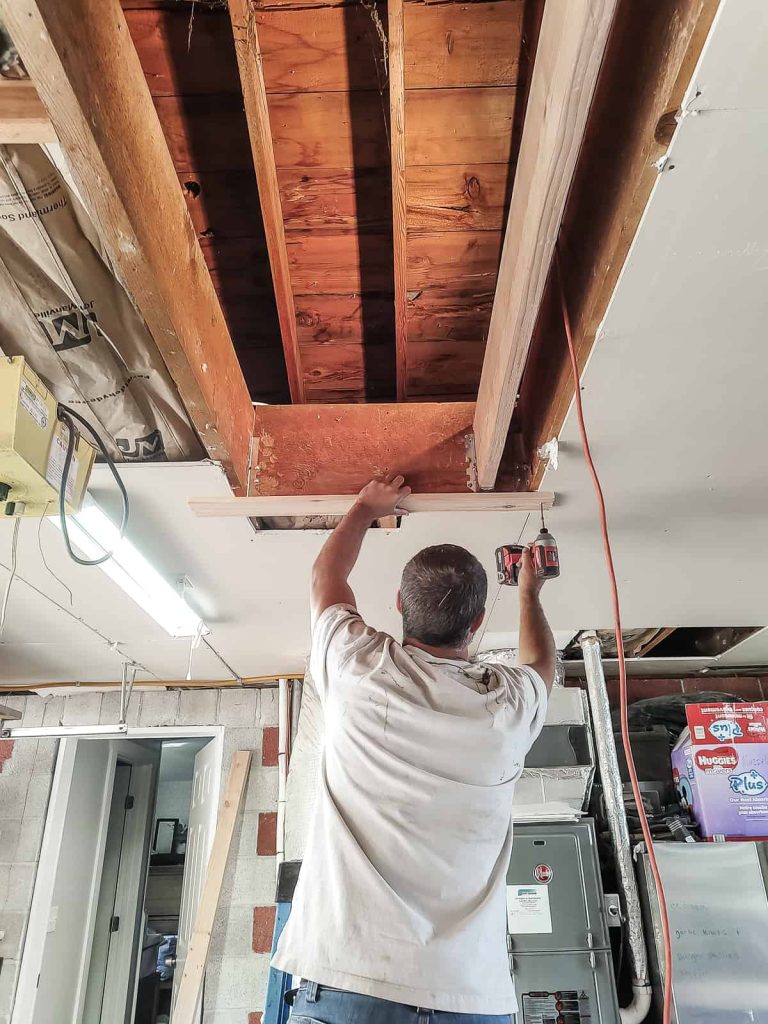
Grab a couple of scrap boards (1×4 or 2x4s, whatever you have laying around) and some 2 1/2″ wood screws. Screw these into the ceiling underneath both headers, leaving about 1 1/2″ – 2″ or so for the ladder frame to rest on.
Grab a helping hand to lift the ladder up to rest the attic ladder frame up on the two added support boards on the ceiling.
Make sure the support boards are nice and sturdy before moving on to the next step.
Step 4. Temporary attic ladder installation
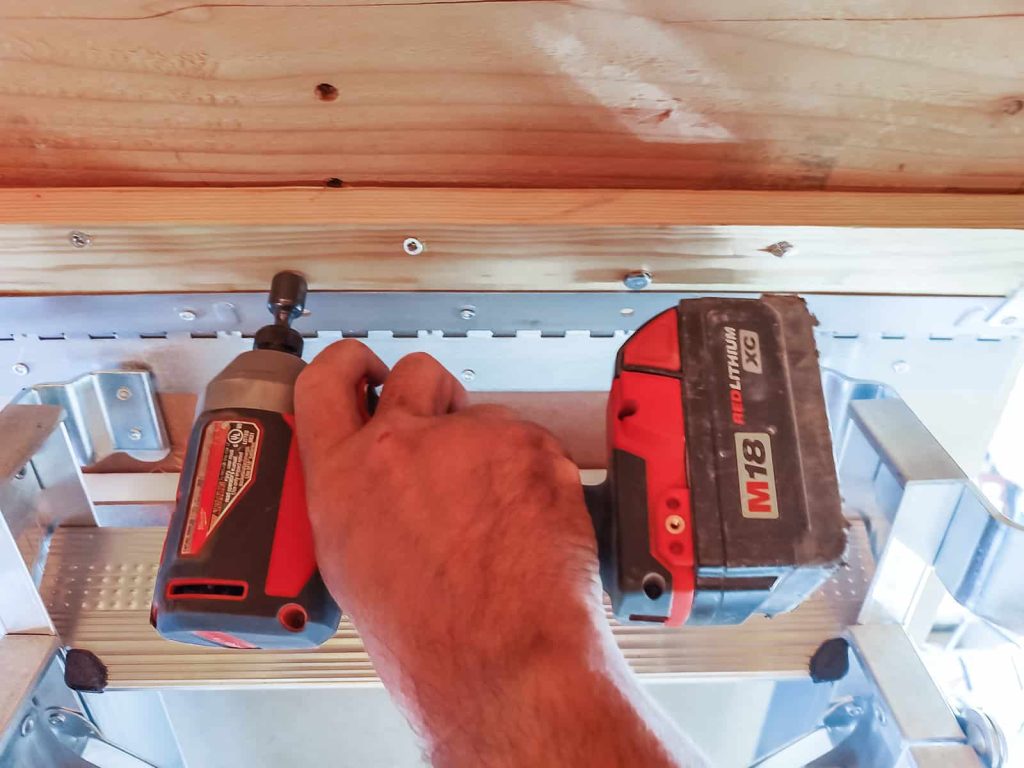
While the ladder frame rests on the support boards, press the hinge end against your header board and center between your joints and stringer. Secure the hinge side with the wood screws provided by the manufacturer with your ladder.
Next, carefully open the attic ladder, but do not unfold it.

If needed, add wood shims to either side and secure the sides with provided wood screws.
Be sure the frame is square the entire time while doing this because you’ll be adding lag screws in the next step, so the temporary holding of the ladder needs to be square.
Step 5. Permanently install the attic ladder frame
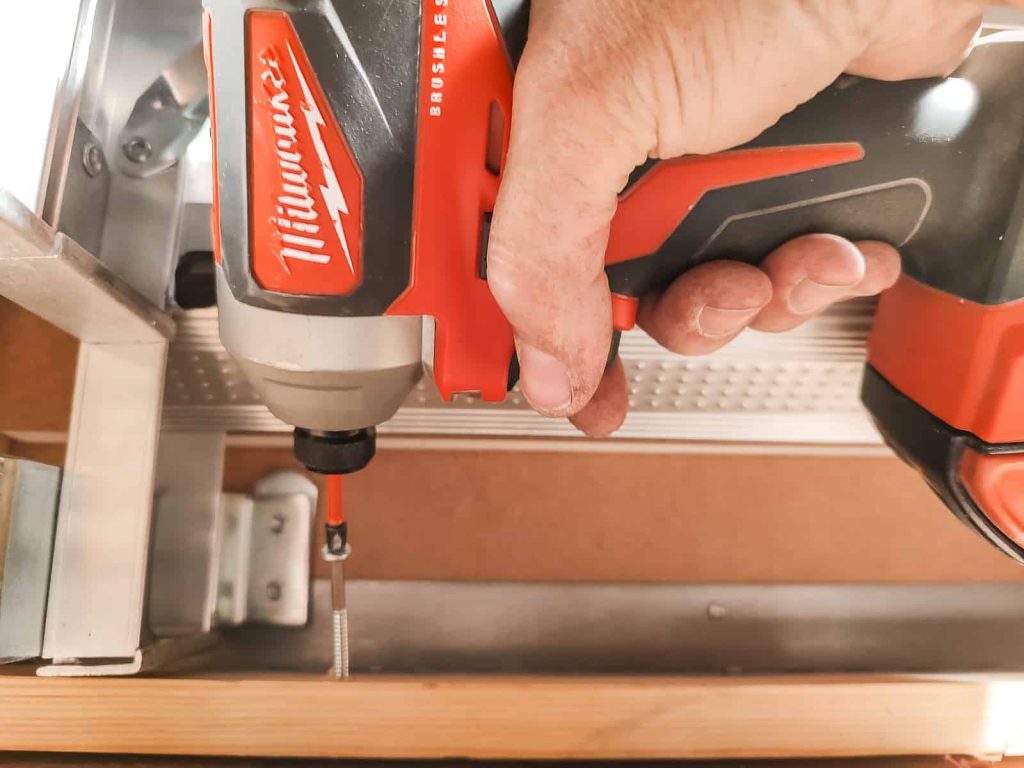
The wood screws you added in the previous step are going to be reinforced with the lag screws provided with the attic ladder kit.
Depending on your model, you will have predrilled holes to add lag screws through the ladder frame into the headers, joist, and stringer.
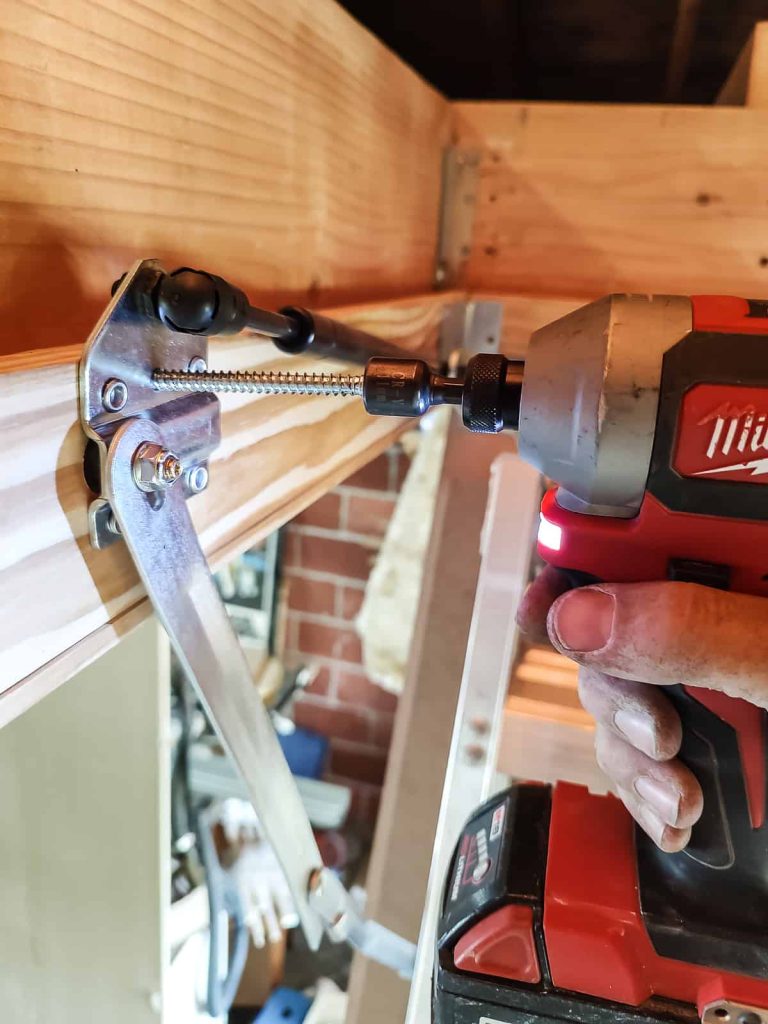
Be sure your wood shims and attic ladder frame remain square while attaching. Don’t overtighten the lag screws because they can pull it out of whack.
Once the lag screws are in, you can go ahead and remove those temporary supports that you added to the ceiling. They aren’t needed anymore.
Step 6. Adjust the attic ladder length to finish the installation.
This can be a very complicated set, but luckily most manufacturers’ instructions provide a sheet and table to simplify this process.
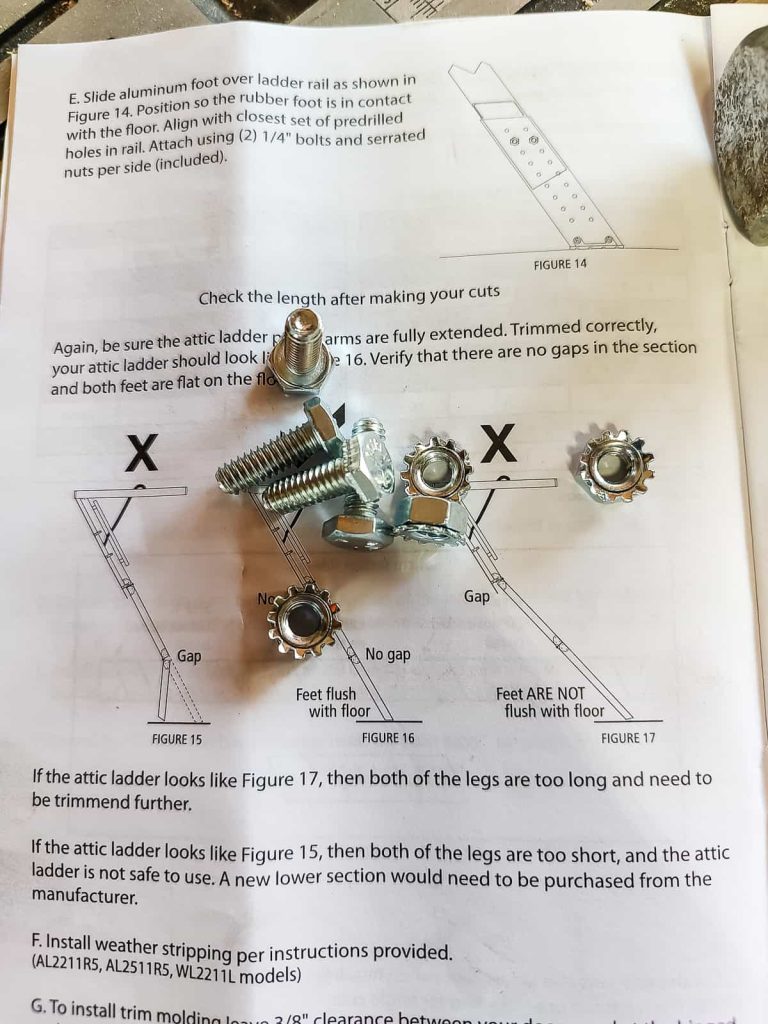
Typically you’ll leave the bottom section of the ladder folded up so it’s not touching the ground quite yet.
Take a tape measure and measure from the hinge to the floor on the front and back of the hinge and record these measurements.
Next, refer to the table provided and cut the ladder at the specific point outlined in the table.
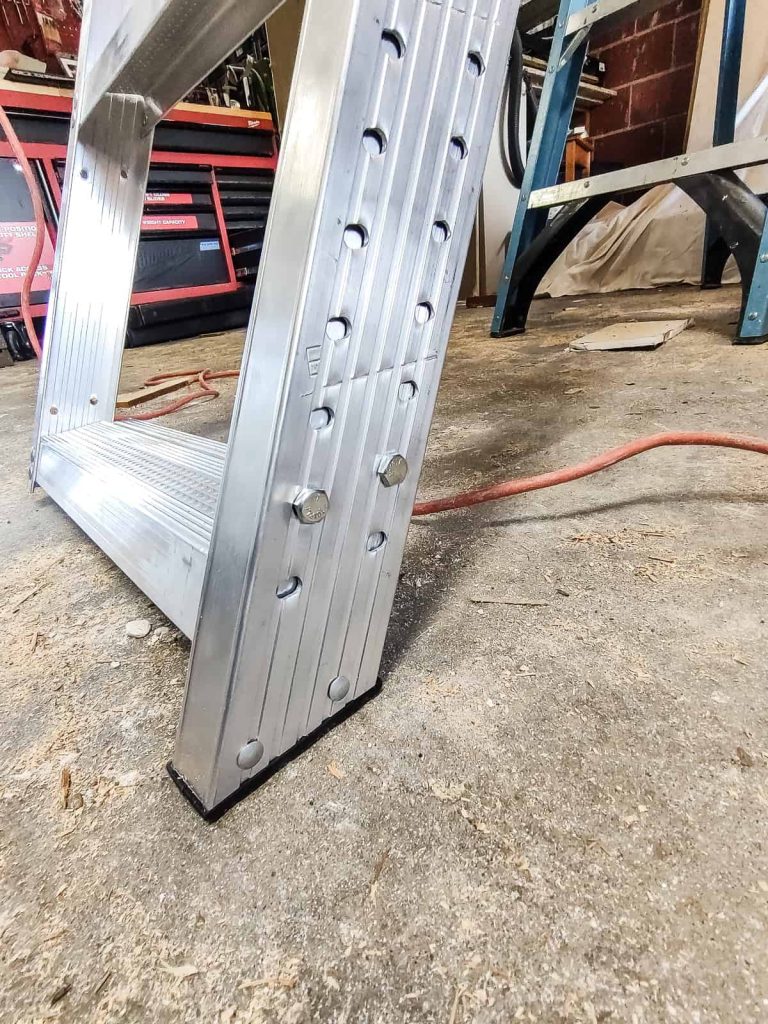
One thing to note is that these instructions vary greatly depending on wood vs aluminum models.
- For wood attic ladders, you’ll cut and add a rubber shoe.
- With the aluminum models, you will have an entire foot you attach after cutting the ladder based on a table.

Now we have the small scuttle hole attic access inside the house, but that is just in case we need to get up into the attic to install a new light or something. This new attic access point from our garage gives us much easier access and a much better choice for using your attic for storage.
I’m SO glad that we decided to make an entirely new opening in our attic and put this new ladder in. If you’re struggling to store everything in your garage, just think about all the untapped potential up in your attic.
In our case, we were able to put all of our seasonal decorations (you don’t even want to know how many boxes of Christmas decorations we have), sentimental items, and other items that we don’t use frequently.
We hope you enjoyed this tutorial on how to install an attic ladder! Good luck with your project and let us know if you have any questions in the comments below!

How To Install an Attic Ladder
Lacking space in your house? Need to know how to add more? In this step-by-step tutorial, we'll show you how to install an attic ladder and open up extra storage!
Materials
Tools
- Impact Driver
- Speed Square
- Tape Measure
- Pencil
- Floor Jack
- Hack Saw
Instructions
- Pick a spot to install your attic ladder
- Prepare the rough opening for the attic ladder
- Add support boards to the ceiling
- Temporary attic ladder installation
- Permanently install the attic ladder frame
- Adjust the attic ladder length to finish the installation