Small Bookshelf Plans & Step-by-Step-Tutorial (One Board Project)

Get these free small bookshelf plans and learn how to build this easy woodworking project! You can use it as a desk organizer, in the kitchen, or even in the bathroom.
Thank you to Kreg for sponsoring these small bookshelf plans! All opinions are entirely my own. This post also contains affiliate links, but nothing that I wouldn’t recommend wholeheartedly. Read my full disclosure here.
Every year we try to come up with some good DIY woodworking gifts that we can make for our family. One thing that Logan’s Mom requested this year was a small bookshelf that she can put on her desktop to organize files, books and other office items. I told her “consider it done!”
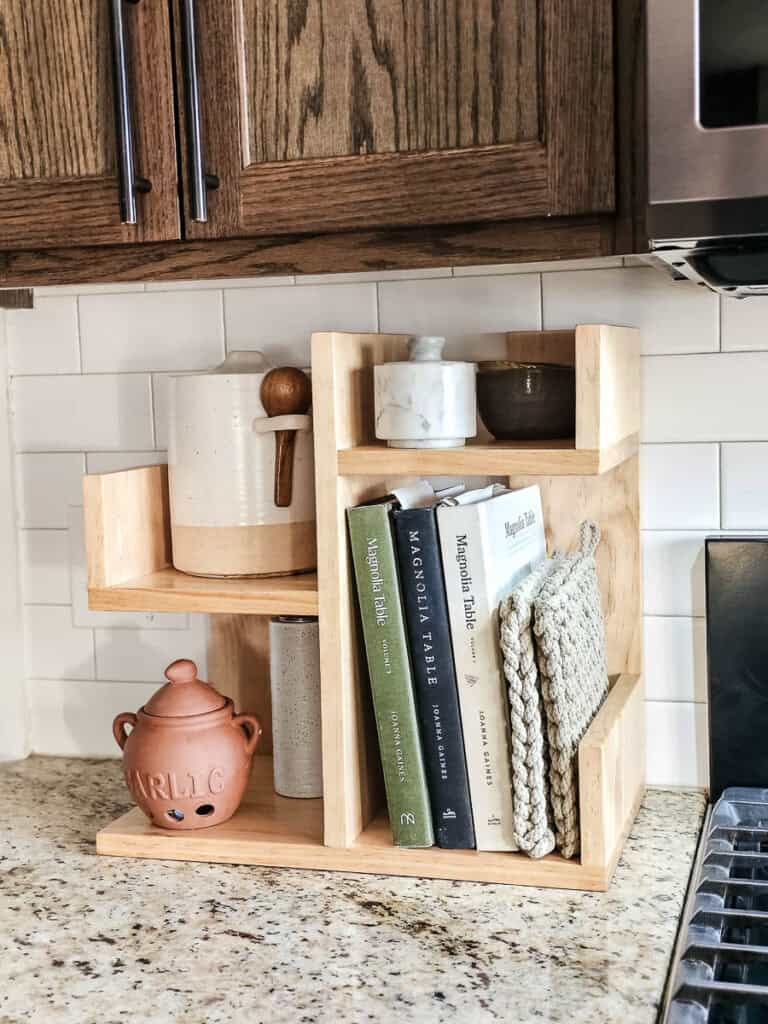
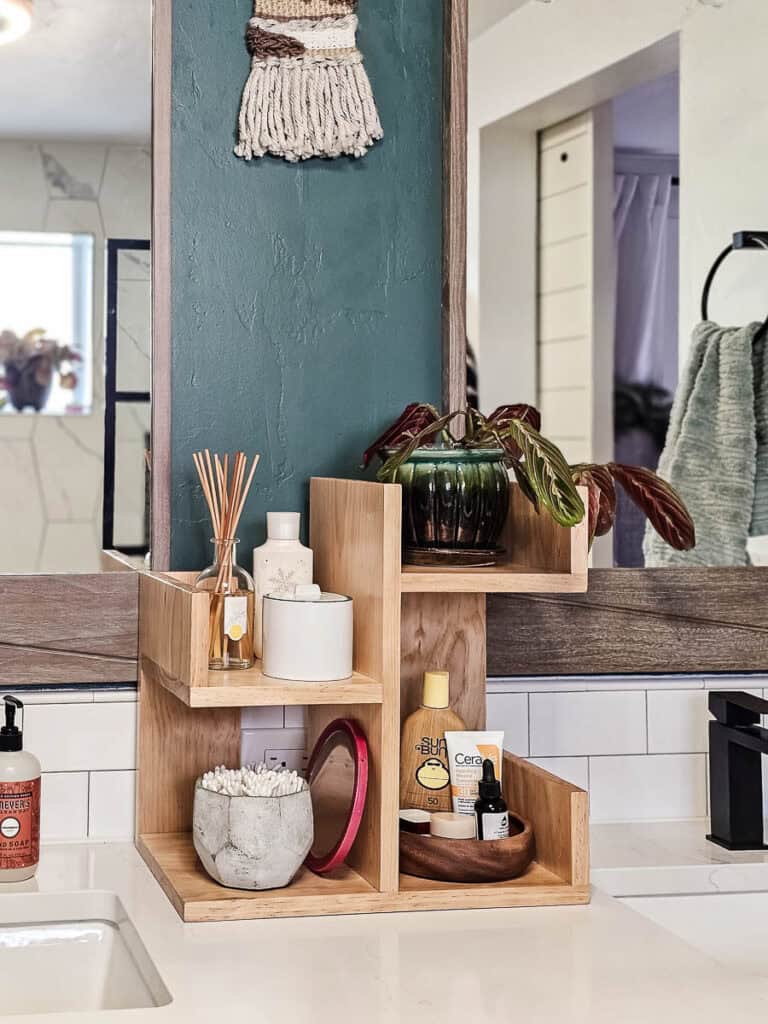
The small bookshelf turned out so good and it is so versatile! While I was taking pictures of it, I staged it in my kitchen and bathroom to show how it could also be used to organize countertop clutter in other rooms. Today we’re sharing the full step-by-step tutorial and giving you the free small bookshelf plans, so keep reading!
Kreg 720 Pro Pocket Hole Jig
If you’ve been following Making Manzanita for a bit, you know that we’re kinda sorta mega fans of the Kreg pocket hole system.
For most projects with pocket hole joinery, we use our 720Pro, which is what we’re using for this small bookshelf build.
Not sure which pocket hole jig is right for you and your woodworking project? Check out this guide on which pocket hole jig to buy for a detailed overview!
We teamed up with our friends Kreg again for these small bookshelf plans and are sharing them online for free, now available on KregTool.com!
P.S. Kreg’s website is chocked full of so many easy-to-follow FREE woodworking plans! I promise that you are going to find so much inspiration while you’re there! It is a goldmine!
How To Build A Desk Organizer: Step-by-Step Tutorial
Supplies and materials you’ll need
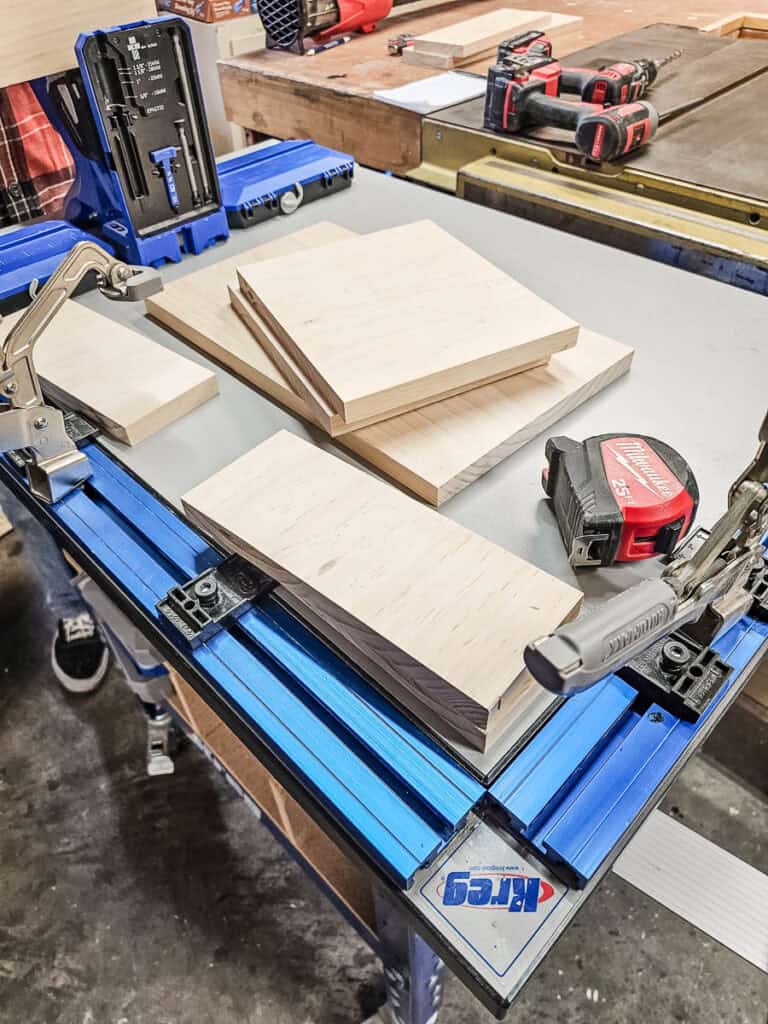
You only need one board for this easy woodworking project! You can cut all the wood you need from one 8-ft length of 1×10 pine. Be sure to get “premium” to avoid knots and warping!
Step 1: Cut wood
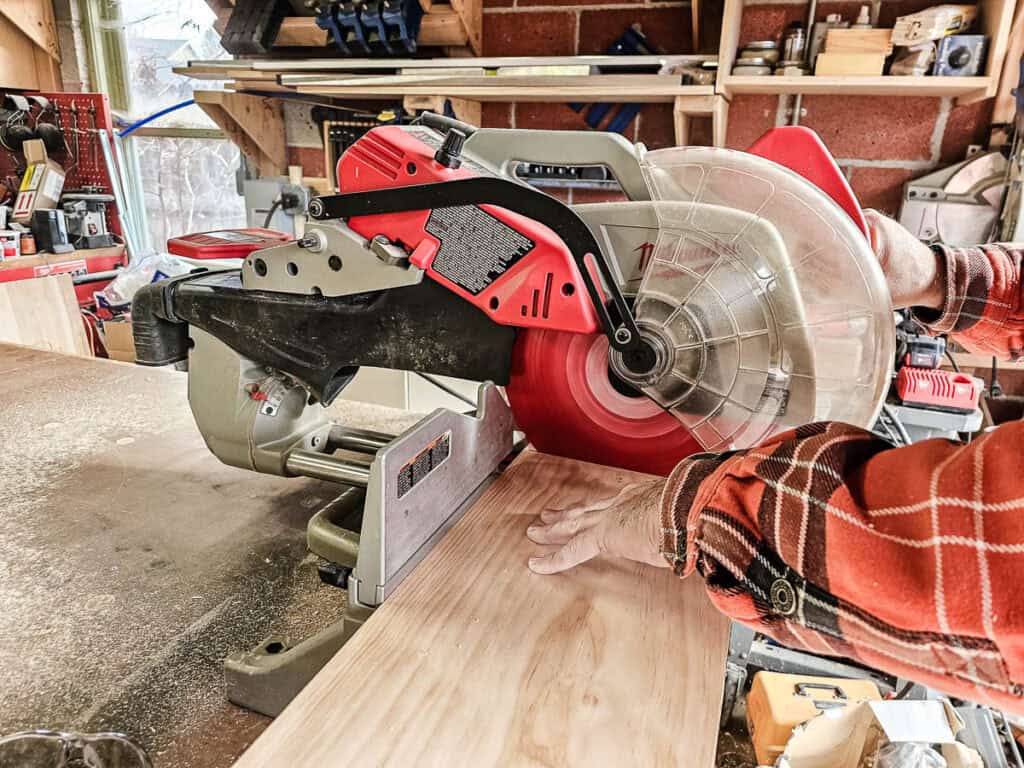
- Use the visual cut list from the woodworking plans, which can be downloaded here.
- For length cuts: Use a miter saw.
- For rip cuts: Use a table saw.
What type of wood did we use?
We used pine for this project. It’s an inexpensive type of wood that works well for small projects like this. We were able to cut all the small pieces of wood from one 8-ft 1×10 piece of pine.
Even though it is an inexpensive type of wood, you definitely want to get a piece of “Premium” Pine when shopping for lumber because you’ll get a piece with fewer knots and warping.
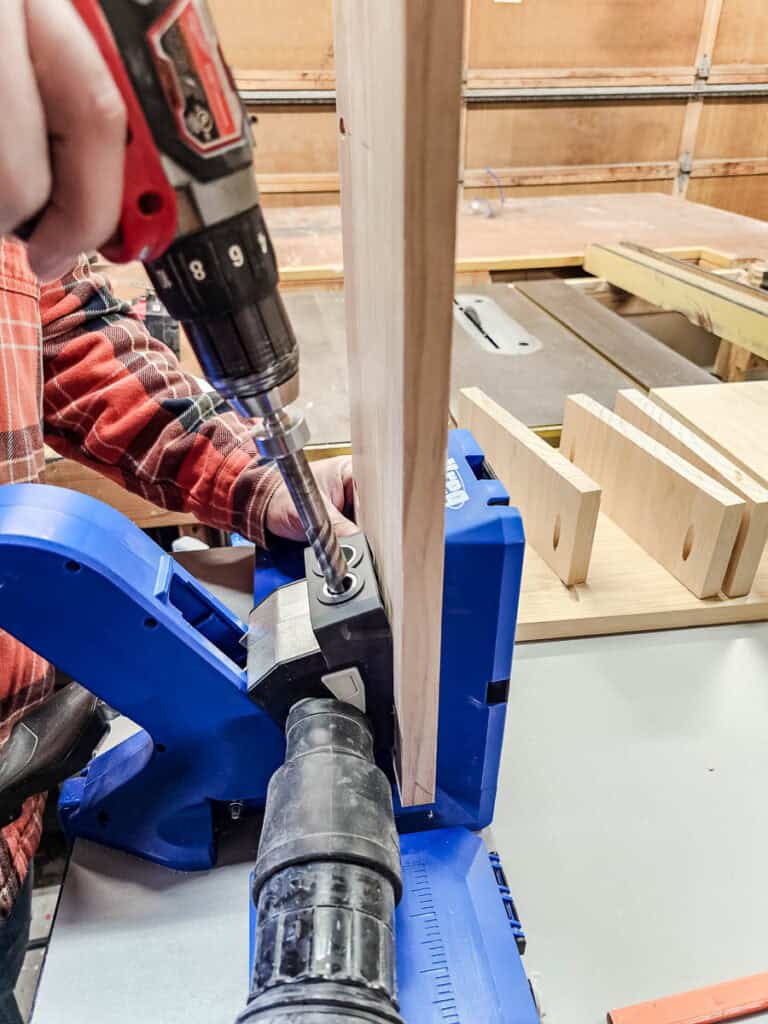
Step 2: Drill pocket holes
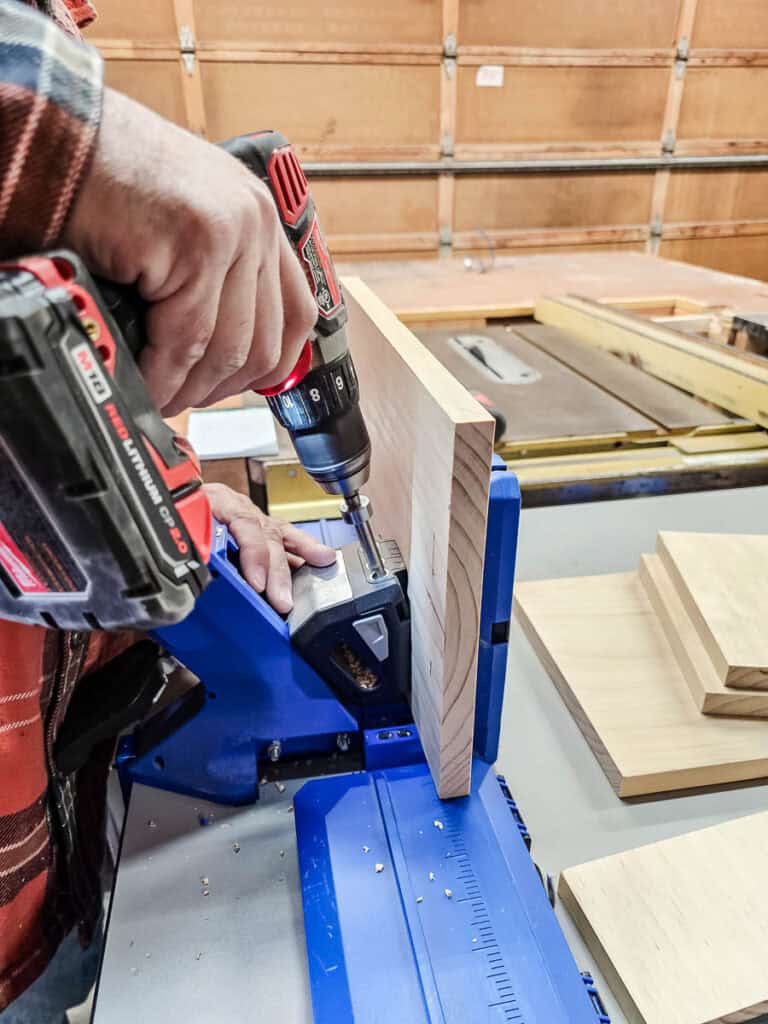
- Follow the woodworking plans to drill pocket holes in the right location.
- We used the 720Pro pocket hole jig on this project.
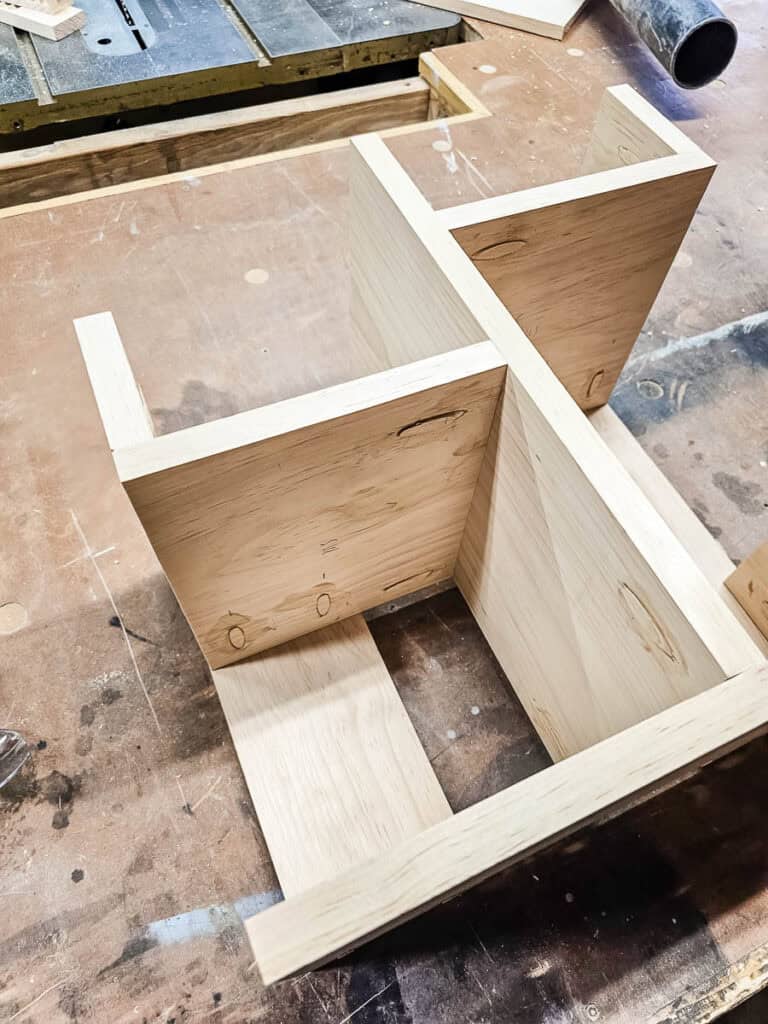
Step 3: Assemble
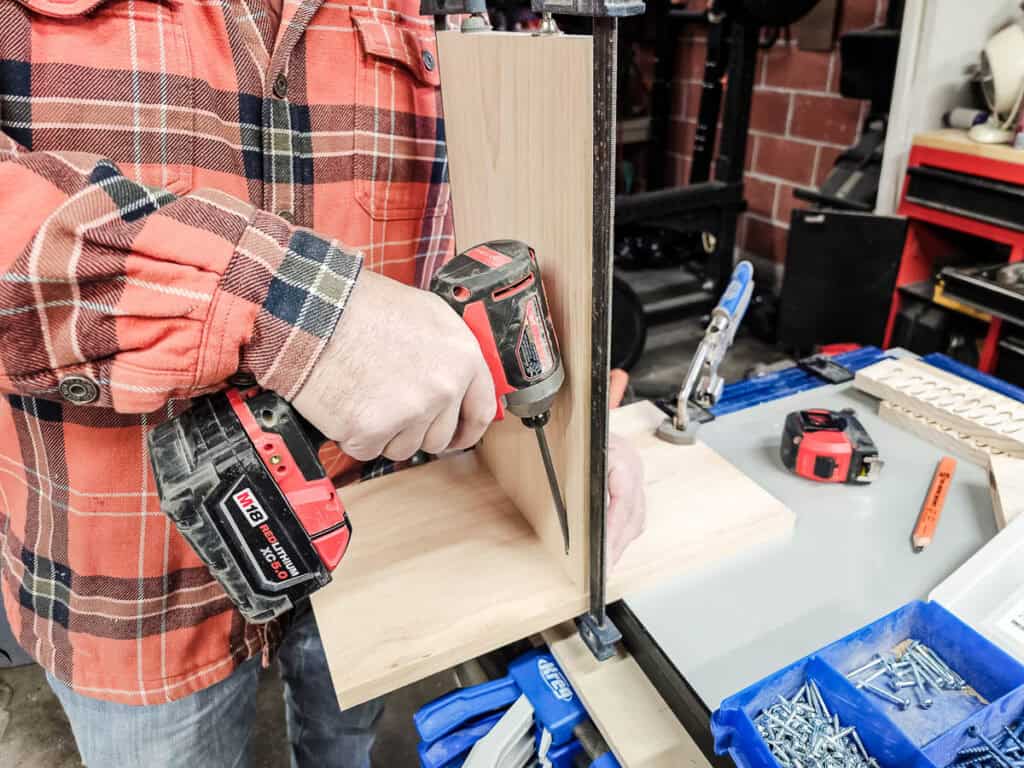
- Attach the bottom and center piece:
- Use pre-drilled pocket holes and 1 ¼” pocket hole screws.
- Clamp them together to hold everything steady.
- Attach the shelves:
- Secure both shelves to the center piece with pocket hole screws.
- Attach the side pieces:
- Clamp and attach each shelf side as per the plans using pocket hole screws.
- Attach the back pieces:
- Clamp and secure both back pieces using the pocket holes on the bottom of the shelves and the bottom piece.
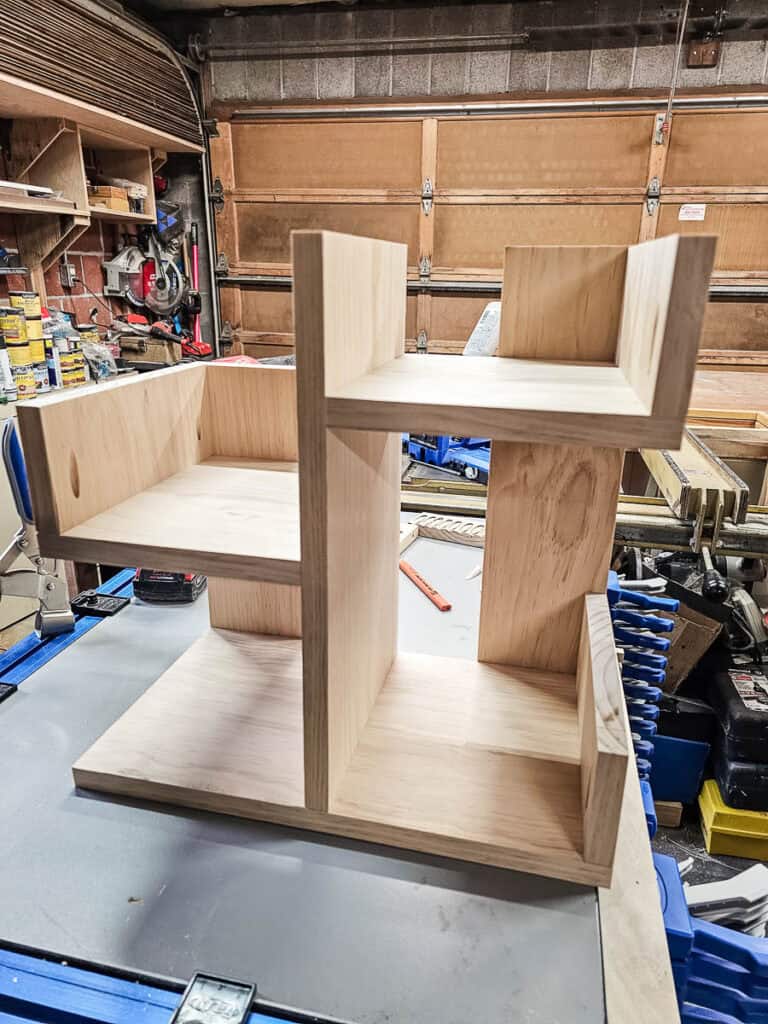
Here’s what it looks like when it is all assembled!
Step 4: Fill pocket holes
- If using premade plugs:
- Glue them in place.
- If making custom plugs:
- Use the plug cutter to drill them out of extra pine wood.
- Glue them into the pocket holes.
We love using the Custom Plug Cutter to make our own plugs using scrap wood from the project. It is great because the plugs always match the wood perfectly this way!
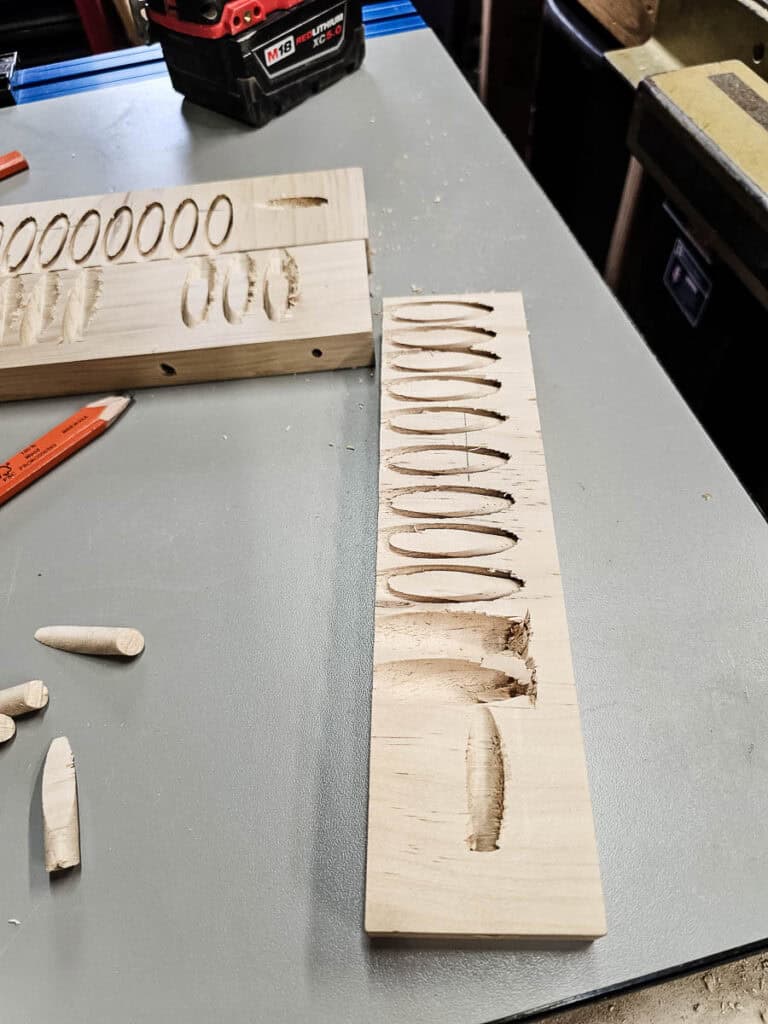
You simply swap out the drill guide in your pocket hole jig and drill the plugs using the special drill bit. Pretty cool, right?
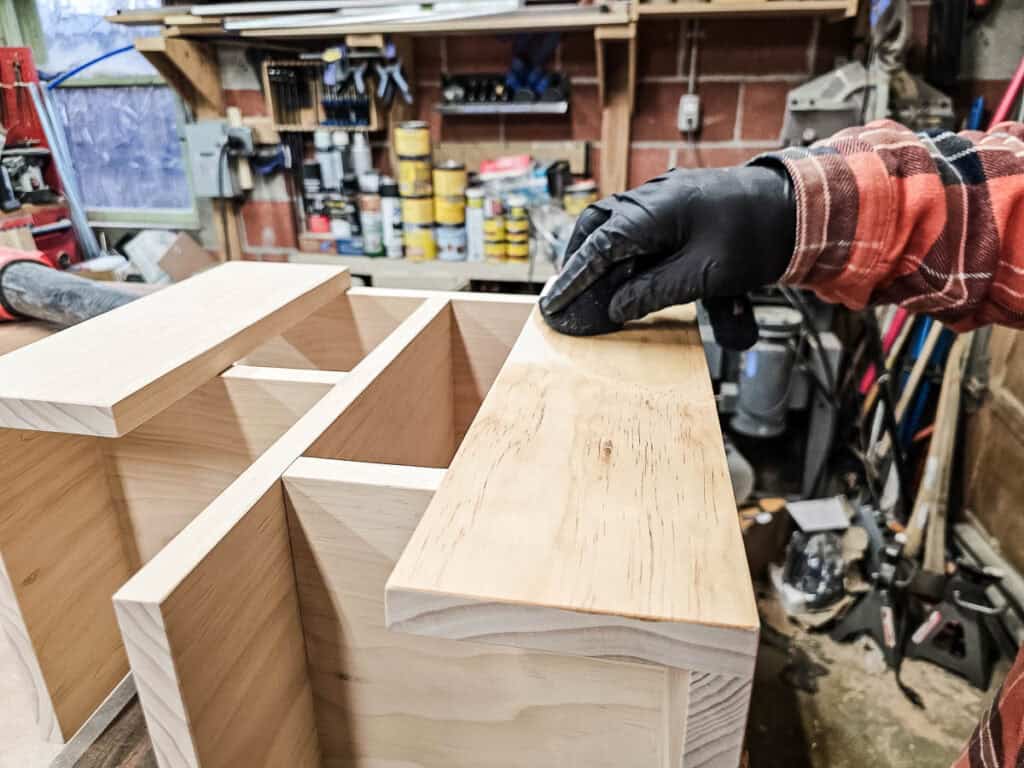
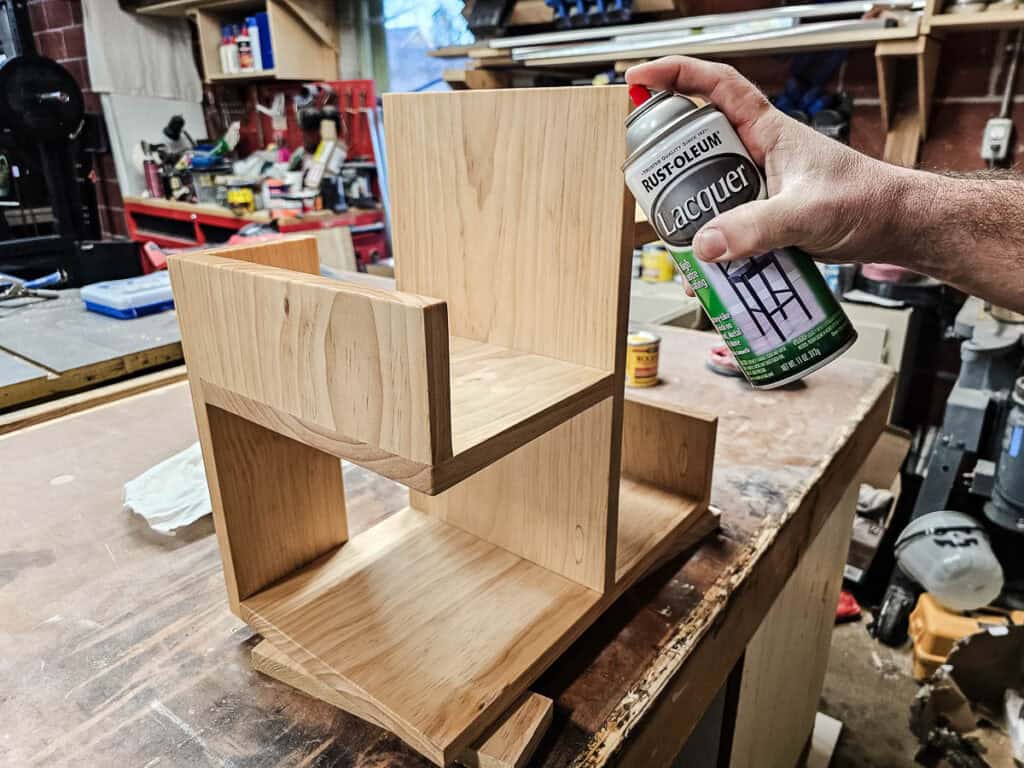
Step 5: Sand, stain and seal the bookshelf
- Once the glue is dry, sand everything smooth with 150-grit sandpaper.
- Clean off the dust.
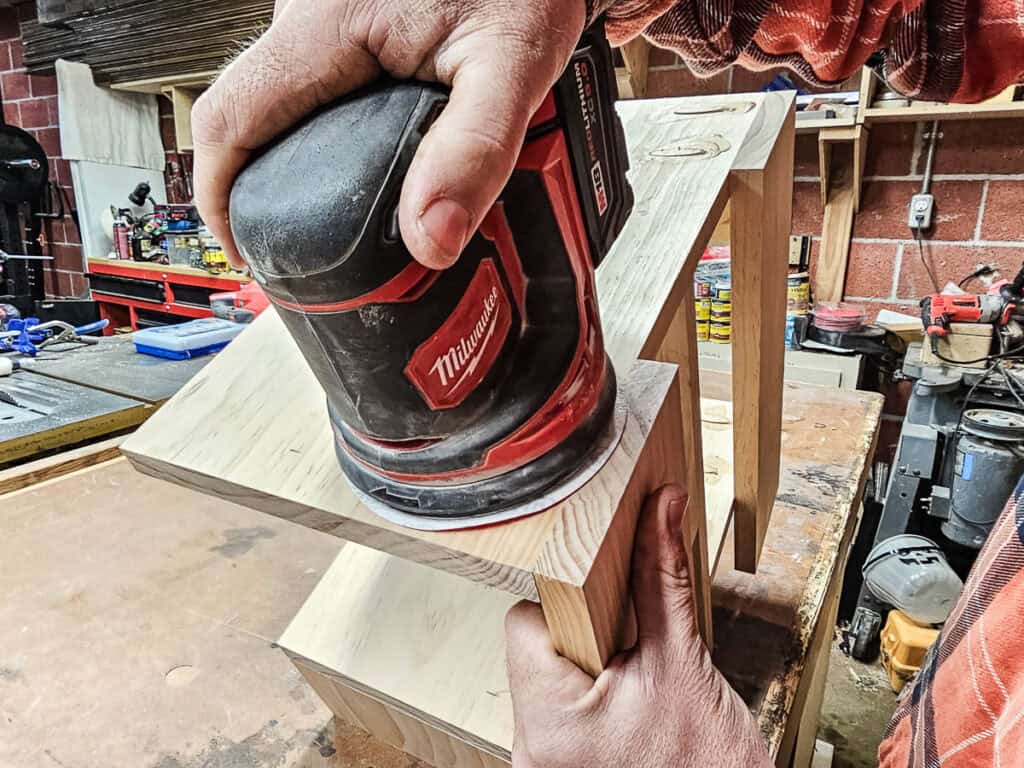
- Stain the wood with your chosen color. Since Pinewood dings easily as soft wood, we went with Natural to avoid calling attention to any dings or dents.
- After the stain dries completely, seal the piece with a lacquer finish. Using a spray lacquer is great because you can easily get into the nooks and crannies.
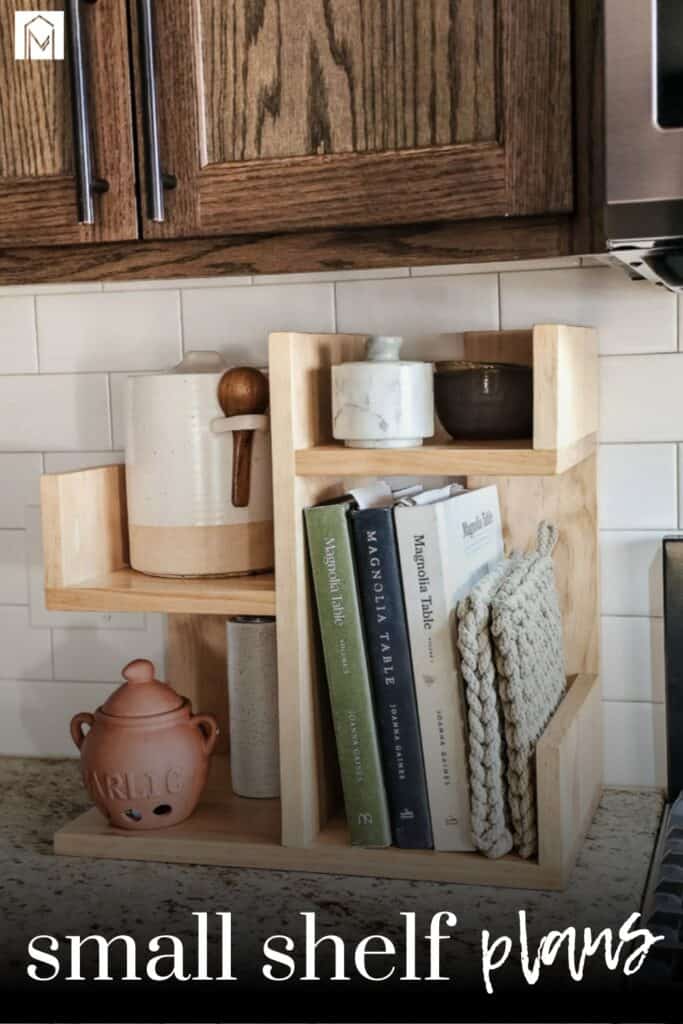
You can use the small shelf in your kitchen to control countertop clutter. Organize your cookbooks, salt and pepper shakers, garlic keeper and other small items that you normally put on your kitchen counters. Everything will be easy to find and easy to access.
Another place you could use the small shelf is in the bathroom. It can hold plants, lotions, skincare items, sunscreen, Q-tips and more. It’s nice to have all the clutter on your bathroom countertop a little more organized.
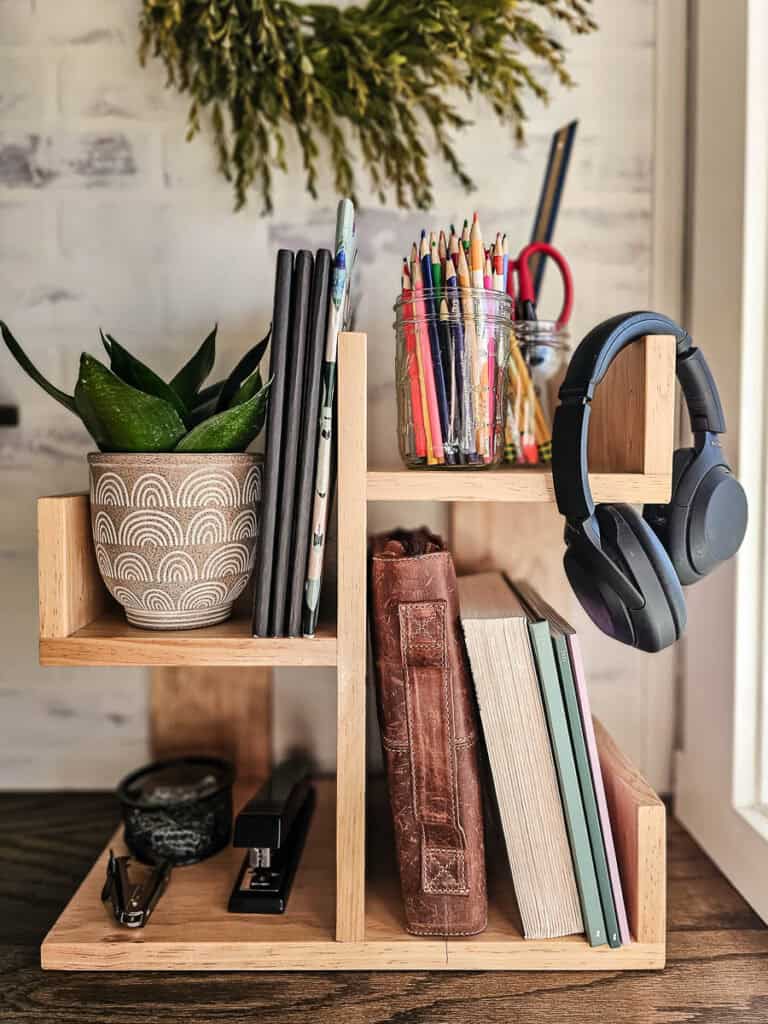
Of course, you can use it on your desk to hold books, paper files, journals, pens and pencils, plants and more office supplies. It is a great little desktop organizer.
If you want to build your own small bookshelf or countertop organizer, be sure to hop over to Kreg Tool’s website to get the free woodworking plans with all the dimensions and measurements. We’ve done all the hard work for you, so the plans will make this build a lot easier.
Related – Projects that use a pocket hole jig
- Kid’s Cabin Bed
- Table Top
- Planter Box for Front Porch
- Outdoor Plant Wall
- Farmhouse Sink Cabinet
- Mudroom Lockers
- DIY Desk Calendar & Wooden Pencil Holder
- DIY Dress Up Storage for Kids
- Picture Ledge DIY
- DIY Firewood Rack with Roof
- DIY Cane Headboard
- Boho Nightstand with Cane
- DIY Behind the Couch Table with Outlet
- DIY Headphone Stand
- DIY Cookbook Stand
- Easy DIY Grill Utensil Holder
- DIY Deck Box for Outdoor Toys
- DIY Towel Rack Made With One Board
- DIY Tool Organizer for Kreg Tool Stand
- DIY Mail and Key Holder
- DIY Step Stool for Toddler
- DIY Trash Can
- DIY Spice Rack
- DIY Book Holder
- Easy DIY Magazine Shelf
- DIY Clamp Rack
- DIY Chicknic Table
- DIY Bike Rack
- Small Bookshelf
- DIY Laptop Tray