Kreg 720 Pro Pocket Hole Jig | How To Set Up & Use

If you are a beginner woodworker who’s interested in pocket hole joinery, this guide is for you! This article will walk you through the most commonly asked questions and provide a step-by-step video tutorial on how to use the Kreg Jig 720 Pro.
This Kregk 720 Pro tutorial contains affiliate links, but nothing that I wouldn’t recommend wholeheartedly. Read my full disclosure here.
A pocket hole jig is one of those tools that every woodworker needs in their toolbox. Becoming familiar with pocket hole joinery is a great way to get acquainted with joining two pieces of wood together to create picture frames, shelves, furniture pieces, and more.
Whether you are just getting started with your Kreg Jig 720 Pro or you’re considering making your first big investment, this guide will help you know if this beginning woodworker tool is right for you.
In 2021 the K5 System has been discontinued and the 720 Pro is its replacement. If you are looking for more information on the old Kreg Jig K5 System, check out this guide for more information.
Table of Contents
- Kreg Pocket Hole Jig FAQs
- What is the best pocket hole jig for you?
- How to use Kreg pocket hole jig 720 Pro
Kreg Pocket Hole Jig FAQs
What is a pocket hole?
A pocket hole is an angled hole for a screw to join together two pieces of wood.
How do pocket holes work?
Pocket holes are created by drilling a hole into a single piece of wood at a 15-degree angle. Then, drilling a self-tapping screw into the angled hole to bring the second piece of wood together with the first piece.
Pocket holes are great for beginners because it is one of the simplest ways to join wood and is more efficient than gluing.
What screws do you use with pocket holes? Can you use regular screws with pocket holes?
It’s important to use pocket hole screws instead of regular wood screws to ensure precise joinery.
Regular screws have threads all the way up the neck of the screw while pocket hole screws have threads that only go about halfway up the neck of the screw.
With the threads primarily in the second piece of wood, this prevents the screw from pushing the joint of the pocket hole apart as the screw is driven into the pocket hole.
Check out our guide for more information about choosing the right screw for the job.
How far should you space pocket holes?
You should always have at least 2 pocket holes on every board. You can fit 2 pocket holes even on 1×2 pieces of wood. For longer panel joints, space out the pocket holes approximately 6-8 inches, with the first one roughly 2 inches away from the edge.
There are three holes (called drill guides) on the pocket hole jig labeled A B and C. For more information on which drill guides to use, see below.
What angle are pocket holes?
15 degrees.
Can pocket holes be covered or hidden?
When you’re planning your woodworking projects, you can plan to put the pocket holes on the inside or back of your projects to hide them.
If you want to cover the pocket holes, they make plugs that fit right in to fill the hole.
Do you need to drill a pilot hole in the 2nd piece of wood when using a pocket hole?
No, a pilot hole is not necessary for pocket holes. The self-tapping point of the pocket hole screws eliminates the need for pilot holes.
What is the best pocket hole jig for you?
If you aren’t sure which Kreg jig is right for you, check out this article about which jig to buy.
We own a Kreg Jig K5 System (discontinued now), Kreg 320 Jig, Kreg 720 Pro, and the Kreg 520 Pro.
Kreg Pocket Hole Jig 720 Pro Review
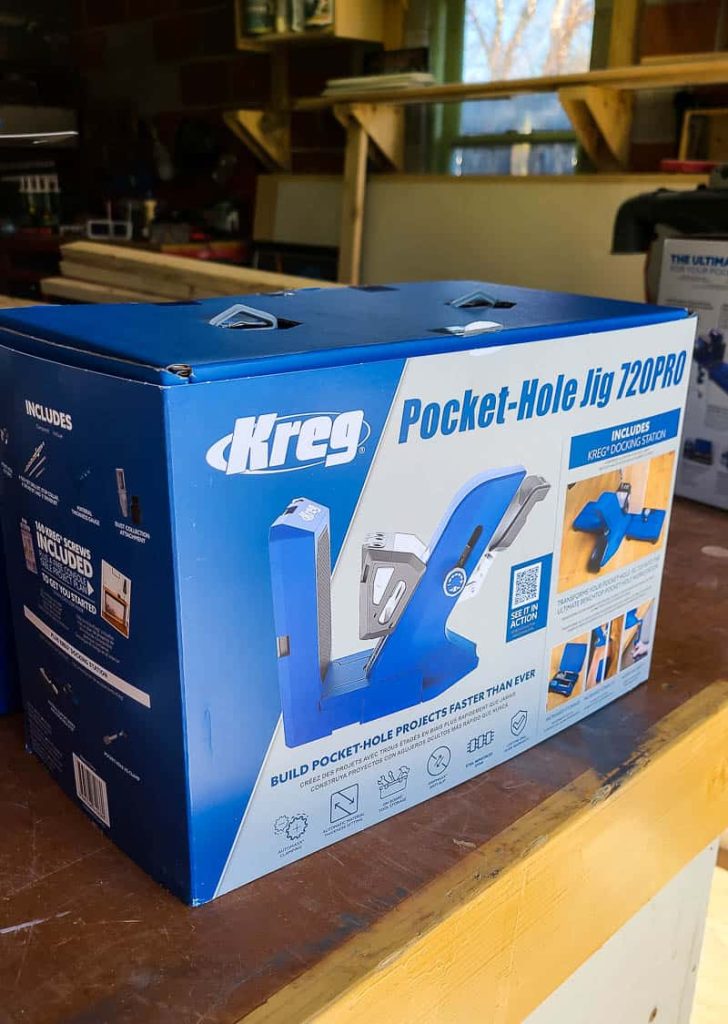
Since the K5 System has been discontinued, the 720 Pro is an excellent substitute and comes with even more features built-in.
Not only is it easy to set up and adjust the clamping system, but it also has a new docking station, built-in storage for drill bits, and other accessories.
In addition to all these bells and whistles, the 720 Pro also includes the drill bits, stop collar, driver bits, sample screws, and a dust collection accessory that fits common shop vacuums and dust vacs.
What’s the difference between Kreg Pocket Hole Jig 720 Pro and 720 base model?
The main difference between the 720 base model and the 720 Pro is that the docking station with support wings, additional stops, and the clamp are all included with the Pro model.
The docking station features large wings that fold out from the base of the jig, creating a more stable workspace. The docking station wings also have storage inside to hold extra accessories.
These are all really handy features that will make woodworking so much easier.
Kreg 520 Pro Pocket Hole Jig
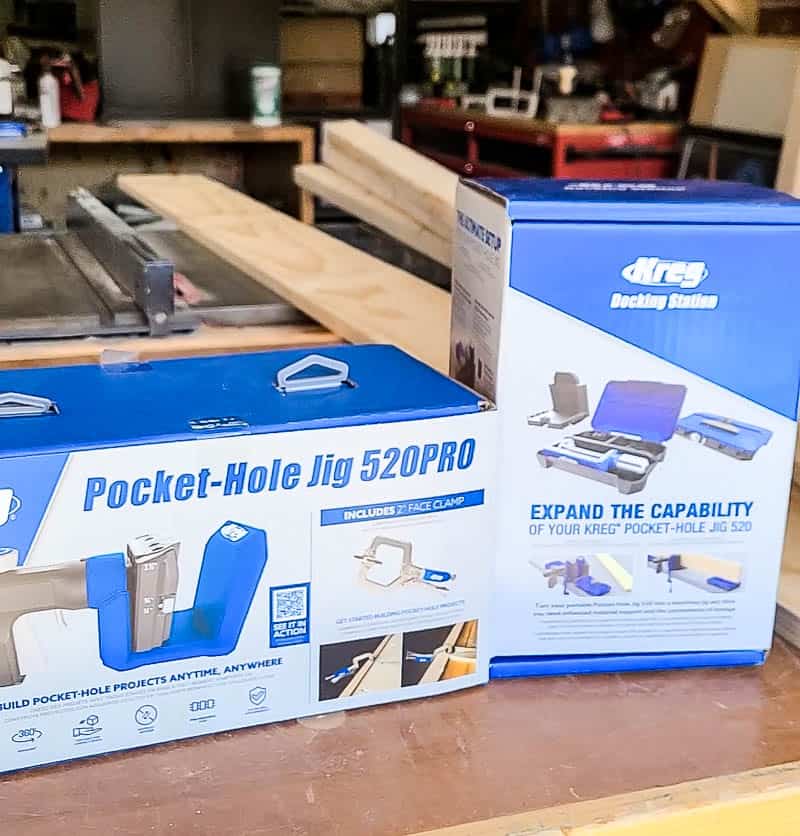
The 520 Pro was released by Kreg at the same time as the 720 Pro in 2021 and replaced the old K4 pocket hole jig. Kreg calls it their “most versatile jig” due to an easy-to-use system that can be used on the go.
In general, the 520 Pro is less expensive than the 720 Pro and is smaller and more lightweight.
The Kreg 520 Pro is smaller than the 720, which makes it more portable and easy to use “on the go”.
It has a built-in handle called a VersaGrip has a button to easily clamp your wood by simply squeezing the handle. The handle also rotates 360-degrees to provide added flexibility.
The 520 Pro does not come with a docking station, like the 720 Pro, but there is a docking station sold separately to expand the capabilities of the 520.
The 520 Pro does not come with a clamp to secure the jig to your workstation, but it does include a face clamp to secure your wood pieces together.
Unlike the 720, which has a base model and a Pro, the 520 was only released in the 520 Pro. There is no Kreg 520 Jig.
Kreg 320 Jig Review – a budget-friendly alternative
We also have the Kreg 320, which we love too! It’s a more budget-friendly option if you’re not ready for an investment, like the Kreg Jig 720 Pro. I also love how portable and lightweight the 320 is.
We also use the 320 when we’re working with really long pieces of wood that we’d have trouble standing up on the traditional pocket hole jig (like the large face frame we built for these mudroom lockers).
However, one of the awesome features of the 720 is that you can use the pocket hole jig “upside down” which is handy for long and large pieces of wood.
One thing to note, however, is that you cannot use the 320 on boards 1 1/2″ thick, like the other jigs…so this rules out making pocket holes on 2x4s.
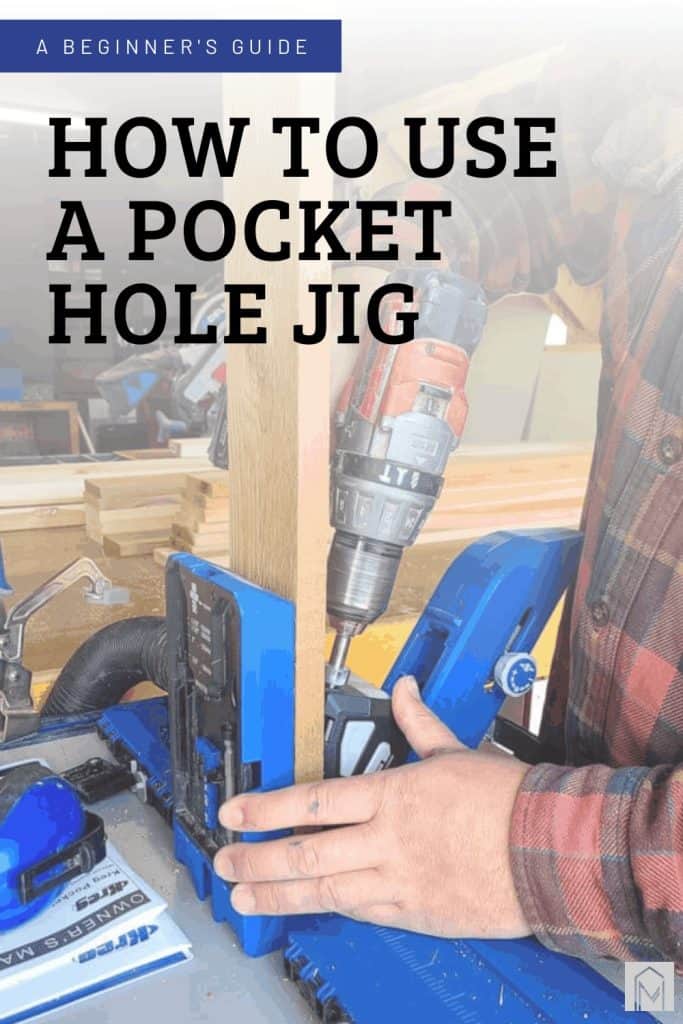
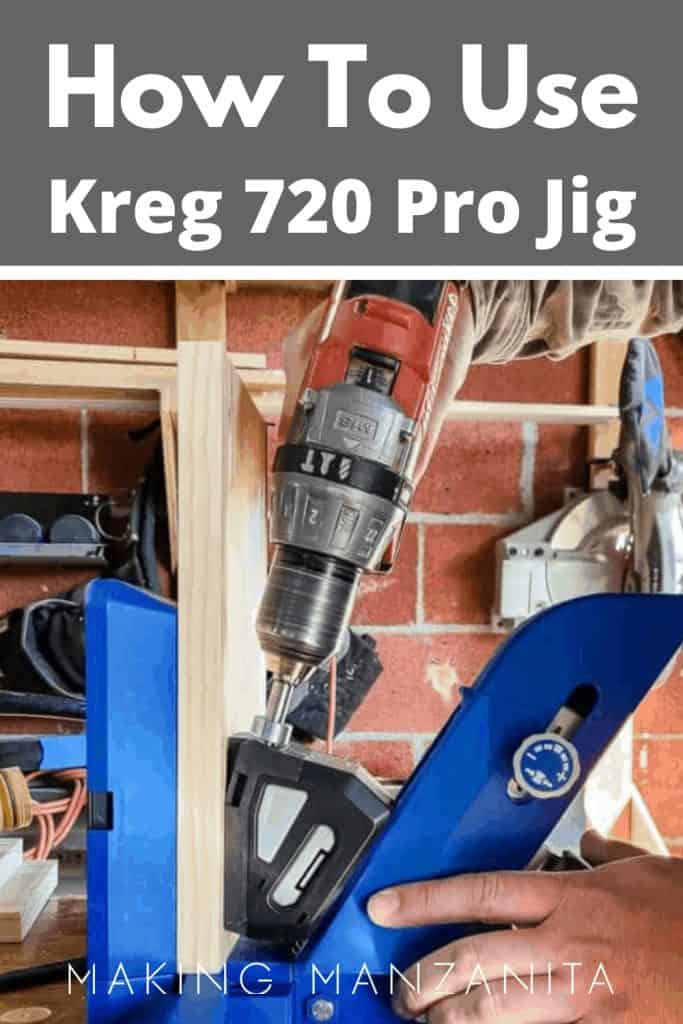
How to use the Kreg Pocket Hole Jig 720 Pro
In this step-by-step tutorial for how to use a pocket hole jig, I’m going to be demonstrating on the Kreg 720 Pro.
Video Tutorial – How To Set Up Your Pocket Hole Jig
We also created a YouTube video demonstrating how to use the 720 Pro pocket hole jig, which may be a little easier to see some of the steps in video format.
If you love DIY videos, be sure to subscribe to our YouTube Channel!
Step 1. Determine the material thickness.
Before drilling pocket holes, it’s important to know the thickness of the material you are working with.
Pocket holes can be drilled in material as thin as a half-inch to an inch and a half. Keep this in mind when you are selecting the material for your projects.
Step 2. Adjust easy-set drill bit stop collar.
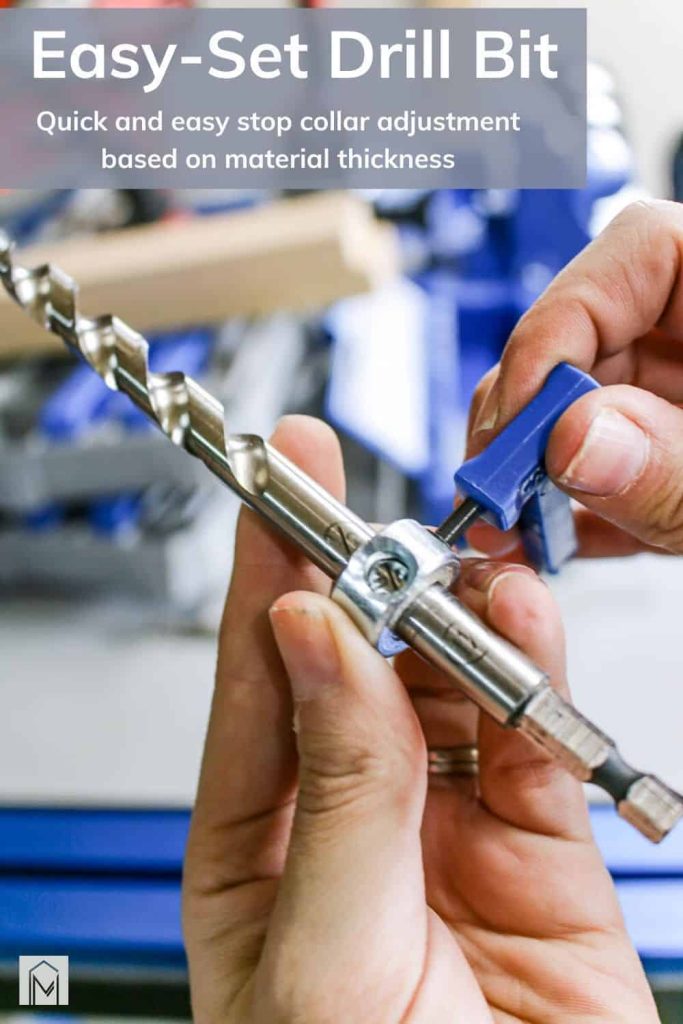
The stop collar attaches to your drill bit and prevents the drill from driving the screw too far into the material. Driving screws too far into the material can cause splitting and fraying of the wood.
To adjust the stop collar:
- Loosen the collar on the drill bit using the hex wrench.
- Adjust the collar to select the material’s thickness as indicated by the numbers on the side of the drill bit.
- Tighten the collar using the hex wrench.
After setting up the stop collar, place the pocket hole drill bit into your drill.
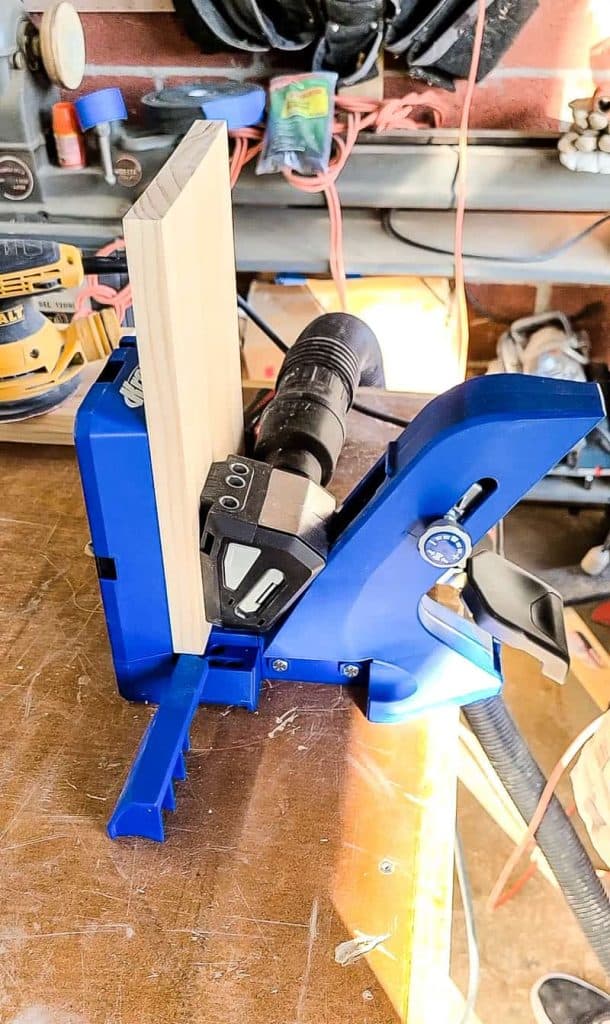
Step 3. Secure jig to your work surface.
Fold out the docking wings to provide a nice stable surface. You can also secure the jig to your work surface using the clamp.
If you are using the base model or don’t have the docking station, you can stabilize the jig using the smaller support wings.
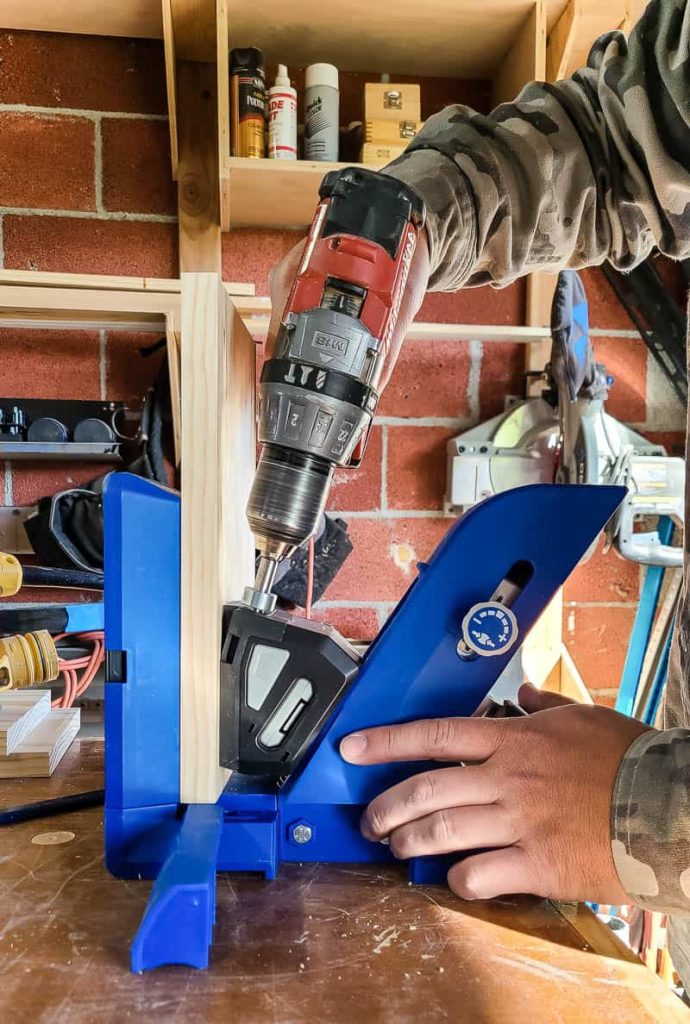
Step 4. Clamp wood into pocket hole jig.
The great thing about the 720 Pro model is there is no need for adjusting the clamp to secure the wood before drilling. The clamp simply adjusts to the width of the wood automatically. How cool is that?
Place the piece of wood into position, then slide the clamp down and secure. That’s all!
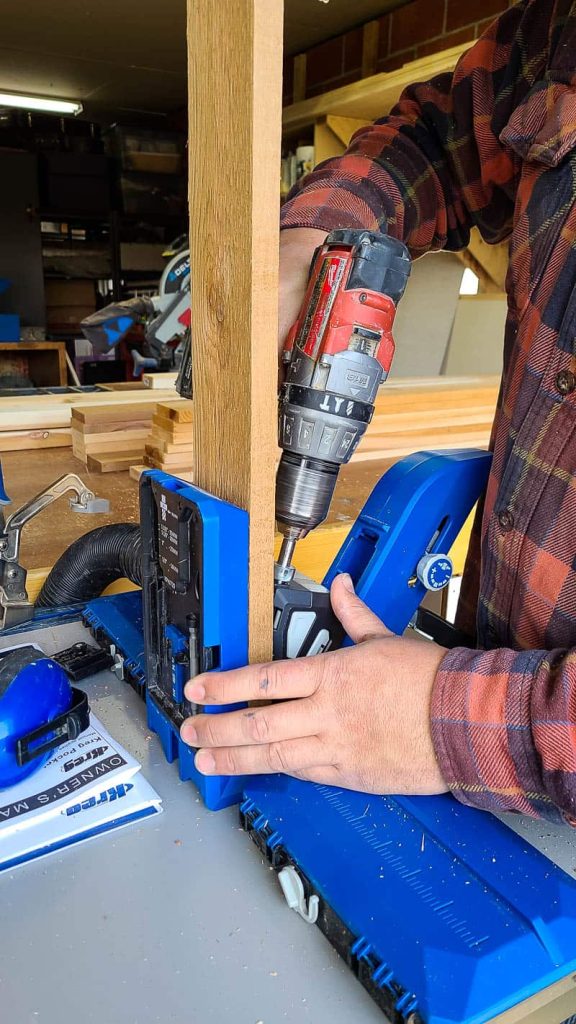
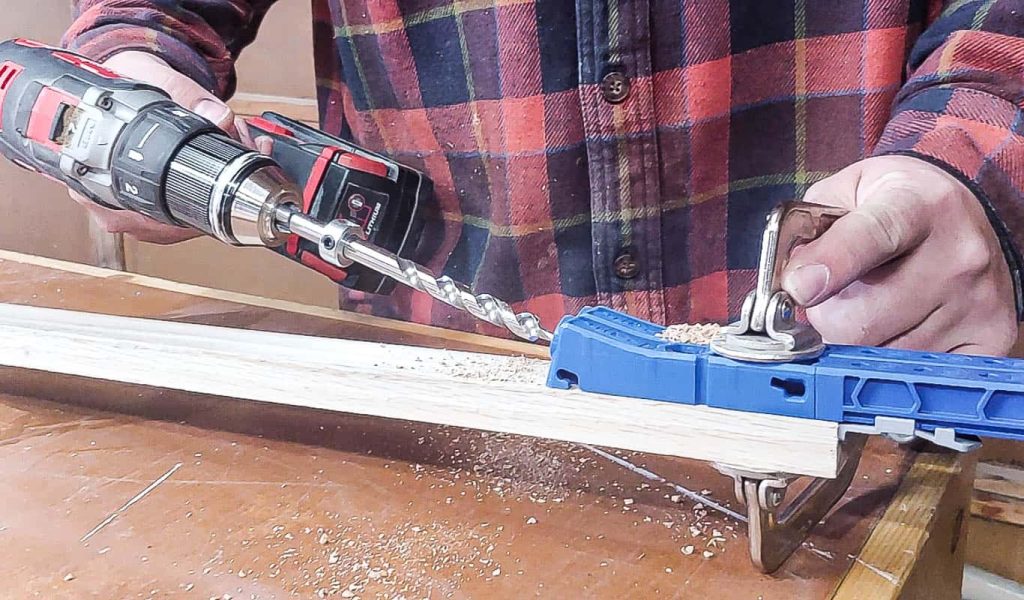
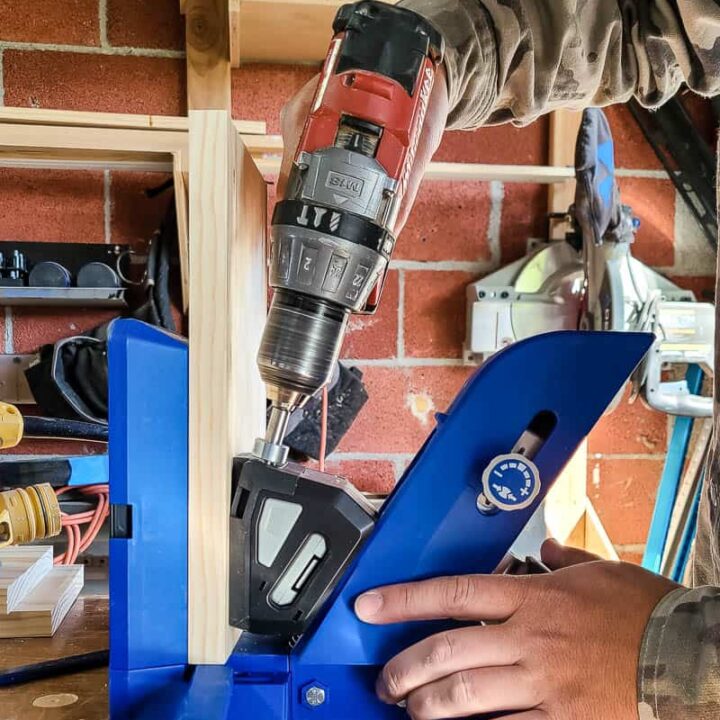
Step 5. Drill pocket holes.
Now, it’s time to drill pocket holes!
This part is a piece of cake, even for a beginner woodworker:
- Align drill bit into the hole.
- Turn the drill on to full speed and push the drill into the wood.
- Wait until the drill stops at the stop collar, then reverse it and pull it out of the hole.
- Unclamp your wood and remove from jig.
Pocket hole placement
Before you start drilling, keep in mind the spacing of your pocket holes is important as well!
- There are three holes (aka drill guides) on the pocket hole jig labeled A, B and C.
- B and C holes are 9/16” apart, A and B are 7/8” apart, and A and C are 1 7/16” apart.
| 1″ – 2″ wide material | Holes B & C |
| 2″ – 3″ wide material | Holes A & B |
| 3″ – 4″ wide material | Holes A & C |
| Panel joints (4″+ wide) | Space out 6-8 inches |
Step 6. Select the right pocket hole screw.
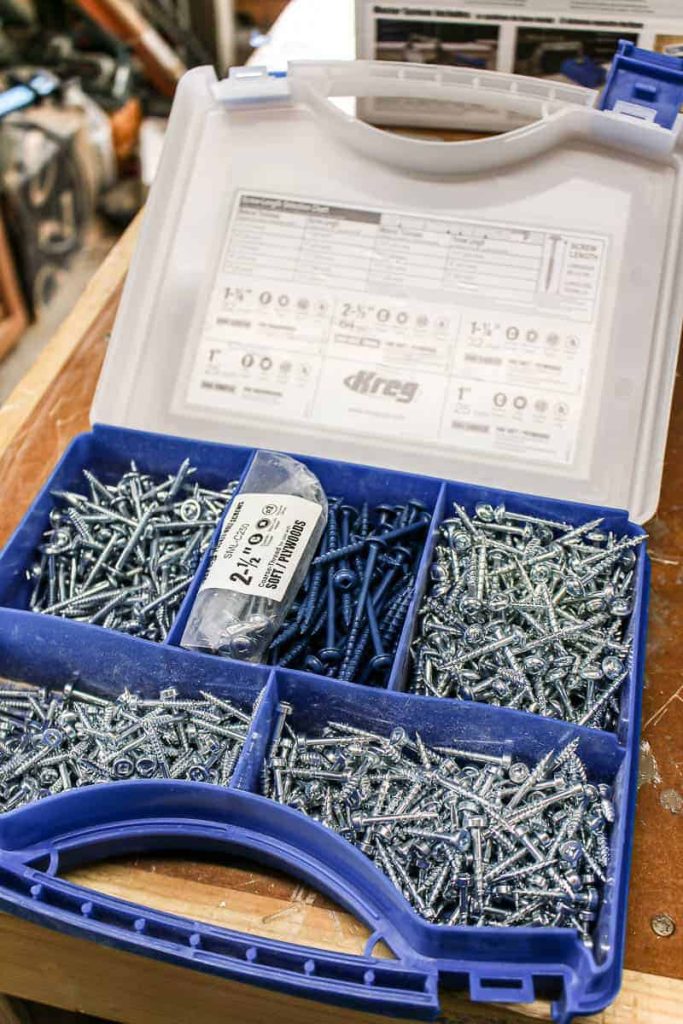
Selecting the right pocket hole screw for your project is important to ensure you have a strong joint. Check out our guide for more information about choosing the right screw for the job.
You definitely want to make sure you are using a specially designed pocket hole screw rather than a regular screw when you are working with pocket holes.
There are so many different options, so make sure you are selecting the right screw for the job. There are a few different factors that play into the decision for choosing the right pocket hole screws too!
Coarse vs fine thread
- Use COARSE thread for soft woods (cedar, pine, fir, etc.), plywood and MDF
- Use FINE thread for hard woods (cherry, maple, oak)
- Not sure what the difference is between hard and soft woods? Check out this guide all about types of wood for woodworking!
Screw composition (zinc, stainless steel or Blue-Kote)
- Use ZINC COATED for indoor projects where moisture is not a concern (like this dress up storage rack)
- Use STAINLESS STEEL for “extreme applications” where there will be excessive exposure to salt water or other corrosive environments
- Use BLUE-KOTE FINISH for damp or wet applications, like outdoor DIY projects (like this firewood storage rack or these planters) or something that will go in a high moisture environment
Screw length
The screw length chart breaks it all down and shows you the correct screw length based on your material thickness.
To make this choice easier, Kreg included a handy chart inside the owner’s manual with screw sizes. You can also find this chart below or in the inside lid of your pocket hole screw kits from Kreg.
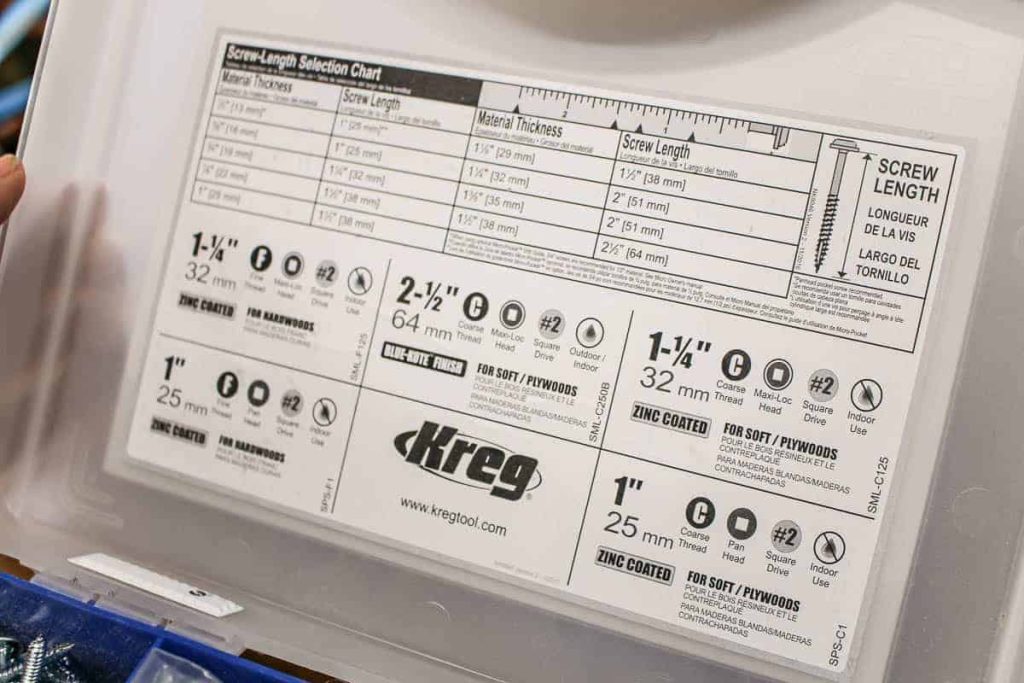
Screw Length Selection Chart
| Thickness | 1/2″* | 5/8″ | 3/4″ | 7/8″ | 1″ | 1 1/8″ | 1 1/4″ | 1 3/8″ | 1 1/2″ |
| Screw | 3/4″ – 1″ | 1 1/4″ | 1 1/2″ | 1 1/2″ | 1 1/2″ | 1 1/2″ | 2″ | 2″ | 2 1/2″ |
When joining two pieces that are different thicknesses, a general rule of thumb is to use the thinner one. However, something that is a handy tool for this is the Screw Selector Wheel.
*For materials 1/2″ thick, it’s recommended to use the pan-head screws. For all other projects, you’ll use the normal Maxi-Loc head screws.
Step 7. Attach wood pieces with pocket holes.
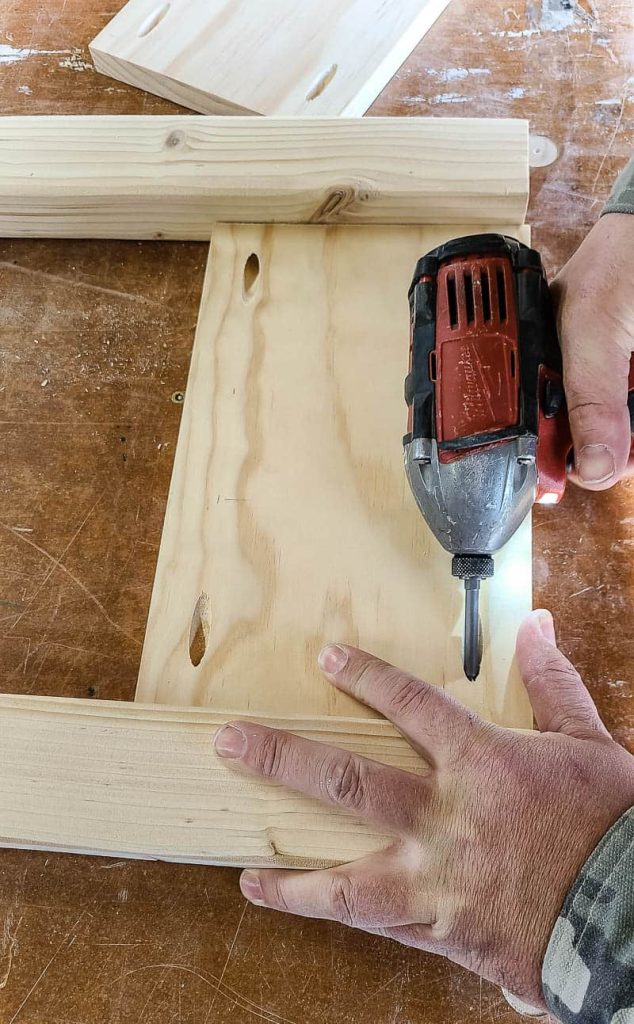
Once your pocket holes are drilled, it’s time to join the two pieces of wood together.
First, clamp the two pieces of wood into place on your workbench. Set the screw in place inside the pocket hole. Then, using the driver bit included with the jig, drill the screws into place to bring the two pieces together.
- For flat pieces, you can use a Kreg clamp on the edge of a workbench or you can invest in the clamping table & stand that we have (and LOVE!)
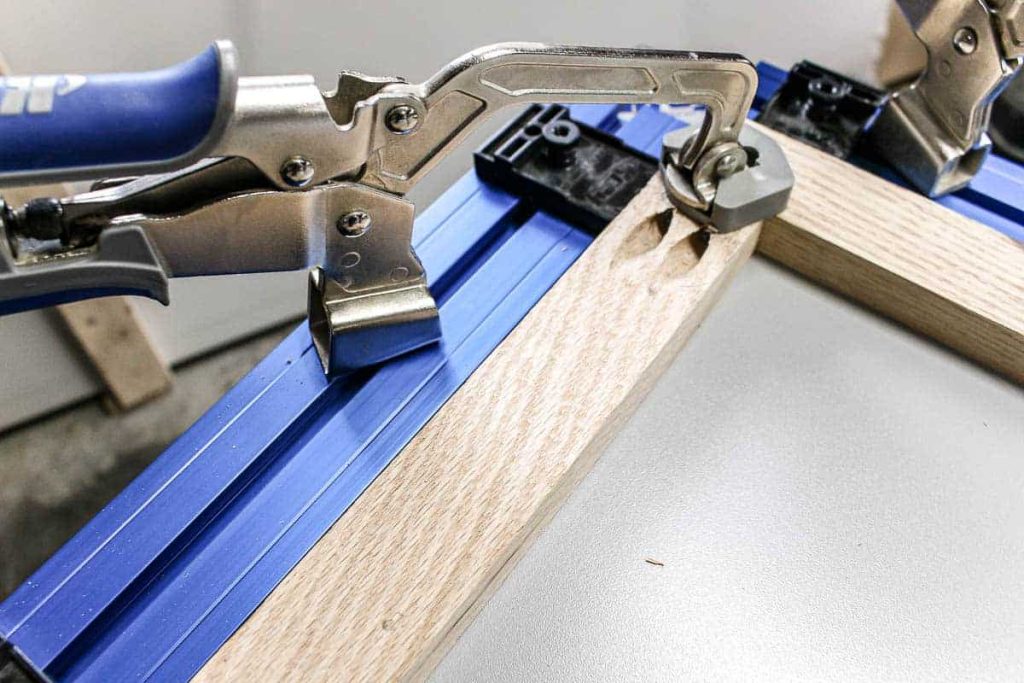
- For corner assemblies, you can use 90-degree clamps or bar clamps to hold the pieces in place.
Then, remove the clamps and your project is complete!
The Kreg Pocket Hole Jigs are super helpful tools for woodworking projects! We hope you enjoyed this detailed guide filled with FAQs and a tutorial on how to use the awesome new Kreg 720 Pro!
Do you have any other questions about the Kreg 720 Pro or anything else about pocket holes?
How To Use Kreg 720 Pro Pocket Hole Jig
If you are a beginning woodworker who's interested in pocket hole joinery, this guide is for you! This article will walk you through how to use a Kreg Jig 720 Pro.
Instructions
- Determine material thickness
- Adjust drill bit stop collar
- Secure jig to work surface
- Clamp wood into pocket hole jig
- Drill pocket holes
- Select pock hole screw
- Attach wood pieces
Related – Projects that use a pocket hole jig
- Kid’s Cabin Bed
- Table Top
- Planter Box for Front Porch
- Outdoor Plant Wall
- Farmhouse Sink Cabinet
- Mudroom Lockers
- DIY Desk Calendar & Wooden Pencil Holder
- DIY Dress Up Storage for Kids
- Picture Ledge DIY
- DIY Firewood Rack with Roof
- DIY Cane Headboard
- Boho Nightstand with Cane
- DIY Behind the Couch Table with Outlet
- DIY Headphone Stand
- DIY Cookbook Stand
- Easy DIY Grill Utensil Holder
- DIY Deck Box for Outdoor Toys
- DIY Towel Rack Made With One Board
- DIY Tool Organizer for Kreg Tool Stand
- DIY Mail and Key Holder
- DIY Step Stool for Toddler
- DIY Trash Can
- DIY Spice Rack
- DIY Book Holder
- Easy DIY Magazine Shelf
- DIY Clamp Rack
- DIY Chicknic Table
- DIY Bike Rack
- Small Bookshelf
- DIY Laptop Tray