DIY Clamp Rack Plans
Thank you to Kreg for sponsoring this DIY clamp rack! All opinions are entirely my own. This post also contains affiliate links, but nothing that I wouldn’t recommend wholeheartedly. Read my full disclosure here.
As you probably know if you’ve been following along with Making Manzanita for a while, we take on our fair share of DIY projects – specifically woodworking projects. And that means that we also have quite the clamp collection.
You see, as a woodworker, you can never have too many clamps. Even in our small workshop, we have places for pipe clamps, parallel clamps, spring clamps, bar clamps, quick clamps, and more.
But when Kreg released their new VersaGrip f-style clamps, we didn’t have anywhere to put them! You see, you never just get rid of old clamps when you get new clamps (because like I said you can never have enough clamps)!
This meant that we had to get creative with clamp storage. And, of course, we didn’t miss the opportunity to turn it into a DIY project!
Kreg VersaGrip Clamps
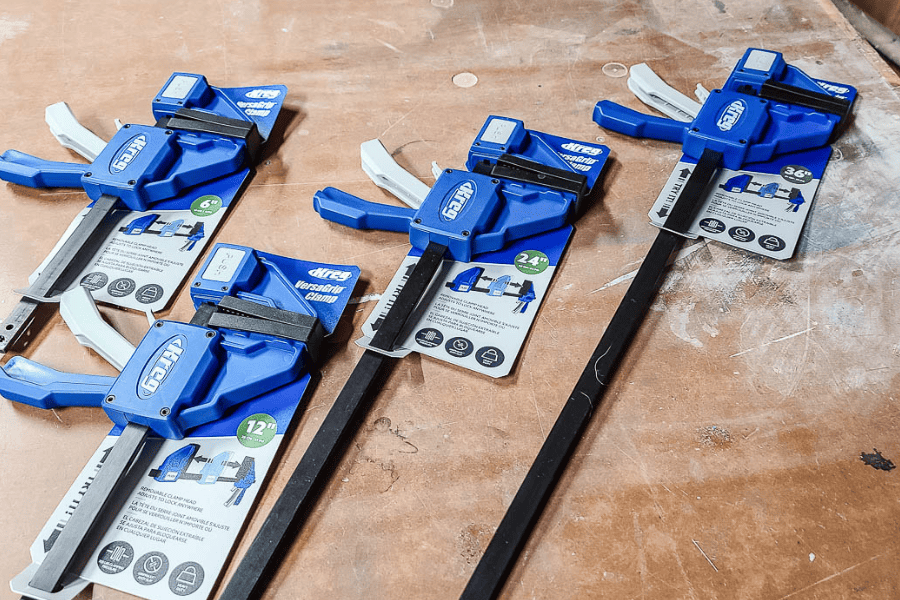
Kreg recently released a brand new f-style clamp that is fast and versatile for any wood project. We love them so far!
F-style clamps are kind of the unsung heroes in your woodworking toolbox. Picture the letter “F” – that’s the signature shape for this type of clamp.
These bad boys are your go-to for holding pieces together while the glue sets or when you’re working on nailing or screwing stuff down. F style clamps are versatile, tackling both large and small projects with ease.
The new Kreg clamps have an adaptable clamp head that is repositionable along the bar and is also reversible, so it can be used in a variety of clamping applications – like spreading. The handle features an easy-release trigger for quick unclamping.
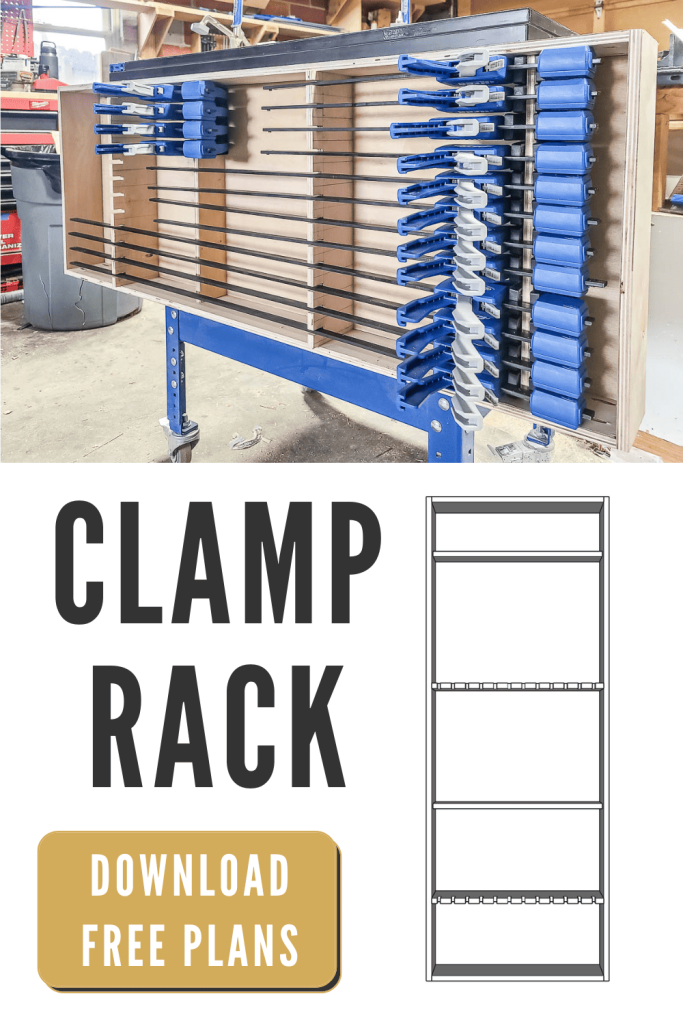
VersaGrip clamps are available in four lengths – 6″, 12″, 24″, and 36″. We have four of each size so our DIY clamp rack is designed to hold those specifically.
Kreg 720PRO Pocket Hole Jig
If you’ve been following Making Manzanita for a bit, you know that we are big fans of the Kreg pocket hole system.
We built a lot of projects using our original K5 Pocket Hole Jig, we even have a super detailed guide and video about how to use it that you can check out here.
In 2021, Kreg released brand new pocket hole systems that replaced the K4 and K5, and the upgrades are pretty awesome.
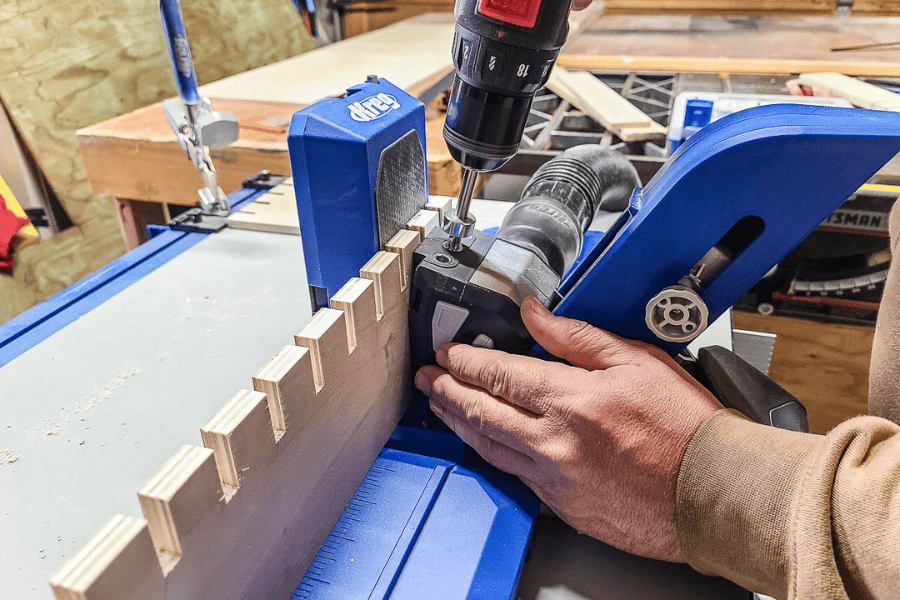
The new 720PRO (which we were using for the pocket holes on this DIY clamp rack) and the 520PRO (which replaced the smaller K4 system) were improved a ton, the most noticeable change being that they are easier to set up and use – score.
My favorite new feature of 720PRO is the clamp that you don’t have to adjust anymore. You should clamp it down and it automatically adjusts to match the thickness of your wood, so cool, right?
Pocket hole joinery is definitely one of the easiest ways to join wood in woodworking projects. It’s our favorite hidden weapon for beginning woodworkers!
Want to learn more? I wrote a super detailed guide & created a video all about how to set up your Kreg 720PRO Pocket Hole and use it, so be sure to check that out too!
We teamed up with our friends Kreg again for these DIY clamp rack plans and are sharing them online for free, now available on KregTool.com!
Kreg’s website is chocked full of so many easy-to-follow FREE woodworking plans! I promise that you are going to find so much inspiration while you’re there! It is a goldmine!
Related – Projects that use a pocket hole jig
- Kid’s Cabin Bed
- Table Top
- Planter Box for Front Porch
- Outdoor Plant Wall
- Farmhouse Sink Cabinet
- Mudroom Lockers
- DIY Desk Calendar & Wooden Pencil Holder
- DIY Dress Up Storage for Kids
- Picture Ledge DIY
- DIY Firewood Rack with Roof
- DIY Cane Headboard
- Boho Nightstand with Cane
- DIY Behind the Couch Table with Outlet
- DIY Headphone Stand
- DIY Cookbook Stand
- Easy DIY Grill Utensil Holder
- DIY Deck Box for Outdoor Toys
- DIY Towel Rack Made With One Board
- DIY Tool Organizer for Kreg Tool Stand
- DIY Mail and Key Holder
- DIY Step Stool for Toddler
- DIY Trash Can
- DIY Spice Rack
- DIY Book Holder
- Easy DIY Magazine Shelf
- DIY Clamp Rack
- DIY Chicknic Table
- DIY Bike Rack
- Small Bookshelf
- DIY Laptop Tray
DIY Clamp Rack: Video Tutorial
YouTube video coming soon!
If you love DIY videos, don’t forget to subscribe to our YouTube channel!
Ready to see the finished result of the DIY clamp rack?

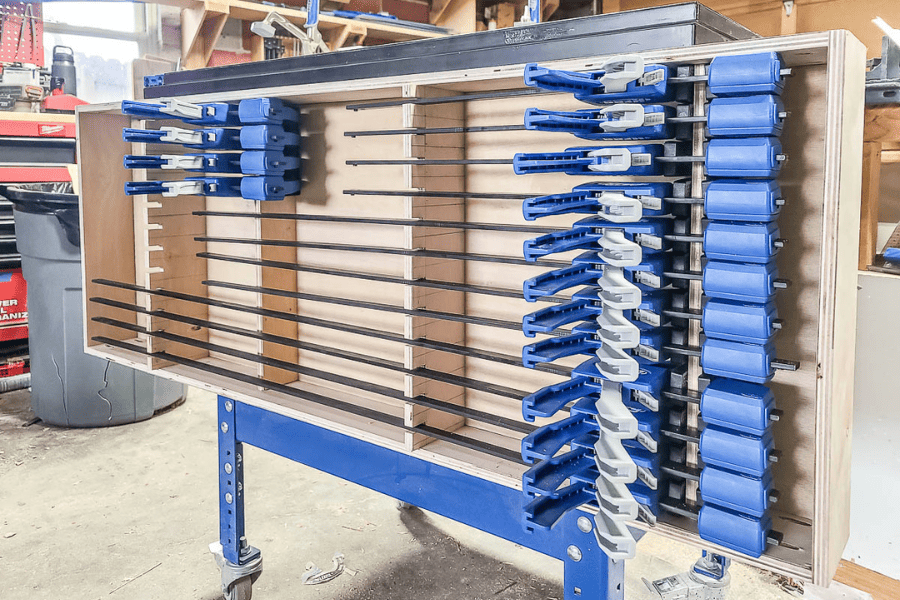
We love how it turned out! This simple clamp rack is just perfect for all of the new VersaGrip clamps – from the smaller clamps to the long clamps.
Since we have limited space in our small woodshop with basically no extra wall space on our shop walls, we decided to attach it to the back of our tool organizer shelves on the bottom of our Kreg clamp table. It’s the perfect spot to keep the clamps at an arm’s reach while we’re building.
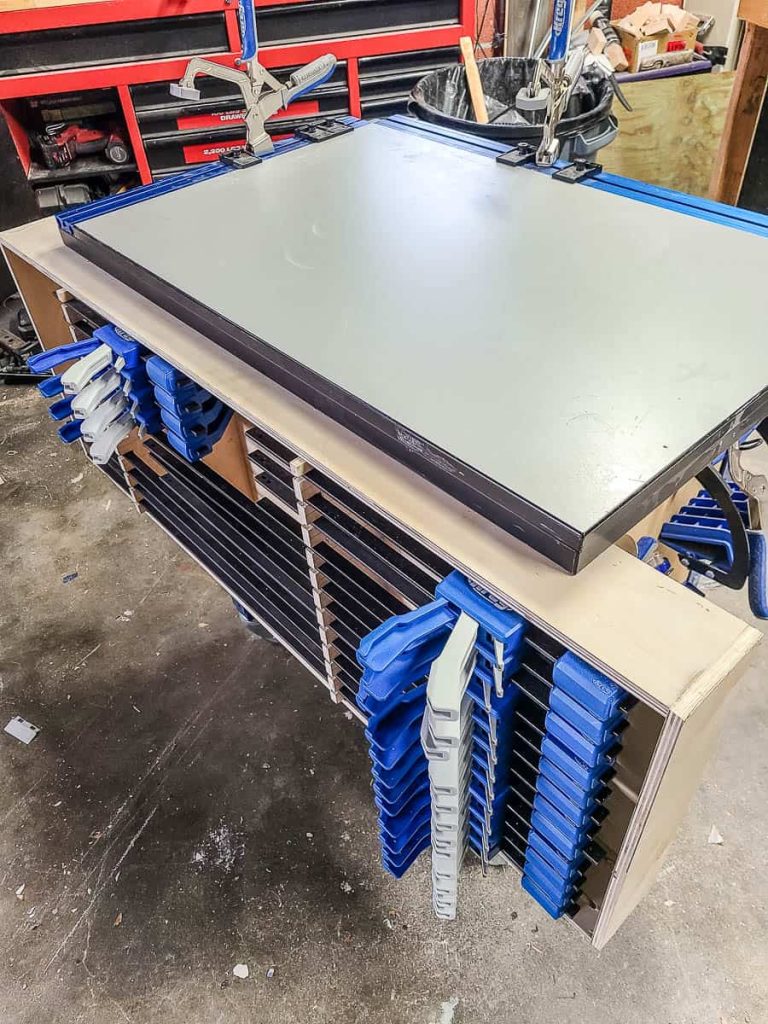
If you have spare wall space in your shop, this DIY clamp rack can easily be mounted on the wall instead.
And we would probably recommend hanging in vertically if you do that – but, as you can see, horizontally works too! We made sure when we were working on this clamp rack design that it could be hung either way so you can decide what works best for you and your space!
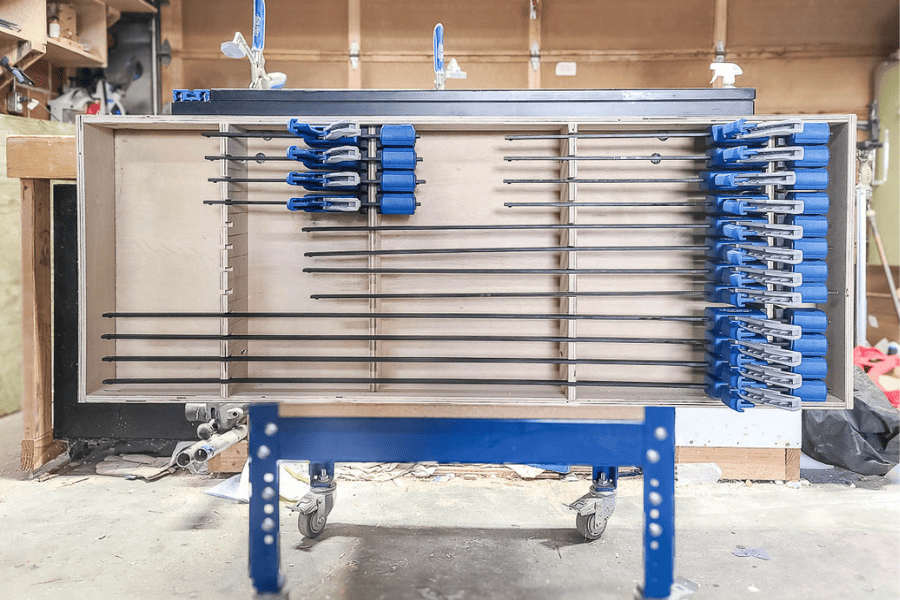
This whole DIY clamp rack came together with just one piece of plywood – a 4′ x 4′ project panel. Can you believe that?
We have the clamps all organized by size, from smallest to largest. The longest clamps are on the bottom of the rack.
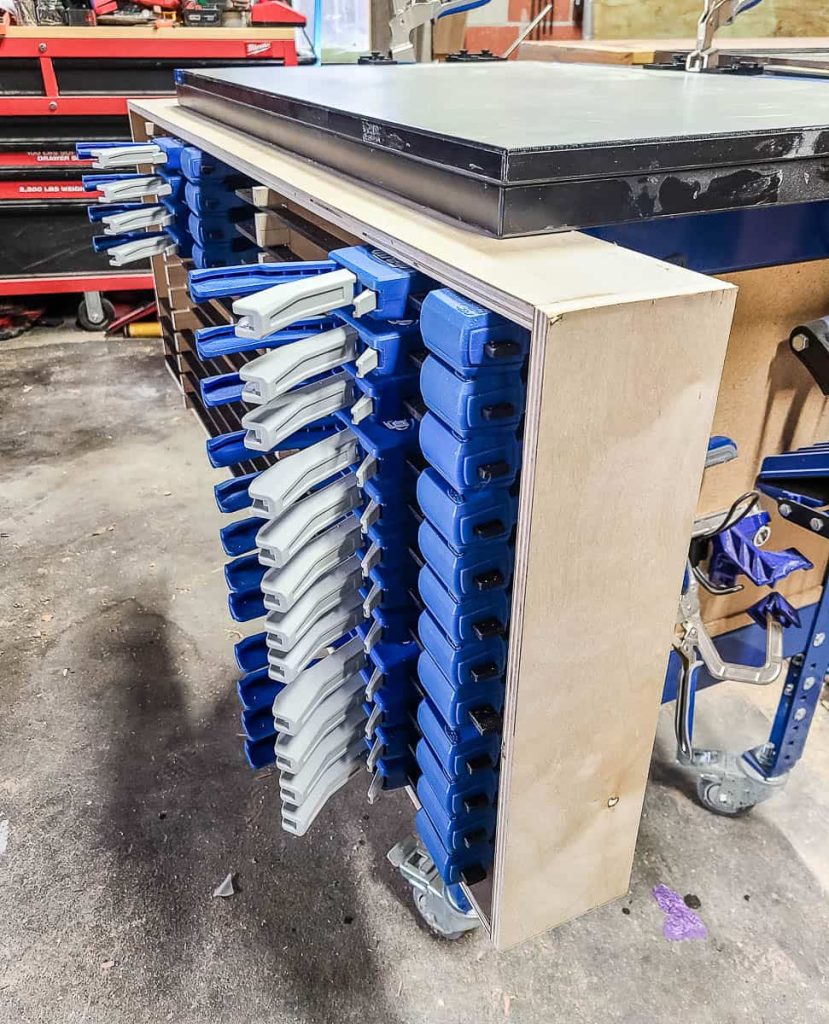
This is a pretty quick build once you get going. The only thing that takes a bit of time is grooving out the board with all of the slots to hold the clamp bars.
If you love the Kreg VersaGrip clamps too, you’ve gotta built this ultimate clamp rack as the perfect way to store them! It is so handy!
Want to build this clamp rack? Here’s what you’ll need!
Tools Needed
- Kreg jig – 720 Pro
- Kreg micro-pocket drill guide
- Kreg clamp table
- Table saw (or circular saw)
- Tape measure
- Drill
- Impact driver
- Clamps
- Socket or crescent wrench
Materials Needed
- 1/2″ x 4′ x 4′ sanded plywood
- Kreg pocket hole screws with pan head (1”)
- 5/16″ carriage bolts (1 1/4″)
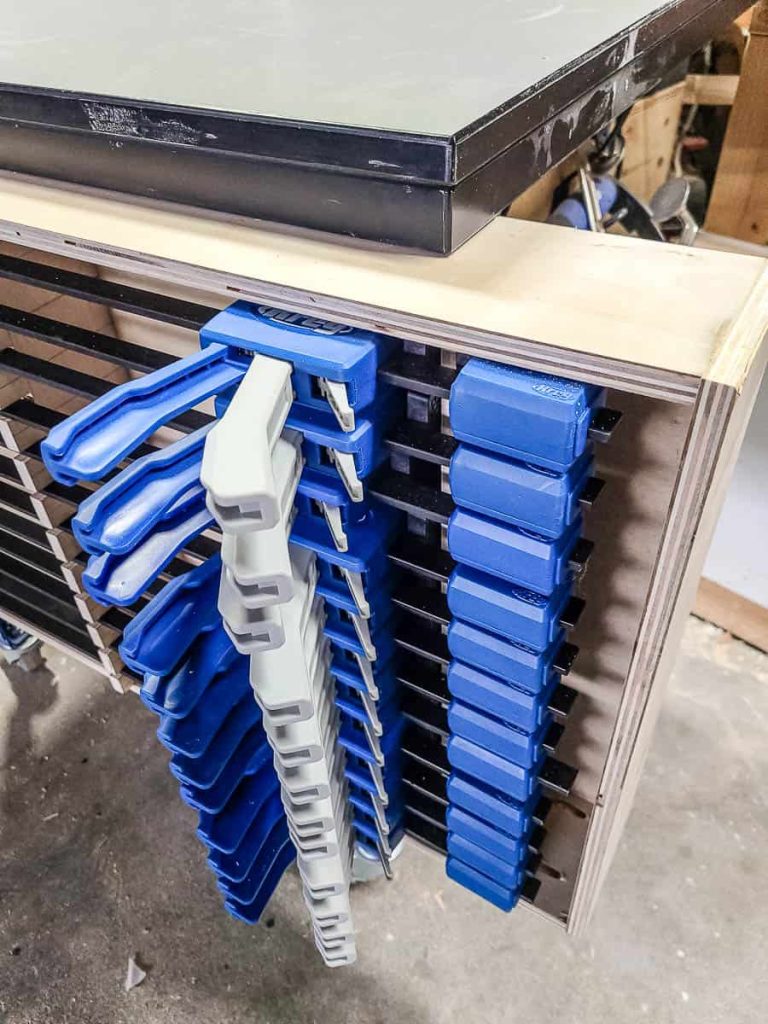
Want to build your own DIY clamp rack? We’ve done all the hard work for you! All you need to do is hop over to Kreg’s website and check out the full tutorial.
At the bottom of the tutorial on Kreg’s website, you’ll also see a link to download the free plan to get all of the detailed measurements and a cut list!
Do you have any other questions about how to make this DIY clamp rack?
Let us know in the comments!

