Wood Bead Ornaments: 3 Easy Tutorials

We added a Christmas tree to our bedroom this year, so that meant that I needed a lot more ornaments. I decided to go all out and make ALL the ornaments for the tree. So I’ve been very busy making so many different ornaments.
Today’s are all with wooden beads and they turned out amazing.
Out of all of the ornament tutorials that I’ve shared this year, these wooden bead ornaments are definitely the easiest. You’ll see below that even my 5-year-old was able to help out these this DIY projects.
Table of Contents

This DIY wood bead ornaments tutorial contains affiliate links, but nothing that I wouldn’t recommend wholeheartedly. Read my full disclosure here.
The best way to buy a bunch of wood beads for ornaments like this is in a set with various sizes. I got this one on Amazon for my ornaments and it worked perfectly.
I have a bunch leftover too for future wood bead craft project or I could probably even make a fun wood bead garland, like this!
I absolutely love the natural look of the wood beads just as they are. But if you wanted them to be a different color (or create some different variations), you could use painted wood beads or stain them with wood stain.
Ornament #1: Wood Bead on String
This is the most simple of the homemade ornaments in this set of wood bead ornaments. To prove to you that this is an easy DIY project, I had my 5-year-old this one. If she can do it, you can do it too.
She LOVES helping Mama! You’ll see her little hands in this tutorial. We had so much fun crafting together and definitely made some precious memories. I never want to forget this stage where she is all about doing whatever Mom is doing.
Supplies for wood bead on string ornament:
- Wooden beads of various sizes
- String or twine (small enough to go into holes of wood beads)
- Scissors
- Tape
Step 1: Cut string
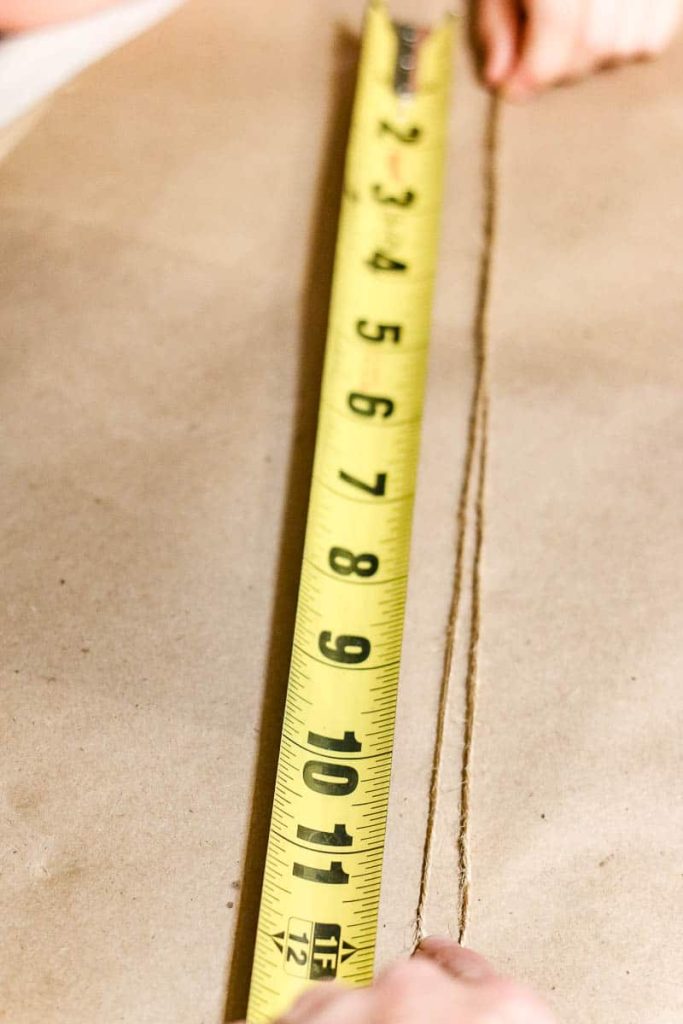
Cut a piece of twine roughly 24 inches (or 12″ folded in half).
Step 2: Add wood beads
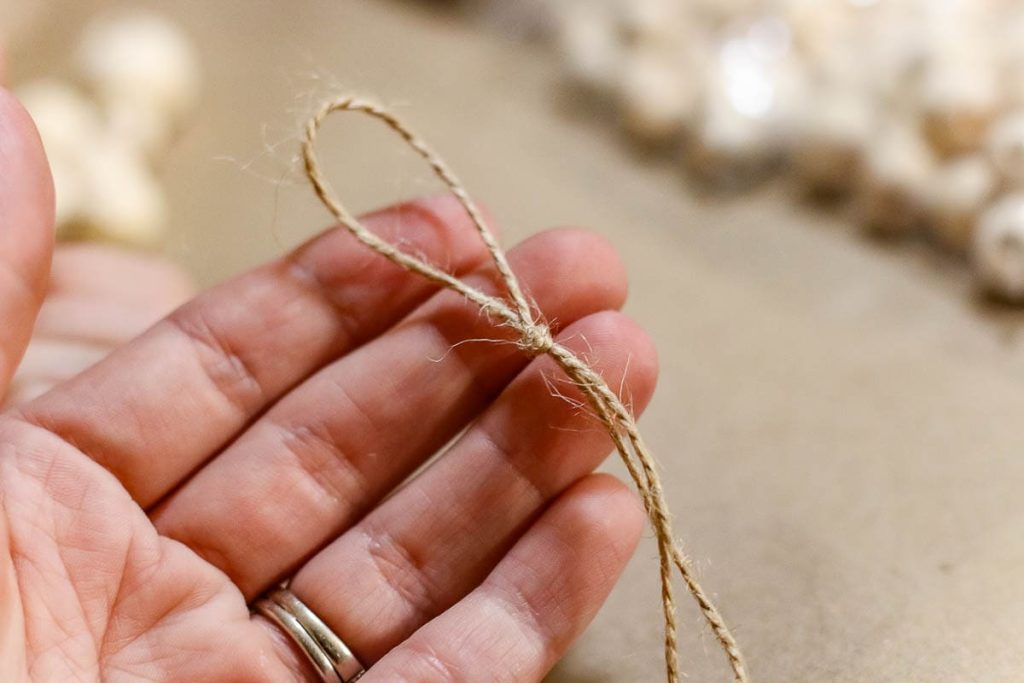
Fold the string in half and add a simple overhand knot about two inches from the top at the folded end. This loop will be where you hang it on the Christmas tree so make sure the loop is large enough to do that. The knot will help prevent the wood beads from going all the way up on the pieces of twine when you string them on.
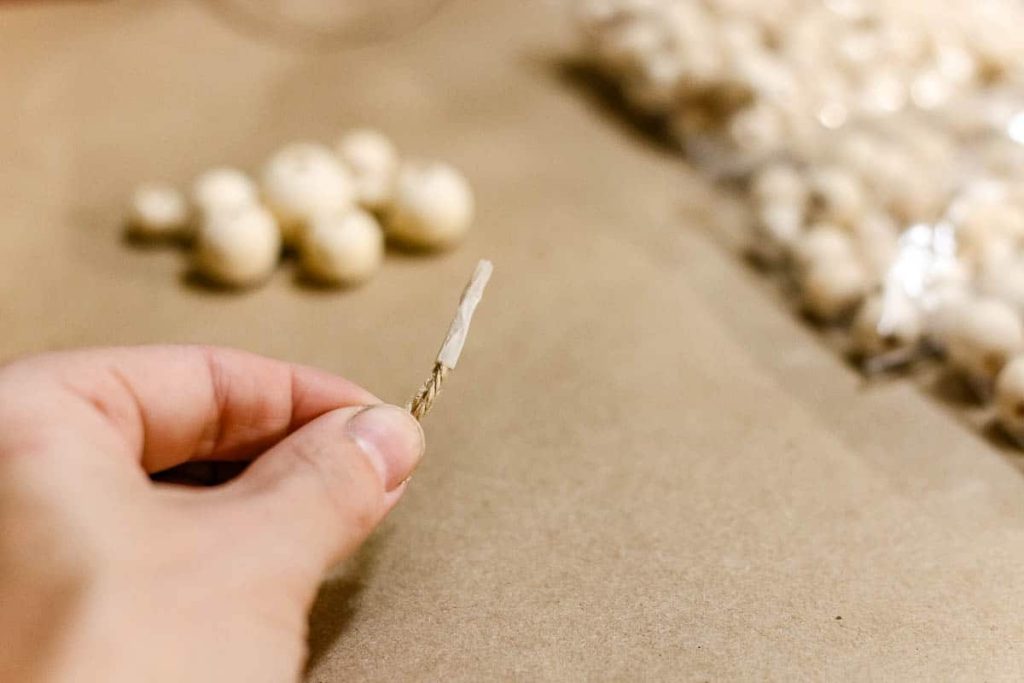
Tape together the opposite ends of the twine with some tape to make it easy to string the wooden beads on.
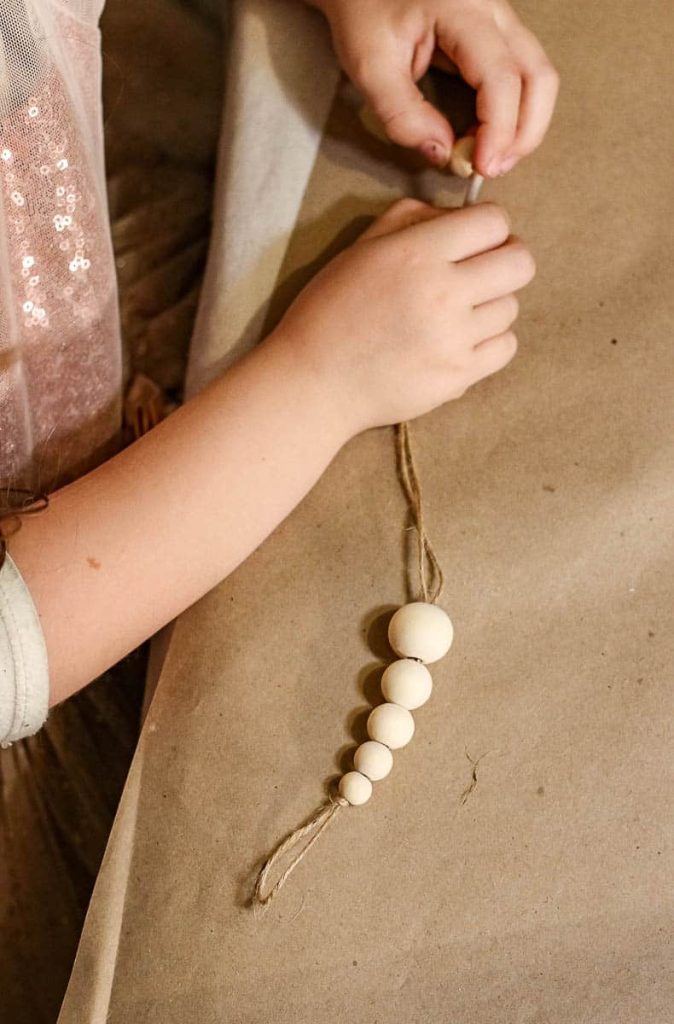
Starting with the smallest bead first, add it to the string where it is taped. For the second bead, go up to the next size slightly larger. For the next bead, go even larger with the bead.
Once you have added the largest beads, go back down in size as you add them to the piece of string so that it is symmetrical on the bottom half.
Feel free to go as long as you’d like with the various wooden bead sizes. I did one with five different sizes and one with three different sizes.
Step 3: Tie the bottom of the ornament
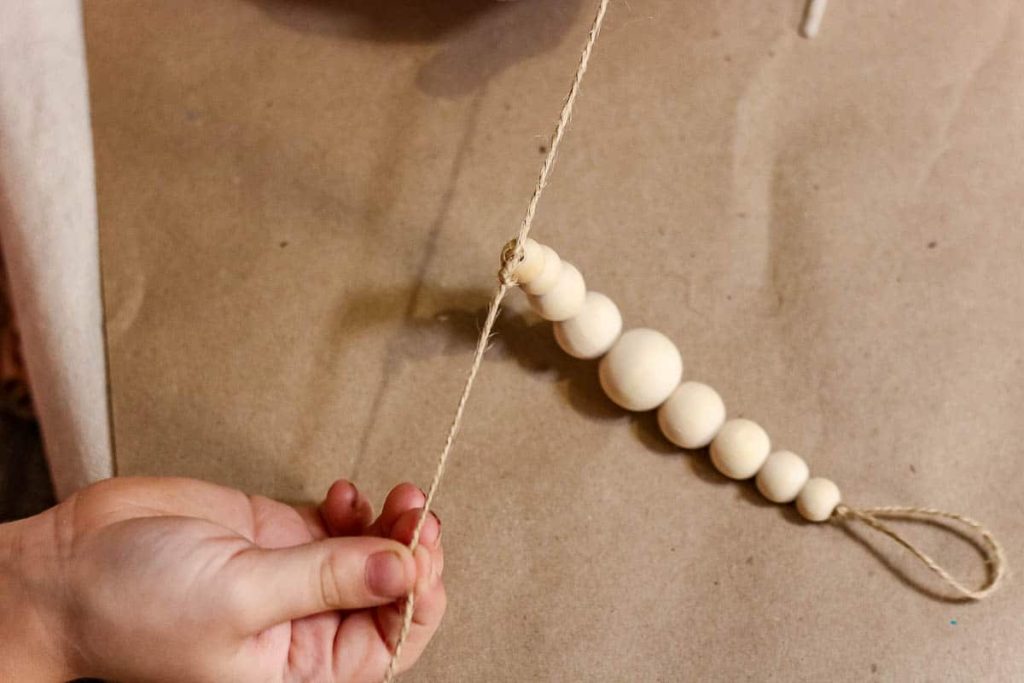
Once you have all the beads added, tie another simple overhand knot at the bottom to prevent the wood beads from falling off. If needed, tie two knots to make it bigger (which you may need to do depending on the size of your bead holes).
Cut off the excess string below the knot with scissors.
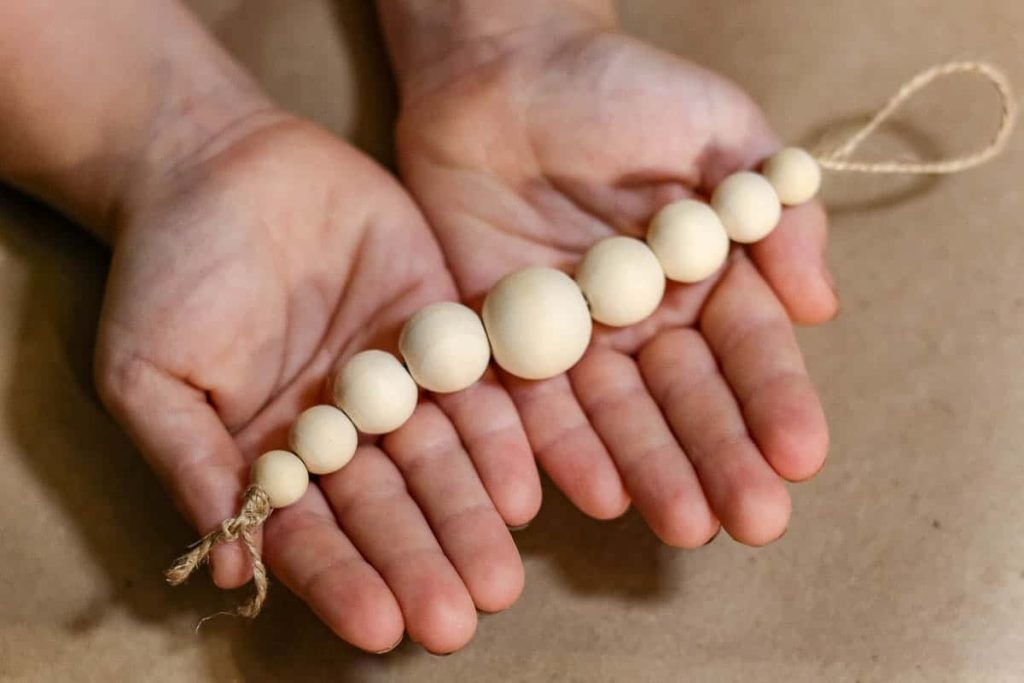
She was so proud of herself! These type of projects that the kids can do almost entirely by themselves are the best because they are able to build confidence when it comes to crafting!
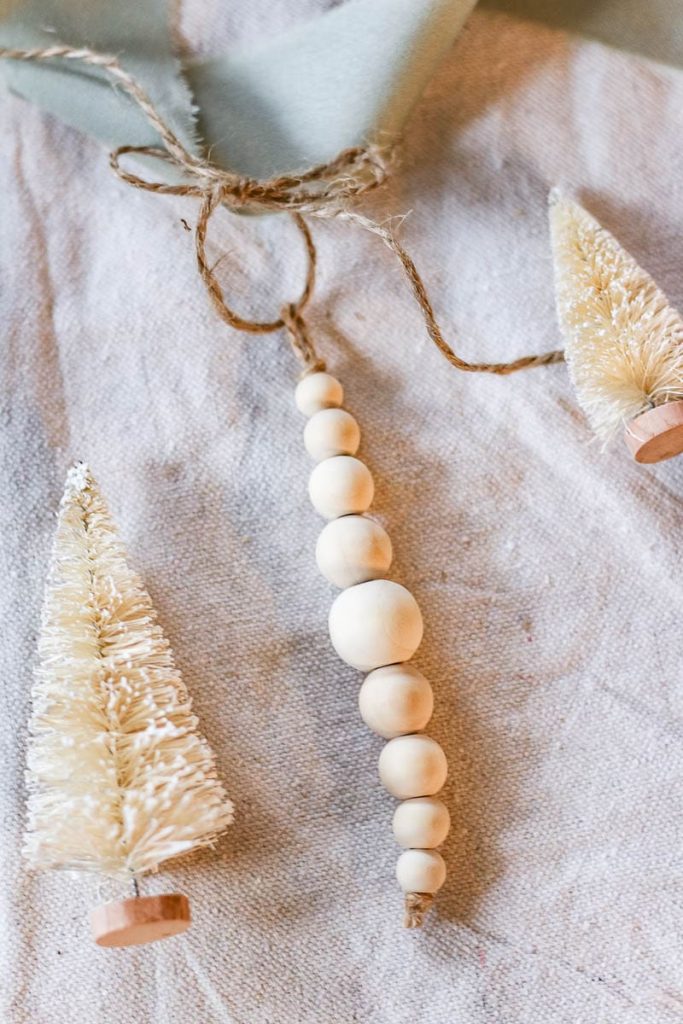
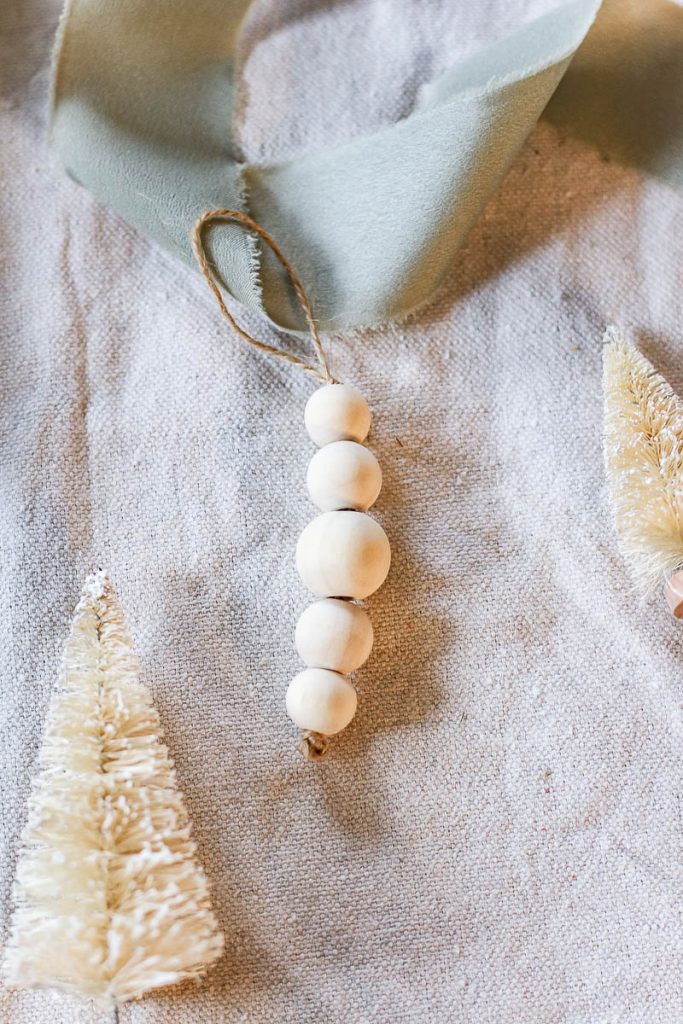
Here’s a slightly smaller version that I made with only three different sizes of wooden beads.

Ornament #2: Wood Bead Mini Wreath
This is definitely one of my favorite of the wooden bead ornaments! This ornament gets its wreath shape from the wire in a pipe cleaner. Genius, right?
How cute is this little mini wreath full of unfinished wood beads? You could even use these small wooden bead wreaths as gift toppers or as mini wreaths on kitchen cabinets or the backs of dining room chairs to add to your holiday decor.
I love the natural wood look of the wood beads, but you could also paint them green if you wanted it to look more like a wreath.
Supplies for wood bead mini wreath ornament:
- Wooden beads of various sizes
- Pipe cleaner
- Scissors
- Velvet ribbon
Step 1: String wood beads onto the pipe cleaner
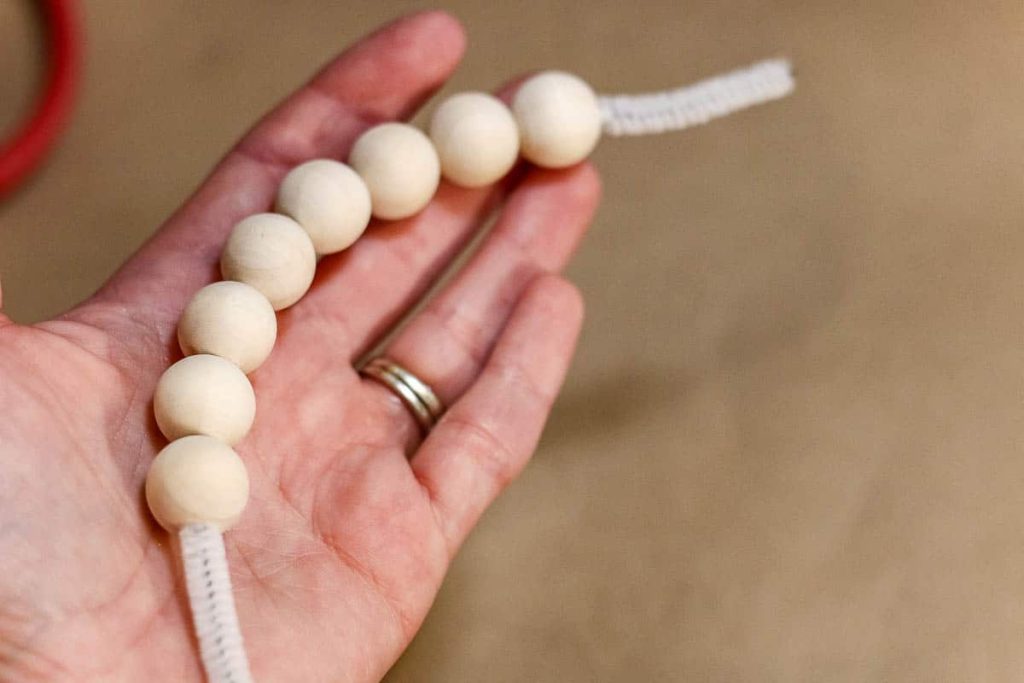
It couldn’t be any easier! All you do is simply string the wooden beads onto the pipe cleaner bending it into a circular shape as you go.
I used 13 wood beads total, but feel free to make yours smaller or larger if you’d like.
Step 2: Secure pipe cleaner together to make a mini wreath
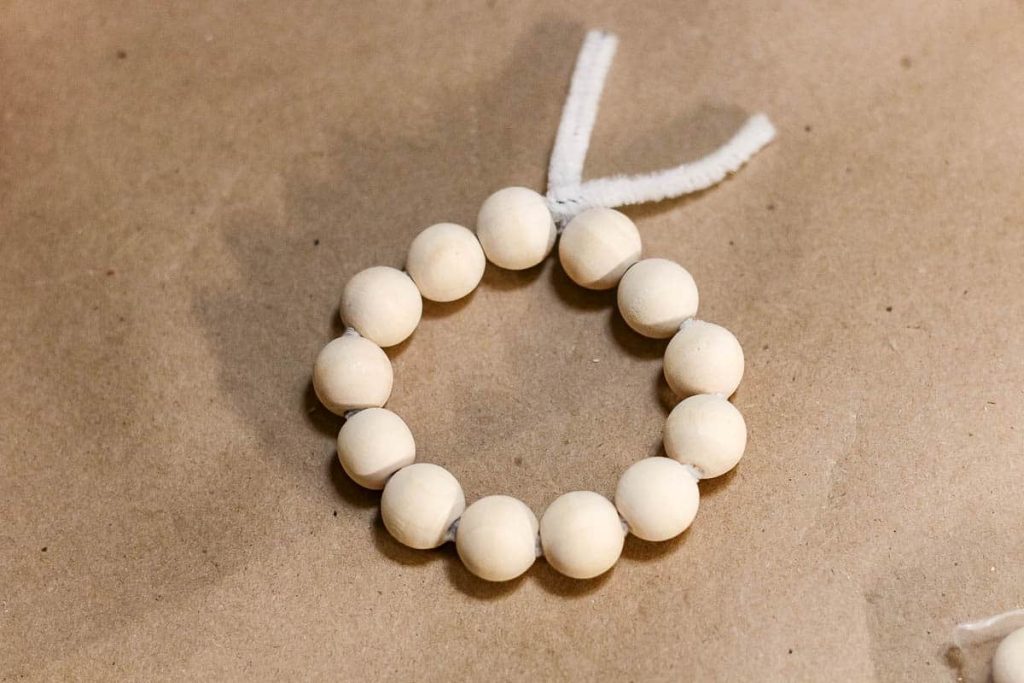
Once you’re happy with the amount of beads, take both of the ends of the wire pipe cleaner and twist them together tightly.
Cut off the excess pipe cleaner with scissors. If you’re making a lot of these, you’d probably want to use wire cutters to prevent dulling your scissors by cutting wire.
Step 3: Add a ribbon hanger

Cut a small piece of velvet ribbon roughly 8-9 inches. Loop the ribbon through the middle of the wreath and glue the ends together. This will be the hanger for your wooden ornament.
Step 4: Add bow
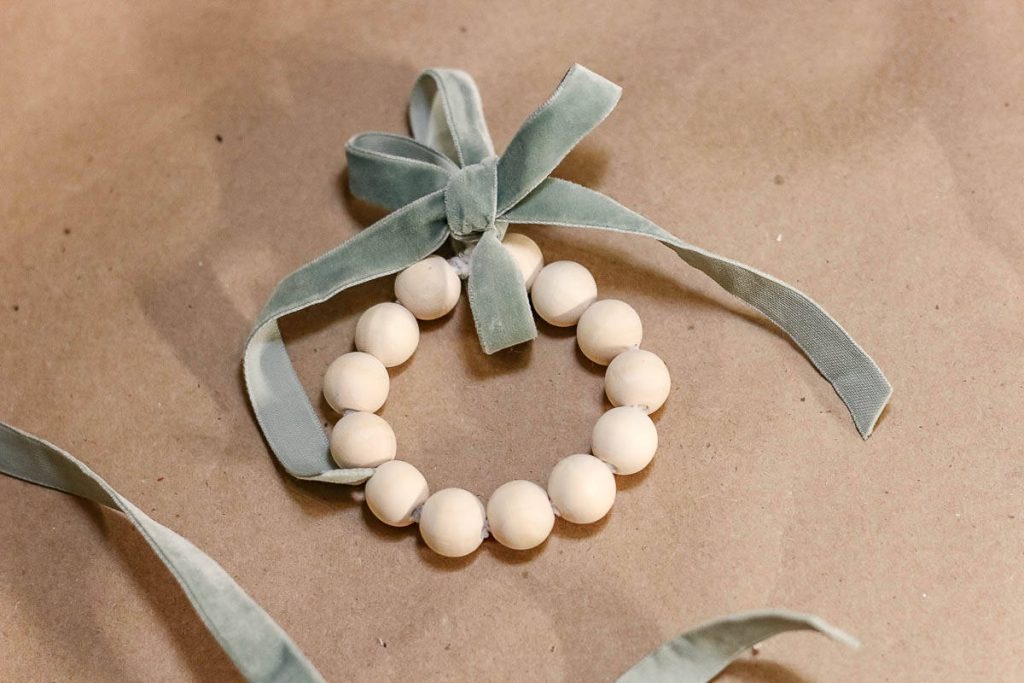
For the finishing touch, add a bow to the front of the hanger with the same velvet ribbon.
To prevent the hanger from flipping around on the wreath (and to hide the twisted pipe cleaner), add a small dot of glue to the back of the ribbon where the bow is and press it into place over the spot where the pipe cleaner was twisted together.

I love how this one turned out! It is such a fun twist on the traditional wood bead ornament!

Ornament #3: Wood Bead and Twine Angel
This is SUCH a cute ornament and it is made completely using DOLLAR TREE supplies. Yes, that is right. You can get both the wood beads and the twine at the Dollar Store.
After I made this macrame angel ornament, I wanted to find a way to replicate it but on a budget so you wouldn’t have the extra cost of the macrame cording.
That’s when I came up with this unique variation for the angel ornament using wood beads and jute twine. I love that both of the angels have different styles too! This one with the twine is a bit more rustic and less boho.
Video tutorial
If you love DIY videos, don’t forget to subscribe to our YouTube channel!
Supplies for wood bead and twine angel ornament:
- Wood bead
- Jute twine
- RapidFuse Super Glue (or hot glue)
- Scissors
Step 1: Make a tassel with the twine
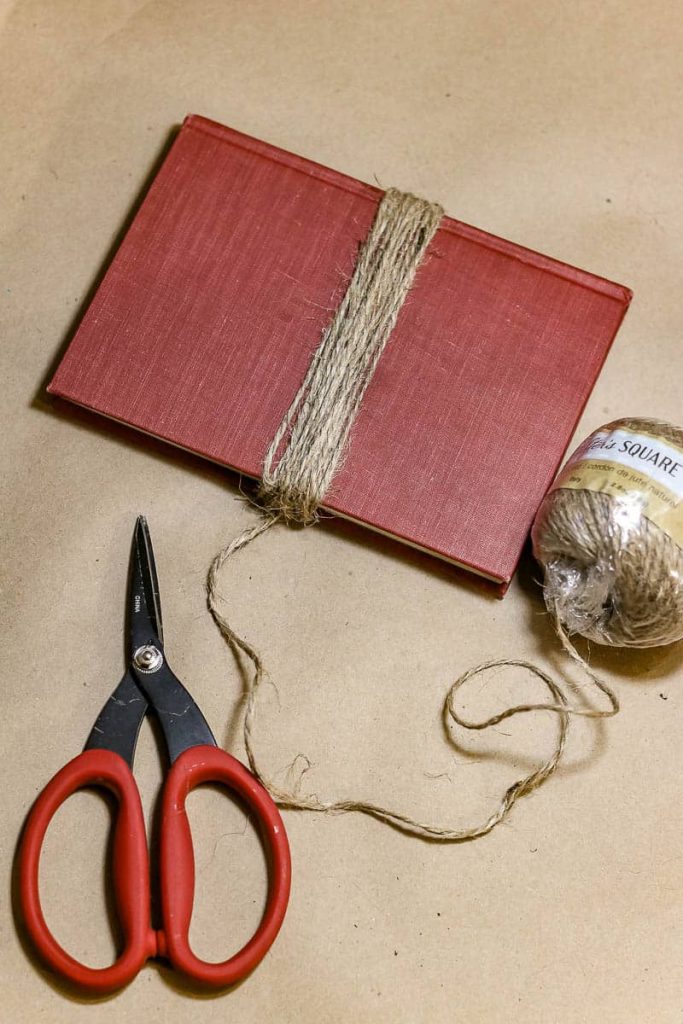
Start by wrapping the twine around a small book (or something else flat that is about the same size that you want your angel ornament to be). This is the exact same way I make yarn tassels too!
Wrap it around the object several times (the more you wrap the fuller the tassel will be on the angel). I did mine about 10 times and then cut the end.
Slide the twine off the book and cut one end all the way across so that all of the twine pieces are the exact same size.
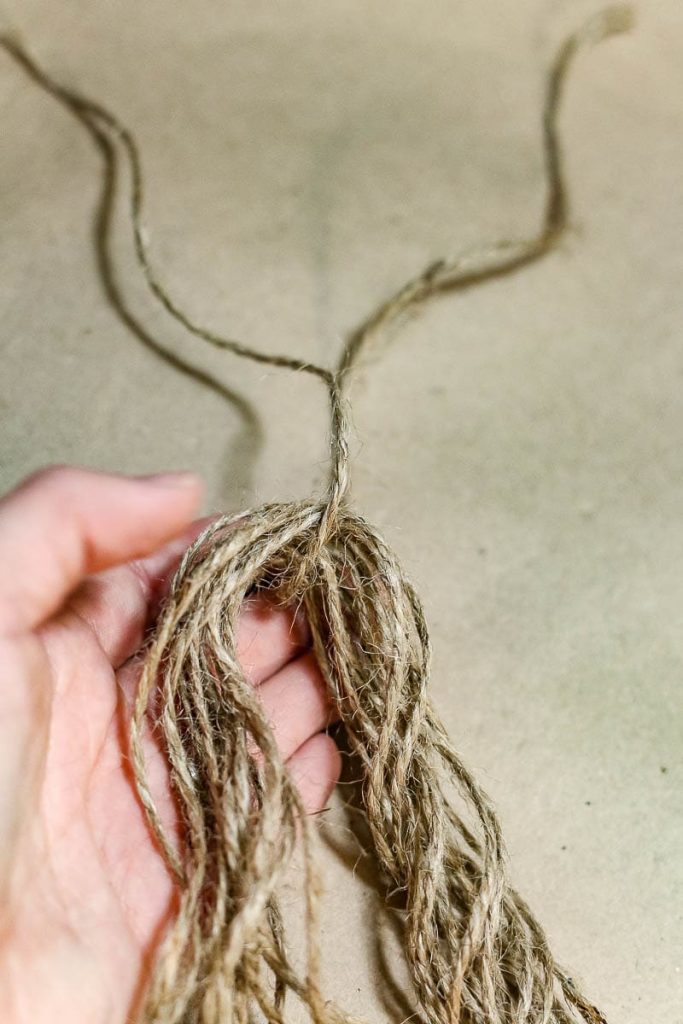
Open the folded twine and tie another piece of twine about 10 inches to the middle of the stack (right where it was previously folded).
Step 2: Add wood bead
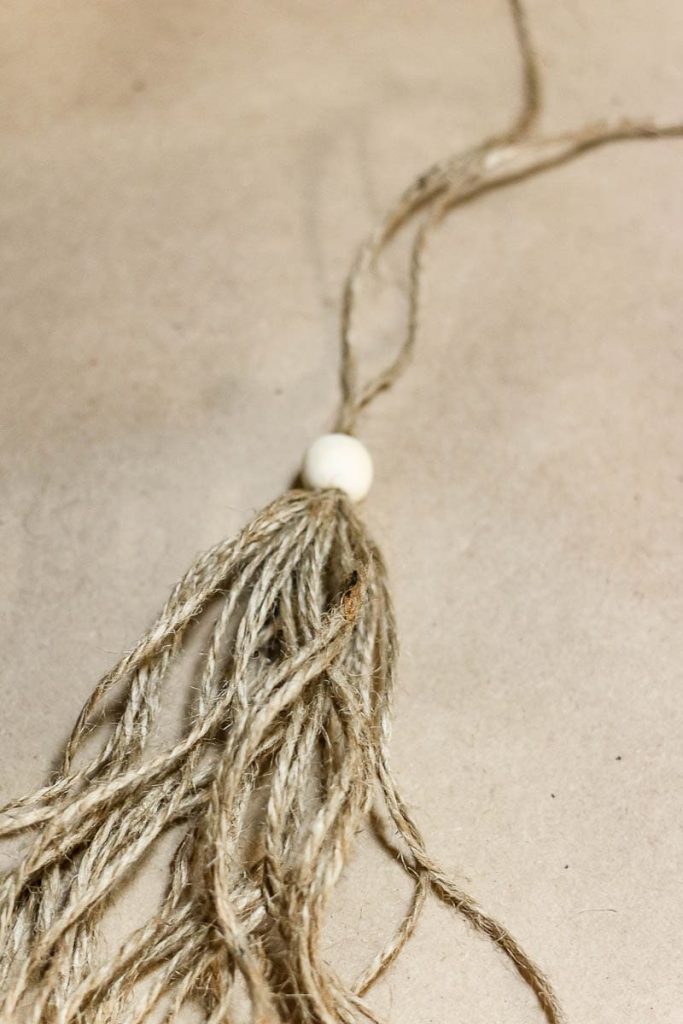
Pull both of the pieces of twine that was tied on up and string a small wood bead to top so it is sitting on top of the tassel.
Step 3: Wrap and secure the tassel
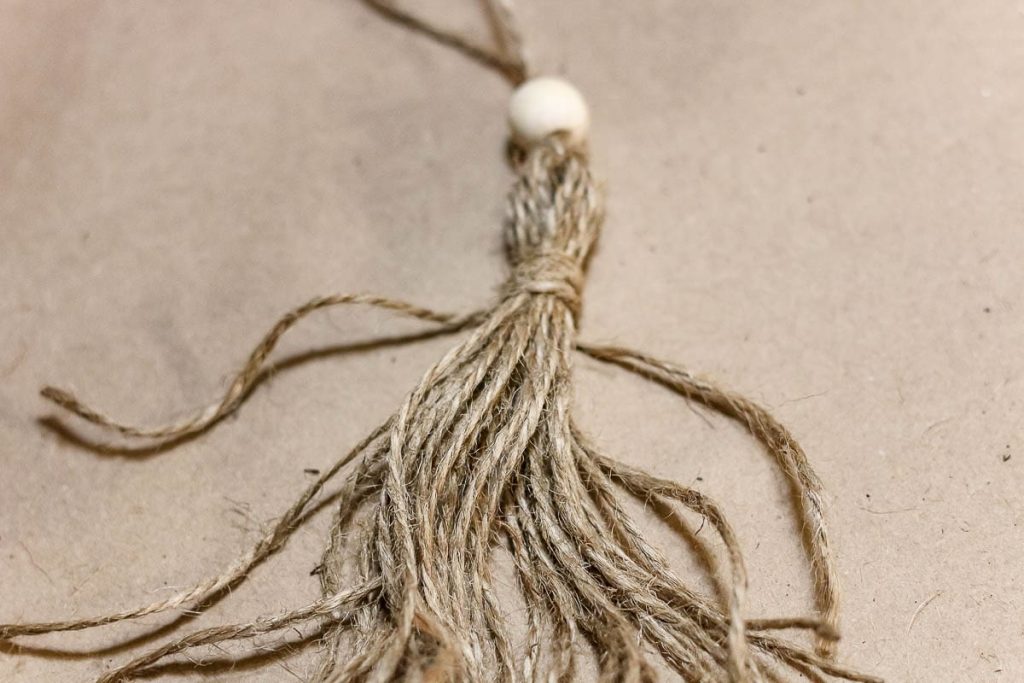
Take another piece of twine about 10 inches long and wrap it several times around the top of the tassel about 1-inch from the top. Tie in the back with a knot and cut off the excess.
Step 4: Add angel wings

Now it is time to add the wings to this little angel ornament! Take a piece of twine and loop it together in a figure-8 two times. Tie together in a knot to secure.
To add it to the ornament, add a small dot of glue in the middle of the figure-8 (where the knot is) and press it into place on the back of the angel ornament (where it has been wrapped at the top).
Step 5: Finish hanger
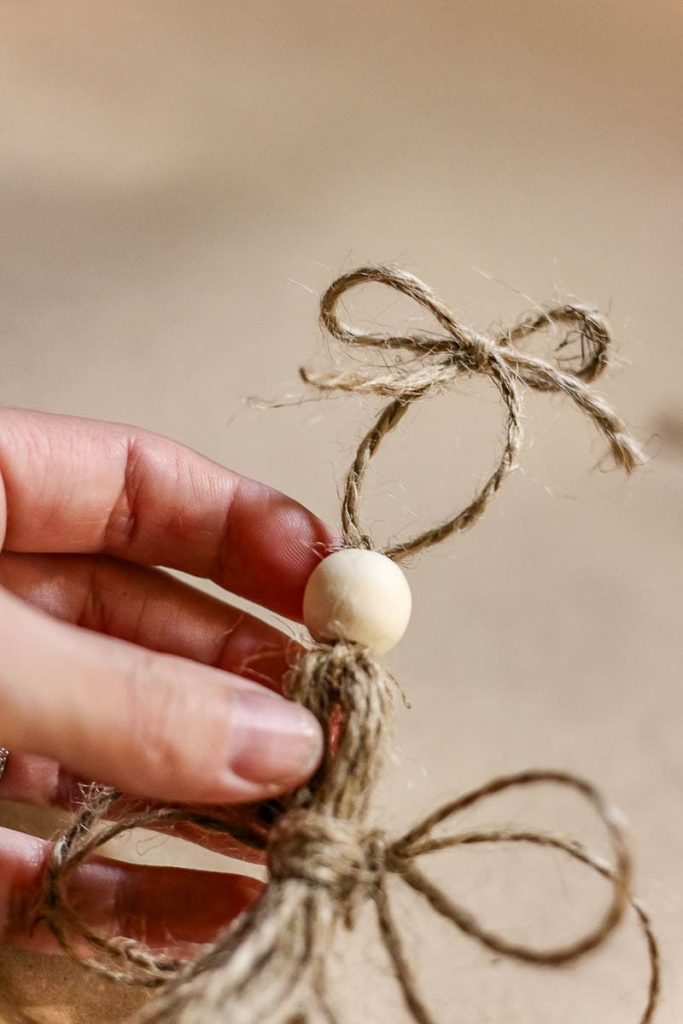
Add a small overhand knot the top above the wood bead to secure it. The tie the remaining pieces at the top in a knot or bow. This will be your hanger where you add it to the to Christmas tree!
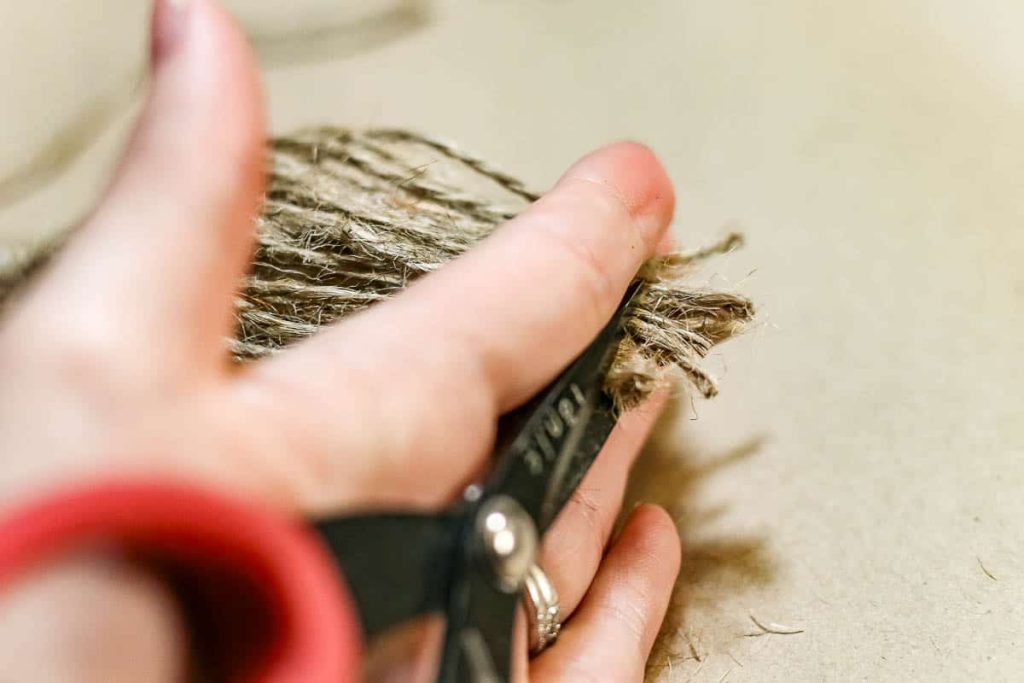
You can also trim up the bottom of the tassel now too!

I love that I decided to play around with the angel ornament and make two different versions at different price points.

The one on the left made with twine and a small wood bead can be made entirely with Dollar Tree supplies, while the one on the right is made with slightly more expensive macrame cording and larger wooden bead. I love them both!
Wood Bead Christmas Ornaments – watch all tutorials
Want to hang out and watch all of these wooden bead Christmas ornaments being made in one video? I’ve compiled all of the video tutorials so you can do just that! So grab a cup of coffee and hang out with me.
If you love DIY videos, don’t forget to subscribe to our YouTube channel!

I loved making these fun ornaments this year! After you buy the wood beads (which I got in this set from Amazon), there are not many other supplies you need.

These unique ornaments added a lot to the boho decorated Christmas tree that we have in our bedroom this year. I decorated almost the entire tree with handmade ornaments!
Check out the tutorials for the other Christmas tree ornaments here:
- Textured ornaments with paint and baking soda
- Mercury glass ornaments
- Macrame ornaments (three versions – angel, hanging, and tree design)
- DIY Leather Ornaments – Mini Christmas Tree with Wood Beads
Make a bunch of wood bead ornaments and decorate your Christmas tree or give them away as gifts. You even tie them to your wrapped presents along with a gift tag for a fun addition.
Which of these DIY wood bead ornaments was your favorite?
Let us know in the comments below!
Want to see more Christmas craft projects? Check out these posts!
- Fake Gingerbread House with Dollar Tree Dollhouse
- DIY Wood Nativity Scene
- How To Make A Christmas Tree Star with Yarn and Cardboard
- Wood Bead Ornaments: 3 Easy Tutorials
- Macrame Christmas Ornaments: 3 Easy Versions
- How To Make Easy Faux DIY Mercury Glass Christmas Ornaments
- DIY Matte Textured Ornaments with Dollar Tree Ornaments
- Homemade Mulling Spices for Christmas Gifts with Free Printable Tag
- Easy DIY Stovetop Potpourri Gift Idea with Free Printable Tags
- How To Make Cheap and Easy Paper Bag Snowflakes with Lunch Bags
- How To Make Cotton Ball Garland for Less Than $5
- DIY Stocking Tags | Cheap & Easy Idea Anyone Can Do
- Easy DIY Gnome for Christmas Decor Using Dollar Store Materials
- Easy Boho DIY Yarn Christmas Trees
- DIY Christmas Village Makeover For Less Than $10
- Handmade Christmas Ornament with Farmhouse Style
- DIY Wrapping Paper For Christmas Gift Wrap
- How To Make Christmas Gift Tags With The Silhouette Mint
- DIY Dreamcatcher Ornament for Boho Christmas Tree
- Easy Leather Christmas Ornaments – Circles with Wood Beads
- DIY Leather Ornaments – Mini Christmas Tree with Wood Beads
- How To Make A Fabric Christmas Tree
- Rustic Christmas Advent Calendar
- Fabric Christmas Ornaments Made With Homespun Fabric – 4 Different Tutorials
- Cozy Sweater Covered Vases