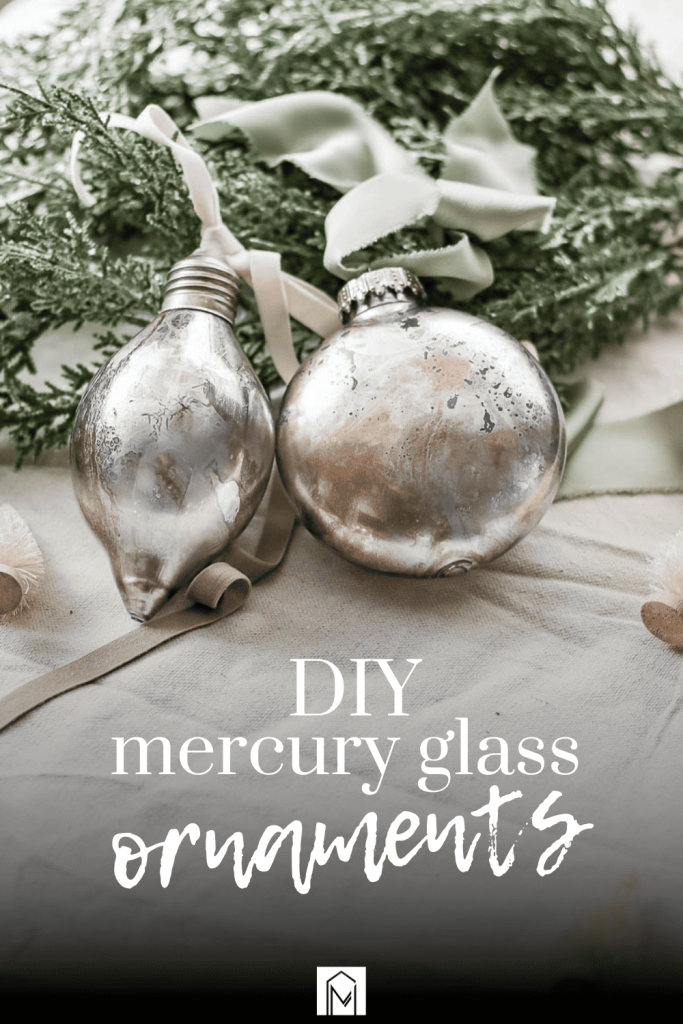
How To Make Easy Faux DIY Mercury Glass Christmas Ornaments

Do you love the vintage mercury glass look? Make your own DIY mercury glass ornaments using clear plastic ornaments from Dollar Tree and spray paint with vinegar! These will add a little vintage look to your Christmas tree.
There’s something so special about shiny things when it comes to holiday decor. The glitter and glitz are something that I don’t typically use in my everyday home decor, so I love adding a little bit of shine to our boho Christmas decorations, especially on the tree!
This DIY mercury glass ornaments tutorial contains affiliate links, but nothing that I wouldn’t wholeheartedly recommend anyway! Read my full disclosure here.
If you find yourself longing for those pretty mercury glass Christmas tree ornaments that are sold for a pretty penny at Pottery Barn, this one is for you! You can totally make those yourself this holiday season!
Head to the Dollar Store and grab some clear plastic ornaments and then get the two types of spray paints mentioned below and follow along with these easy steps to make these handmade ornaments.
Mercury Glass Ornaments – Video Tutorial
If you love DIY videos, be sure to subscribe to our YouTube channel!
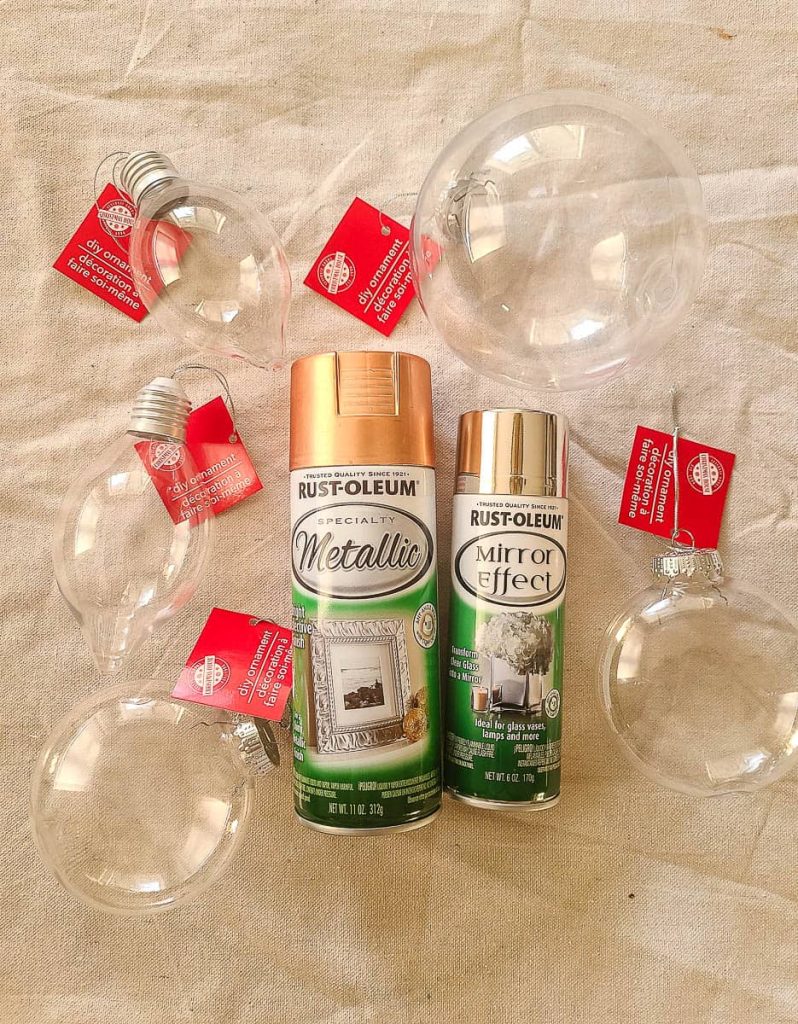
Supplies for DIY mercury glass Christmas ornaments:
- Clear plastic ornaments (I used these ones and one of these large ones from Dollar Tree)
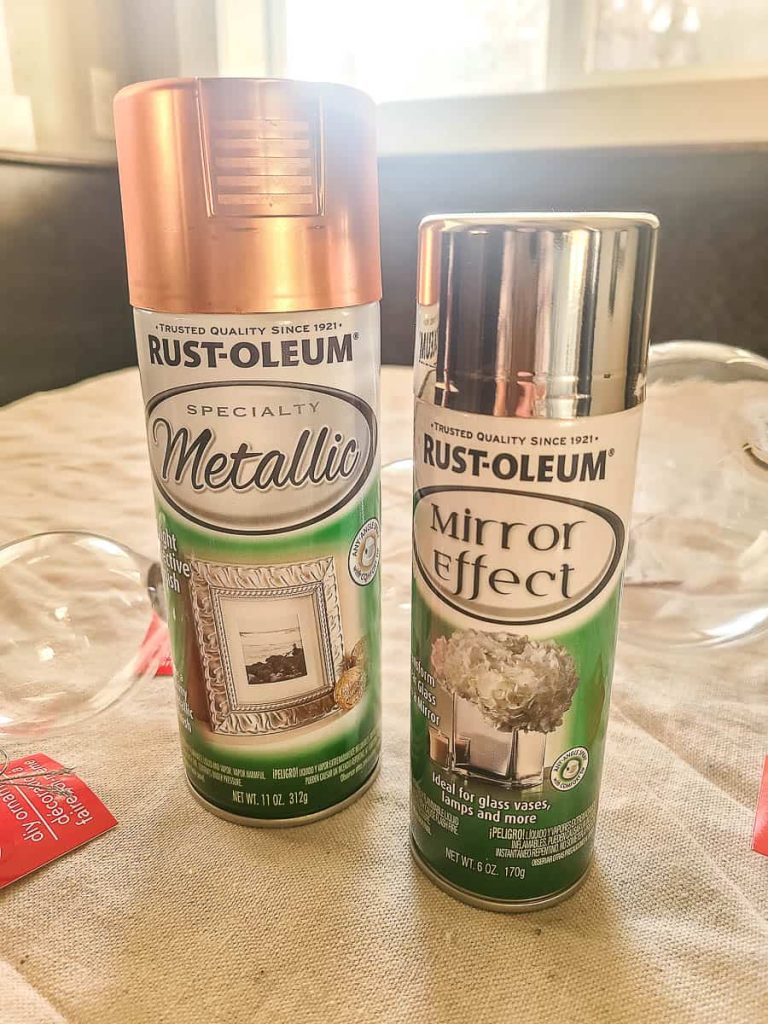
- Mirror spray paint – either the Krylon Looking Glass spray paint or Rustoleum Mirror Effect spray paint
- 2nd color of spray paint – I used this gold metallic
- Spray Bottle – you can also grab a plastic one from Dollar Tree if you don’t have one
- Distilled White Vinegar
- Hair Dryer
- Rub’ n Buff in European Gold (or whatever you want to use on your ornament tops)
- Velvet Ribbon
- Chiffon Ribbon
- Scissors
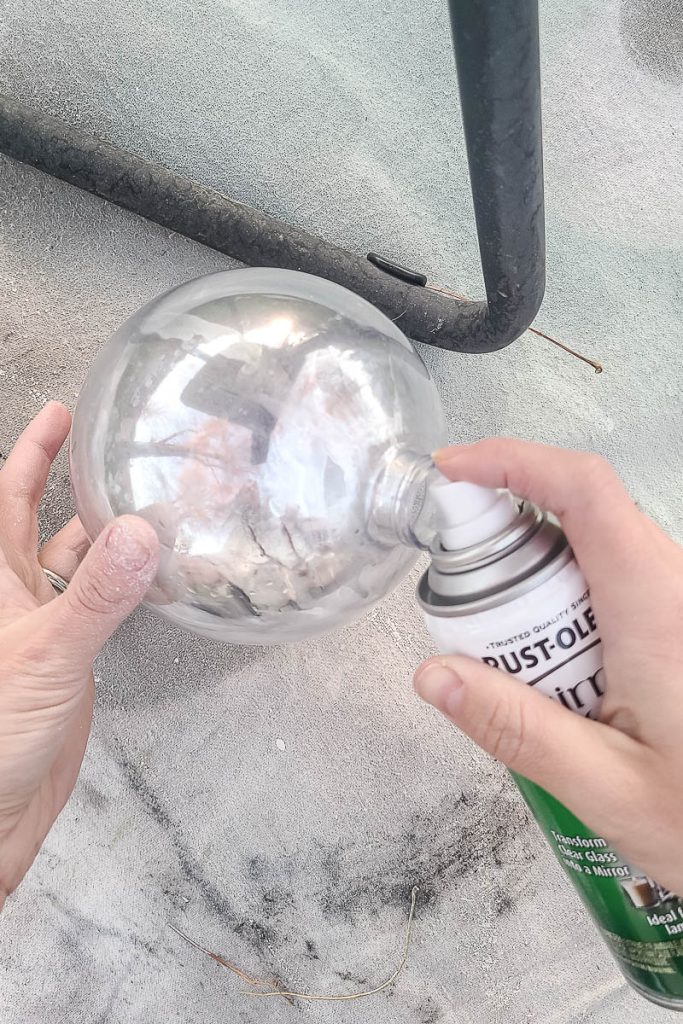
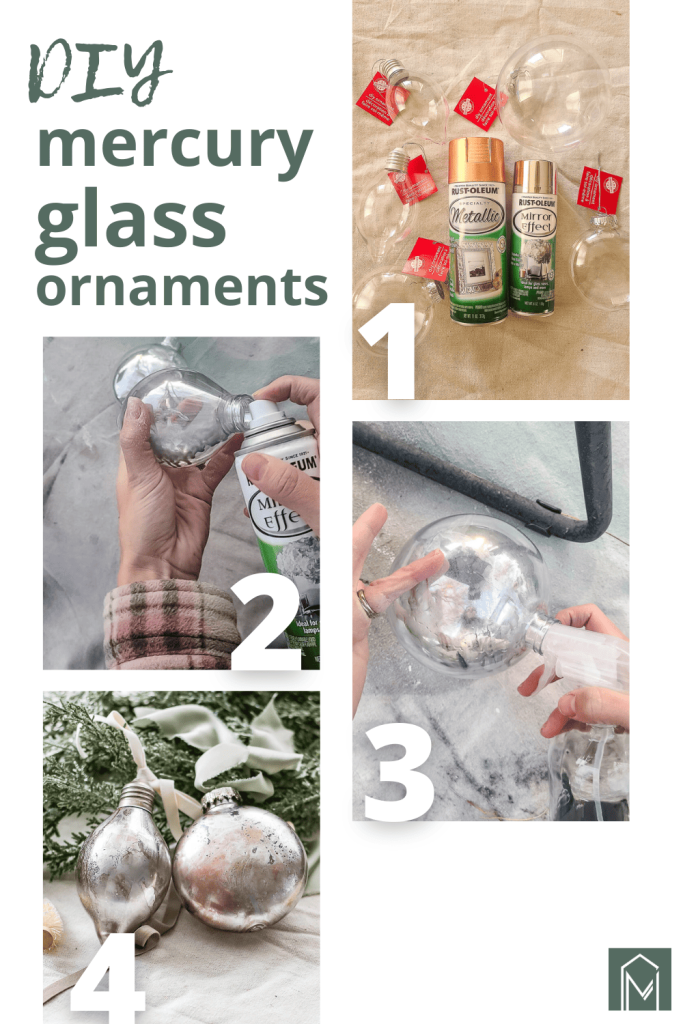
Step 1. Spray mirror spray paint into clear ornaments
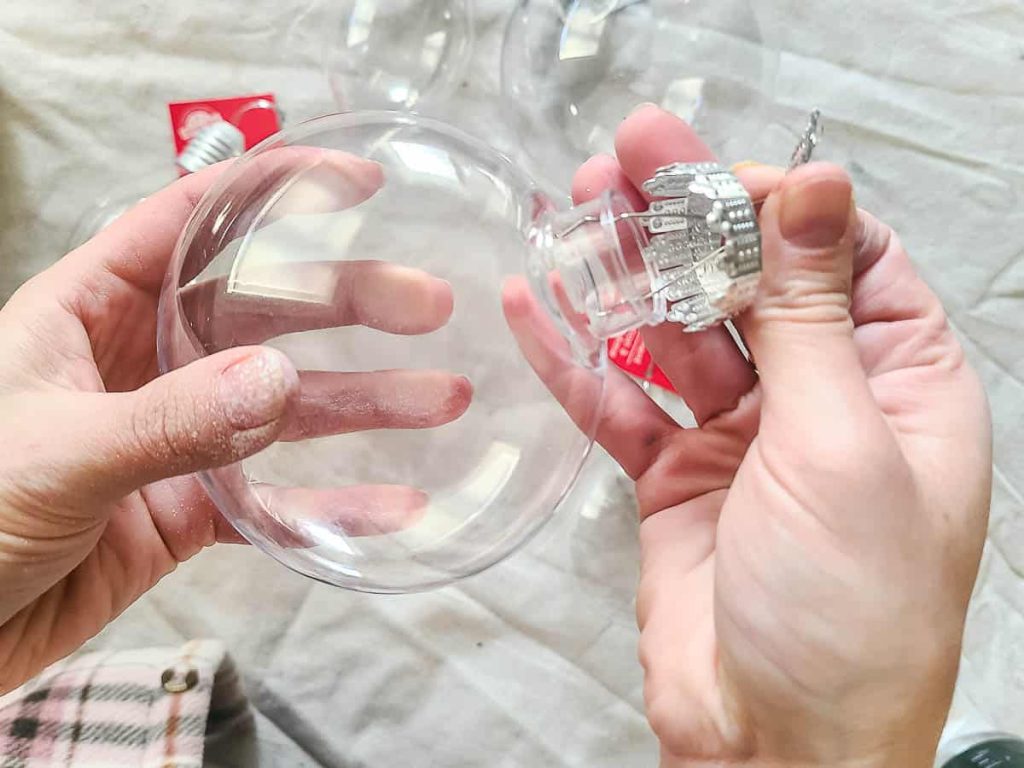
Remove the caps to the clear ornaments and set aside.
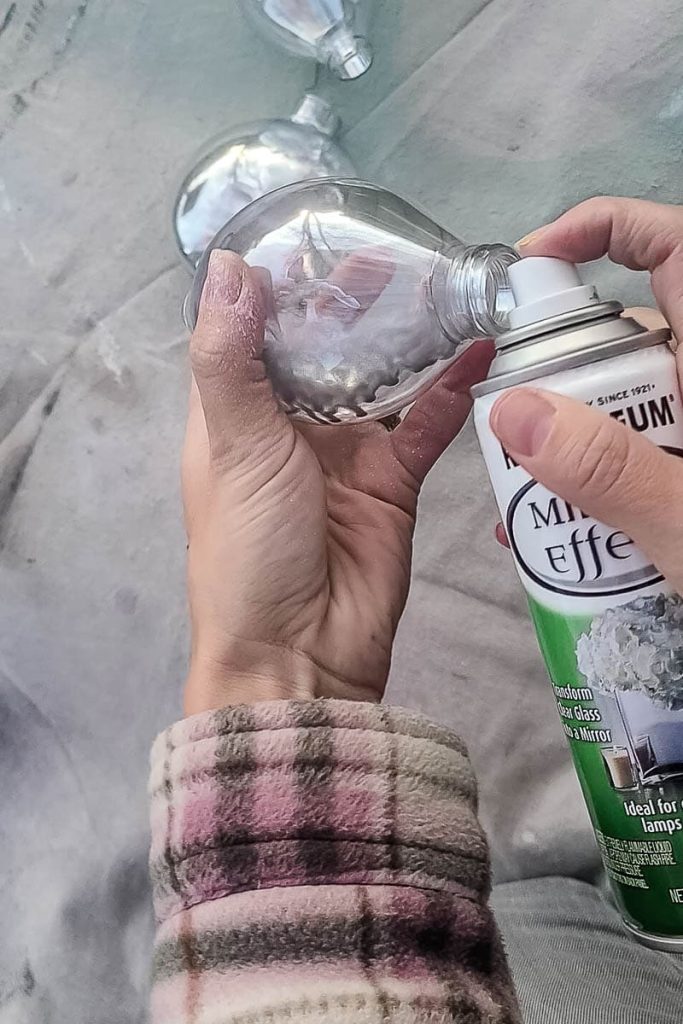
Take the ornaments outside and spray the inside of the ornament with one or two small spritzes of the mirror spray paint.
Roll the paint around on the inside if necessary.
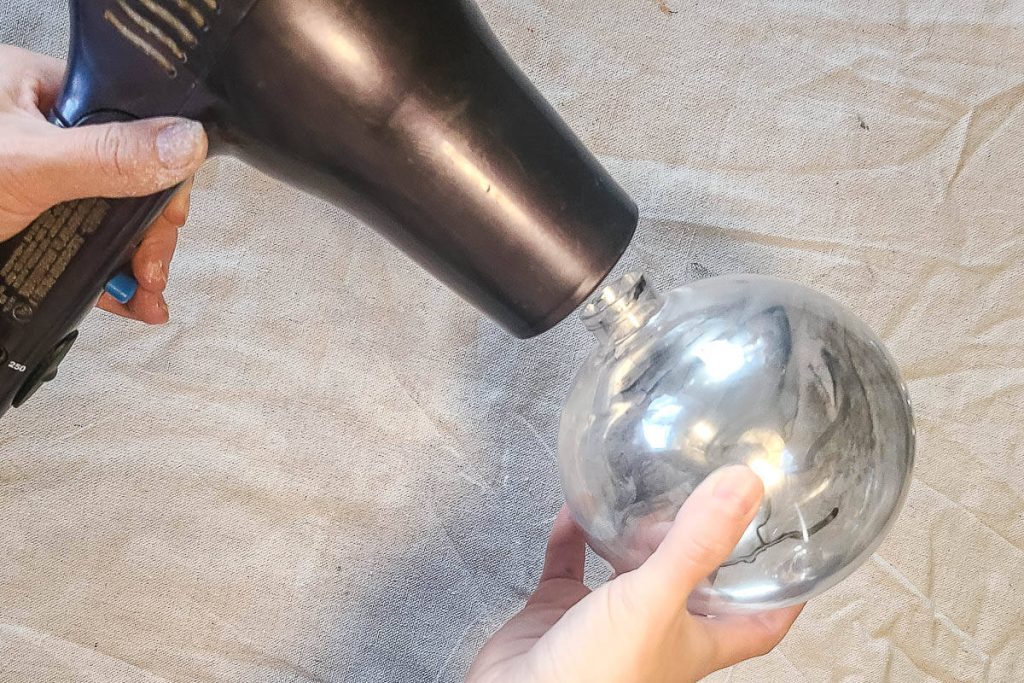
To speed up the drying process, use a blow dryer pointed inside the ornament.
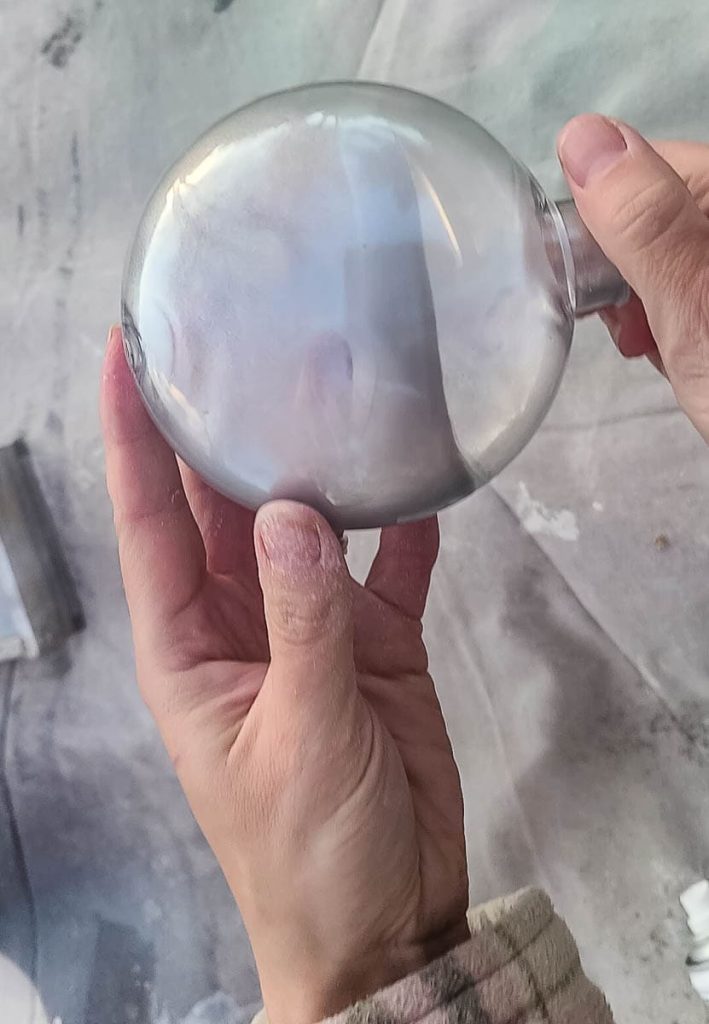
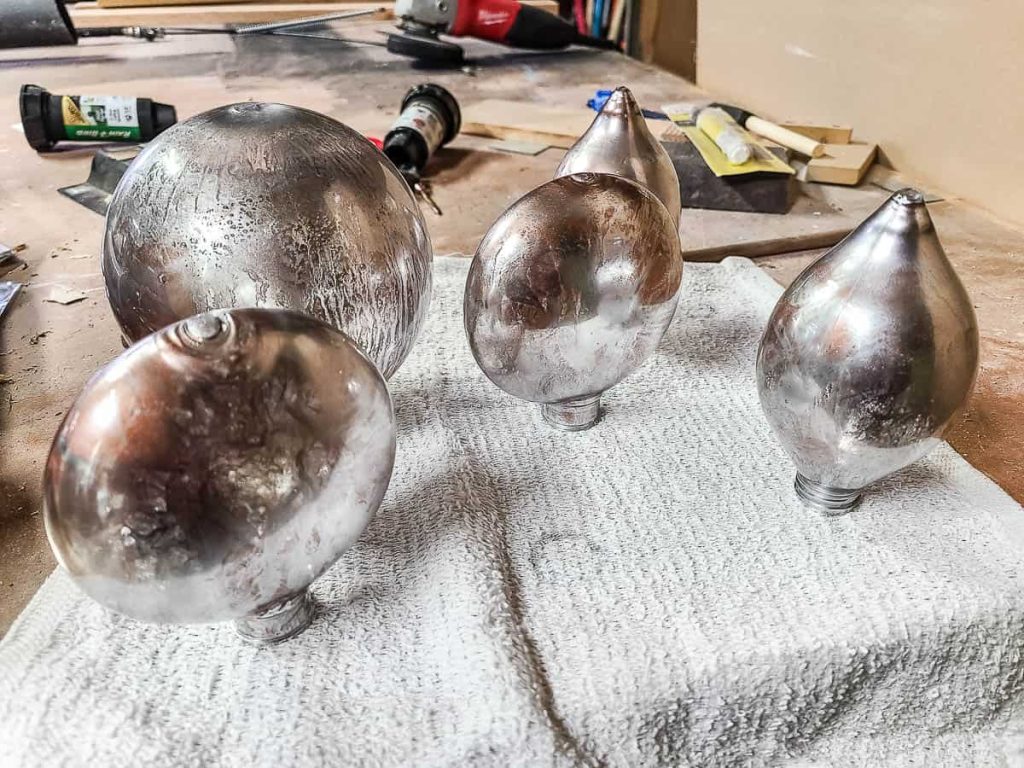
As the paint dries, you’ll really start to see it turn into a shiny mirror finish.
Since this is a Christmas craft, you’re probably going to be doing this when it is cold outside, so be sure to follow along with my tips for spray painting in cold weather.
Step 2. Spray 2nd coat of mirror spray paint with vinegar
Once the 1st coat is dry, add another spritz of mirror spray paint on the inside of the ornament. Gently roll the ornament around to push the paint around.
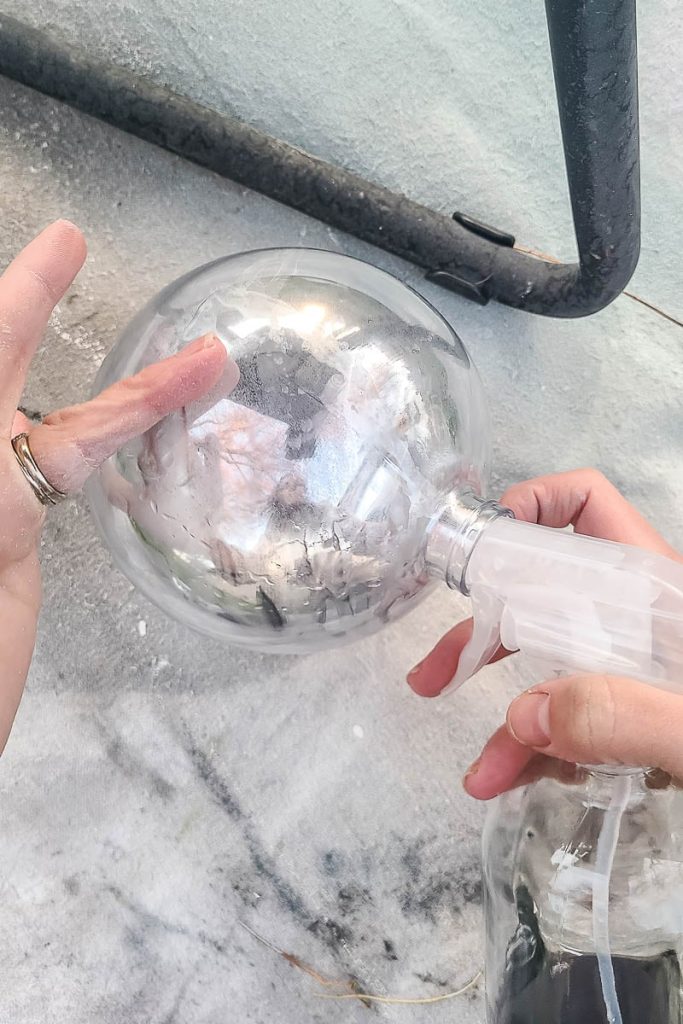
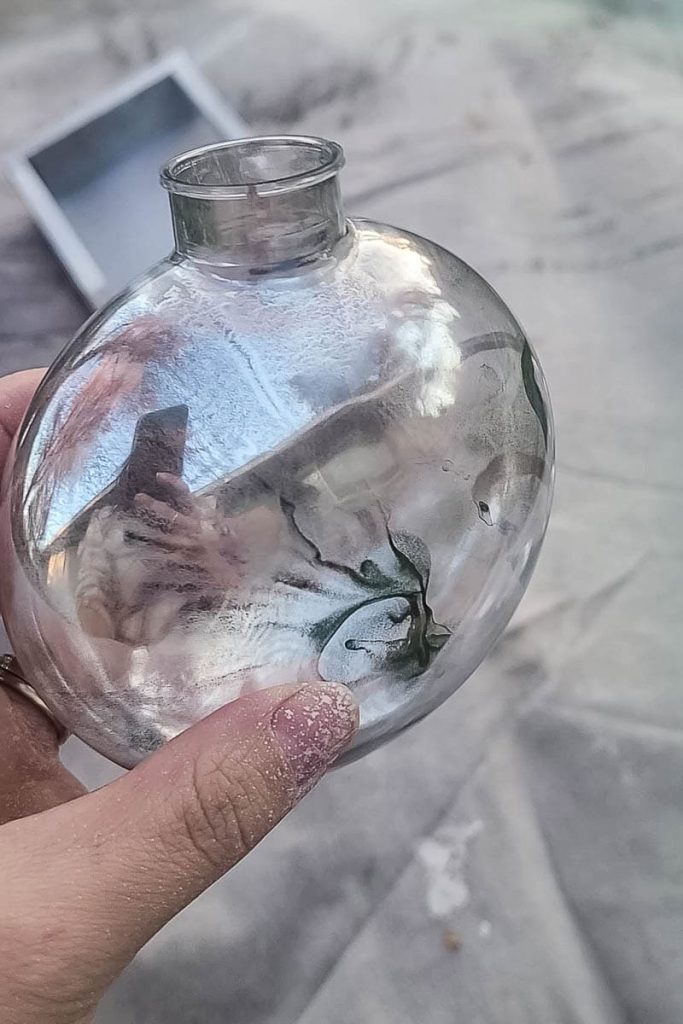
Immediately after adding the spray paint, add a spritz of the vinegar and water solution into the opening of the ornament.
You want the water droplets on the inside of your ornament to prevent the paint from sticking to certain parts of the ornament to make it look like real vintage mercury glass Christmas ornaments.
Step 3. Spray metallic spray paint with vinegar
For best results, it helps to have two different colors of spray paint to make it look like real mercury glass. The 2nd color of spray paint doesn’t need to be the mirror type of spray paint, but it helps if it is metallic. I used this pretty gold spray paint.
The good news is that you can totally customize the look of these faux mercury glass ornaments by using a different 2nd color or using more or less vinegar water spraying.
I think these would also look great black paint used as the 2nd color.
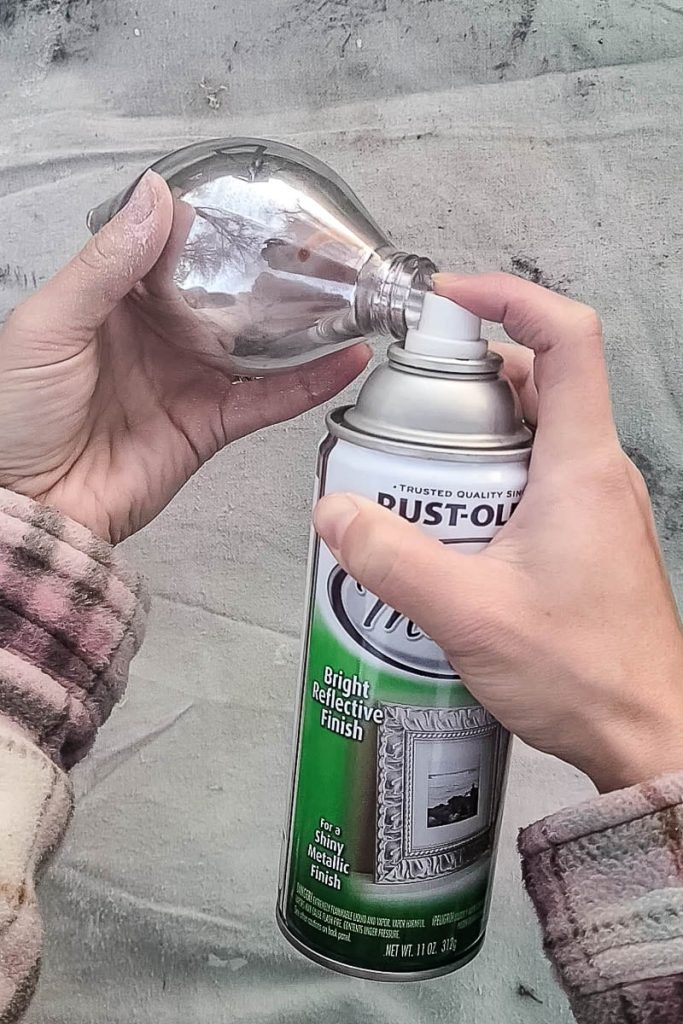
Spray 1 or 2 spritzes of the metallic spray paint into the ornament, targeting different areas of the ornament to make sure the inside of the clear ornament is evenly coated. Swirl the paint around and spritz again with more vinegar water as it is drying.
I used the hair dryer after adding paint each time to quickly dry the inside of the ornaments. Otherwise, the drying process for these DIY ornaments would have taken forever and I’m simply not that patient.
Step 4. Repeat with more layers of spray paint (if necessary)
After I was done with these three coats, I let my own DIY mercury glass ornaments dry before deciding if I wanted to do any more.
Once they were dry, I could still see through them in a couple of spots, so I decided to do one more coat of mirror spray paint with even more vinegar and water spray.
Dump any extra vinegar or paint into the trash and let the ornaments dry upside down so any excess paint falls out of the opening on the top.
Feel free to continue the steps until you’re happy with the look of your mercury glass ornaments!
Step 5. Paint or Rub ‘N Buff the metal tops for ornaments
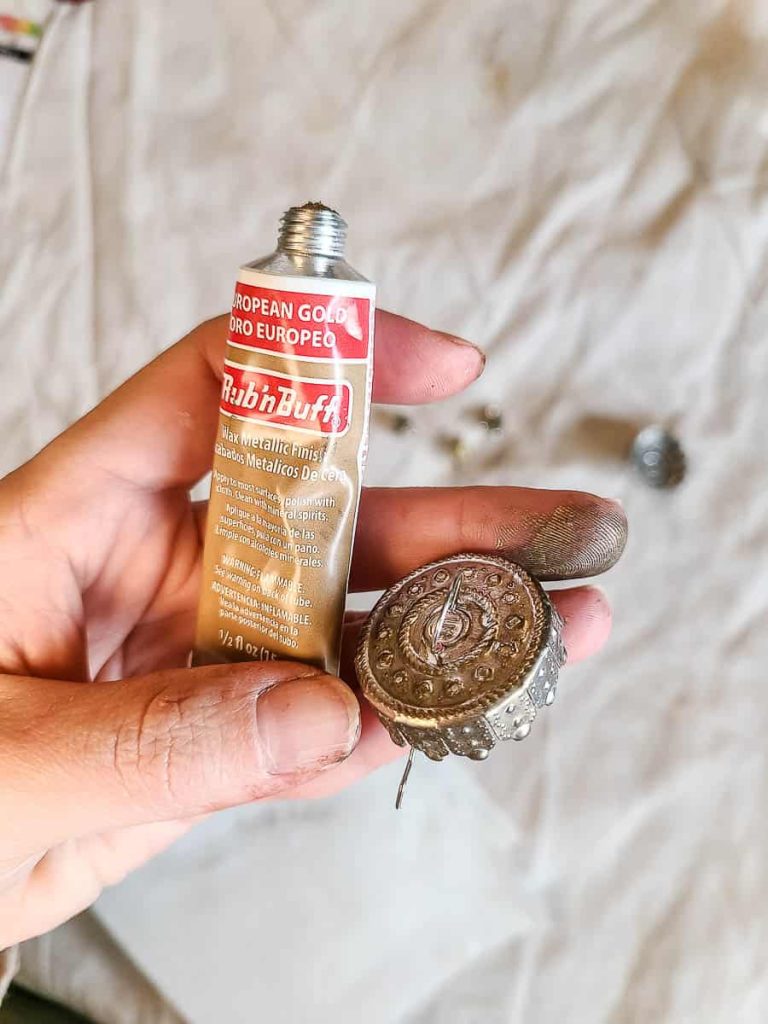
To make the metal tops fit in better with the beautiful ornaments, you can either paint the metal tops with your 2nd color of spray paint or use Rub ‘n Buff.

The Rub ‘n Buff gives the tops a nice antiqued look, rather than the shiny new look that they come with.
I found that it is easiest to just apply the Rub ‘n Buff with your finger. Wipe off excess with a cloth or paper towel if needed. A little goes a long way with the Rub ‘n Buff, so don’t use too much!
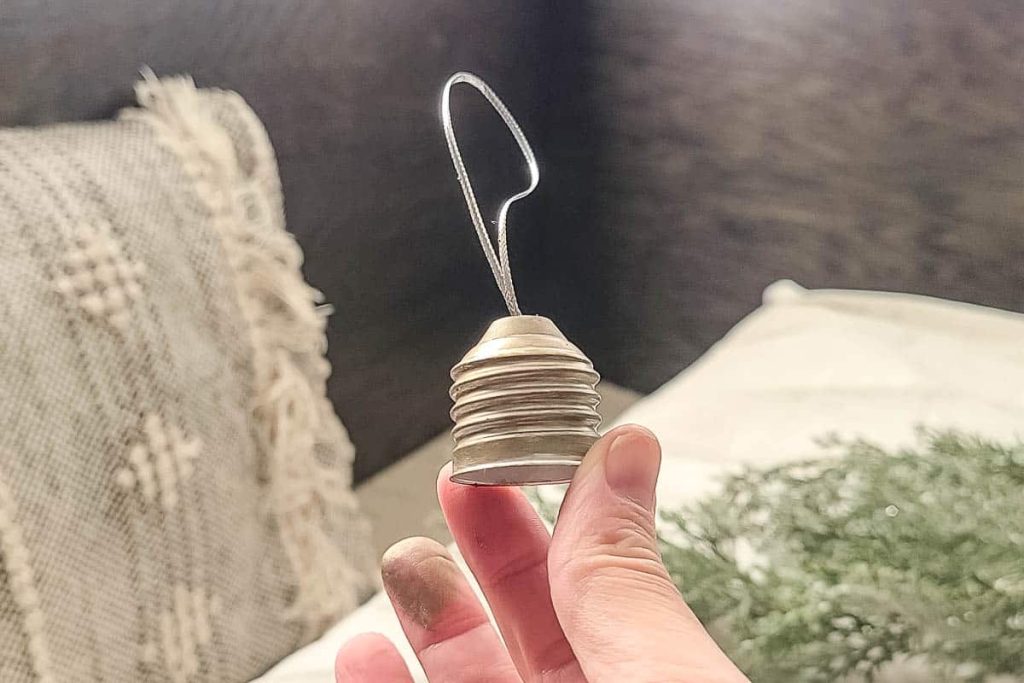
Step 6. Add ribbon to the top of the ornament
Once everything is dry, add the caps back onto the top of the ornaments.
Cut into pieces about 10 inches in length and tie onto the top of each ornament.

This chiffon sage green ribbon was perfect tied in a knot as an ornament hanger.
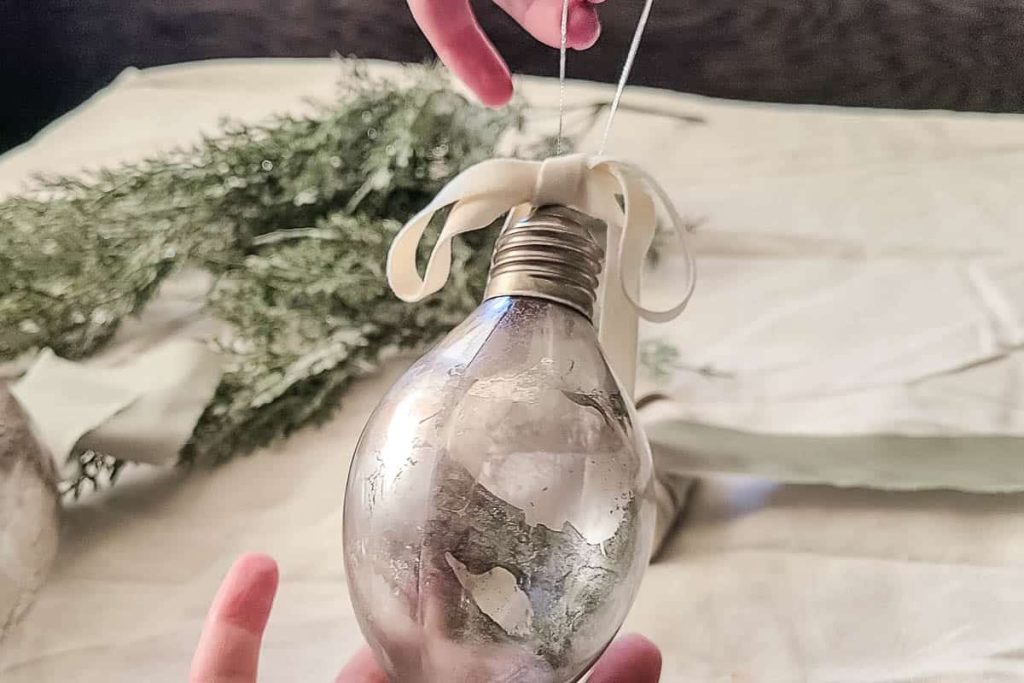
I also absolutely love the neutral velvet ribbon that I used on the smaller ornaments tied as a bow. It comes in three different shades and they are all great.
Mercury Glass Christmas Ornaments FAQ
What kind of spray paint can I use to make faux mercury glass?
You must use mirror spray paint for the DIY mercury glass Christmas ornaments, not just metallic shiny or silver spray paint!
The two most popular versions of the mirror spray paint are either Rustoleum Mirror Effects spray paint or Krylon Looking Glass spray paint.
Where can I get mirror spray paint?
I actually had a hard time finding the mirror spray paint locally for my own mercury glass ornaments. They didn’t have it in-store at my usual go-to’s where I get spray paint, like the craft store. I ended up getting it at Wilco (a farm store).
Because it isn’t sold at every store that carries spray paint, here are a few good places to buy it online.
- Rust-Oleum Mirror Effect spray paint at Amazon
- Rust-Oleum Mirror Effect spray paint at The Home Depot
- Krylon Looking Glass spray paint at Amazon
- Krylon Looking Glass spray paint at Michaels
- Krylon Looking Glass spray paint at Lowe’s
Can I use glass ornaments or only clear plastic ornaments?
If you’d rather use clear glass ornaments (instead of plastic), this tutorial will work on those as well.
However, I learned long ago that I must have shatterproof ornaments in my house. Between my clumsiness, the two rambunctious kids, and two rowdy dogs… let’s just say we’ve lots more than our fair share of breakable ornaments.
But if you’re wondering if this mercury glass ornament tutorial will work on not-clear ornaments (if you were to paint the outside of the ornament), it will NOT!
The way the looking glass spray paint works (both the Rust-Oleum Mirror Effect and Krylon Looking Glass paint) is only on clear, transparent surfaces.
The painted side will appear dull, but the underside is where the magic happens that makes it look like a mirror. This is why the ornaments must be painted on the inside.

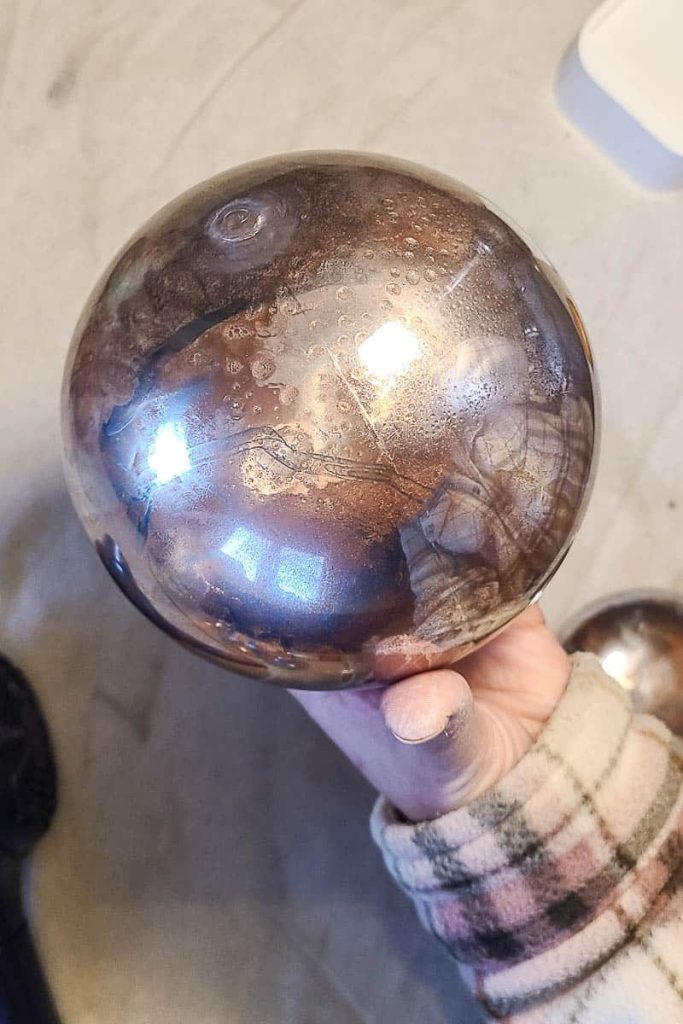
I love the shimmer and shine that these DIY mercury glass Christmas ornaments will add to my bedroom Christmas tree.
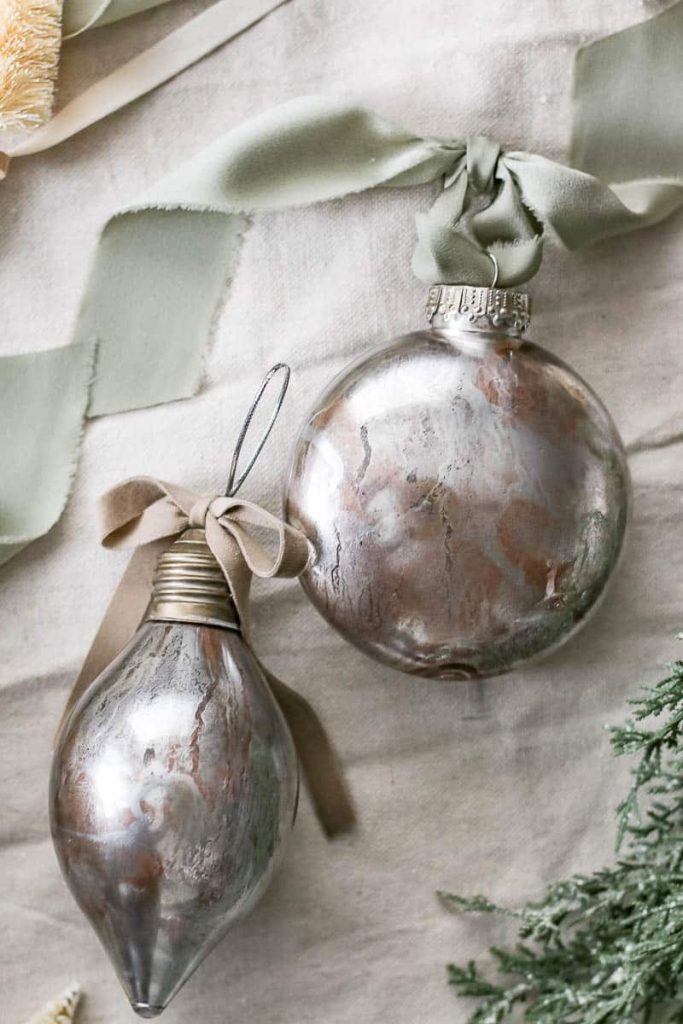
They especially look good next to textured ornaments, wood bead ornaments, and leather ornaments.

The best part is that they totally look like the real thing! Who knew you could make your own shatterproof mercury glass ornaments using Dollar Tree plastic ornaments?!
Happy crafting and Merry Christmas!
Want to see more Christmas craft projects? Check out these posts!
- Fake Gingerbread House with Dollar Tree Dollhouse
- DIY Wood Nativity Scene
- How To Make A Christmas Tree Star with Yarn and Cardboard
- Wood Bead Ornaments: 3 Easy Tutorials
- Macrame Christmas Ornaments: 3 Easy Versions
- How To Make Easy Faux DIY Mercury Glass Christmas Ornaments
- DIY Matte Textured Ornaments with Dollar Tree Ornaments
- Homemade Mulling Spices for Christmas Gifts with Free Printable Tag
- Easy DIY Stovetop Potpourri Gift Idea with Free Printable Tags
- How To Make Cheap and Easy Paper Bag Snowflakes with Lunch Bags
- How To Make Cotton Ball Garland for Less Than $5
- DIY Stocking Tags | Cheap & Easy Idea Anyone Can Do
- Easy DIY Gnome for Christmas Decor Using Dollar Store Materials
- Easy Boho DIY Yarn Christmas Trees
- DIY Christmas Village Makeover For Less Than $10
- Handmade Christmas Ornament with Farmhouse Style
- DIY Wrapping Paper For Christmas Gift Wrap
- How To Make Christmas Gift Tags With The Silhouette Mint
- DIY Dreamcatcher Ornament for Boho Christmas Tree
- Easy Leather Christmas Ornaments – Circles with Wood Beads
- DIY Leather Ornaments – Mini Christmas Tree with Wood Beads
- How To Make A Fabric Christmas Tree
- Rustic Christmas Advent Calendar
- Fabric Christmas Ornaments Made With Homespun Fabric – 4 Different Tutorials
- Cozy Sweater Covered Vases