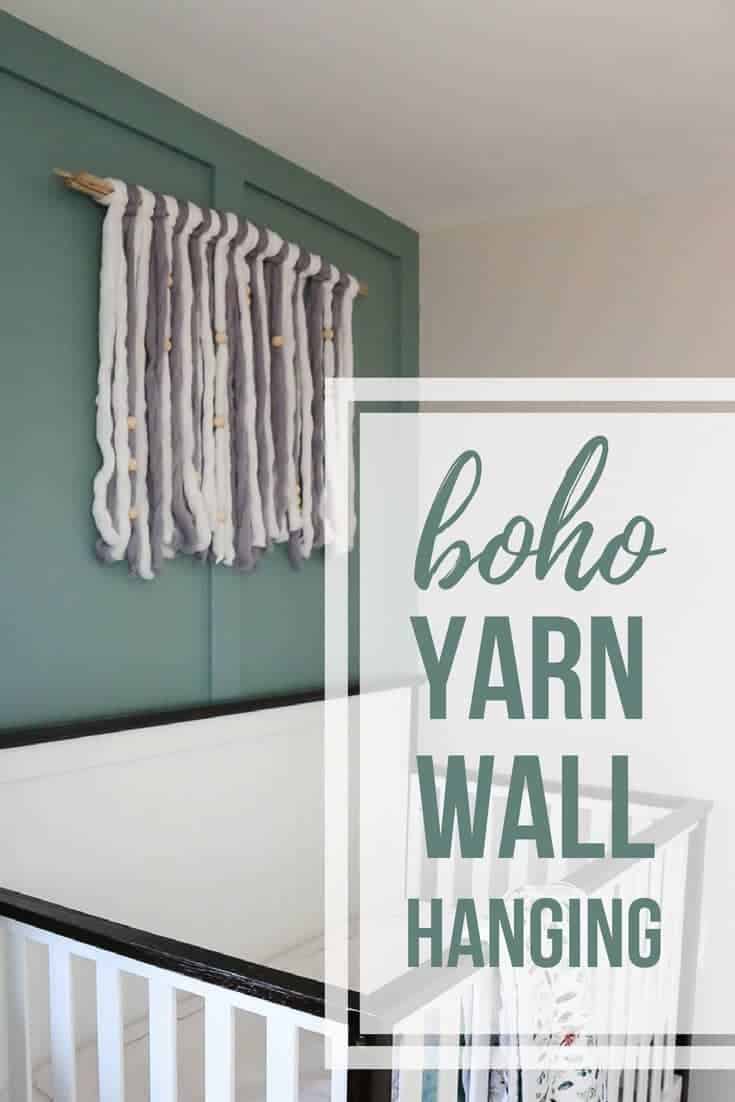
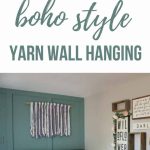
DIY Yarn Wall Hanging For Boho Nursery
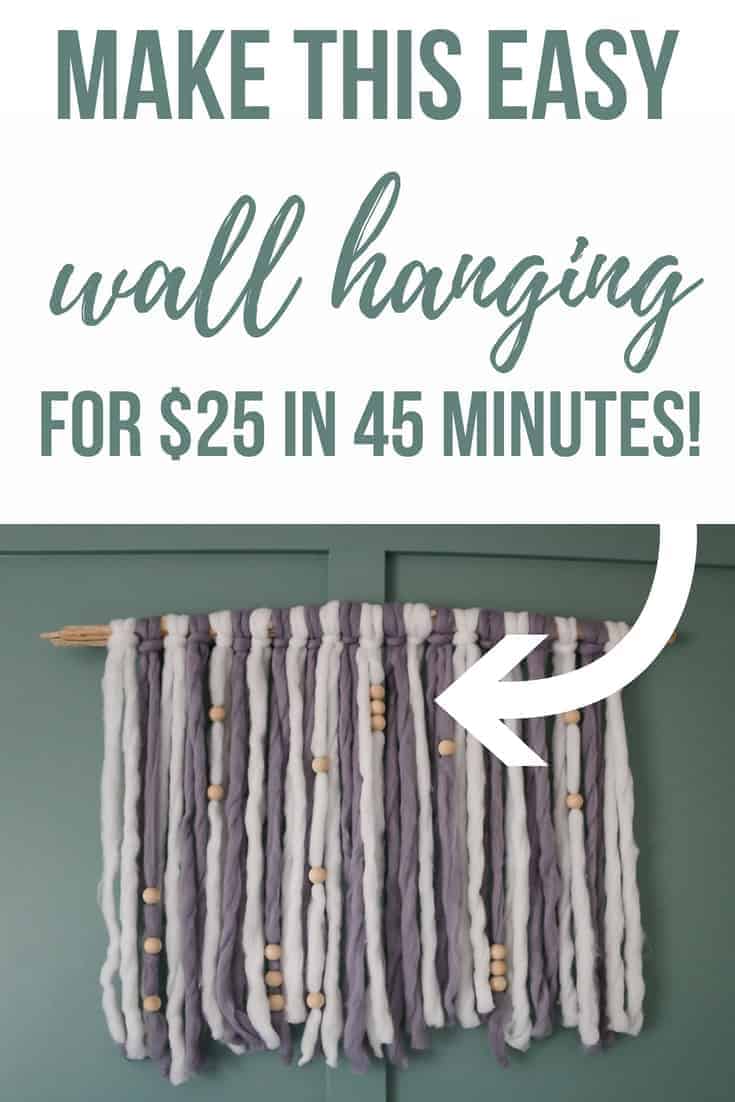
If you're looking for a really easy DIY yarn wall hanging that is perfect for a beginner, this project is for you! You can make this yarn wall art for under $25 in less than one hour. Customize the size, color and design of this wall hanging to really make it your own. I love the way ours turned out for our boho nursery!
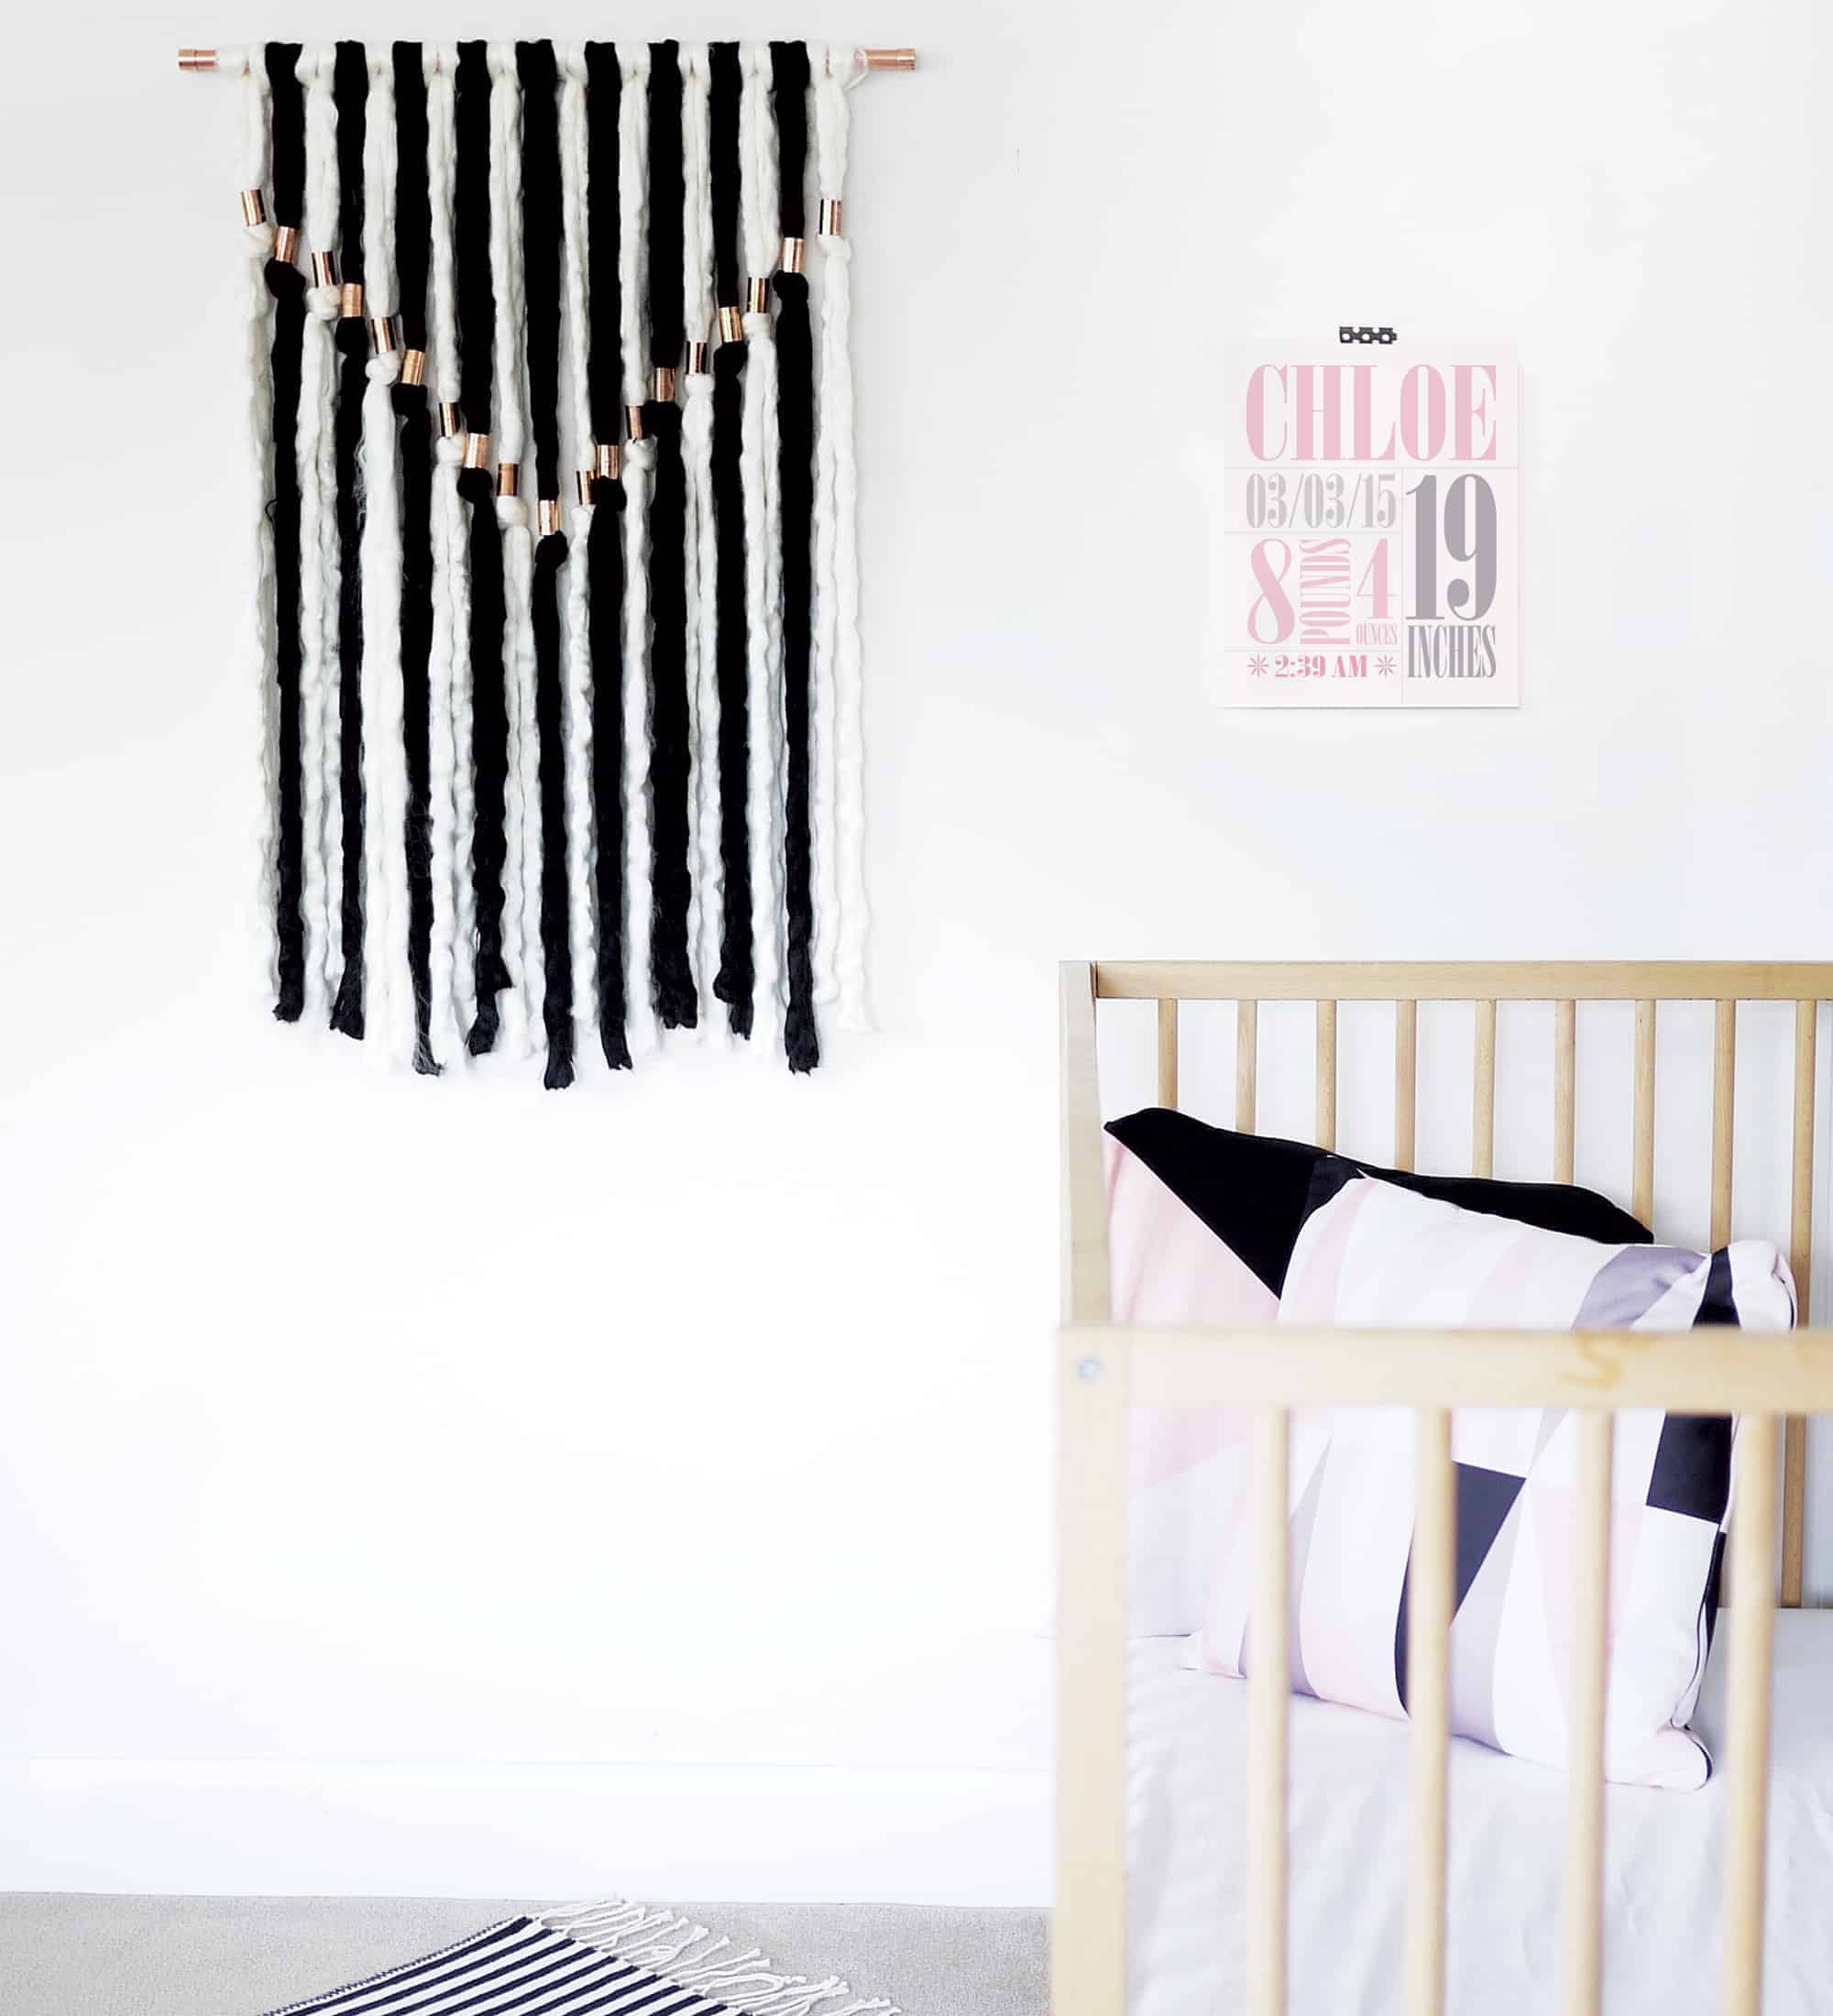
I still remember when I stumbled upon this adorable DIY yarn wall hanging from Project Nursery (made by Trendy Peas) on Pinterest.
I remember pinning it immediately and then mentally categorizing it in my mind under “projects I must make for my house”. I’ve just been waiting for the day when I have a good spot for a DIY yarn wall hanging like this.
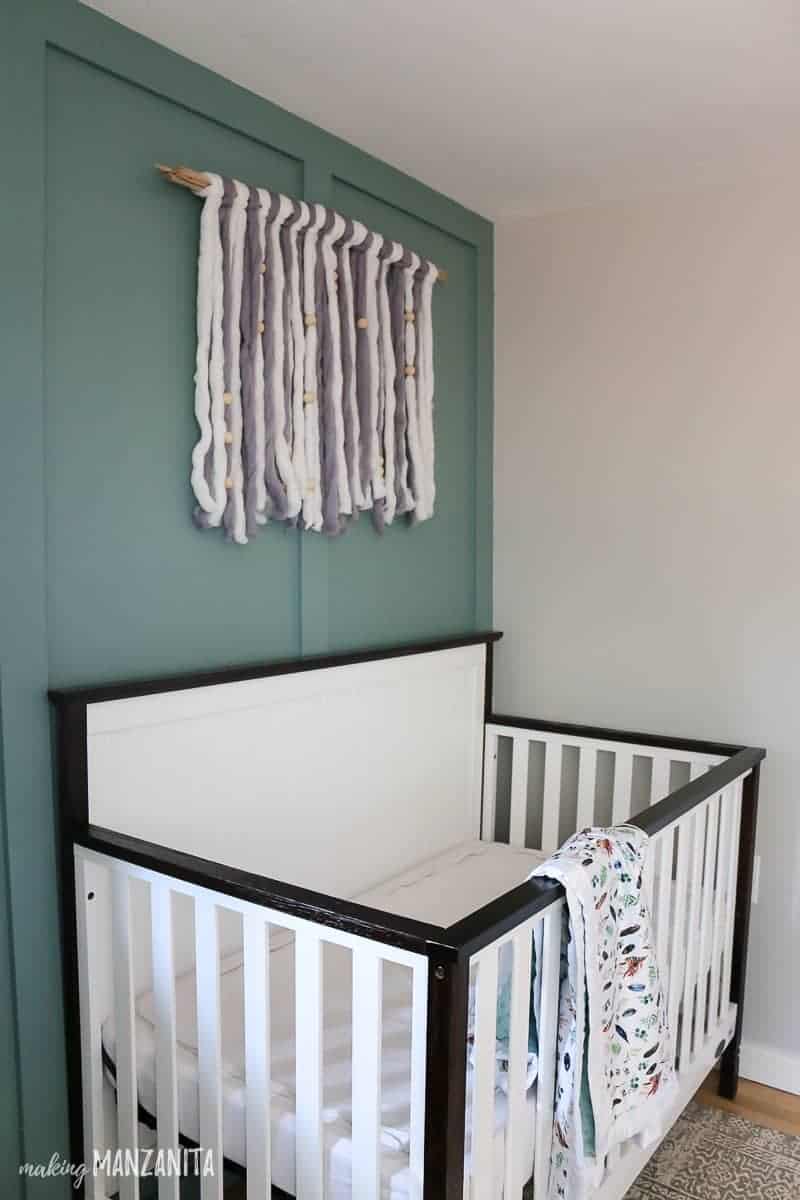
When I was thinking about what to put above my little one’s crib in her boho nursery, this wall hanging instantly came to mind! I knew it would be the perfect simple contrast on the backdrop of our newly completed board and batten wall in my little girl’s nursery.
Today I’m joining up with a super fun group of bloggers for the Pinterest Challenge where we all take something that we found on Pinterest and give it a try!
The focus of the challenge is to stop pinning and start doing, which is a motto that I can definitely get behind.
If you love videos, be sure to subscribe to my YouTube channel so you don’t miss the next one!
How to Make a Boho Yarn Wall Hanging: Step-By-Step Tutorial
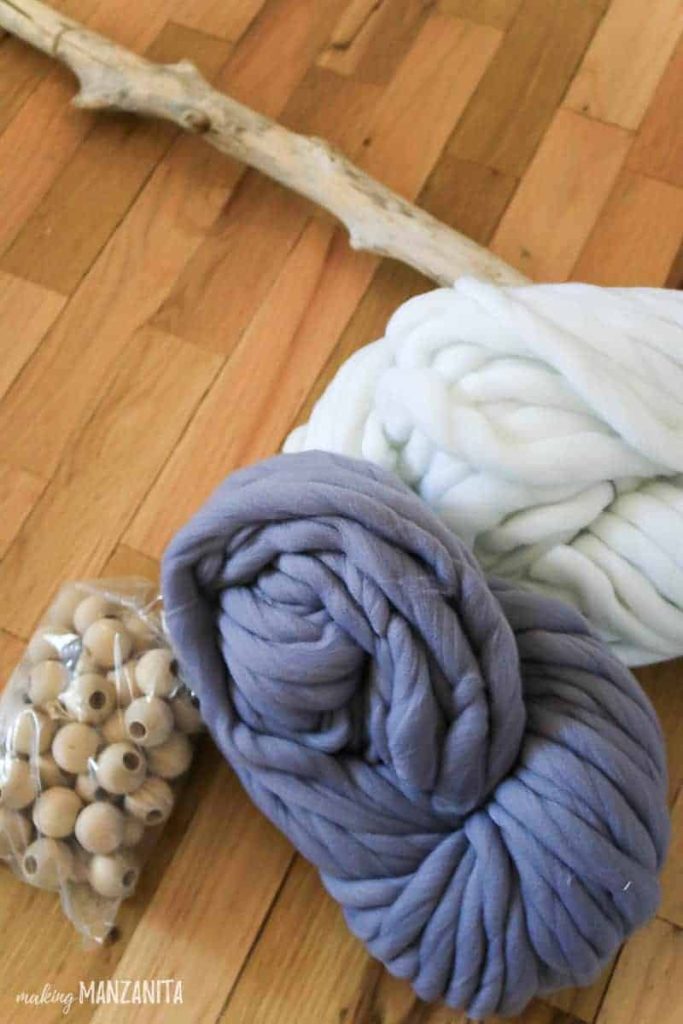
Supplies for DIY yarn hanging:
- Driftwood about 3 feet wide (or you could use a wooden dowel)
- Chunky yarn in two colors – I got a bag of both the white and gray and had plenty left over.
- Wood beads
- Nails
- Hammer
- Scissors
Step One: Cut yarn.
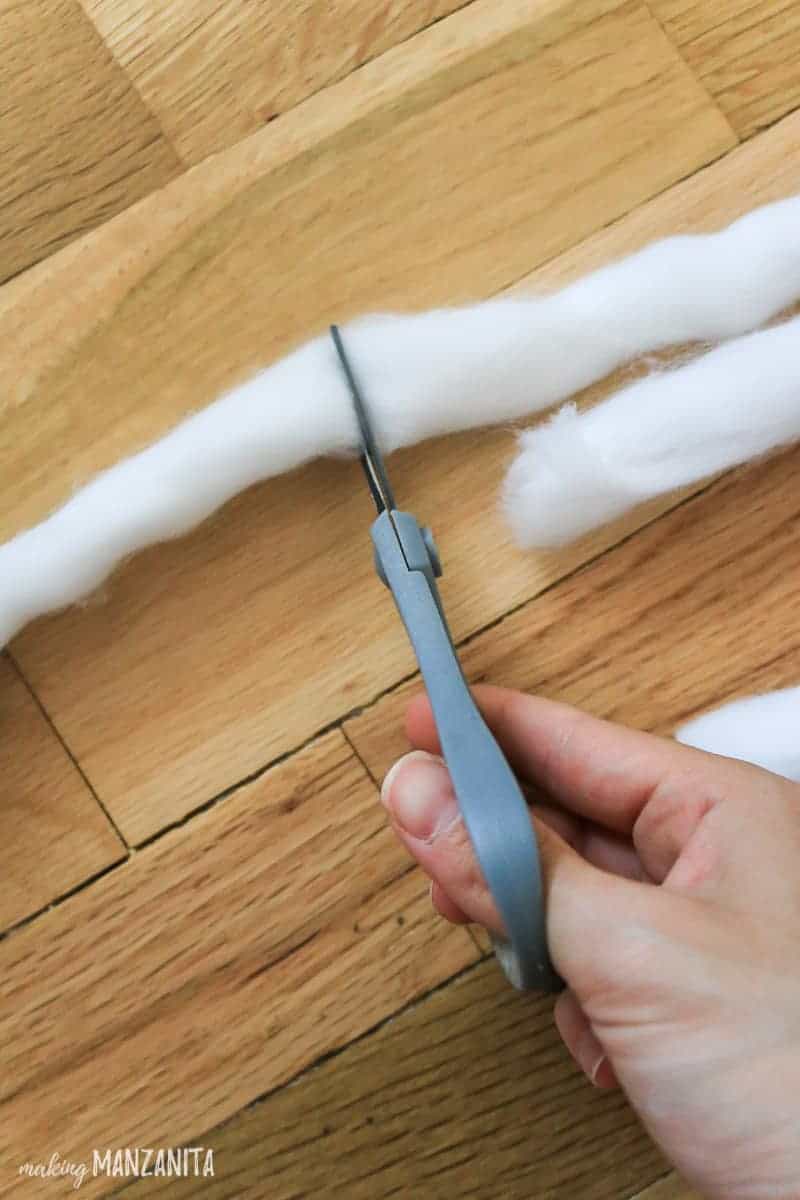
The length of the yarn really just depends on how big you want your yarn wall art to be. Take the approximate height that you want, double it, and then add a couple of inches to account for the looping around the wood. This will be the length that you cut each piece of yarn.
You can save time by cutting a bunch of pieces at once rather than one at a time.
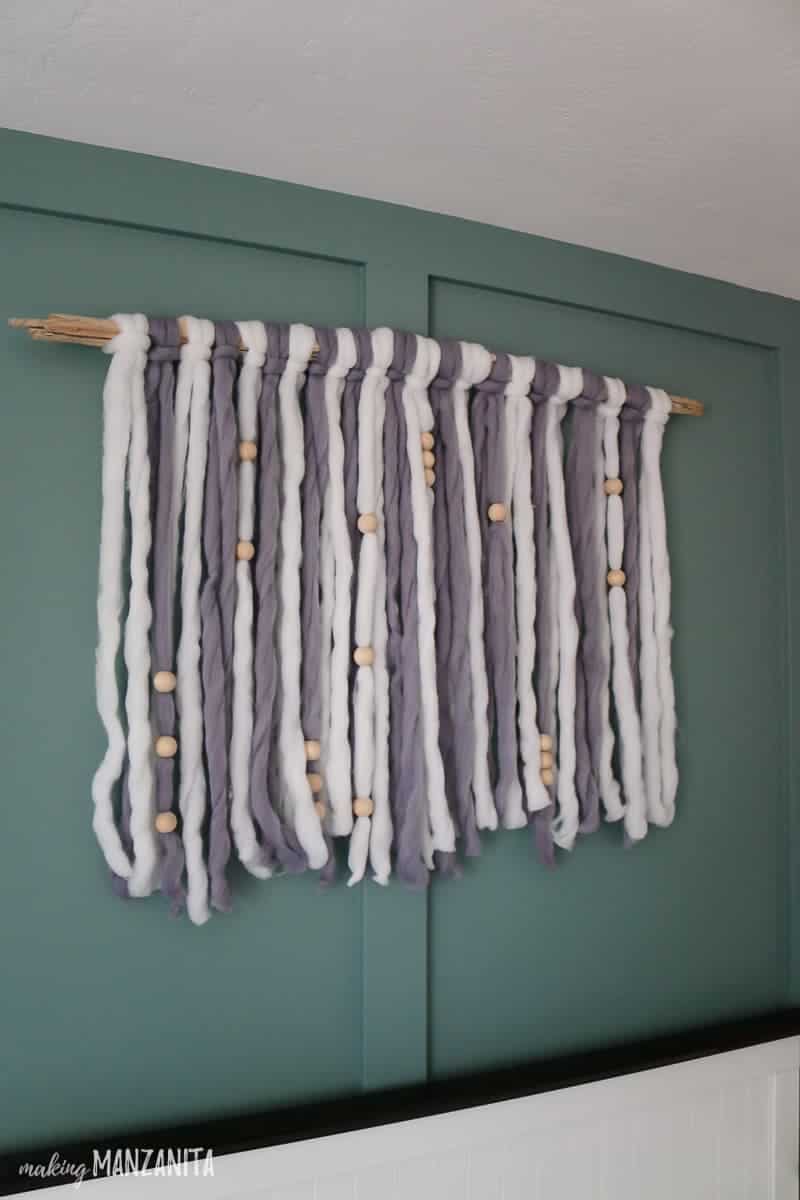
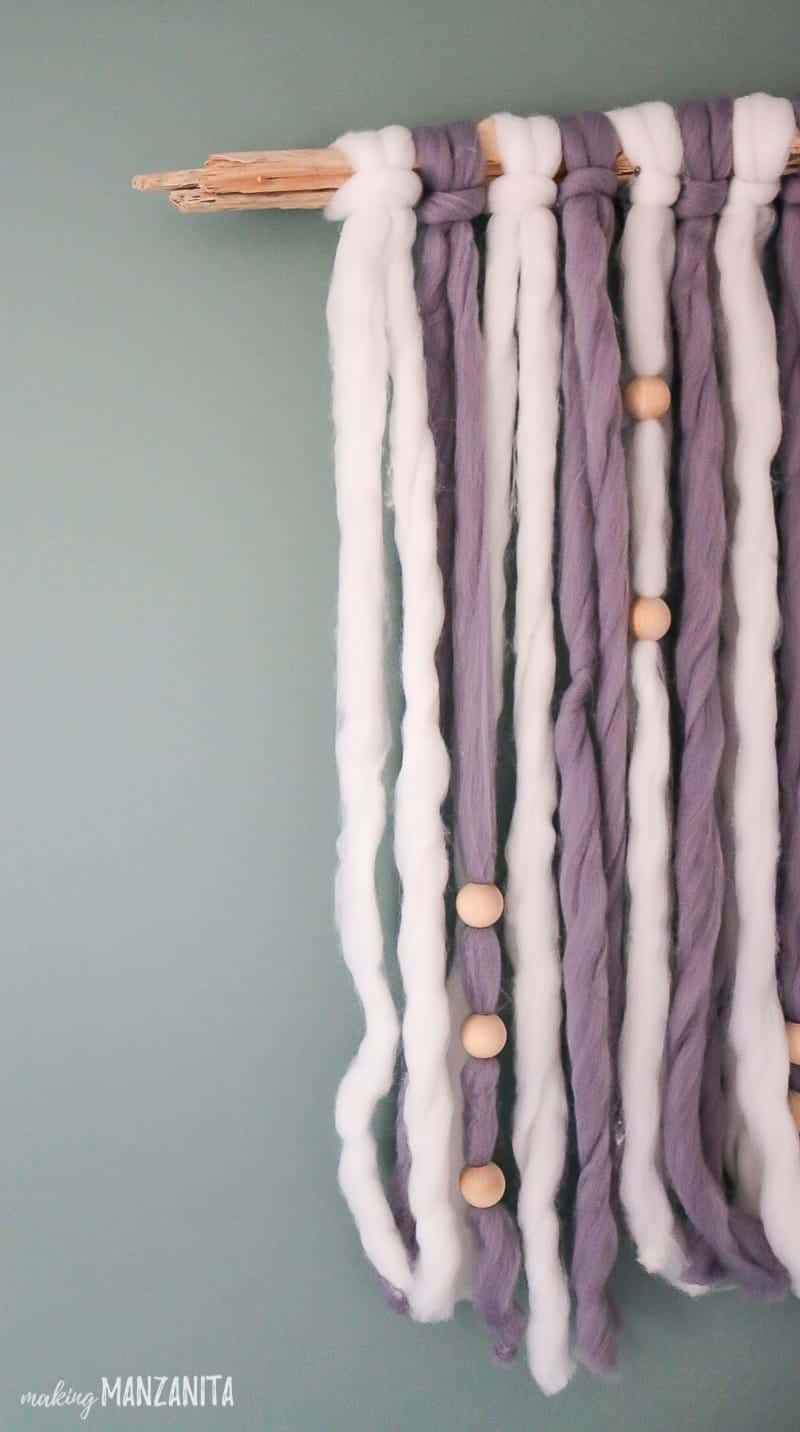
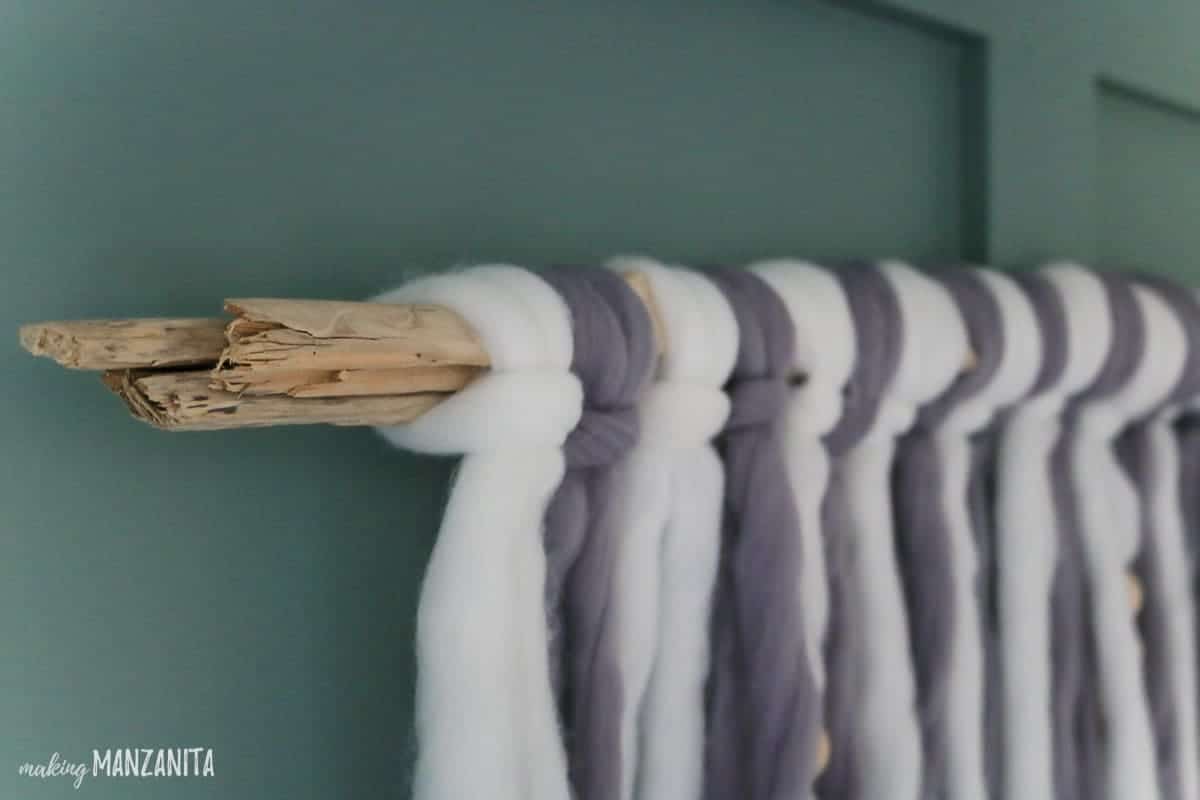
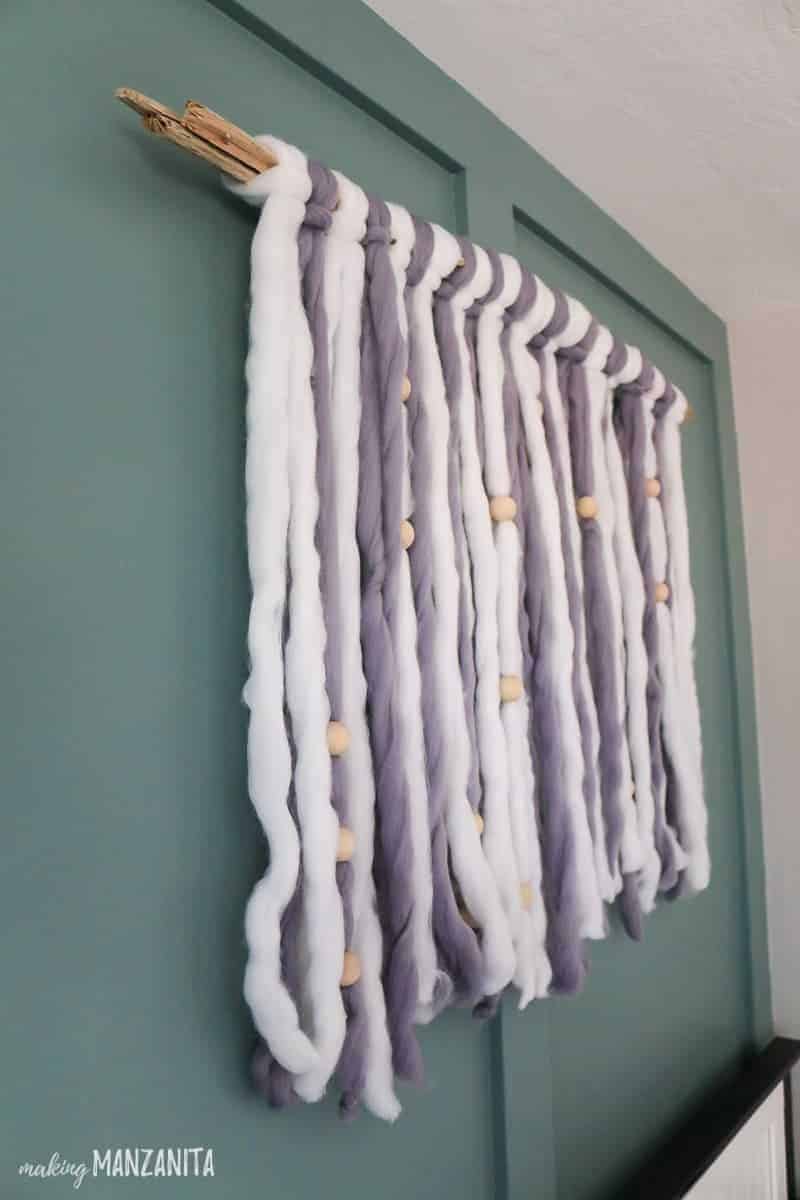
Step Two: Loop on yarn to driftwood.
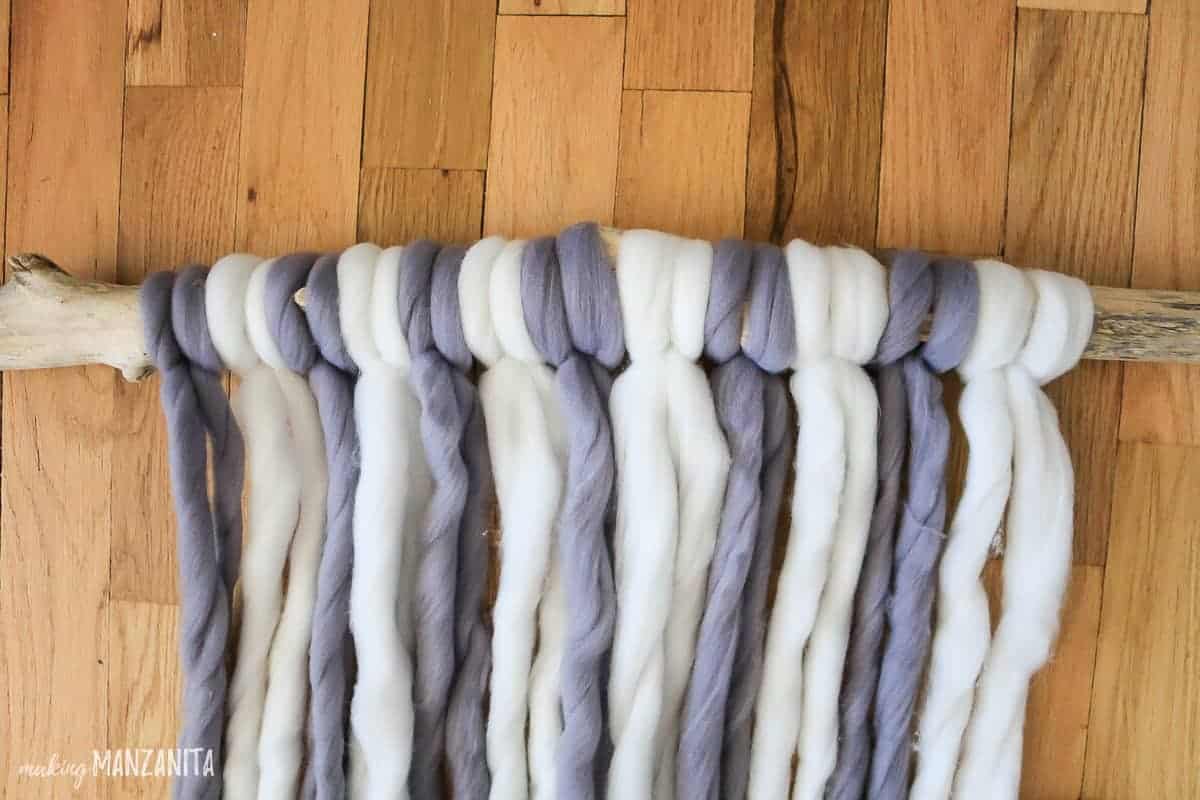
It’s just a really simple loop around the driftwood to attach the chunk yarn. Since I was using two colors, I alternated them.
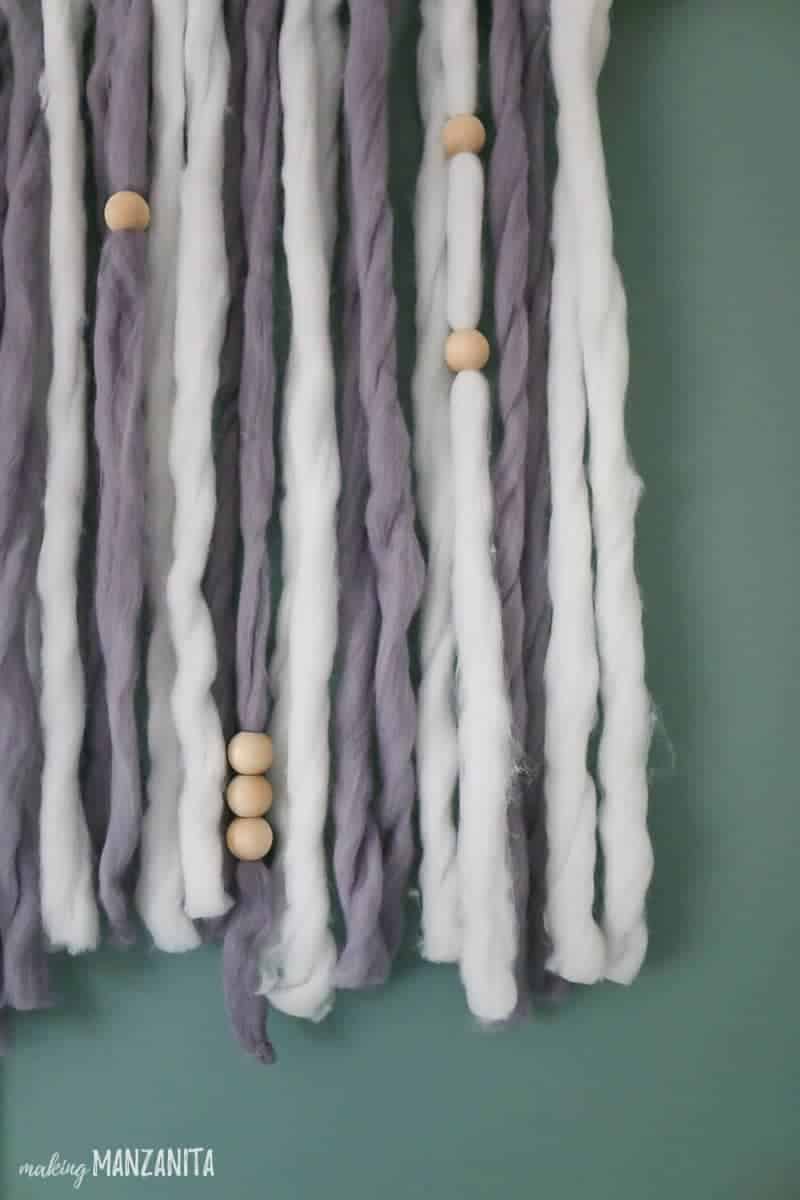
Step Three: Add wood beads.
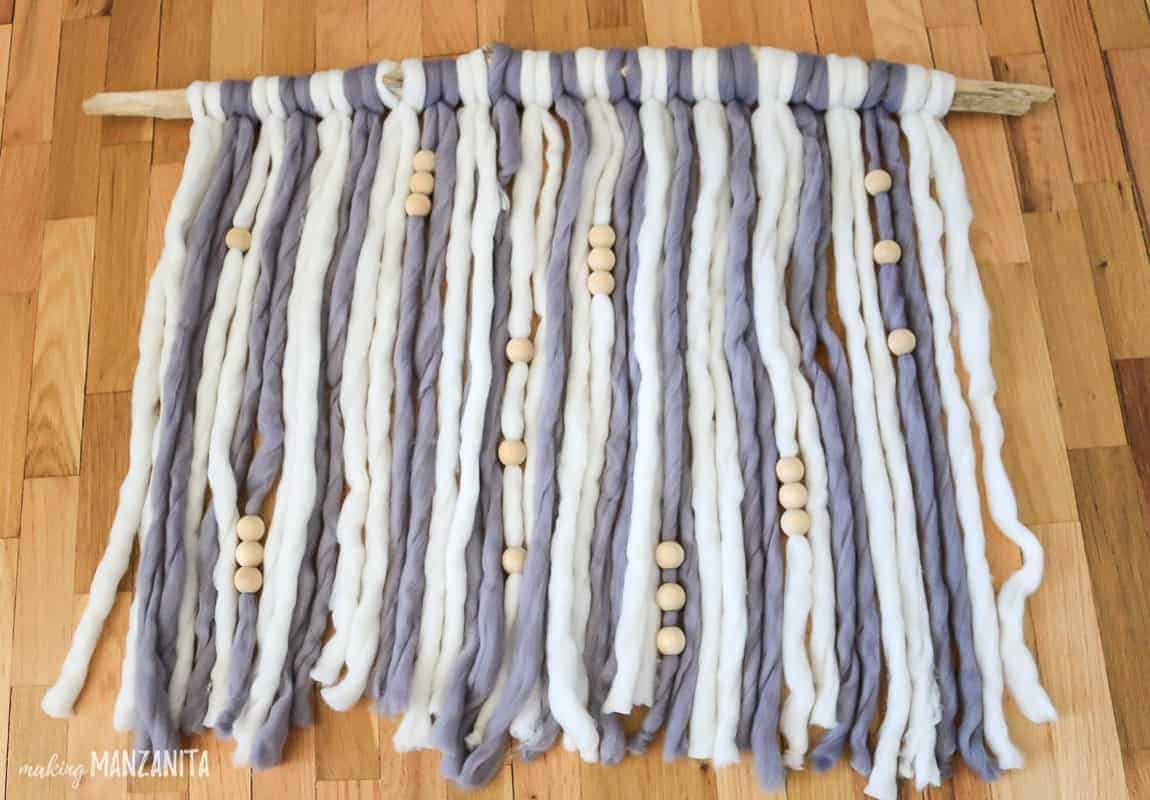
My inspiration used copper pieces on the yarn, which is so cute! But I thought that wood beads would go better with the general design of the nursery, so I found some that were large enough to string onto the yarn.
The wood beads were just large enough, but not so large that they were “easy” to put on.
I found it was easiest to twist up the bottom of the pieces of yarn and then twist the wood bead onto the yarn (kind of like you would twist and push on the top to a jar) until the yarn was all the way through the bead.
I added the beads in a really random fashion. At first, I tried to replicate the V shape that my inspiration used, but it wasn’t looking good with the wood beads.
When you buy wood beads, you’ll probably get a big package – so check out these wood bead crafts for some ideas on what to do with the left overs.
Step Four: Hang up on the wall.
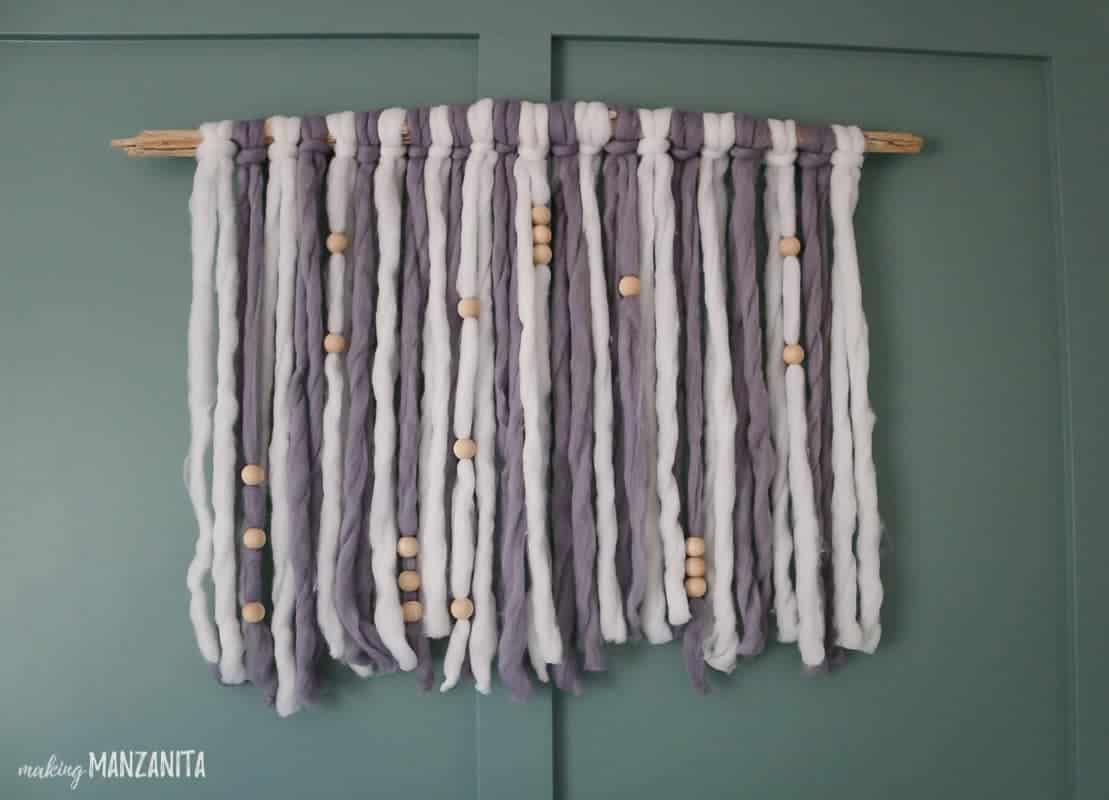
You’ll need to get some long nails so there is enough to go into the wall and hang out to set the wood on top of. We used 2.5″ nails.
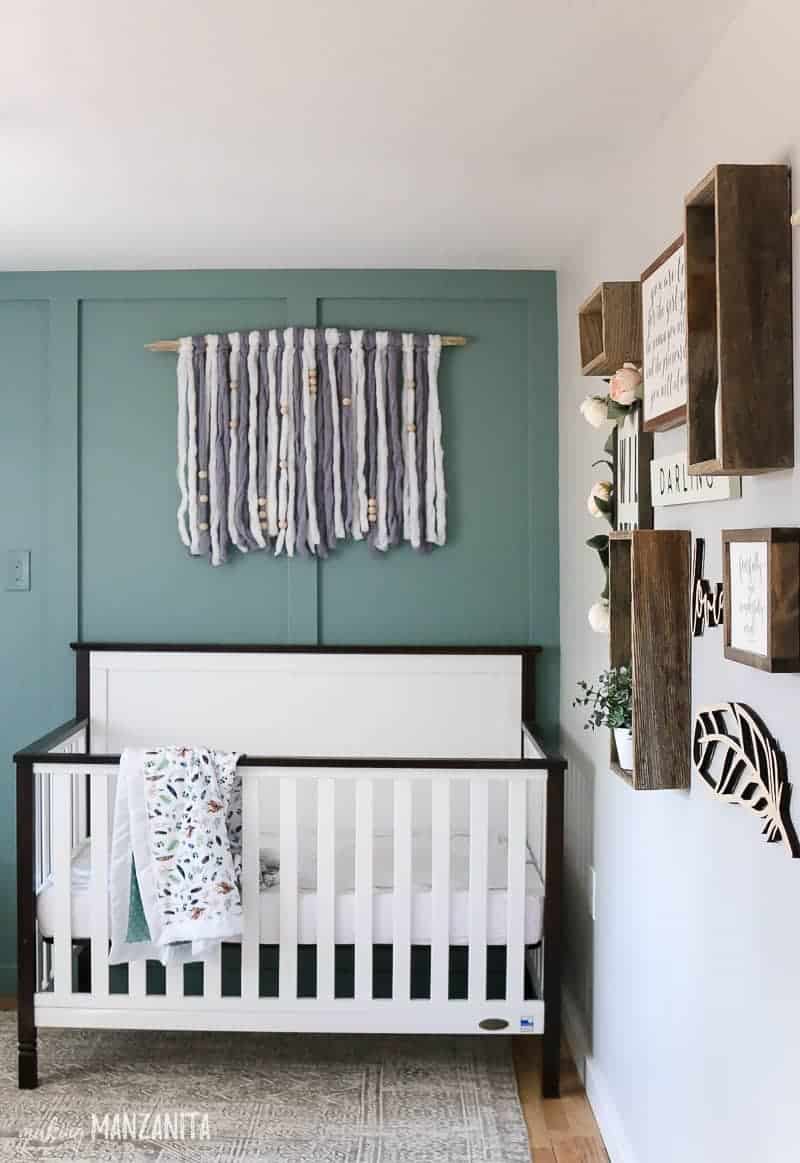
Also, I’ve gotta mention this safety warning for nursery installations…. Since it is over the crib in our boho nursery, we are going to further attach it to the nails by wrapping some floral wire around the wood and then around the nail.
This isn’t necessary if you’re just hanging it on a random wall!
I’m also going to add some knots under the beads to make sure they stay put (they would have to be pulled off, they wouldn’t just fall). But wouldn’t want those to get in the crib as a choking hazard.
I also was sure to hang this high enough so that a little one couldn’t reach up and grab anything.
My favorite part about this adorable yarn wall art is the piece of driftwood we used. When our little one was just 2 months old, we took a trip as a family to the Oregon Coast.
I looked high and low while walking on the beaches for the perfect pieces of driftwood for this project that I knew I wanted to make. Now that it is incorporated into this wall hanging, it’s a fun reminder of that first vacation of a family of four.
Also, if you are wondering – you can take driftwood from beaches as a souvenir (at least here in Oregon), but not for commercial purposes or in large quantities. I was a nervous Nelly so I looked it up. Haha.
If you’re not lucky to vacation at the beach and find some driftwood, you may be able to find some at your local thrift stores. You may also be able to find some for sale on Etsy.
This DIY yarn wall hanging was seriously SO easy to make and only cost me $23 in supplies.
I think from start to finish, this yarn wall art for our boho nursery took me about 30-40 minutes. And that was while I was taking pictures, adding them to Instagram stories….and trying to keep my toddler away from chucking the wood beads across the room, haha.
If you’re looking for a really easy DIY yarn wall hanging that is perfect for a beginner, this project is for you! You can make this yarn wall art for under $30 in less than one hour.
Customize the size, color, and design of this wall hanging to really make it your own. I love the way ours turned out for our boho nursery!

What is the last thing you’ve tried after finding it Pinterest??
Let me know in the comments below!
Want to see more of our modern farmhouse nursery??
- Modern Farmhouse Baby Nursery Inspiration
- 10 White Modern Farmhouse Crib Ideas
- Setting Up A Nursery? Here’s What You Really Need (+ Baby Checklist Printable)
- Modern Farmhouse Rugs & Rug Buying Tips
- How To Build A Wall
- How To Frame A Door In Interior Wall
- How To Install A Board and Batten Wall
- How To Plan Your Gallery Wall Layout (and Nursery Wall Art Reveal)
- Hardwood Floor Refinishing
- Interior Painting Tips & Tricks
- How To Install A Prehung Door
- DIY Yarn Wall Hanging – you are here!
- Changing Table Organization
- Modern Farmhouse Floor Lamp Ideas Under $100
- Room Reveal
How to Make a DIY Boho Yarn Wall Hanging
Love the look of boho-chic decor? You'll love this Boho Yarn Wall Hanging! We made this white and gray yarn wall art for our baby's nursery, but this piece of DIY decor will look great in any part of your home.
Materials
- Driftwood about 3 feet wide
- Chunky yarn in two colors
- Wood beads
- Nails
Tools
- Hammer
- Scissors
Instructions
- Cut yarn.
- Loop on yarn to driftwood.
- Add wood beads.
- Hang up on wall.


It’s beautiful and what a versatile idea. You can make any colour scheme and vary the beads to suit your decor. Lovely.
Thanks Julie! I love that you can totally customize this for any room or decor style!
Your nursery is beautiful! I love the natural wood elements! This soft gray and white wall hanging looks lovely above the crib! -Marci @ Stone Cottage Adventures
Aw, thanks so much Marci!
Very pretty & I like the colors you chose! What a wonderful memory from your first family vacation with the driftwood.
That’s definitely my favorite part! 🙂 Love how it turned out.
Very pretty, looks great in the room.
Thanks Kelley. I’m loving how it looks up above her crib.
The whole thing looks wonderful! Love that you used driftwood and wooden beads, too.
Thanks so much Lydia! 🙂
That looks so soft! I love the colors and the nursery. Pinned.
Yes, it is so soft!!! I totally need to figure out something else to do with the rest of the yarn now 🙂
I love this wall hanging! The colors are great and the beads are perfect! I love the idea of a boho nursery.?
Thanks T’onna. I love how it turned out!
This is so darling for the nursery. It will be something that will grow with the baby.
Thanks Debra! 🙂 I hope she’ll love it forever.
What a cute idea and it can be used in any room and color scheme. Already thinking where to put one or two! Pinning
Thanks Lisa!! I know.. I could have one in every room in my house…so versatile ! 🙂
This would make such a nice gift for a mom to bee or new mom. Fun that we both chose a baby project this month for the challenge.
This would make a darling gift for a mom to be. Fun that we both chose a baby related project for the challenge this month.
Babies all around ! 🙂 thanks Debbee.
This looks so pretty in your nursery!
Thanks Roseann! 🙂
This turned out great and I love that you incorporated the driftwood from a trip. It makes this so much more special!
Thanks, that’s my favorite part of this DIY!
Nice work! I always wanted to make something from this super chunky yarn. The nursery looks so cozy and I absolutely adore the color you chose for the wall and the collection of frames and sayings.
Thanks Habiba! I love how her room is turning out. I’m almost done decorating…now that she is almost 5 months old, haha.
This is really beautiful, it looks so pretty in your nursery!! Love the yarn you used too!
Thanks Katrin 🙂 it was a such a good Amazon find!
What a very precious project of love. That yarn is so soft looking. It just looks perfect for something ‘baby’. Reminds me of chubby baby fingers and toes. The whole nursery is such a soothing, sweet space. Beautiful!!
Thanks so much Leslie. I was totally going to for a really calm feeling in the room.