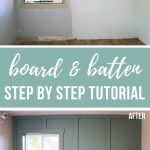
Board and Batten Wall Tutorial (on textured walls!)

Thank you to DAP for sponsoring this post! All opinions are entirely my own. This post also contains affiliate links, but nothing that I wouldn’t recommend wholeheartedly. Read my full disclosure here.
When I was planning the design of our modern farmhouse nursery, I knew I wanted to add an accent wall of some sort.
You guys know how much I love shiplap. We’ve installed a faux shiplap wall in our bathroom and made a plywood shiplap wall in our living room at our last house.
I considered doing shiplap in the nursery, but wanted to try something new. So I decided on adding board and batten!
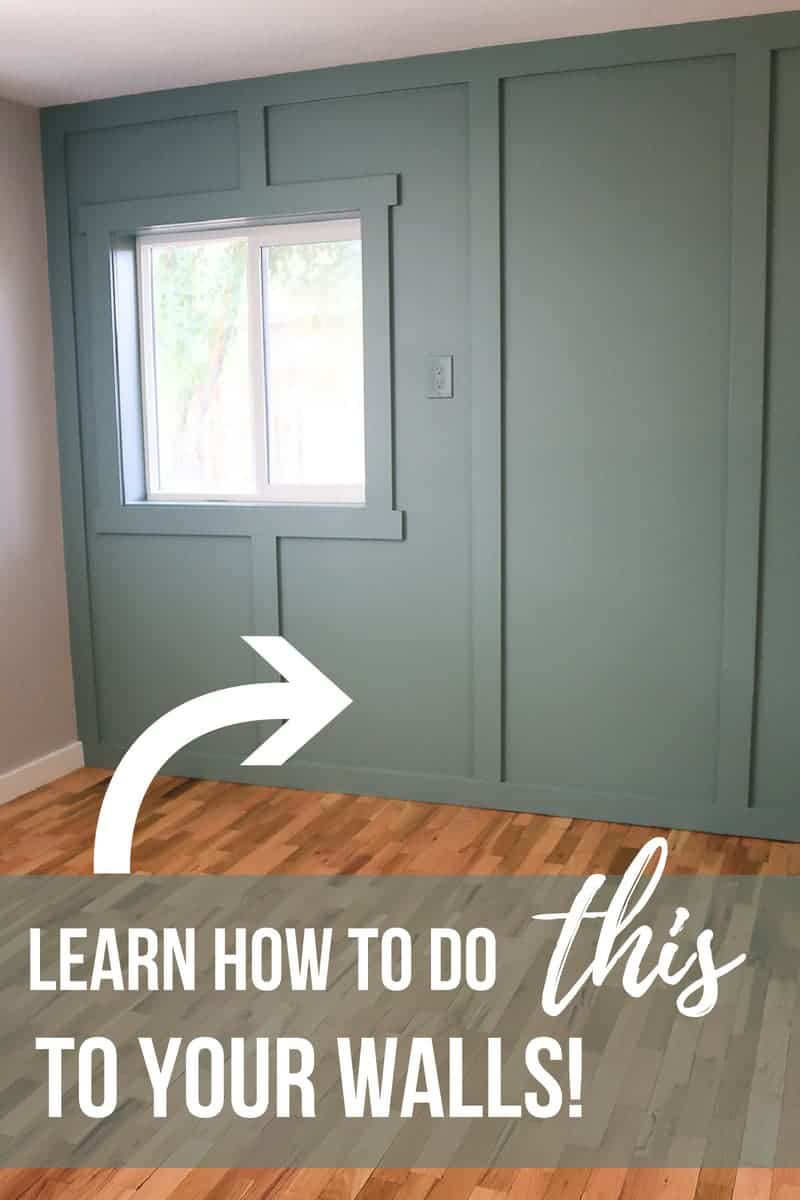
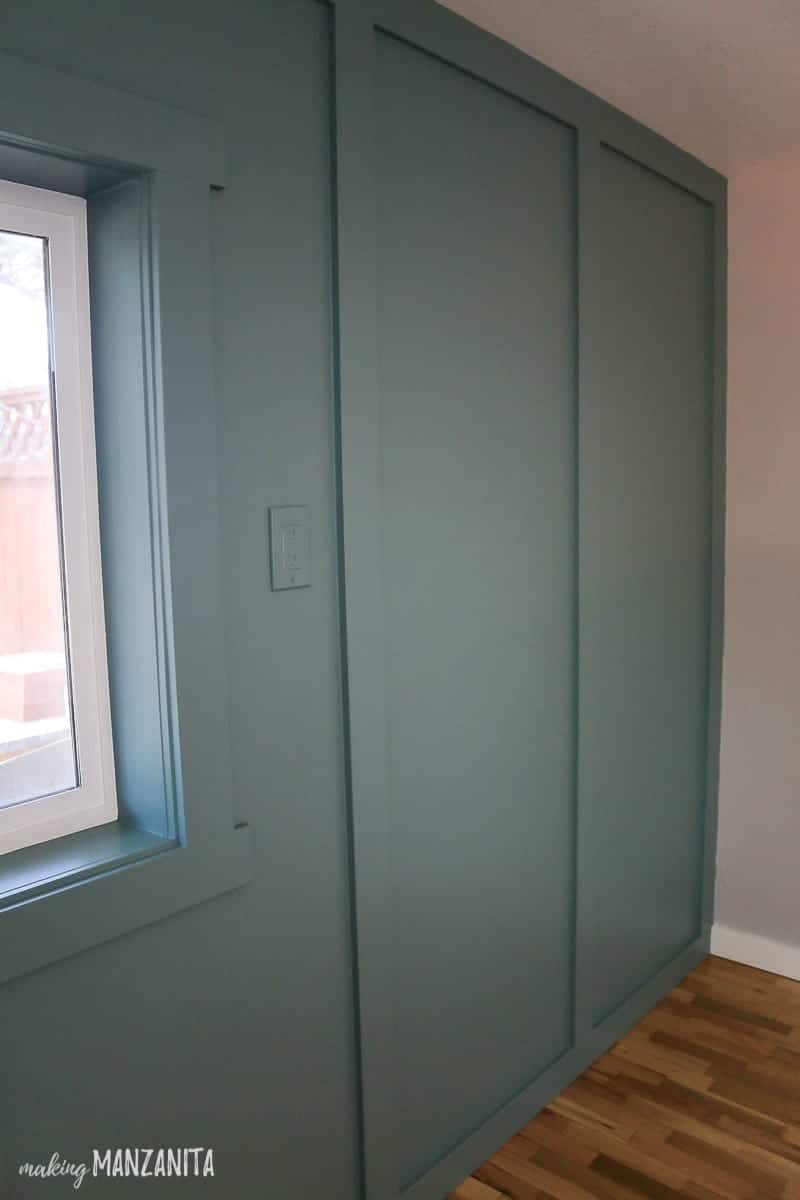
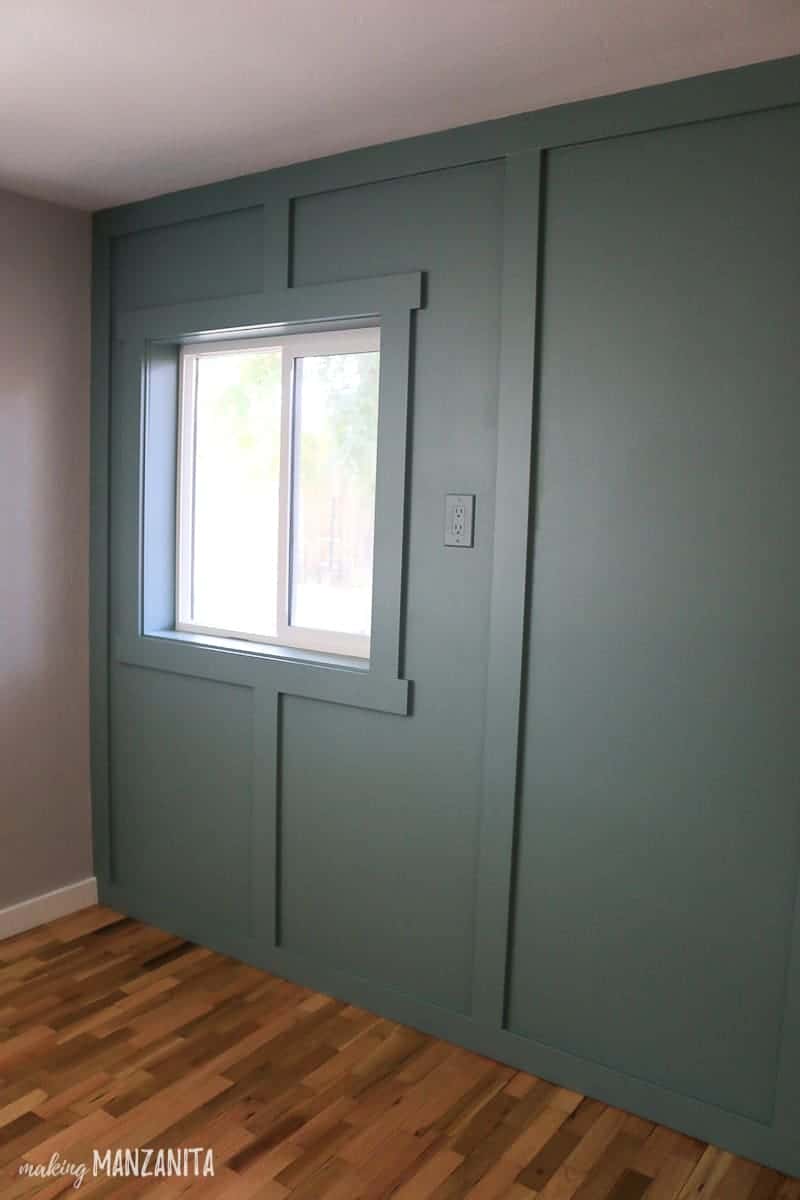
I absolutely love how the feature wall turned out. It adds so much to the room! I can’t wait to show you just how easy it was to add board and batten in this simple tutorial!
Table of Contents
- What is board and batten?
- Can you do board and batten on textured walls?
- Board and batten wall: Step-by-step instructions
- Supplies for board and batten on textured walls:
- Step 1. Plan your board and batten wall.
- Step 2. Mark your wall where the batten will go.
- Step 3. Cut your MDF panels down to size.
- Step 4. Glue boards to the wall.
- Step 5. Add batten.
- Step 6. Caulk seams on board and batten wall.
- Step 7. Patch & sand nail holes.
- Step 8. Paint board and batten wall.
Further Reading – Here’s some other accent wall ideas:
What is board and batten?
Board and batten is a wood wall treatment that can be applied to interior or exterior walls. The “board” is a smooth board that is applied to the wall first. The “batten” are trim pieces that are added to the top of the boards as decorative accent. The batten pieces are usually vertical and sometimes have horizontal pieces added too.
Can you do board and batten on textured walls?
Yes, you absolutely can install board and batten on textured walls. In fact, a “true” board and batten wall involves adding boards directly to the wall for a smooth backing.
Many of the board and batten tutorials out there show trim pieces added directly to the wall, which is definitely a very inexpensive way to install board and batten! But, that version doesn’t work on walls that are heavily textured or varied backgrounds.
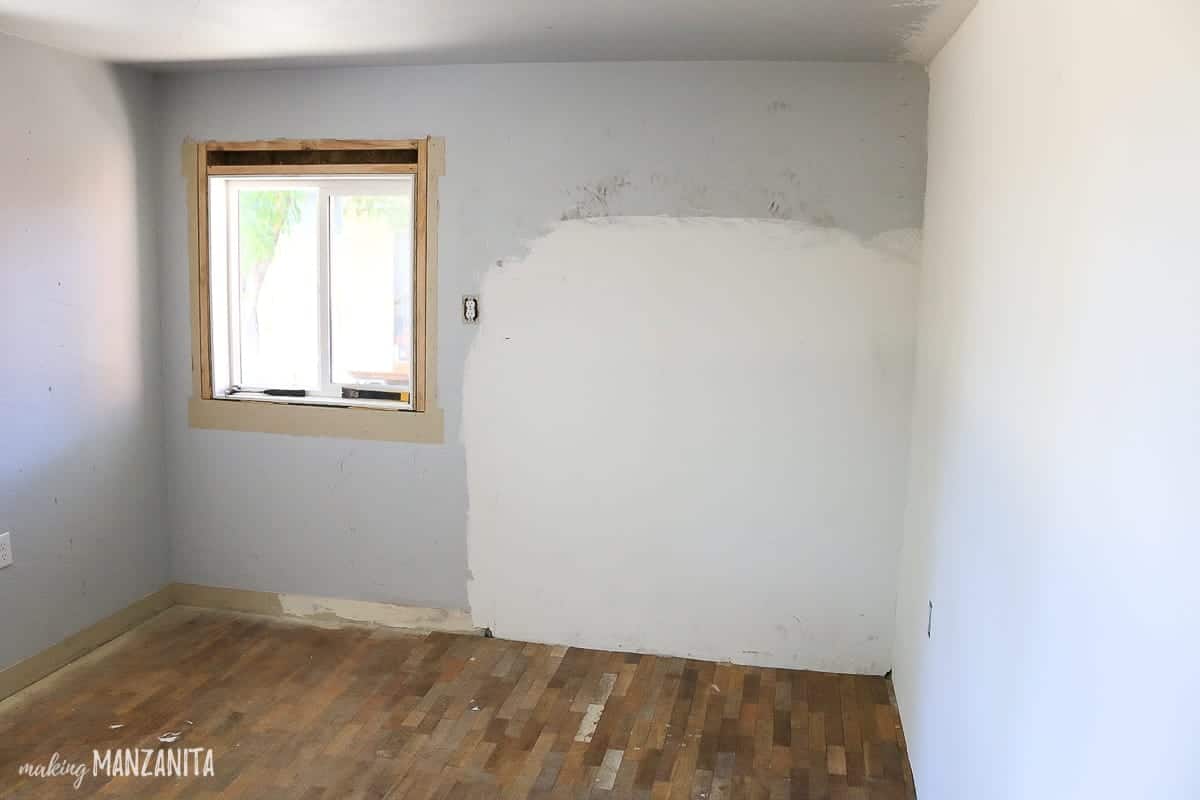
In our case, we had removed a fireplace on the wall where we were adding the board and batten, so there was a large patch. Our walls are also pretty heavily textured, versus something a little more subtle like Orange Peel texturing.
I’m going to show you how easy it is to install board and batten on textured walls.
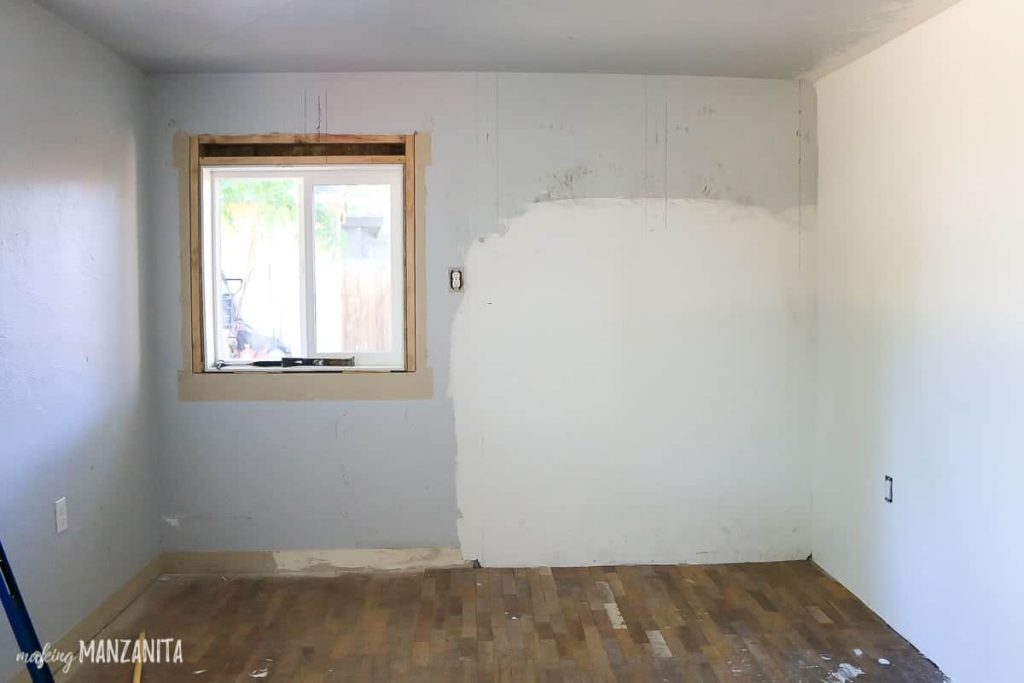
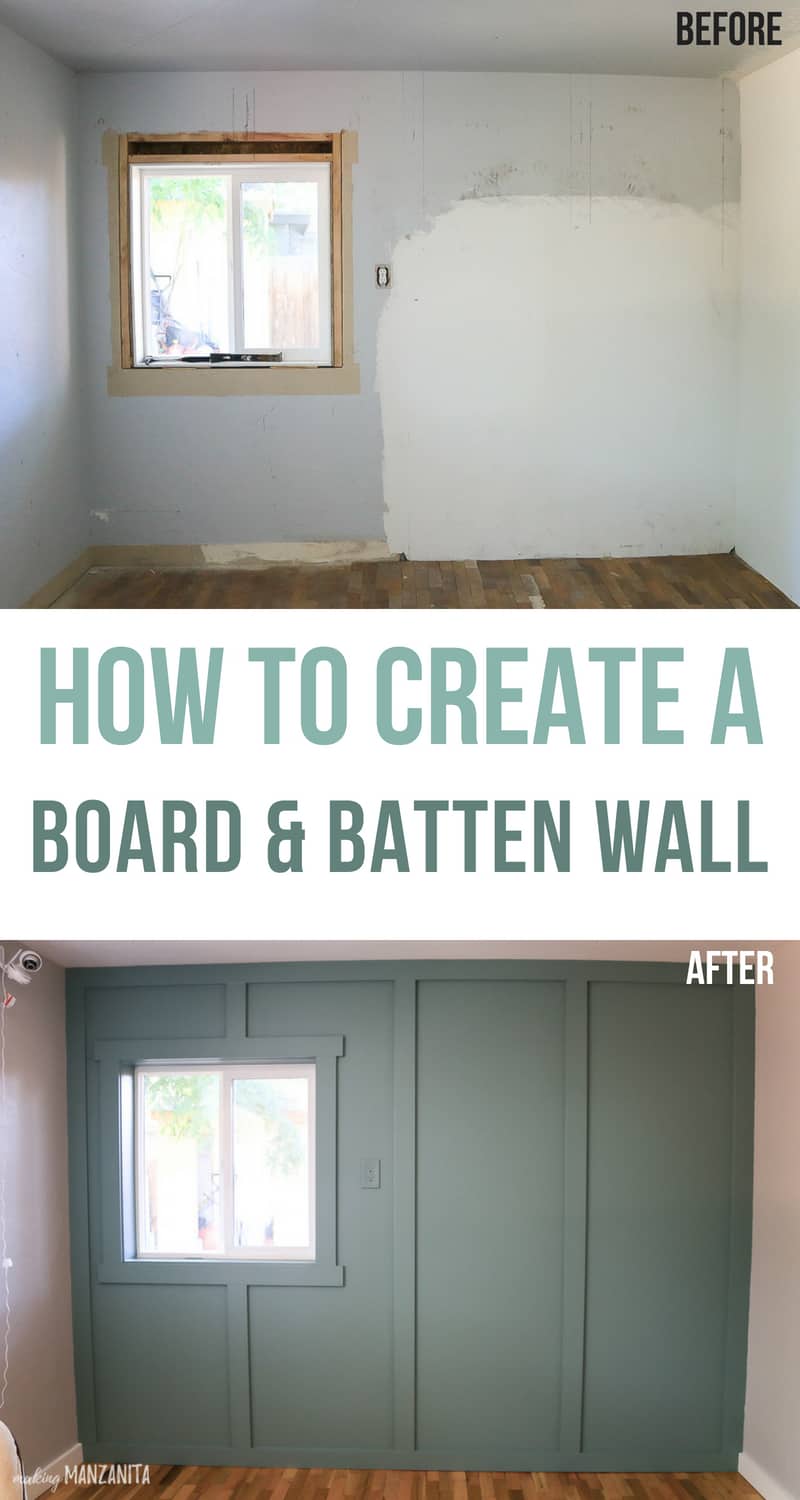
Here’s the VERY ROUGH before picture of our wall:
Board and batten wall: Step-by-step instructions
Supplies for board and batten on textured walls:
- Measuring tape
- Skill saw – this is the one we have
- 1/2″ x 4′ x 8′ MDF panels – we used 3
- DAP Beats the Nail All-Purpose Construction Adhesive
- Caulk gun
- 3 1/2″ Primed MDF trim pieces – we used 6 eight foot pieces and 2 ten foot pieces
- Nail gun – this is one we have
- 1 1/4″ Brad Nails
- DAP Dynaflex 230 Premium Indoor/Outdoor Sealant
- DAP Alex Plus Spackling
- Paint + primer – we had this color left over from painting our front door
- Paint roller
- Paint brush
Step 1. Plan your board and batten wall.
Before you jump right into installing your board and batten wall, you need to grab a tape measure and some pen & paper to plan it out.
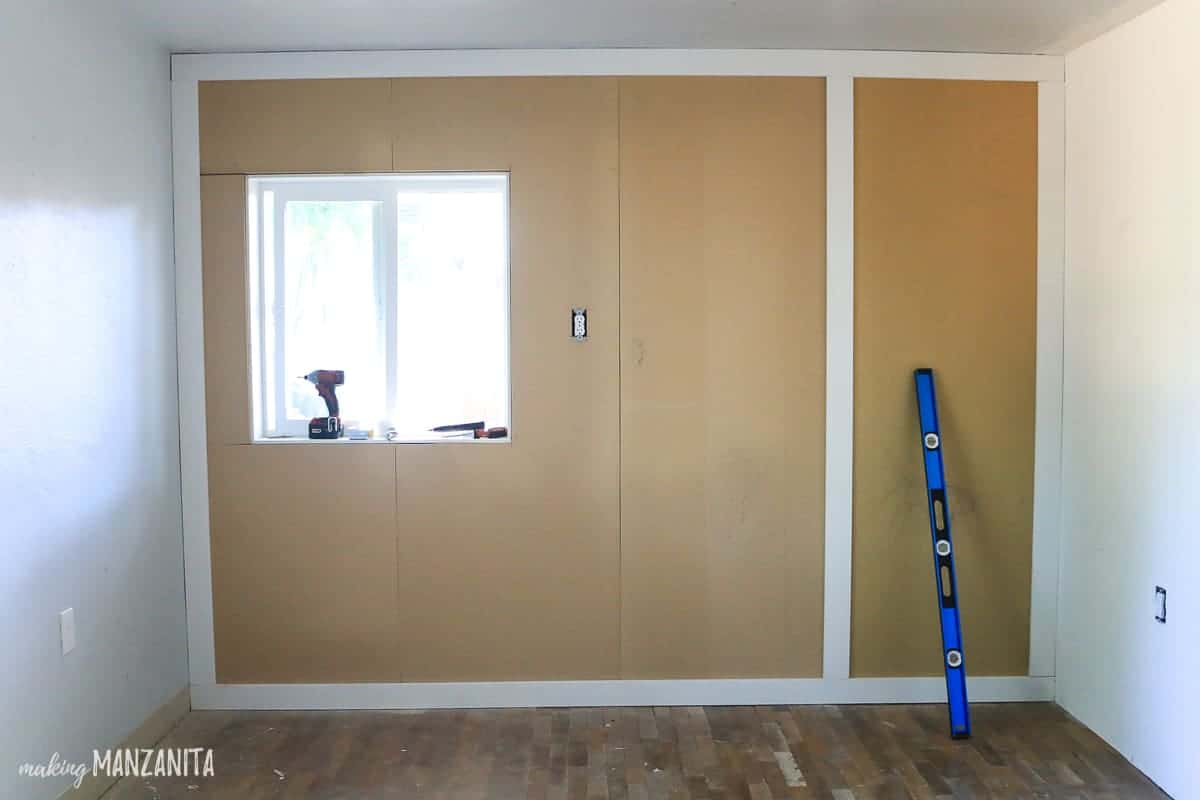
It is important that the batten pieces (which are the vertical trim pieces that are attached on top of the boards) are evenly spaced, so take the width of your entire wall and divide it by the number of battens you want on the accent wall, which in our case was 5 (which includes the pieces of the right and left corners).
If you are wondering how far to space your board and batten, I would recommend something in the range of 12″ to 18″.
Our wall is 119 inches wide and we wanted 5 battens, so that means that there will be roughly 23 3/4 inches between each batten (119 ÷ 5 = 23.8). This measurement will be the distance between the battens from the center of the batten pieces (which are 3.5″ wide in our case).
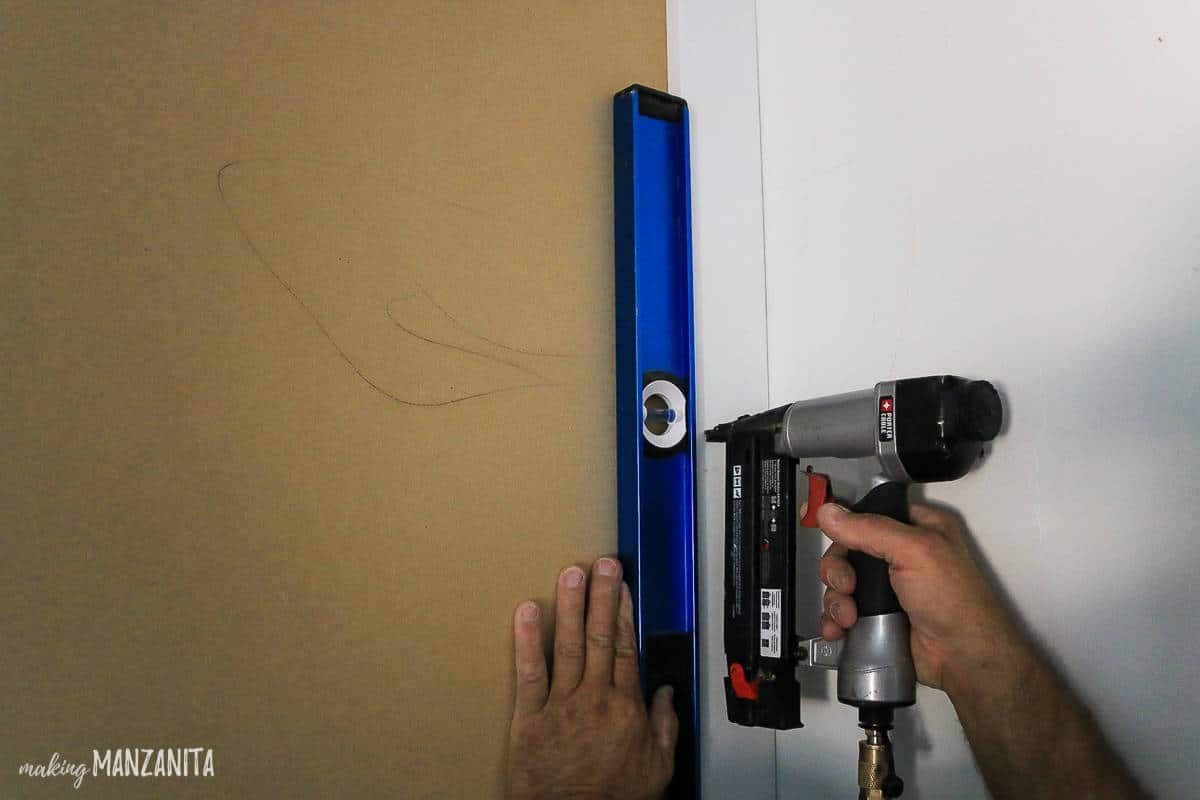
Step 2. Mark your wall where the batten will go.
Next, let’s take your plan and mark it on the wall. Remember you need to account for the width of the batten pieces (which are 3.5″ wide), so starting from one corner, make a mark 1.75″ from the corner. This mark is the center of the first batten piece.
From that mark, measure and make a second mark at whatever the distance is supposed to be between your batten pieces. Continue this all the way across your wall until you get to the other corner. If your math is right, your last mark should be 1.75″ from the far corner.
Next, you will draw in the actual lines where the batten pieces will go. On each side of your marks, make two lines – both 1.75″ from the mark. Again, this is to account for the width of your batten pieces, which are 3.5” wide.
Take a step back now and look at your board and batten wall design. Does it look right to you? Do the batten pieces line up poorly on your wall with any outlets or window trim? You definitely want to plan ahead to avoid those. If needed, adjust the number of batten pieces on your wall to avoid outlets or trim pieces.
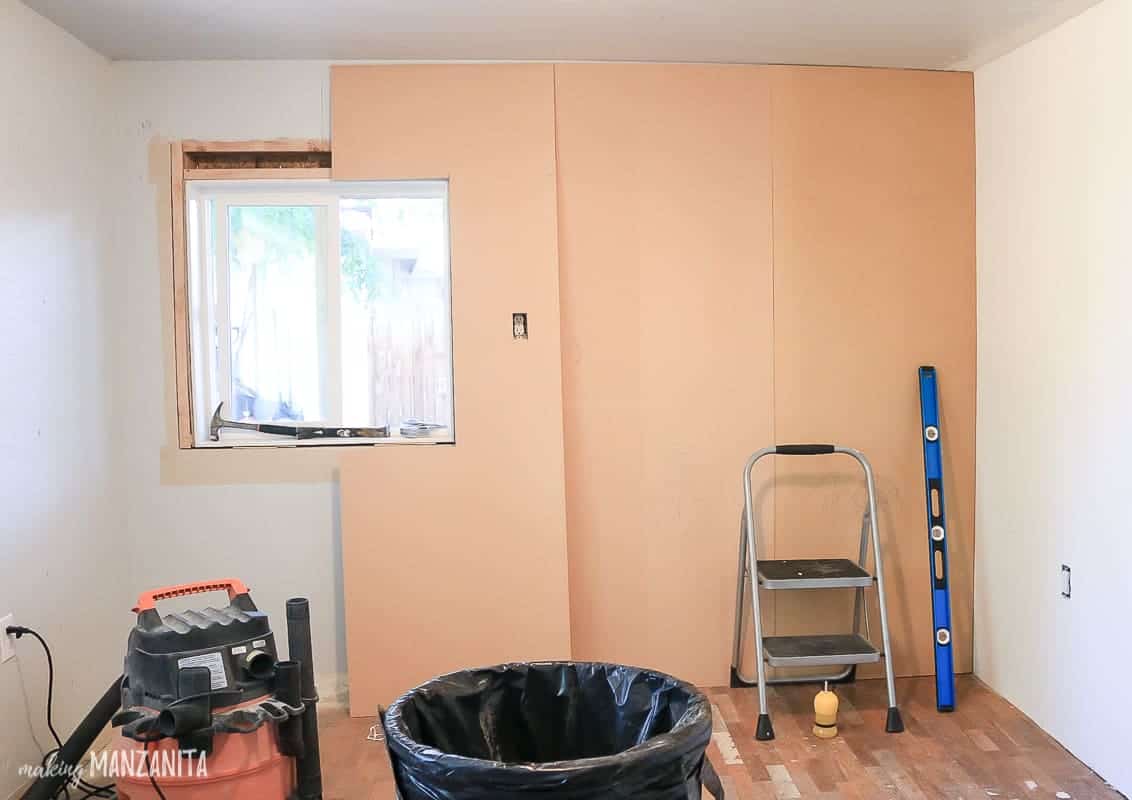
Step 3. Cut your MDF panels down to size.
Now that you’ve got your plan drawn on the wall, it’s time to cut the boards down to size. The boards will provide a smooth back to your accent wall, which is necessary if you are installing the board and batten on textured walls.
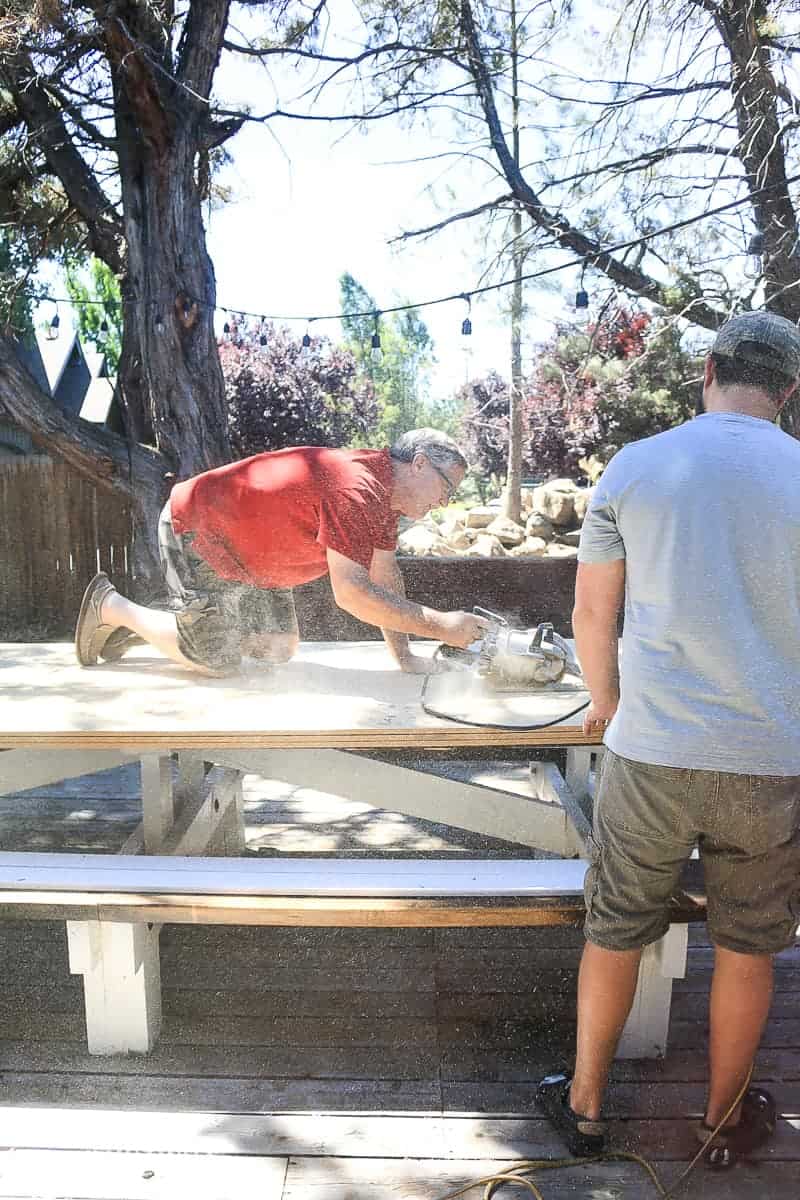
You need to cut these down to size so that the seams of the boards are behind. We used a skill saw to cut a separate panel of MDF board for each section of board and batten. (My awesome father-in-law was in town when we were working on this and helped us out! Cheers for a DIY family!)
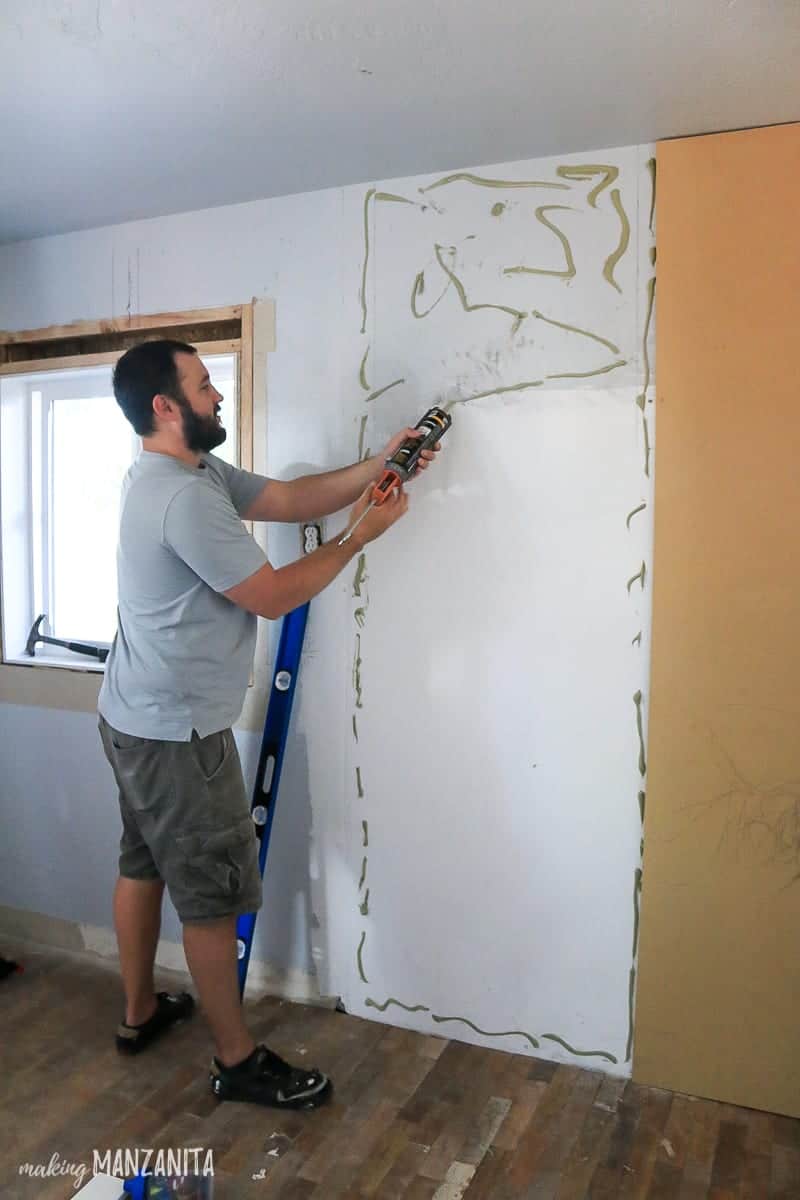
Step 4. Glue boards to the wall.
Next, you will glue your boards to the wall with construction adhesive. This is where the DAP Beats the Nail All-Purpose Construction Adhesive comes into play with its quick-grab formula.
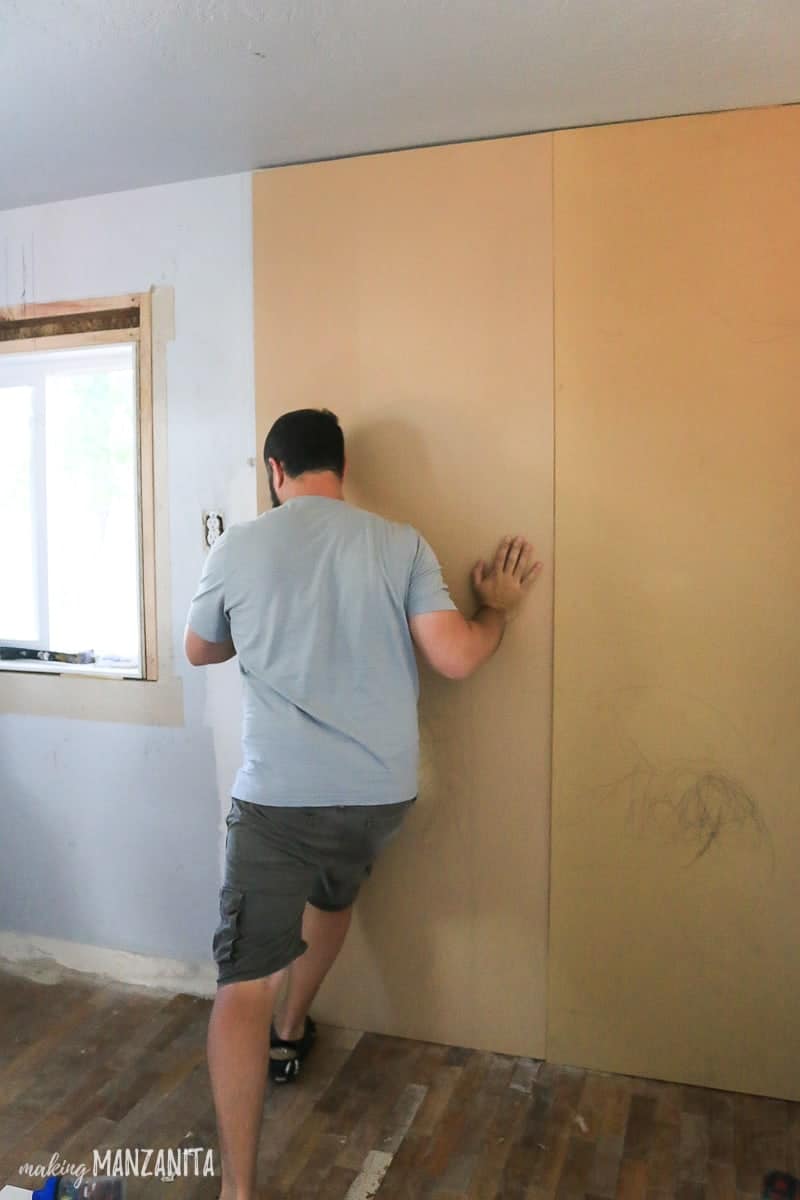

Put the adhesive in a caulking gun and generously apply it to the wall. Then, lift your MDF panels up and onto the wall and press all over.
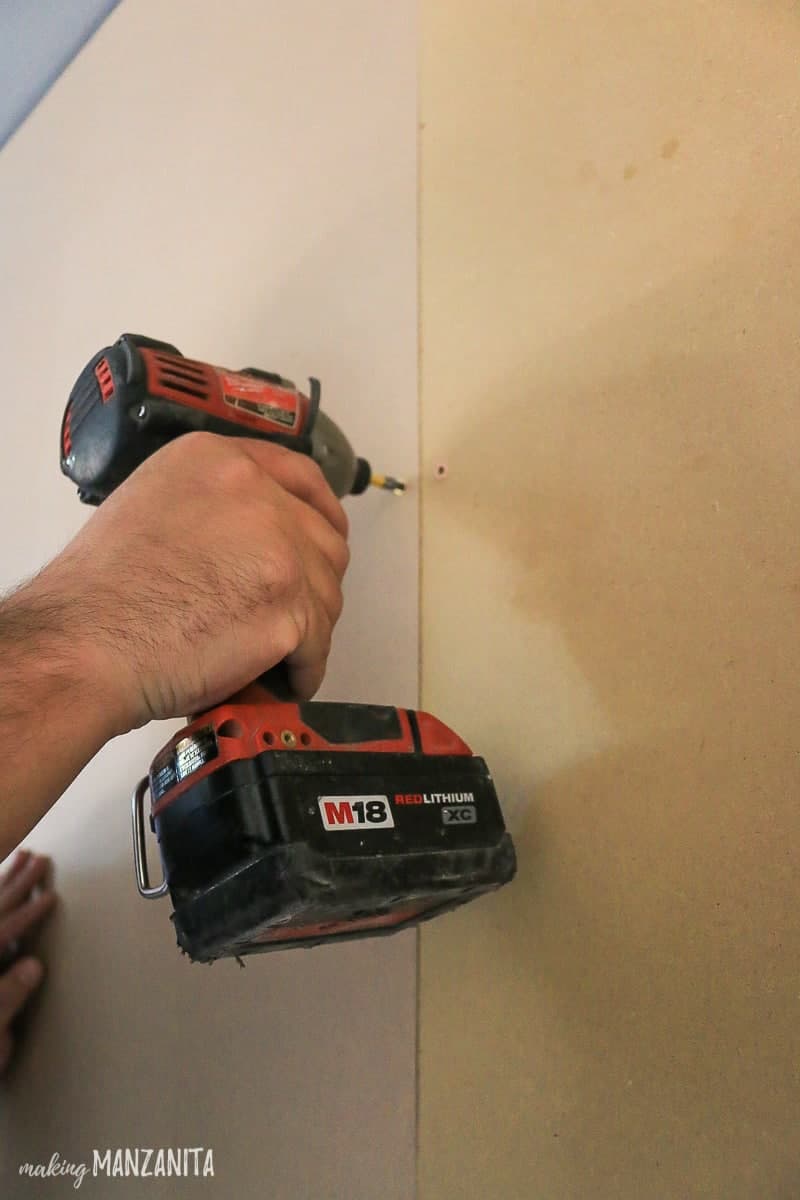
We added a couple of screws in a few places on the MDF panels but did not nail or screw the panels to the wall all over. This is because our walls were uneven and had some high spots and we wanted the boards to be flat.
Step 5. Add batten.
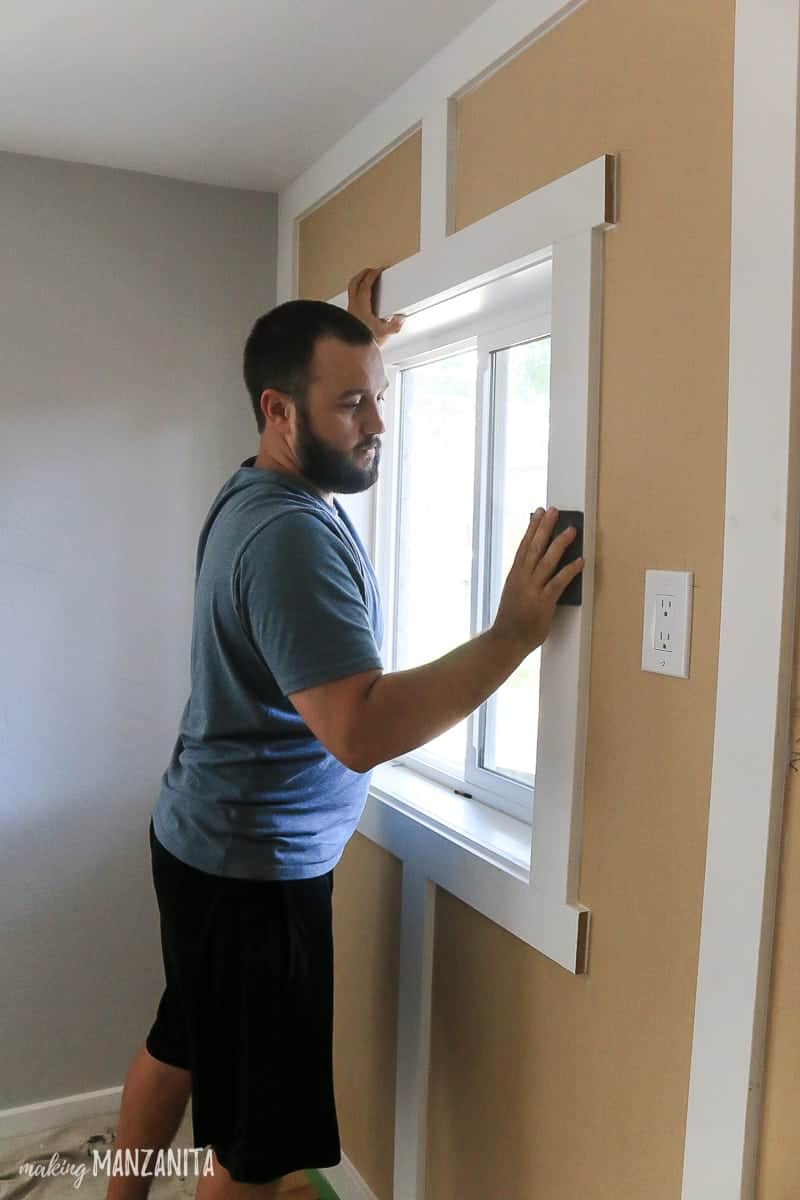
When adding your batten pieces, start with the top and bottom pieces and then the right and left corners so you essentially have a box around the board and batten wall. Again, apply more construction adhesive to the back of the batten pieces and press on to the wall. Be sure to check that you are level as you go.
Follow up by nailing the batten pieces in place with a brad nailer and 1 1/4″ nails.
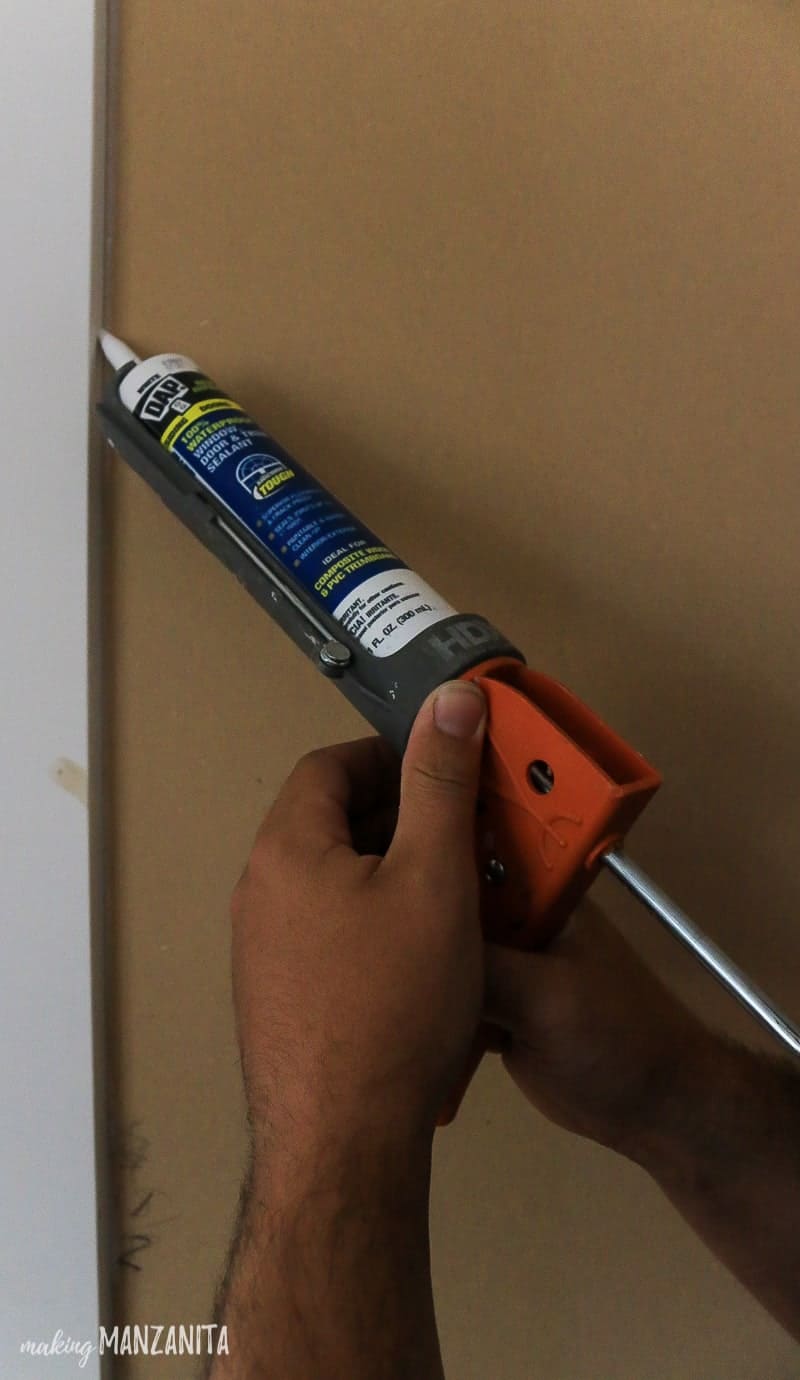
Step 6. Caulk seams on board and batten wall.
Now you can begin caulking to cover the seams and cracks of the wall with DAP Dynaflex 230 Premium Indoor/Outdoor Sealant. If there are any gaps between your boards and window trim, you can also fill them with caulk.
Apply the caulk in a small bead on any seams of the wall and then press them in with your finger.
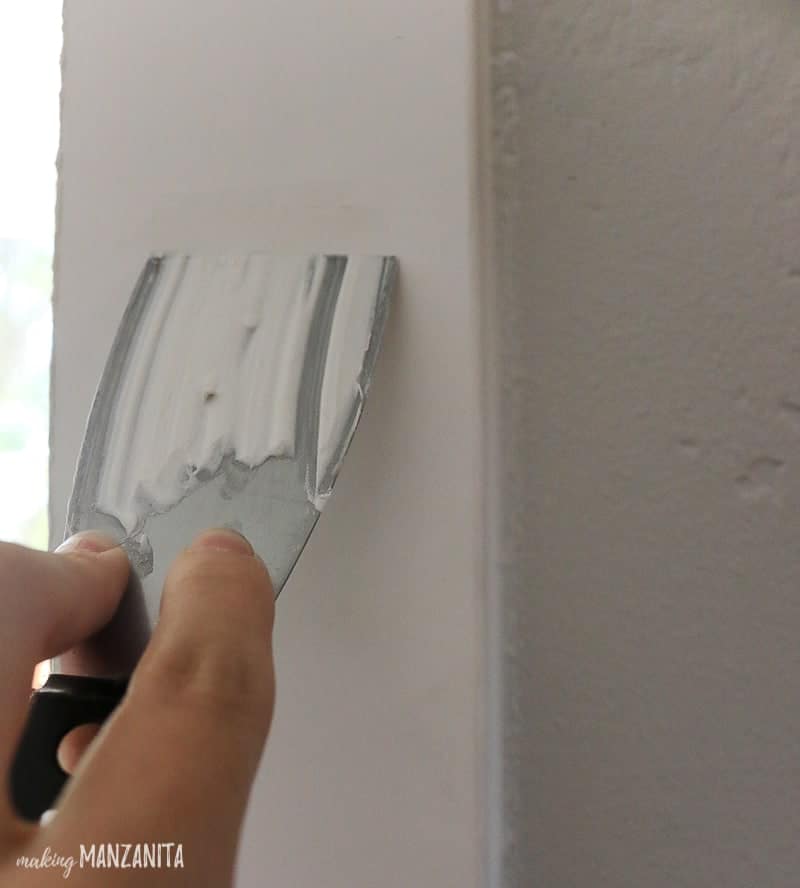
Step 7. Patch & sand nail holes.
While the caulk is drying, you can start patching nail holes in the batten with DAP Alex Plus Spackling by using a putty knife.
Follow up with lightly sanding any places you patched. You want the trim to be silky smooth before painting.
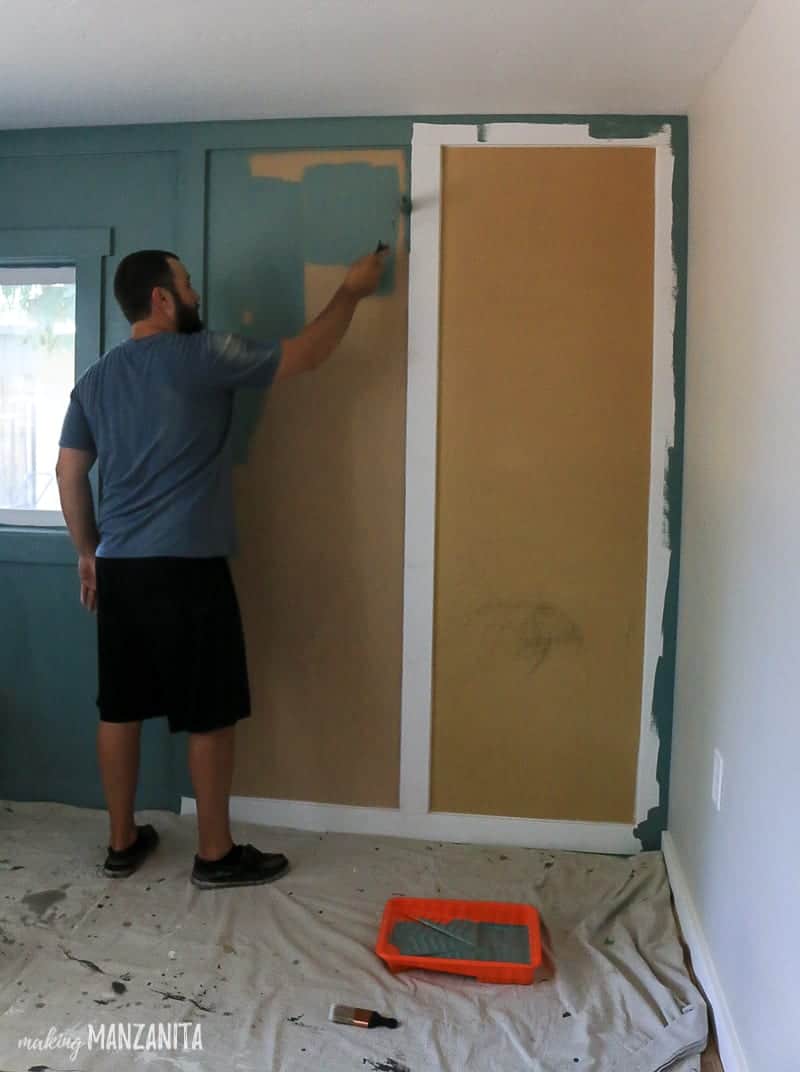
Step 8. Paint board and batten wall.
Finish off by painting the board and batten wall. We always use a high-quality paint that has a primer in it, but if you’re not using a paint + primer, be sure you prime first.
We had this gorgeous leftover paint from this project of painting our front door. It’s the perfect color (which is ‘In The Moment’ by Behr if you’re wondering) that I fell in love with and influenced the design inspiration for our modern farmhouse nursery.
Further reading – If you’re doing any interior painting, you’ve gotta read this post which covers how to paint a room for beginners!
We used this small paint roller, which was great because we could easily roll the paint onto the edges of the board pieces and didn’t have to use a paintbrush. We only used a brush when cutting in on the edges of the board and batten wall.
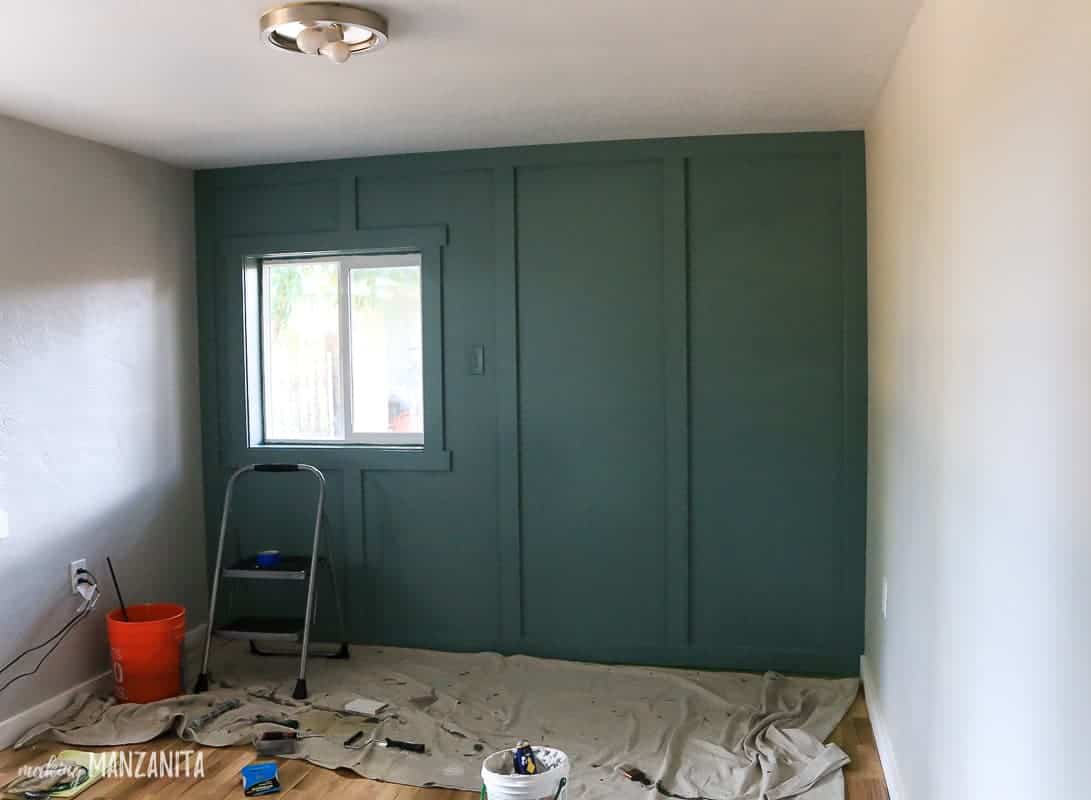
This board and batten wall was so easy to install and added so much character to our nursery. You can easily transform a room in your home in just a couple of hours by adding an accent wall treated with board and batten.
And I really think the look of board and batten is so timeless and works with many different styles!
Where would you install a board and batten wall in your home??
Let us know in the comments below!
Want to see more of our modern farmhouse nursery??
- Modern Farmhouse Baby Nursery Inspiration
- 10 White Modern Farmhouse Crib Ideas
- Setting Up A Nursery? Here’s What You Really Need (+ Baby Checklist Printable)
- Modern Farmhouse Rugs & Rug Buying Tips
- How To Build A Wall
- How To Frame A Door In Interior Wall
- How To Install A Board and Batten Wall
- How To Plan Your Gallery Wall Layout (and Nursery Wall Art Reveal)
- Hardwood Floor Refinishing
- Interior Painting Tips & Tricks
- How To Install A Prehung Door
- DIY Yarn Wall Hanging
- Changing Table Organization
- Modern Farmhouse Floor Lamps Under $100
- Baby Girl Nursery Reveal

Hi Chelsea,
Great tutorial and beautiful result! Looking forward to checking out more of your posts… Question – did you paint right over the electrical plug? I love how it blends in and isn’t an eyesore! Will be sharing this on Pinterest.
Thanks,
Denise
Thanks!! Ya…we didn’t want to remove it and didn’t want it sticking out like an eyesore…we figured it was only a couple bucks if we hated it painted, but turns out I love it! Blends right in to the wall. Thanks for commenting and sharing 🙂
It looks great and is such a quick, easy and cheap solution, especially when plugs are higher up – will definitely be using this idea! Thinking about adding board and batten wall in our bedroom after seeing how well yours turned out. Thanks again!
You should go for it, Denise! It was such a fun and easy project and made a huge difference. If you do give it a try, be sure to come back and share a photo or let us know how it goes!
I’ve painted over my outlets, but the paint scrapes off of them. What did I do wrong?
Love this tutorial, by the way. I’m getting myself convinced that I can do this!
We do not use this plug at all, that’s why we painted over it. If you want to use the plug, I’d recommend this paintable outlet cover: https://amzn.to/3fnMrsG And yes, you totally can do this DIY !
Can trim on walls be installed on a orange peel textured wall?
Or is that a definitely no rule for interior design? I want to give my parents living room a new look but their walls have the orange peel texture and all the cool wall trim I’ve seen online is only on smooth walls.
Yes, you couldn’t definitely add the trim directly to the walls if you have something like orange peel texture. Our texture was a little more noticeable and heavier than orange peel, so we chose to cover it up before adding the trim.
Did the batten go over studs? If not, do the brad nails used hold in just drywall?
Hi there, we added MDF panels to the wall first (because our wall had thick texture). We glued these on with construction adhesive and screwed into place over the studs. Then the batten pieces were added on top of that with more constructive adhesive and brad nails. The seams of the MDF panels are hidden under the batten pieces. If you’re not dealing with texture like we were, you could forgo the MDF panels and just the the batten pieces directly on to the wall. If you had line them up to studs, great. If the spacing doesn’t work for the studs, using a strong construction adhesive + nails will do the trick. Hope that answers your question.
Hi! Loved the finished product.
I’ve read over tutorials and one suggested painting all pieces first
Then touching up the nails holes after attaching. Any thoughts how this would change the process? Thx
yes, great tip. You could totally do it this way. It wouldn’t really change the process at all, you’d just paint and then install, patch holes, sand smooth and paint again. You have to have room to lay everything out flat in order to paint it and wait until it dries thoroughly, which we didn’t really have. I like to simply paint once it is on the wall because you only have to get all the paint stuff out once.
Hello! I love how this turned out! What paint brand/color did you use?
Thanks! This paint is called In the Moment by Behr Paint. https://rstyle.me/+iJ50QZ5JSmIe2fcEOhBgZQ
Hi Chelsea. Thanks for this post. I see the bottom framing of the wall was very similar to the baseboards on the adjoining walls… if the baseboards are taller, let’s say 6 inches, do you think it would also work to leave the baseboards as they were instead of the mdf frame and then just paint the baseboard the same accent color? Thanks!
Yes, you could totally make it work with taller baseboards and you could either paint it the same color as the wall or the same color as your other baseboards. I’ve seen it done both ways and it looks good with either scenario.