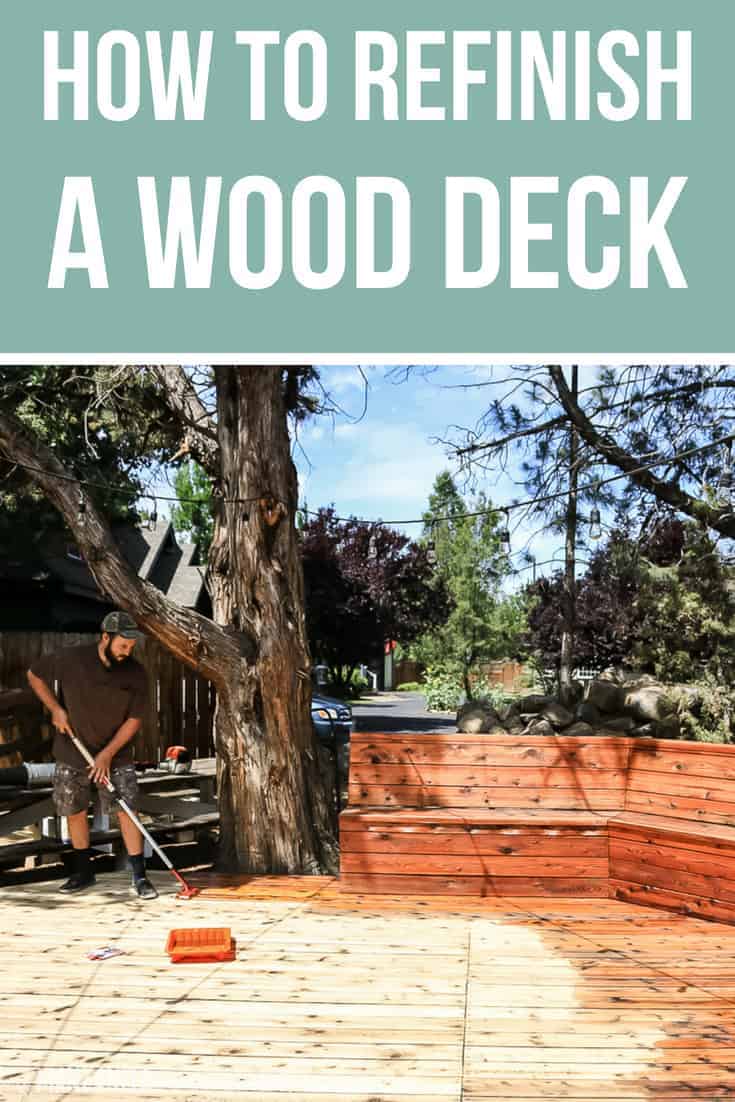
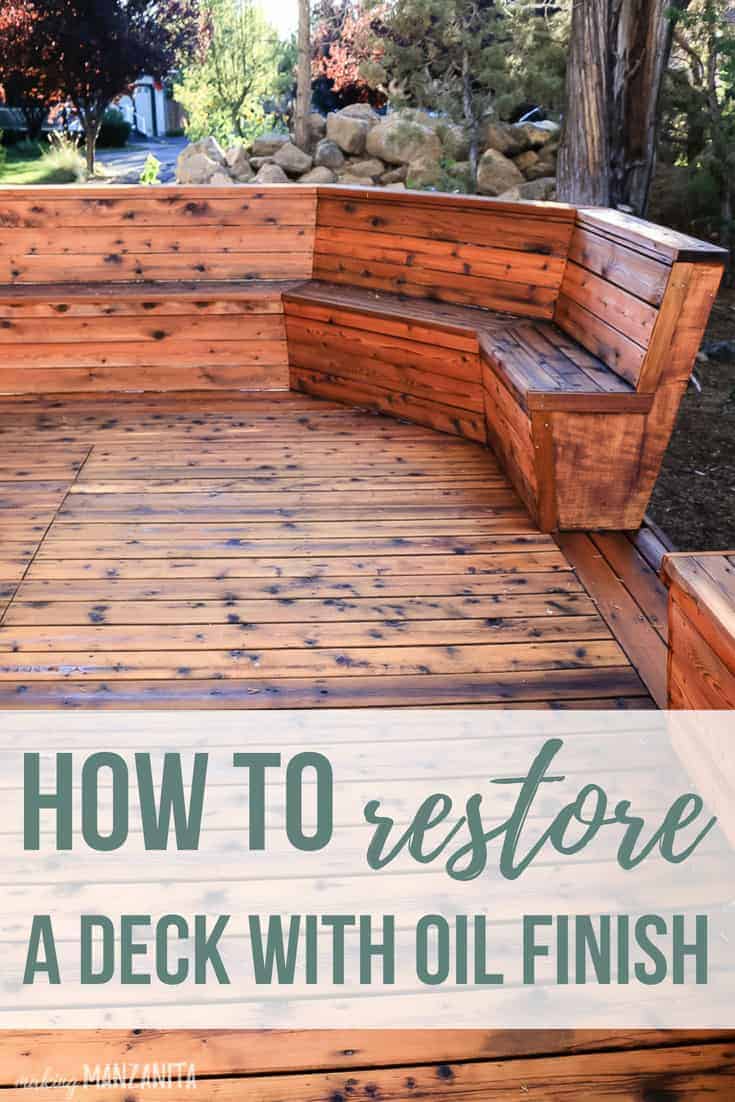
How To Restore A Deck That Has Been Neglected

If you need to restore a deck, this detailed tutorial will really help you out! We're going to show you exactly how we restored a deck that had been neglected for way too long. We also cover FAQs about deck treatment like 'what is the best deck sealer?' and 'what is the best way to clean decking?'.
We definitely weren’t planning on refinishing our deck ANYTIME soon. In fact, we probably weren’t even going to think about it until next year. We have so many renovations going on inside the house for Phase 1 of our renovation with building out a bedroom for our new baby, expanding our closet in a walk-in and building an entire bathroom from scratch. But sometimes projects pop up sooner than expected and you just gotta roll with it.
UPDATE: See how our refinished deck is holding up one year later!
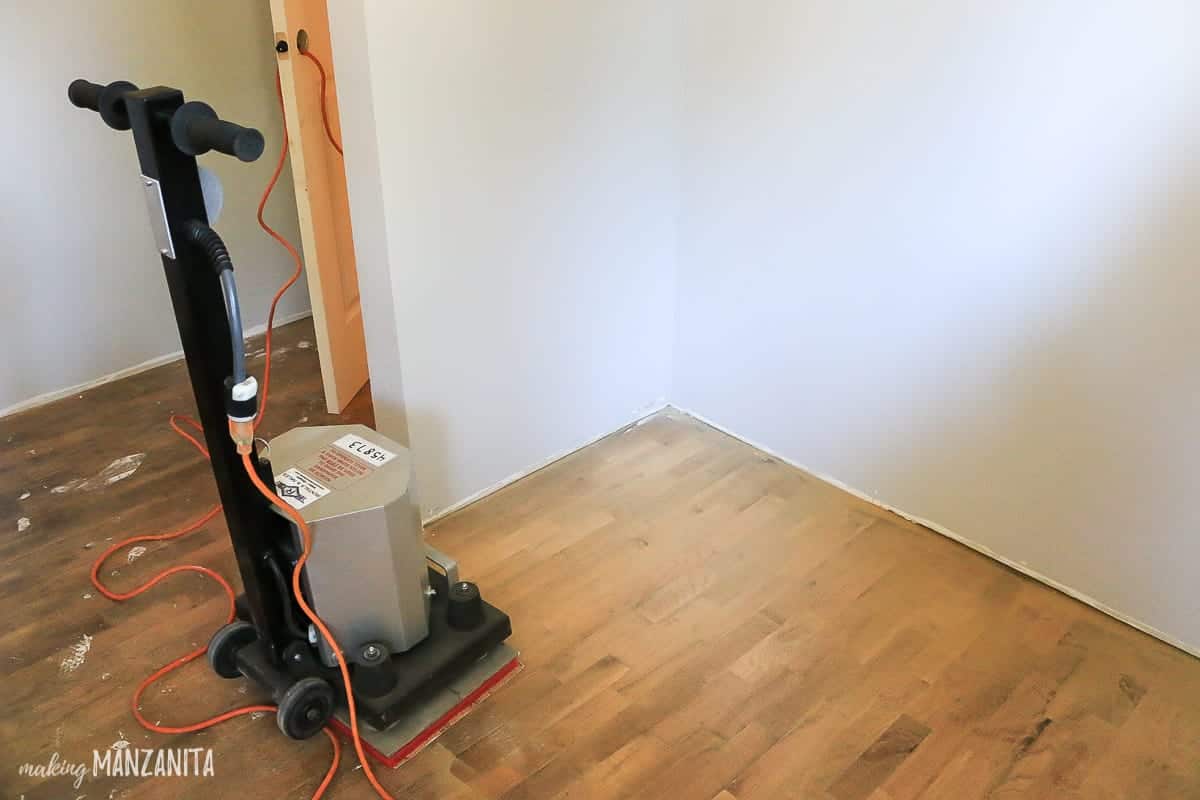
It all started when we were refinishing the hardwood floors in the nursery & hallway. We had rented a square buff sander for the floors for the weekend.
Saturday morning Logan started sanding the flooring and a couple of hours later realized that the sander we had rented just wasn’t going to cut it. The square buff sander wasn’t cutting through the many layers of sealer and stain that our hardwood floors had.
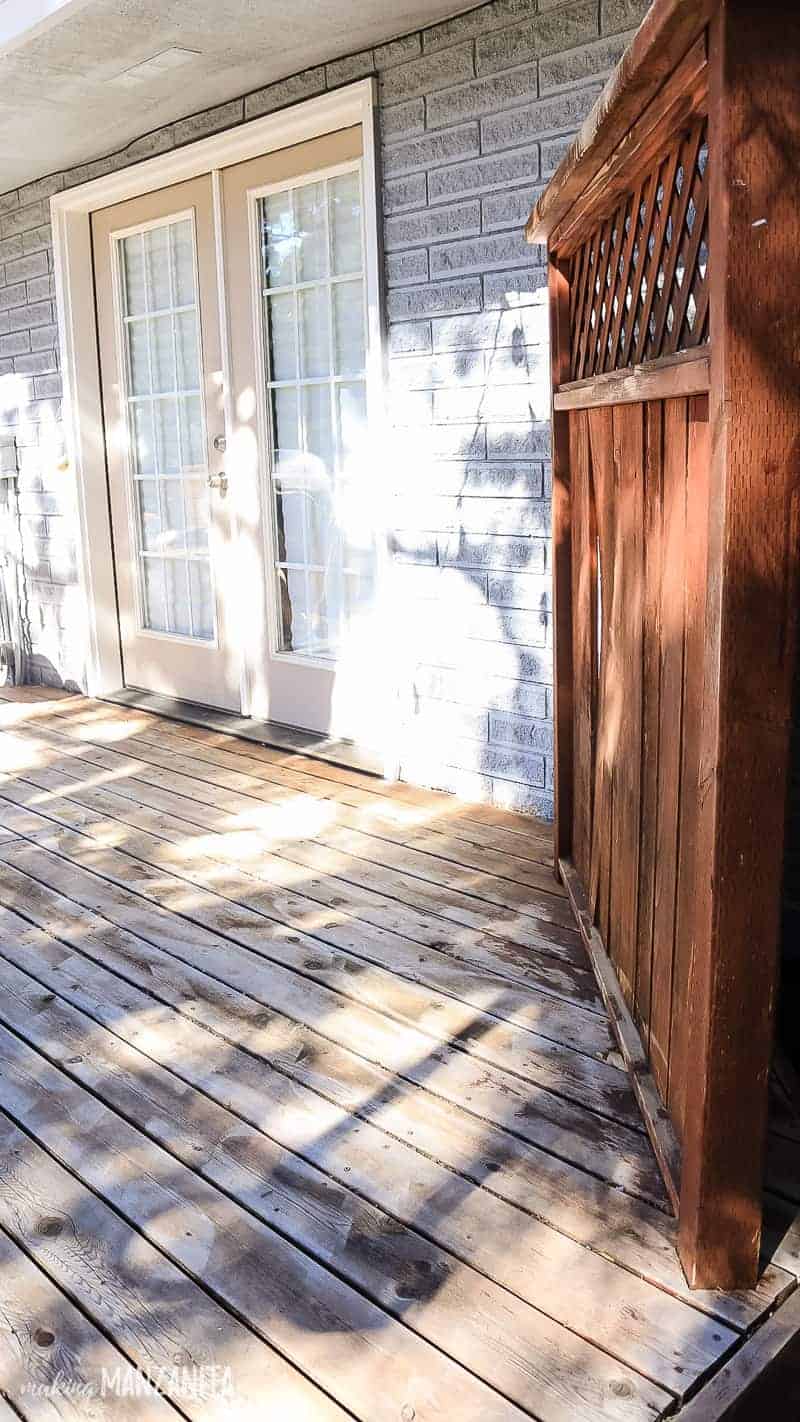
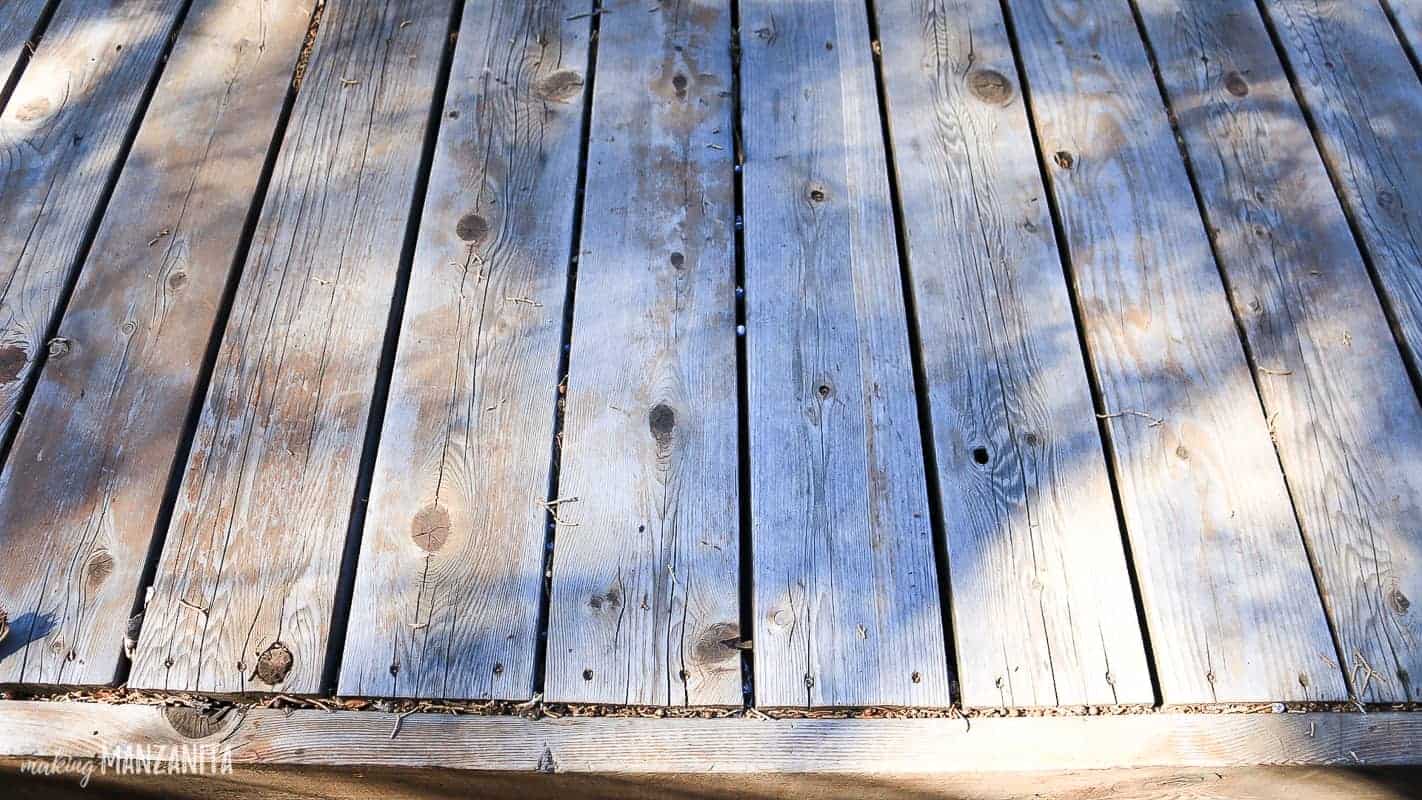
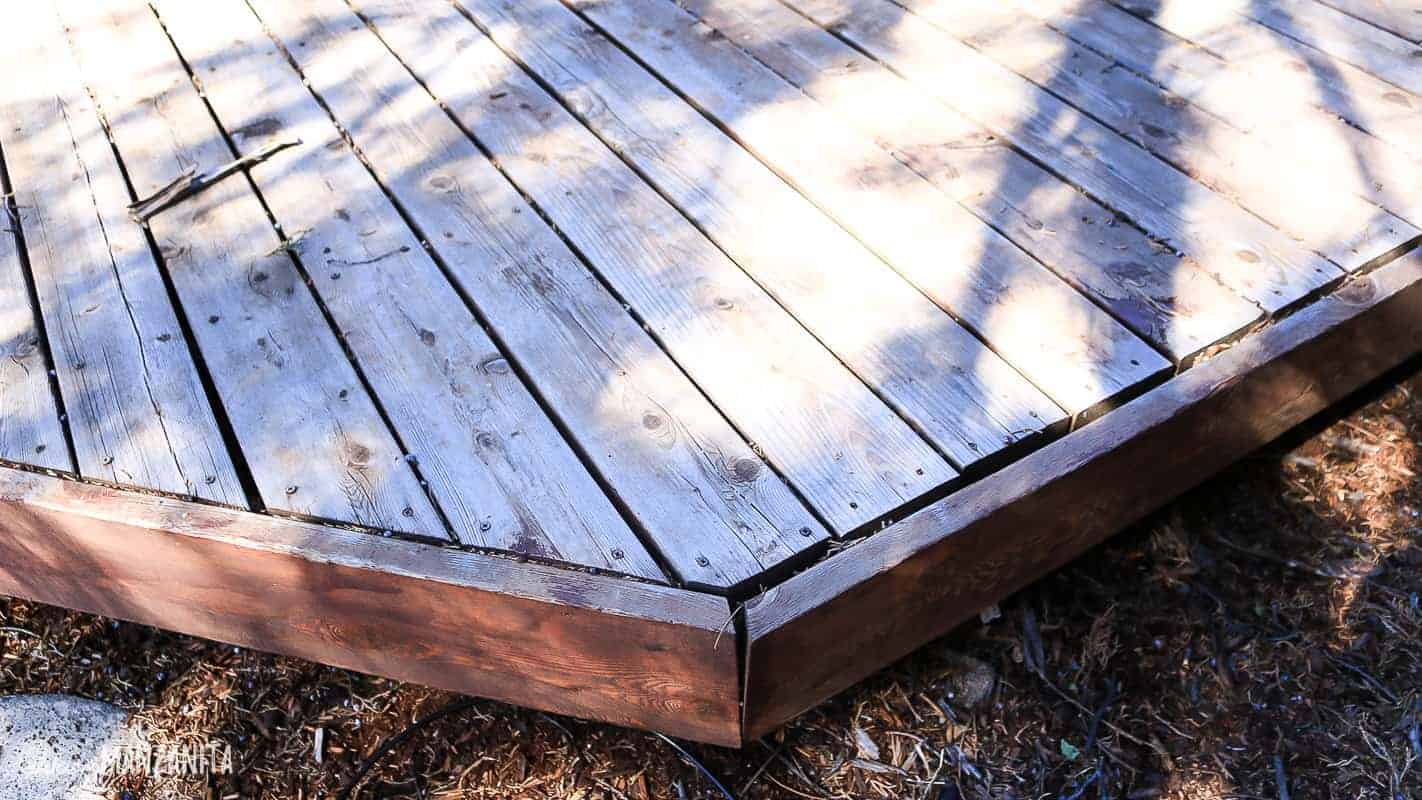
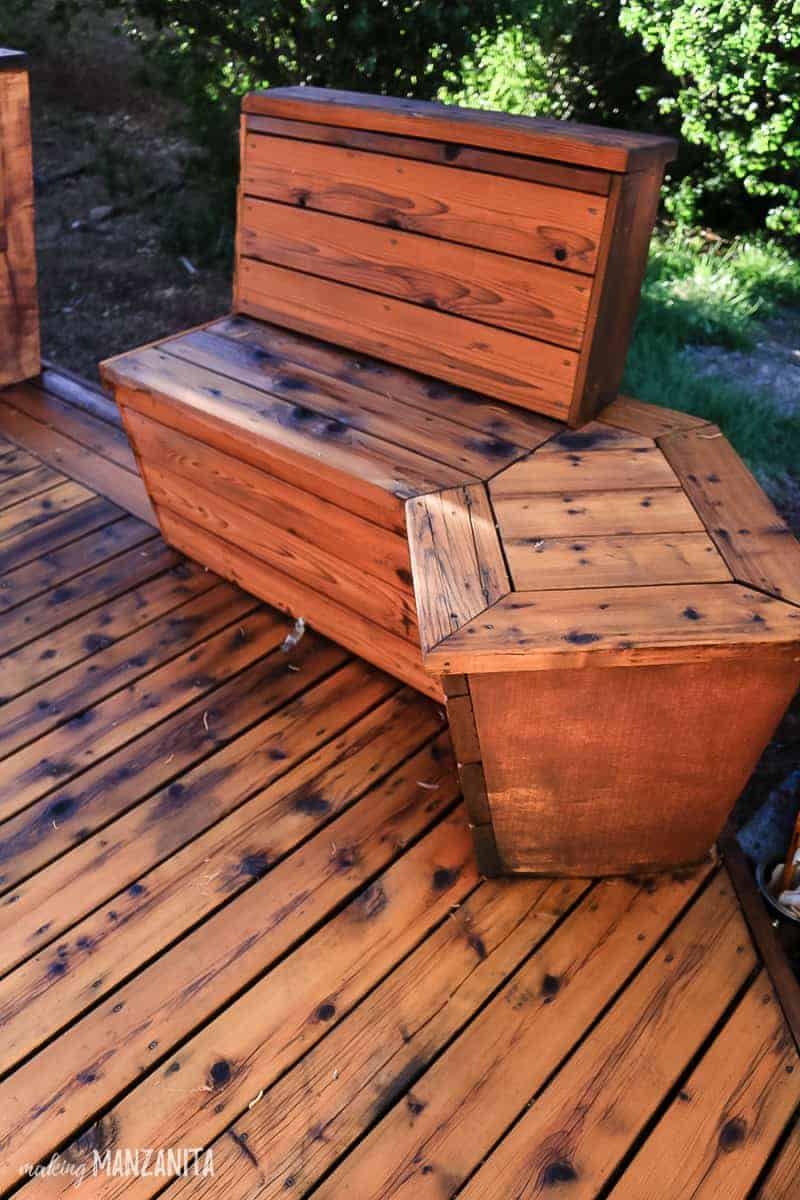
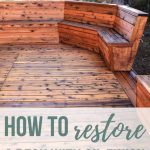
Before Pictures: Wood Deck Before Refinishing
The deck, however, was so neglected and weathered that it was back to bare wood. But it was definitely uneven and needed a good sanding.
The tool rental shop was closed for the weekend, so we were stuck with it. Instead of sitting around watching Netflix (SO tempting), we decided to take advantage of the square buff sander which we already had paid for the entire weekend.
We took the sander out to the deck and…voila! It was an accidental deck makeover! And I, for one, am pretty stinkin’ happy with this accident.
This restore a deck tutorial contains affiliate links, but nothing that I wouldn’t wholeheartedly recommend anyway! Read my full disclosure here.
Before we jump into the steps of the cleaning the deck and applying the decking treatment, I thought we would take care of a couple important questions that you may have if you’re thinking about restoring your deck that has been neglected – what is the best deck sealer and what is the best way to clean decking.
What is the best deck sealer?
The best deck sealer is going to depend heavily on the current age, condition of your deck, and how much work you are willing to put in prepping the deck.
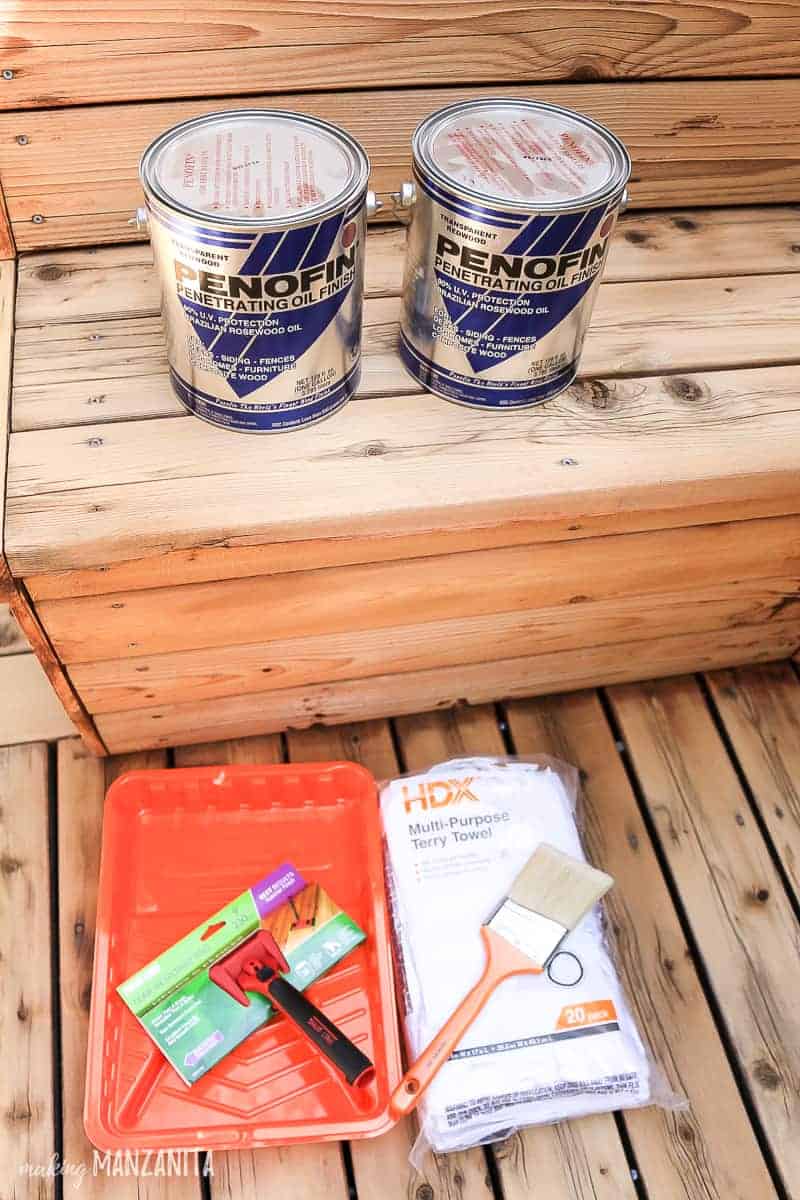
If your deck is brand new or if you sanded down your deck like we did, a penetrating oil based stain is going to be your best bet. We did lots of research and landed on Penofin Blue Label Brazilian Rosewood Oil Finish in Redwood Color for our decking (read more about the Penofin sealer here).
We consider this the best deck sealer type as it does exactly what it says, penetrates deep into the wood. The deeper the stain gets into the wood, the longer it is going to stand up to the outdoor elements.
Another reason penetrating oil based stain is the best deck sealer is its ability to get deep into the wood, while letting the wood grain show through, but that’s just personal opinion.
Also, penetrating oil finish is very easily reapplied. Unlike surface lying stains, you don’t have to strip or sand your wood deck when it is time to reapply. All you do is simply pressure wash your deck with a wide-angle tip, wait a couple of days to dry, then apply the stain.
If you have an older deck and you don’t want to sand it down, then you are looking at a semi-solid to solid color deck sealer to help with deck damage. However, these sealers are often a double-edged sword as they sit on the surface of the decking and create a separate layer. This can cause issues if you don’t prep properly, a spot doesn’t grab the decking, or the wood has any moisture left in it before you apply. Any moisture left in the wood will be sealed under the product and you guessed it, it will probably be peeling off by next summer.
Peeling is a bigger issue with these solid products because once it starts peeling, the only fix is stripping your deck of the product and starting the process over. There goes another weekend working on the house instead of grilling out on the deck and havin’ some fun
Semi-solid and solid deck sealers do have their place. They are great for decks with cracks and restoring an old beat up deck so you can walk on it again without worrying about splinters and you really don’t want to sand.
So take a good look at the current state of your weathered deck, think about how much prep you want to do know (and think about replication in the future) to decide what the best deck sealer is for you! Then follow the steps below on how to apply your best deck sealer.
What is the best way to clean decking?
As you read the rest of this tutorial on how to restore a weathered deck, you’ll notice there is A LOT of cleaning. Each step is incredibly important as the products all work together.
- The sander (or stripper) gets the previous finish off.
- The pressure washer and wood cleaner get rid of any mildew, stains, and dirt.
- The wood brightener further cleans brightens the wood and balances your deck chemically.
The moral of the story is…don’t skip a step when you’re cleaning decking.
Deck Refinishing: Video
If you love DIY videos, be sure to subscribe to our YouTube channel so you don’t miss one!
Supplies we used for restoring our wood deck:
- Deck screws
- Square buff sander with 36 & 60 grit sandpaper (can rent these at your local tool shop or maybe Home Depot)
- Blower (similar, our Stihl blower is no longer sold)
- Pressure washer (you could also rent one)
- Wood cleaner
- Wood brightener
- Deck brush
- Sprayer
- Terry towels
- Penofin Blue Label Brazilian Rosewood Oil Finish, Redwood – Full disclosure here, I’m including the link on Amazon so you can see what it looks like, but we bought this at our local lumber supply for much less than they are selling it for on Amazon. You can see where it is sold near you on here on Penofin’s site.
- Paint tray
- Paint brush
- Applicator & pole
Step 1. Clean off wood deck.
First step when restoring a deck is to clear off anything you have on it so you can see what needs to be done in terms of preparation before you start the deck treatment.
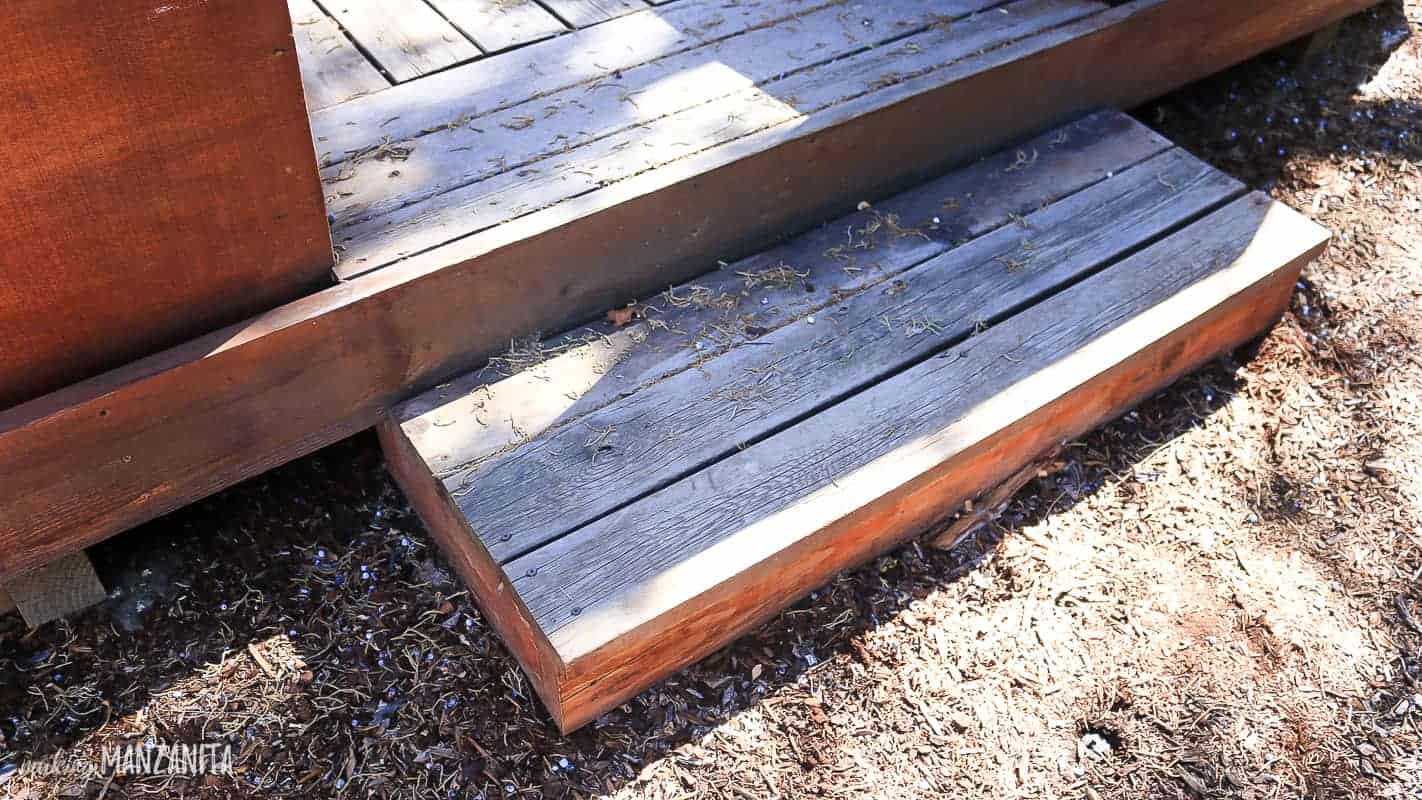
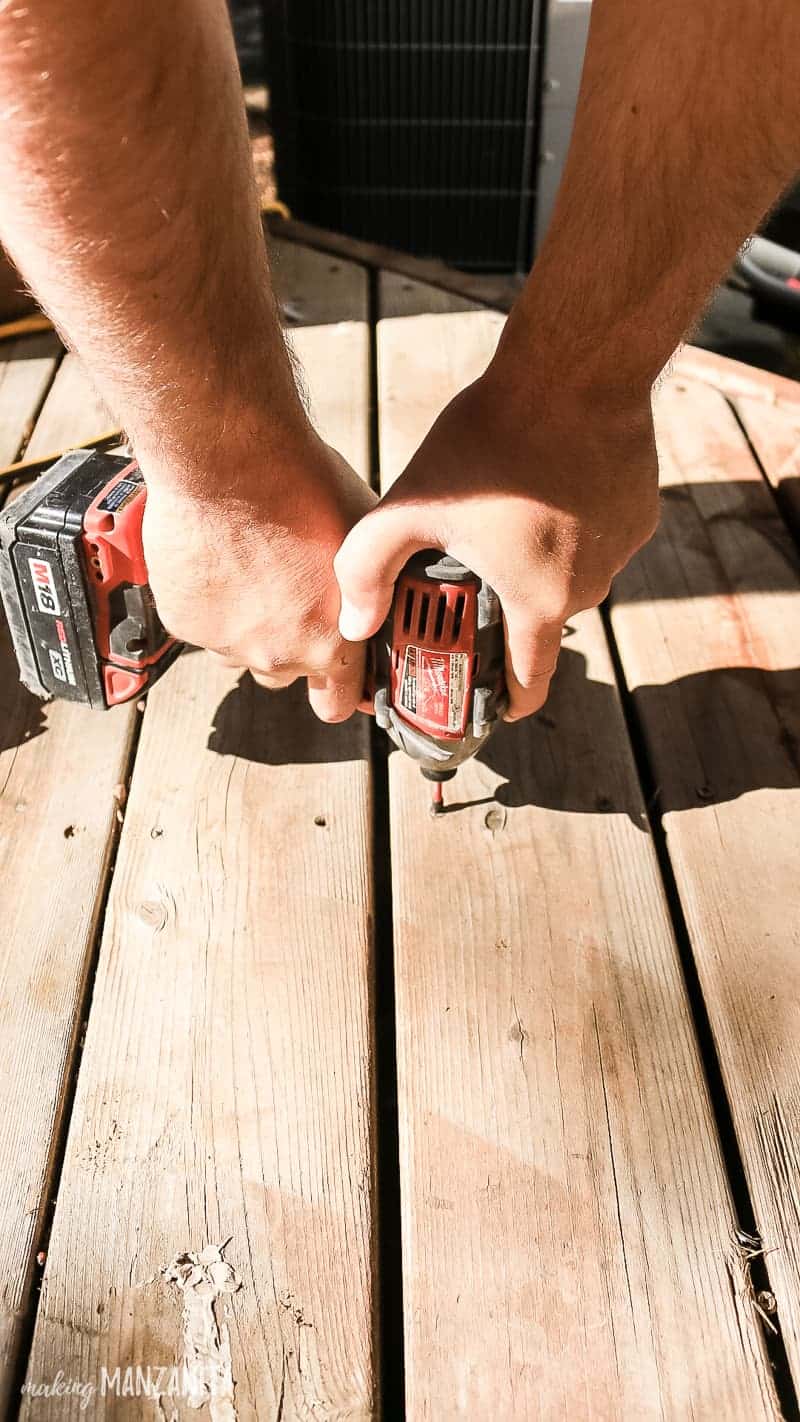
Step 2. Tighten screws on deck and replace boards.
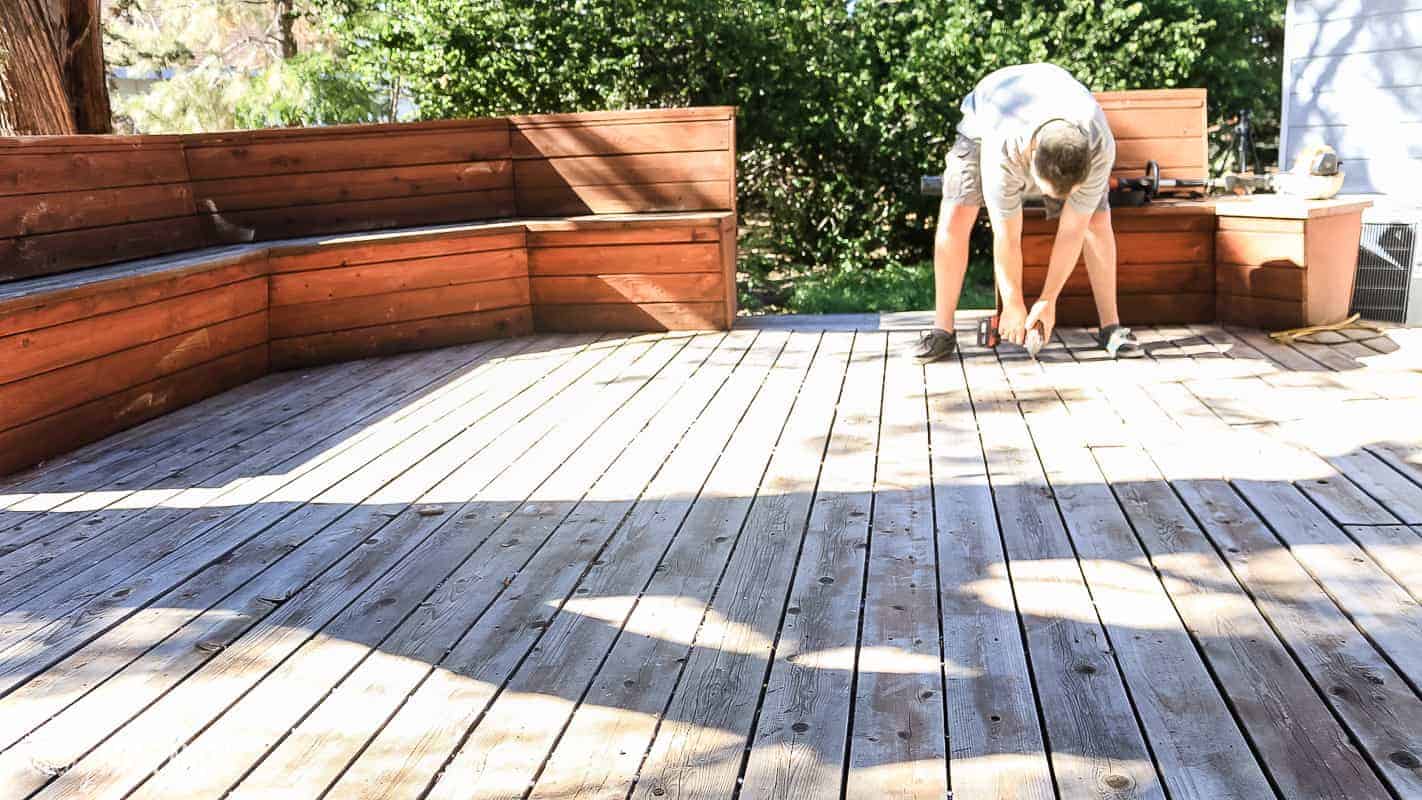
Once you have everything off, you’ll be able to see if any nails or screws have popped up that need to be put back in. After you identify these boards, grab a box of deck screws and secure any loose decking boards, railings, bench boards, or any other loose piece of wood on your deck.
Next check for any decking boards that are too far gone to be saved. Now is the time to replace any boards that might be rotted or cracked all the way through. If you are replacing deck boards, be sure to use the same type of wood as the rest of the your deck and definitely get pressure treated wood, which is designed to withstand the elements outdoors.
Step 3. Sand deck (if necessary).
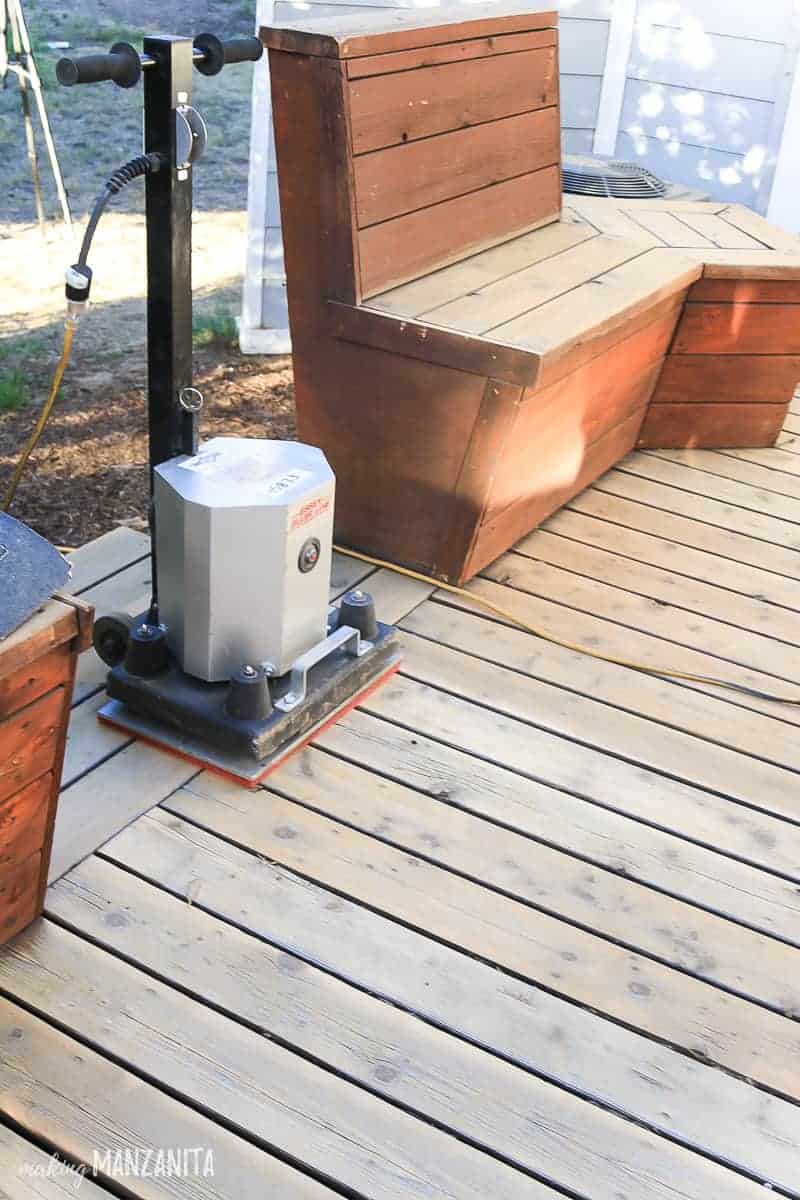
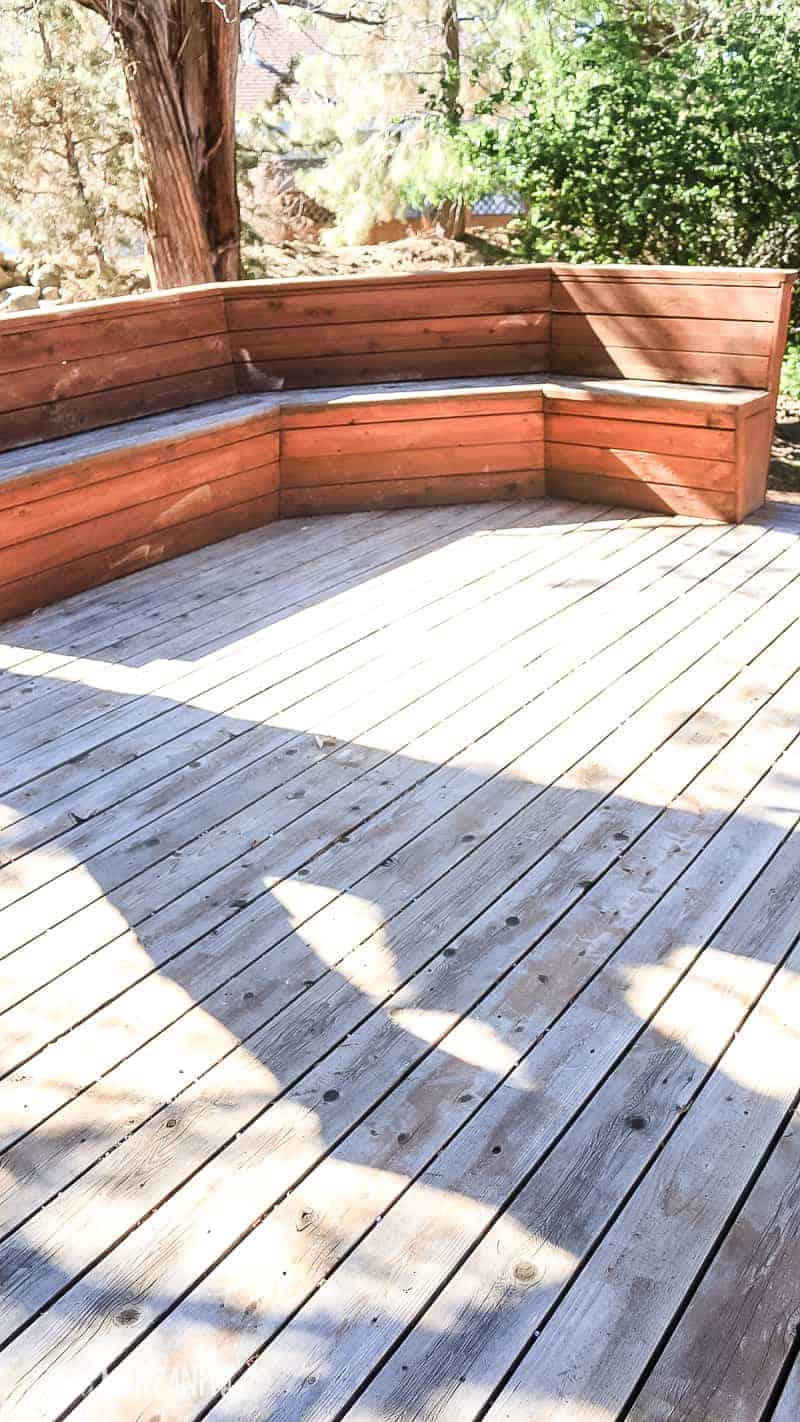
Our deck had been seriously neglected when we moved in. There was unevenness on the wood boards and no finish left whatsoever. We knew the best way to restore a deck that has been neglected was with a sander. We had that sander and a whole weekend free, so we sanded the deck. This step is only necessary if your decking needs it.
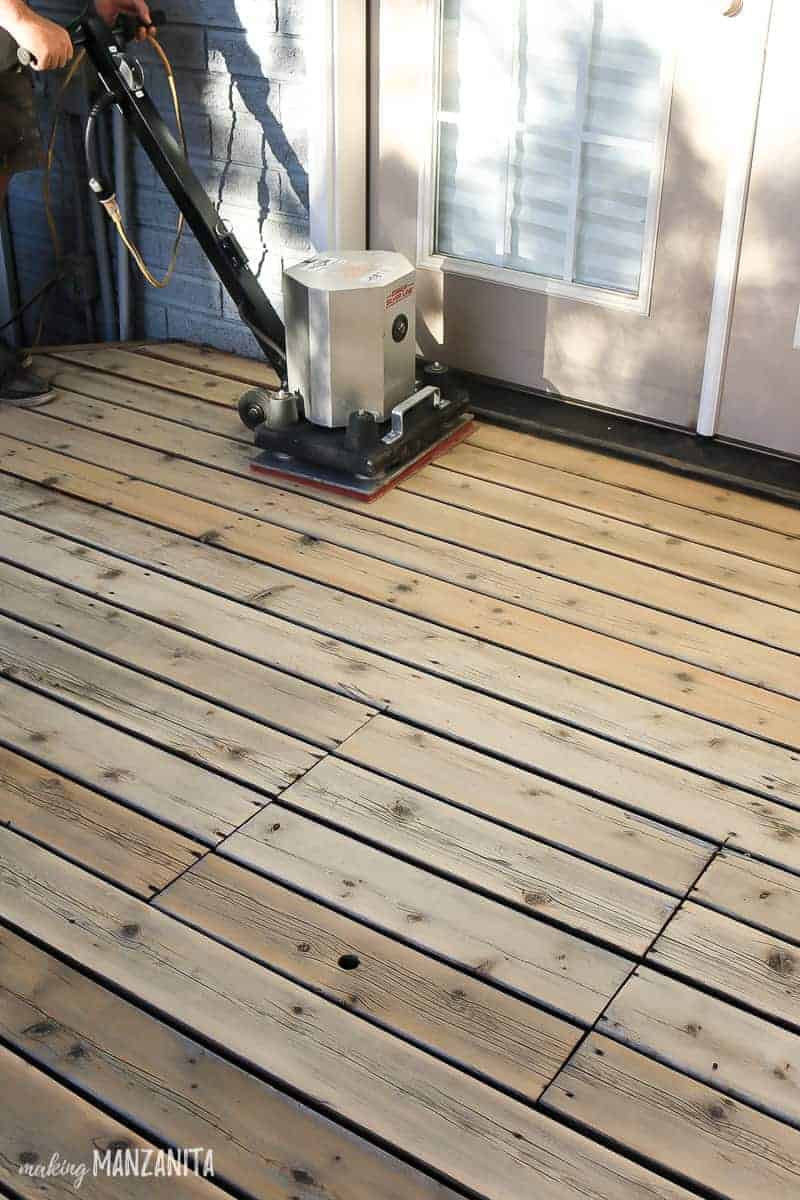
We used the square buff sander to do two passes with 36 grit sandpaper and one with 60 grit.
Step 4. Wash deck.
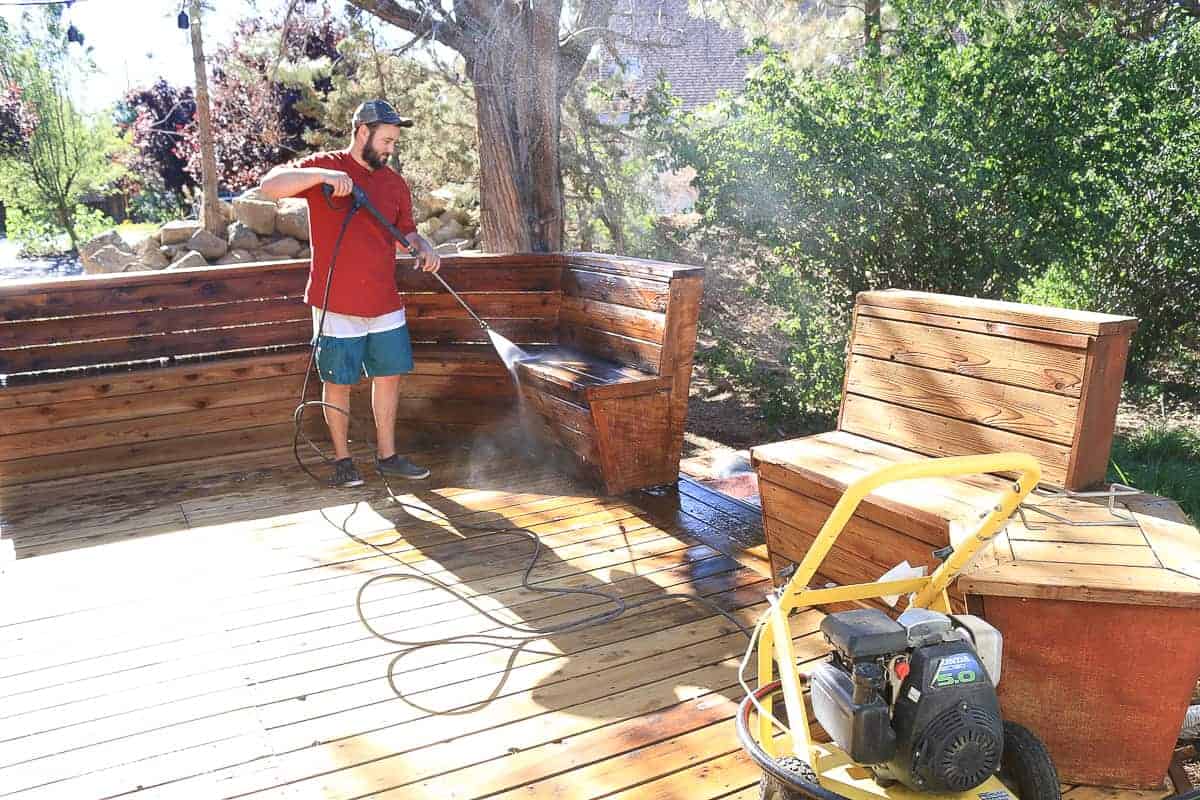
The best way to clean decking is definitely using a pressure washer. If you don’t have one, you can rent one from your local Home Depot.
Use a pressure washer with a wide-angle tip to clean your deck of any surface dirt and grime. Once the deck is dry, you can decide if you are going to need to use a stripper to get the previous finish off or if will be able to get the job done with narrow pressure washer tip.
Keep in mind the pressure washer is going to send high pressured water into your deck boards, which will have to dry out completely before any new finish is applied.
If you go with the stripper to remove the previous finish, be sure to wet or cover any plants you have around your deck or they will die.
After you get the previously finish completely removed, it is on to the next step.
Step 5. Use deck cleaner.
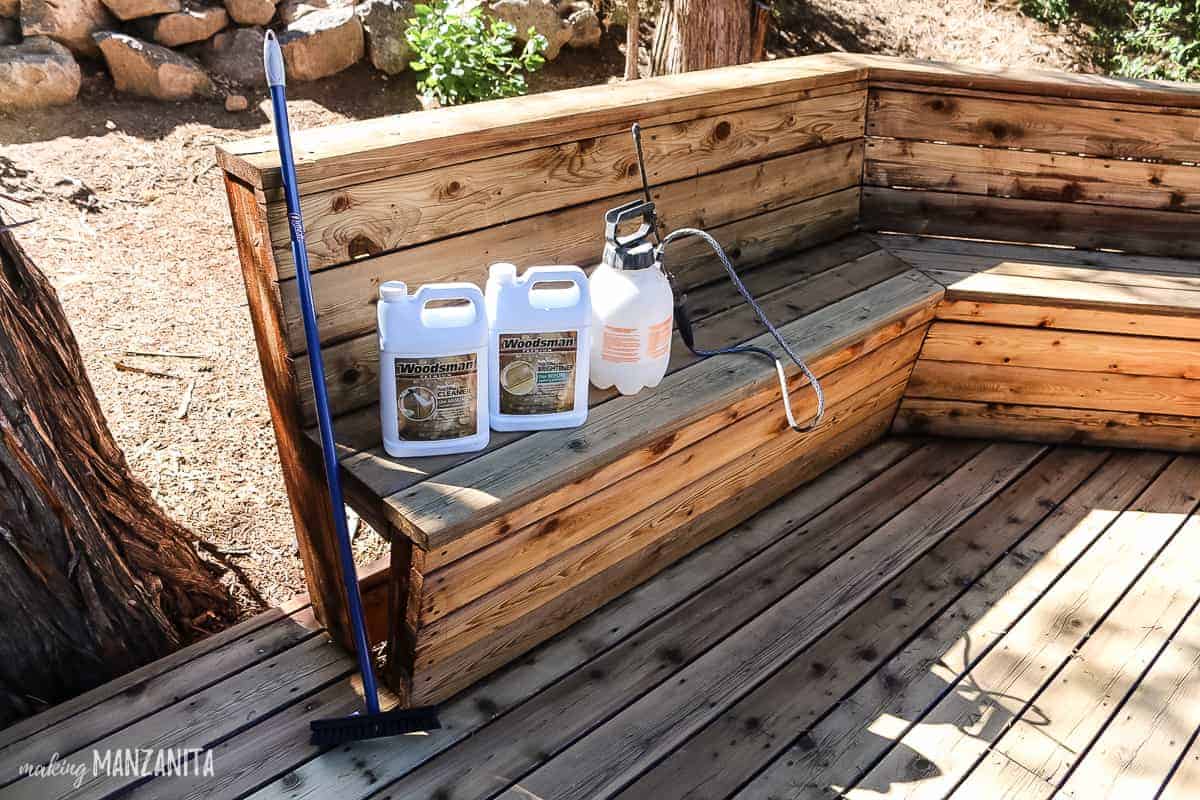
So you stripped the deck and have already cleaned it once with the pressure washer, it is time to clean the deck again! It may seem like overkill, but it is very important that your deck is very clean when you start trying to restore a deck with finish.
Find yourself a highly rated deck cleaner (we used this one), get a garden sprayer, your hose, and a scrub brush. Don’t skimp on this step and be sure to take your time. You may need to spend a lot of time and use a lot of elbow grease to really clean off any dust and growth off the neglected deck and seats.
Be sure to follow the instructions on your deck cleaner to the letter. We soaked the deck with this cleaner and then scrubbed it hard with the brush before it dried up. This process took what seemed like hours.
You’ll want to apply the deck cleaner starting from one corner, so you don’t have to walk over this cleaner.
Once you are done applying the deck cleaner, you can hose the entire deck down to get any remnants of the cleaner off of your deck.
Step 6. Use wood brightener.
If you thought that was bad enough, now you will repeat the deck cleaning process, but this time with a wood brightener! The wood brightener that we used instructions were to spray and let it sit for 10-15 min, then scrub, scrub, and scrub with a deck brush.
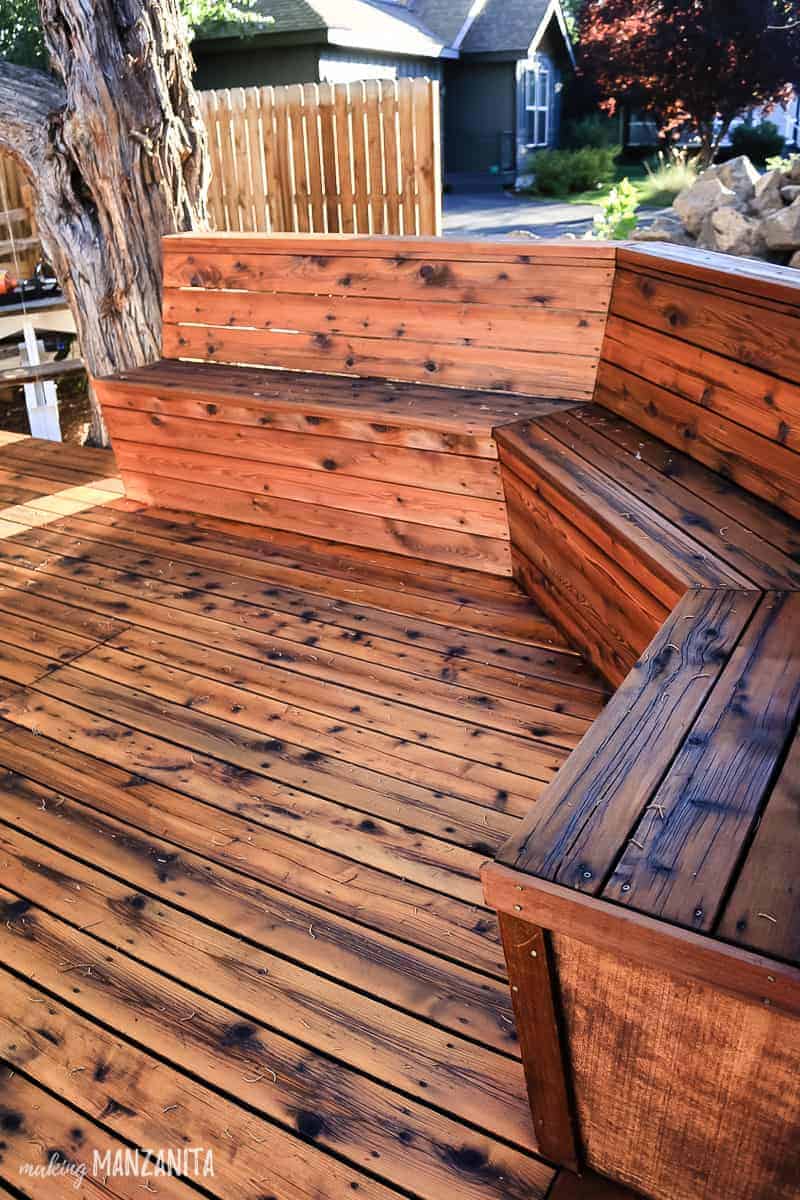
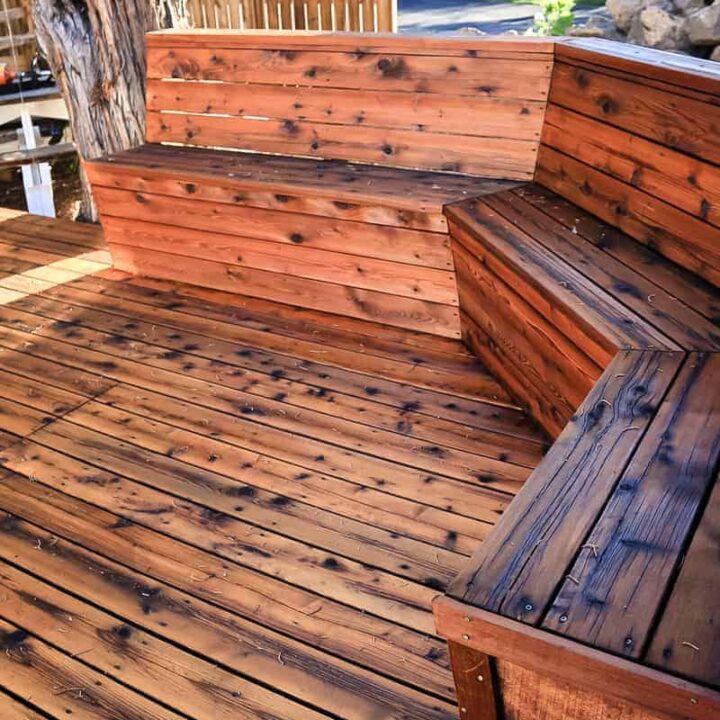
Let me tell you, the wood brightener makes a huge difference when you are trying to restore a deck and give it life again. Our wood deck looked nearly brand new when we were done, but the deck boards were just bright again. Logan kept saying they looked like we got them right off the shelf.
Step 7. Wash deck (again).
I know it seems like the 100th time, but one more rinse will get all of the cleaner and chemicals removed from the wood.
Now wait until your deck is completely dry!
Step 8. Check if deck is ready for sealer.
So how do you tell if your deck is dry enough to apply a sealer? Well, any easy way is to pour a couple of tablespoons of water in an inconspicuous part of your decking. If your deck absorbs the water within 8-10 seconds, you can get ready to stain. Anything longer than that and you should wait awhile before staining and test again until it absorbs quickly enough.
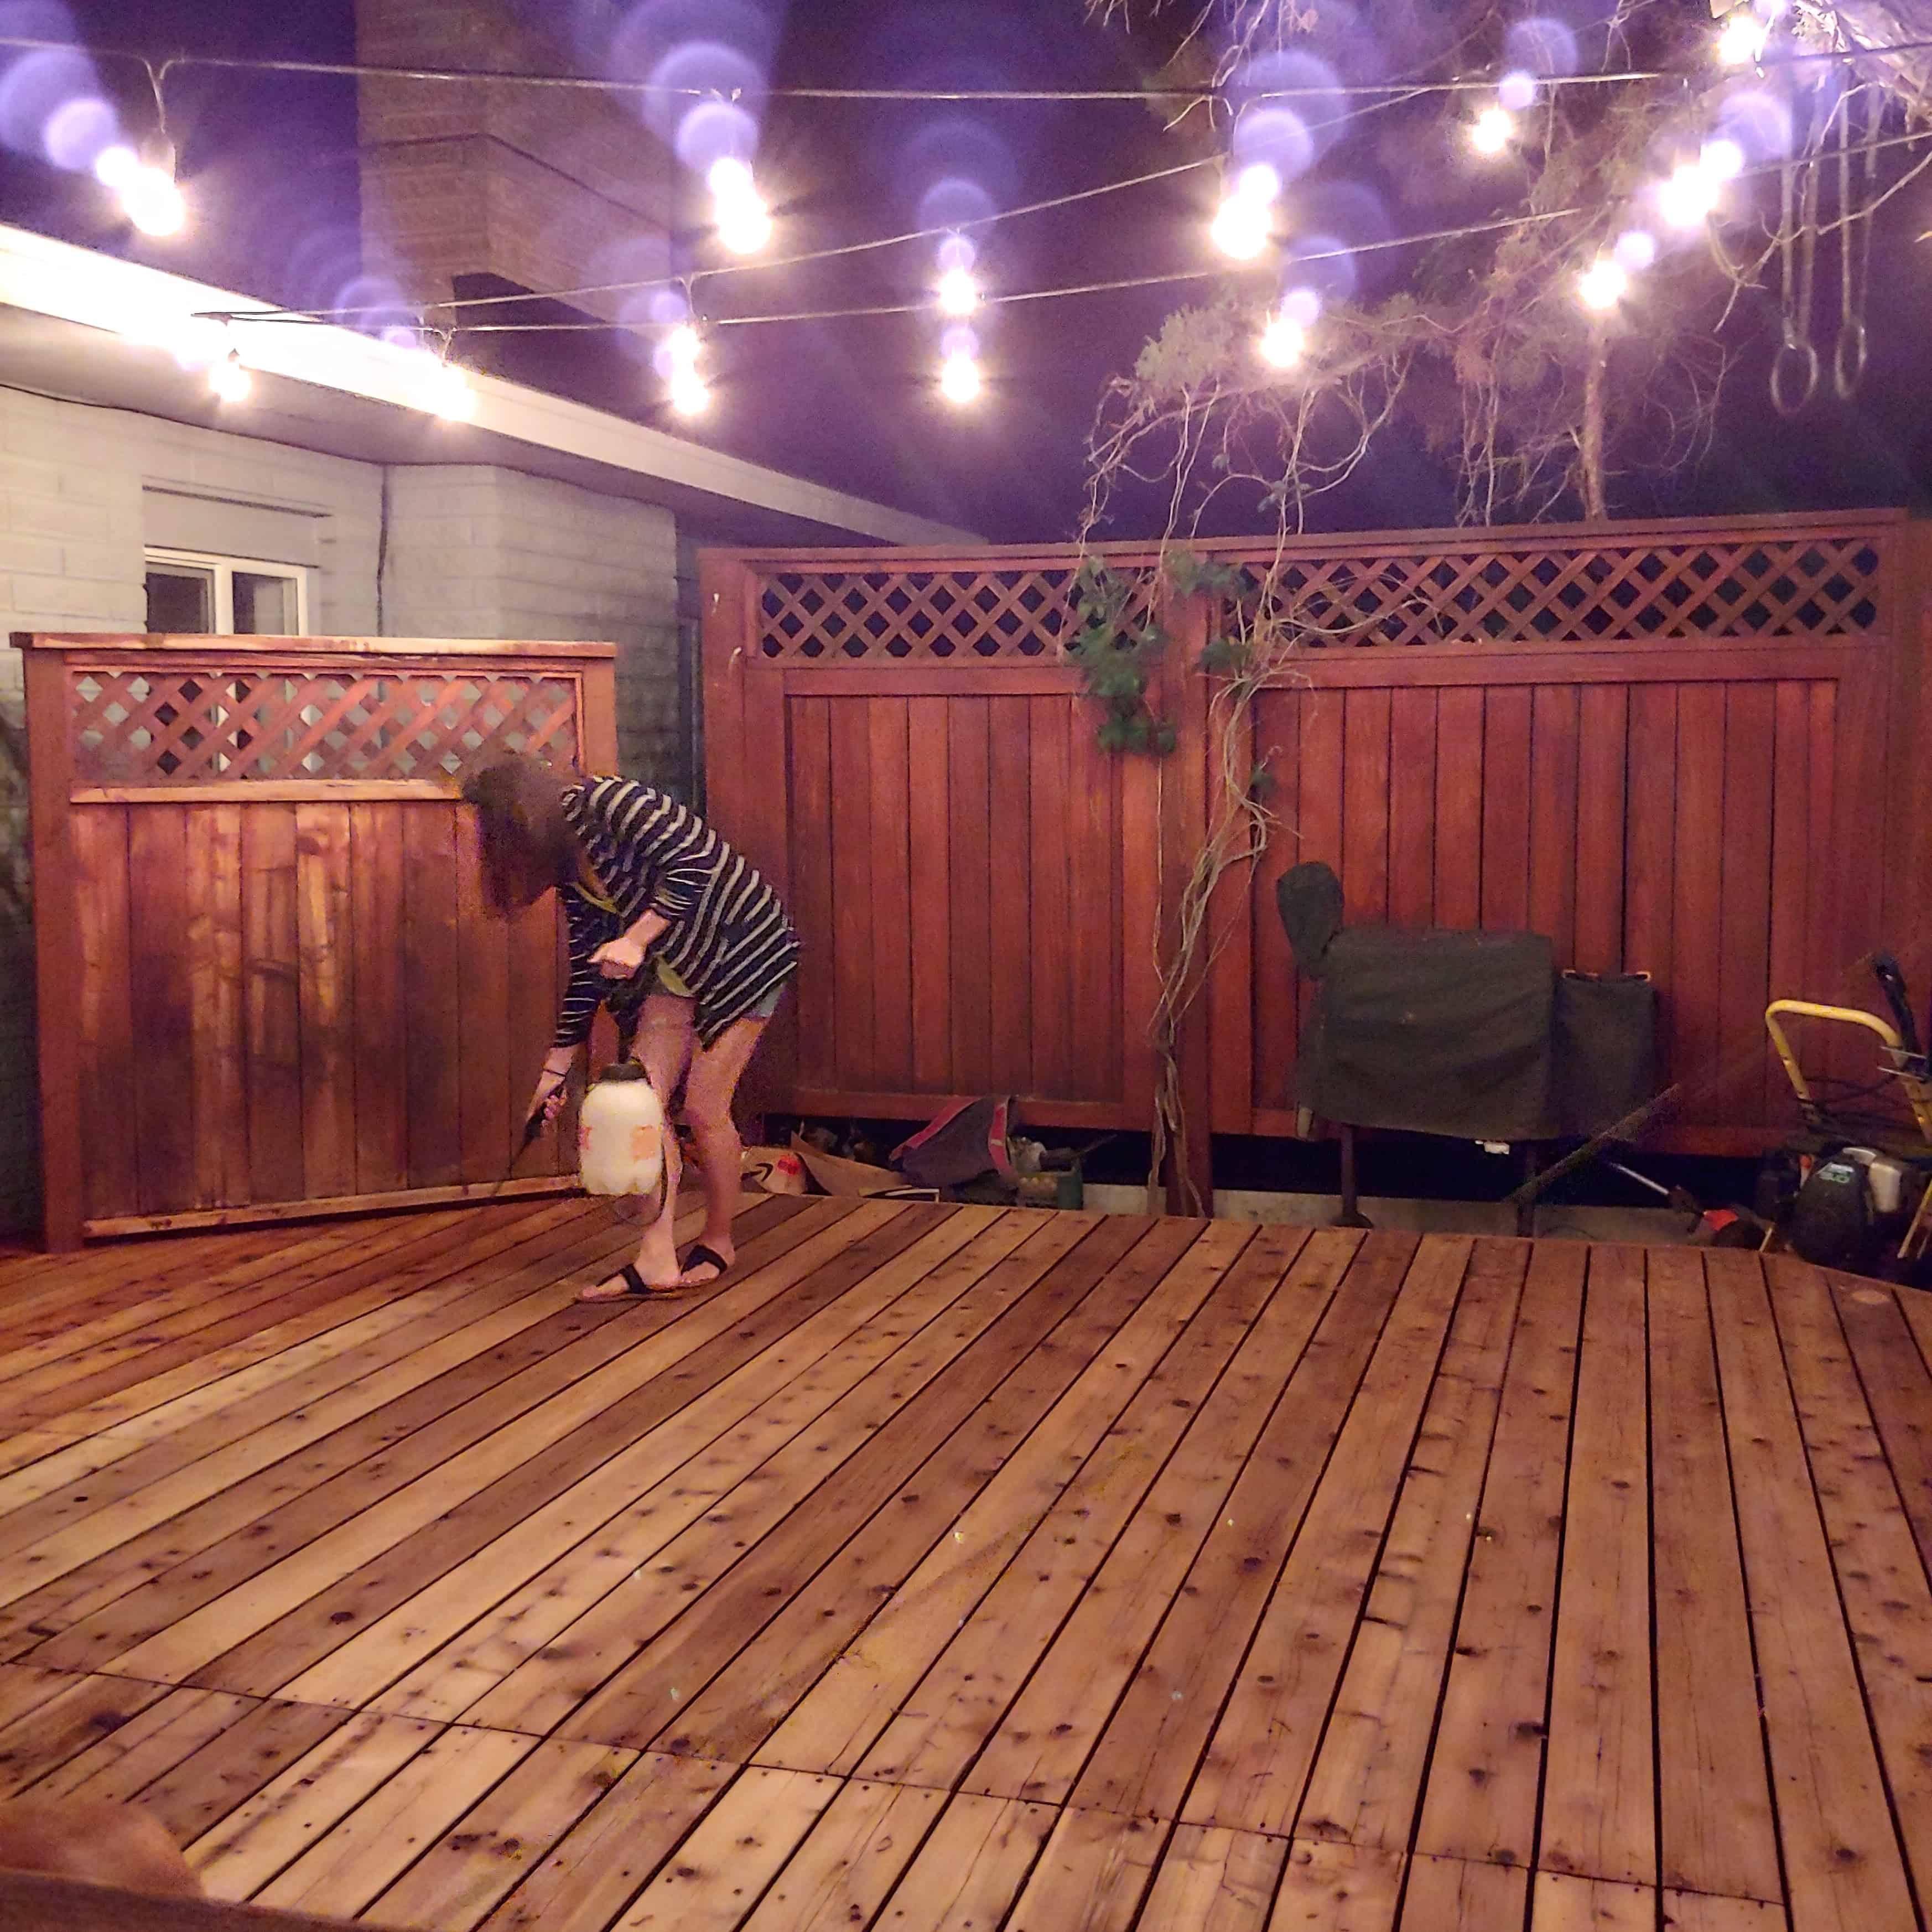
Step 9. Apply deck sealer.
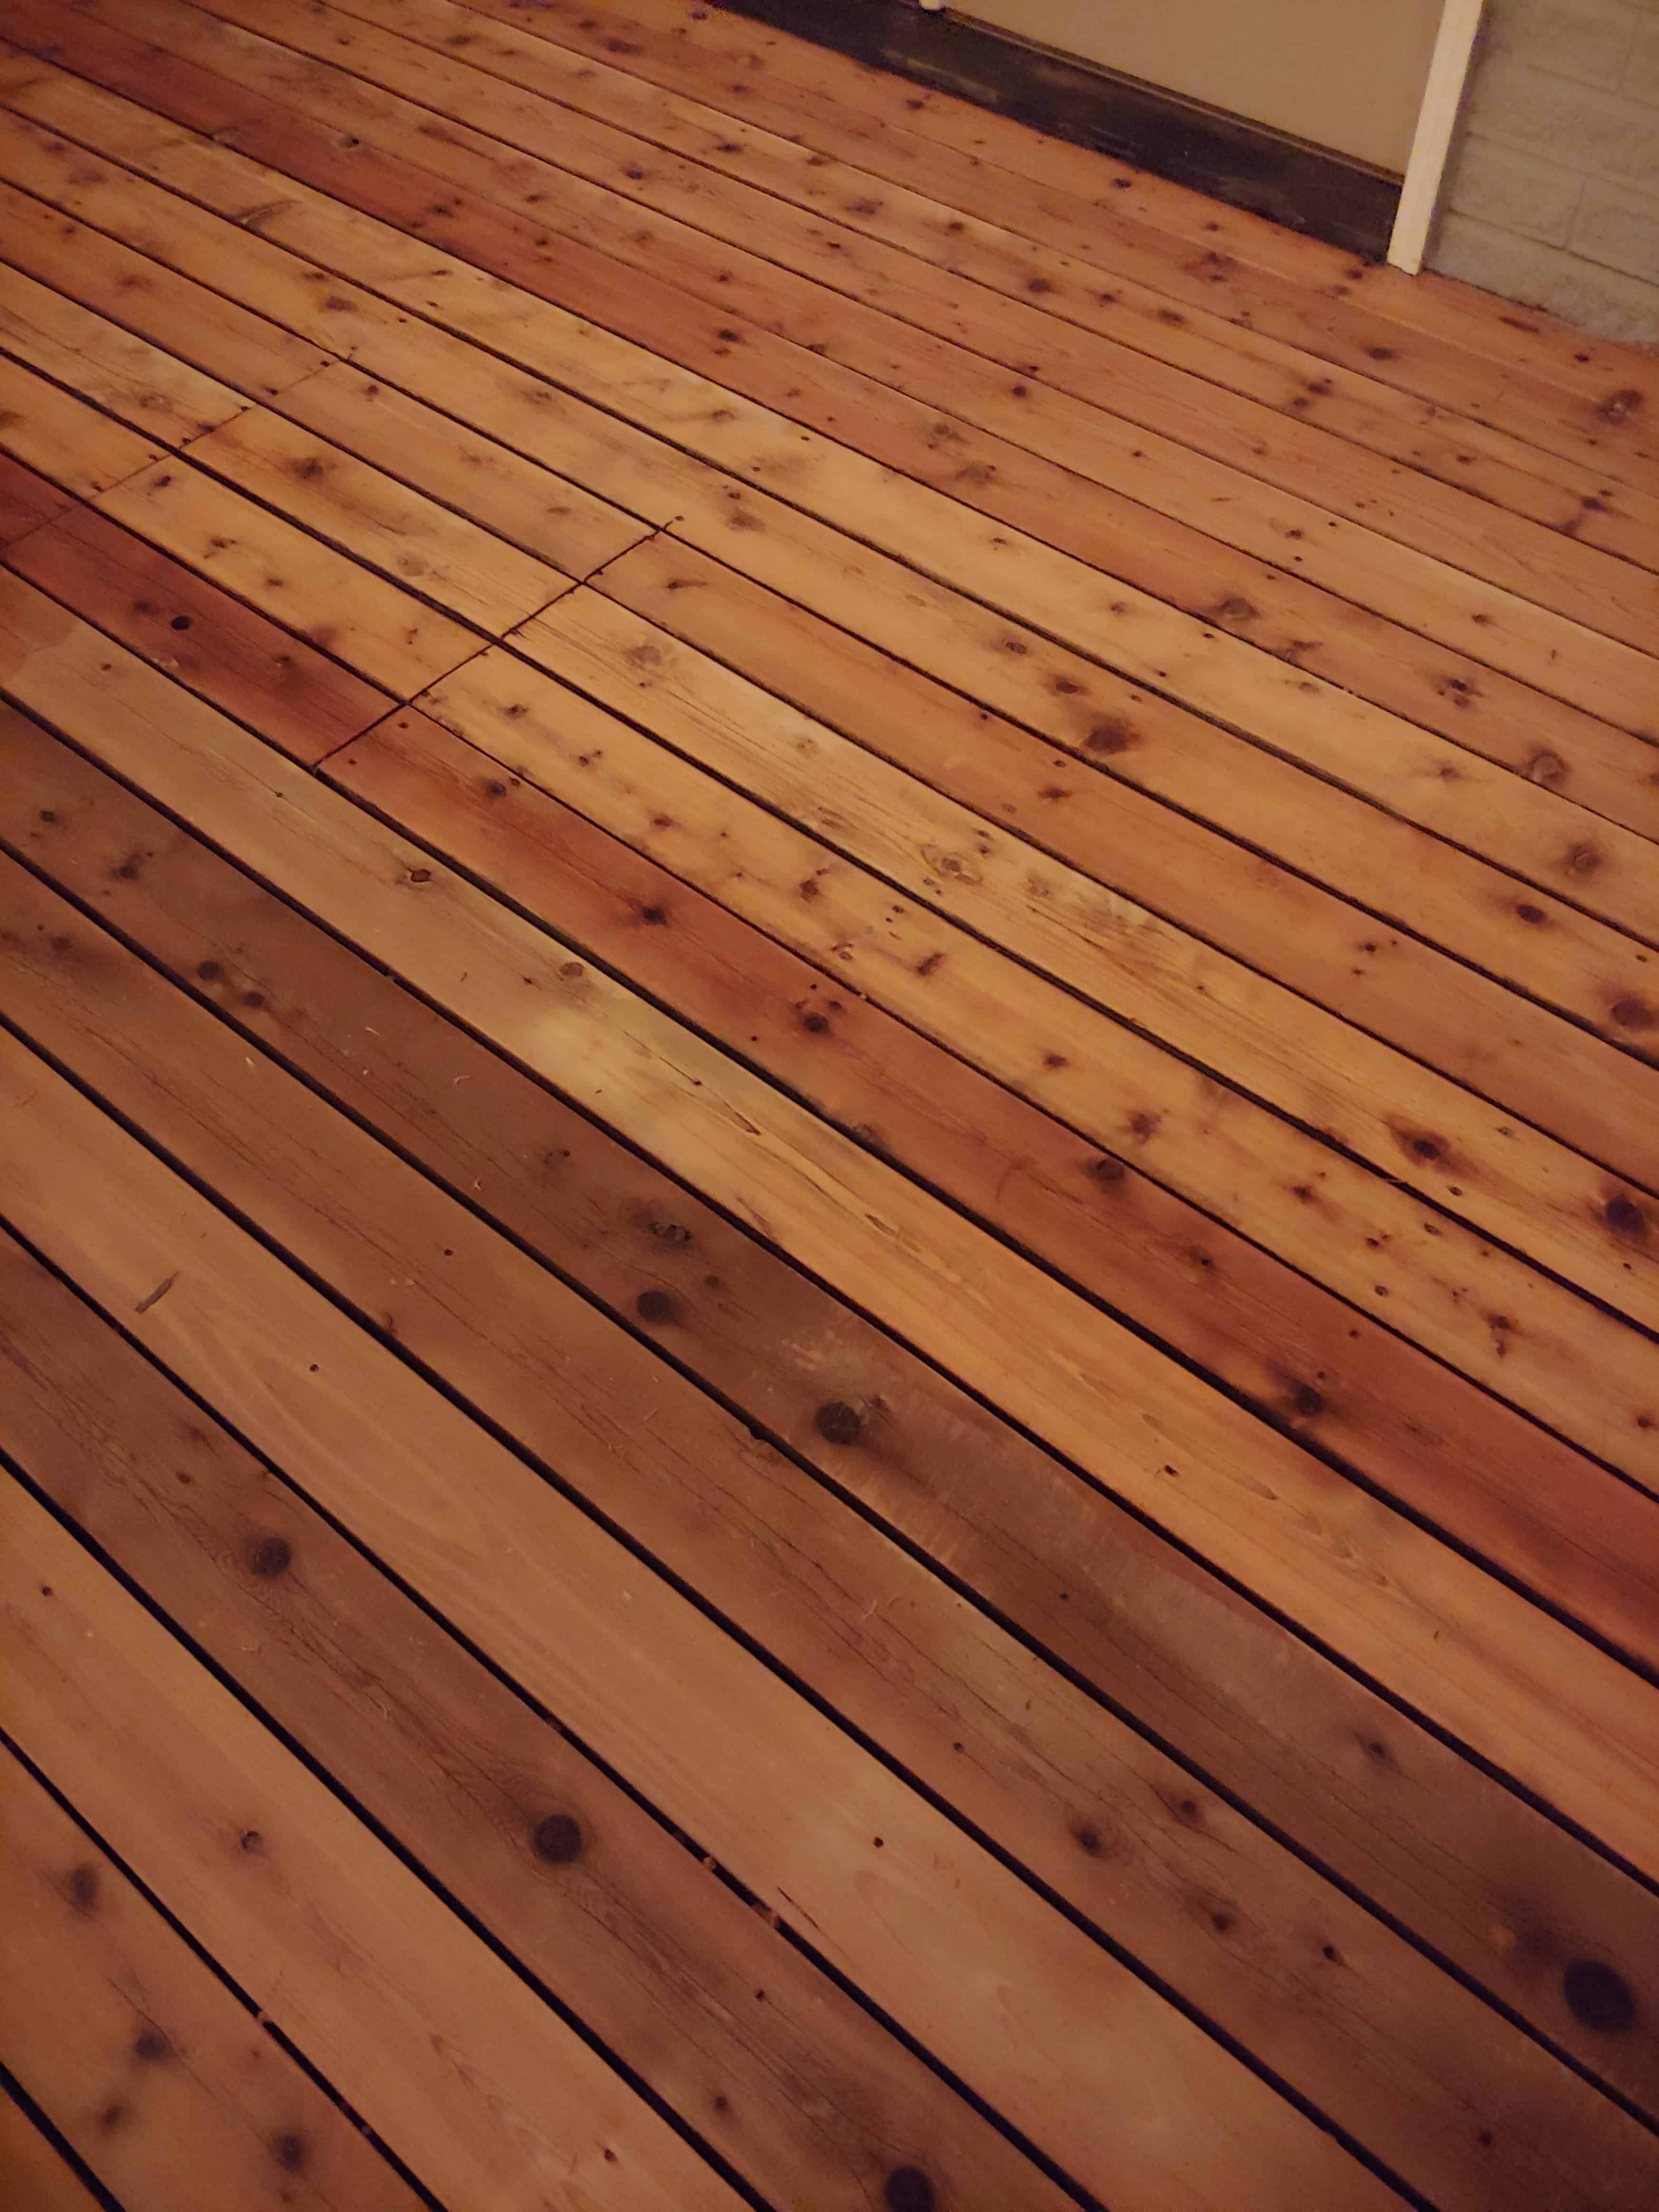
Once your deck is dry enough, you can apply the deck sealer you have chosen and get to work. We used this oil finish, a cheap oil stain brush, a deck pad, and paint tray. We started with our benches and used the brush on the spaces between the boards. Since the bench has vertical pieces, the stain wouldn’t get in between the boards like it does on the horizontal boards.
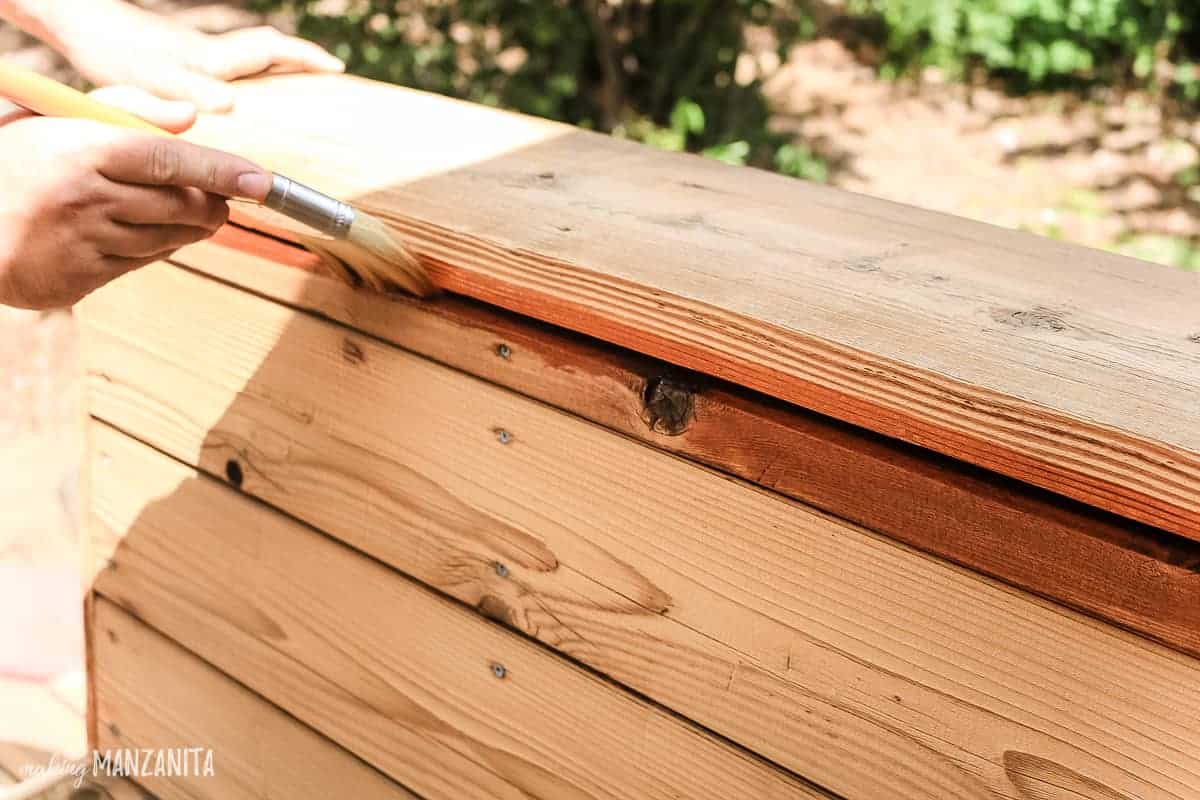
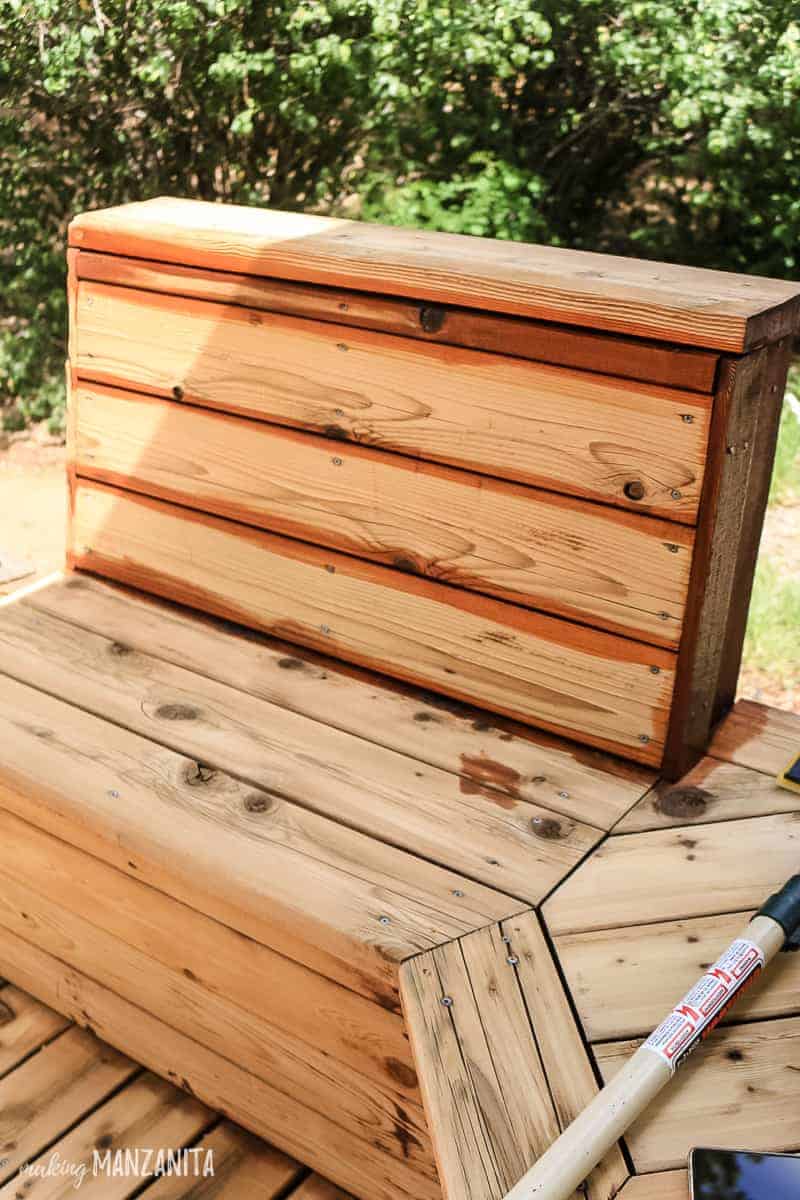
Then we finished off the deck by applying the finish with the applicator pad on a pole. Applying the deck stain was actually the simplest step and boy did it make a difference. The decking really started to come to life with the oil.
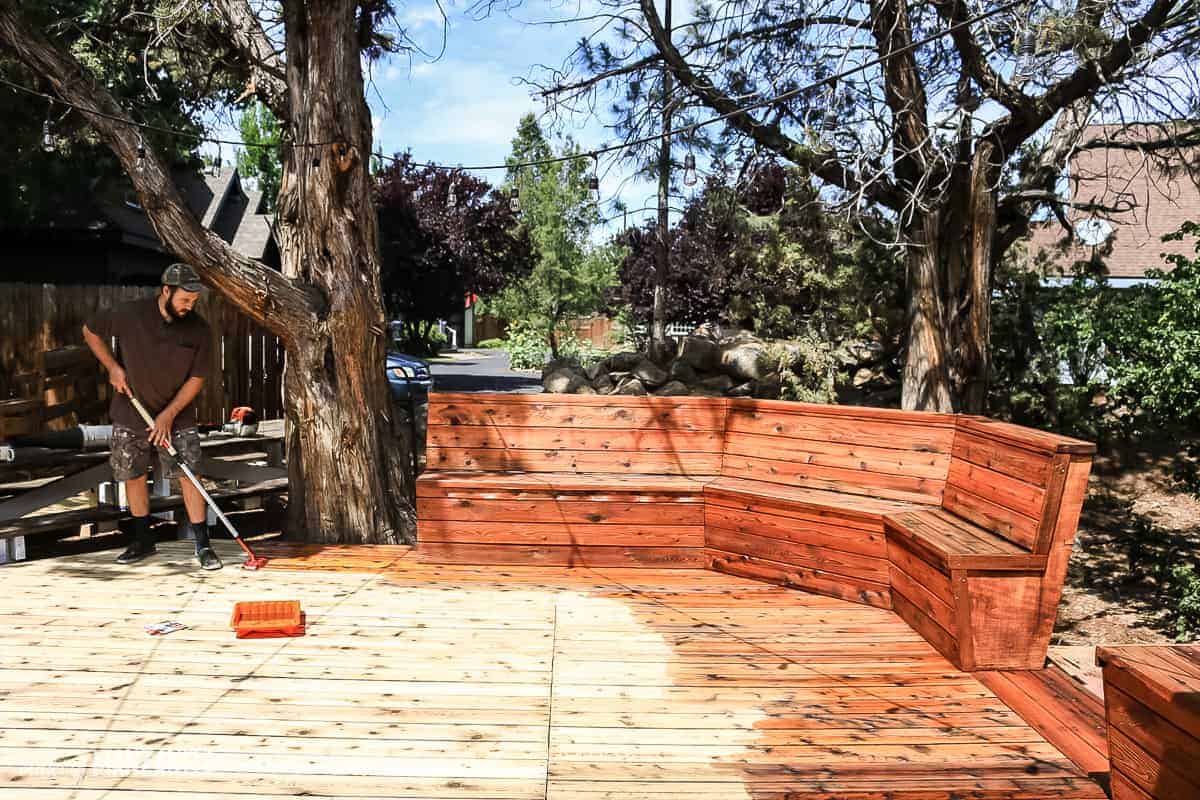
We did 2 coats.
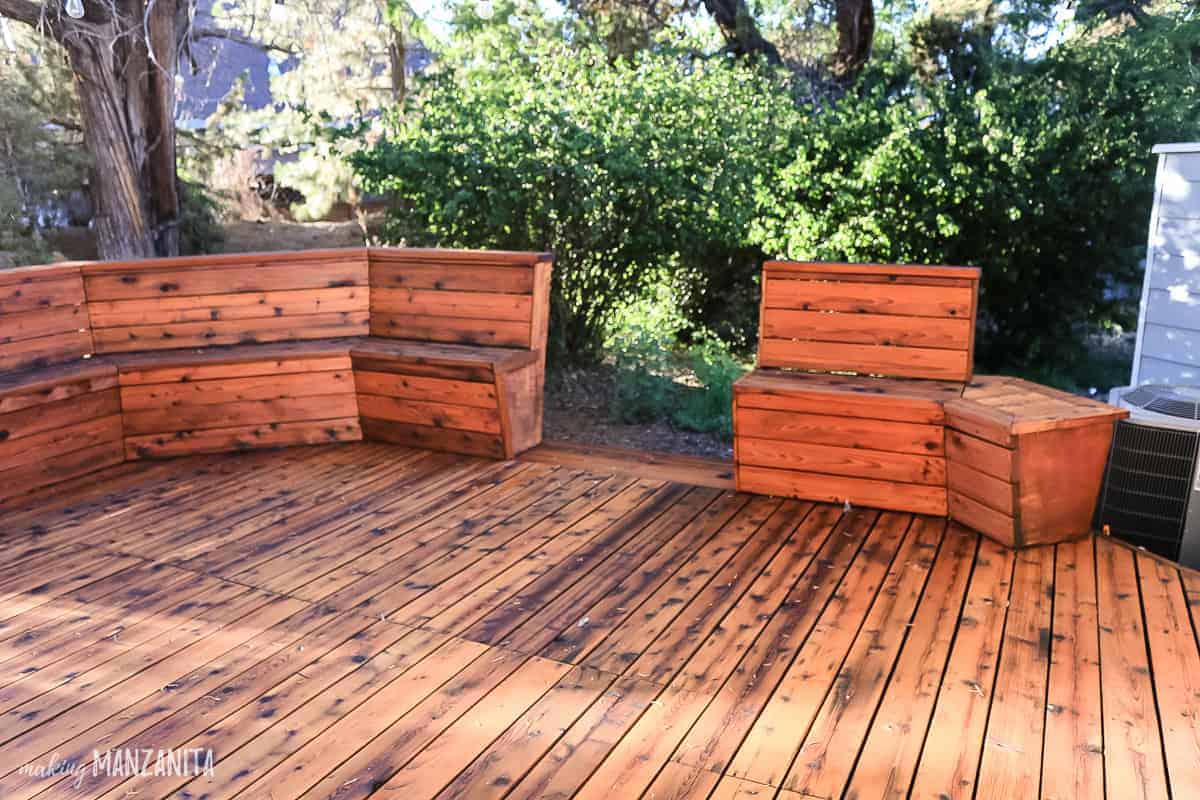

Boy, am I glad that we ended up with the wrong sander when we were doing the hardwood floors refinishing. If you need to restore a deck, now you know that it is totally a do-able DIY project if you have the time! In this post you saw exactly how to restore a deck that had been neglected for way too long. Now the key is to upkeep it, so we don’t have to completely restore it next time!
Have you used this tutorial to restore a deck?
Let me know in the comments below!!
How To Refinish a Wood Deck
If you need to restore a deck, this detailed tutorial will really help you out! We’re going to show you exactly how we restored a deck that had been neglected for way too long.
Materials
Tools
- Square buff sander with 36 & 60 grit sandpaper
- Blower
- Pressure washer
- Deck brush
- Paint tray
- Paint brush
- Applicator & pole
Instructions
- Clean off wood deck.
- Tighten screws on deck and replace boards.
- Sand deck (if necessary).
- Wash deck.
- Use deck cleaner.
- Use wood brightener.
- Wash deck (again).
- Check if deck is ready for sealer.
- Apply deck sealer.


Hi! Did the sanding make a big difference in the project?
Yes, absolutely. Our deck was very neglected and definitely need to be sanded before anything else. From here on out, we will continue to maintain the deck to hopefully avoid the need to sand the deck again (reapplying the oil finish annually).
There is a big difference in type of wood-whether green treated or cedar. A power washer actually pushes the dirt and mold/mildew deeper into the grain of the wood and may damage older wood. Wood experts do not recommend power washers, esp for cedar. Cedar never needs staining or sealing but some people prefer the stained look. It does however need annual cleaning with a simple household mixture: 1/4 C Dawn dish soap, 4 C outdoor bleach, 1 gal warm water in a garden sprayer. Leave on 5-10 min when shady, scrub extra dirty areas and hose off. Works well for most anything on your exterior.
Thanks for the tips!
Great job ! Looks really cool and clean . Looks really good after sanding. Keep it up
Thank you for an easy to understand tutorial :)) When the boards are loose and I can”t get to the nail, do I just put a deck screw in a nearby spot? Or do I need to replace nail with a screw in the same spot? Thank you :))
You should be able to secure it with a new screw in a different spot. Maybe two if needed 🙂 Just be sure that the screw is lined up so that it connects with the support joist underneath the deck.
I understood the “just” of it, but the fact that you had the huge sander…well it gives me hope after fighting with this deck at every turn. I swear the world did not want me to restore my deck. Your video has resecured my position in getting my deck finally officially started! One question though, did you use a orbital sander or sand by hand on the vertical wood and seats (all the hard to get places for the huge sander)?
No those weren’t in bad shape so we just left them! Good luck. 🙂
This gives me so much hope for my deck and I’m so glad I found it! I was about ready to give up and just tear it down or call in a professional deck cleaning and refinishing service, so I’m really happy that I found your experience that it can in fact be done with some hard work. I will definitely following the steps you took and crossing my fingers that it works like it should. Thanks for sharing!