Stencils for Wood Signs: How To Prevent Bleeding Under Stencil

Do you have trouble with your stencils for wood bleeding when you are making DIY wood signs? You try your darnest to do multiple light coats of paint brushing away from the stencil edges, but there is still paint bleeding underneath your stencils, right?! It’s even worse when you are using rough, reclaimed wood – like pallet boards.
Sign-making was turning into frustration rather than a fun hobby…but then I heard about this game changin’ sign-making hack. This hack on how to prevent stencil bleeding when you are making wood signs will seriously change the way you DIY signs.
Table of Contents
This how to stencil on wood post contains affiliate links, but nothing that I wouldn’t wholeheartedly recommend anyway! Read my full disclosure here.
My Sign-Making Experience Before This Hack
So…just so you can get the full effect of how amazing this sign-making hack really is, here’s a look at how my normal sign-making process goes.
You cut the stencil out with your Cameo or Cricut. I always use the adhesive shelf liner (aka contact paper) from the Dollar Tree.
Then you put it on the wood….you push real hard to make sure it’s adhered and then you go to town painting.
You can try light coats. You can try letting the brush pounce on top of the stencil. You can try brushing away from the stencil edge.
But if you’re anything like me, I bet that you’ll still have bleeding under your stencils.
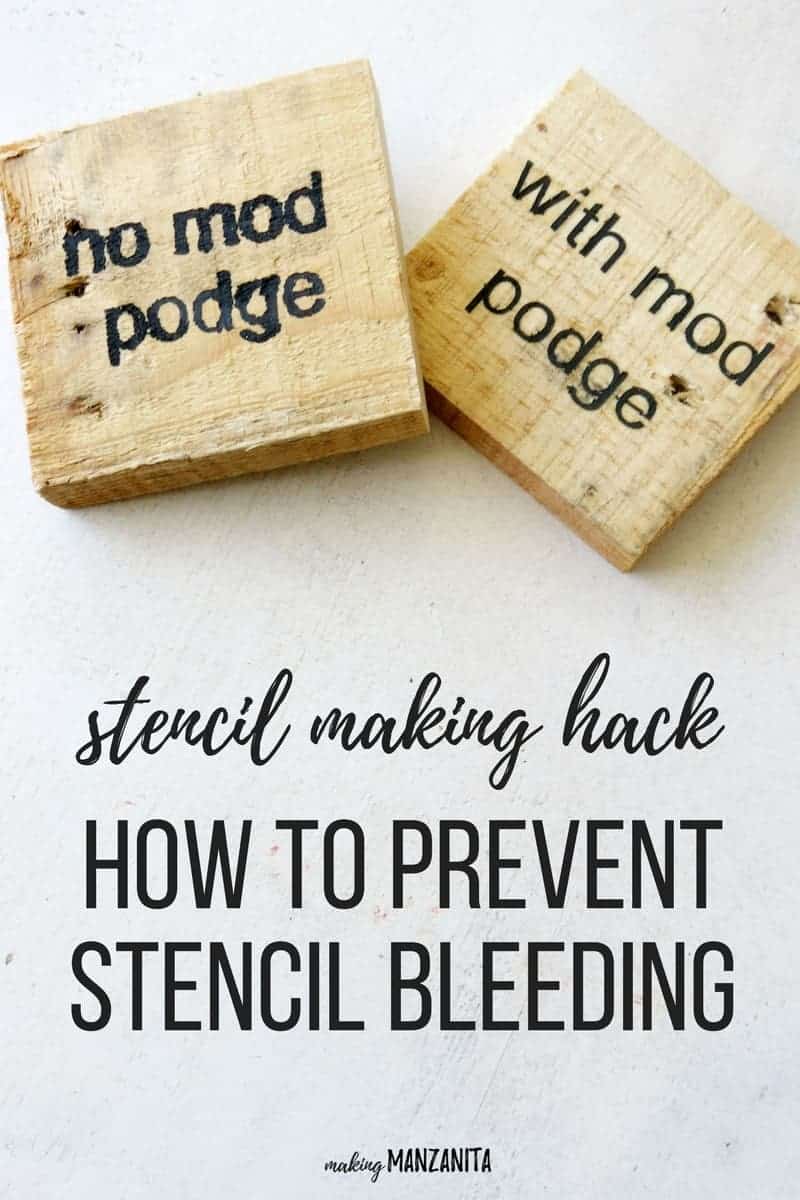
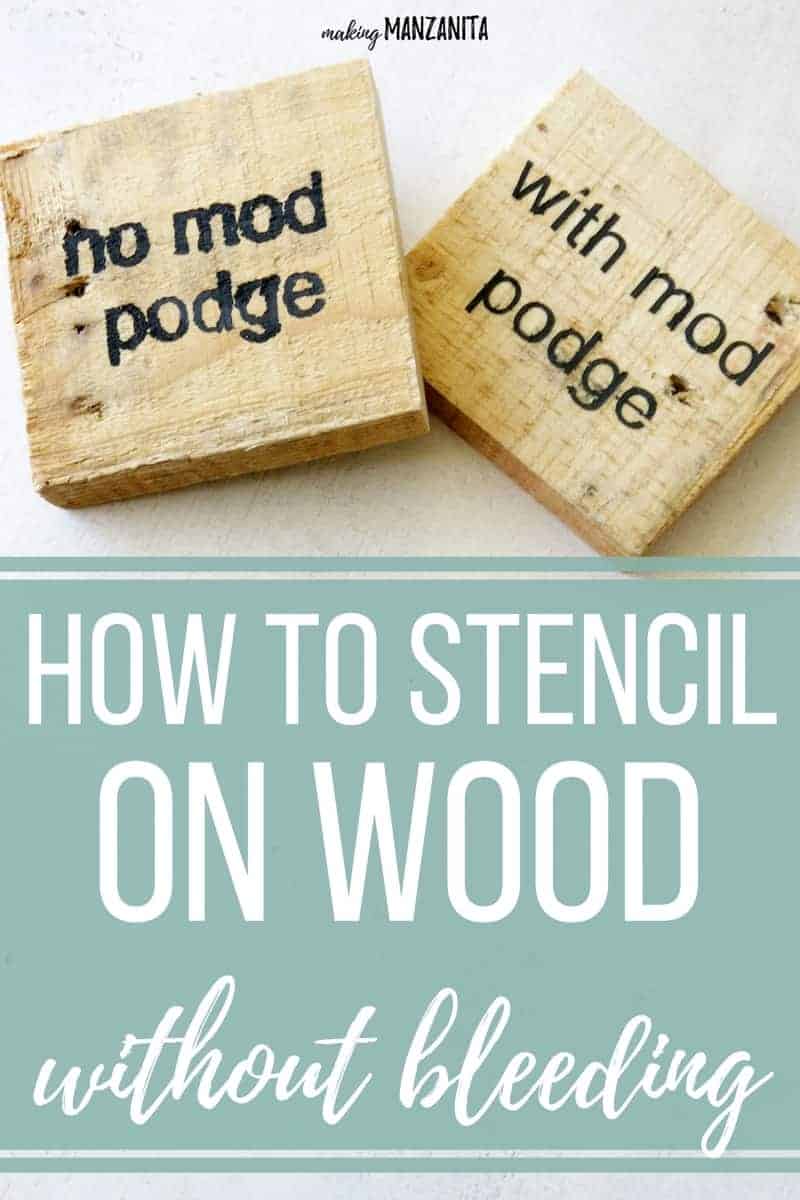
Will you just look at how bad this one was!?
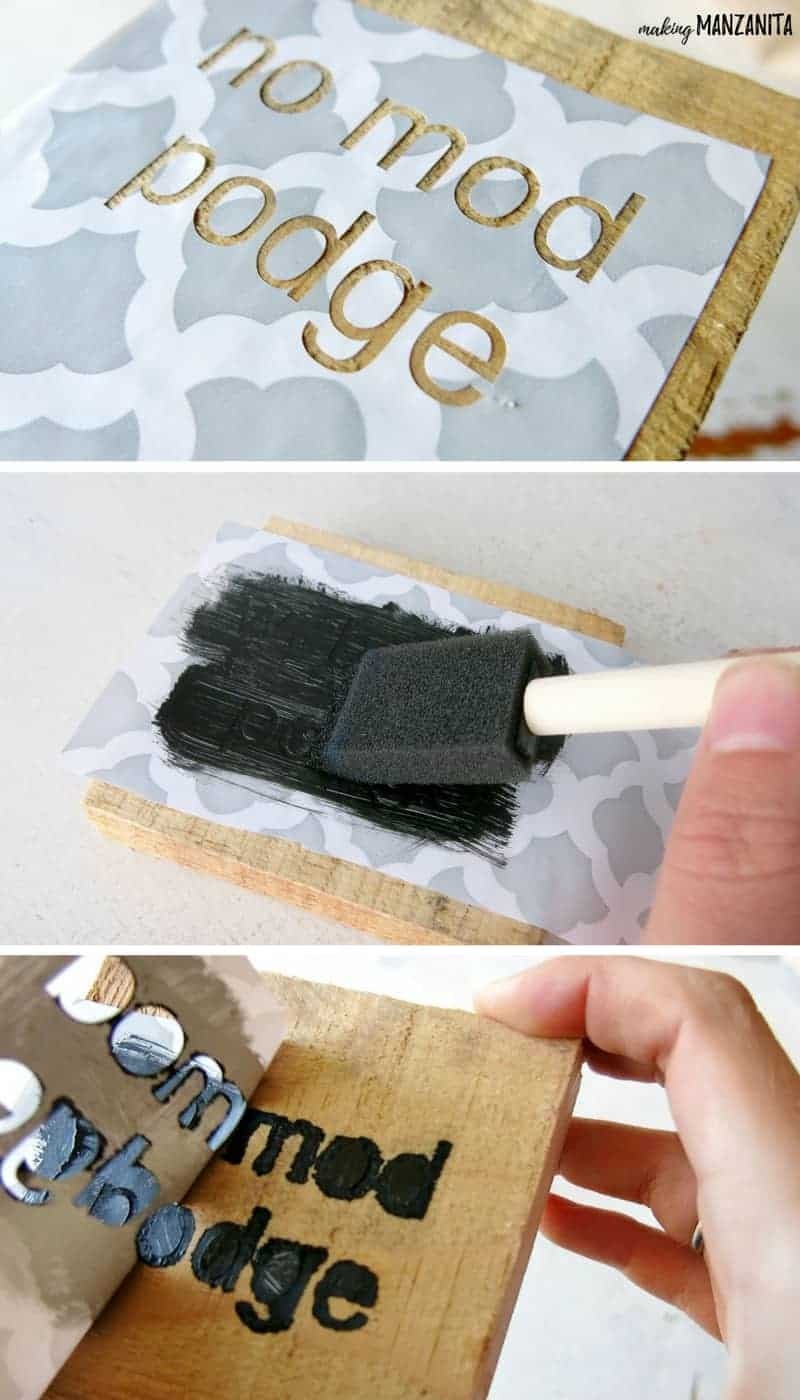
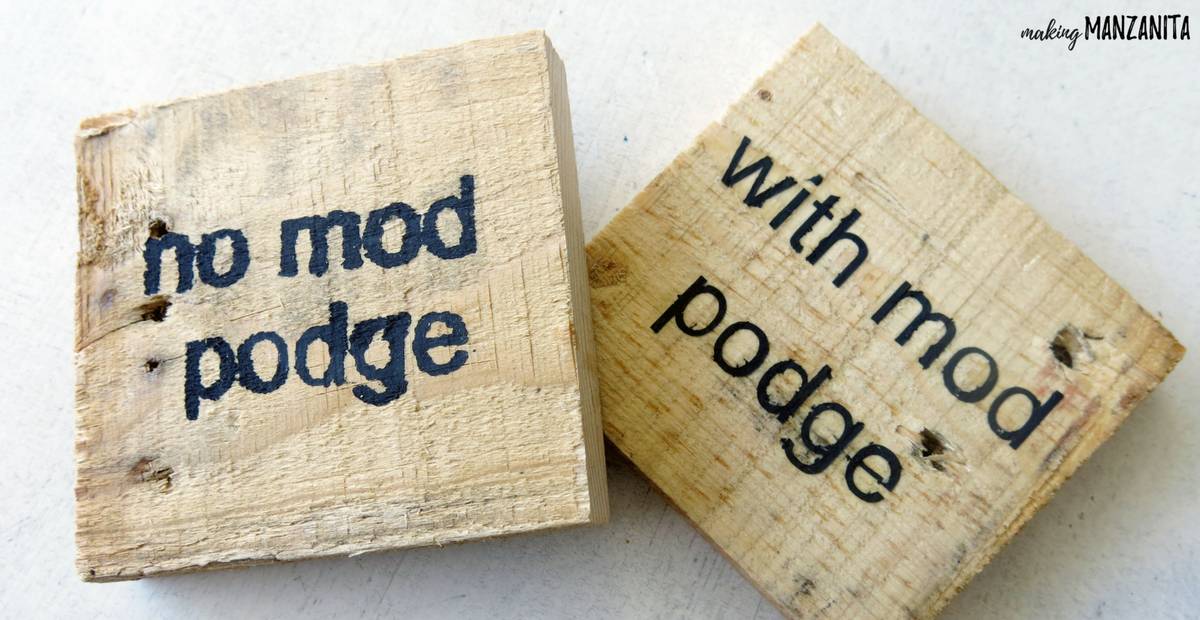
This was on a piece of unsanded scrap pallet wood. I used the exact same type of wood for the 2nd sign when I used the sign-making hack.
It’s just hideous. Keep in mind this is a tiny piece of wood and very small letters. Something’s gotta change though… this just ain’t working. I had to figure out how to prevent stencil bleeding.
A few months ago during one of my Hometalk Live Videos, I was making this reclaimed wood sign. I was sharing my typical sign making tips to prevent bleeding…like using a foam brush and doing light coats of paint..always brushing away from the edge of the stencil, rather than towards it….and if all else fails, giving it a light sanding after you’re done and call it “rustic”.
That’s when one of the Hometalk viewers mentioned how she uses Mod Podge to seal her stencils before painting.
I saw the comment later that night when I was scrolling through the thousands of comments and answering questions. I was intrigued.
How have I never heard of this? So I followed up with her to make sure I understood it right…and then I gave it a try.
It was when I was making these reclaimed wood bottle openers that I first tried this method. I was shocked. Like literally…jaw to the floor flabbergasted.
Since I know you ain’t got time to scroll through all of the many comments in my Hometalk videos…I decided to dedicate an entire post just to this sign-making hack. This is just too good not to share.
Everyone needs to know how to prevent stencil bleeding. Because if you know how to prevent bleeding on your wood sign stencils, you’ll probably DIY more wood signs. And we all know the world needs more wood signs.
Related Posts: Wood Sign & Stencils for Wood Tutorials
How to Prevent Stencil Bleeding: Step-by-Step
Step 1. Cut stencil.
Using a Silhouette Cameo cutter (or another type of paper cutter), cut out your stencil.
I always use adhesive shelf liner from the Dollar Tree to create my stencils for wood. It works great and it’s so cheap!
Step 2. Peel & attach stencil.
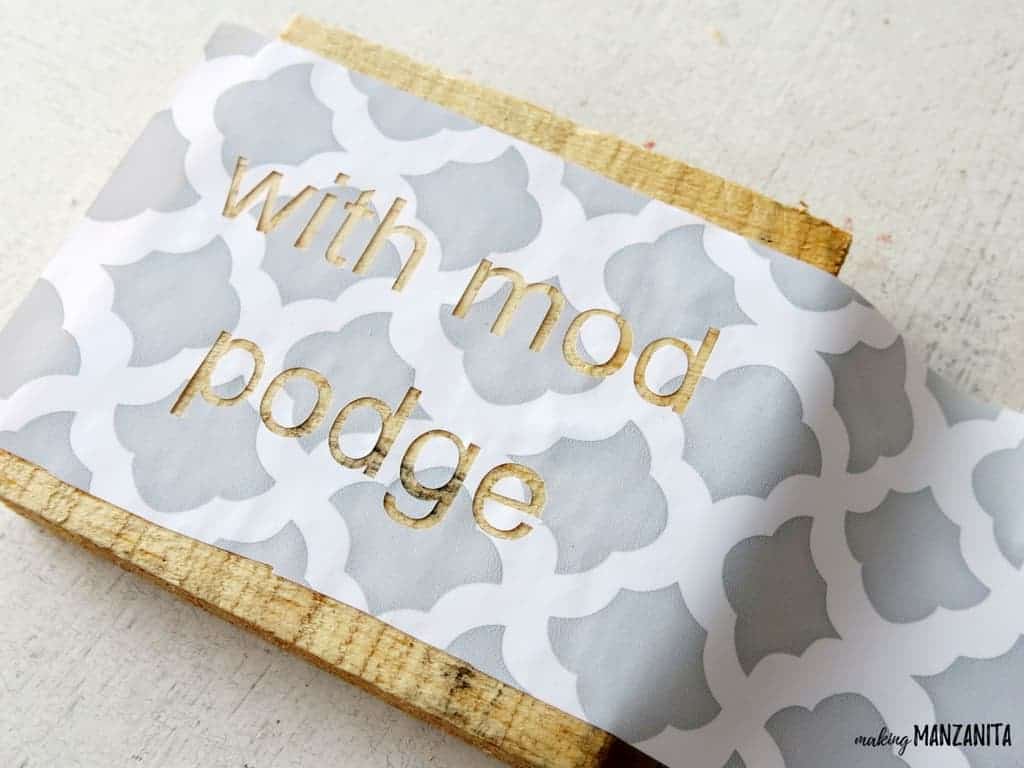
After it is cut, peel off your stencil and press onto the wood. Press hard to make sure it sticks.
Step 3. Seal stencil. *** THIS IS THE MAGIC STEP ***
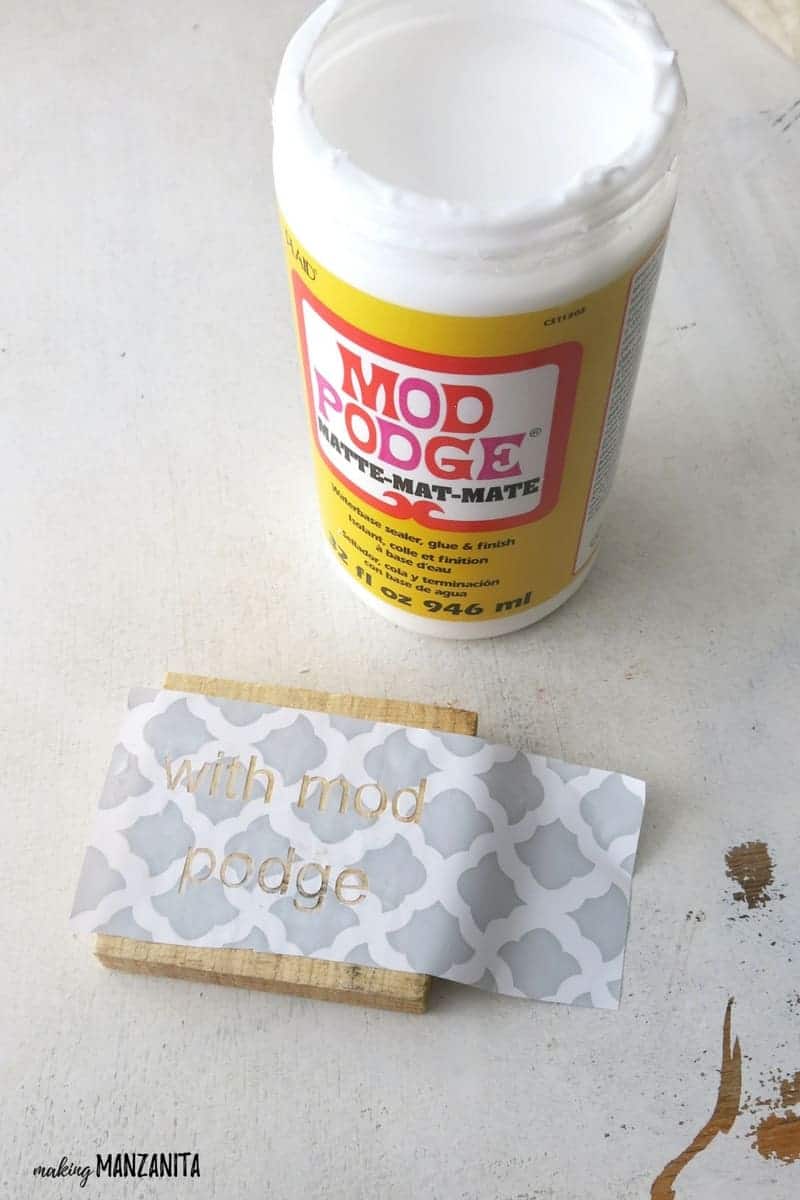
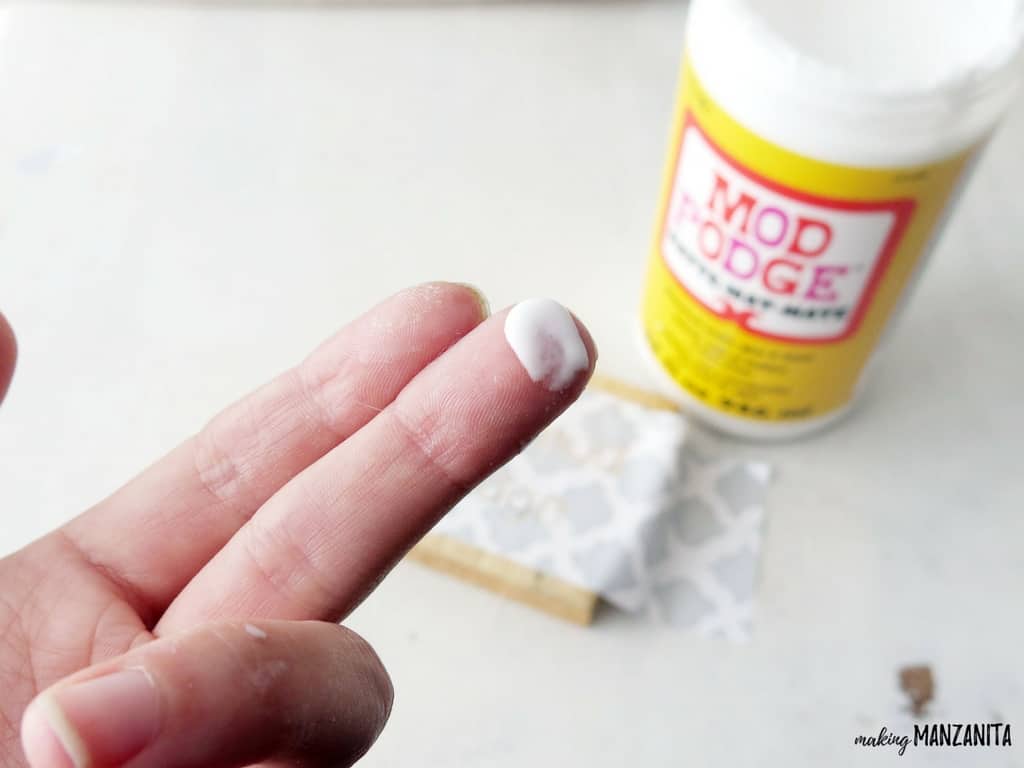
Now…this, my friends, is where the magic happens. Take your Mod Podge and just rub is over the stencil in a light coat.
I just use my finger for this, but you can use a foam brush if you’d like.
This seals the edges of the stencil so that the paint won’t bleed under it.
You only need to do one coat of the Mod Podge. Wait for it to dry completely before moving on to the next step (15 minutes or so).
Step 4. Paint over stencil.
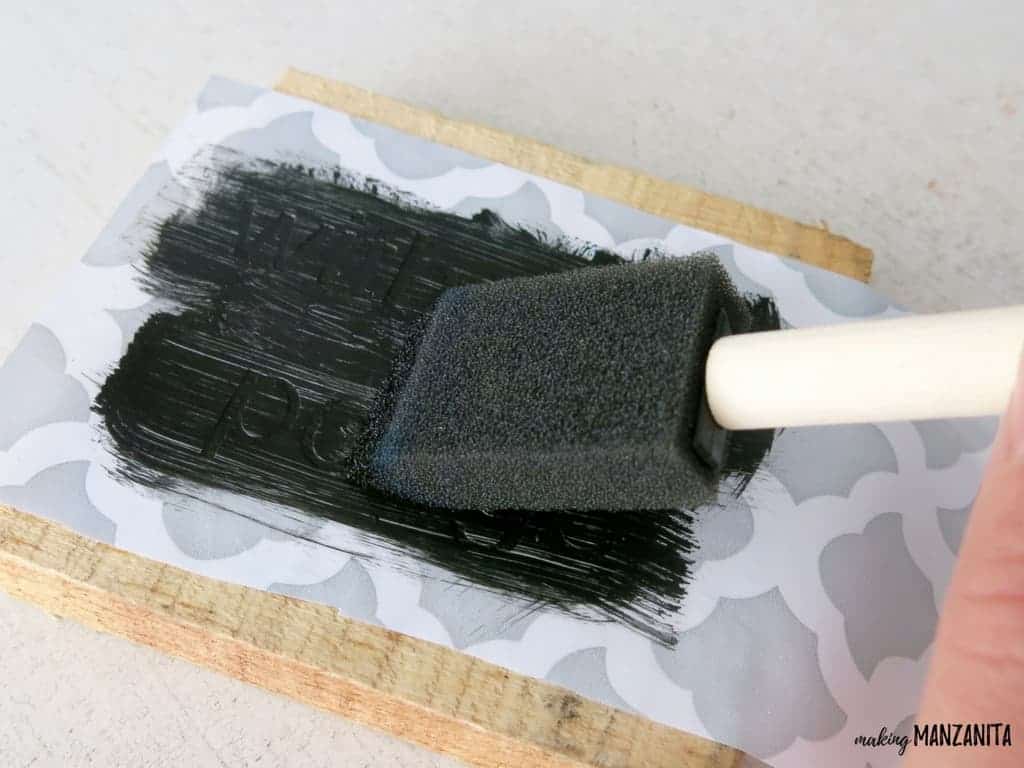
Next, you just paint over the sealed stencil. I typically use acrylic craft paint and do 2-3 of light coats of paint.
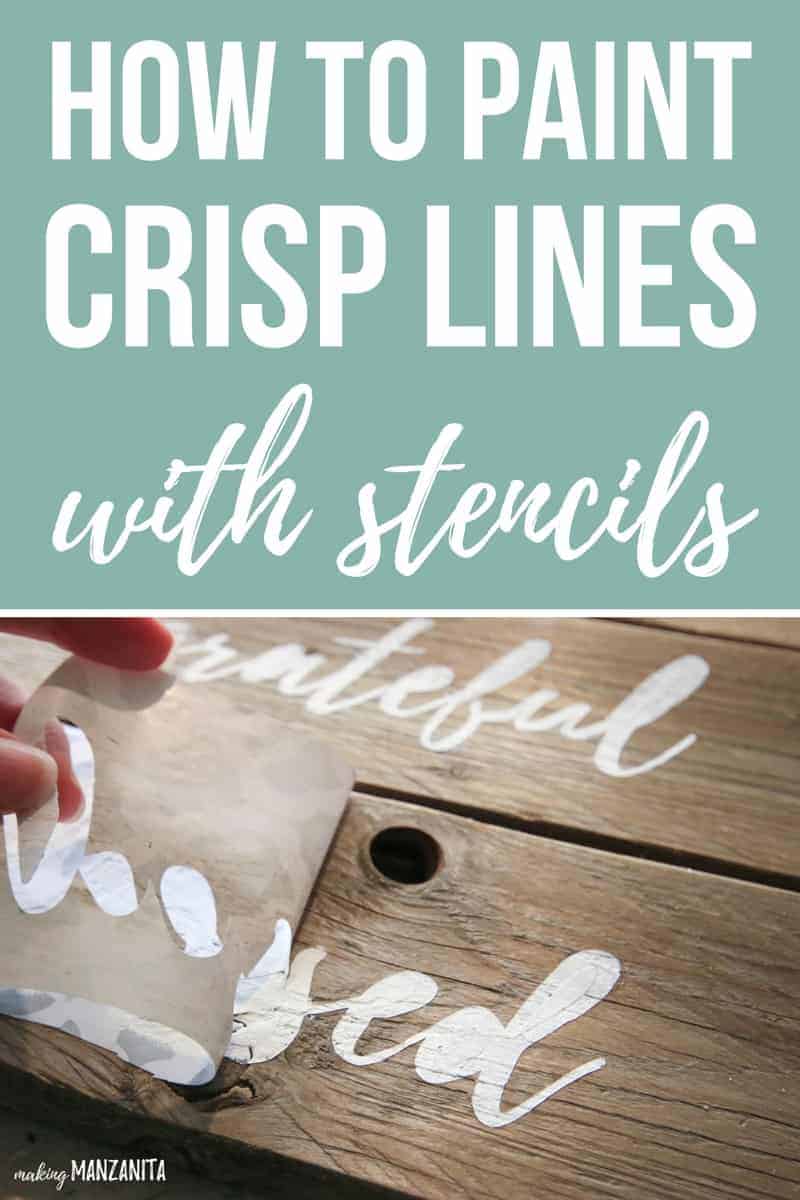
Step 5. Peel off the stencil and be amazed at the crisp lines.
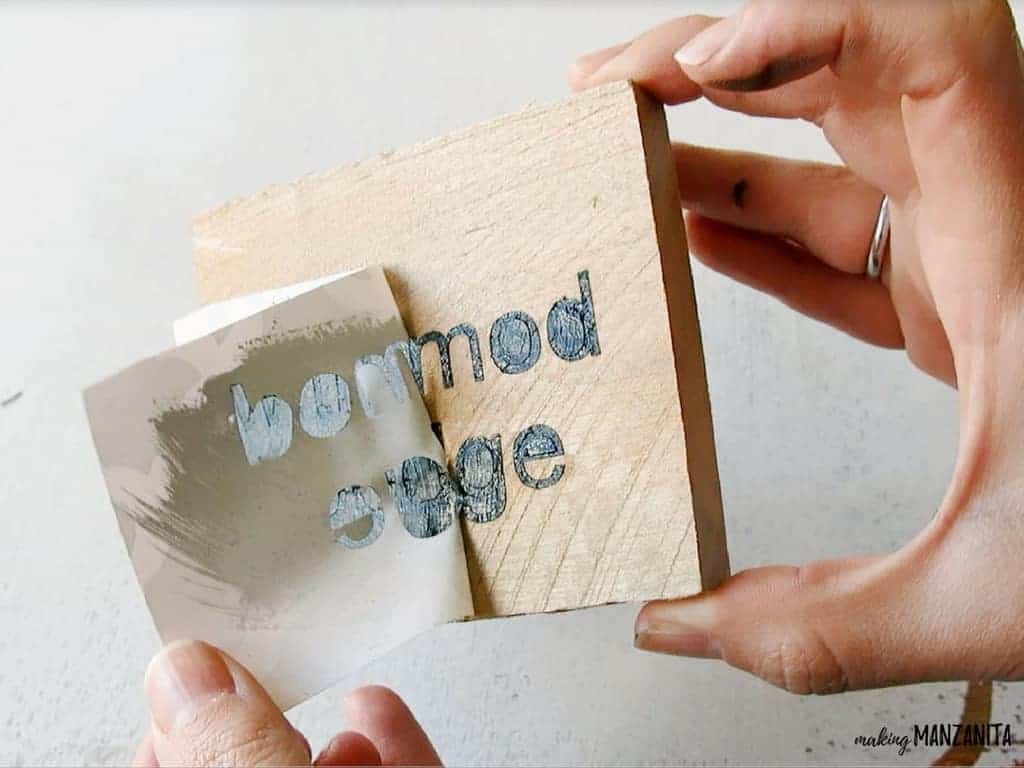
After your paint is dry to the touch, you can remove the stencil by peeling at one of the edges.
Will you just look at those crisp lines?! Are you as shocked as I am?
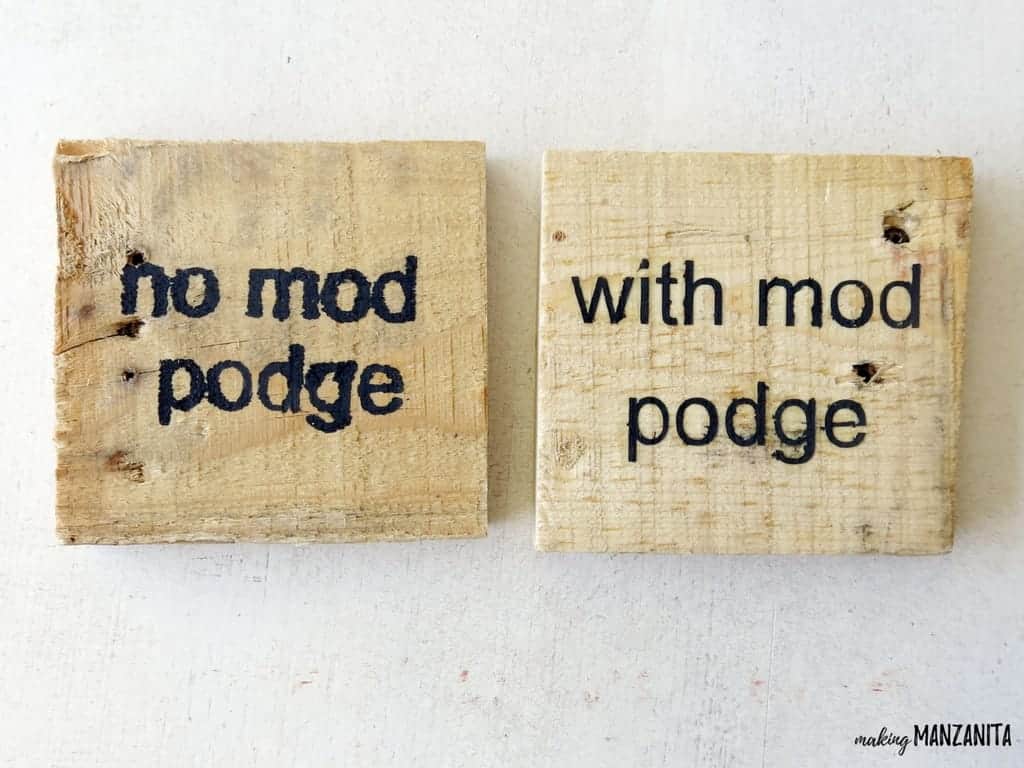
See…I told ya so! Making professional-looking wood signs doesn’t have to be frustrating!
You can get crisp stencil lines using this easy sign-making hack with Mod Podge. All you have to do is put a thin layer of Mod Podge over your stencils for wood before you paint!
This hack on how to prevent stencil bleeding when you are making wood signs is going to change the way you make signs, am I right?
This whole sign making hack is shown way better in a video format, so don’t forget to watch this short video to see how it’s done!
If you love making your own wood signs, be sure to check out these DIY sign tutorials using stencils for wood:


Thanks for these tips and for avoiding bleeding when using stencils on wood signs like using Mod Podge or any similar sealant before painting. I really liked the homemade rustic feel from having these sorts of signs.
Hi do you rub the mod podge over the whole stencil wording?
You can use a foam paint brush or just a finger to smooth over the stencil.
I tried this method on three different projects and lettering on all 3 peeled up and ruined my signs. Big bust for me. ?
Aw dang it! Sorry, this method didn’t work for you. It has worked for me over and over again. 🙁
Do you know if this method works with plastic stencils as well?
I’ve heard from readers that it doesn’t work great with plastic.
Can I use this method on concrete, bricks
I’ve only tried this on wood signs, so I’m unsure. Because concrete and bricks are porous I would test it in a small area first to make sure the Mod Podge doesn’t change the color. Let us know if you give it a try.
What about stencils that don’t have a sticky back and are made out of a PET material?
Sorry I haven’t used this hack on those type of stencils, but maybe someone here in the comments will chime in to see if they have any tips!
Thank you for this great hack, I will definitely be trying it out!! Would this work for plastic stencils? Or is there a tip you recommend so the paint will not bleed under the plastic stencils? Thank you!!
IM GOING TO TRY THIS! I REALLY HOPE IT WORKS BECAUSE I WANT TO STENCIL BUT EVERYTIME IM DISAPPOINTED.
IM GOING TO TRY THIS! I REALLY HOPE IT WORKS BECAUSE I WANT TO STENCIL BUT EVERYTIME IM DISAPPOINTED.