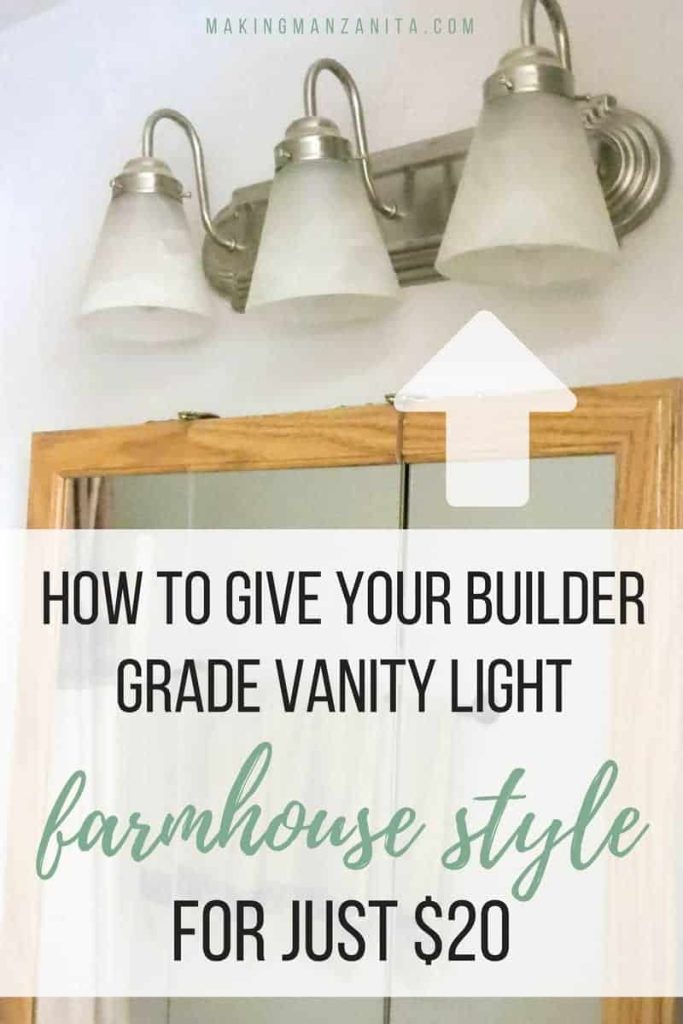
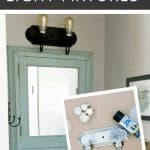
Builder Grade Light Fixtures? Here’s How To Spray Paint Bathroom Light Fixtures

You don't need a new vanity light! Here's how to update your boring builder grade light fixtures for less than $20! All you need is some spray paint and new light bulbs. Learn how to spray paint bathroom light fixtures in this step by step tutorial.
One of the easiest things we did during our farmhouse bathroom renovation was to fix the dreadful vanity light.
I really didn’t want to spend money or time installing a new vanity light, but we HAD to do something about the builder-grade light fixtures. It was boring and didn’t fit with the farmhouse feel that I wanted for our master bathroom.
If I had decided to go with a new light fixture instead, I probably would have purchased something like this farmhouse bath vanity light or this farmhouse-style glass wall light.
I was shocked when we figured out how to paint light fixtures to give them a farmhouse look – it was SO easy !!
We were able to use what we had instead of buying something brand new, which saved a ton of money. In fact, we only spent $22 on the supplies needed for this DIY bathroom light fixture makeover.
You can even spray paint other bathroom fixtures to give them a new look – like updating a bathroom mirror as we did in this tutorial.
Related – If you’re looking for inexpensive bathroom remodel ideas like spray painted light fixtures, check out this article with 30+ ideas!
Don’t want to mess with updating your old light? Buy a new one and install the vanity light yourself!
Spray painting bathroom light fixtures FAQs
What are builder-grade lights?
Builder-grade lights on inexpensive and mass-produced lights that are commonly purchased and installed by builders in bulk. Usually, these are the cheapest and most plain light fixtures on the market and are of average quality. One of the quickest and easiest ways to update a home is the makeover or replace the builder-grade lights.
How do you modernize a light fixture?
There are several ways to modernize a light fixture – you could simply replace the light bulbs only, update the shade covers, spray paint the light fixture, or replace it altogether with something new.
Can you spray paint bathroom light fixtures?
Yes, you absolutely can! Spray painting bathroom room light fixtures is the best way to instantly update them on a budget!
What kind of paint do you use on a light fixture?
Spray paint is recommended on light fixtures because it is cheap, it will get into all of the nooks and crannies and you’re able to get a professional-looking finish without brush marks. We love the look of a matte or flat finish black spray paint for a modern look.
Can you paint a light fixture without taking it down?
You technically could paint a light fixture without taking it down if you didn’t want to mess with uninstalling it. You would need to tarp off all surrounding walls and areas in the bathroom, remove the light bulbs and shades, and cover the light sockets with painter’s tape before spray painting.
However, spray paint overspray tends to get everywhere so we recommend removing the light and painting it outdoors if possible.
Do you need to clean before spray painting?
Yes, it is recommended that you wipe down the light fixture before spray painting to remove any built-up dust. It also helps to quickly rub the outside with rubbing alcohol to get all oils and grim removed for better spray paint adhesion.
How do you remove a builder-grade bathroom light fixture?
Before you start, turn off the power to the light at the breaker. Then loosen the screws on the front of the light fixture to pop the light off the wall and reveal the wires behind the light. Unscrew the wire nuts attaching the wires starting with the ground wire first (no plastic coating), then the neutral wire (white), and lastly the live wire (black). For more details, check out this tutorial and video for how to install a vanity light.
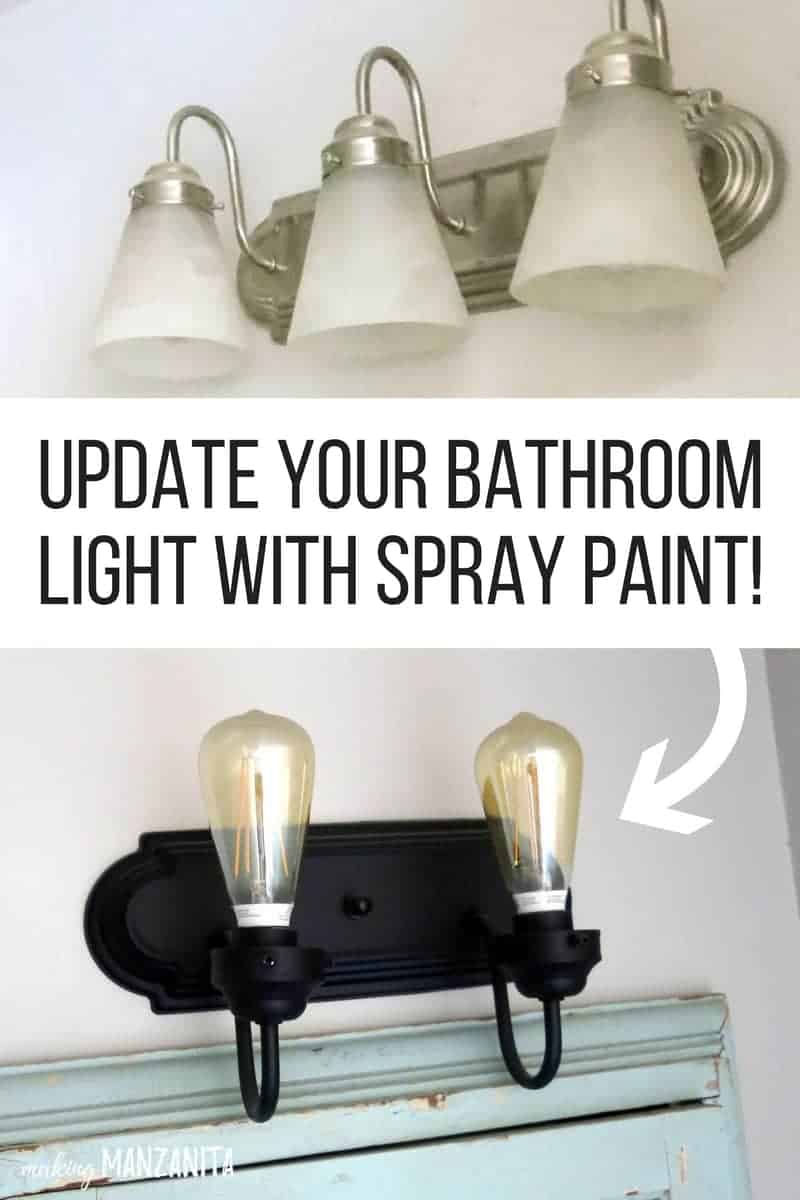
Before Picture
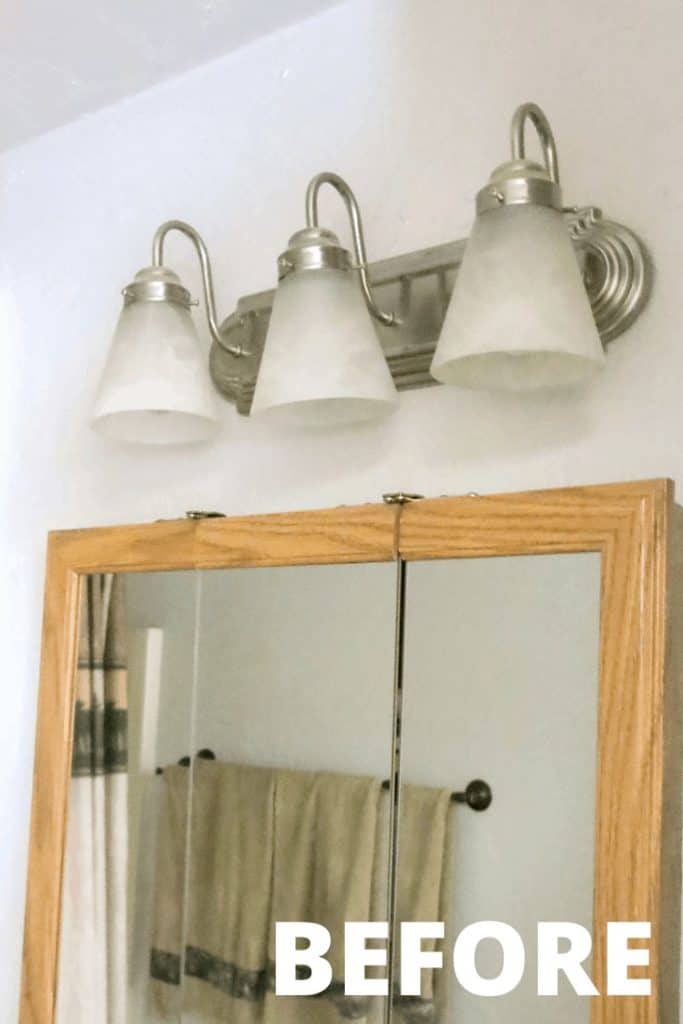
If you’re really confused about why this photo above is a different bathroom and a different light (3 bulbs versus 2 bulbs)…long story short, I lost some photos due to a hard drive that went kaputz, so I don’t have a good “before” photo of the same light in our master bathroom….but I promise it looked JUST like this, but just with 2 lights. 🙂
This spray paint bathroom light fixtures tutorial contains affiliate links, but nothing that I wouldn’t wholeheartedly recommend anyway! Read my full disclosure here.
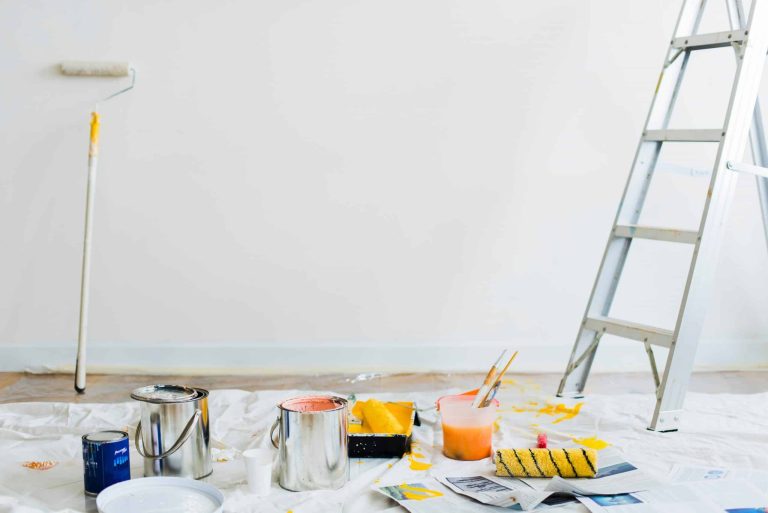
Spray Painting Light Fixtures: Step-by-Step Instructions
Supplies needed:
- Boring builder grade vanity light with no character… 🙂
- Flat black spray paint (or even oil rubbed bronze)
- Old fashioned style Edison light bulbs
- Painter’s tape
- Screw driver
- Voltage detector
- Rubbing alcohol
Step 1. Take the light off of the wall.
Before you touch the light, be sure to turn the light switch on and then turn off the breakers on your electrical panel one by one until the light turns off. If you’re still scared the electricity is “live”, you can use one of these handy voltage detectors to check.
Once the electricity is off for the light, remove the glass shades and bulbs. You may need a screwdriver to remove the glass shades depending on the style of your builder-grade light fixtures.
Next, you can unscrew and pull off the light fixture. There will probably be little screws on the front that you can simply undo to loosen the light from the wall.
Once you can see the wires behind the light, start with the grounding wire first (this will be the one without any plastic coating on it, or in some cases, it may be the green wire). Simply unscrew the wire nut (the plastic cone-looking thing) and pull the wires apart. Then reattach the wire nut over the wire coming out of the wall. Move on to the neutral wire (white plastic coating around the wire) and last disconnect live wires (black). Next, do the same thing with white wires.
Always be sure that you are reattaching a wire nut over the wire coming out of the wall before you step away. Never leave the wires coming out of the wall exposed.
If you want a closer look at how to remove builder-grade light fixtures from the wall, watch this video of ours from 0:00 to 1:05 to see the process!
Step 2. Remove light bulbs and cover light sockets.
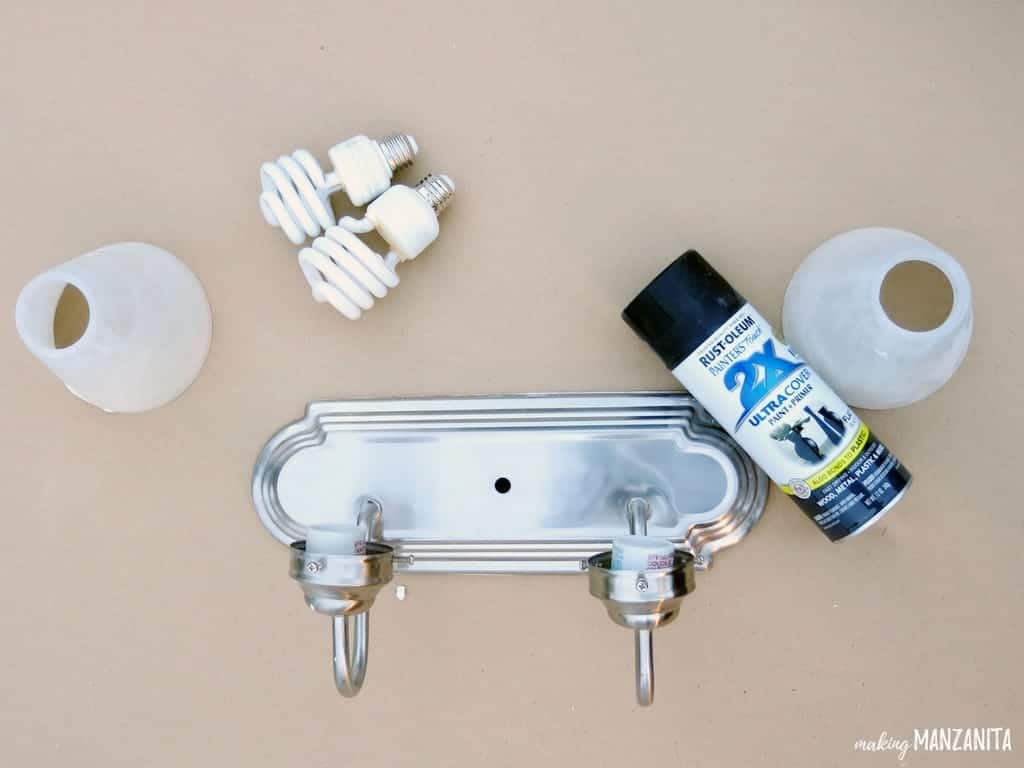
You don’t want to get spray paint on the light sockets. So after you remove the light bulbs, add painter’s tape over the sockets.
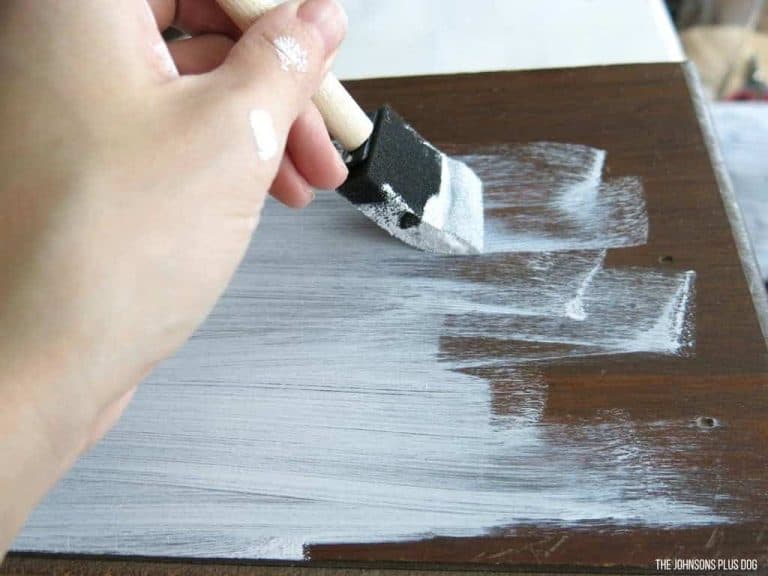
Step 3. Spray paint bathroom light fixture.
Before you begin spray painting, wipe down the light fixture to remove any dust. Then rub the entire fixture down with rubbing alcohol to remove any oils and grime from the surface. A clean surface will ensure that the paint will stick to the light rather than the oil or dust!
Next, you just start spraying your light in even, light coats with the spray paint. We did about 3 coats of this flat black spray paint. Let the spray paint dry thoroughly before moving on.
If you want more help with getting the right spray painting technique, check out this article with spray painting tips and tricks for beginners.
Step 4. Reinstall spray-painted light fixture.
Last, you just put the light right back where you found it on the wall. Reattach the wires by twisting the ends together and securing them with wire nuts.
For the order of the reattaching wires, start with the grounding wire (no plastic coating), neutral wire (white), and live wire (black). Want more help with installing a bathroom light fixture, watch this quick video which commenters have called “the best light replacement video” on YouTube!
After the wires are connected, you can bolt the spray-painted light fixture onto the wall.
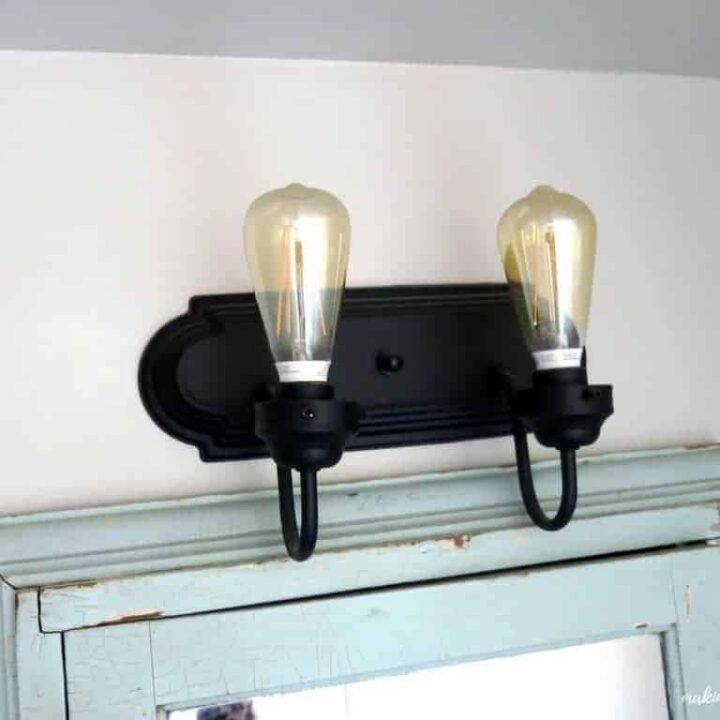
If you notice, we technically installed our bathroom light fixture upside down. I liked the way it looked having the light bulbs point upwards instead.
We also did NOT add those glass light covers either. That’s the fun part of this light! I love that you can see the vintage-looking light bulbs.
You can do whatever you prefer… point the lights up or down… no glass shades or add them back. You could even swap out the shades with something like these wire ones for a more industrial look!
Step 5. Add new light bulbs.
I think boring builder-grade bathroom light fixtures really start to take on a whole new farmhouse feel when you attach the old-fashioned light bulbs.
We use these ones throughout our house and love how long-lasting they are….(in fact I’ve never had to replace one yet after living here nearly 3 years!!…but you watch, just because I said that one is going to go out, like tomorrow!). Whatever type of old-fashioned light bulbs you purchase, be sure you buy the LED ones!
Tada! Yes, it’s really that simple to do a DIY bathroom light fixture makeover. All you need to do is give it a few coats of spray paint and add the old-fashioned-looking light bulbs.

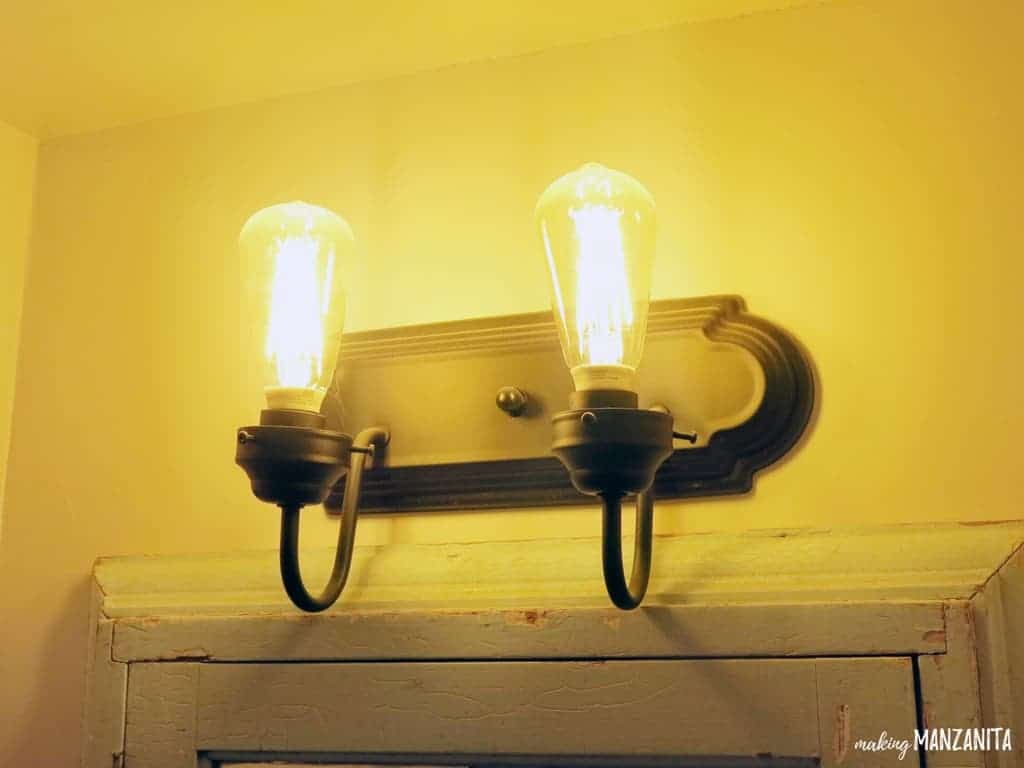

I love that we were able to transform our boring builder-grade light fixtures into something that fits right into our farmhouse master bathroom for just $22!
Have you ever transformed something with spray paint??
Let’s hear about it in the comments!
Looking for more of our farmhouse master bathroom renovation?
- How To Install A Faux Shiplap Wall
- How To Build Floating Shelves For Extra Bathroom Storage
- Farmhouse Master Bathroom Room Reveal
- Ombre Painted Wood Sign
- Rub A Dub Dub Chippy Paint Sign
- Add a Vintage Medicine Cabinet for Farmhouse Charm
- How To Spray Paint Bathroom Light Fixtures (you are here!)
- How To Fix a Shower Curtain That is Too Short
How to Spray Paint Bathroom Light Fixtures
Here's how to update builder grade light fixtures for less than $20! Learn how to spray paint bathroom light fixtures in this tutorial.
Materials
- Boring builder grade vanity light with no character
- Flat black spray paint
- Old fashioned style Edison light bulbs
- Painter’s tape
- Rubbing alcohol
Tools
- Screw Driver
- Voltage Detector
Instructions
- Take light off of wall.
- Remove light bulbs and cover sockets.
- Spray paint light.
- Reinstall light.
- Add new light bulbs.

Great update. Love it! Thanks for sharing your tips.
Thanks for stopping by Charlene!
Hi! Awesome job! Was one a stock picture? It looks like it went from 3 lights to 2. 🙂 Was there a reason for hanging it with the lights sticking upward? I think I would just put them going down the other way…
Hi Andrea… yes, I know it was a little confusing…the whole 3 lights to 2. I explained in the post that I totally forgot to get a good picture of the 2 light before we painted it, so I took a picture of the light in our other bathroom that was exactly the same, but just 3 lights. I ended up doing the farmhouse makeover to both lights and love it! I just liked the way the lights looked pointed up instead of down…you could install it either way you choose. 🙂 Let me know if you have any other questions.
Loved the simple upgrade for the bathroom, brilliant!!
Thanks Penny!
What if you have the older than that 6 light brass row light fixture…….
Hi Dorris – I’m guessing you mean the fixture they call “hollywood” lights – if so, try searching “upcycle hollywood vanity light” on Pinterest for some good ideas!
Hello! I love those lightbulbs! Do they give off decent light?
Yes, they give off ok light (400 lumens, which is the “brightness” factor). But something to keep in mind is that the specific Kelvin score for that light bulb is very low (2200), which means that it is a very warm light – yellow / orange tones – which helps it look more vintage. However, if you prefer a softer white you could get something with a higher Kelvin score. Warm white which is pretty standard for interiors is usually a 2700 Kelvin – here’s an example of lights that look like this but have the 2700 Kelvin: https://amzn.to/3bIwdsn Those ones also have a 700 Lumen which will be brighter than the ones I linked in the blog post. Hope all that makes sense!
I love this diy update! I’m wondering if you have suggestions about the white portion of the light that’s left white. Any suggestions for either covering the white or spray painting or? Would it get too hot to spray paint?
That is actually not part of the light fixture but the base of the lightbulb. I wouldn’t recommend painting that. You may, however, be able to find another brand/style of lightbulb that has a more attractive base in a different finish (like metal?).
Can I spray paint my glass pendant shades? I got glass and don’t like it. I’d like to spray paint the glass shades black.
Yes, spray painting the glass shades should work fine.
This article provides valuable insights and step-by-step instructions for readers looking to transform a builder-grade vanity light into a charming farmhouse-style fixture, making it relevant for those interested in DIY home improvement projects.