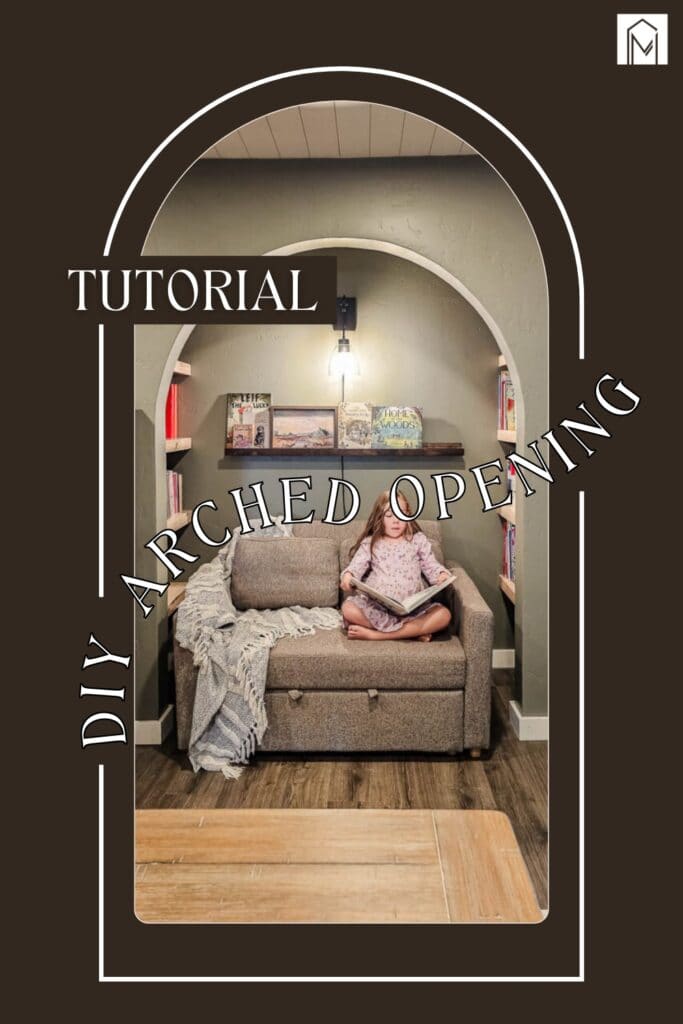
How To Create An Arched Doorway For A Nook

Learn how to create an arched doorway for a reading nook with our step-by-step tutorial. From framing to finishing, we guide you through every stage!
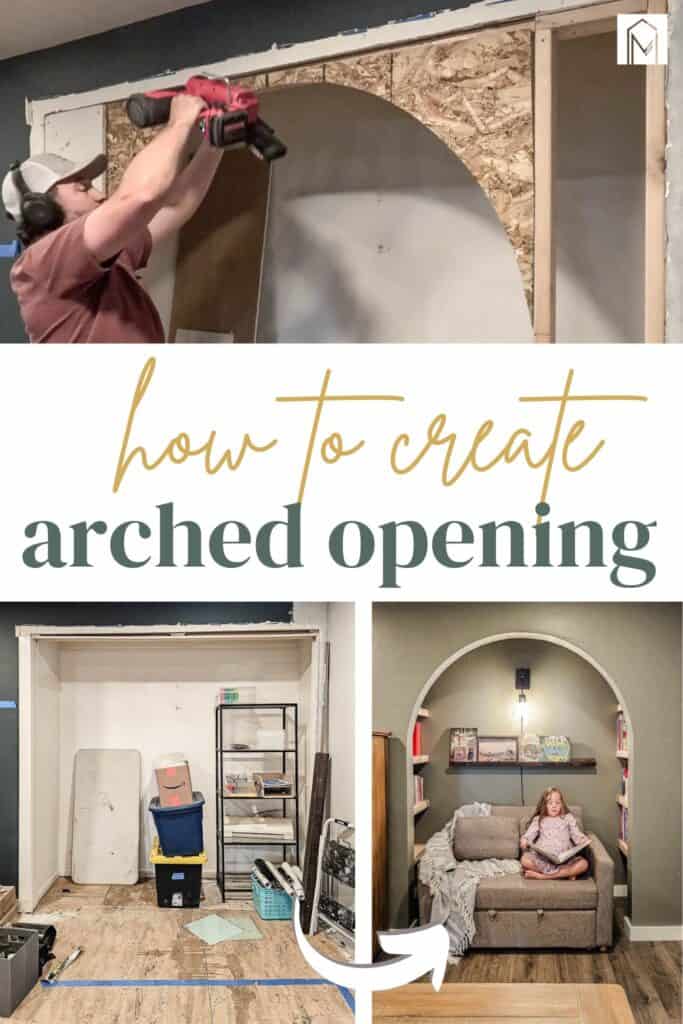
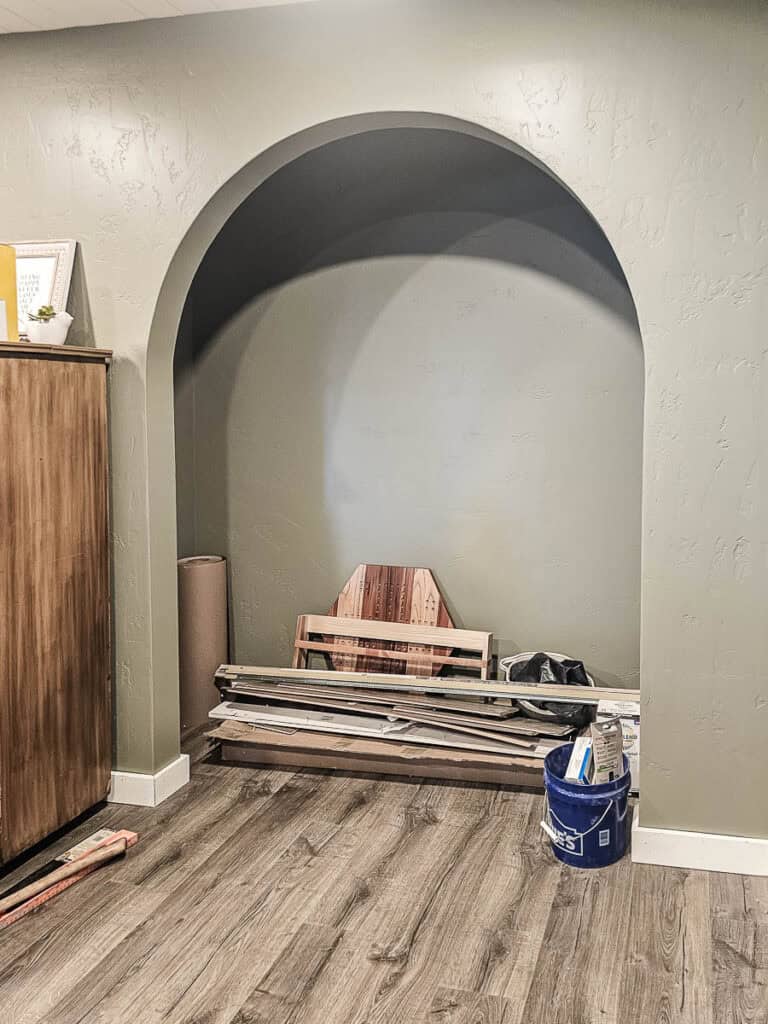
As we continued to work on our big dining room renovation, it was finally time to figure out what to do with the original closet in the room. The closet with rolling doors is, of course, not really needed in a dining room and would look a bit out of place if we left it as-is.
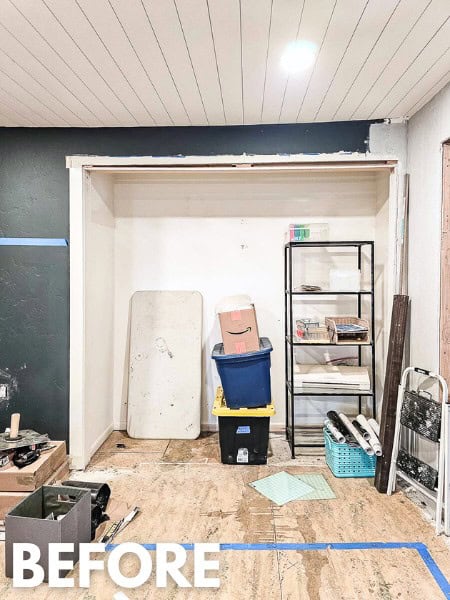
In the middle of the demolition chaos, I had the brilliant idea to turn the closet into a reading nook with book storage. Now that is something that our homeschooling book-loving family would definitely use!
But I wanted to find a way to make the reading nook more of an architectural feature in the room and add character to the entire space – especially since you can see it from the living room and kitchen now.
That’s when the idea of arching the top of the opening popped into my brain! I looked around on Pinterest for arched reading nooks and found some great inspirational photos to get Logan on board.
It was definitely a lot of extra steps to create the arch on the door frame of the old closet, but it was SO worth it. The reading nook now feels like a focal point in the room and adds so much architectural interest to the room. If you want to make a huge impact to your room, an arched doorway is the way to go.
We’re going to walk you through the entire process of how to create an arched opening for a nook. You can also use this tutorial on hallway doors, interior doorways, closet doors, windows, and more. In general, the process of creating the arch frame is mostly the same. Let’s jump in!
Archway: YouTube Video Tutorial
If you love DIY videos, don’t forget to subscribe to our YouTube channel!
Arched Opening: Step-by-Step Instructions
Tools & materials you’ll need
Step 1. Measure for your arch
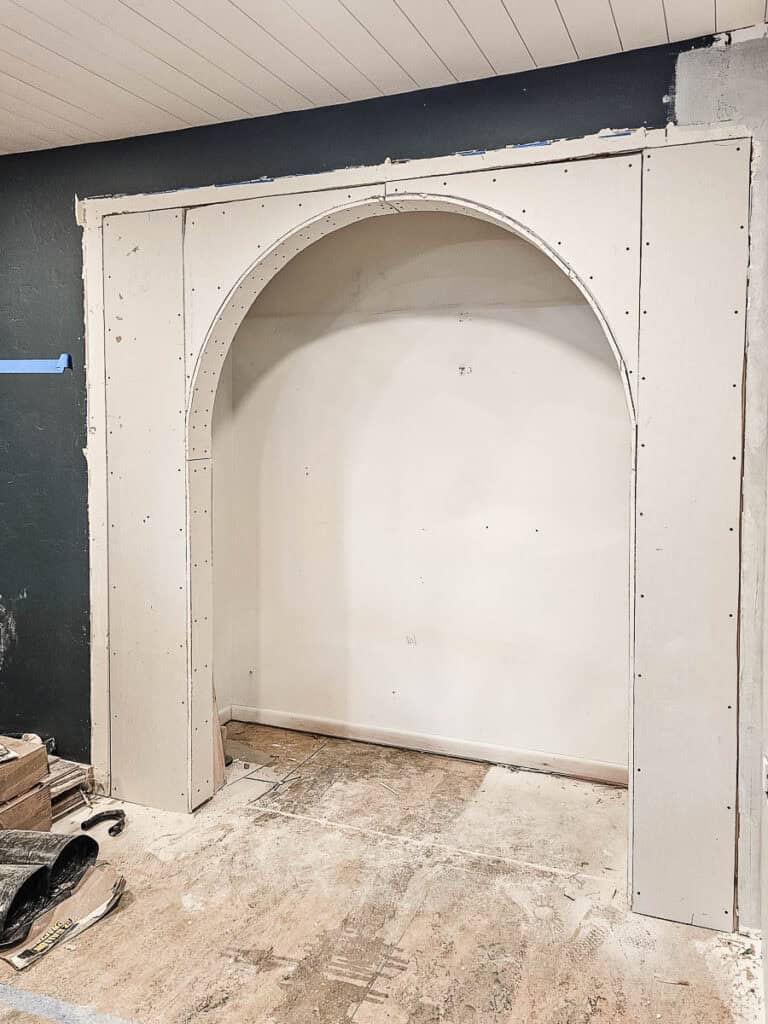
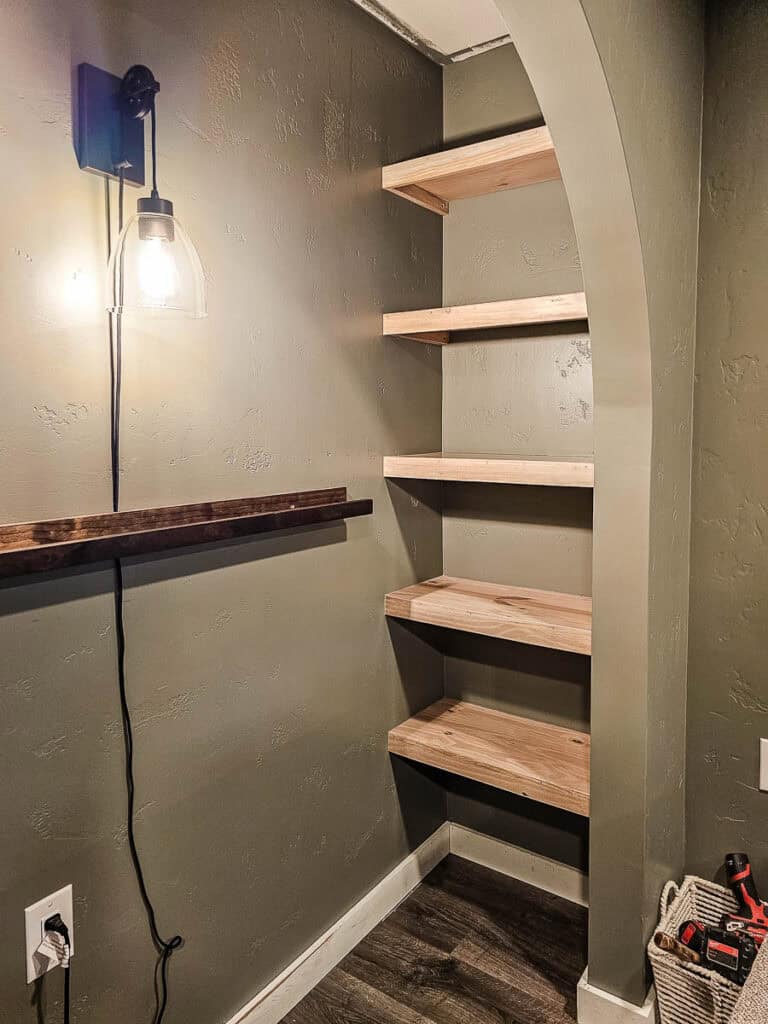
The first step is to figure out your general measurements before starting. Start by finding the center of your opening that you want to make into an arched opening. Since ours was a reading nook, we wanted to also put some floating shelves in for books so we needed to build out some walls to make room for them on each side.
Once we had our space for shelving and our center of the area marked, we calculated the overall width of the arched opening, which was 59 1/2″.
We also decided to have a half circle for our arch. Alternatively, you could just round the corners of your opening rather than making it a complete semicircle. This specifically works better if you have a larger doorway opening.
Step 2. Rough frame the opening and add header
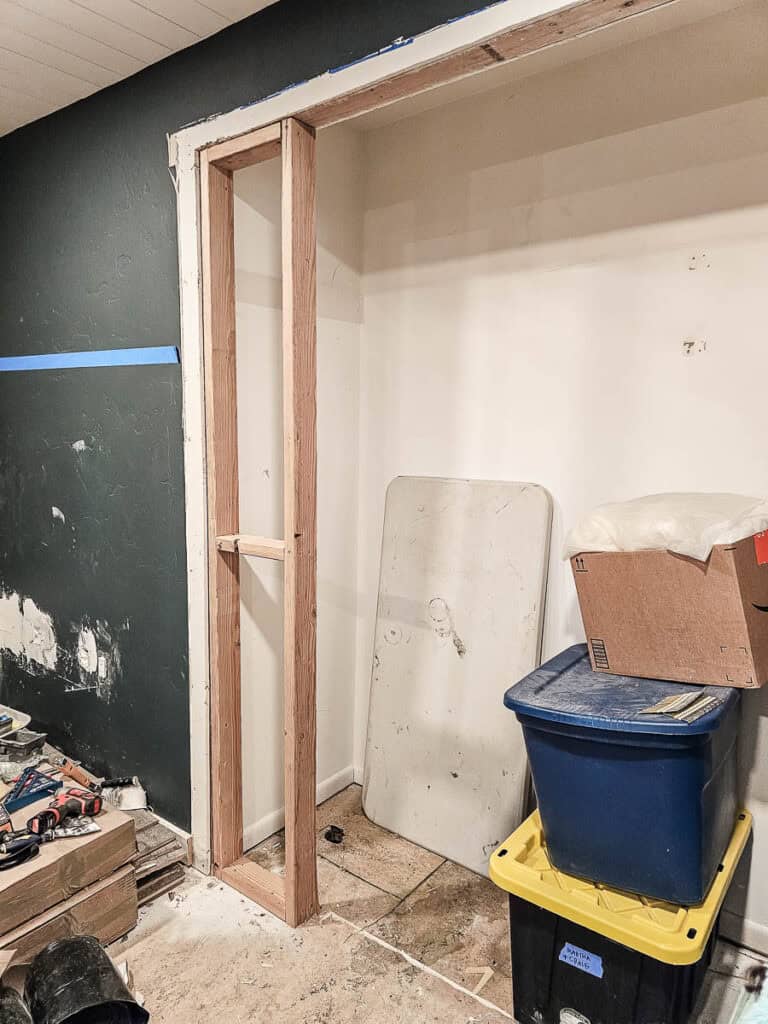
Start by rough framing the two walls around the opening with 2×4 studs.
Then using a 2×3 board, attach a header to the top of where you’d like the arched opening.
Note: we are using 2×3 boards here because we will be cutting the arch into 7/16” thick OSB to sheet the 2×3 boards. After we sheet both sides of the 2×3 with the 7/16” OSB the arch will be the same thickness as our 2×4 walls so everything will be nice and lined up.
You could also use pieces of plywood instead of OSB, but OSB is cheaper and lighter so we went with that.
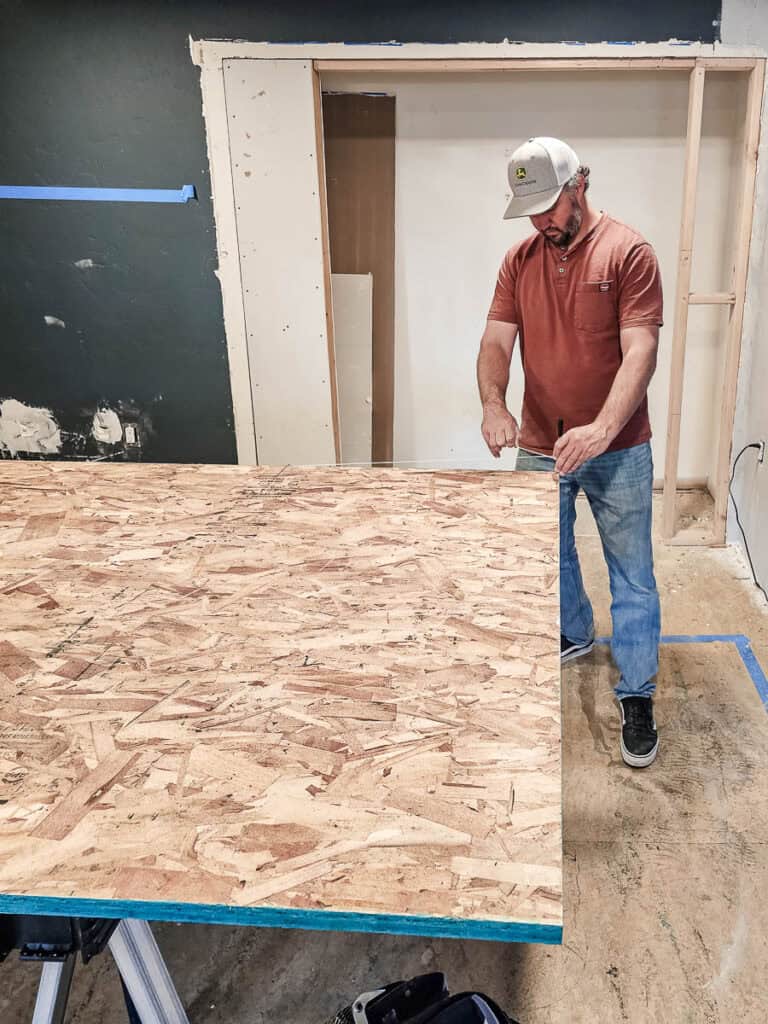
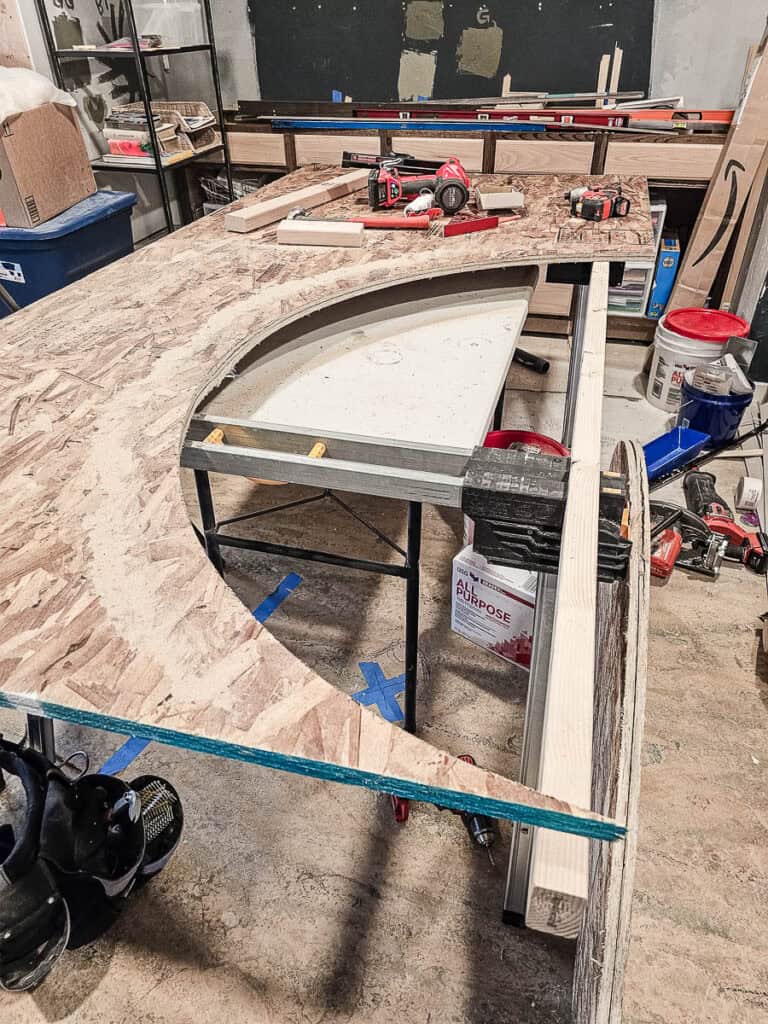
Step 3. Mark an arch shape on OSB
After you attach the 2×3 header to the top, you’ll switch gears and work on cutting the arch out of your OSB. We used a string method to mark out the half circle. It is a great way to get the arch shape marked out without doing tons of math.
This method has worked well for us in the past when we used it to paint an arch and again when we painted an arch on a giant pegboard wall.
Measure out the width of your opening. Ours turned out to be 59 ½”.
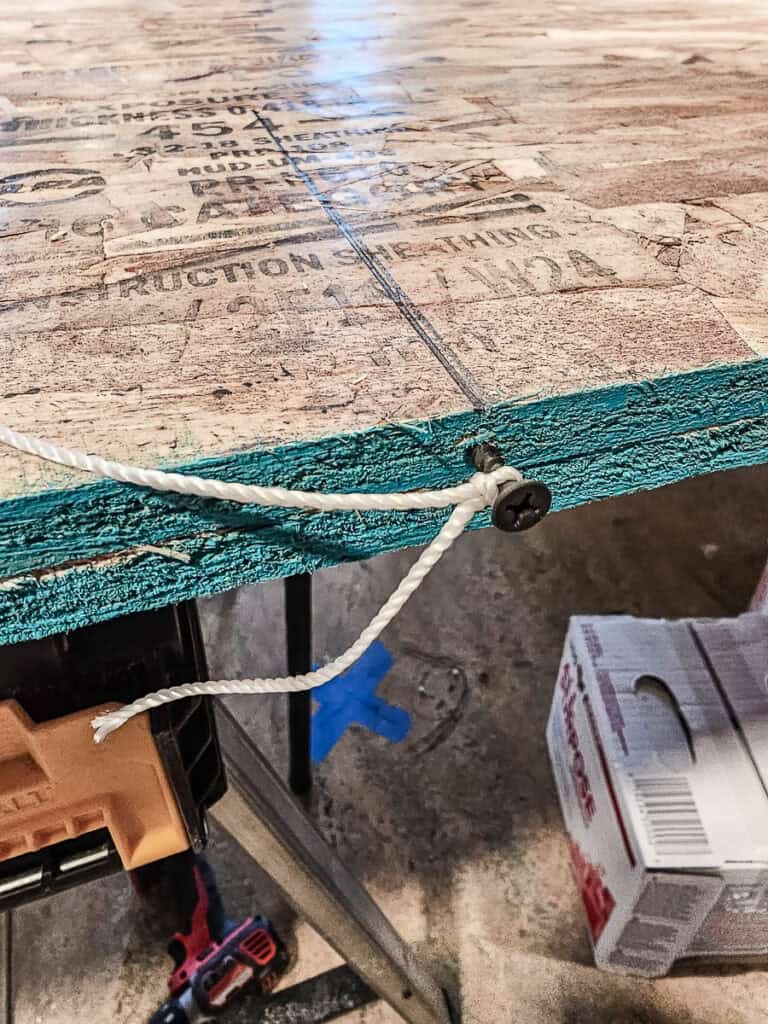
Measuring from the edge of the OSB we marked out 59 ½” and the halfway point 29 ¾”. Next, use a drywall screw or nail we attached them to the halfway mark on the edge of the OSB.
Then grab some mason line or a string and wrap it around the screw. With the string around the screw, we made sure to leave enough to reach the mark at 59 ½”. Grab a Sharpie and wrap the string around it until it is tight and right over the mark at 59 ½”.
Very carefully hold the Sharpie straight down (not at an angle) and start scribing the curve of the arch shape on the OSB sheet. Keep the piece of string tight by slightly pulling the string/marker away from the screw.
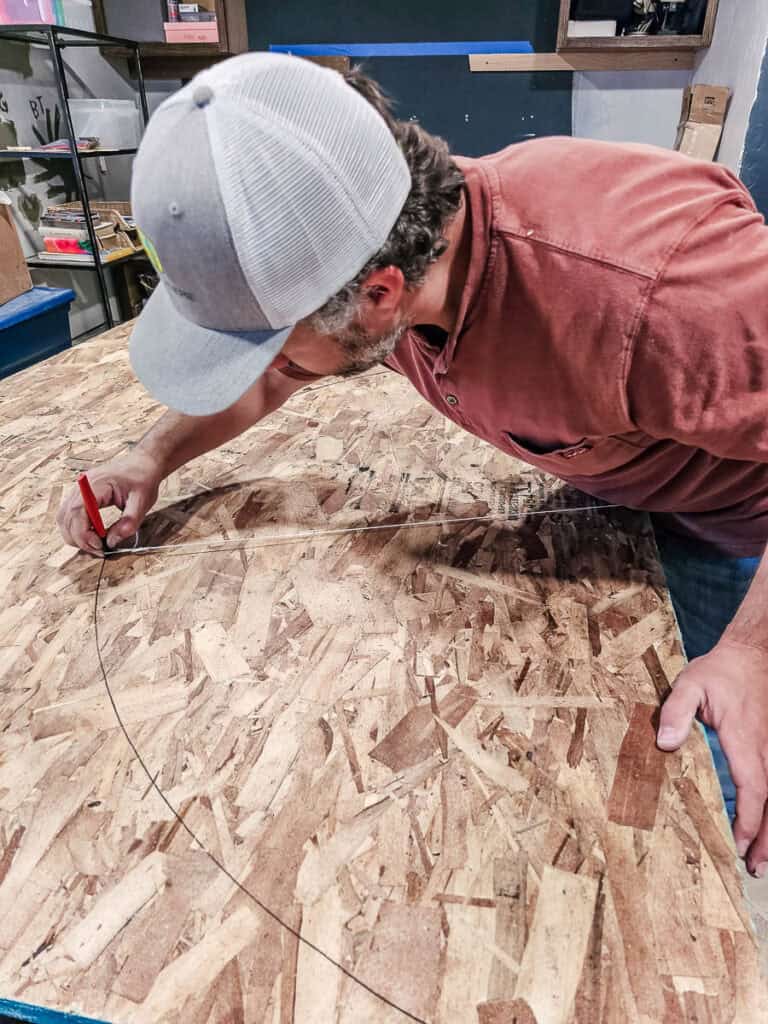
We did the half circle starting from the 59 ½” mark all the way over to the other edge of the OSB and then back again. We ended up with a half circle with a radius of 29 ¾” all the way around.
Before we started cutting this arch we checked all the measurements and eventually had to mark it again to correct a few areas that weren’t the 29 ¾” radius we were looking for. This can happen if the Sharpie marker wobbles and is not directly pointed down while marking the arch shape.
Step 4. Cut arch from OSB
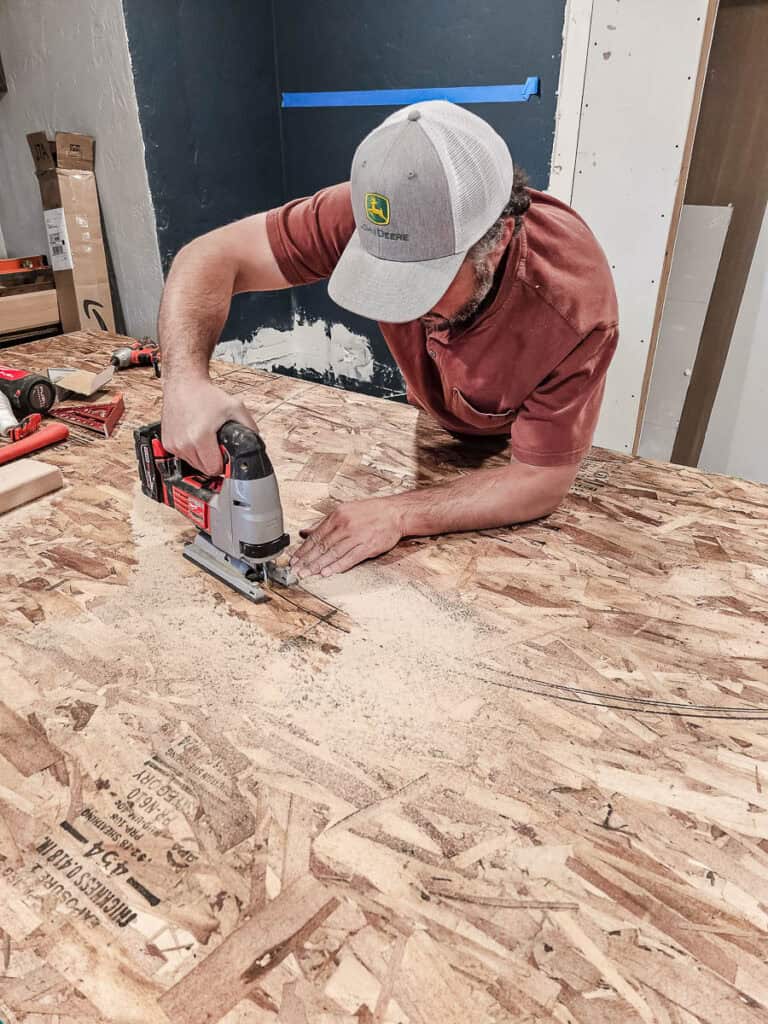
Once you are confident in your arch marks, grab your jig saw and carefully cut the arch out of the OSB sheet.
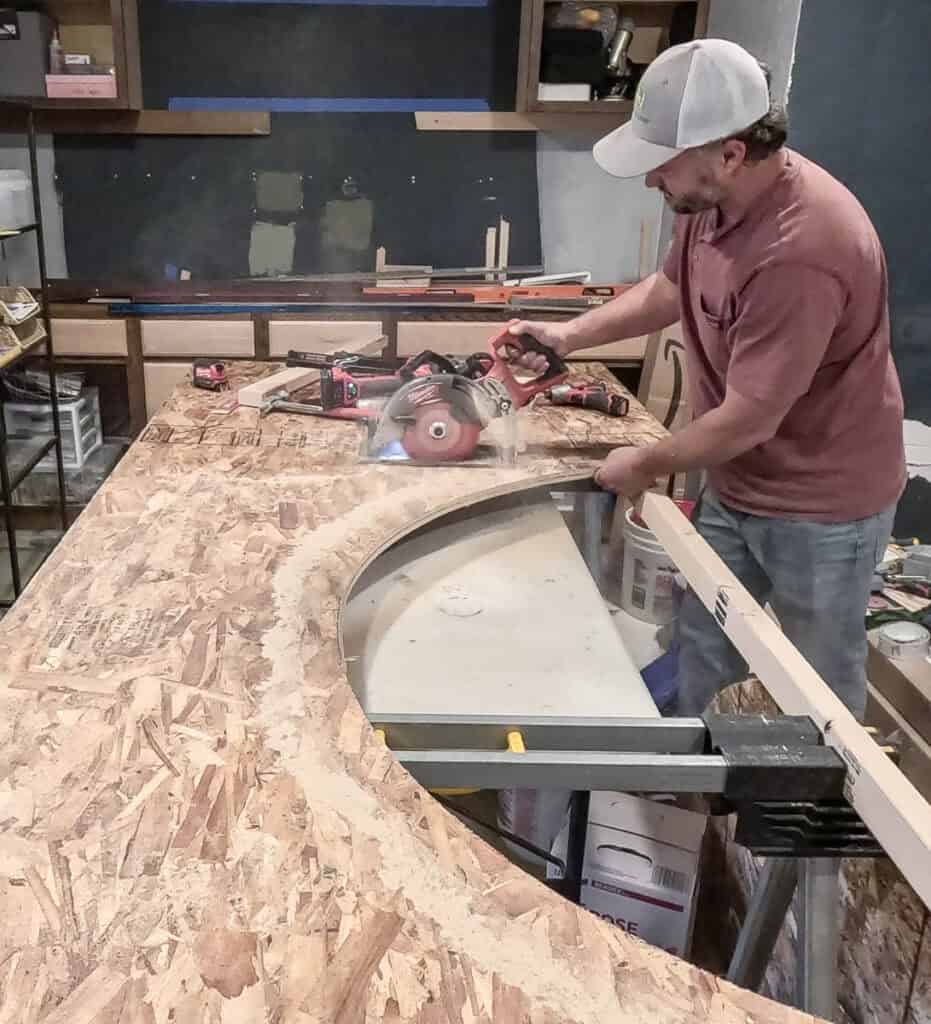
With the arch cut into the OSB, now the opposite edge needs to be trimmed down to fit in your opening. Use a table saw or circular saw to cut the OSB for the other edge arch.
Lastly, you’ll need to rip down the top of the arch to fit in the arched opening. The very top of the OSB sheet with the arch needs to match the short side of your 2×3 studs (1 ½”) used on the header of the opening.
Make a mark 1 1/2″ above the arch on the OSB sheet and then cut along the line.
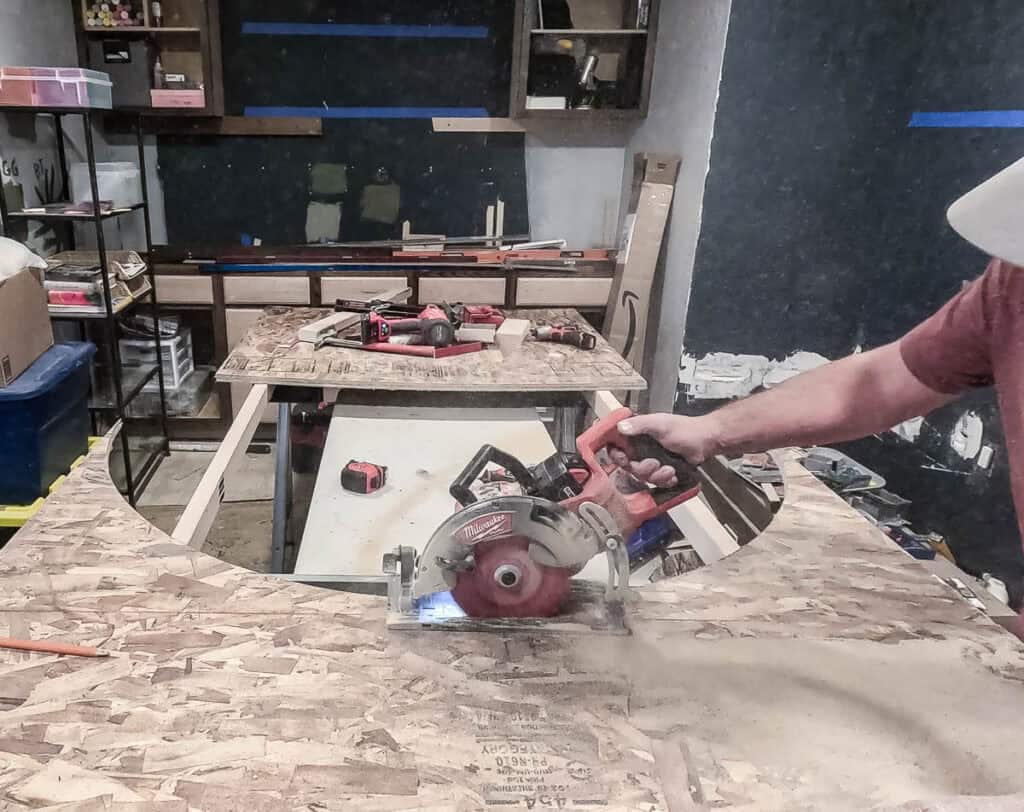
Step 5. Cut a second arch from OSB
Now that you have one arch shape cut out from the OSB, you need to make a second for the back side of the arch. Luckily this time around, you have one cut already so you can just use it as a template so they match each other perfectly.
Simply use the first arch as a stencil to mark it on OSB and cut it out along the marks with a circular saw for the straight cuts and a jig saw for the curved cut.
Step 6. Adjust arches (if needed)
We had to trim our arches a bit here and there because it turns out the existing header we had over the original closet wasn’t at all square.
You may need to do the same if your existing opening isn’t perfectly square either. Logan was sure to measure each side from the floor up because it was level so the points of the arches would match each other.
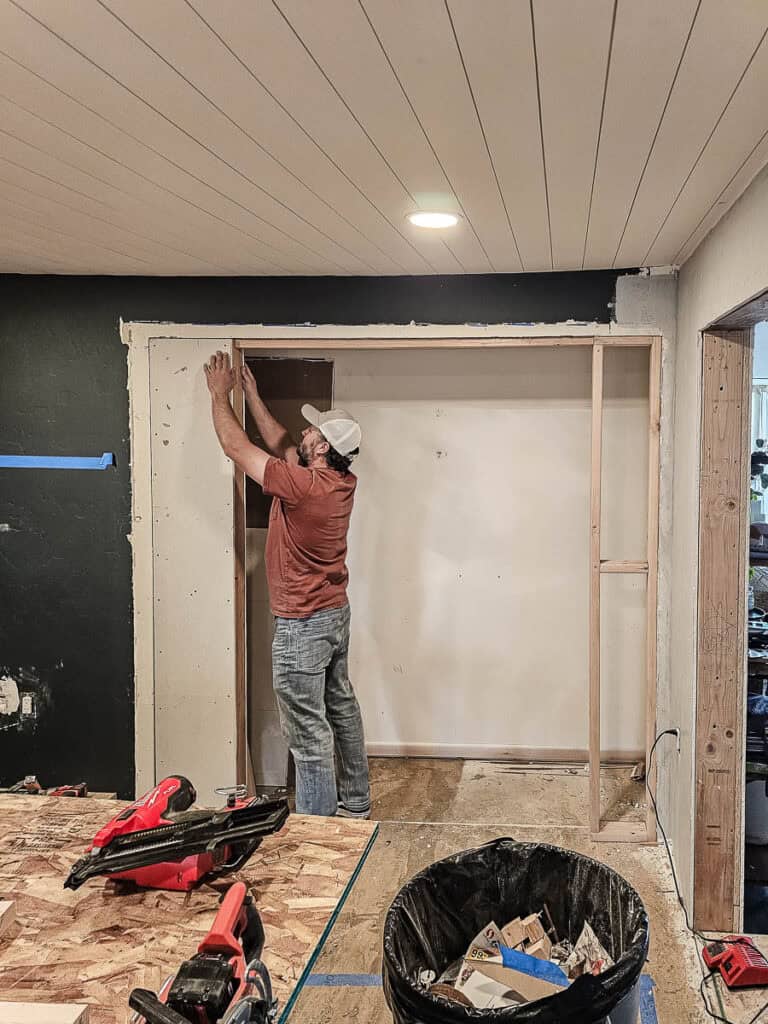
Step 7. Attach OSB arches
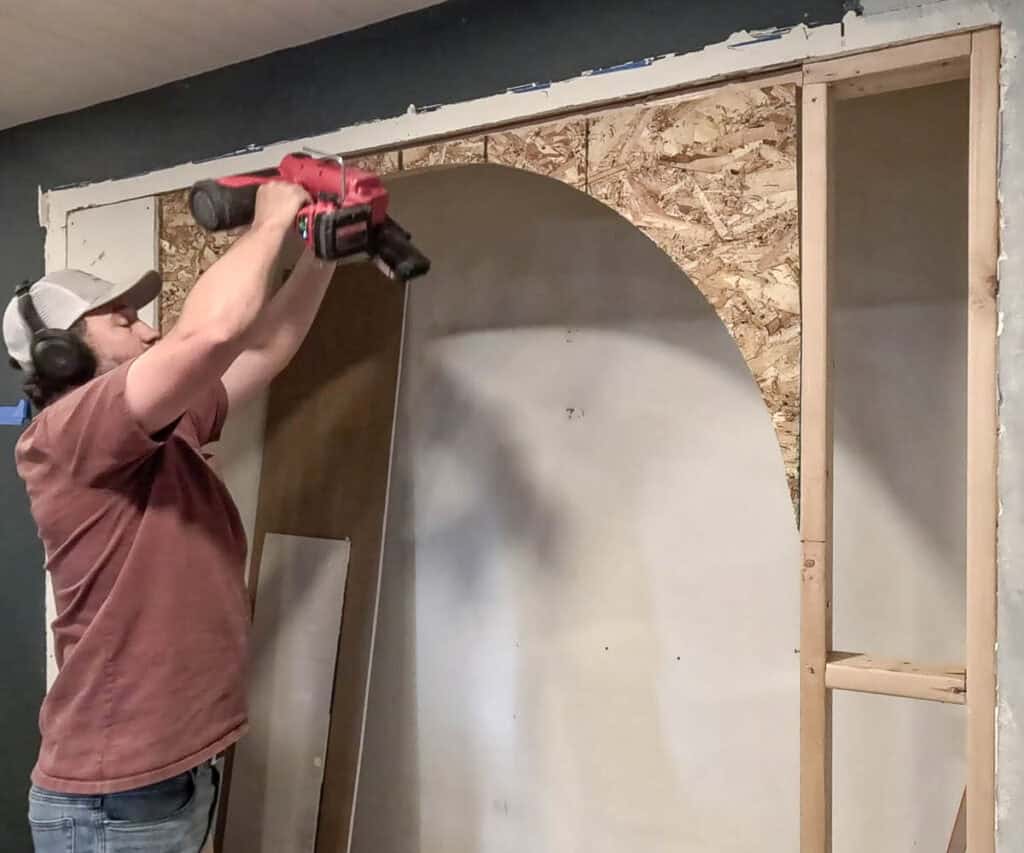
Hold the arch up to the opening and attach it with a framing nailer and 8d nails in several places along the 2×3 header.

Repeat on the second side of the arch with the second arch sheet.
Step 8. Fill in the gap
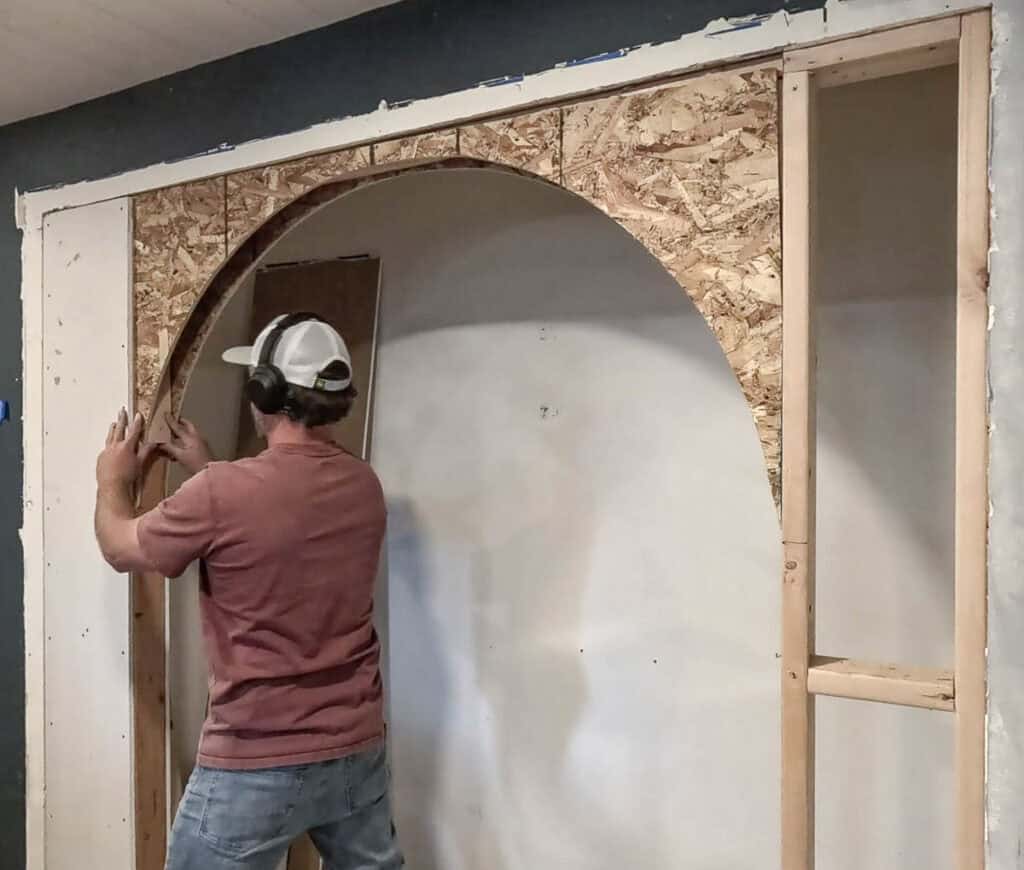
To shore up the sides of the arches, add a longer 2×3 board and attach it to the 2×4 stud in the wall. Be sure this 2×3 doesn’t go beyond your arch. If you do the drywall will not curve correctly.
You can also add more nails on the OSB arch sheets into this 2×3 board to secure everything.
After attaching both of the arched OSB sheets to the header and the 2×3 filler boards, you need to fill in the arch radius with more 2×3 boards. To accomplish this, you can cut 2×3 boards into 2 ½” lengths to fill in the arch.
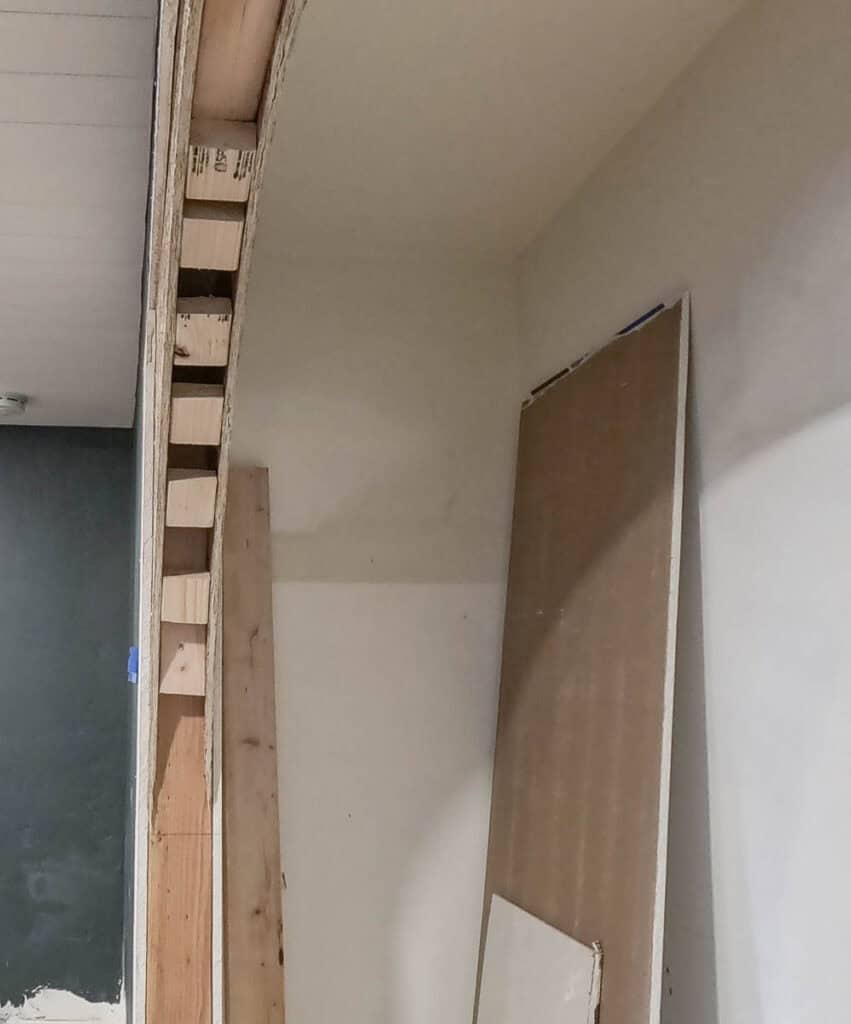
Take your time here this is a long process but make sure each block is flush with your arched opening and maintain the radius when you attach the drywall in the next step.
Step 9. Cover with drywall
Next cover the arched opening with drywall. The curved part will take the most work. Start by cutting a 3 ½” strip of drywall for the inside edge of the arch. Next, score the backing of the drywall about every 1” with a utility knife.
The scoring will allow the drywall to curve with your arched opening as you attach it.
Cover the bottom sides of the doorway with a strip of drywall.
Step 10. Attach corner bead
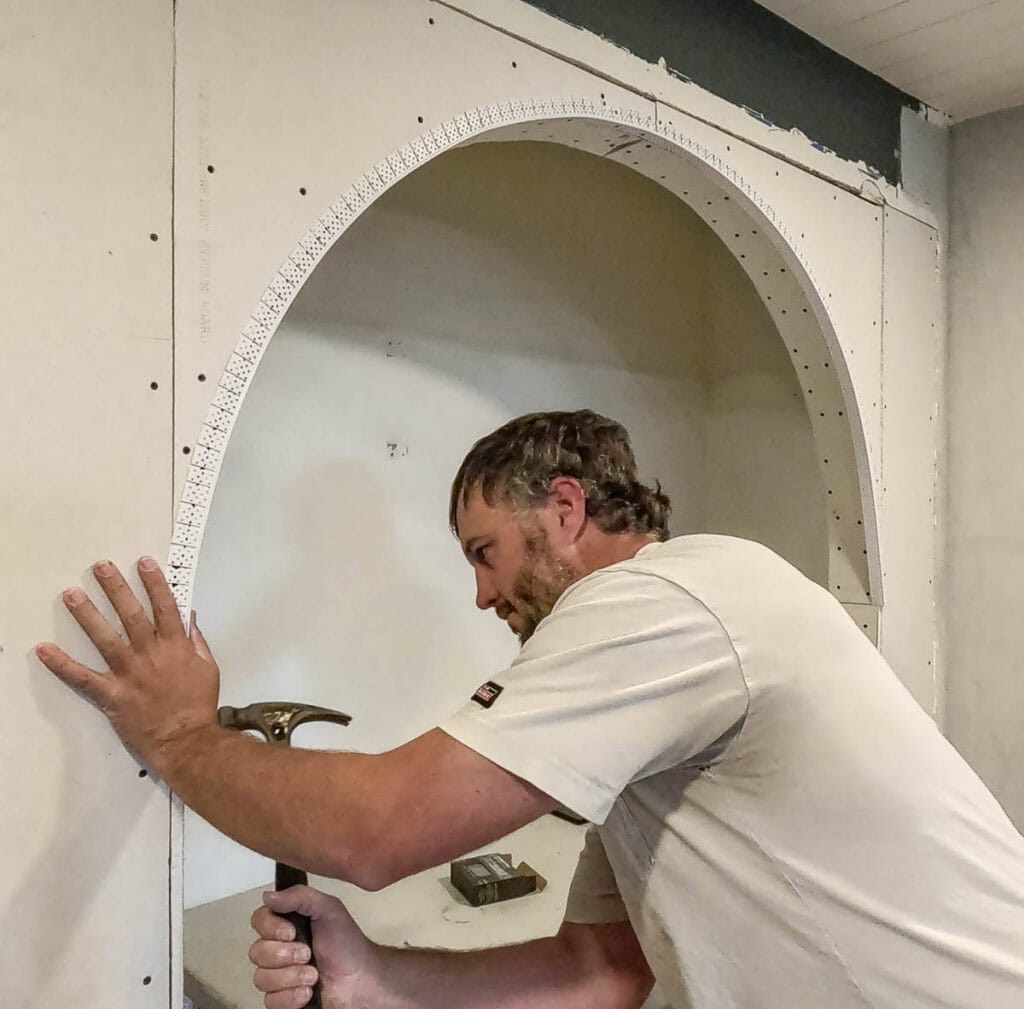
Along the edges of the archway, add flexible vinyl archway bead for the curved part of the arched opening. This corner bead is made specifically for archways so it has a notched flange to adapt to any radius curve.
Attach the corner bead with 1 1/2″ galvanized nails and a hammer.
You can use regular corner bead on the straight edges at the bottom of the doorway.
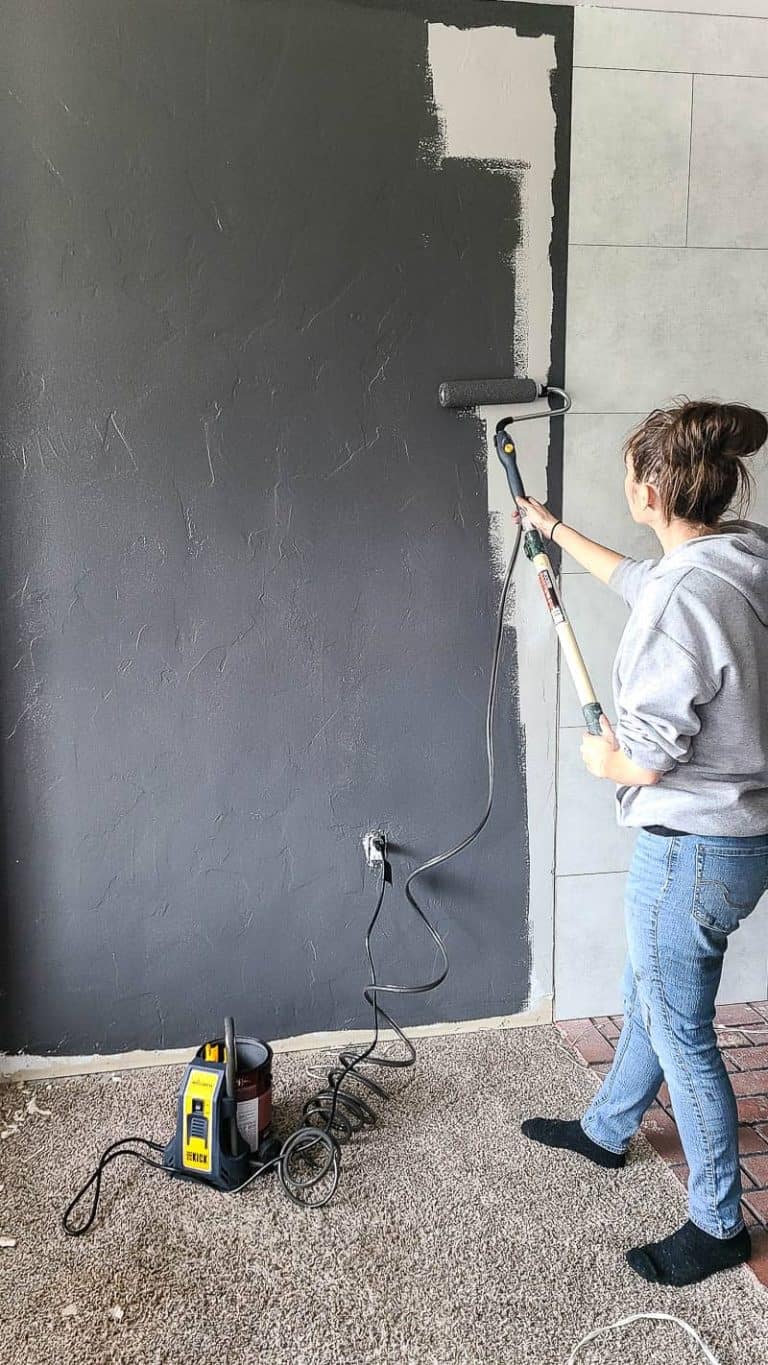
Step 11. Mud and texture the drywall
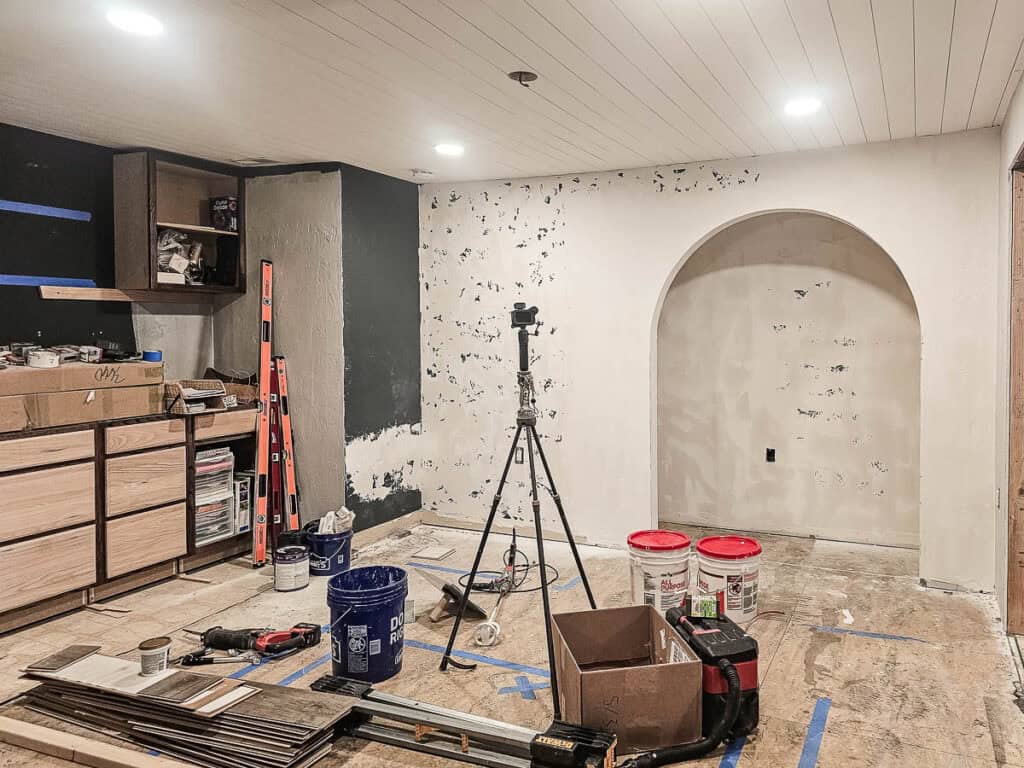
Next, you can float out the inside of the arch and texture the rest to match the surrounding walls.
For more information about how to texture drywall, check out this article!
Step 12. Prime and paint arched doorway

Lastly, prime and paint the walls and the arched opening to match the rest of the room.
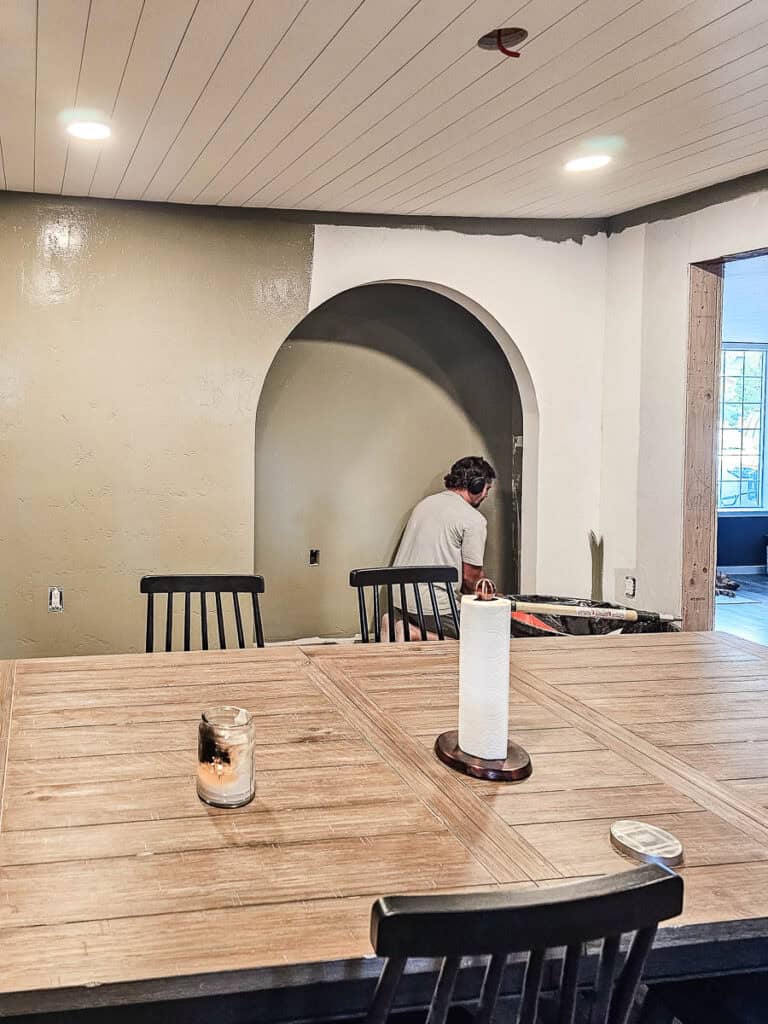
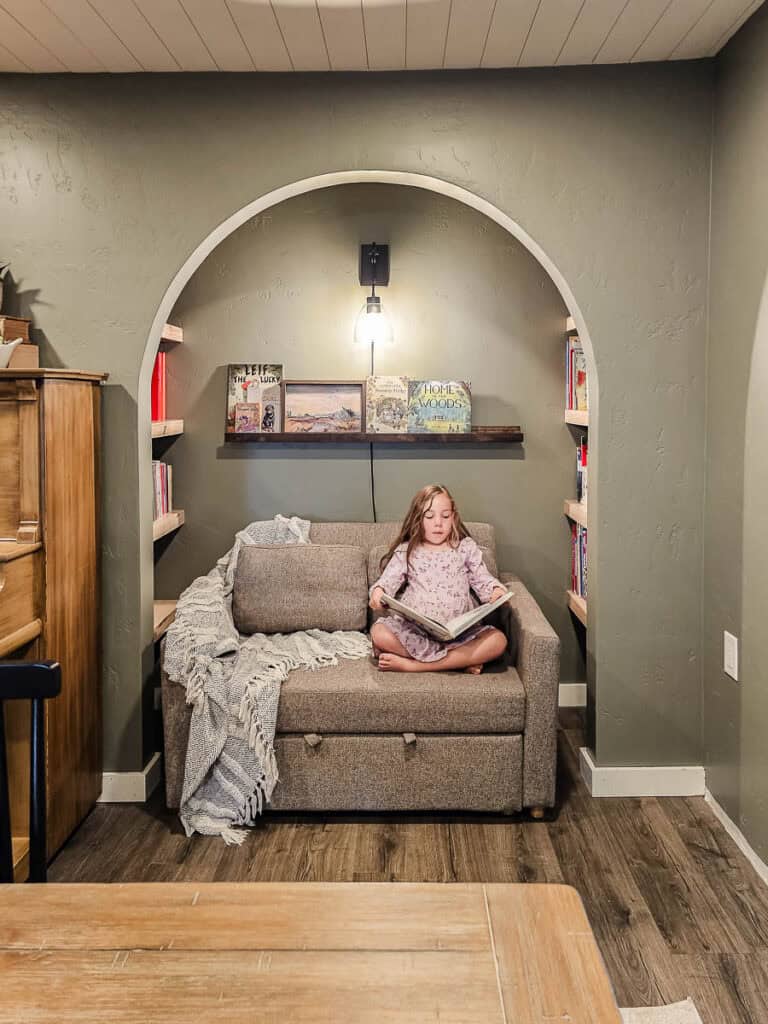
Didn’t it turn out great? Not too shabby for our first time with an arched opening or doorway.
I’m SO glad that we decided to arch the opening to the reading nook. It added so much extra character to the room.
We’ll be sharing more about the finished reading nook soon, so stay tuned! (UPDATE: Check out all of the details on the reading nook here). Here’s just a sneak peek of how it turned out.
More about our
Dining Room Project