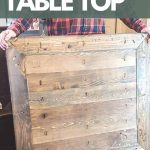
DIY Table Top For Beginners (with Free Woodworking Plans!)

Are you looking to build a new DIY table top for your kitchen table? This one is super simple to build (even for beginners) and we're giving you the free woodworking plans too!
Thank you to Kreg for sponsoring this DIY table top build! All opinions are entirely my own. This post also contains affiliate links, but nothing that I wouldn’t recommend wholeheartedly. Read my full disclosure here.
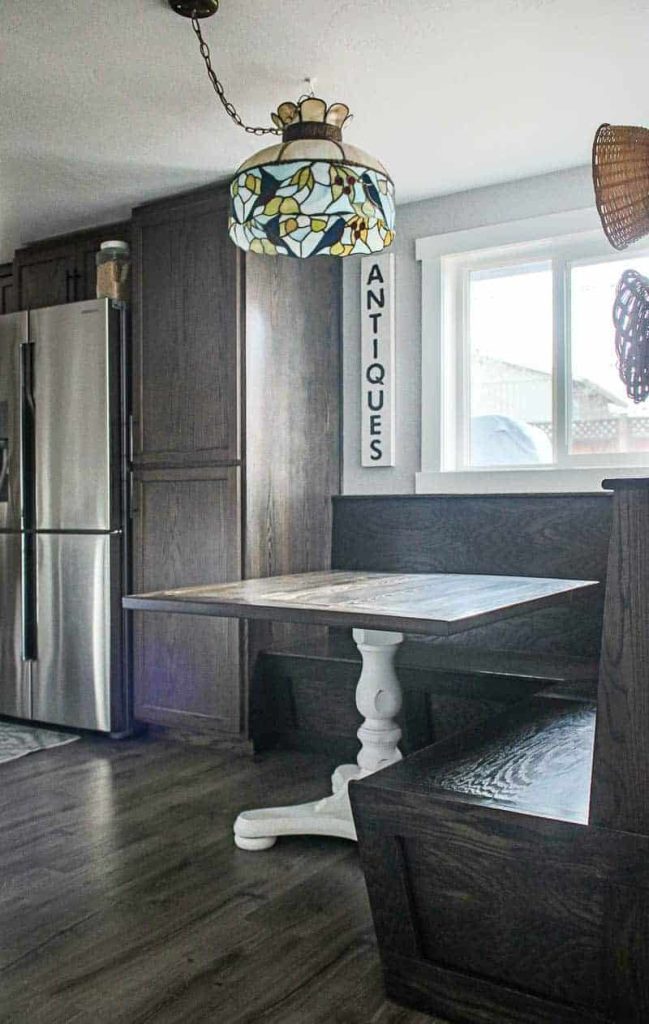
Last year we built this gorgeous custom built in banquette in our breakfast nook. After we were done, we needed a table for the space so we could actually use it and I was at a loss! I couldn’t find ANYTHING that would fit the space.
Table of Contents
- Before Picture
- Why we needed to build our own table
- How we made this project super simple
- DIY Table Top Plans
- DIY Table Top: Step-by-Step Instructions
- Wood products needed:
- Supplies needed:
- Tools needed:
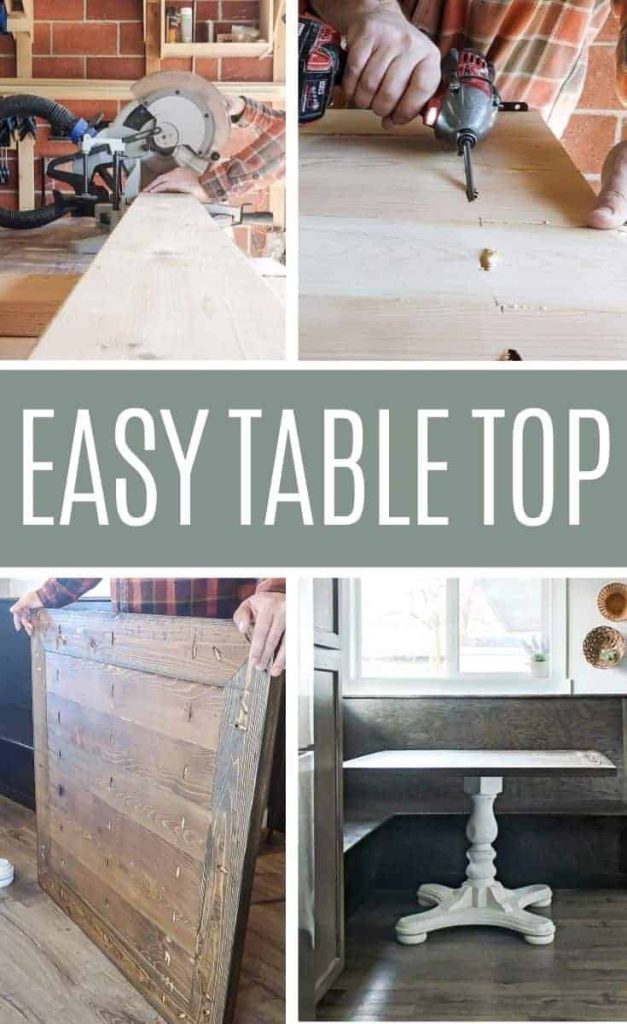
- Step 1: Prepare wood
- Step 2: Drill pocket holes
- Step 3: Cut wood
- Step 4: Assemble table slats
- Step 5: Sand and square up the interior slats
- Step 6: Add border
- Step 7: Sand
- Step 8: Fill gaps and sand
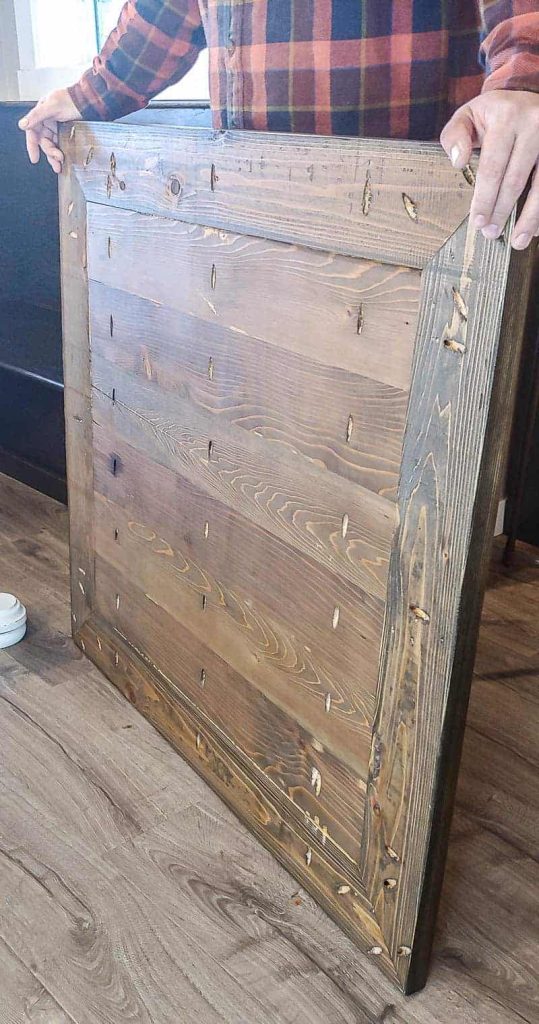
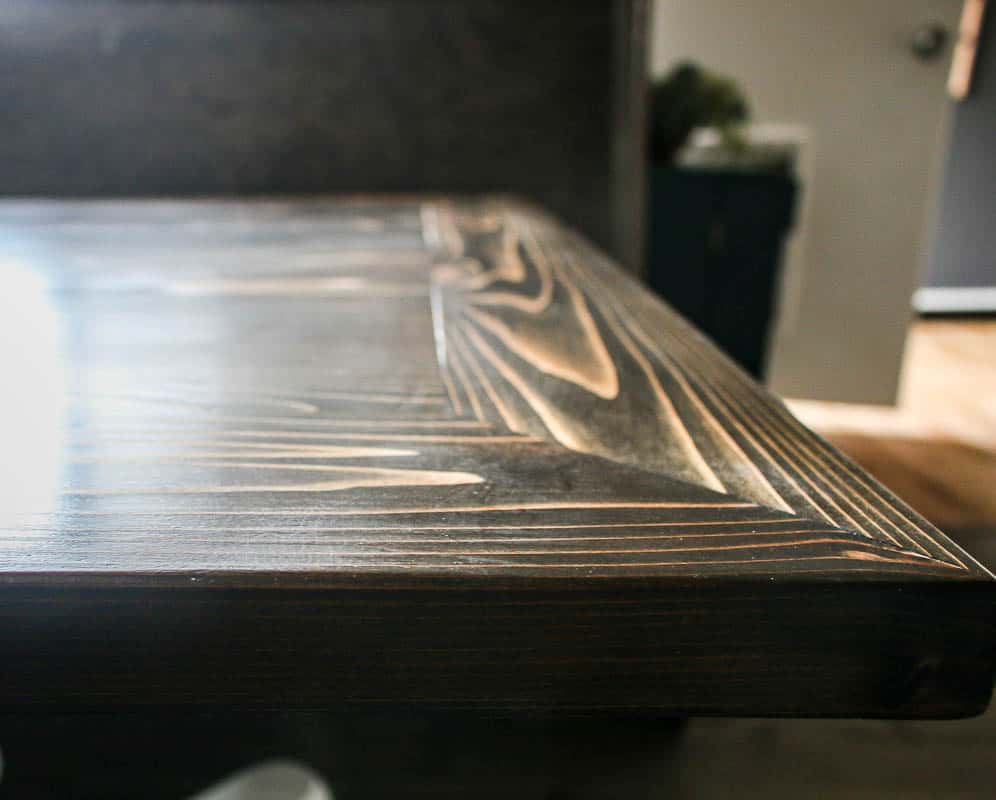
- Step 9: Stain and seal
- Step 10: Attach tabletop to base
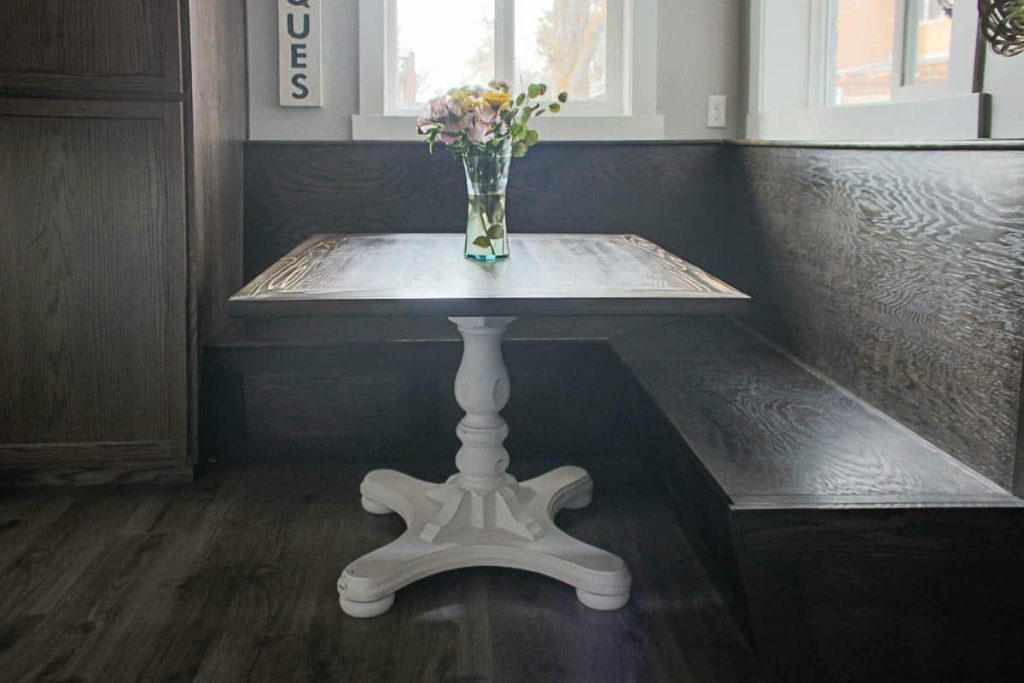
- DIY Tabletop: The Reveal
- How much did it cost to build this tabletop?
- What about the cost of painting the table base?
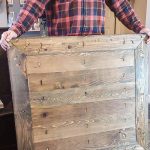
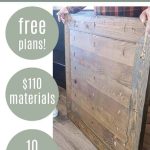
Before Picture

Why we needed to build our own table
The round tables were awkward for anyone sitting in the corner. We couldn’t find a square table that fit right and the rectangular tables were all too narrow.
So, what do we do when we can’t find something that works perfectly? We DIY it!
And don’t worry guys, even if you’re a beginner when it comes to woodworking (like you’ve never built anything in your life before)…this is TOTALLY manageable. I promise.
But, here’s the thing. I had envisioned a farmhouse-style chippy paint table base with curves and details. Which is not impossible to DIY yourself, but it’s pretty darn tricky.
How we made this project super simple
So to really make this project super simple and achievable in just one weekend, we took an existing table base from something I found on Facebook Marketplace for $25 and built a new DIY table top for it that fits perfectly with our banquette.
We actually got this table on Facebook Marketplace with the round top that doesn’t work “perfect”, but it works ok and we’ve been using it now for almost 2 years! I’d say it was DEFINITELY time to make this new DIY table top happen. In fact, it was long overdue!
DIY Table Top Plans
For this fun DIY (and SUPER EASY) woodworking project we teamed up with our friends Kreg again to create the plans and share them online for free, which are now available on KregTool.com!
If you’re wondering, Kreg’s website is full of easy-to-follow woodworking plans that are all available for free! I promise that you are going to find so much inspiration while you are there!
Now the thing that makes this DIY table top an incredibly easy woodworking project that is PERFECT for beginners is the incorporation of Kreg’s pocket hole jig, which is the easiest way to join pieces of wood. Click here to learn how to use a pocket hole jig!
UPDATE: In 2021 Kreg replaced the K5 Pocket Hole system with the Kreg 720 Pro. Check out our guide all about the new Kreg 720Pro to learn more.
DIY Table Top: Step-by-Step Instructions
Wood products needed:
Supplies needed:
- 1 1/2″ pocket hole screws, zinc
- Wood glue
- Wood stain
- Polyurethane
- 1 1/2″ cabinet screws (for attaching the table to base)
Tools needed:
- Kreg 720Pro pocket hole jig
- Jointer
- Miter saw
- Table saw (or Rip-Cut with circular saw)
- Square
- Table saw
- Tape measure
- Clamps
- Drill
- Impact driver
- Hammer
- Orbital sander
- Belt sander with 80-grit sandpaper
- 150-grit sandpaper
- Air compressor
- Level
Step 1: Prepare wood
- Run your wood through a jointer to flatten all sides, ensuring a tight fit for your tabletop.
- No jointer? No problem: Use a table saw to square the edges of each board, removing any rounded edges from store-bought lumber.
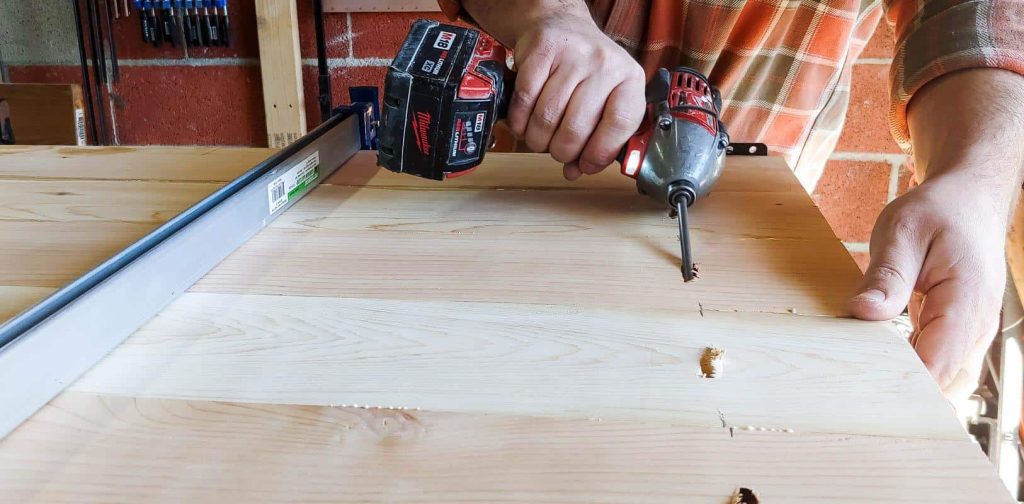
Step 2: Drill pocket holes
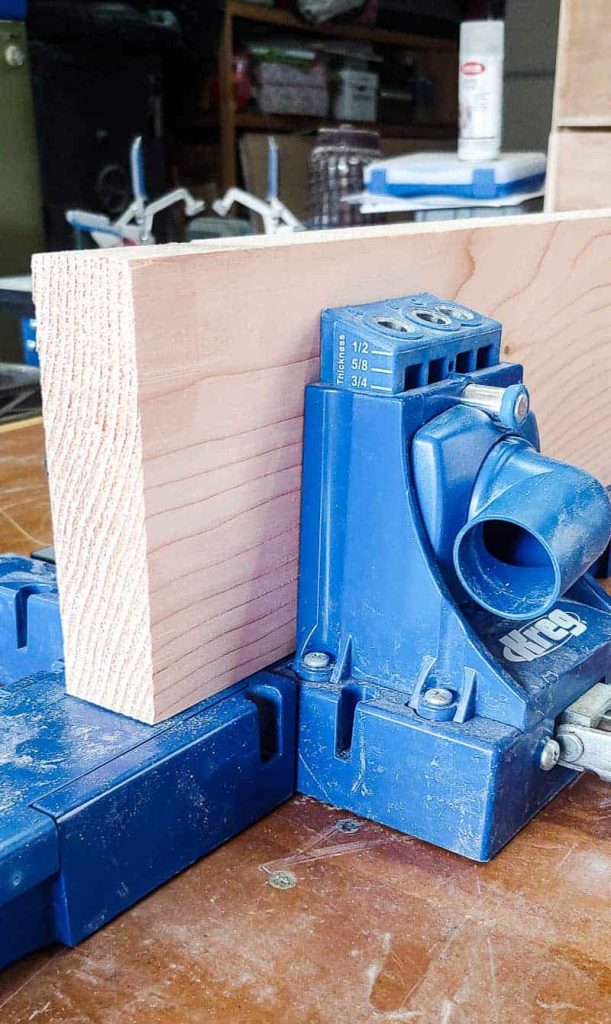
- Arrange boards according to the woodworking plans and mark the locations of the pocket holes.
- Use a Kreg pocket hole jig to drill holes to the correct depth.
Step 3: Cut wood
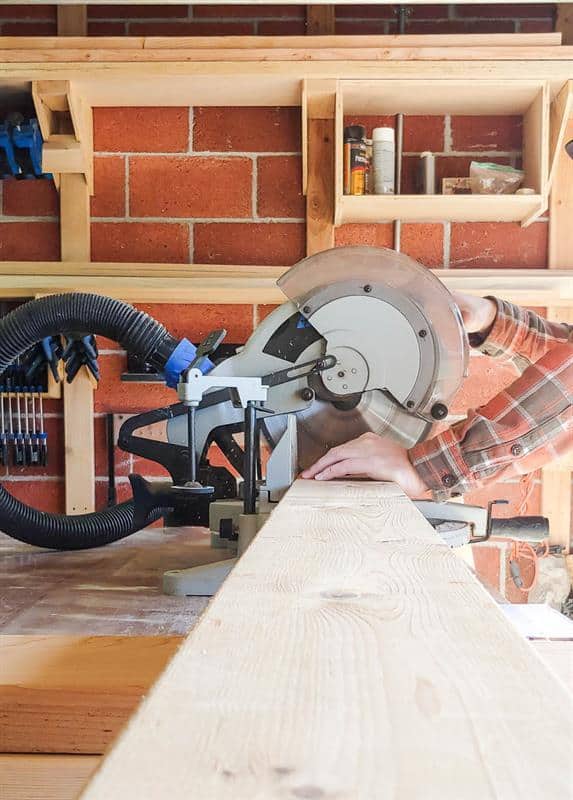
- Use a miter saw to cut wood to the specified lengths in the plans, which you can download here.
Step 4: Assemble table slats
- Glue together the middle slats.
- Screw them in at pocket holes.
- Clamp interior slats together and let the glue dry.
Step 5: Sand and square up the interior slats
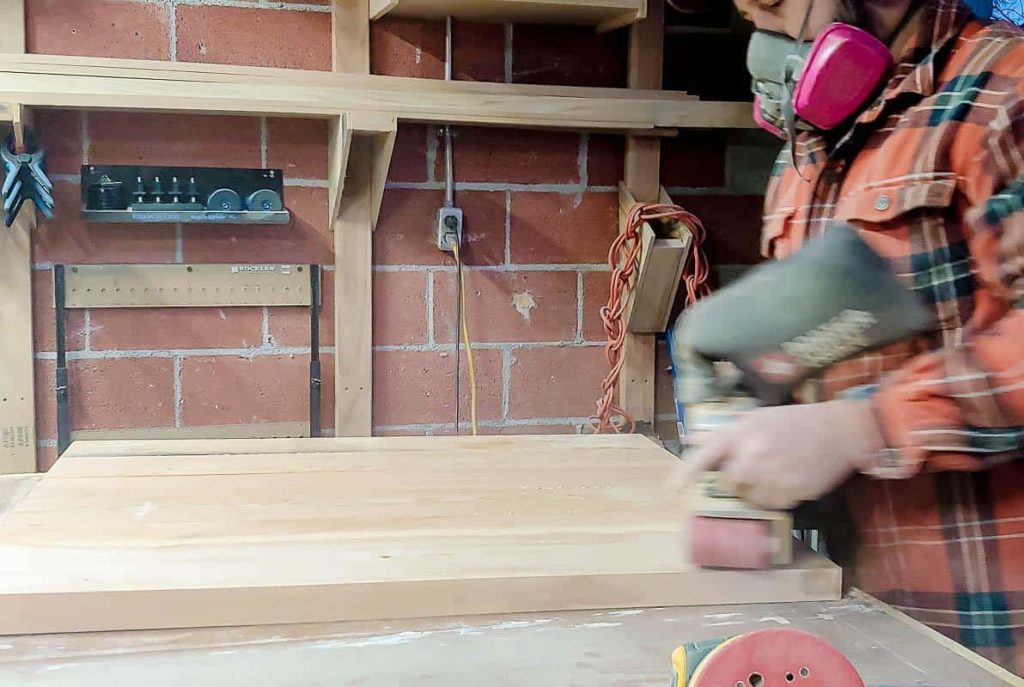
- Level the middle slats with a belt sander using 80-grit sandpaper.
- If needed, square edges with a table saw or Kreg’s Rip-Cut.
Step 6: Add border
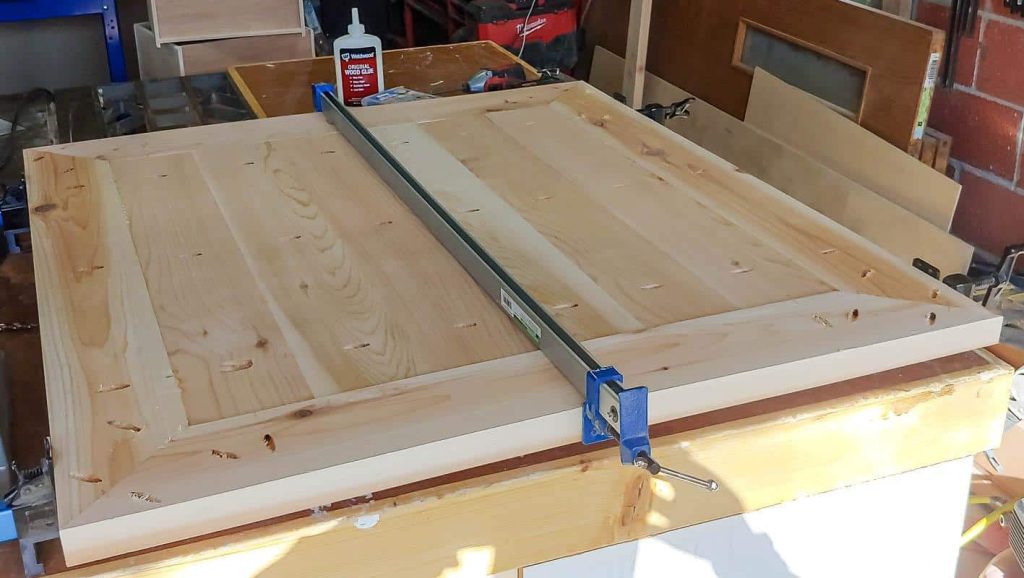
- Attach miter-cut border slats around the table edge with wood glue and screws at pocket holes.
- Clamp and allow to dry.
Step 7: Sand
- Use a belt sander and 80-grit sandpaper to ensure a flat surface.
- Once flat, you can use an orbital sander with 150-grit sandpaper.
Step 8: Fill gaps and sand
- Fill gaps with wood filler or sawdust mixed with wood glue. Let dry.
- Sand down with an orbital sander, progressing from 80 to 220 grit sandpaper.
Step 9: Stain and seal

- Apply stain and finish to the tabletop.
- We used Dark Walnut stain and polyurethane finish.
Step 10: Attach tabletop to base
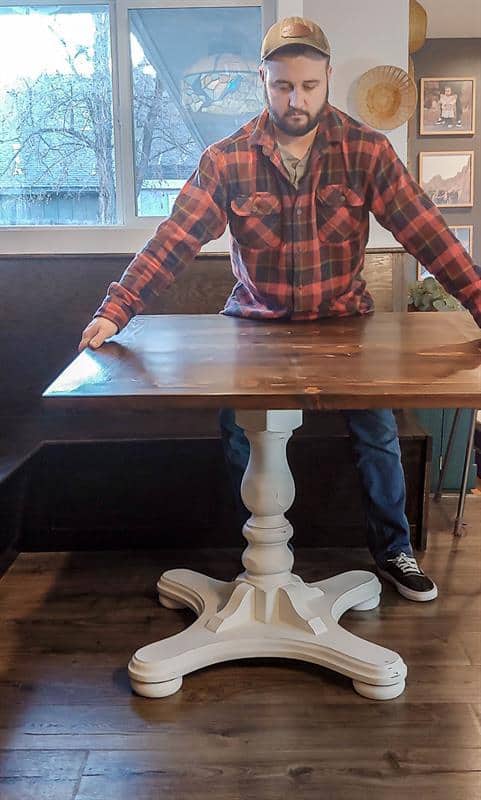
- Attach the tabletop to the base with screws.
- If your base doesn’t have a platform, create one using plywood.
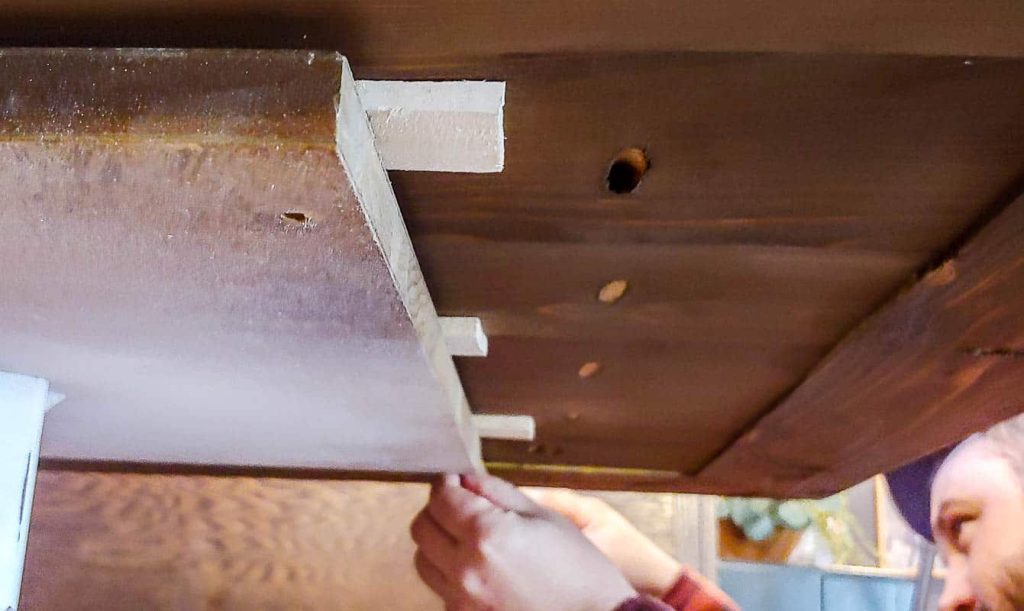
- Ensure the top is level; adjust as needed with shims under the tabletop.
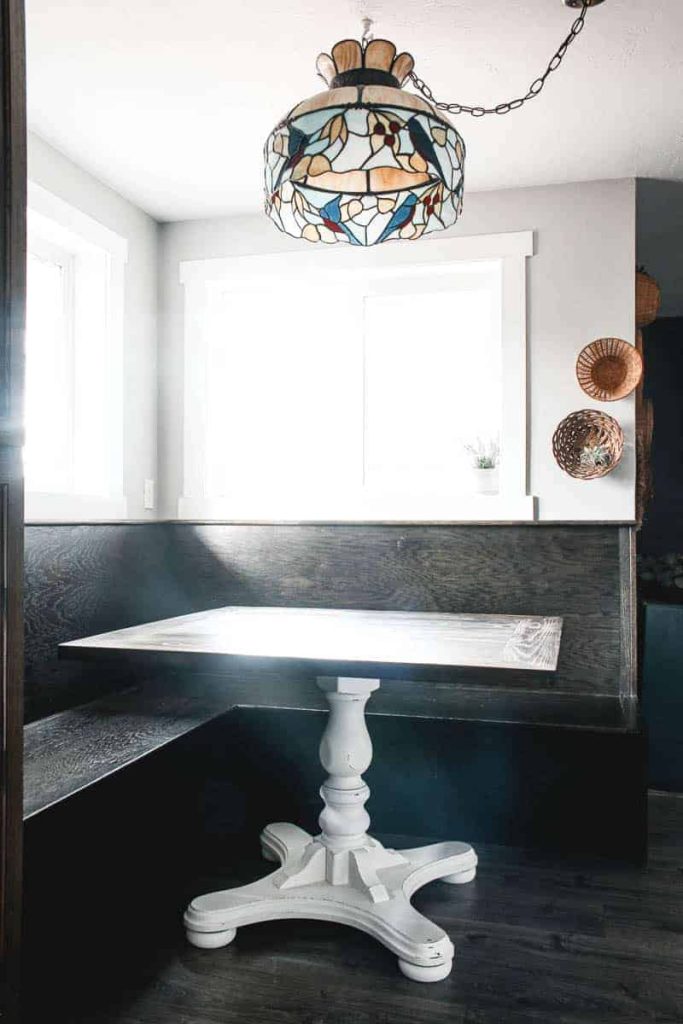
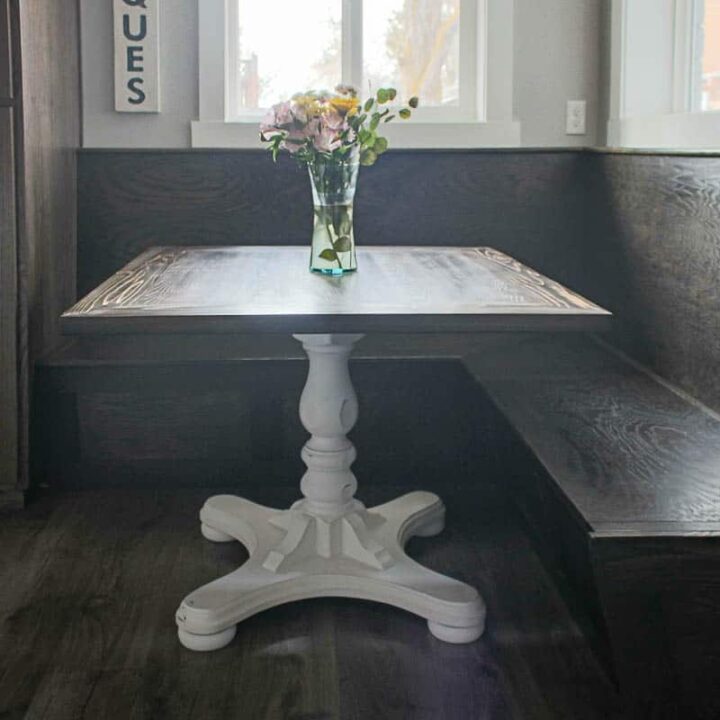
DIY Tabletop: The Reveal

We love how our new tabletop turned out! The square shape functions so much better for our kitchen and the banquette seating area!
Other methods of building a kitchen table top without pocket holes involve complicated table top construction techniques like dowel joinery or biscuit joinery.
Both of these methods require jigs and extra tools to make holes in the edge of the wood for dowels or biscuits.
How much did it cost to build this tabletop?
Not only is this DIY table top super easy to build (even for beginners), it was pretty inexpensive.
Cost breakdown:
- Lumber (2×6 premium cedar) – $81.81
- Polyurethane – $11.48 – If you’re trying to decide whether to use polyurethane vs polycrylic for your project, check out this article with an overview of each.
- Wood Putty (1 Walnut & 1 Ebony) – $3.68 each – $7.36
- Cabinet Screws (to attach the table to base) – $7.37
- **Already hand on hand: all sandpaper, wood glue, pocket hole screws, Dark Walnut stain, and all tools required **
TOTAL COST OF DIY TABLE TOP – $108.02
If you wanted to find ways to cut costs, even more, you could choose a different type of wood that was more affordable.
Alternatively, you could also use a thinner wood and attach a border on the edge to hide the thinner wood.

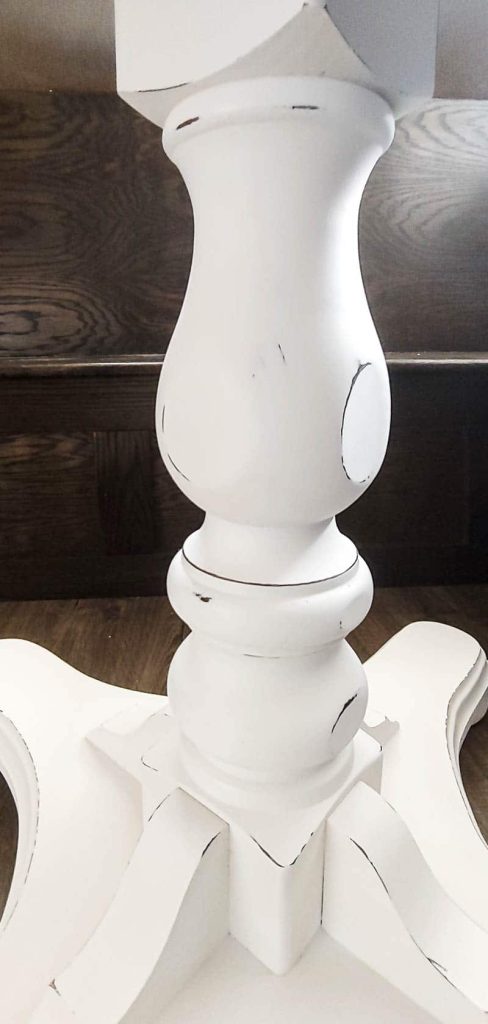
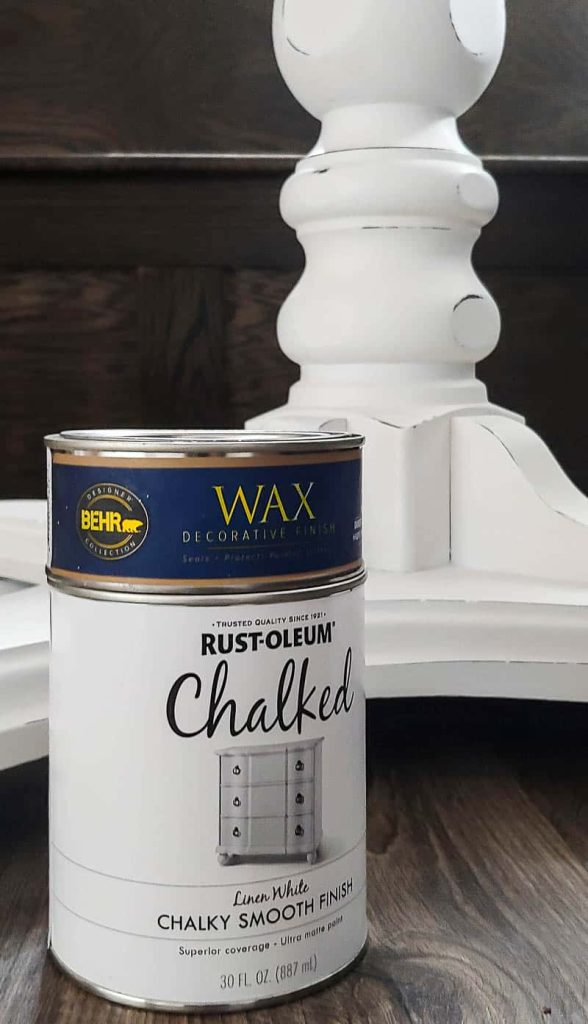
What about the cost of painting the table base?
The table base was also pretty cheap to makeover. Here’s the cost breakdown for the painted table base:
- Chalk Paint – $19.98
- Wax – $14.98
- Old Table (from Facebook Marketplace) – $25
- ** Already had on hand this paint sprayer, this wax brush, and 220 grit sandpaper **
TOTAL COST OF PAINTED TABLE BASE – $59.96
If you loved this, be sure to check out these other chalk paint furniture ideas!
So that means we’re into this table for approximately $170 – which is pretty good. Definitely, A LOT cheaper than buying a real wood table and the best part is that it fits perfectly in our space.
How To Build A DIY Table Top
This kitchen tabletop is so easy to build, even for beginners. We incorporated pocket hole joinery to join the table slats together and used an old table base from something we already had and repainted it
Materials
- (3) 2x6, 144", Board
- (46) 1 1/2" Pocket Hole Screws (Zinc)
- Wood Glue
- Wood Stain
- Polyurethane
- (8) 1 1/2" Cabinet Screws
- Wood Putty
Tools
- Kreg Pocket Hole Jig
- Air Compressor
- Clamps
- Drill
- Hammer
- Impact Driver
- Jointer
- Miter Saw
- Orbital Sander
- Square
- Table Saw
- Tape Measure
Instructions
- Cut wood.
- Run wood through jointer.
- Drill pocket holes.
- Assemble table slats.
- Sand sand square table interior.
- Add border slats.
- Sand table top flat.
- Fill gaps and sand.
- Stain and finish.
- Assemble table.
Notes
Cut list:
- (6) Table Slat, 1 1/2" x 6" x 34"
- (2) Short Side Table Border Slat, 1 1/2" x 5" X 40"
- (2) Long Side Table Border Slat, 1 1/2" x 5" x 44"
Click here to download the woodworking plans and see more step by step details!
Related – Projects that use a pocket hole jig
- Kid’s Cabin Bed
- Table Top
- Planter Box for Front Porch
- Outdoor Plant Wall
- Farmhouse Sink Cabinet
- Mudroom Lockers
- DIY Desk Calendar & Wooden Pencil Holder
- DIY Dress Up Storage for Kids
- Picture Ledge DIY
- DIY Firewood Rack with Roof
- DIY Cane Headboard
- Boho Nightstand with Cane
- DIY Behind the Couch Table with Outlet
- DIY Headphone Stand
- DIY Cookbook Stand
- Easy DIY Grill Utensil Holder
- DIY Deck Box for Outdoor Toys
- DIY Towel Rack Made With One Board
- DIY Tool Organizer for Kreg Tool Stand
- DIY Mail and Key Holder
- DIY Step Stool for Toddler
- DIY Trash Can
- DIY Spice Rack
- DIY Book Holder
- Easy DIY Magazine Shelf
- DIY Clamp Rack
- DIY Chicknic Table
- DIY Bike Rack
- Small Bookshelf
- DIY Laptop Tray