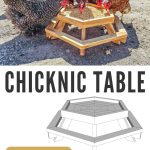
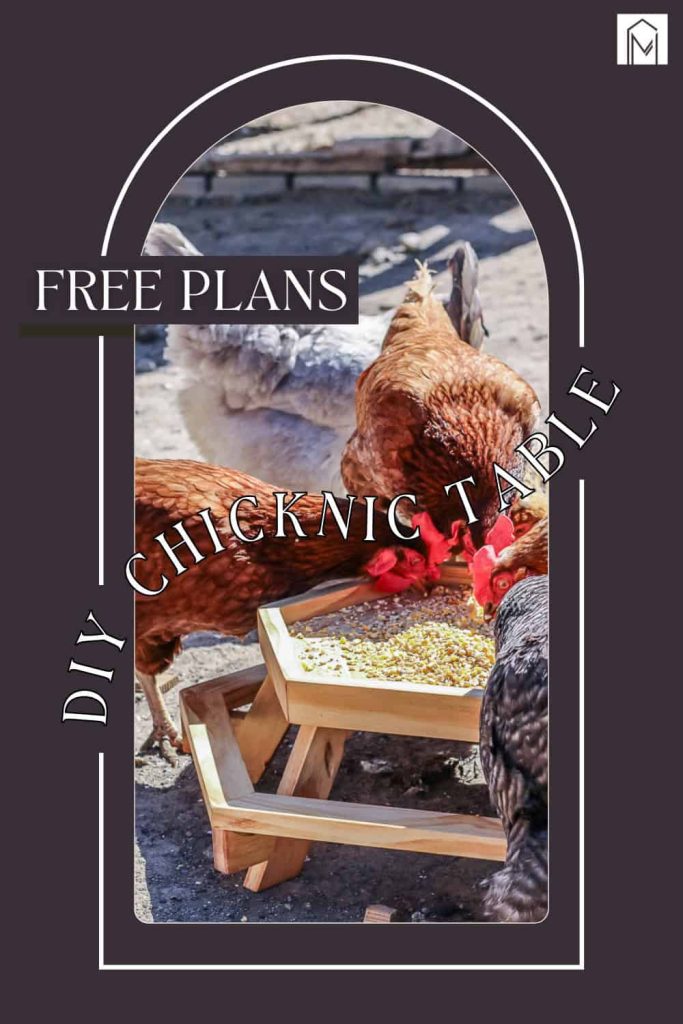
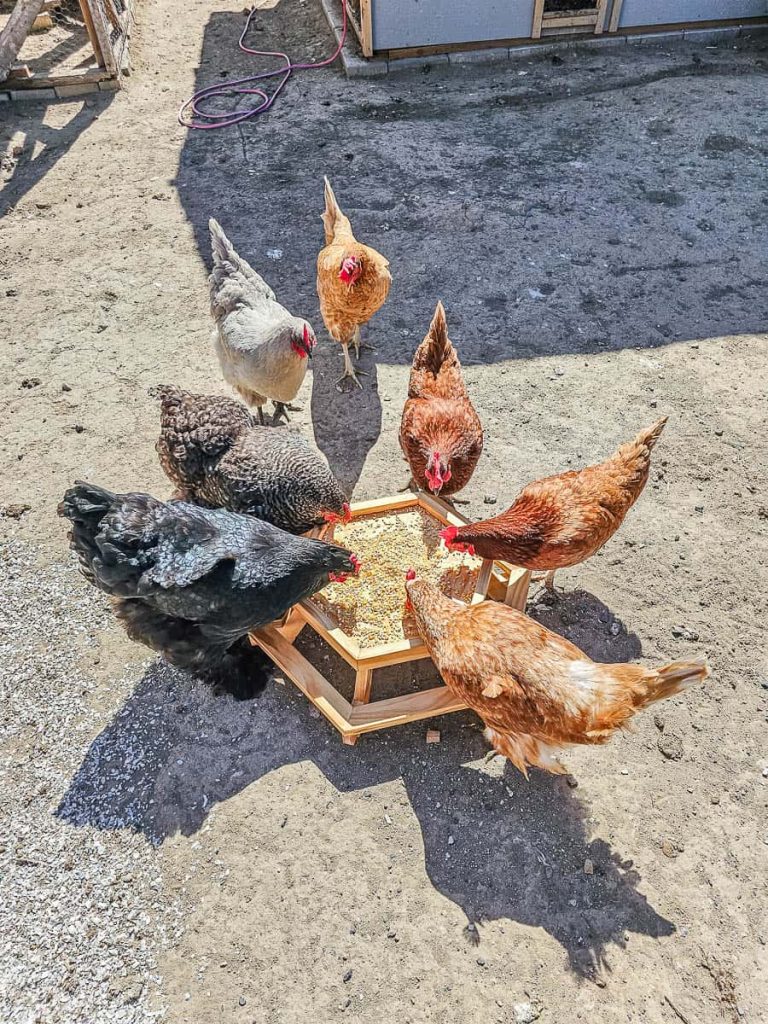
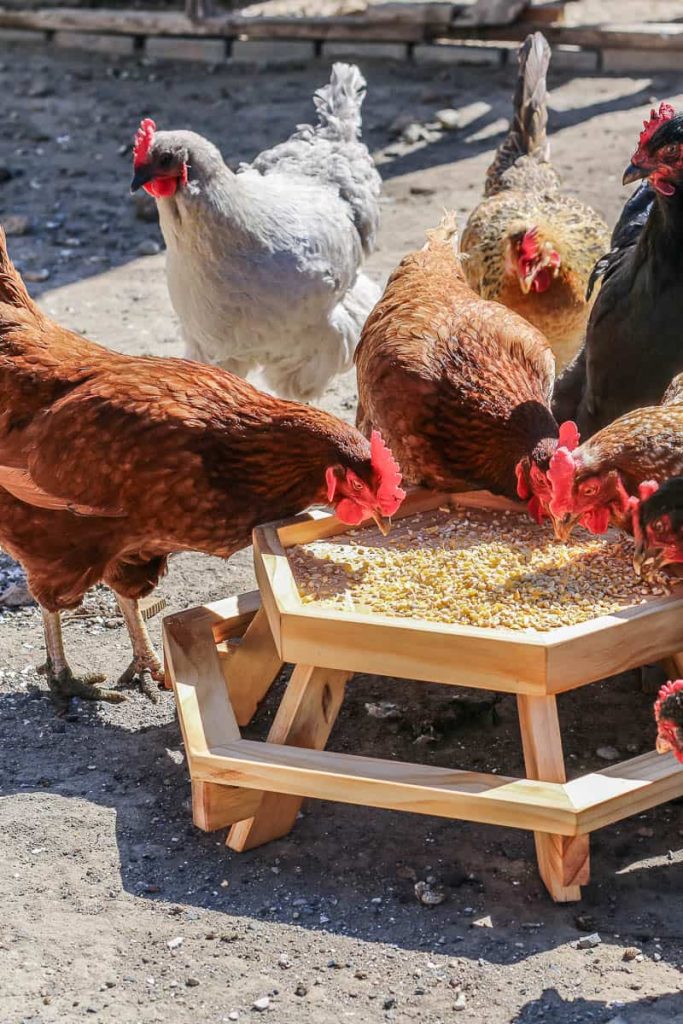
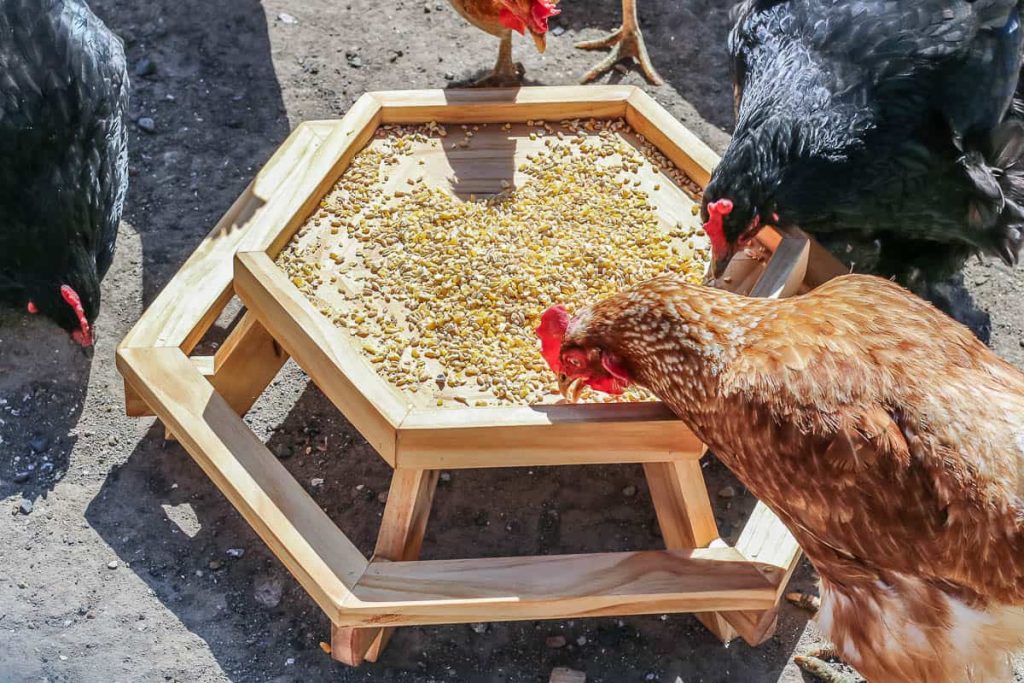
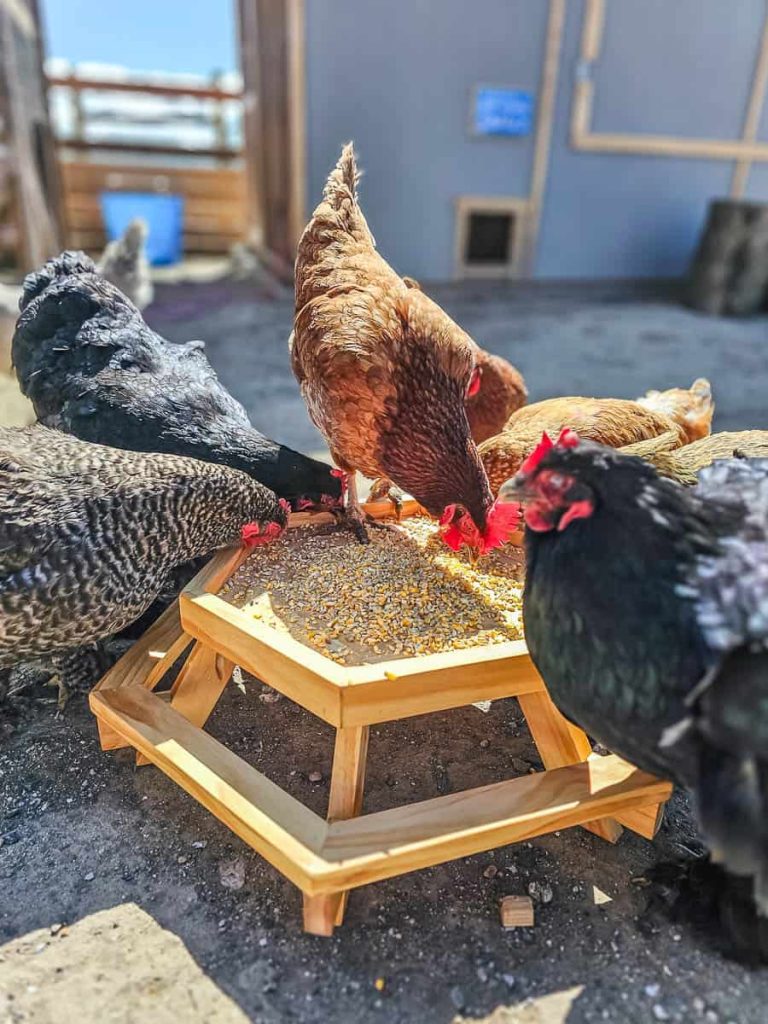
Treat your feathered friends with this adorable DIY picnic table for chickens - known as the chicknic table. Feeding your chickens has never been so much fun!
Thank you to Kreg for sponsoring this DIY chicknic table! All opinions are entirely my own. This post also contains affiliate links, but nothing that I wouldn’t recommend wholeheartedly. Read my full disclosure here.
Have you ever heard of a chicken picnic table? It’s also affectionately known as a chicknic table. Today we’re sharing the tutorial and woodworking plans to make this mini-sized picnic table that is just the most adorable thing I’ve ever seen.
Table of Contents
- Kreg Pocket Hole Jig Micro
- DIY Chicknic Table: Video Tutorial
- Chicknic Table: Step-by-Step Instructions
- Wood Products Needed:
- Supplies & Hardware Needed:
- Tools Needed:
- Step 1. Cut wood.
- Step 2. Drill pocket holes.
- Step 3. Attach support pieces to legs.
- Step 4. Assemble interior top pieces.
- Step 5. Sand
- Step 6. Fill gaps.
- Step 7. Attach trim.
- Step 8. Sand the top again.
- Step 9. Attach bench seat pieces.
- Step 10. Add legs.
- Step 11. Add top.
- Step 12. Sand again.
- Step 13. Seal.
Maybe you’ve seen or heard of the mini picnic tables for squirrels – like this? Well, the chicknic table is just like that but made just for chickens!
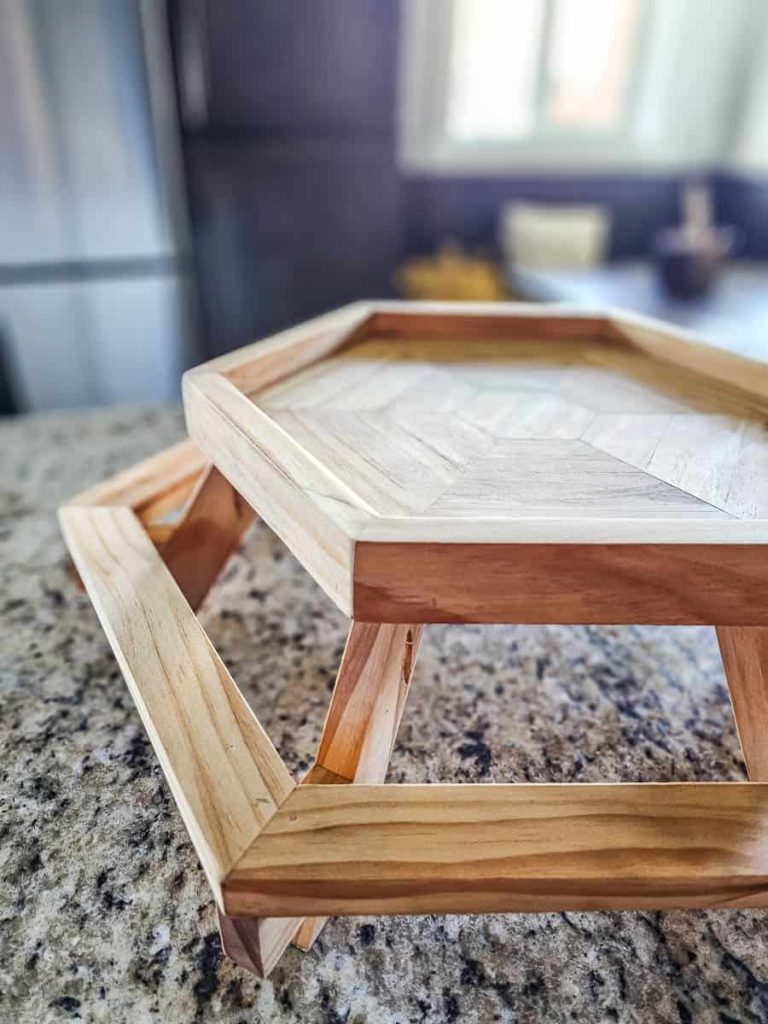
It just may be the cutest thing we’ve ever built. Yes, we realize that it is completely unnecessary. And it is also completely and utterly over the top with the intricate hexagon shape. But the irony here is what makes it so fun!
If you don’t have chickens, it is also a great size as a table for Barbies or dolls.
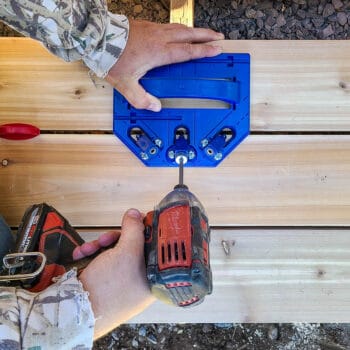
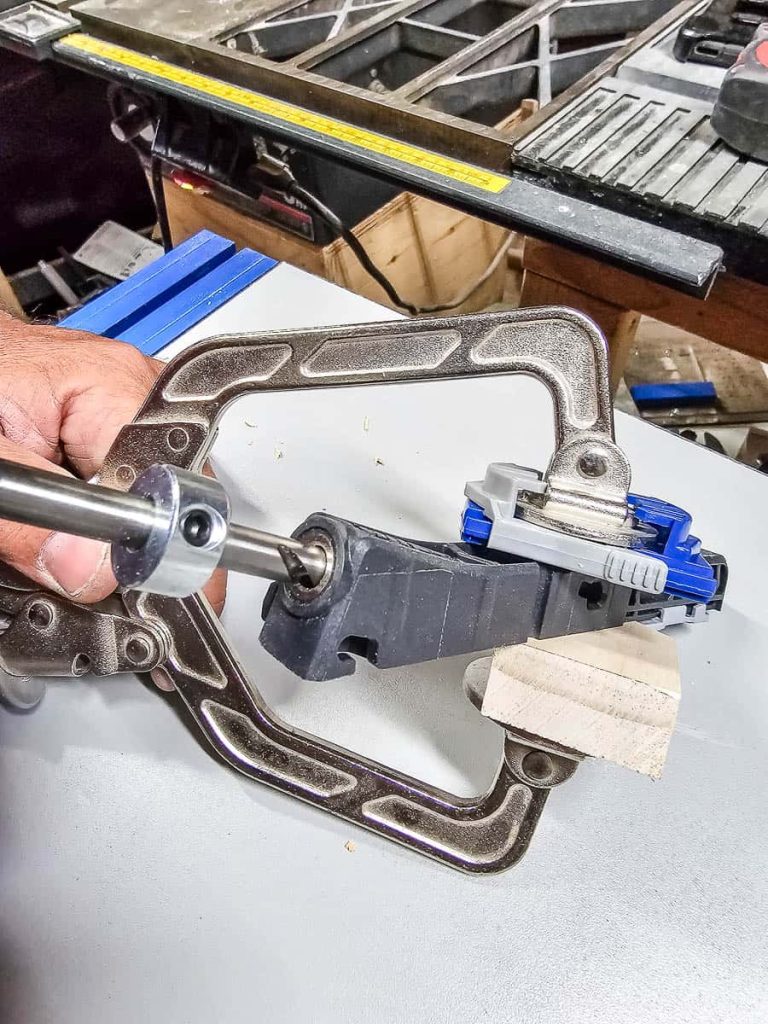
Kreg Pocket Hole Jig Micro
If you’ve been following Making Manzanita for a bit, you know that we are big fans of the Kreg pocket hole system.
For most projects with pocket hole joinery, we use our 720Pro or 520Pro jigs. But since this little picnic table for chickens is so small, we’re going with the Kreg pocket hole jig micro.
Not sure which pocket hole jig is right for you and your woodworking project? Check out this guide on which pocket hole jig to buy for a detailed overview!
The micro pocket hole jig makes 33% smaller pocket holes, which is perfect for small-scale projects or thin-stock, like 1/2″ thick boards.
Remember that you’ll also need to use a different type of pocket hole screw for these smaller pocket holes. You’ll want to look for the “pan-head” head type when buying pocket hole screws. Those are the ones that are made for the micro pocket holes.
Kreg also makes removable drill guide blocks that drill micro pocket holes for both the 720 and 520 jigs if you have those. You can simply slide the drill block in and drill your pocket holes as normal.
However, for this chicknic table project, we wanted to try out the new stand-alone micro pocket hole jig that has a cool twist-apart design. It functions very similar to the 320 jig, which we covered here.
We teamed up with our friends Kreg again for these chicken feeder picnic table plans and are sharing them online for free, now available on KregTool.com!
P.S. Kreg’s website is chocked full of so many easy-to-follow FREE woodworking plans! I promise that you are going to find so much inspiration while you’re there! It is a goldmine!
DIY Chicknic Table: Video Tutorial
If you love DIY videos, be sure to subscribe to our YouTube channel!
Chicknic Table: Step-by-Step Instructions
Wood Products Needed:
Supplies & Hardware Needed:
- Kreg zinc pan-head pocket hole screws (1 ¼”)
- 80 & 150 grit sandpaper
- 1 ½” Brad nails
- Wood filler
- Wood glue
- Boiled linseed oil
- Staining cloth
Tools Needed:
- Kreg pocket hole jig micro
- Kreg wood project clamp
- Kreg clamp table & stand
- Miter saw
- Table saw (or circular saw with RipCut)
- Tape measure
- Drill
- Impact driver
- Orbital sander
- Brad nail gun
- Bar clamps
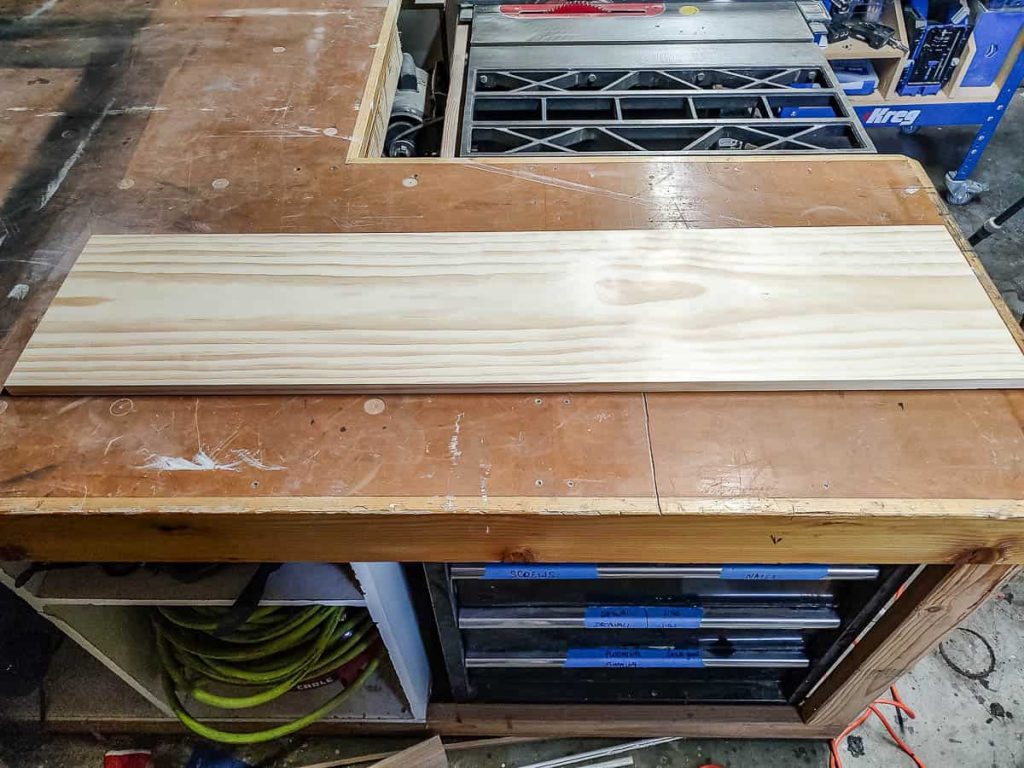
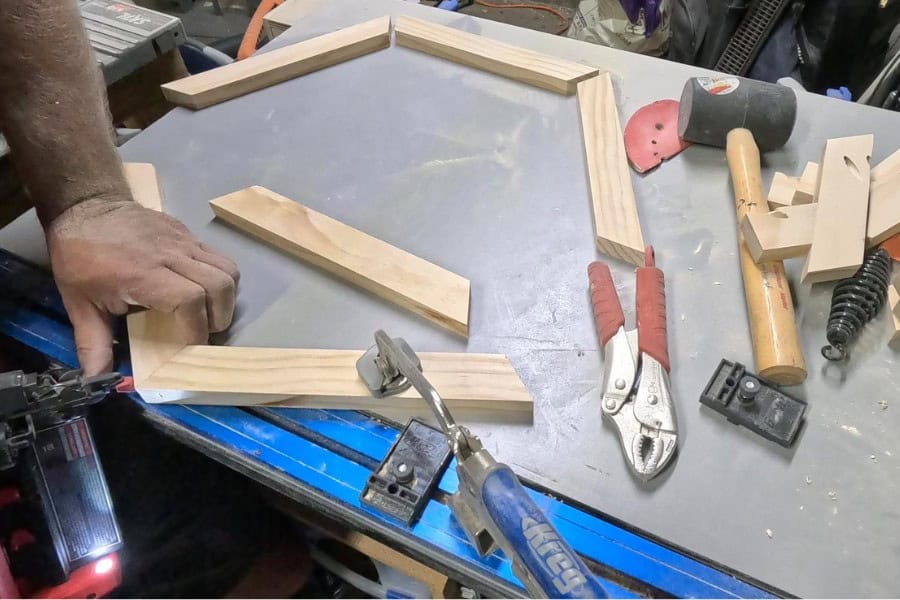
Step 1. Cut wood.
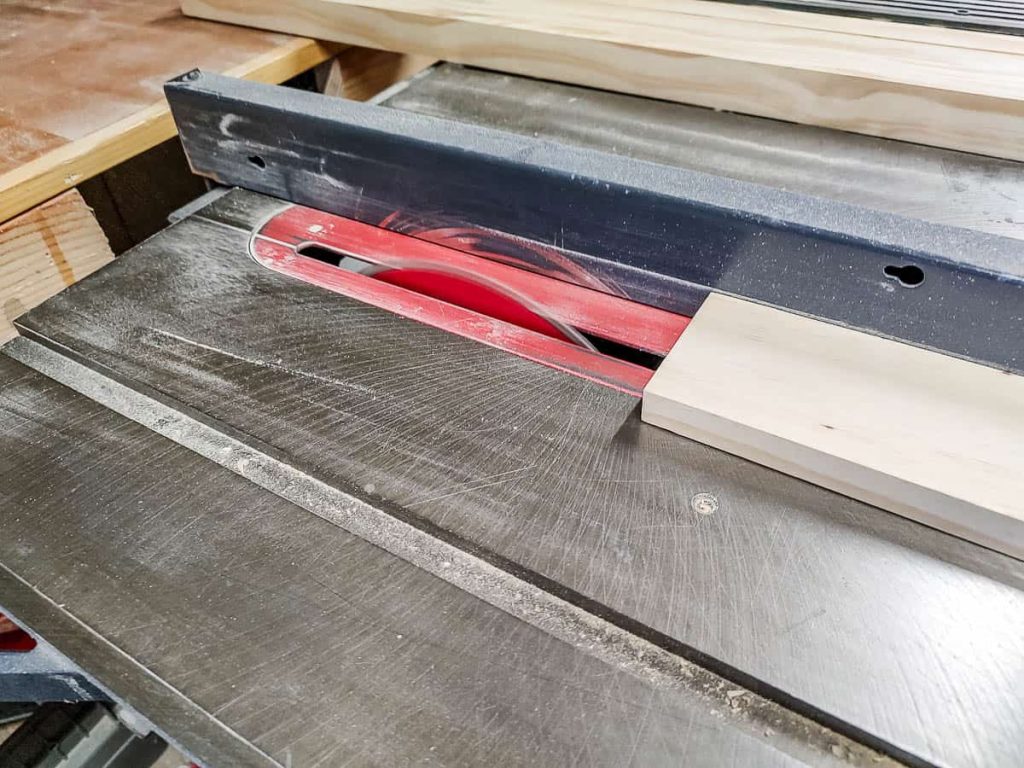
- Follow the visual cut list in the woodworking plans, which can be downloaded here.

- Save money by ripping a 4’ length of a 1×12 to the correct sizes with a table saw or circular saw with Rip-Cut. Alternatively, purchase 1x2s to skip this step.
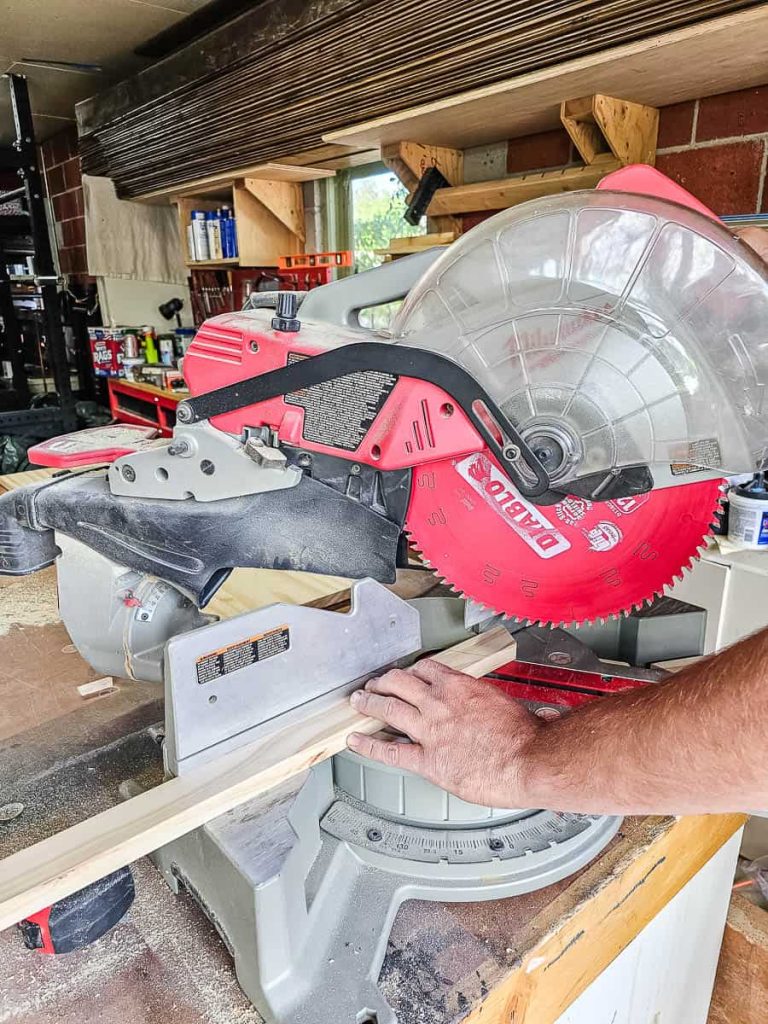
- Use a miter saw for the lengths and angled cuts.
Hexagon Angle Tip: The math for the hexagon shape calls for 30-degree angles. Set your miter saw to a 29.5-degree angle when cutting interior pieces. This slight adjustment allows for easier fitting. Remember, perfection isn’t necessary as wood filler will be applied later.
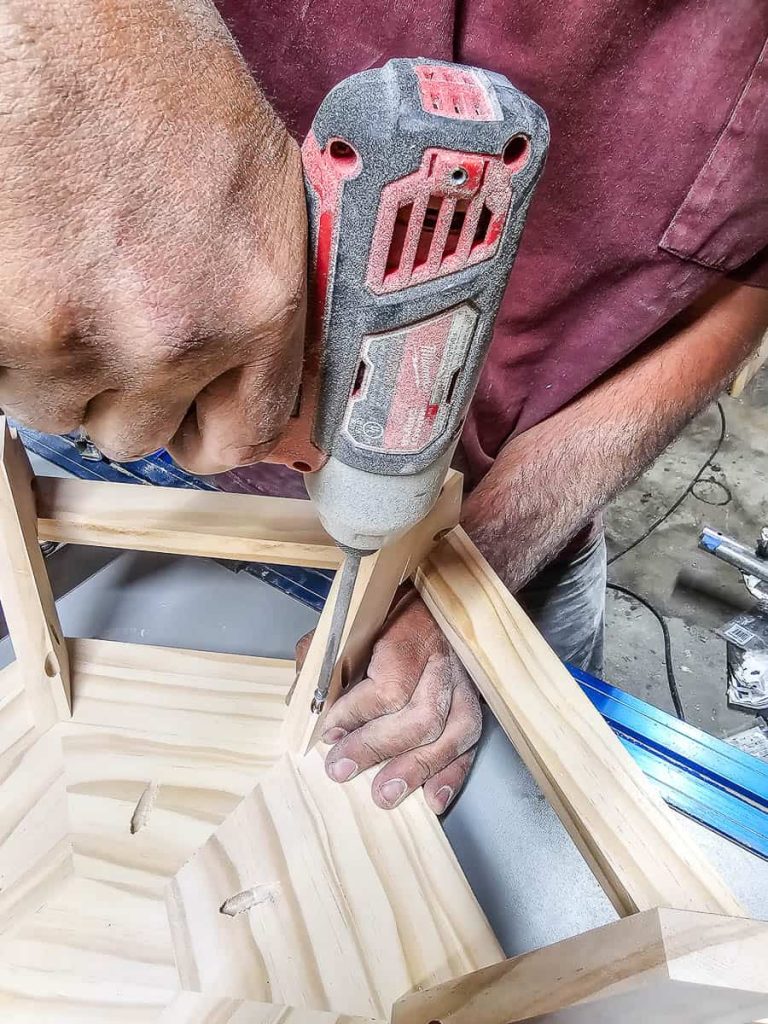
Step 2. Drill pocket holes.

- Refer to the woodworking plans for pocket hole placements.
- We recommend using the Kreg Pocket Hole Jig Micro for small pieces. This jig creates smaller pocket holes.
Step 3. Attach support pieces to legs.
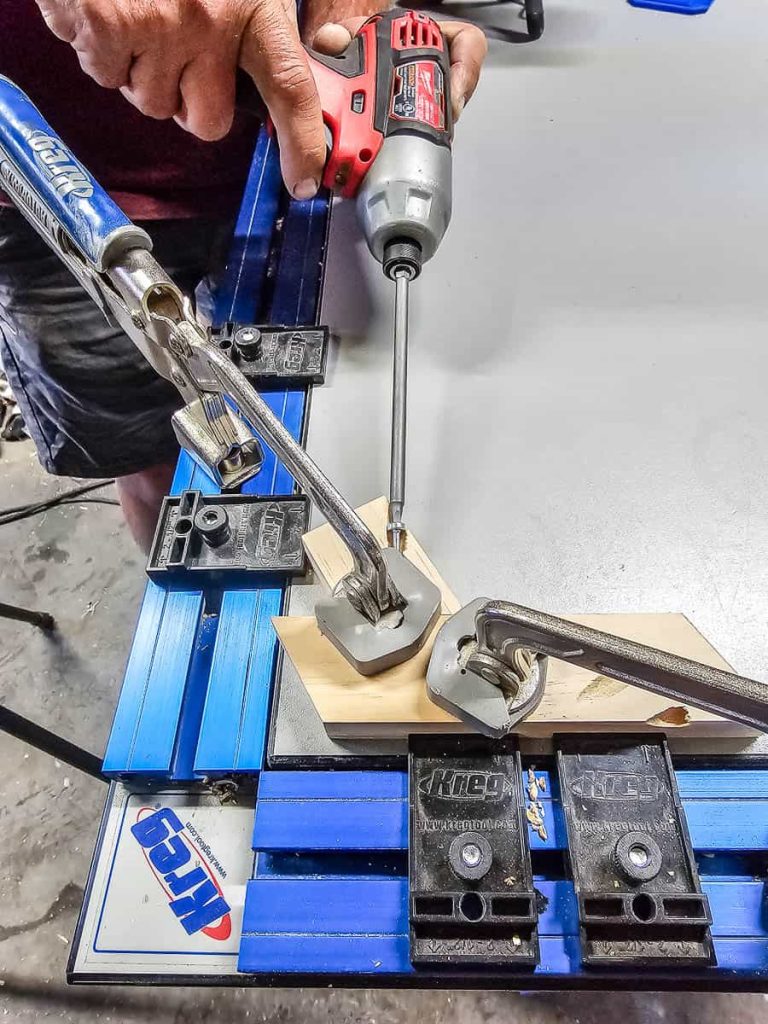
- Mark the legs for support piece placement.
- Clamp and attach using pre-drilled pocket holes.
- We love using the Kreg Clamp Table for simple and easy alignment.
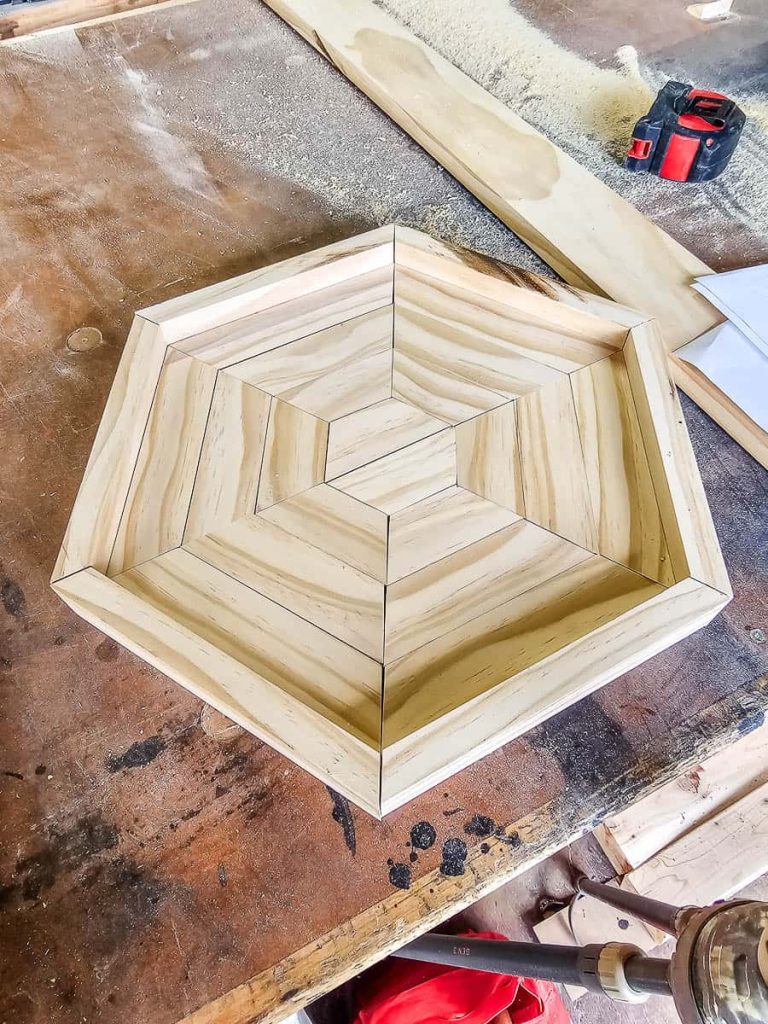
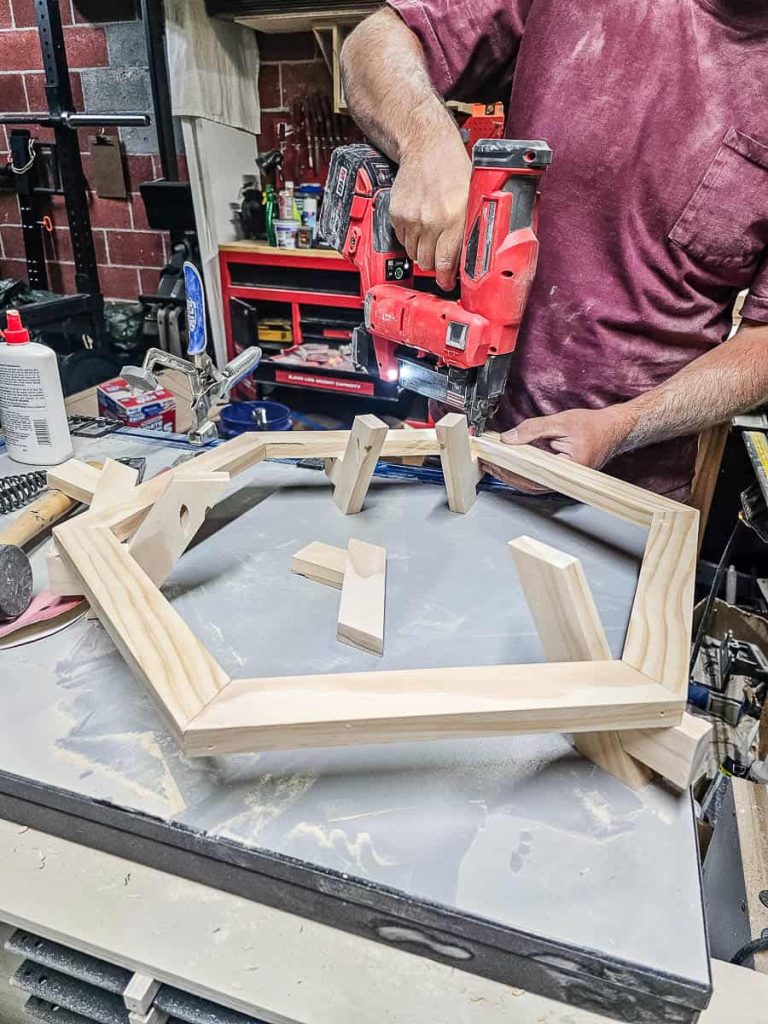
Step 4. Assemble interior top pieces.
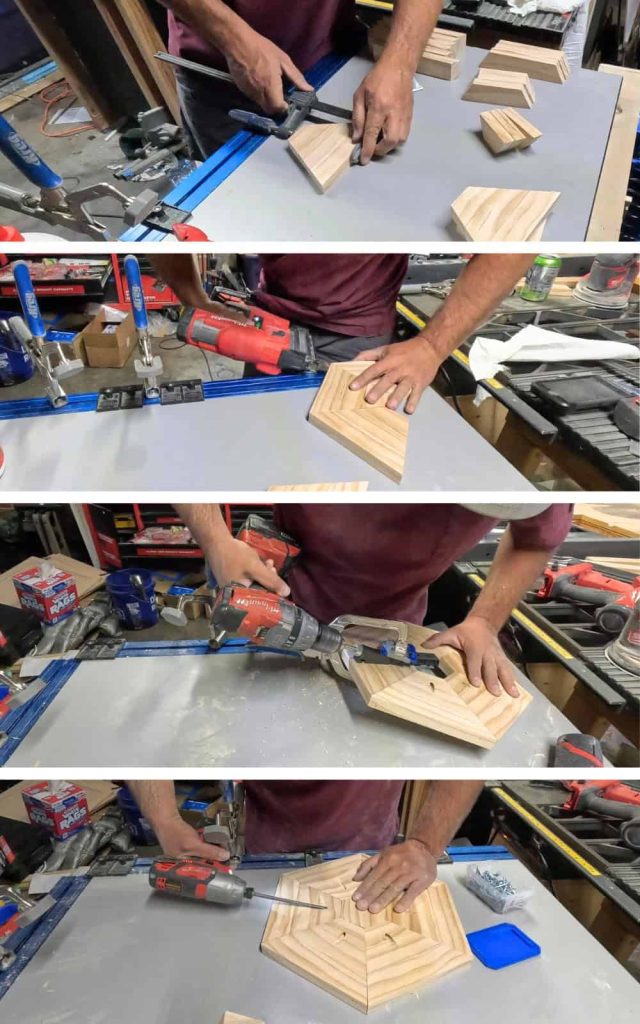
- Apply wood glue to tabletop interior piece edges.
- Clamp three pieces of each wedge together.
- Secure with 1 ½” brad nails at an angle.
- Sand edges with 80-grit and 150-grit sandpaper.
- Drill one pocket hole on the short side of each wedge.
- Glue and clamp three wedges to form one hexagon half.
- Attach both halves together with wood glue and brad nails.
- Add the hexagon middle piece and secure with pocket holes.
- Sand edges if needed.
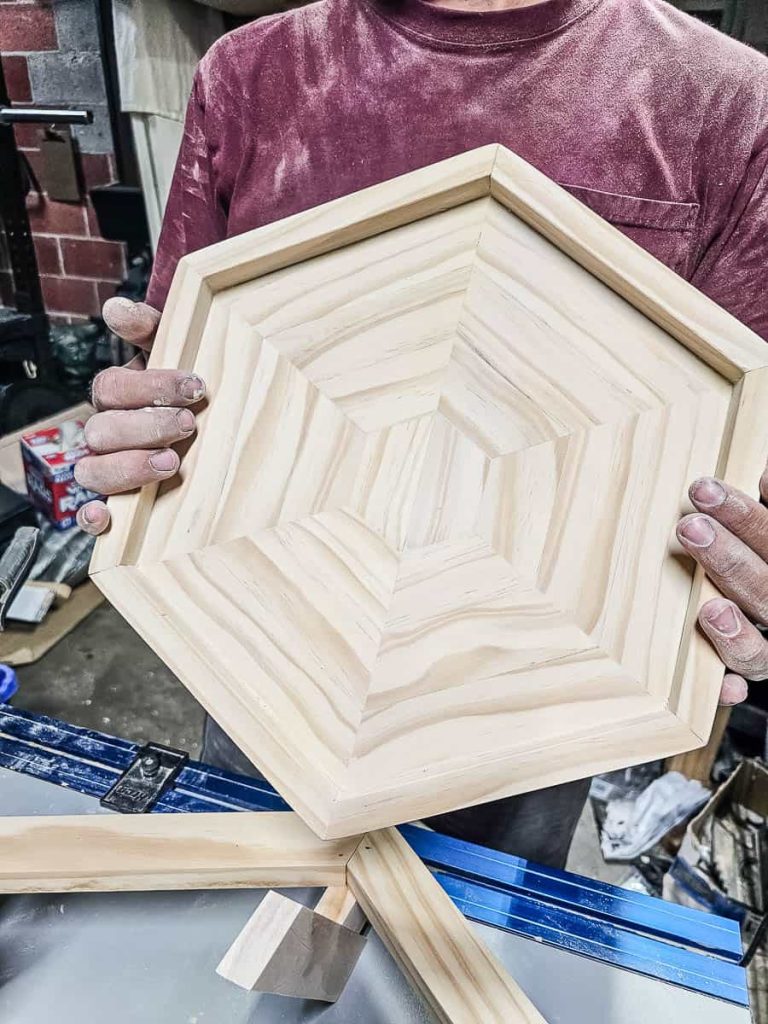
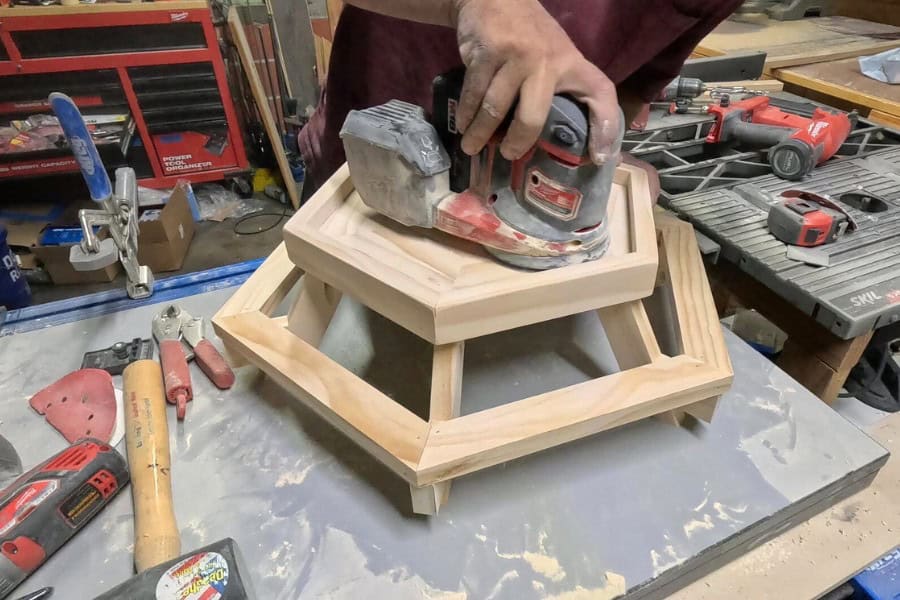
Step 5. Sand
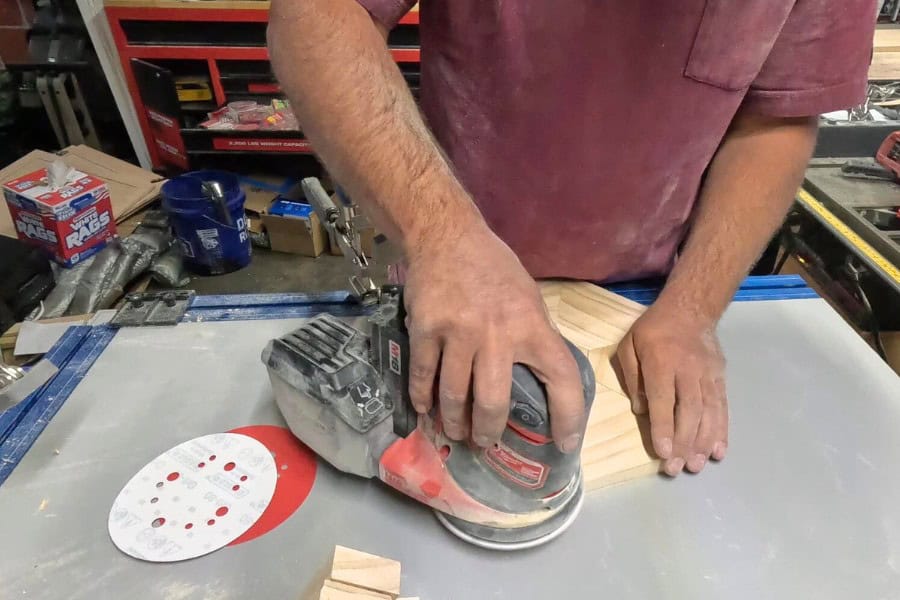
- Sand all interior top pieces with 80-grit and 150-grit sandpaper.
Step 6. Fill gaps.
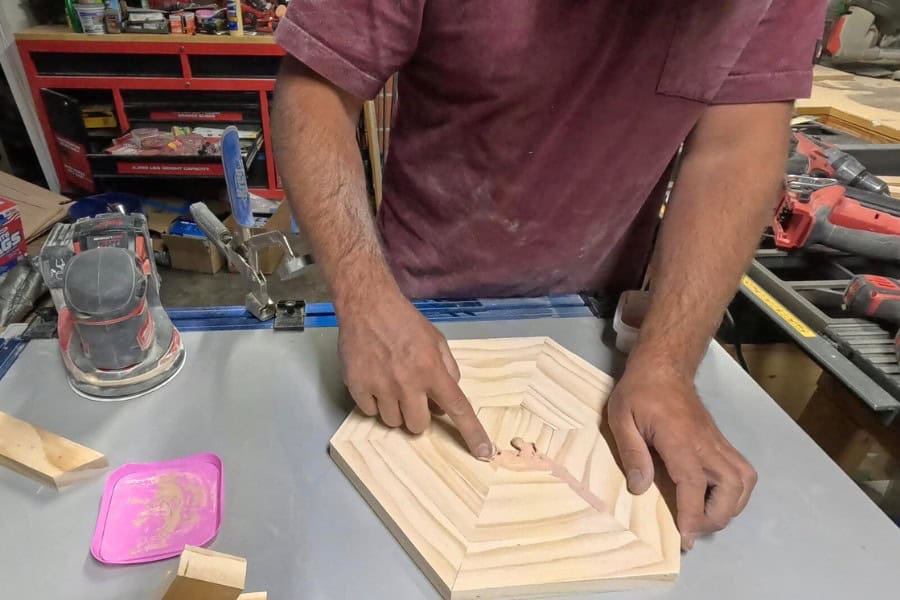
- Fill all gaps on table top with wood filler.
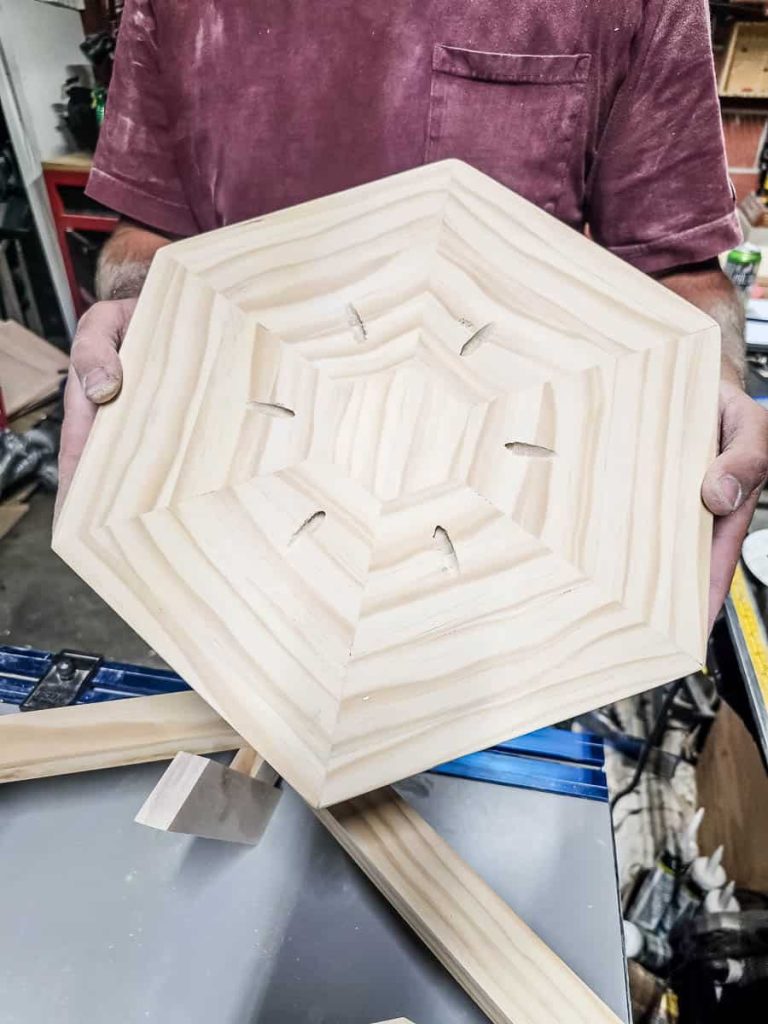
Step 7. Attach trim.
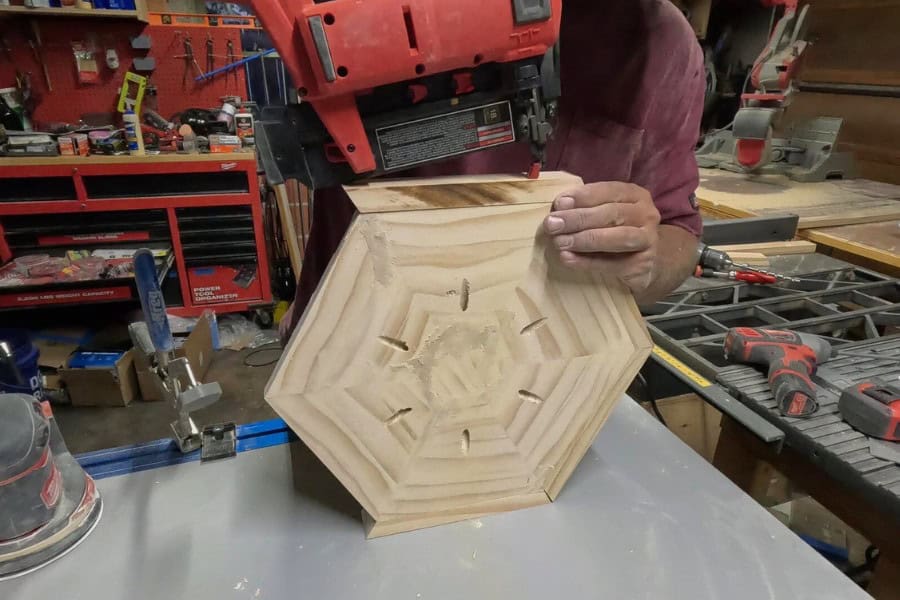
- Use wood glue and brad nails to attach trim pieces.
- Fill nail holes with wood filler.
Step 8. Sand the top again.
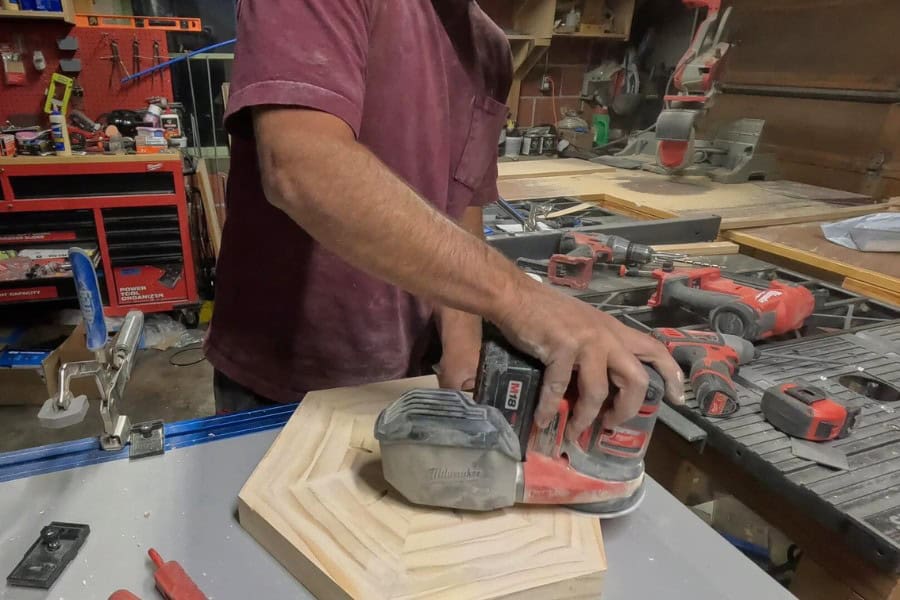
- Sand the top again until everything is flush and smooth.
Step 9. Attach bench seat pieces.
- Glue and secure bench seat pieces with brad nails.
Step 10. Add legs.
- Apply wood glue to support piece edges.
- Secure legs to bench seat with brad nails.
- Fill nail holes with wood filler.
Step 11. Add top.
- Secure tabletop with pre-drilled pocket holes.
Step 12. Sand again.
- Sand with 80-grit and 150-grit sandpaper.
- Hand sand edges and corners with 150-grit sandpaper.
Step 13. Seal.
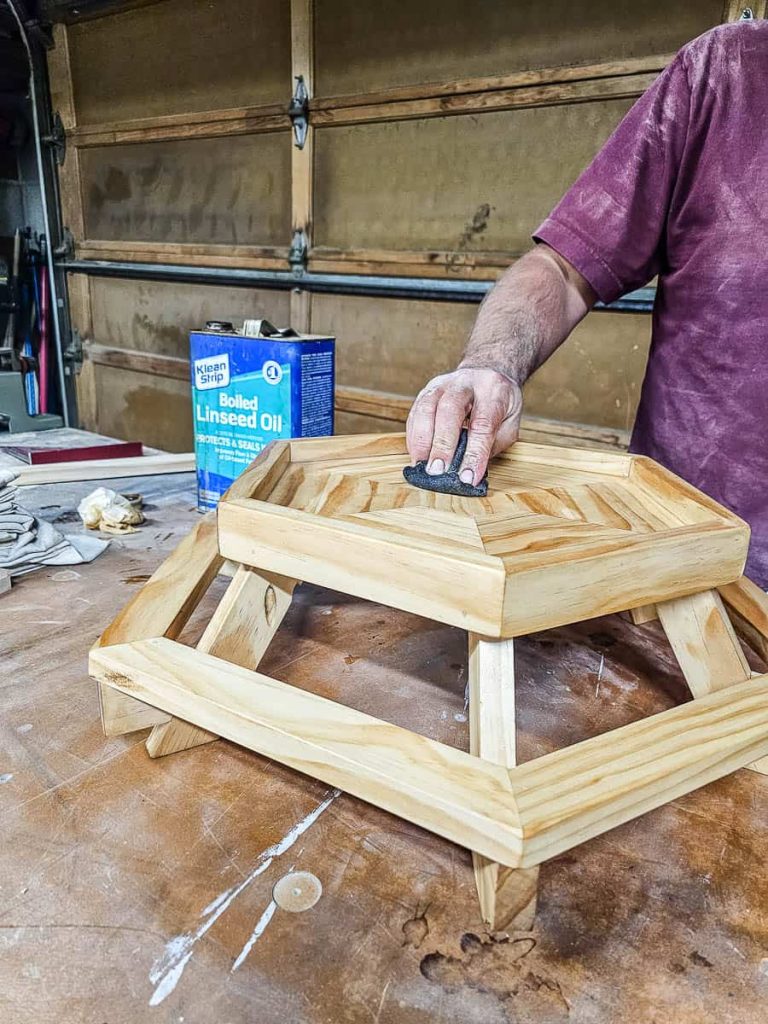
- Wipe all of the surfaces and apply chosen sealer, such as linseed oil.
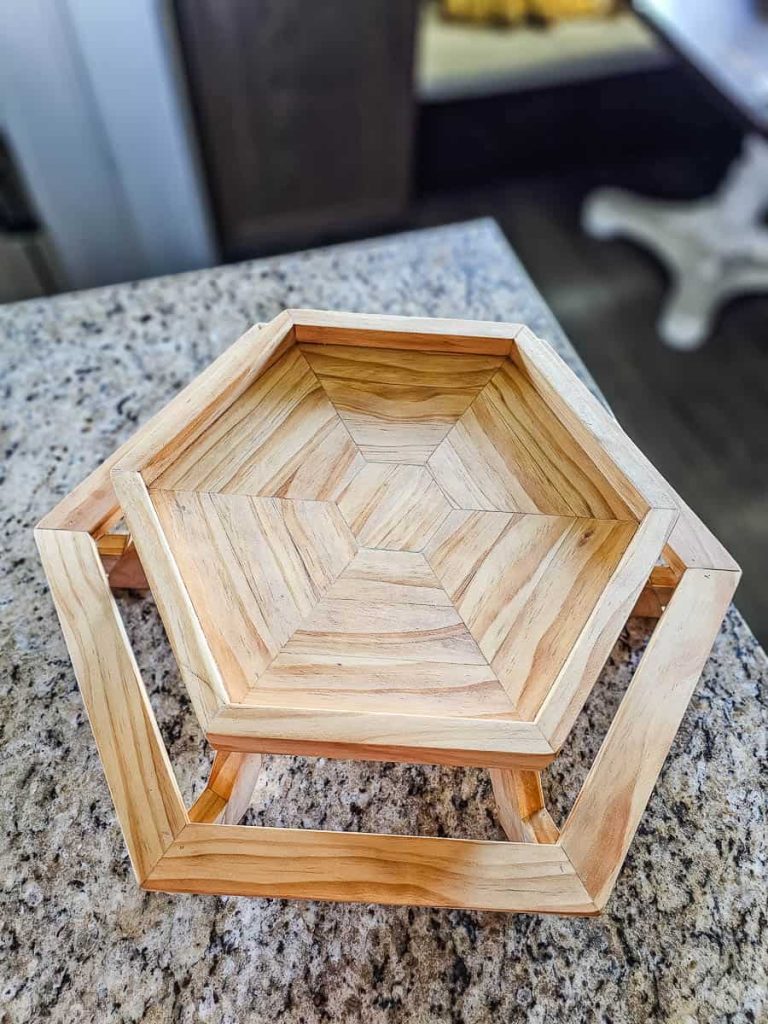
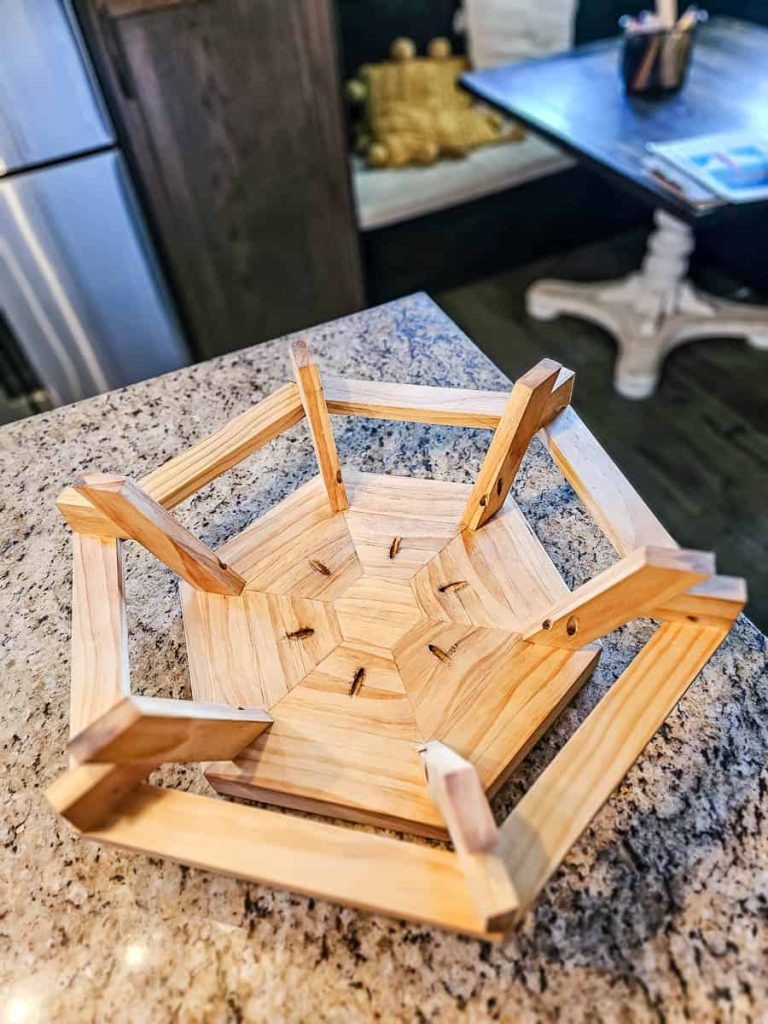
We could have definitely kept the handmade chicknic table more simple with a rectangular shape, but Logan wanted to have some fun with it and make something unlike everything else that is out there on Pinterest or Etsy. Gotta give it a unique touch, right?
We also found that with the clever design of the hexagon, there are more openings for the chickens to eat – which is nice when they also start bickering over the feed!
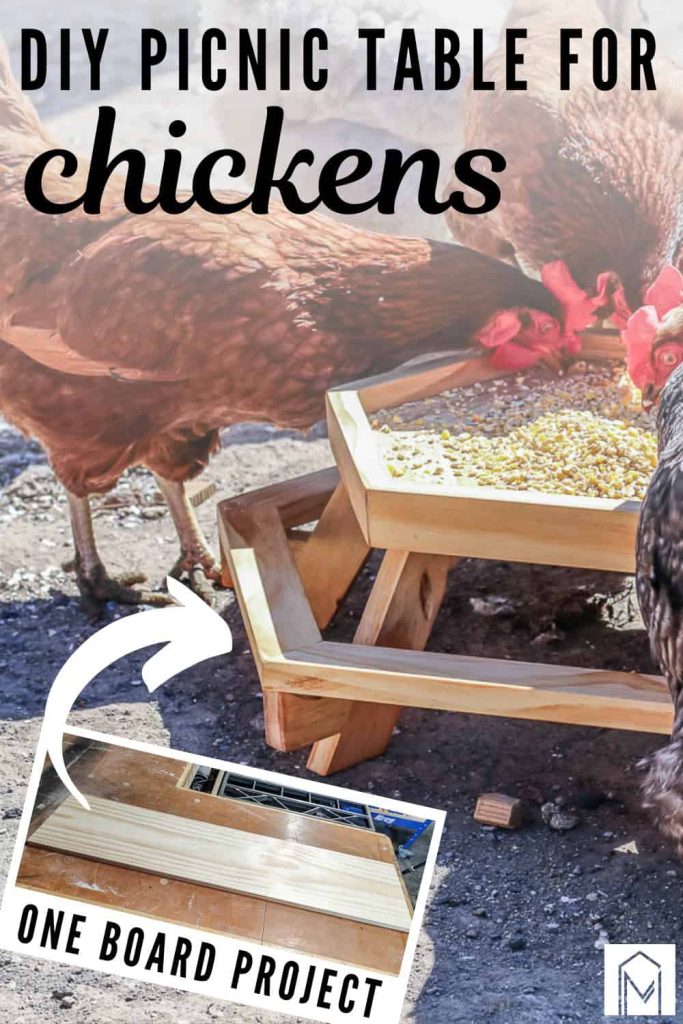
One thing that I love about this project is that you can make it entirely with one board of wood – under $15! I also love a small woodworking project where you don’t need to buy a lot of supplies and materials. Even better when you build it with scrap wood, like one of these projects.
If you want to build your own little chicken picnic table, be sure to hop over to Kreg Tool’s website to get the free woodworking plans with all the dimensions and measurements. We’ve done all the hard work for you figuring out the math and angles, so the plans will make this build a lot easier.
Related – Projects that use a pocket hole jig
- Kid’s Cabin Bed
- Table Top
- Planter Box for Front Porch
- Outdoor Plant Wall
- Farmhouse Sink Cabinet
- Mudroom Lockers
- DIY Desk Calendar & Wooden Pencil Holder
- DIY Dress Up Storage for Kids
- Picture Ledge DIY
- DIY Firewood Rack with Roof
- DIY Cane Headboard
- Boho Nightstand with Cane
- DIY Behind the Couch Table with Outlet
- DIY Headphone Stand
- DIY Cookbook Stand
- Easy DIY Grill Utensil Holder
- DIY Deck Box for Outdoor Toys
- DIY Towel Rack Made With One Board
- DIY Tool Organizer for Kreg Tool Stand
- DIY Mail and Key Holder
- DIY Step Stool for Toddler
- DIY Trash Can
- DIY Spice Rack
- DIY Book Holder
- Easy DIY Magazine Shelf
- DIY Clamp Rack
- DIY Chicknic Table