How To Use The Kreg Pocket Hole Jig 320

Are you thinking about buying the Kreg pocket hole jig 320? Or did you just get it and don't know how to use it? Learn how to use this budget-friendly portable jig to create easy pocket holes!
If you’ve been around a while, you know that we love using pocket-hole joints on our woodworking projects. Most often, we use the Kreg 720Pro to drill the pocket holes. But we also have the 520Pro (slightly smaller and more portable) and the Kreg Pocket Hole Jig 320, which is very compact and versatile.
Today we’re doing a deep-dive on that Kreg 320 pocket hole jig so you can learn how to use it. Whether you’re attempting your first DIY project or you have years of project-building experience behind you, the 320 is a great little pocket hole jig.
This Kreg pocket hole jig 320 article contains affiliate links, but nothing that I wouldn’t wholeheartedly recommend anyway! Read my full disclosure here.
Even though it is a small jig, it is really a complete pocket-hole kit!
Let’s dive in!
Kreg Pocket Hole Jig 320: Video Walkthrough
If you love DIY videos, be sure to subscribe to our YouTube channel!
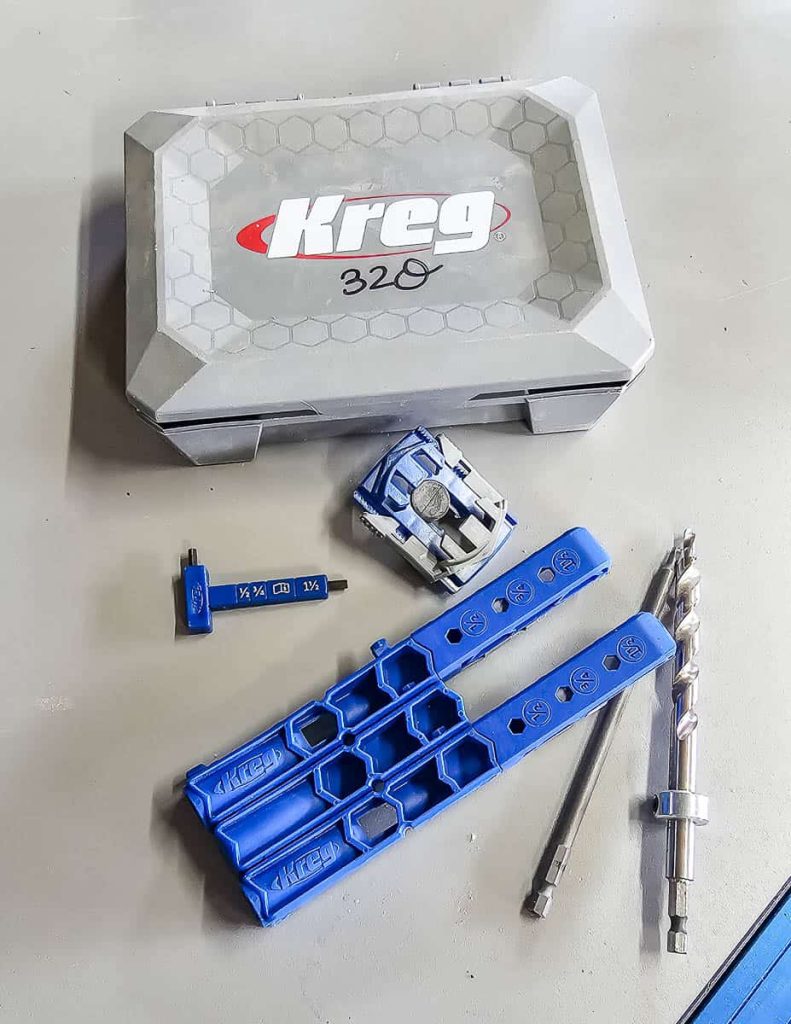
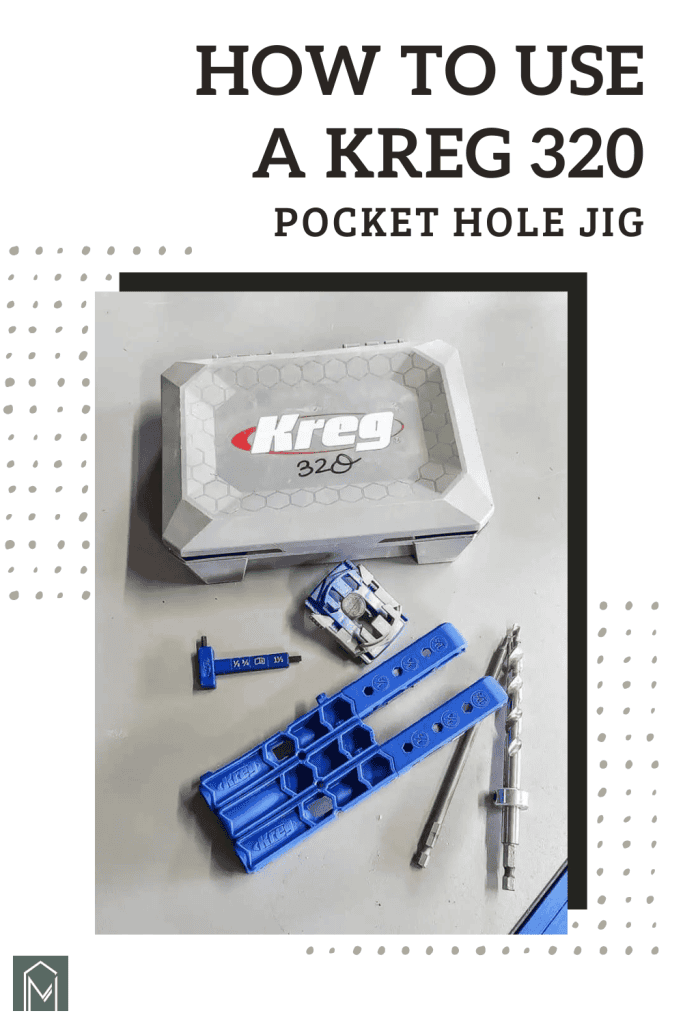
What’s Included with Your Kreg Pocket Hole Jig 320
You’ll get:
- Kreg pocket-hole jig 320 with 2 drill guides and 1 removable spacer
- Carrying case
- One easy-set drill bit and stop collar
- One hex wrench (also can be used as material-thickness gauge)
- One 6″ square-drive bit
- 40 sample screws to get started (not shown above)
- Owner’s manual (not shown above)
How To Use The Kreg Pocket Hole Jig 320 – Step-by-Step Instructions
Right out of the box, there’s not any setup to do on the pocket hole jig, which is really convenient. I love that you can just take it right out of the compact case and start using it right away for building DIY wood projects.
Step 1. Determine material thickness
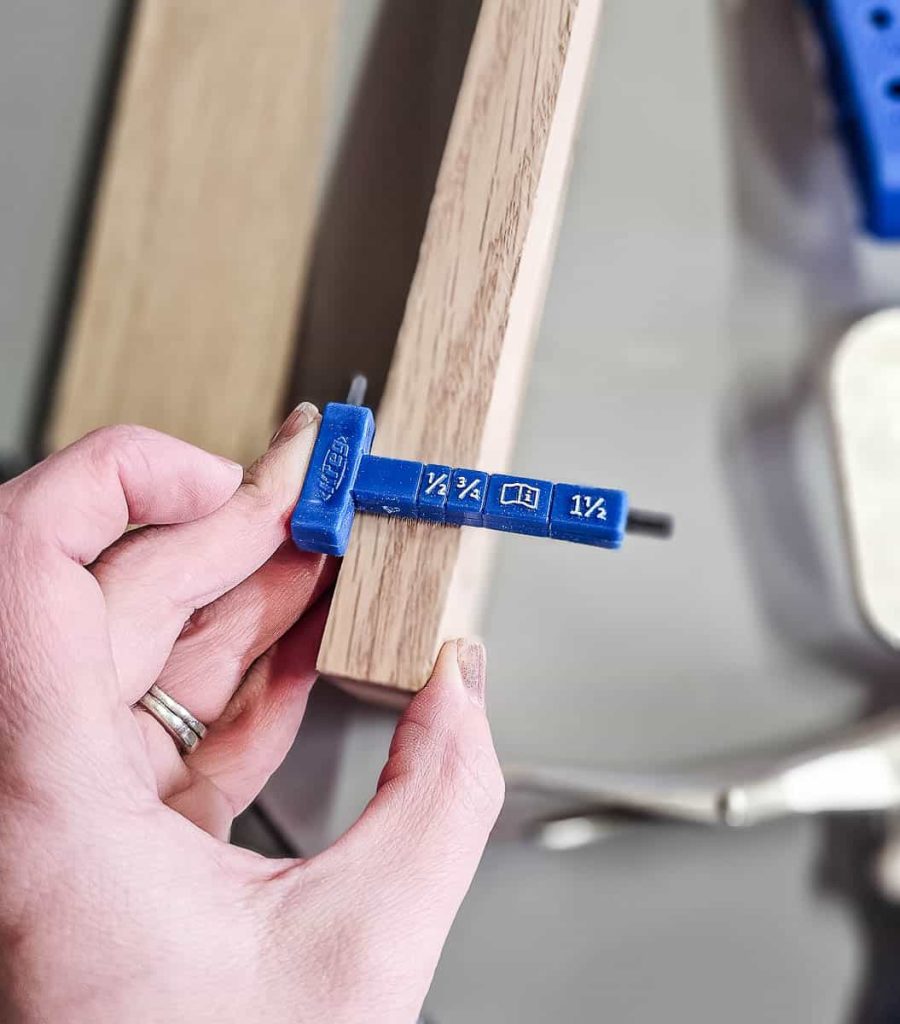
If you purchased the wood yourself, you probably already know how thick it is. But if you grabbed it from your scrap pile or you want to double-check the thickness, that’s your first step.
You can use a tape measure or the handy included material thickness gauge (which is on the side of the hex wrench). I love how Kreg Tools combined two different accessories with this little guy.
You’ll need to know the thickness of the material that you’re drilling the pocket holes on for the next few steps, so don’t skip this one!
Step 2. Set the stop collar on the drill bit
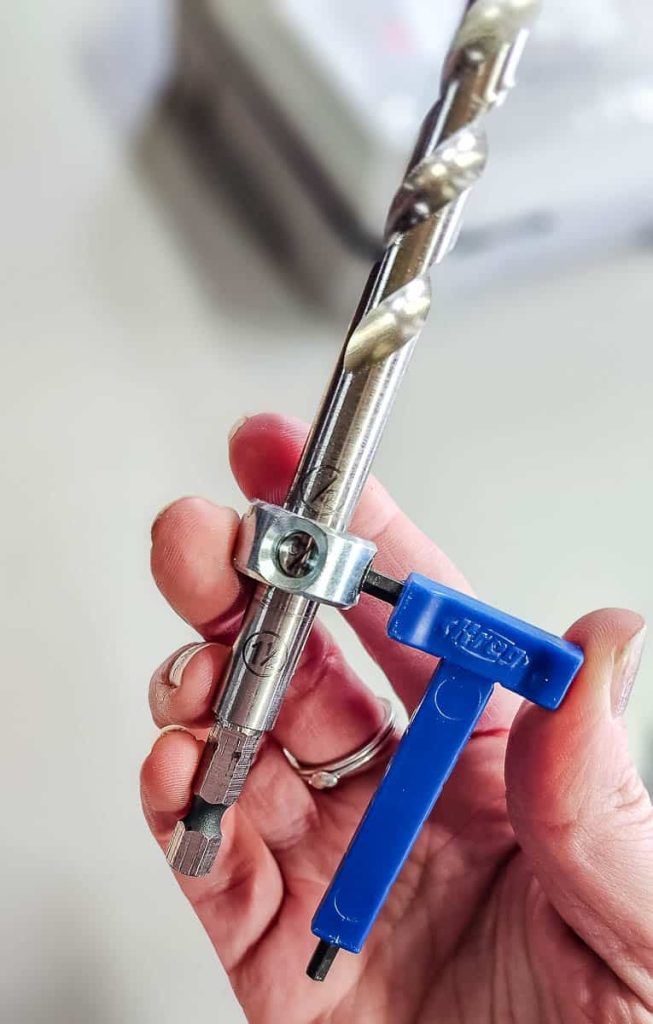
Now that you know how thick your material is, you can set the stop collar on the drill bit. The bit setup process is super simple.
The stop collar is the metal ring that goes around the drill bit.
The purpose of the stop collar is to stop the drill bit at the exact right spot, according to the thickness of the material, when drilling the pocket holes.
There’s a little circle in the middle of the stop collar so you can see the bit markings. All you do is loosen the stop collar with the hex wrench, line up the little circle with the correct number for your material thickness, and tighten it again.
Step 3. Position the stops on the jig
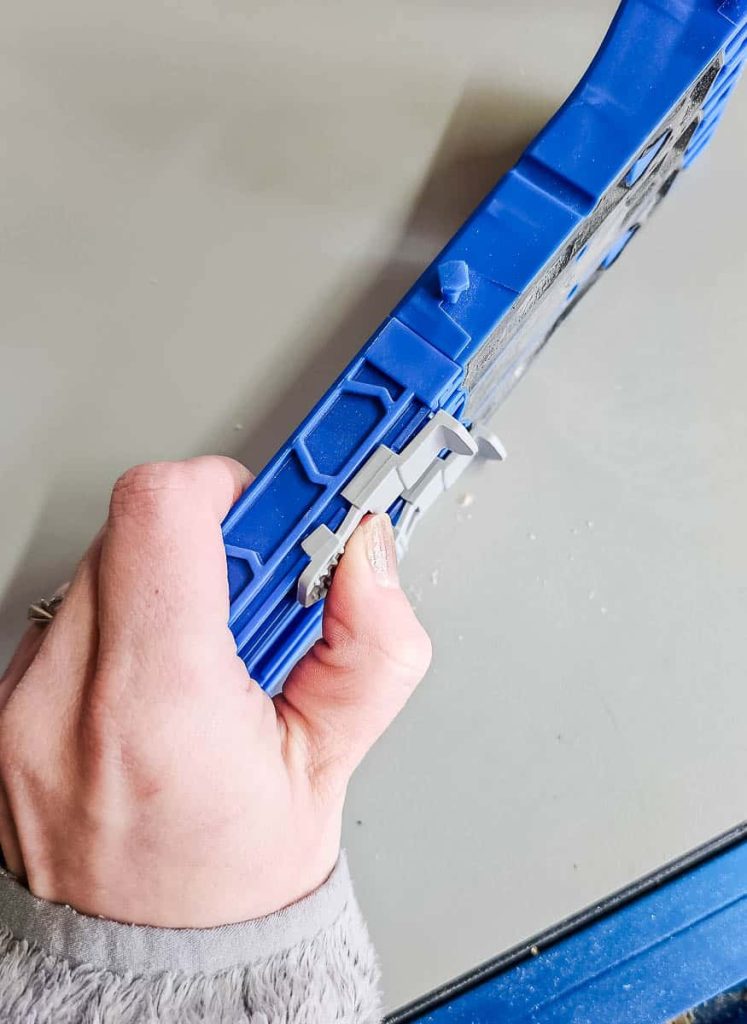
One thing that is unique about the 320 jig is that you also need to set some material thickness stops on the actual jig.
There’s a lever on the bottom of the jig that allows you to push and slide the material thickness stop to the right spot. Just push and slide it to the right setting by looking at the top of the jig to see when it lines up with the right material thickness number. Then just click it into place and you’re good to go.
Step 4. Adjust drill guide spacing (if needed)

One very cool feature of the 320 jig is that you can adjust the pocket-hole spacing of the drill guides. You can make them closer together by removing the drill guide spacer or you can keep the spacer in. It has an easy twist-apart design that allows you to adjust it.
Rule of thumb: If your wood is 1.5″ – 3.5″, you’ll want to remove the spacer so the pocket holes don’t get too close to the edge of the board.
Step 5. Clamp jig to wood
Now your jig is all set up and ready to use!
Line up the jig into the correct place on the board and double-check that your material thickness stop (on the bottom of the jig) is pushed to the edge of the board.
Next, clamp the jig into place with a clamp (sold separately). You can use either a Kreg clamp or another clamp that you have around your workshop.
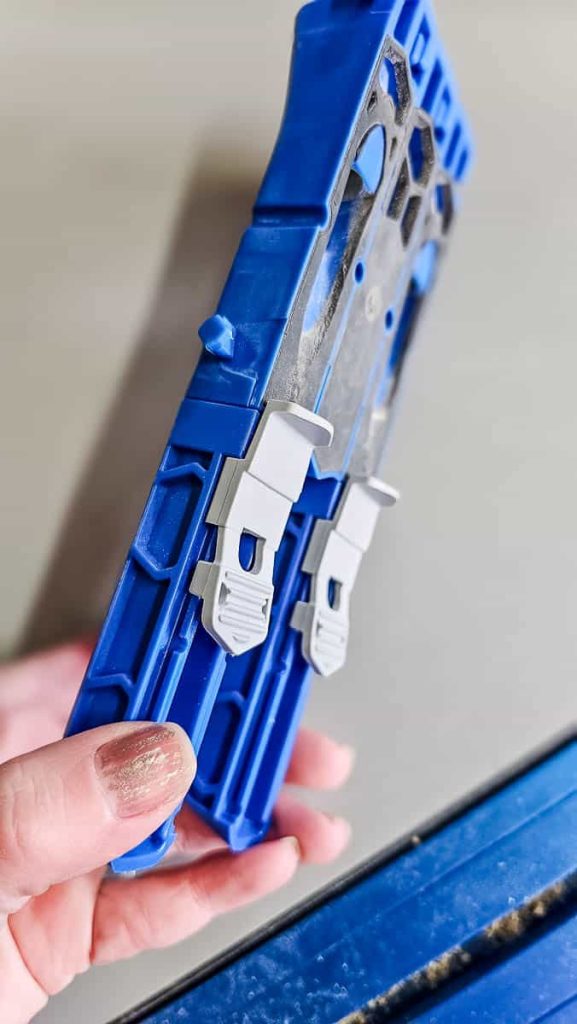
The 320 jig comes with a cool Universal Clamp Pad Adapter that you can click into place on the top of the jig. It’s a little piece that gets pushed into the top of the jig and then opens to hold the clamp, connecting it to the jig.
The clamp pad will speed up the pocket drilling process because you can move the jig as you drill pocket holes with the clamp already in place.
Where should I position the pocket holes?
- For narrow pieces of wood (anything from 1 1/2″ to 3 1/2″) you can use just the two drill guides without the spacer positioned in the middle of the board.
- For slightly wider boards that are at least 3 1/2″ wide, you can add one spacer into the middle of the drill guides and position it in the middle of the piece.
- If you’re working with something like a 1×6, you can either:
- drill pocket hole/s on the edge of the board at least 1″ in and then clamp it again on the other edge to drill another one
- add more drill guide spacers in between the two drill guides so they are spaced out more and only clamp down the jig one time
- add a third pocket hole drill guide with one spacer in between each so you can have three pocket holes across the piece
- Note: you’ll need to purchase the expansion pack to get the additional spacers and/or drill guide to do this
- For wider pieces, like plywood panels, position your pocket holes every 6 to 8 inches, and be sure you get one on each end about 1″ from the edge
Step 5. Drill pocket holes
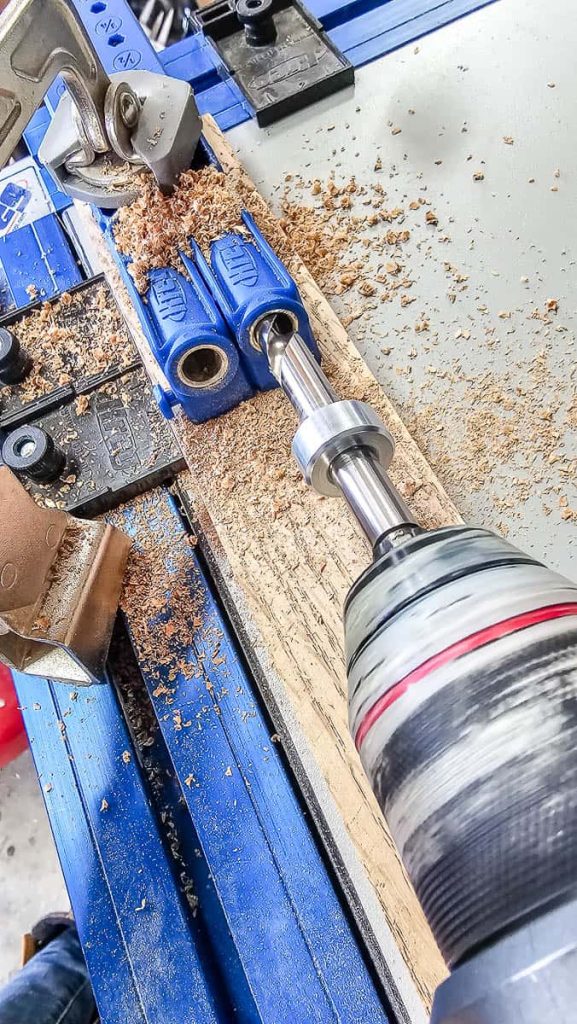
With your jig clamped into place, you can drill the pocket holes. Load your drill with the bit that you set up in Step 2 and position it into the drill guide (but not all the way in where it is pressing against the wood quite yet).
Push the trigger and allow the drill to come up to full speed before pressing it down into the drill guide to drill the pocket hole.
Step 6. Drive pocket-hole screws
After the pocket holes have been drilled, you can drive the screws into place to secure your joint. Clamp the two pieces into place on a flat surface, like a workbench or clamp table.
Place the screw on the driver tip (provided with the jig) and put it into the already-drilled pocket hole. Push the trigger to turn the driver on and drive the screw into place until it is fully seated in the hole.
What type of screw should you use?
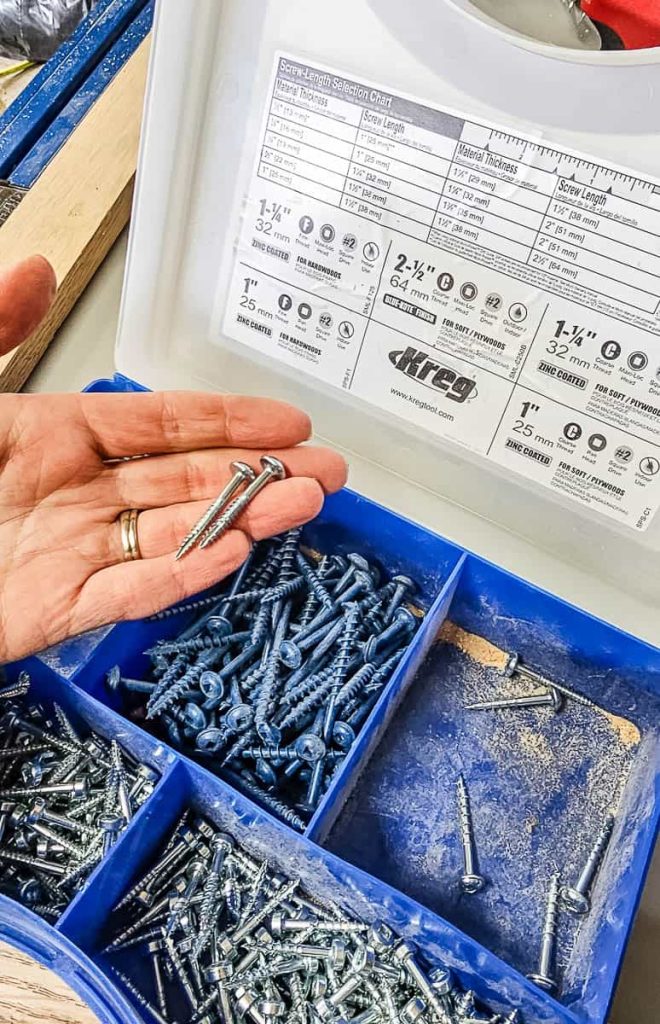
Opt for a pocket hole screw, not your regular one, when diving into pocket hole projects.
Coarse vs fine thread:
- Use COARSE thread for soft woods (cedar, pine, fir) and plywood.
- Use FINE thread for hard woods (cherry, maple, oak).
Screw type:
- Use ZINC COATED for indoor projects without moisture concerns.
- Choose STAINLESS STEEL for extreme environments or saltwater exposure.
- Opt for BLUE-KOTE FINISH for damp or wet outdoor projects
Screw head type:
- Use PAN-HEAD screws for materials 1/2″ thick
- Use MAXI-LOCK screws for everything else.
Screw length:
- Refer to the screw length chart for the right size based on material thickness, which you’ll find below for reference, on the inside of a pack of Kreg pocket-hole screws, or in the owner manual.
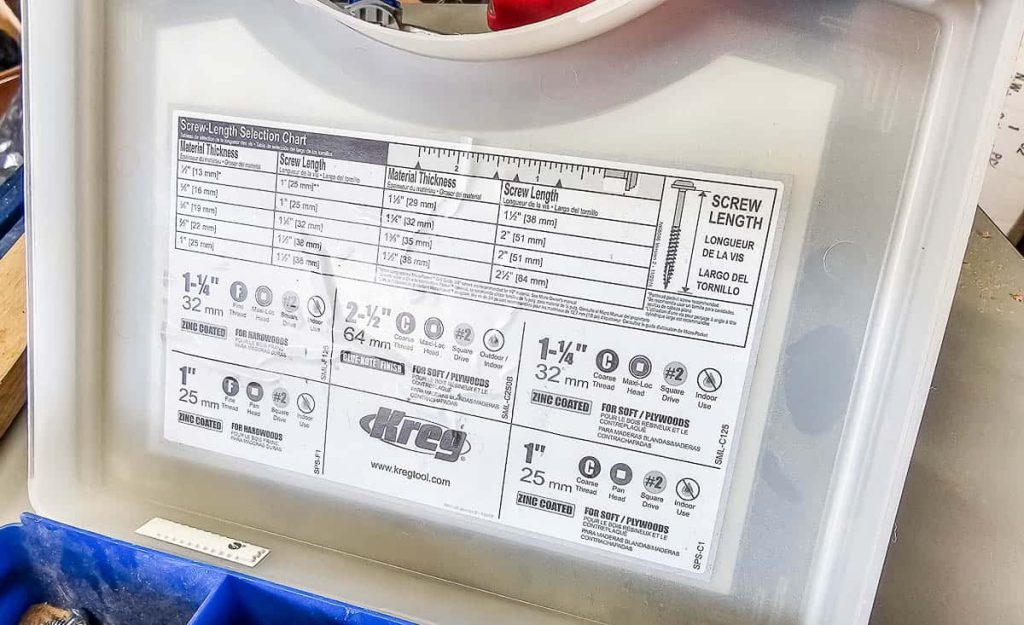
Screw Length Selection Chart
| Thickness | 1/2″ | 5/8″ | 3/4″ | 7/8″ | 1″ | 1 1/8″ | 1 1/4″ | 1 3/8″ | 1 1/2″ |
| Screw | 3/4″ – 1″ | 1 1/4″ | 1 1/2″ | 1 1/2″ | 1 1/2″ | 1 1/2″ | 2″ | 2″ | 2 1/2″ |
When joining two pieces that are different thicknesses, a general rule of thumb is to use the thinner one.
Easy as that!
PROS for the Kreg Pocket-Hole Jig 320
There are a lot of things I love about the Kreg pocket-hole jig 320. Here are my favorite features.
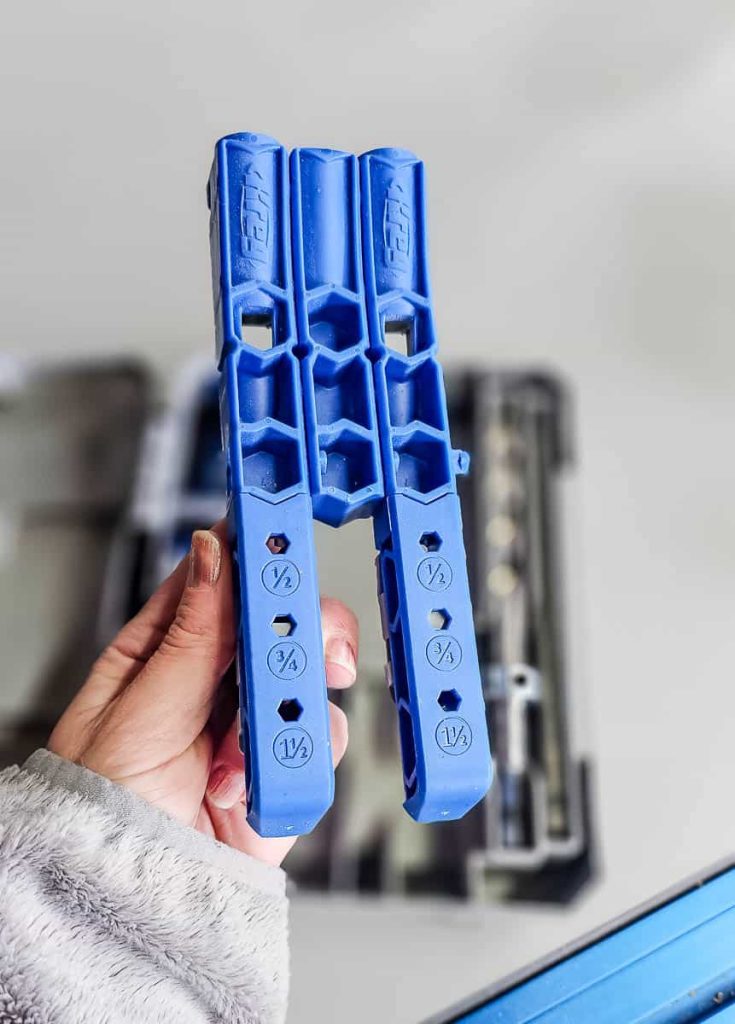
There are different configurations
There are several different ways that you can use the 320 because there are cool twist-apart drill guides! The other Kreg jigs don’t have this versatile design, so that makes this jig very unique.
You can keep both drill guides in place with the spacer (for wood that is 3 1/2″ or wider).
Or you can take out the removable spacer in the middle to make the pocket holes closer together (for wood that is 1 1/2″ or wider).
You can also just use one pocket hole drill guide if needed.
You can use it without a clamp
If you need to use the jig in really tight spaces for making repairs, you can use it without a clamp. There’s a place for you to drill screws through the jig to keep it secured while drilling.
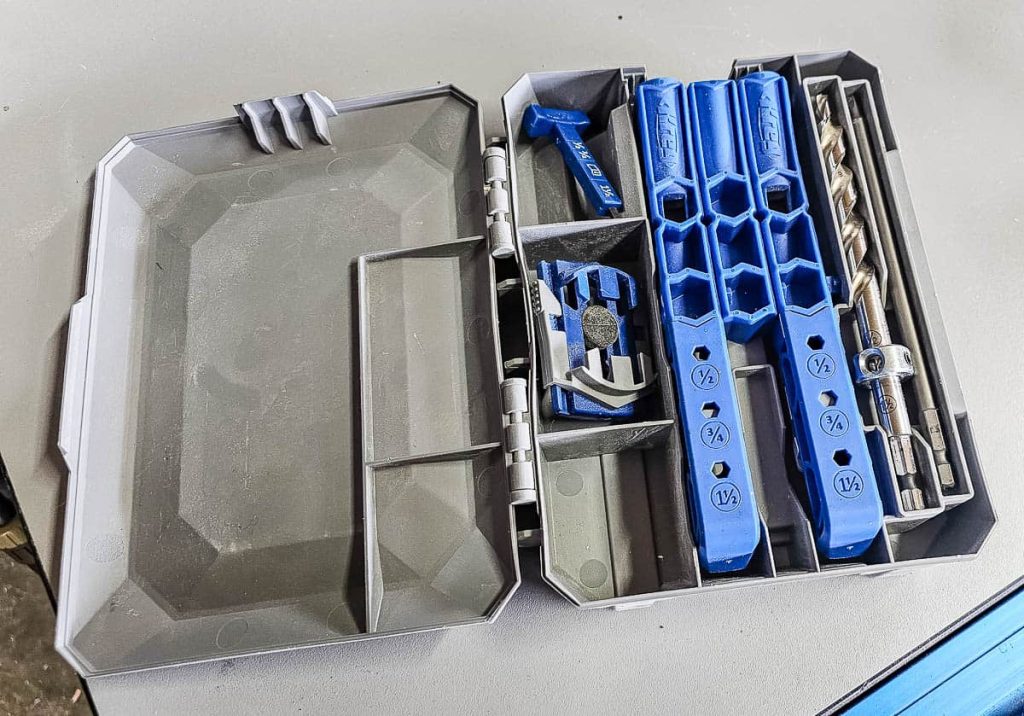
Carrying case keeps everything in one spot
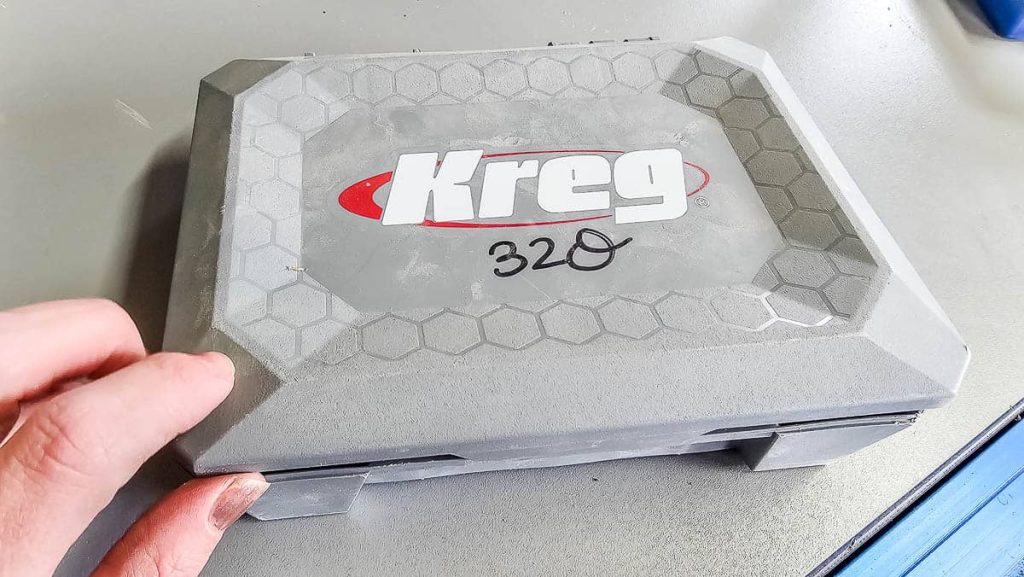
The Kreg 320 comes with a plastic carrying case that is really convenient for keeping everything organized! You’ll be able to put the jig, drill guide, stop collar, and hex wrench in the case. There’s even room for screws in the case.
It’s easy on the budget
The 320 Pro is one of the most affordable jigs offered by Kreg, so if you’re on a budget it is a great option! If you’re not quite ready for the investment of the 720Pro, it is a great option.
Once clamped in place, it stays
Once the jig is clamped into place (using the clamp pad adapter, which connects to any Kreg clamp easily), it will stay in the right spot while drilling the pocket holes because there’s an anti-slip base.
Lightweight and portable
Even when the carrying case is full with the accessories, it is super lightweight. This makes it very easy to throw in your workbag and take with you when working on the go! It also doesn’t take up much room in your workshop when it is not in use.
CONS for the Kreg 320
There are a few more steps to set up than other pocket hole jigs
The 320 does take a little more time to set up the jig to use each time (setting the stops on the jig based on the material thickness).
Whereas the 720Pro has an automatic thickness clamp so you don’t need to change any settings on the actual jig. This allows you to switch between different materials of any thickness much easier. But the 720Pro is also $100 more than the 320, so there’s that too.
You can only use it for three material thicknesses
This jig can be used for materials that are 1/2″, 3/4″ and 1 1/2″ thick. These are the most common material thicknesses, so it shouldn’t be too big of an issue, but if you work with anything that is not common (or bigger than 1.5″) then you’ll have trouble finding the right setting on this jig.
We hope you enjoyed this detailed look at the Kreg pocket hole jig 320! It is a great tool for beginners who are looking to try woodworking with pocket hole joinery for the first time or those who want to work on the go with small and portable tools.
If you’re new to woodworking, be sure to check out these other woodworking tools that are great for beginners and get inspiration for your next project with these beginner woodworking projects.
Do you have any other questions about the Kreg pocket hole jig 320?
Let us know in the comments below.
Related – Projects that use a pocket hole jig
- Kid’s Cabin Bed
- Table Top
- Planter Box for Front Porch
- Outdoor Plant Wall
- Farmhouse Sink Cabinet
- Mudroom Lockers
- DIY Desk Calendar & Wooden Pencil Holder
- DIY Dress Up Storage for Kids
- Picture Ledge DIY
- DIY Firewood Rack with Roof
- DIY Cane Headboard
- Boho Nightstand with Cane
- DIY Behind the Couch Table with Outlet
- DIY Headphone Stand
- DIY Cookbook Stand
- Easy DIY Grill Utensil Holder
- DIY Deck Box for Outdoor Toys
- DIY Towel Rack Made With One Board
- DIY Tool Organizer for Kreg Tool Stand
- DIY Mail and Key Holder
- DIY Step Stool for Toddler
- DIY Trash Can
- DIY Spice Rack
- DIY Book Holder
- Easy DIY Magazine Shelf
- DIY Clamp Rack
- DIY Chicknic Table
- DIY Bike Rack
- Small Bookshelf
- DIY Laptop Tray