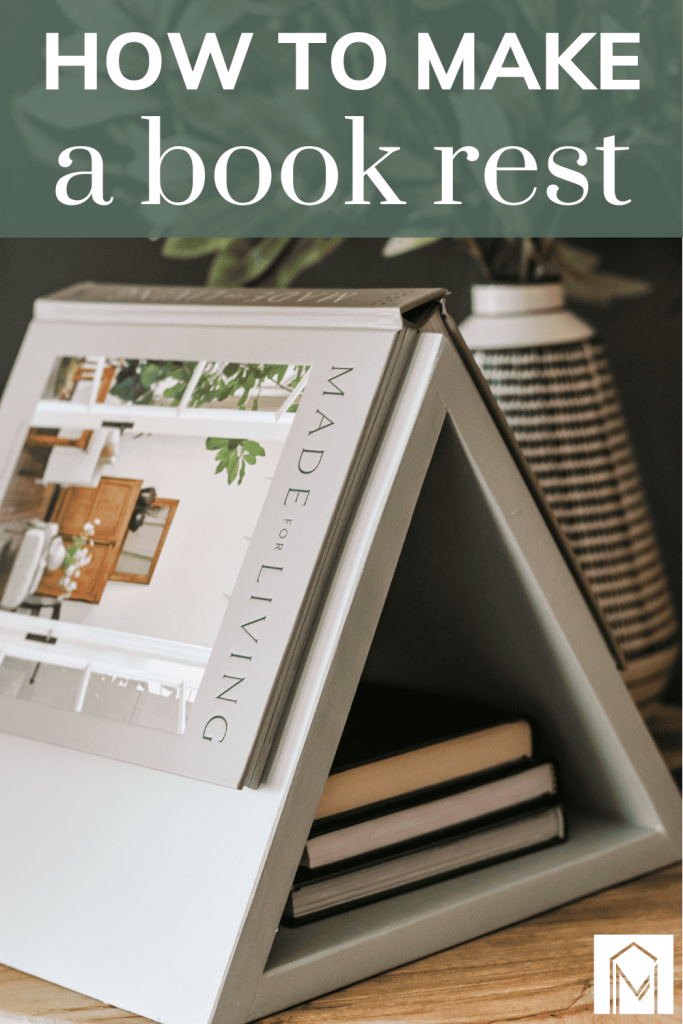
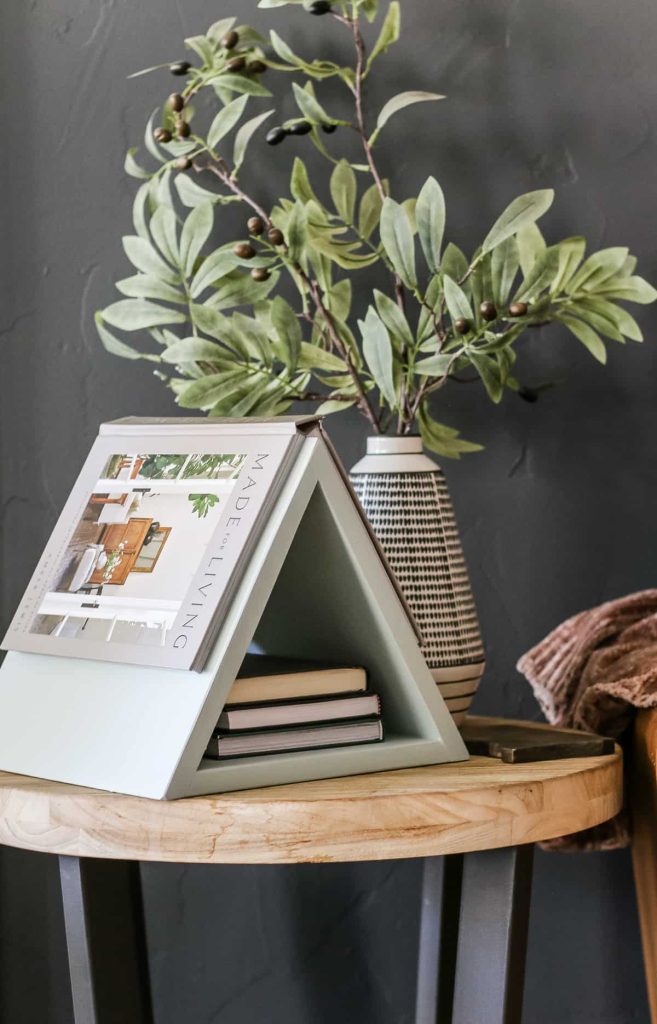
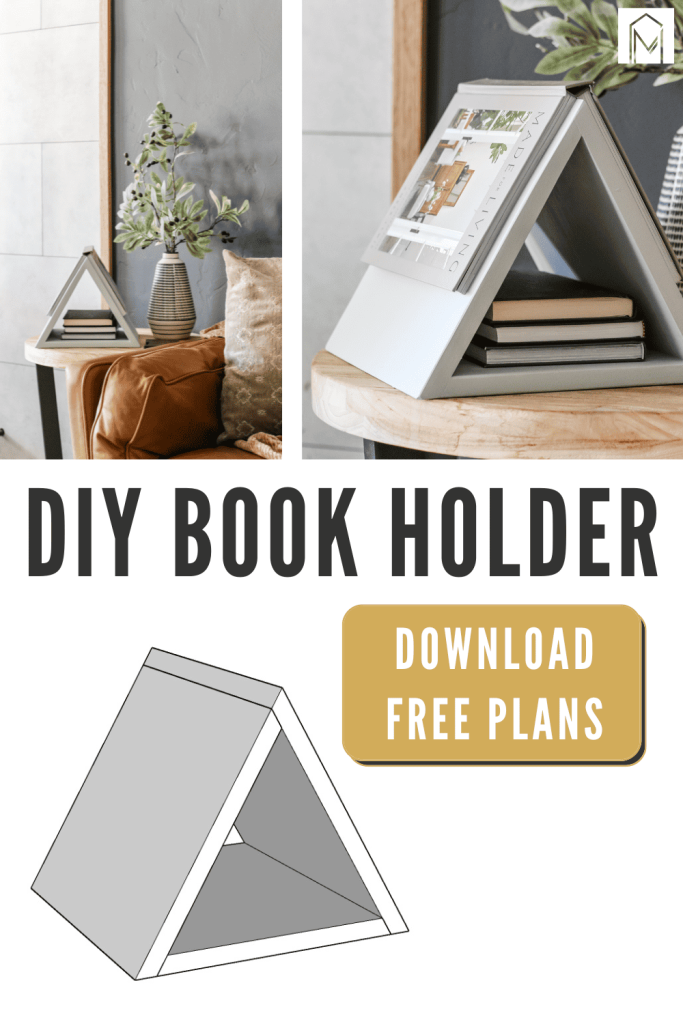
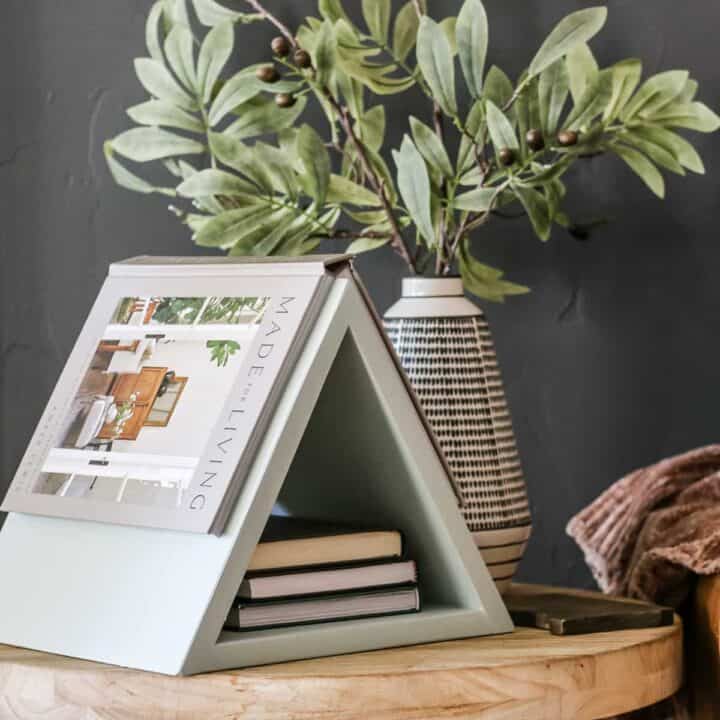
DIY Book Holder with Free Woodworking Plans

Need a creative way to store books? Build this DIY book holder, which has storage for your favorite book and keeps your spot held in your current book. Follow along with our free plans!
Thank you to Kreg for sponsoring this DIY book holder! All opinions are entirely my own. This post also contains affiliate links, but nothing that I wouldn’t recommend wholeheartedly. Read my full disclosure here.
Whether you love books yourself and you’re looking for a new way to store books in your home or you’re searching for a good simple project that would make a great gift for book lovers, you’re going to love this little project!
To get started all you need is a 1×12 piece of wood about 4 feet long. Who knows maybe you even have something that size lying around in your scrap wood pile! This is totally a great way to use up some pieces of scrap lumber!
When we were designing this DIY book page holder, we took extra care to make sure this would be an easy DIY project that is good for beginning woodworkers and incorporated easy joinery with pocket holes.
Although there are a few angled cuts to get it to fit together in a triangular shape, these are pretty simple if you follow along with our free woodworking plans we share all of the measurements for the cuts.
Kreg 720PRO Pocket Hole Jig
If you’ve been following Making Manzanita for a bit, you know that we are big fans of the Kreg pocket hole system.
We built a lot of projects using our original K5 Pocket Hole Jig, we even have a super detailed guide and video about how to use it that you can check out here.
In 2021, Kreg released brand new pocket hole systems that replaced the K4 and K5, and the upgrades are pretty awesome.
The new 720PRO (which we were using for this DIY book page holder) and the 520PRO (which replaced the smaller K4 system) were improved a ton, the most noticeable change being that they are easier to set up and use – score.
My favorite new feature of 720PRO is the clamp that you don’t have to adjust anymore. You should clamp it down and it automatically adjusts to match the thickness of your wood, so cool, right?
Pocket hole joinery is definitely one of the easiest ways to join wood in woodworking projects. It’s our favorite hidden weapon for beginning woodworkers!
Want to learn more? I wrote a super detailed guide & created a video all about how to set up your Kreg 720PRO Pocket Hole and use it, so be sure to check that out too!
We teamed up with our friends Kreg again for these triangle book holder plans and are sharing them online for free, now available on KregTool.com!
Kreg’s website is chocked full of so many easy-to-follow FREE woodworking plans! I promise that you are going to find so much inspiration while you’re there! It is a goldmine!
DIY Book Holder: Video Tutorial
If you love DIY videos, don’t forget to subscribe to our YouTube channel!
Ready to see the end result of the DIY book page holder?
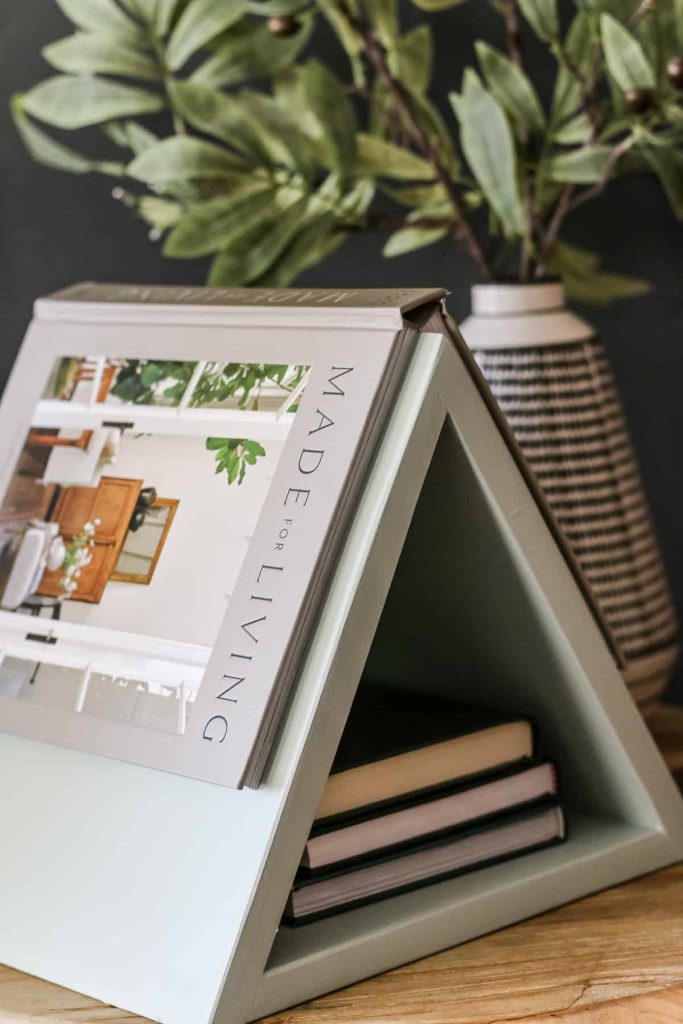
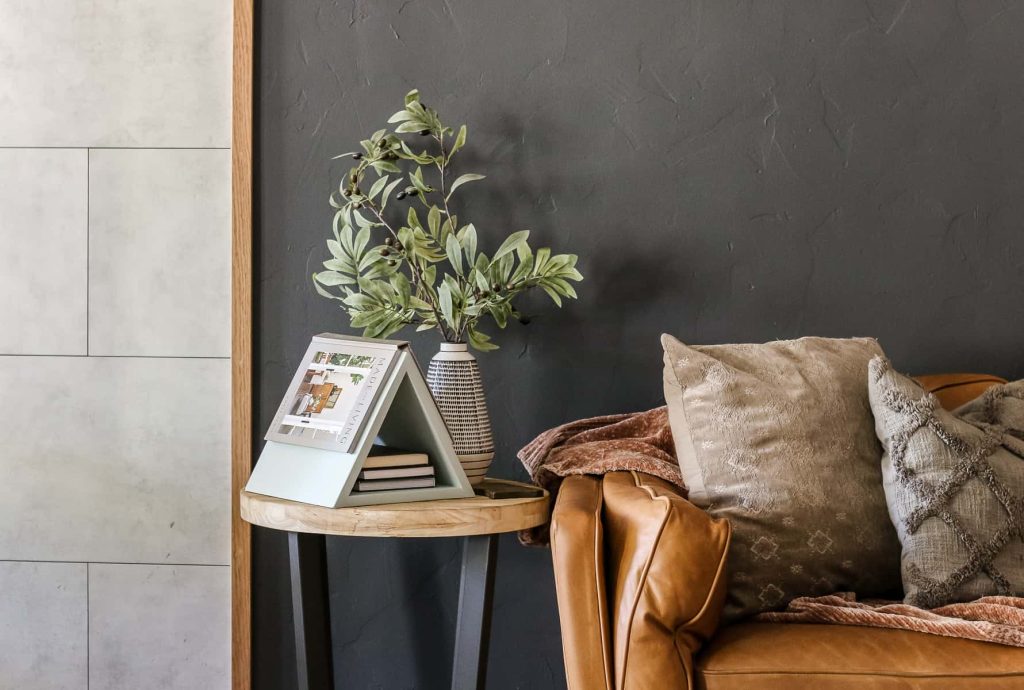
I just love how our DIY book holder turned out! It is the perfect solution for someone that loves to read. The best place for the book holder is wherever you read most, of course.
I love it here styled in our living room on the side table next to our sofa, but it would also be great on a nightstand by your bedside (if that is where you read).
This also makes a great Dad day gift because, you know, Father’s Day is right around the corner. Does your Dad love to read and have a book problem? Build him this geometric book stand!
Want to build this DIY book holder? Here’s what you’ll need!
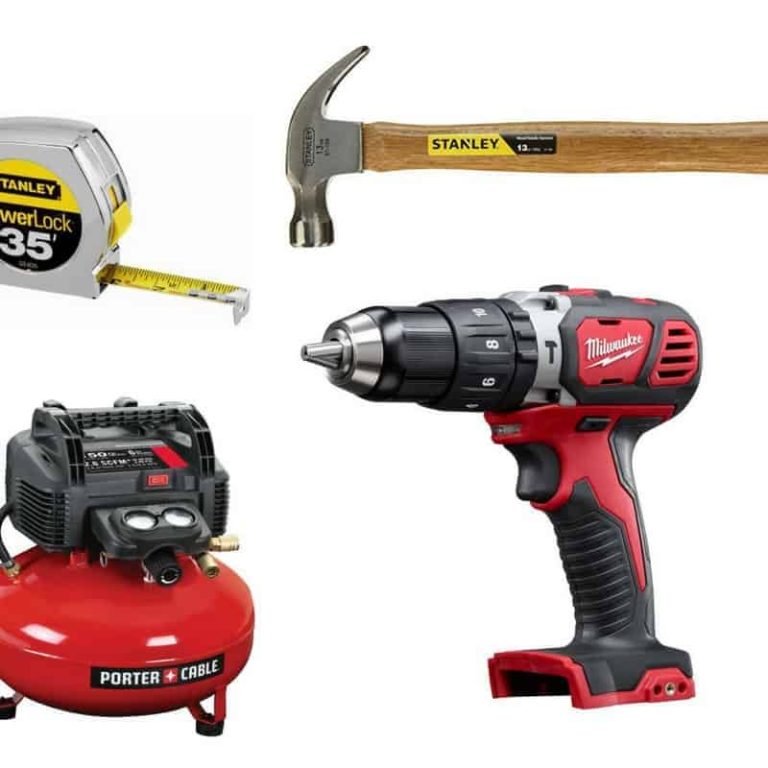
Tools Needed
- Kreg jig – 720 Pro
- Kreg clamp table
- Miter saw
- Tape measure
- Drill
- Impact driver
- Orbital sander
- Clamps
- Multi-tool with sander and wood cutter attachments
- Speed Square
Materials Needed
- Select Pine, ¾” deep X 1’ wide X 4’ long (Qty 1)
- Kreg pocket hole screws (1 ¼”)
- Pocket hole plugs, paint grade
- 80 & 150 grit sandpaper
- Wood glue
- Wood filler
- Primer
- Paint – we used this paint color (you could also opt for spray paint instead)
- Paint brush
FAQs about this DIY book holder
What is a beveled cut?
A beveled cut is an angled cut using a miter saw where the saw blade tilts to the left of the right. The angle is seen when you look at the edge of the piece of wood.
What’s the difference between a beveled cut and a miter cut?
A miter cut is an angled crosscut where the angle moves across the face of the wood and the saw blade pivots to make the cut.
What degree angle are the cuts to make a triangle shape?
The wood to make a triangle shape DIY book holder needs to be cut at 30-degree angles with a bevel cut. Now here’s the deal…you can either just take our word for it or you can keep reading for the math. Be warned…this may bring you back to your Geometry days in school.
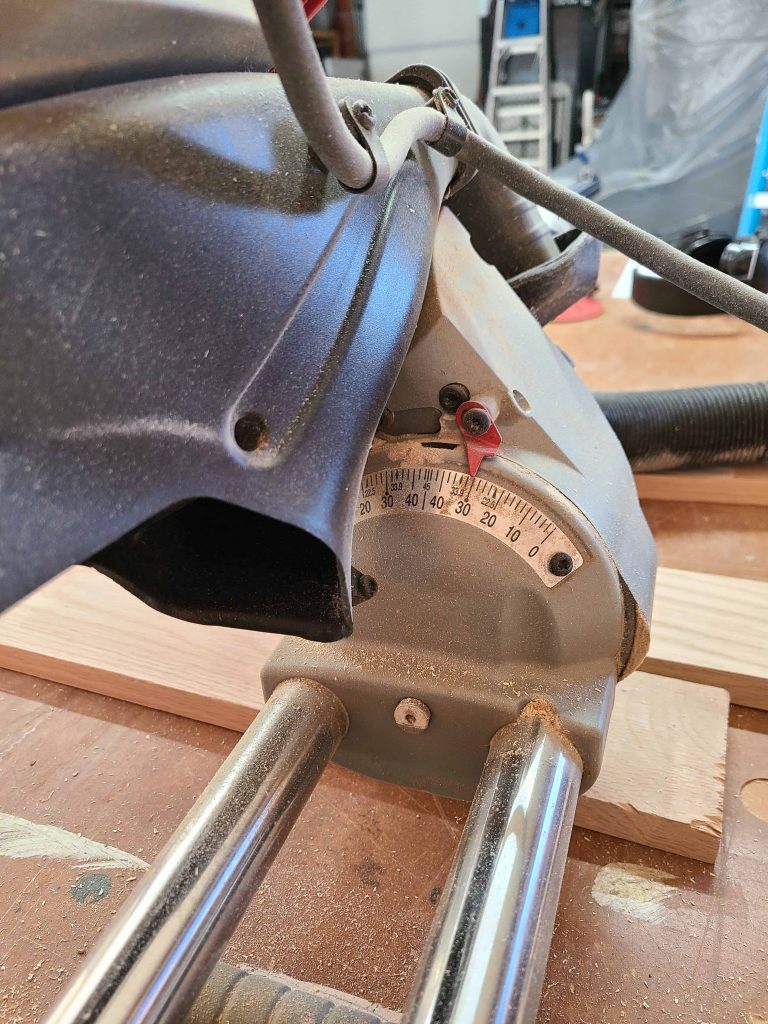
This is an equilateral triangle, which means that all of the sides are the same length. This means all of the corners will be at the same angle. The sum of all of the angles at the corners for an equilateral triangle must equal 180 degrees and there are 3 corners to a triangle, so each peak must equal 60 degrees total. This means that if each corner is 60 degrees total and you’re splitting it between 2 pieces of wood coming together each piece of wood will be cut at 30 degrees.
How to make angled bevel cuts on a 1×12 piece of wood?
To make the bevel cuts on a wide piece of wood, like a 1×12, you’ll need to have a sliding compound miter saw. With this type of saw, the blade slides forward and backward allowing you to cut wider boards.
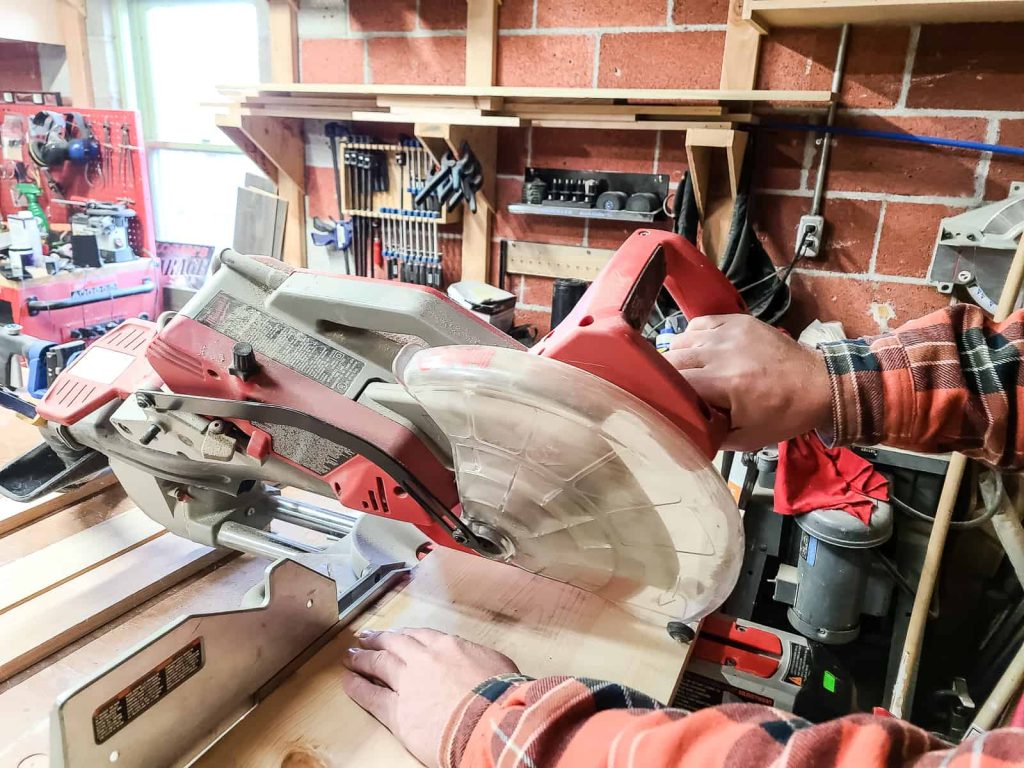
Sliding compound miter saws come in either 7-in, 10-in, or 12-in sizes, based on the size of the blade. The larger the blade, the wider the board you can cut. You could cut the 1×12 piece of wood with a 10-in or 12-inch model. We used this 12-in dual bevel sliding compound miter saw.
If you don’t have a sliding compound miter saw, you could also make these cuts with a table saw or a circular saw with the saw blade tilted.
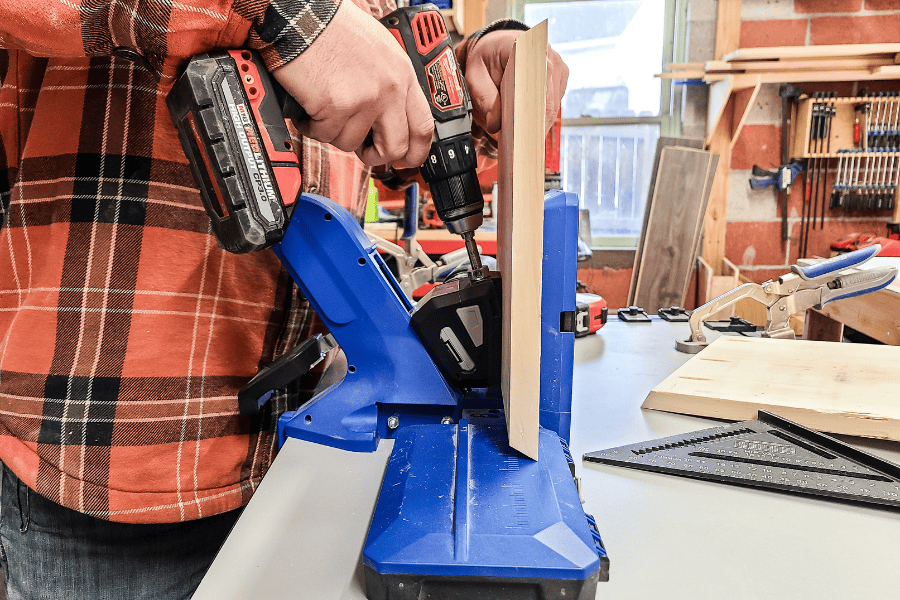
How do you drill pocket holes on angeled edges?
Pocket holes on angeled edges, like the pieces that have been cut with a bevel, are tricky. The stop collar on the pocket hole drill bit is set based on the material thickness, which allows the very tip of the drill bit to just barely come out of the bottom of the board on the edge.
When the end of the piece has been cut at a bevel, the drill bit will blow through further if you keep the stop collar set at the same setting, which will have your pocket hole sit too deep and could cause the wood to split when assembling. You definitely want to avoid this so your pocket hole joints will be strong.
You will need to manually adjust the stop collar if you’re drilling pocket holes on a beveled edge. The perfect way to figure this out is to do some tests with a piece of scrap wood cut with the same angled edge while making small adjustments to the stop collar.
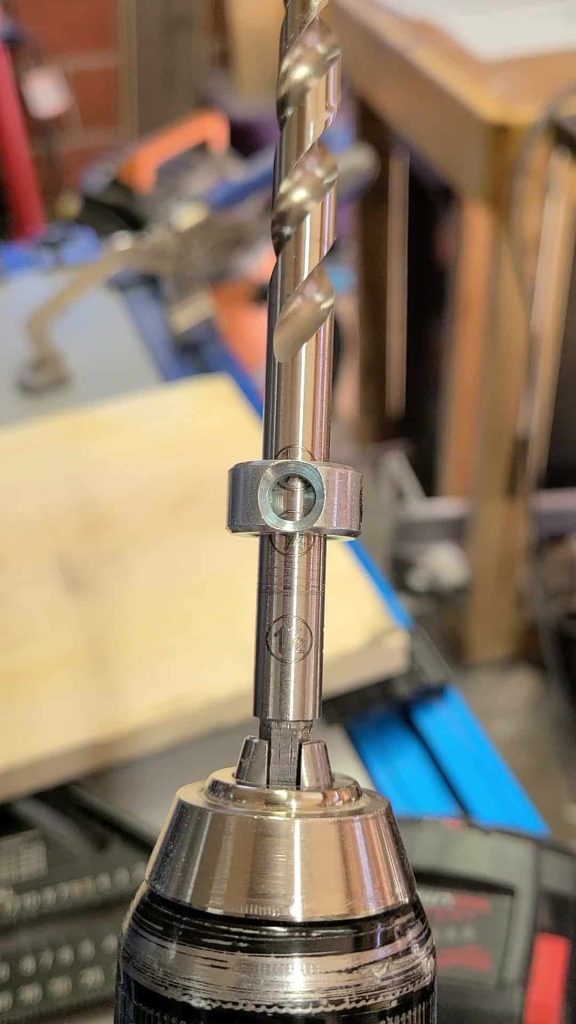
We figured out that the best setting for the stop collar was between 1/2″ and 3/4″ settings.
If you want to build your own DIY book holder? We’ve done all the hard work for you! All you need to do is hop over to Kreg’s website and check out the full tutorial.
At the bottom of the tutorial on Kreg’s website, you’ll also see a link to download the free plan to get all of the detailed measurements and a cut list!
Do you have any other questions about how to make a triangle book holder?
Let us know in the comments!
How To Build A Book Holder
Need a creative way to store books? Build this DIY book holder, which has storage for your favorite book and keeps your spot held in your current book. Follow along with our free plans!
Materials
- Pine, ¾” X 1’ X 4’
- 9 Pocket Hole Screws (1 ¼”) - Coarse Thread, Zinc
- 9 Pocket Hole Plugs - Paint Grade
- 80 & 150 Grit Sandpaper
- Wood Glue
- Wood Filler
- Primer
- Paint
- Paint Brush
Tools
- Kreg Pocket Hole Jig 720PRO
- Clamp Table and Steel Stand Combo
- Miter Saw
- Tape Measure
- Drill
- Impact Driver
- Orbital Sander
- Clamps
- Multi-Tool With Sander and Wood Cutter Attachments
- Speed Square
Instructions
- Cut wood: Cut wood according to the visual cut list in the woodworking plans with a miter saw for the lengths. You'll need to use a table saw or a sliding miter saw and cut each piece at a 30-degree angle.
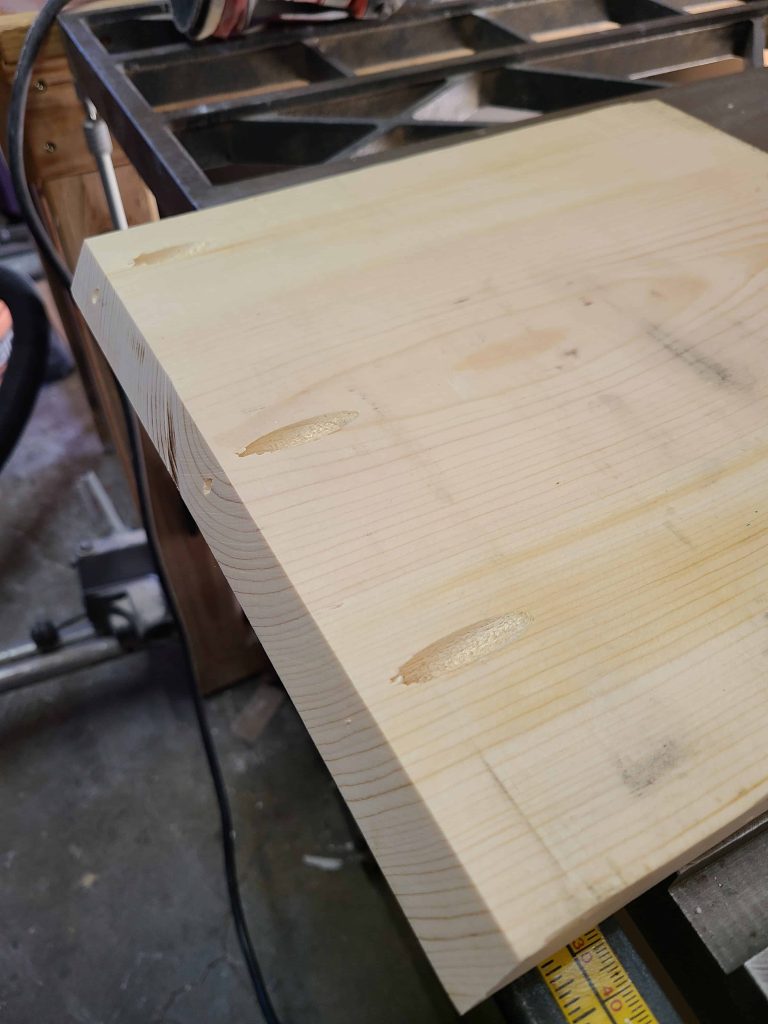
- Drill pocket holes: Drill pocket holes as shown in the woodworking plans. We used Kreg 720 Pro.
- Sand: Lightly sand all pieces with an orbital sander, 80-grit sandpaper, and then 150-grit sandpaper.
- Assemble: Because these pieces are angled clamping is difficult. You might want to grab a friend if you are not able to clamp the large pieces together at the right angles. Attach the pocket holes at the top of the triangle first, followed by the bottom piece last.
- Fill: Take a wood filler that can be sanded and painted and fill in any gaps at the joints and blemishes on the wood from the assembly. Then glue in the pocket hole plugs with wood glue and wait for the filler and glue to dry.
- Sand: Once the glue and filler are dry, take 150 grit sandpaper making sure all joints are flush and smooth. Sand smooth the pocket hole plugs and any excess wood filler, and make sure each joint is flush. For the inside of the structure, use a multi-tool with a woodcutter attachment to cut down the plugs and then sand the remaining inside by hand with a sheet of sandpaper because the orbital sander won't fit inside.
- Prime and paint: Apply 2-3 coats of aerosol paint primer and follow up with a paint color of your choice. We used Behr Riverdale.
Notes
Tip: Pocket holes on angled edges
Because the wood is on angles you will want to be careful not to plunge your drill too deep and make adjustments to the pocket hole depth. We did this by testing it out on scrap wood cut at the same angle to determine where to put the stop collar on the drill bit.
If you want to build your own DIY book holder? We’ve done all the hard work for you! All you need to do is hop over to Kreg’s website and check out the full tutorial.
At the bottom of the tutorial on Kreg’s website, you’ll also see a link to download the free plan to get all of the detailed measurements and a cut list!
Related – Projects that use a pocket hole jig
- Kid’s Cabin Bed
- Table Top
- Planter Box for Front Porch
- Outdoor Plant Wall
- Farmhouse Sink Cabinet
- Mudroom Lockers
- DIY Desk Calendar & Wooden Pencil Holder
- DIY Dress Up Storage for Kids
- Picture Ledge DIY
- DIY Firewood Rack with Roof
- DIY Cane Headboard
- Boho Nightstand with Cane
- DIY Behind the Couch Table with Outlet
- DIY Headphone Stand
- DIY Cookbook Stand
- Easy DIY Grill Utensil Holder
- DIY Deck Box for Outdoor Toys
- DIY Towel Rack Made With One Board
- DIY Tool Organizer for Kreg Tool Stand
- DIY Mail and Key Holder
- DIY Step Stool for Toddler
- DIY Trash Can
- DIY Spice Rack
- DIY Book Holder
- Easy DIY Magazine Shelf
- DIY Clamp Rack
- DIY Chicknic Table
- DIY Bike Rack
- Small Bookshelf
- DIY Laptop Tray

Thank you for the plans! I have been struggling to get the angles correct, but now that I have found your page, I hope this helps. Is each piece of the board you’re using 12 inches long? Are all pieces identical and then you do the 30 degree cuts?
Thank You!
Hi Abby, the specific cuts and dimensions are all detailed better in the woodworking plans, which are downloaded from the Kreg website. Did you find that PDF ok? It can be downloaded by clicking the “Download” button in the top left of the screen here: https://learn.kregtool.com/plans/book-holder/
Here’s the dimensions for the three pieces of wood: Large Side Plate , ¾” X 11 ¼” X 1’ // Small Side Plate , ¾” X 11 ¼” X 11 ⅛” // Bottom Plate , ¾” X 11 ¼” X 10 ¼”
Your measurement is wrong for the first plate. 1″ ?? Should be 11″
It is 1′ with one mark, not two – indicating 1 foot or 12 inches. 🙂