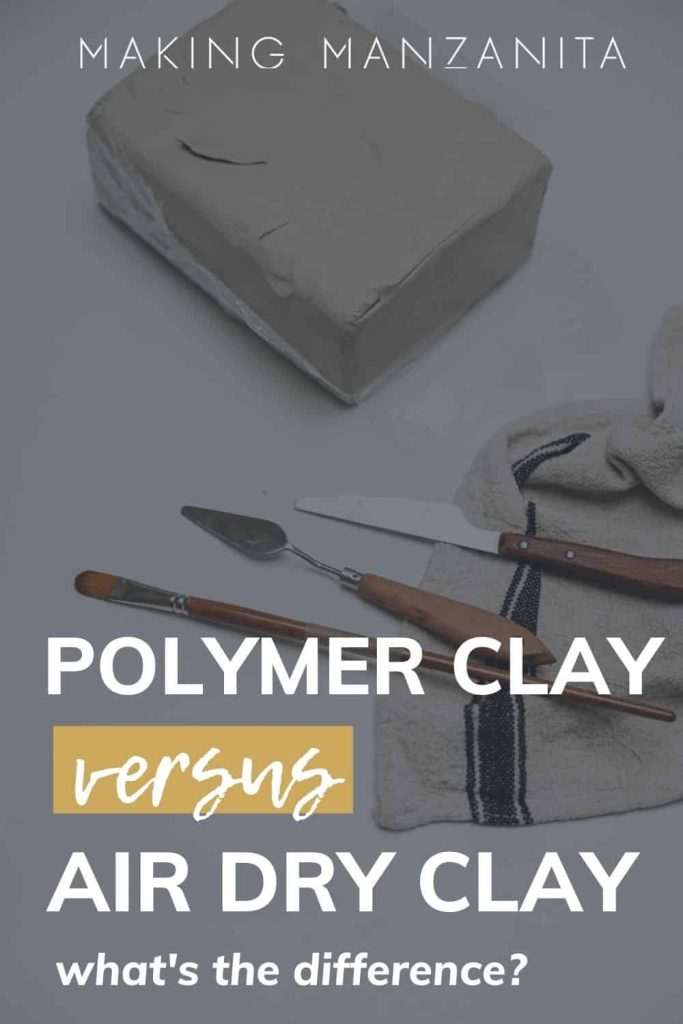
Air Dry Clay vs Polymer Clay: What’s the Difference?

Air-dry clay and polymer clay are the two most common types of clay used among hobby crafters and sculptors. But, do you know what's the difference between air dry clay and polymer clay? Learn the difference between air dry clay and polymer clay, how to use both, and more in the guide below.
Before you begin your next sculpting clay project, it’s important to understand the nuances between air dry clay and polymer clay.
Generally speaking, both types of clay will give you the same result; however, each type has its own unique properties, uses, curing requirements, and other advantages and disadvantages. The decision really boils down to what your project is and its intended use.
The key difference between polymer clay and air dry clay is that polymer clay needs to be baked (or fired), whereas air dry clay simply dries in the air.
Choosing the right clay for the job can make all the difference in the end result! As you weigh the options for your next project, come back to this guide for reference. Be sure to check out the chart at the end of this post for air dry clay vs polymer clay details at a glance.
Table of Contents
This air dry clay vs polymer clay overview contains affiliate links, but nothing that I wouldn’t recommend wholeheartedly. Read my full disclosure here.
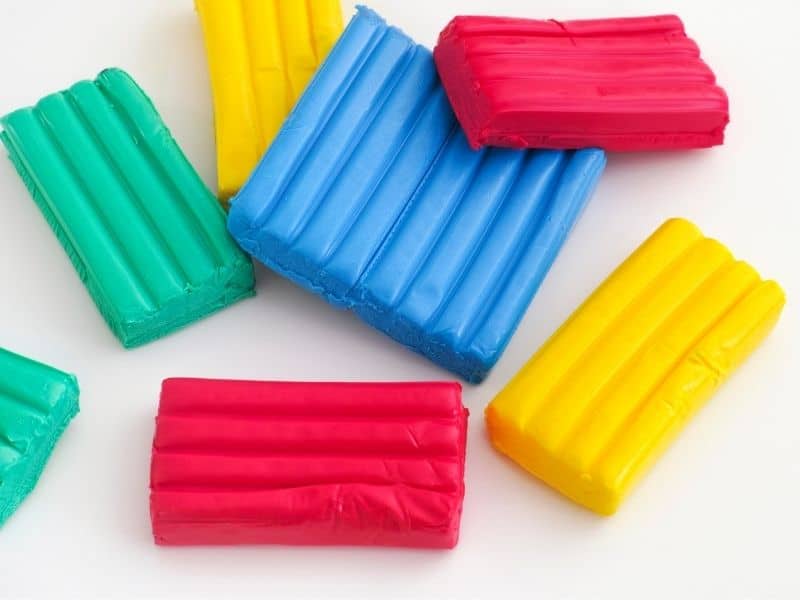
Polymer Clay Overview
Polymer clay can be used to make pottery, jewelry, home decor items, and so many other things! This medium is a great avenue to get into using clay for different crafts. It’s extremely versatile and easy for beginners to use. However, it can be a little challenging if you are attempting complex projects.
What is polymer clay made of?
Polymer clay is made from PVC or polyvinyl chloride. It’s used in a lot of commercial manufacturing for high-end home decor items.
Where to buy polymer clay
You can find polymer clay at just about any craft store. I’ve found it at Michael’s, Hobby Lobby, and Amazon.

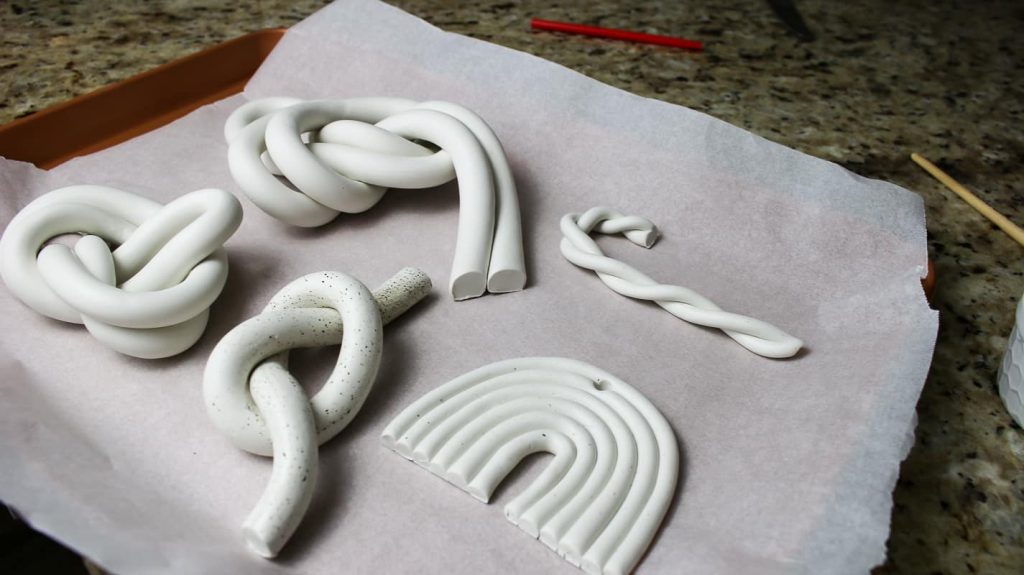
I love working with this type of clay because it’s so versatile to work with. In fact, I used polymer clay to recreate an otherwise expensive decorative clay knot that you would usually find in high-end home decor stores – for a fraction of the price!
They turned out beautifully, and you’d never know it was a DIY. It took a lot of trial and error, but I documented everything I learned in the tutorial.

Looking for more polymer clay craft ideas? I have several polymer clay crafts for you to try at home!
Not only is polymer clay available in a wide variety of colors, but special effects like fluorescent, translucent, pearl, and metallic are also available.
Like a lot of clay, polymer clay has to be baked (also known as fired), or cured, but don’t rush out and buy a pottery kiln just yet. Since polymer clay requires such a low temperature, you can use your kitchen oven, which makes this medium even more user-friendly!

How to Use Polymer Clay
Since instructions can vary from brand to brand, I strongly encourage you to use these instructions as a guide and refer to the packaging instructions for the best results.
- Clean your work surface of any debris or crumbs that may become stuck in the clay. Remove the clay from the package.
- Condition the clay by kneading it between your hands and the work surface. This warms it up and makes it easier to shape. You can also run the clay through a pasta machine to save time and elbow grease.
- Shape and work the clay into the desired shape or shapes.
- To cure your project, carefully place your design on a baking sheet lined with parchment paper. Bake in a preheated oven at 275F degrees for about 15 minutes, or for about 30 minutes per 1/4 inch of thickness.
- Remove from the oven and allow it to cool.
Curing
If you’ve ever done pottery, you know that the items must be cured in a large kiln. Because polymer clay requires a low temperature to cure, a standard kitchen oven will work fine. Plus, it only takes about 15 to 30 minutes to bake (or more depending on your project’s thickness)!
After your design has been cured, it should be fully cooled before touching. Because it needs to be cooled completely to reach its final hardness, your design is subject to cracking or damage if moved around too much.
Allow it to rest out of the way on the countertop for a few hours or until it’s completely cool. After curing, your design will be super durable, rock-solid, and waterproof – a major plus for any designs that will be set out for others to touch!
Polymer Clay FAQs
How long does polymer clay last?
Make sure to store the leftover clay in an airtight container. I recommend placing it in a Ziploc bag or wrapping it in plastic wrap and then inside another container to keep the clay as fresh as possible. As long as it’s stored correctly, the clay will last indefinitely.
How long should polymer clay bake?
Definitely reference your clay’s instructions for more clarity, but generally, you will need to bake in a preheated oven at 275F degrees for about 15 minutes per 1/4 inch of thickness.
How long does polymer clay take to cool?
Your clay project will take a few hours to cool completely.
How do you tell when polymer clay is done baking?
To tell if your polymer clay craft is done baking, you can lift up your project once it is enough to touch and try to press your fingernail in the bottom of the piece. If it is done, you shouldn’t be able to make a mark with your fingernail. If it is still soft enough for you to make a mark, continue baking longer.
Air Dry Clay Overview
Air-dry clay is the clay we are all most familiar with. Kids use it at school, for projects, and even for creative playtime. It’s a great choice for adults and kids alike, whether they are experienced crafters or beginners.
Air-dry clay is just that – clay that dries naturally with air. It’s made from a mixture of natural materials or a combination of materials, like paper fibers and glue. This type of clay is an ideal choice for “hand-building” and shaping – great for kids. It does not require conditioning as polymer clay does, so it’s even easier to use!
Air-dry clay does not require firing, so it’s an excellent choice for schools, childcare environments, and artists who do not have access to a kiln. Additionally, it’s an excellent choice for any sculptures that are too large for a conventional oven. The downside to air-dry clay is the drying time, which is anywhere from 24-72 hours.
Air-dry clay is also incredibly affordable and available in a wide variety of colors. Some packaging even contains accessories and instructions to take your creation to the next level.
Where to buy air dry clay
Air-dry clay is available in just about any store with a school supply aisle. I’ve found it at Michael’s, Hobby Lobby, Amazon, Walmart, Target… and even Dollar Tree!
How to Use Air-Dry Clay
Since instructions can vary from brand to brand, I strongly encourage you to use these instructions as a guide and refer to the packaging instructions for the best results.
- Clean your work surface of any debris or crumbs that may become stuck in the clay. Remove the clay from the package.
- Soften clay by kneading it on a clean work surface.
- Then, begin to shape and work the clay into the desired shape or shapes.
- Place in an undisturbed location to dry, about 24-72 hours.
After the clay has dried, it will not be waterproof or protected, so you will want to paint or seal the project. You can paint a design with acrylic paint, or use a sealant like Mod Podge, varnish, acrylic sealer, or a liquid epoxy to waterproof the creation. It’s worth noting that Mod Podge may yellow over time if exposed to a lot of direct sunlight.
Tip: Since air-dry clay is primarily a water-based product, the moisture will begin to evaporate as soon as it’s exposed to air. Dry clay or clay that has been rolled too thin can lead to cracking and splitting, so keep the clay in the packaging until ready to use.
Curing
The curing process for air-dry clay is much different than polymer clay. Air-dry clay should never be placed in a kiln or oven. The materials can’t resist the high temperatures, which will cause your craft to either break apart or turn into ash.
Instead of baking or firing, it’s best to allow your project to dry naturally. Place the craft in a place where it can rest undisturbed for 24-72 hours. It is said that using a dehydrator may speed up the process, but this can also damage or discolor the design. If you try this method, I recommend using the lowest setting on the dehydrator.
After your creation is completely dry, paint or seal the project to protect it if desired.
Air Dry Clay FAQs
How long does air dry clay last?
If stored properly, air-dry clay should last indefinitely.
Where do you store air dry clay?
I recommend wrapping leftover clay in plastic wrap and then placing it in an airtight container and kept at room temperature.
Why does air dry clay crack?
Cracking is pretty common with air dry clay projects. It is usually caused when the clay shrinks as the water evaporates from the clay when it dries.
To avoid cracking, make sure the area your project is drying is not too hot and has good ventilation (drying too fast or in too warm of environment will cause cracking. Additionally, be sure not to oversaturate the clay with water while you’re working with it. Using too much water will cause cracking.
What’s the typical air dry clay drying time?
Instead of baking or firing, it’s best to allow your air-dry clay project to dry naturally. Place the craft in a place where it can rest undisturbed for 24-72 hours. If you can wait the full 3 days, that is better.
Can you air dry clay faster?
It is said that using a dehydrator may speed up the air dry clay drying time, but this can also damage or discolor the design. If you try this method, I recommend using the lowest setting on the dehydrator.
Your clay project is more likely to crack if you attempt to dry it faster because the clay will shrink when it dries quickly.
When should you paint air dry clay?
Wait until your project is completely dry before painting, no less than three full days.
What’s the difference between air-dry clay and polymer clay?
Armed with so much information, how do you know which is the right clay to use? It really depends on the intent of your project. While these are both easy materials to work with, the biggest difference between air-dry clay and polymer clay is the curing process.
Since polymer clay has a much faster drying time, it might be the best option if you are short on time; however, it does require heat to seal the deal.
If you are only using the clay for small activities and play, air-dry clay may suit you best. It’s much easier to work with and more affordable than polymer clay.
Air dry clay vs polymer clay: snapshot
Depending on your project, there are many advantages and disadvantages to both types of clay. Refer to the chart below for the different features of each.
| Air Dry Clay | Polymer Clay | |
| Ease of Use | Much easier to use and manipulate. | Requires conditioning (kneading clay until soft and smooth) the clay before molding. |
| Heat Dependency | No fire source, kiln, or oven required | Kiln or oven required. |
| Drying time | At least 24 hours, or up to 3 days; Recommend sealing to ensure durability | Will only harden in the oven and needs 15 min of baking for every 1/4″ of thickness, but dry/cool in as little as 15 minutes. |
| Durability | Fragile; will melt when in contact with water | Moisture resistant after baking. Incredibly durable and rigid. |
| Storage | Store in airtight containers for later use or throw away. | Return to original packaging and store. |
| Cost | 1 pound block = $10 average | 1 pound block = $20 average |
| Versatility | Easiest clay option to work with; appropriate for all ages and play | Easy to work with; comes in an impressive array of colors with additional special effects options. |
Whether you choose air dry clay or polymer clay, I’m sure you’ll love DIYing with these fun materials. Hopefully, you now understand the difference between the two so you can select the right material for your next clay project.
What do you like working with better – air dry clay vs polymer clay?
Let us know in the comments below!

can you mix the two kinds together?
I wouldn’t recommend mixing them together because of the different drying and curing methods.