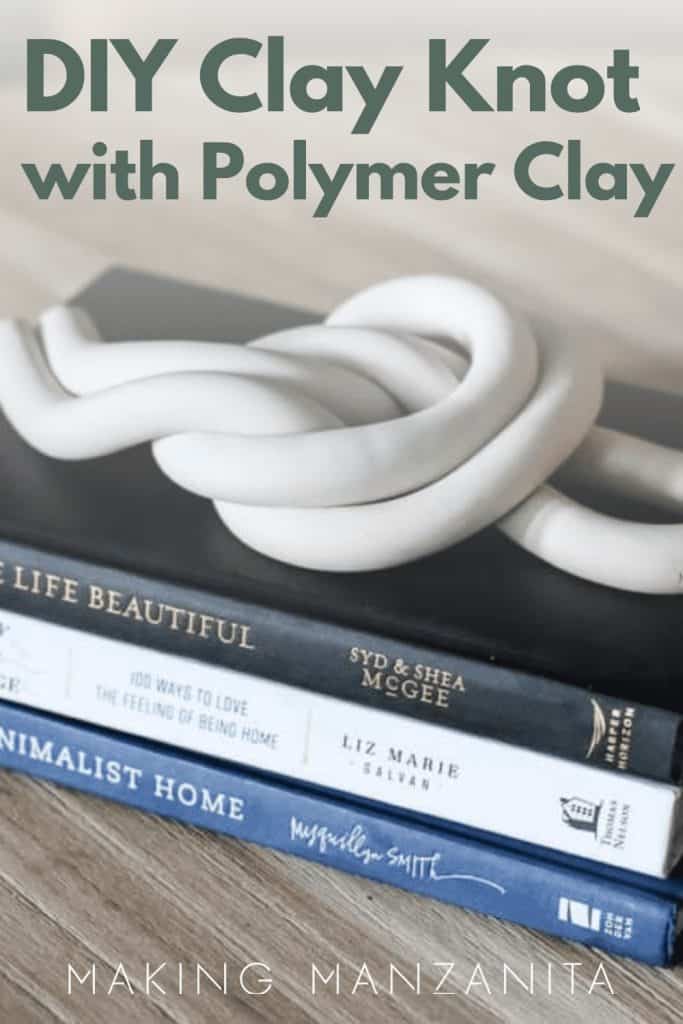
DIY Clay Knot Made with Polymer Clay

Want to get that modern boho look? Try these easy DIY decorative clay knots! These knots look just like the ones sold by high-end interior design retailers like Studio McGee or West Elm. All you need for this knot home décor is a package of polymer clay and some time to follow along with our easy step-by-step tutorial.
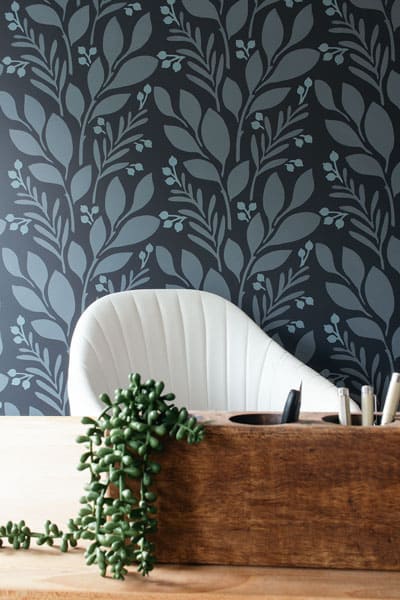
If you are someone who is easily overwhelmed by home décor – specifically trying to resist every home décor project on Pinterest, sticking to decorating on a budget, and creating a beautiful living space – these clay knots could be the ticket! These decorative knots bring in that modern boho decor for your coffee table or living room shelves!
Table of Contents
This DIY polymer clay knot tutorial contains affiliate links, but nothing that I wouldn’t recommend wholeheartedly. Read my full disclosure here.
While these were a little more involved than simply transforming a thrifted vase, they were still a fun project – even for a perfectionist like me!
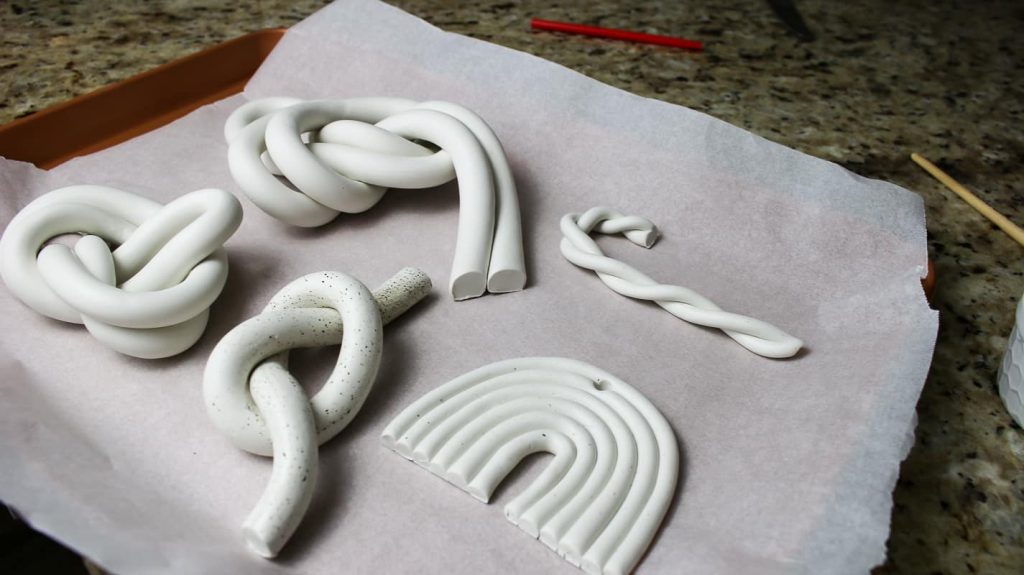
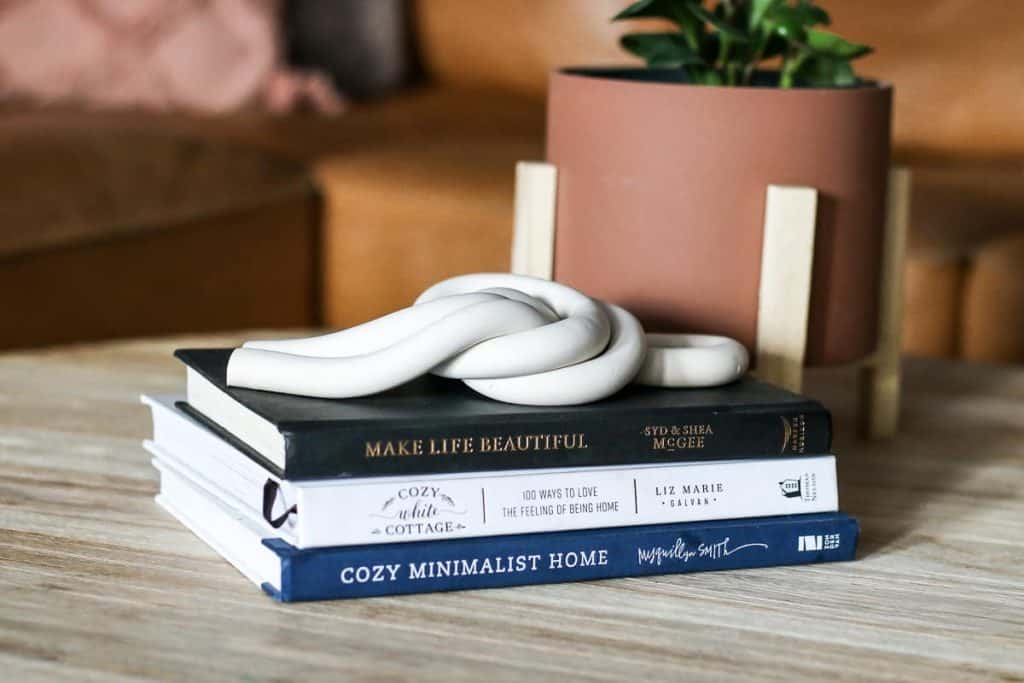
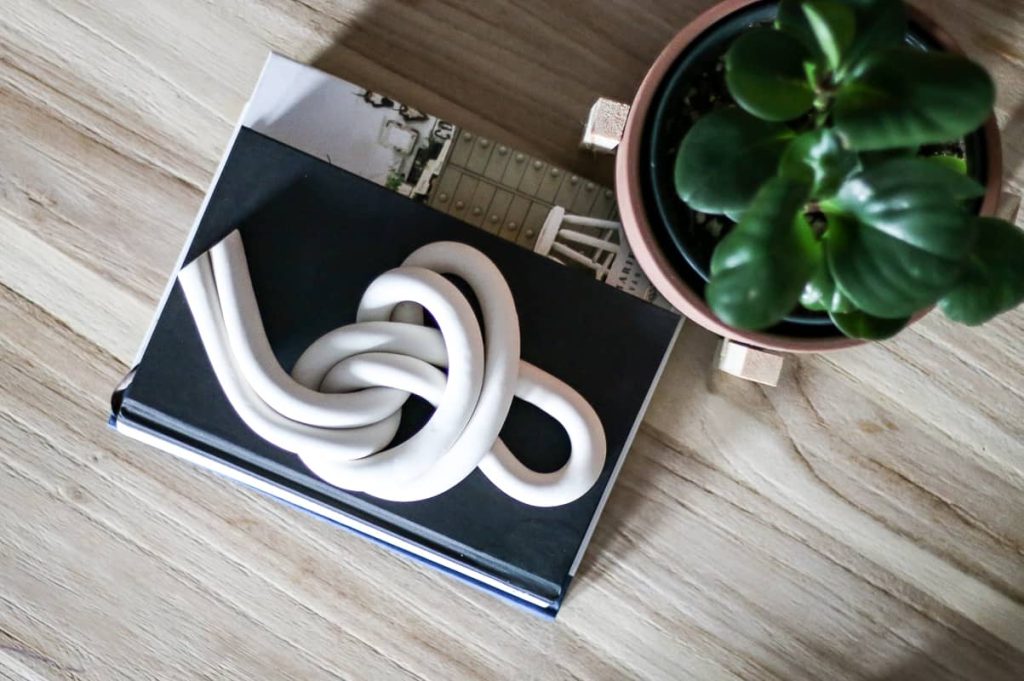
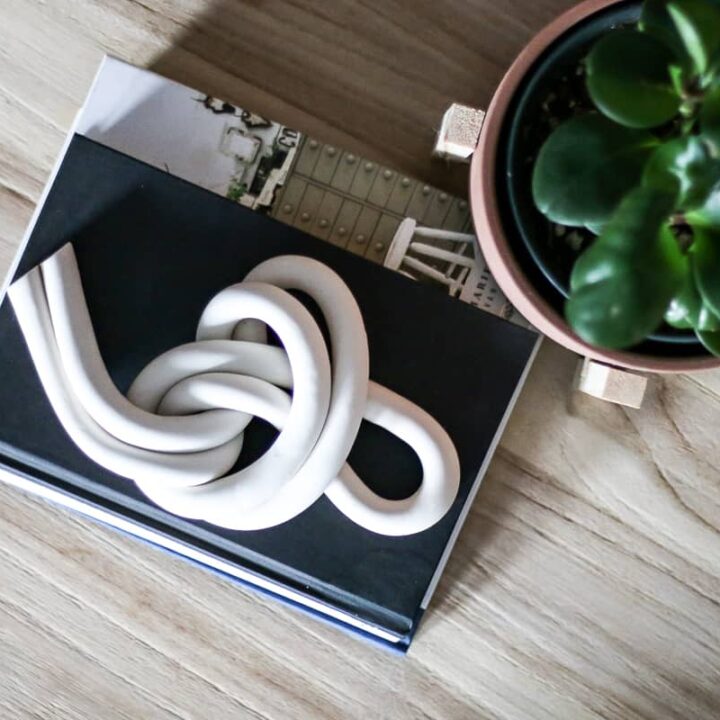
I created three different versions of these clay sculpture knots: looped knot, square knot, and overhand knot. Really, these can be knotted and twisted in any way you choose.
For the overhand knot, I decided to add ground black pepper to the polymer clay while kneading. This gave it a speckled look that turned out to be my favorite! You can also use coffee grounds in the clay, too.
If you want to follow along with these creations, check out the YouTube video below. I also learn a lot by trial and error, so you can learn along with me!
Video Tutorial: DIY Clay Knot
If you love DIY videos, be sure to subscribe to our YouTube channel so you don’t miss the next one. We share weekly renovating DIY tutorials.
How to Make Decorative Polymer Clay Knots

This tutorial uses polymer clay instead of air-dry clay as the knots are baked in the oven before they are put on display.
Here are a few things I learned while making these knots that will save you time:
- Remove all jewelry to avoid making imprints in the clay while kneading.
- Trim your fingernails before starting to avoid having your nails make dents in the clay.
- Embrace the imperfections! I used a small paintbrush and rubbing alcohol to smooth out the dents and nail marks, but it didn’t work as well as expected. Plus, I found that most imperfections worked themselves out while baking in the oven.
- Work on a clean, dry, and cool surface. Anything on your work area will stick to the clay.
Related: If you love working with this Polymer Clay – try one of these other creative clay crafts!
Supplies needed:
- White Polymer clay (not air dry)
- Rubbing alcohol
- Artist paint brushes
- Parchment paper
- Baking sheet
- Pepper
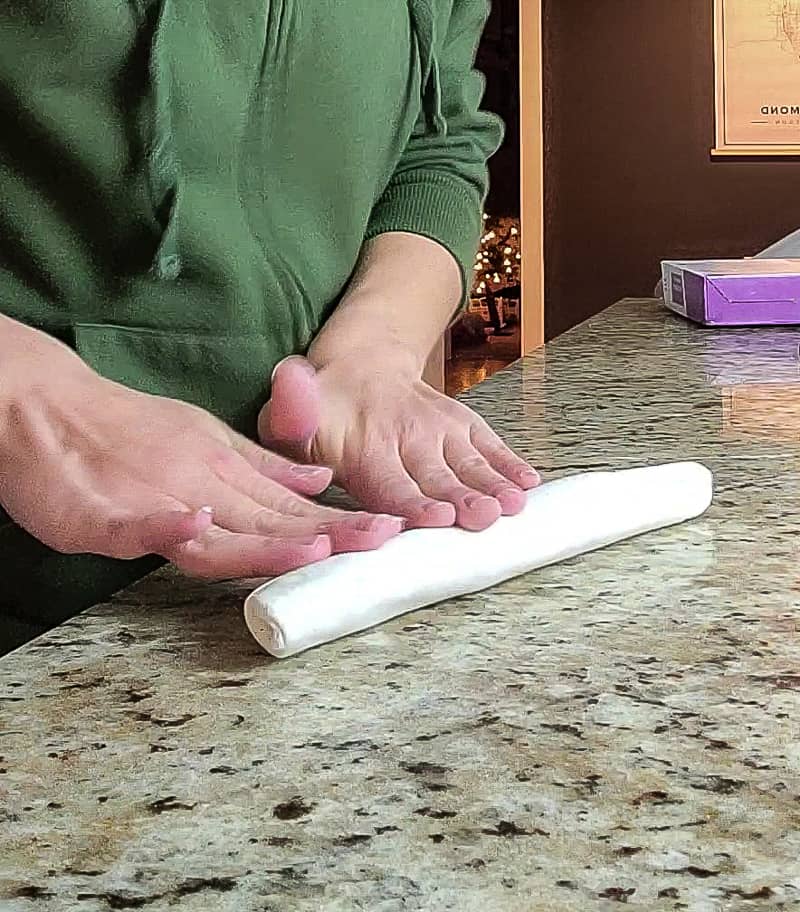
Step 1: Knead the clay.
Starting with about a quarter of the package of clay, begin kneading the clay until it becomes pliable enough to roll. You want to use a piece that’s large enough to fold over, twist, and knot.

Be sure you are working with a clean surface as anything that is on your countertop will stick to the clay as you knead.
The warmer the clay gets, the softer (and stickier) it will be. You don’t want it to get too sticky, so knead until it is just pliable to work with – about 3-5 minutes.
If it starts to get too sticky, you can try letting it rest (and cool off) for a couple of minutes and wash your hands in cold water to cool them down before touching the polymer clay again.
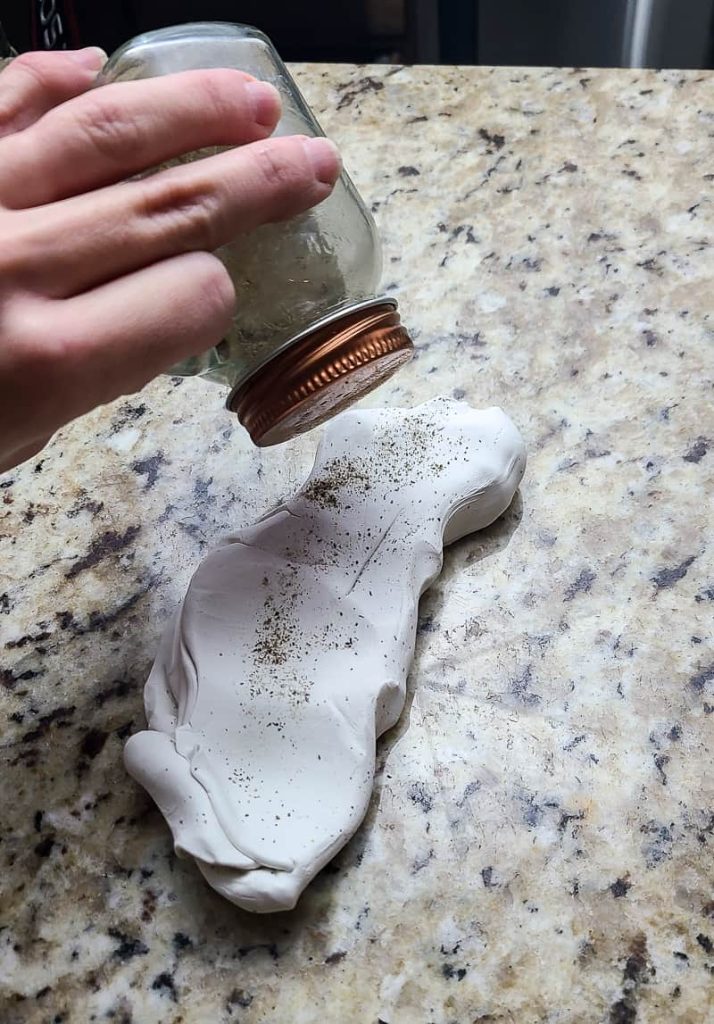
If you are adding in black pepper, coffee grounds, or something else, add that in before continuing to the next step.
Step 2: Shape clay.
After the clay is pliable and easy to work with, begin rolling it into a snake shape. In order to create a knot that I could fold in half length-wise and then knot, I rolled the clay into a 50-inch long and 3/4 inch wide snake shape.
After you’ve created the snake shape, you can begin shaping the knot to your liking.
Here are a few knot shapes to try:
- Square Knot: Fold the snake in half, cross one half over, and send the other through the center – just as if you were tying a knot.
- Loop Knot: Attach the two ends to create a loop, then cross over and and loop through the center.
- Overhand Knot: Cross one half over the other, and send the other leg through the center into a pretzel-shape.
To get a closer look at the knots, watch the video above to see them in action!
The key is to not let the edges stick together too much. There will be some imperfections that you might be able to smooth out with a bit of alcohol and the paintbrush. Alternatively, you can sand any areas after baking.
When your knot is shaped to your liking, trim the ends straight with a knife. I recommend starting closer to the edge to avoid trimming off too much at once.
Step 3: Bake and finish.
Now, place your knots on a parchment paper-lined baking sheet and put them in a 275-degree oven for about 1 hour.
Note: Your cooking time and length may vary based on the brand of polymer clay you use and how thick your knots are. Check the back of the box for clarification.
After your knots are through baking and have cooled, you can use fine-grit sandpaper to brush away any edges or minor imperfections. Be very gentle when sanding to avoid scratching the knots.
I also found that most imperfections worked themselves out while baking. Additionally, the imperfections on the overhand knot with the black pepper were much less noticeable than the others.
Tip: There was something on the bottom of my oven that began to smoke while the knots were baking. The smoke changed the coloring of the clay, so keep this in mind when making this craft.
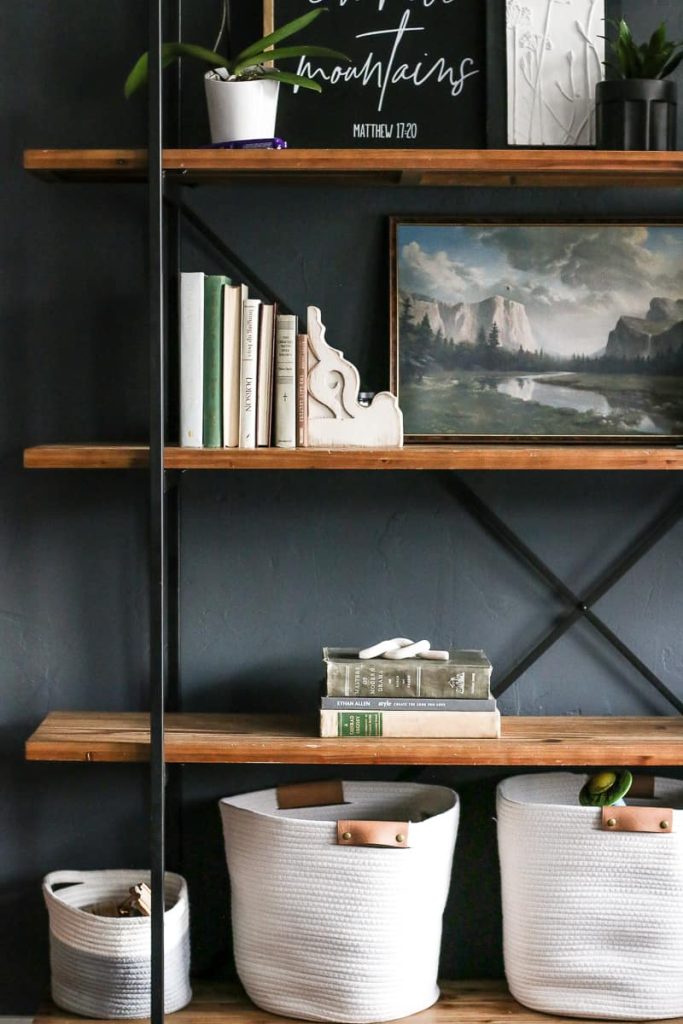
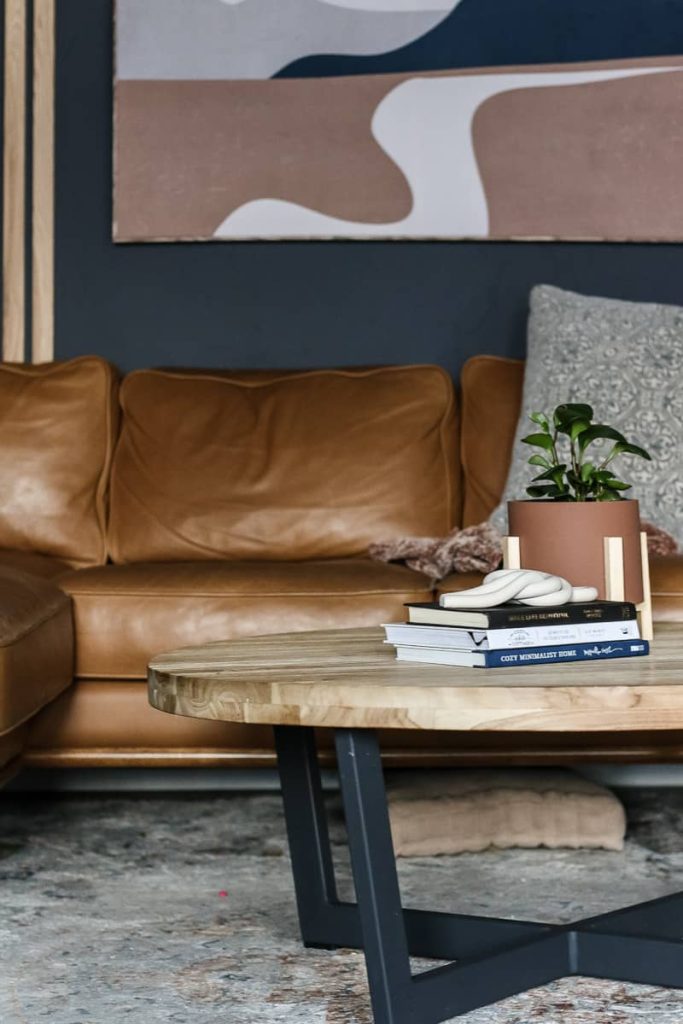
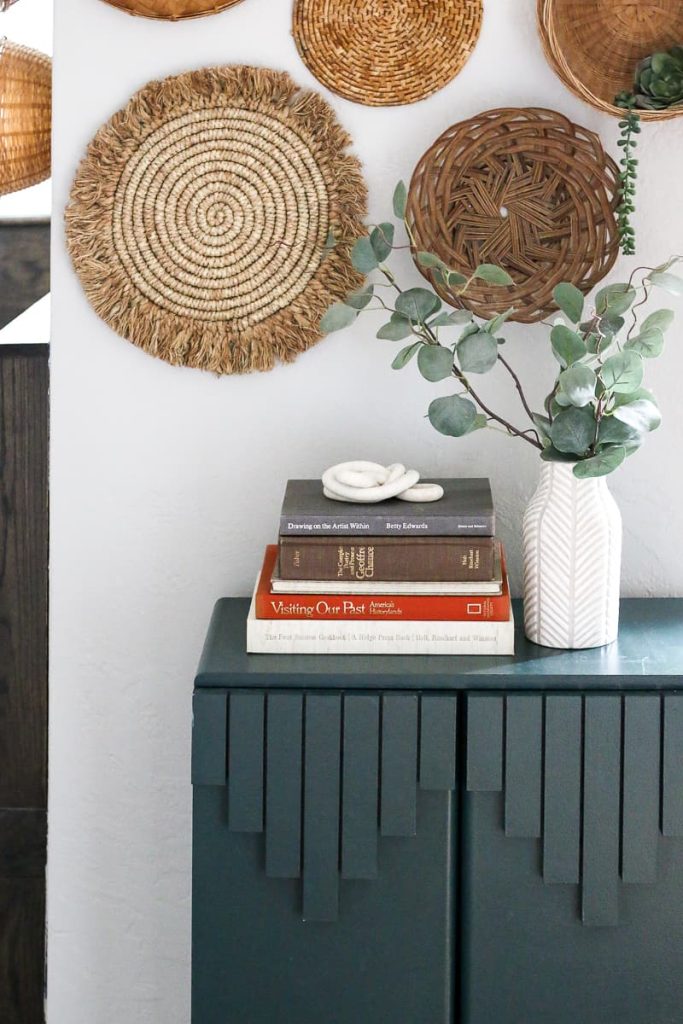
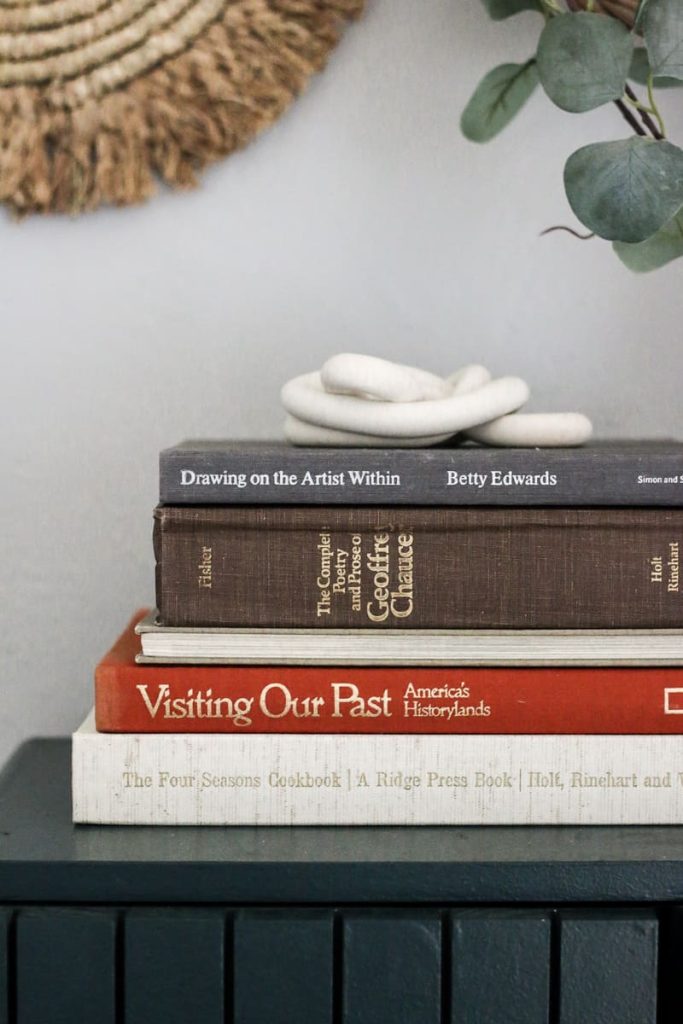
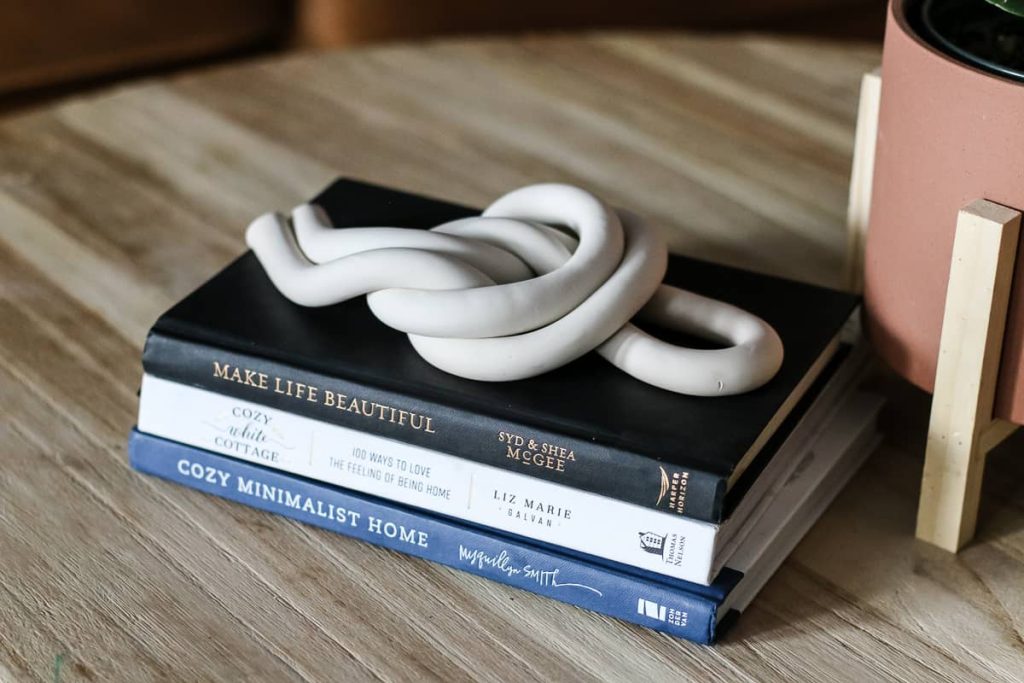
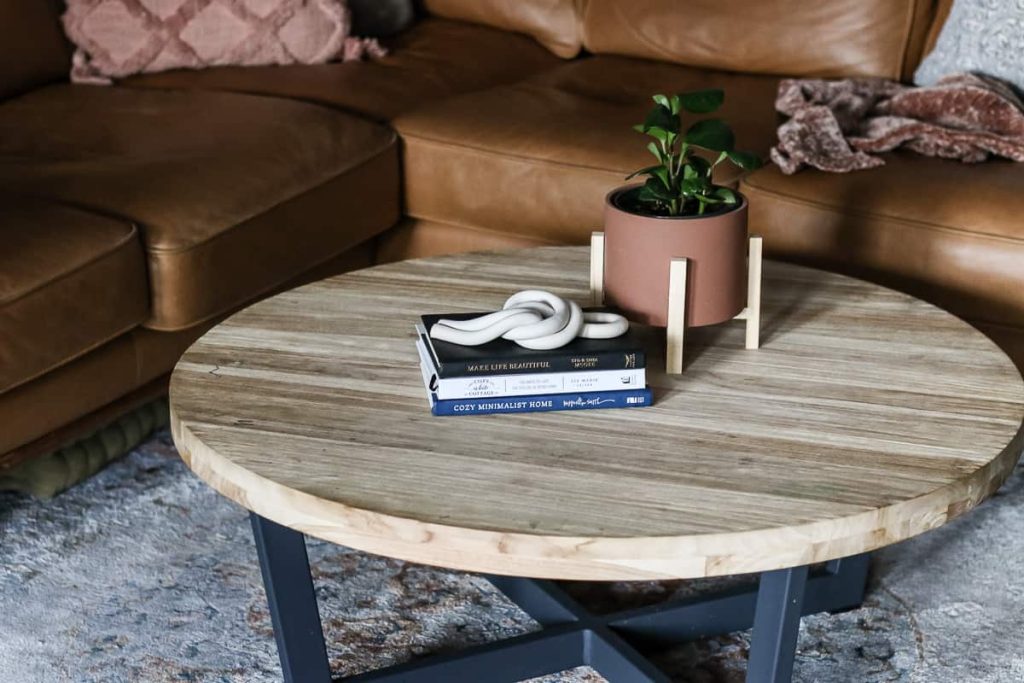
Use your creation as a paperweight, bookshelf décor, coffee table piece, or placed on a small tray or a stack of decorative books.
Even if you don’t consider yourself a DIYer, you’ll be amazed at just how much fun these polymer clay knots are to create! No experience with clay or pottery (or really ANY type of crafting or DIY) is required for this easy project.
You simply leave them natural or paint them if you prefer. If you want to paint the clay knots, you can use spray paint or apply acrylic craft paint with a paintbrush. The clay knots don’t necessarily need to be “sealed” so you can just leave them natural if you don’t want to paint them.
Also if you are craving a color instead of white, you can use colored polymer clay. There are several colors to choose from. This terracotta color would be so fun!
Related – If you liked these clay knots, check out these articles next:
Where would you put a polymer clay knot like this in your home?
Let us know in the comments below!
Clay Knot Made with Polymer Clay
Try these easy decorative DIY clay knots made with polymer clay! They look just like the ones sold by retailers like Studio McGee or West Elm.
Materials
- White Polymer clay (not air dry)
- Rubbing alcohol
- Parchment paper
- Pepper
Tools
- Artist paint brushes
- Baking sheet
Instructions
- Using a quarter of the package of clay knead the clay until it becomes pliable.
- If adding pepper or coffee grounds or something else add that now and finish kneading.
- Shap the clay rolling into a snake shape. 50 inches long and 3/4 of an inch wide.
- Shape the clay into the knot of your liking.
- Bake for an hour. Check the directions for your brand, it might be different from mine.
- Once cooled, use a fine grit sandpaper to brush away any imperfections.
- Decorate with your clay knot!