
How To Make A DIY Bubble Vase

Learn how to make your own DIY bubble vase with this easy step-by-step tutorial! We're using a glass vase, half-round wood beads, and acrylic craft paint mixed with baking soda!
Thank you to DAP for sponsoring this DIY bubble vase project! All opinions are entirely my own. This post also contains affiliate links, but nothing that I wouldn’t recommend wholeheartedly. Read my full disclosure here.
Looking for a quick and stylish way to elevate your home decor in less than an hour? This bubble vase DIY is the perfect mix of on-trend design and a simple, approachable craft project. I promise you, you don’t need to be an expert for this one!
Using a basic glass vase, wood beads, and a textured paint finish with a little baking soda, you can create a chic accent piece that looks high-end without spending a fortune.
Before I attempted this, I tested everything with DAP Weldwood Instant Wood Adhesive to make sure the glue was going to work well with the wood beads on the glass vase. The combination worked beautifully—so this idea came together quickly.
Whether you’re looking for a quick way to refresh the decor on your entertainment center – like I was – or adding a unique touch to a shelf, this DIY vase is an easy way to bring texture, style, and personality into your space.

Supplies & materials needed:
- DAP Weldwood Instant Wood Adhesive
- Glass vase
- Half-round wood beads
- Acrylic paint
- Baking soda
- Paint brush

Step 1. Glue half-round wood beads to the vase
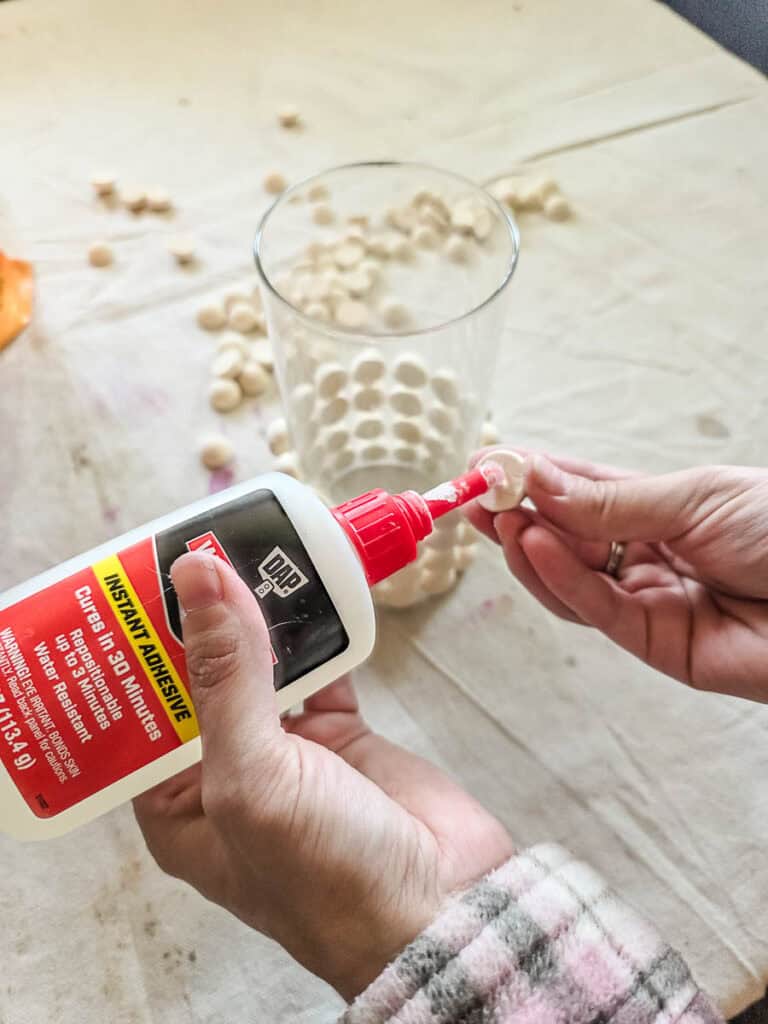

This is the most time-consuming part, but it is pretty easy! Just add the glue to the back side of the half-round wood bead and press it into place on the vase. Hold them in place for about 10-15 seconds to give the glue a chance to grab. I worked on rows, moving my way up the vase as I went.

The glue is a little repositionable for about 3 minutes if you need to shift them around. Be sure to keep them lined up as you go and level the rows. I just eyed this and it worked out.
After you are done, wait 30 minutes to allow the glue a chance to cure.

Step 2. Mix baking soda into paint
To give the vase a little texture, so it looks more organic and earthy, mix in a little bit of baking soda to your paint. I’ve used this technique before on some vase projects, and it worked great, so I was excited to try it again.
Step 3. Paint

Next, use a paintbrush to apply the paint all over the vase. A small paint brush worked for getting in between the beads, and a larger paint brush was great for getting the paint to cover the wood beads quickly.
I also applied a thin coat of the paint on the inside of the vase so it wouldn’t be as transparent and thus require fewer coats of paint between the beads.
After the first coat dried, I needed to come back and do a little bit of touch-up, just adding a little more paint around the edges of the wood beads.
Alternatively, you could use spray paint on this project, but I didn’t have any on hand in the color that I wanted. Spray paint would certainly be faster. That’s what I ended up doing the last time we used these half-round wood beads on a project – the bobbin picture frames.

Step 4. Style

The last step is to get the DIY bubble vase styled in your home. I added ours to our entertainment center in the living room next to a DIY clay knot.

I paired it with some faux eucalyptus stems, and it looks great. Since there is paint on the inside of the vase, you probably won’t want to avoid any real greenery with water.
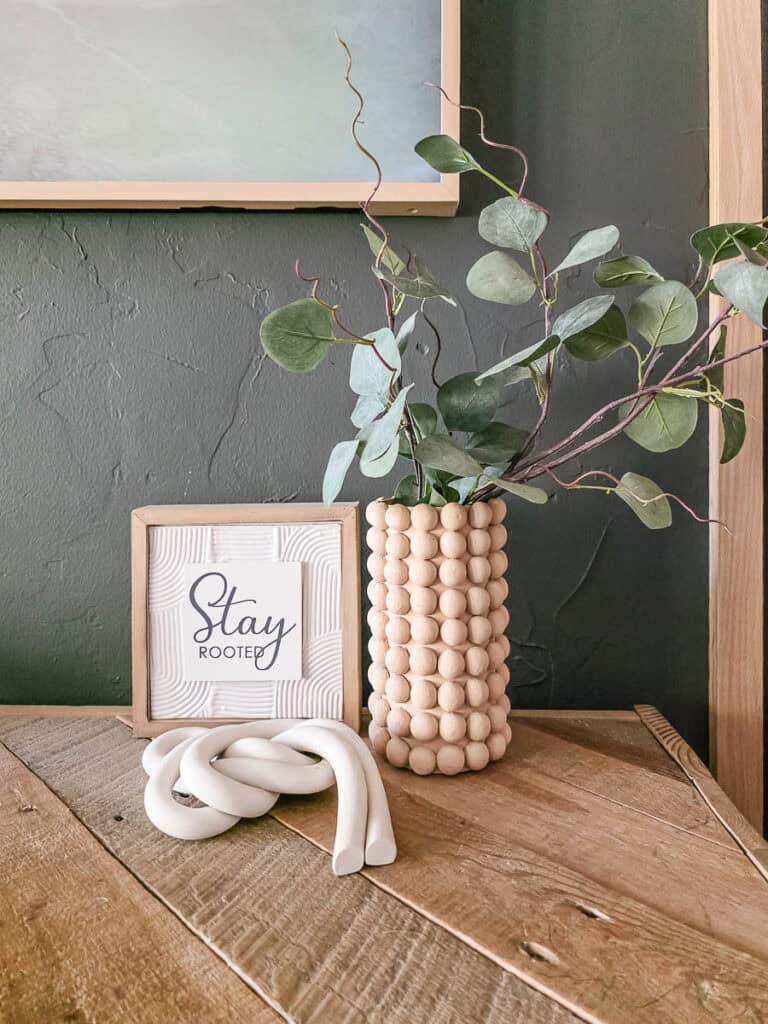
It would also look cute on a shelf or styled on the coffee table, don’t you think? It was such an easy and fun project!
What will you DIY next?