Love is in the air…. every where I look. Love is in the the air. Have you guys started feeling the LOVE yet for Valentine’s Day?
Now before we hop into this Valentine’s Day wreath DIY, let me warn you. This DIY craft is TIME CON-SUM-ING!! Unlike this Valentine’s Day XOXO decor which only takes a few minutes to whip up!
Like…..it-took-me-all-weekend time consuming. Like…I-never-wanna-see-another-felt-rosette-again time consuming. You get the point.

I recently stumbled across a site called Paper Mart with some good prices on craft supplies and packaging. They especially have a great price on their hot glue guns, which you will definitely need if you’re going to take on this Valentine’s Day wreath DIY.
Related – Looking for more Valentine’s Day gift and craft ideas?
If you are planning on spending the weekend inside escaping the snow like I was, grab a few good movies and get started. Or binge-watch Parenthood, I just finished it again for the 2nd time…gah…gets me every time.
I’ve got one more warning about this Valentine’s Day wreath DIY. You’re going to use some hot glue…. and by that I mean a whole boatload of hot glue.
This Valentine’s Day wreath DIY tutorial is brought to you by Papermart and uses affiliate links, but nothing that I wouldn’t wholeheartedly recommend anyway! Read my full disclosure here.
Are you ready to see how to make this Valentine’s Day wreath DIY?!
Supplies for the Valentine’s Day wreath DIY
- Cardboard piece – I used a pizza box
- Cutting mat, acrylic ruler & rotary cutter – Or you can grab this set of all three…seriously great price.
- Craft knife
- Red paint – I used acrylic, specifically Americana Deep Burgandy, but if I was to make this Valentine’s Day wreath again I’d grab something closer to the true red (like this one) that’s closer to the color of the felt, but that’s all I had on hand
- Red felt – I used about 8 of the 9×12 sized sheets
- Fabric or crafting scissors – I love these ones
- Hot glue gun and lots of hot glue sticks
- 2 paper straws
- Ribbon (for hanger) – I got the cute one I used from JoAnn’s a couple years ago, but they should have a fun selection of Valentine’s Day ribbon at your local craft store. They have some cute options at Paper Mart too!
- 1 strand of LED battery-operated fairy lights
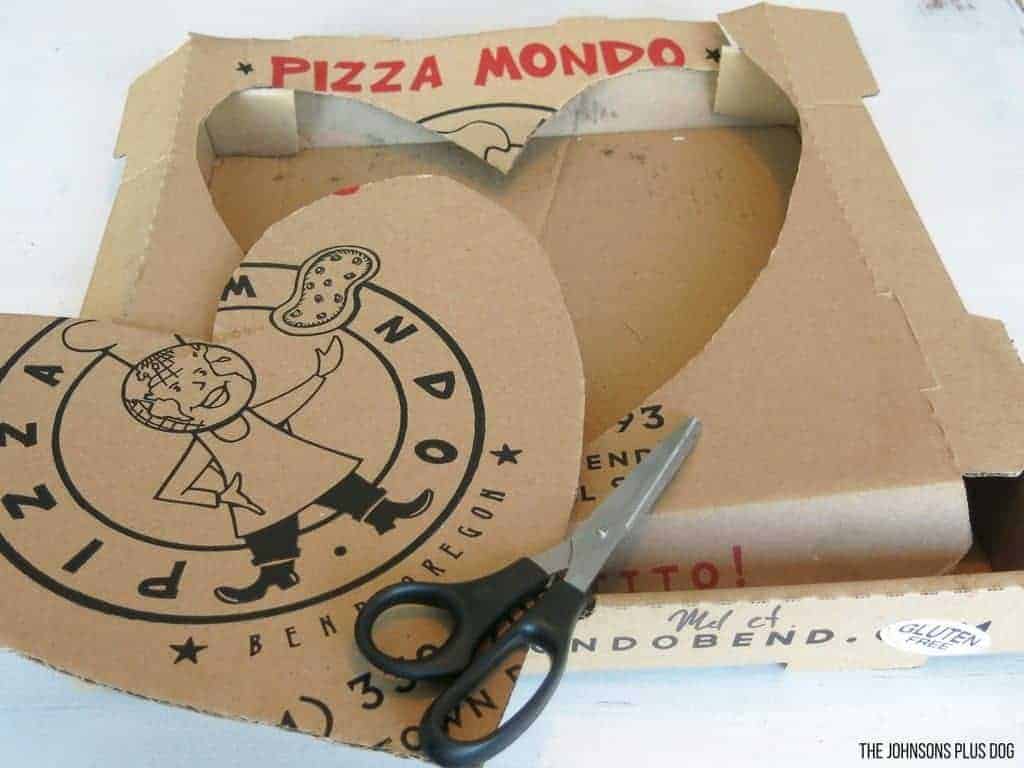
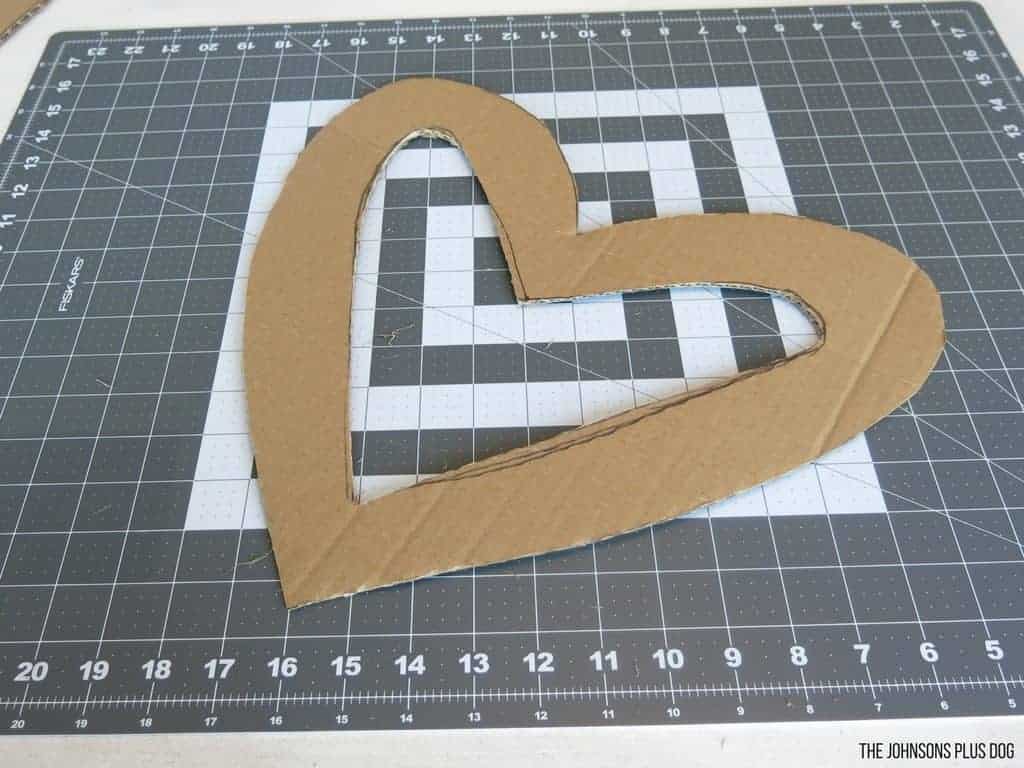
Step 1. Cut cardboard into heart shape.
I started with a pizza box for the base of my Valentine’s Day wreath! It was the perfect size for what I needed.
I cut a large heart out from the top of the pizza box with scissors.
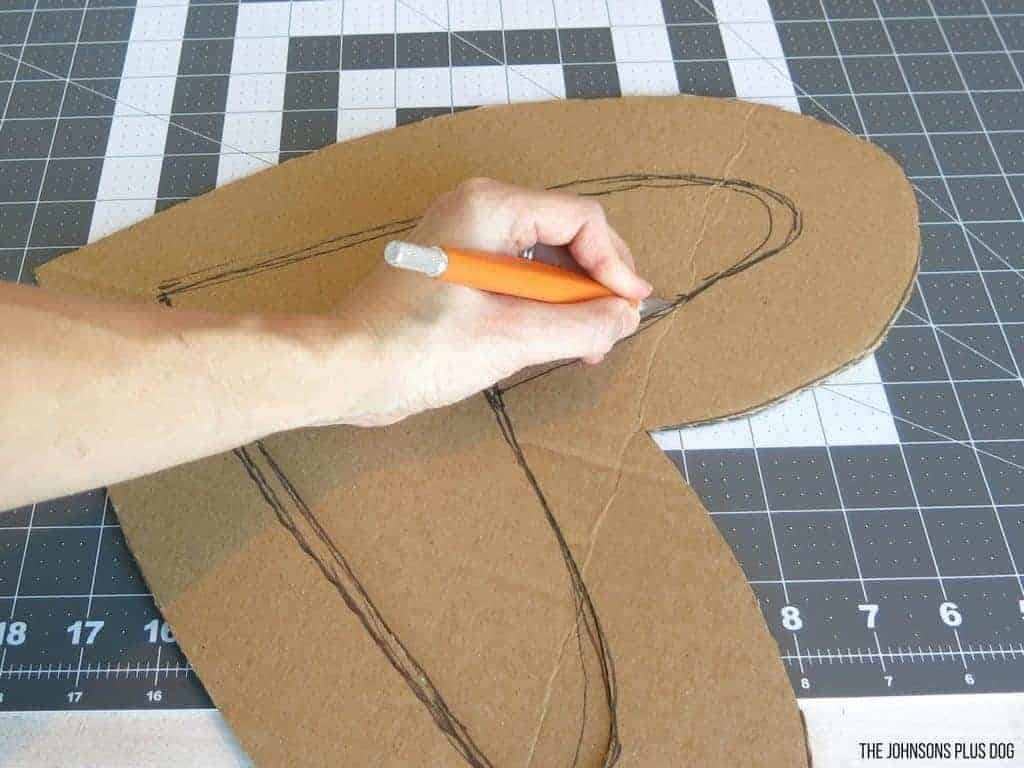
Next I drew another heart on the inside and cut it out with a crafting knife so I’d have a heart that was about 2-3 inches thick.
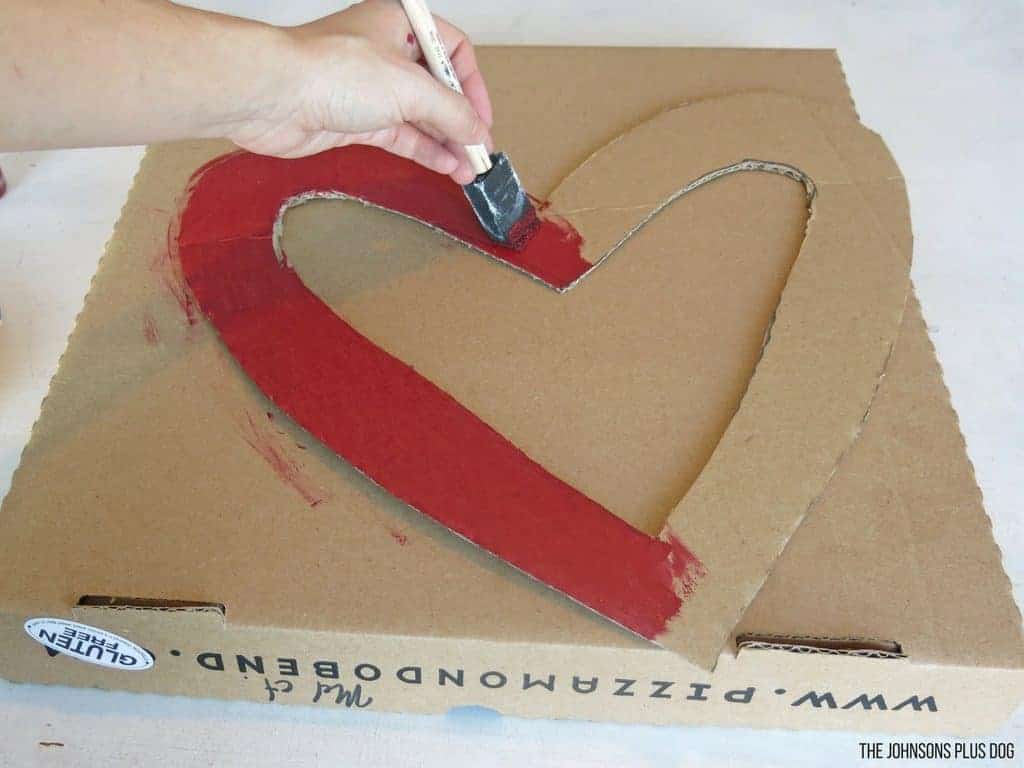
Step 2. Paint heart red.
I painted the heart red. This is just in case of it shows between the felt rosette in the background of the DIY valentine’s wreath.
Step 3. Make felt rosette flowers.
Next I used my super duper awesome new cutting mat I got for Christmas. It is seriously a game changer. it saves so much time if you’re going to be cutting a lot of fabric or felt. It’s going to make a world of difference next Christmas when I start making my homespun fabric Christmas ornaments again.
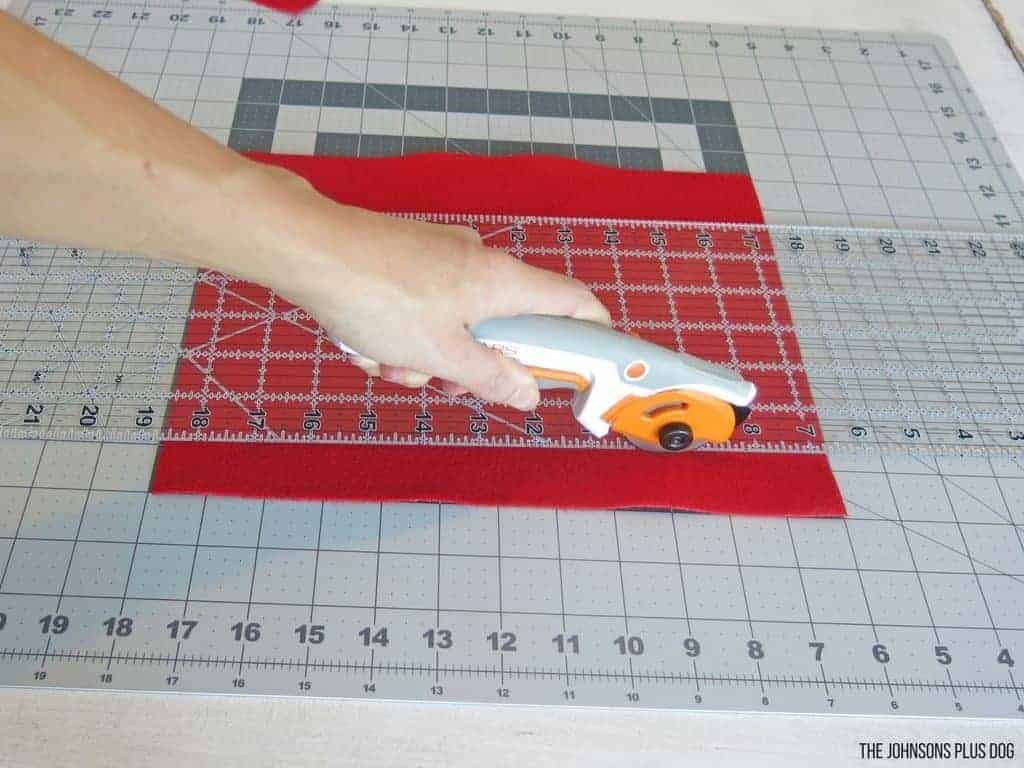
I cut the felt pieces 1 inch and 1/2 inch wide. I wanted different sizes and depths to the rosettes. I also made cut some of the skinnier pieces in half for even smaller rosettes. These small felt roses were great for filling in little gaps or edges of the heart wreath.
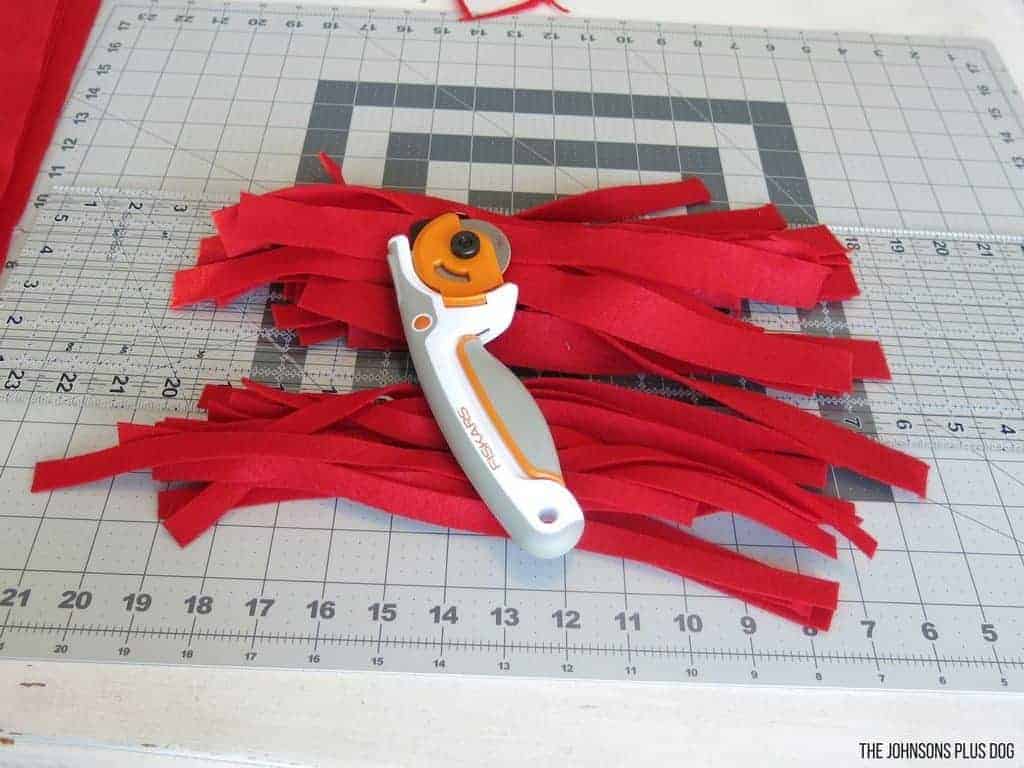
Now it’s time to rocking and rolling on the rosettes. This is the part when I suggested a good binge watching sesh of Parenthood. These are really simple to make, trust me. But they are just going to take you some sweet time. Ok….let’s jump in.
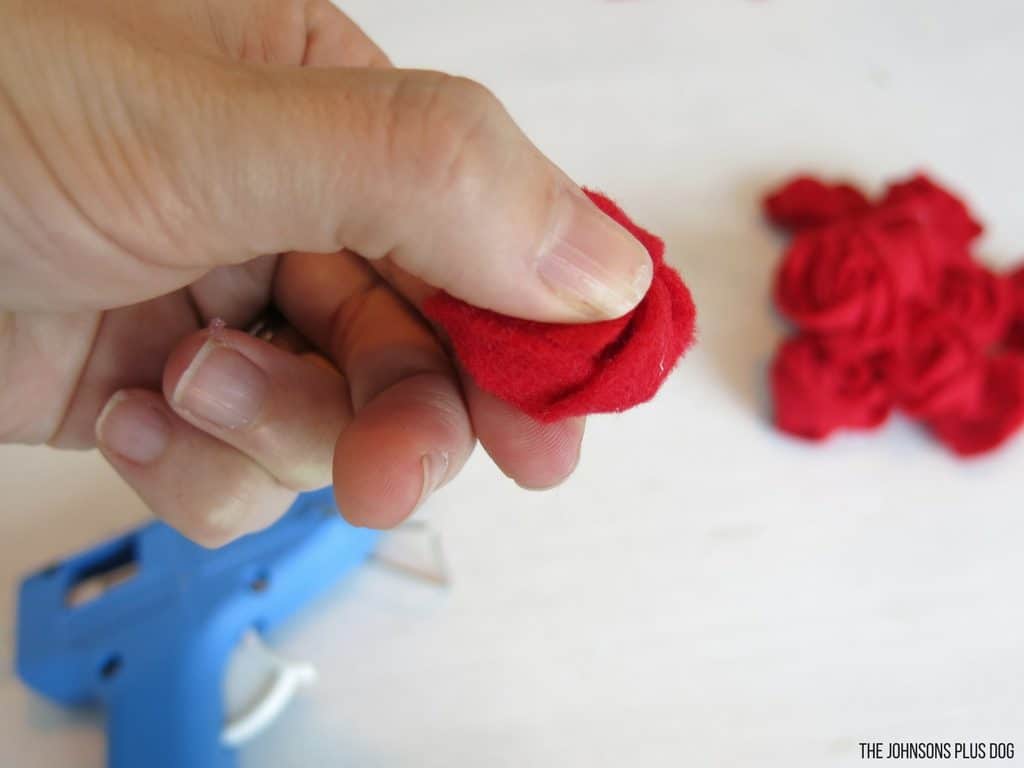
You start by putting hot glue on the first 1-2 inches of the felt strip.
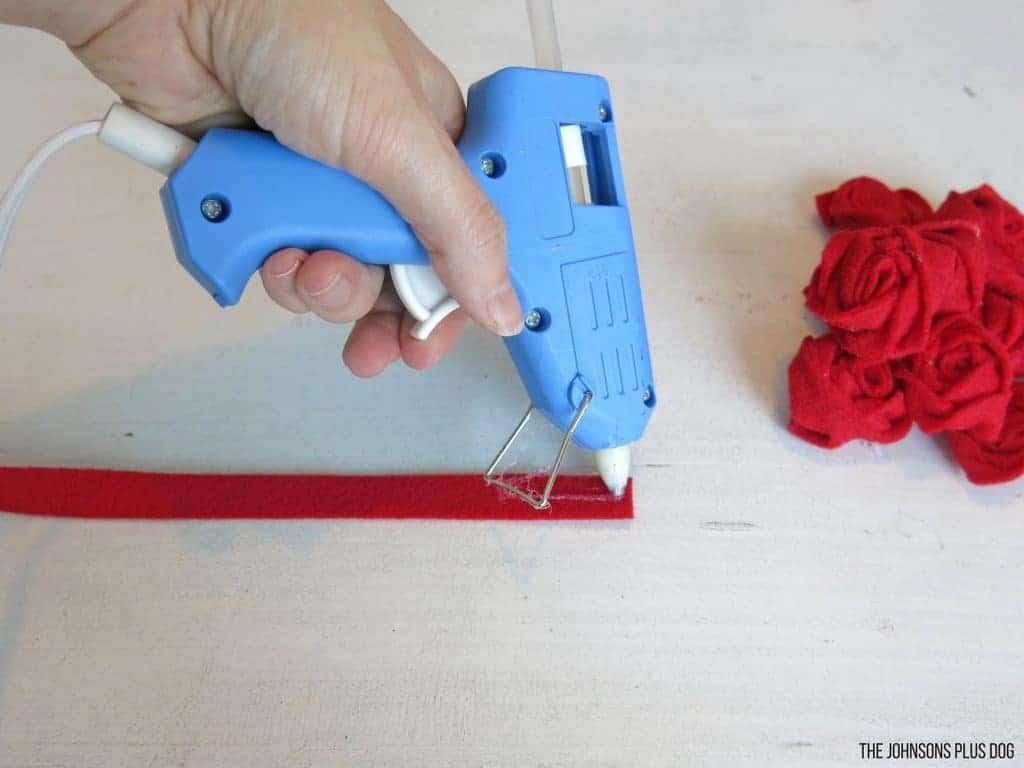
Next you just simply roll up the felt with the glue.
Next you start twisting the felt as you continue rolling it up.
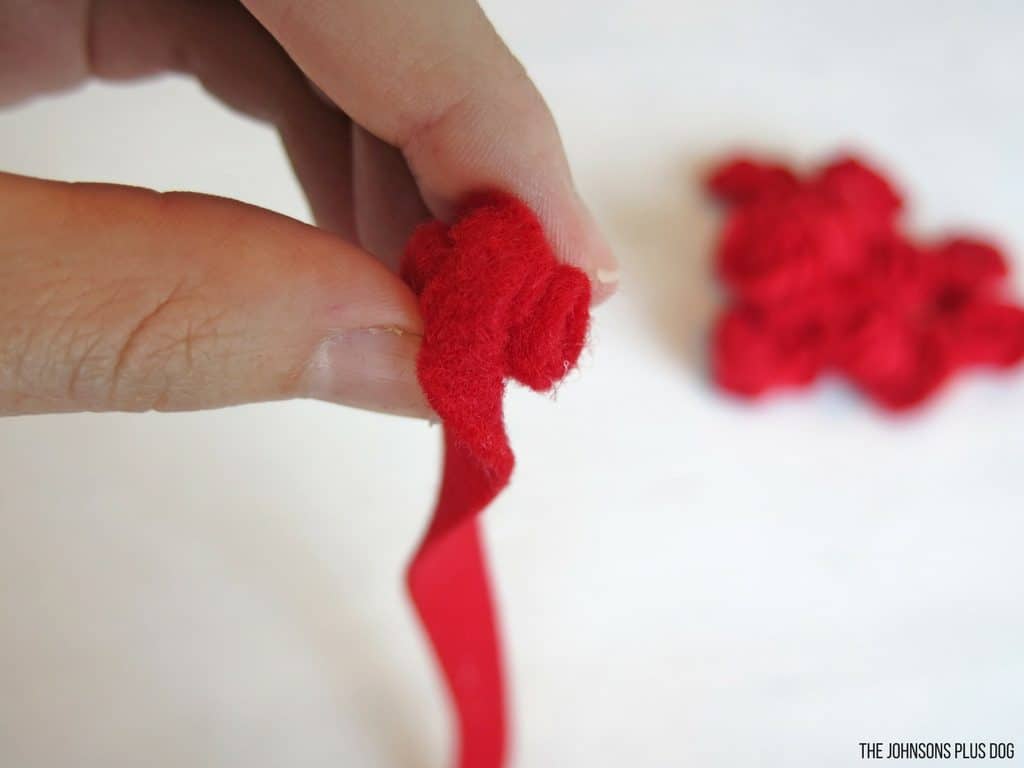
Every few twists, you’ll want to add a drop of hot glue to keep the rosette in place.
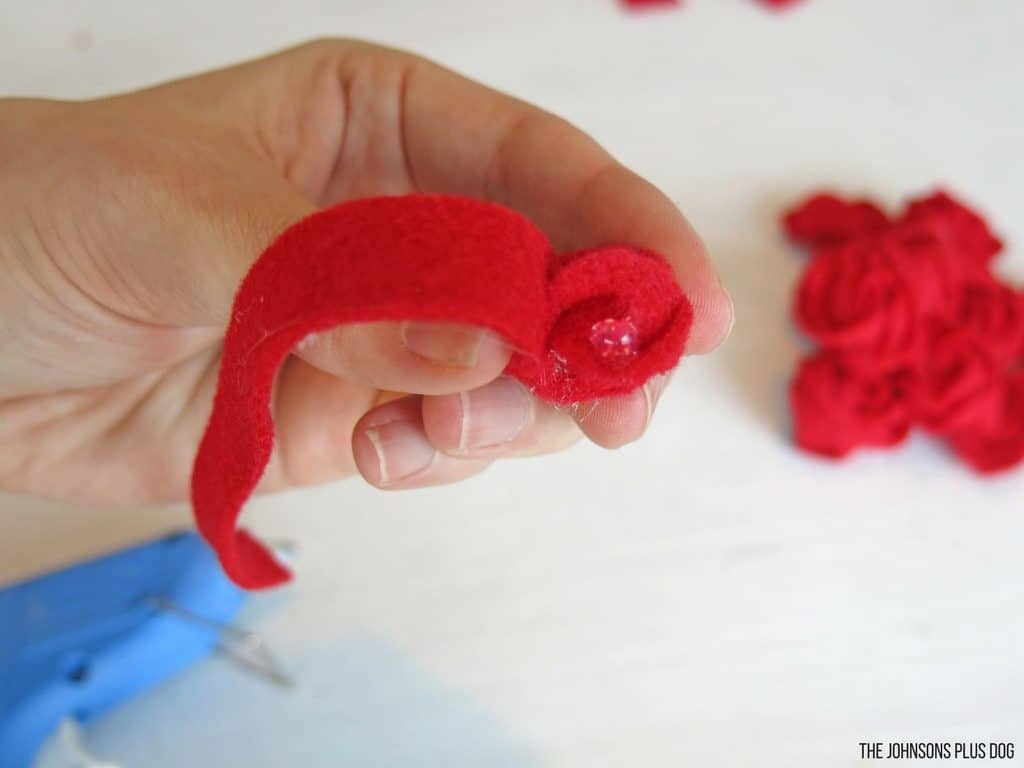
Just keep going…twisting, rolling and gluing until you get about 3/4 inch remaining.
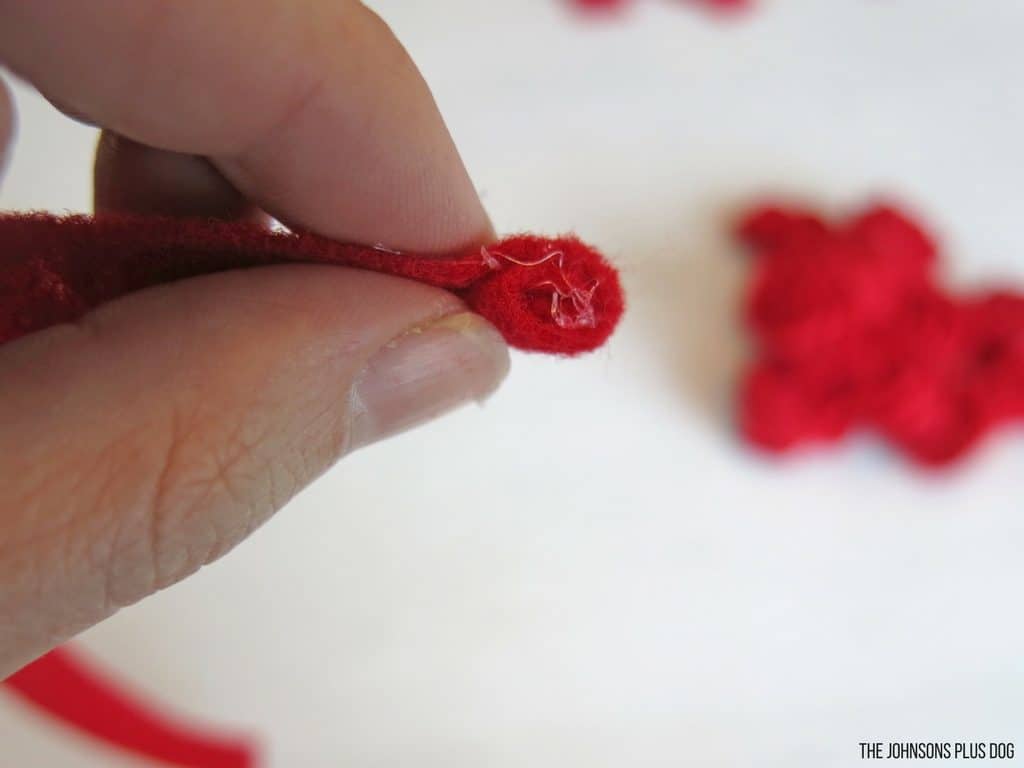
Then, flip the rosette over and at some hot glue to the backside.
Then, you’ll just press the remaining felt on top of the glue that you just applied to the back. This creates a strong backside of the rosette and and even gluing space when you attach it to your Valentine’s Day wreath DIY.
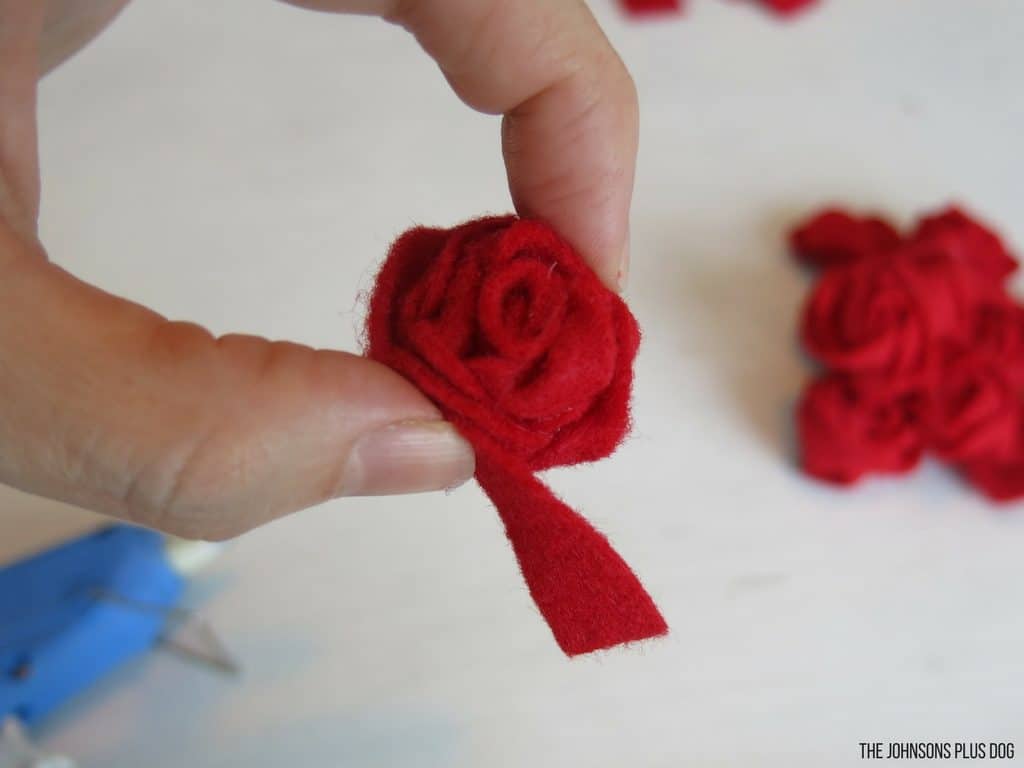
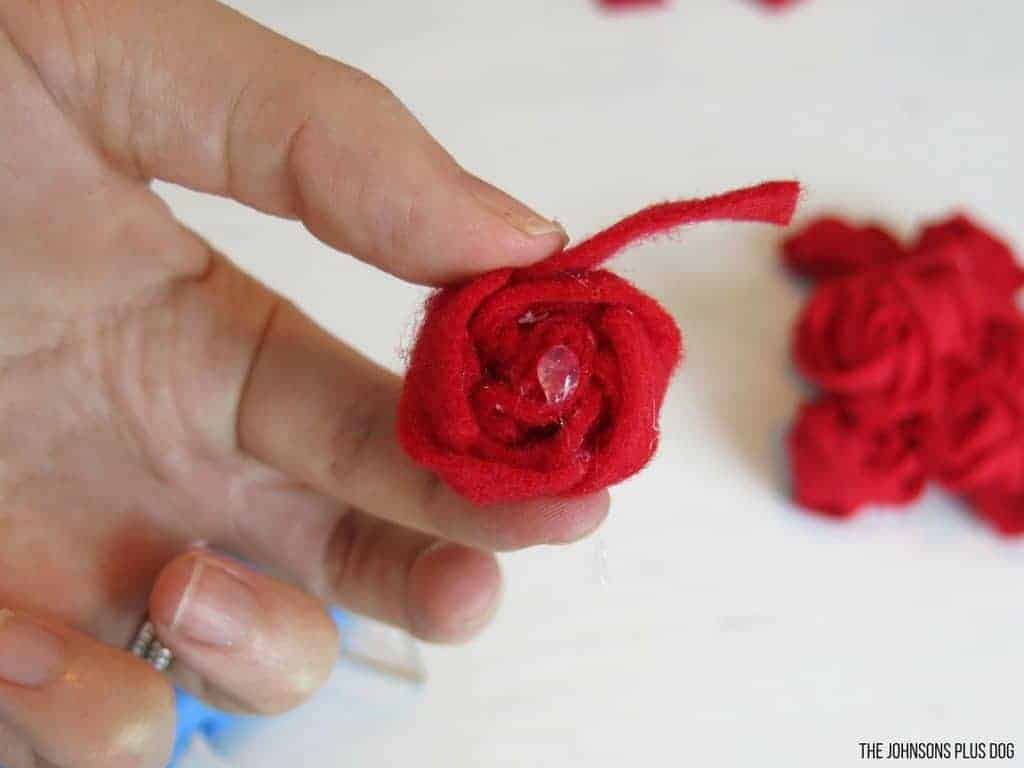
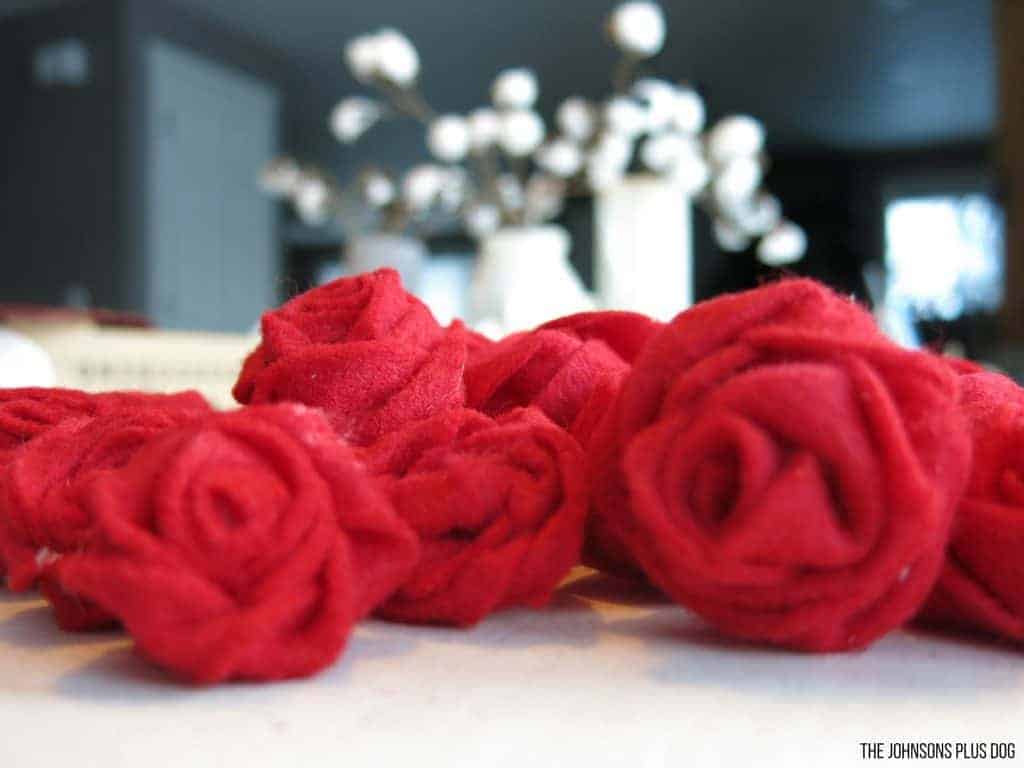
Ta da… Ok… just keep going… and going…. and going. I used 106 flowers for the wreath. Yes, 1-0-6! I swear it’s worth the effort, it turns out sooooo cool! 🙂
Are you still confused??? Haha, I got it. I can be hard to follow something like with just pictures, so I made a quick video so you can see how it all comes together.
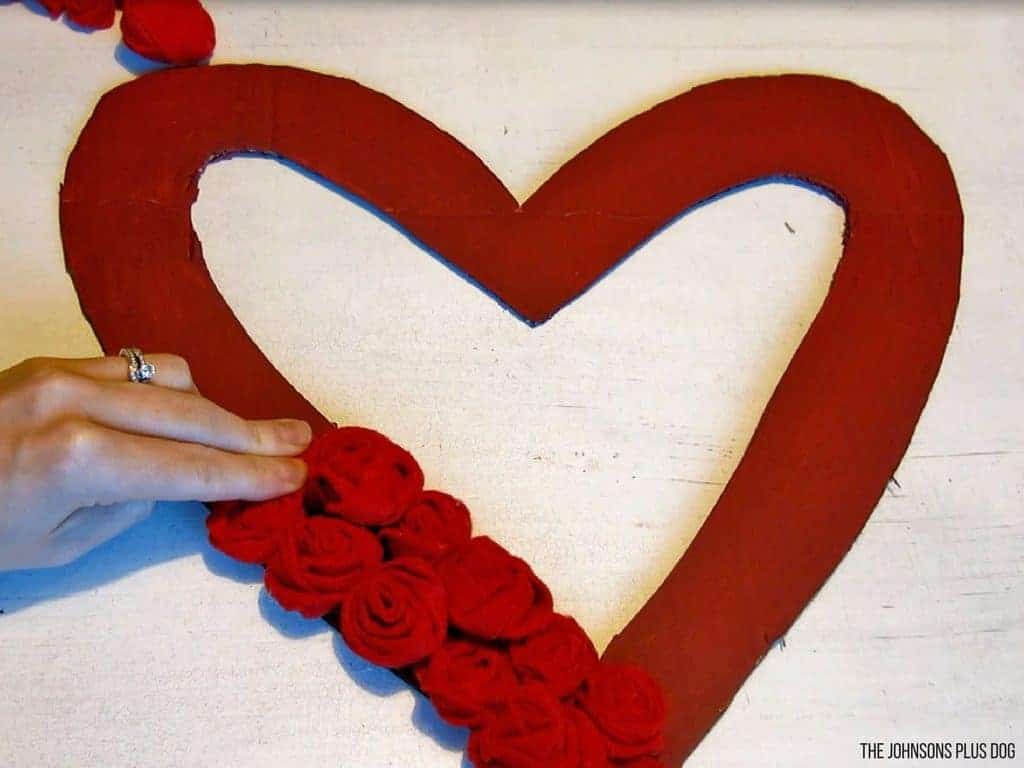
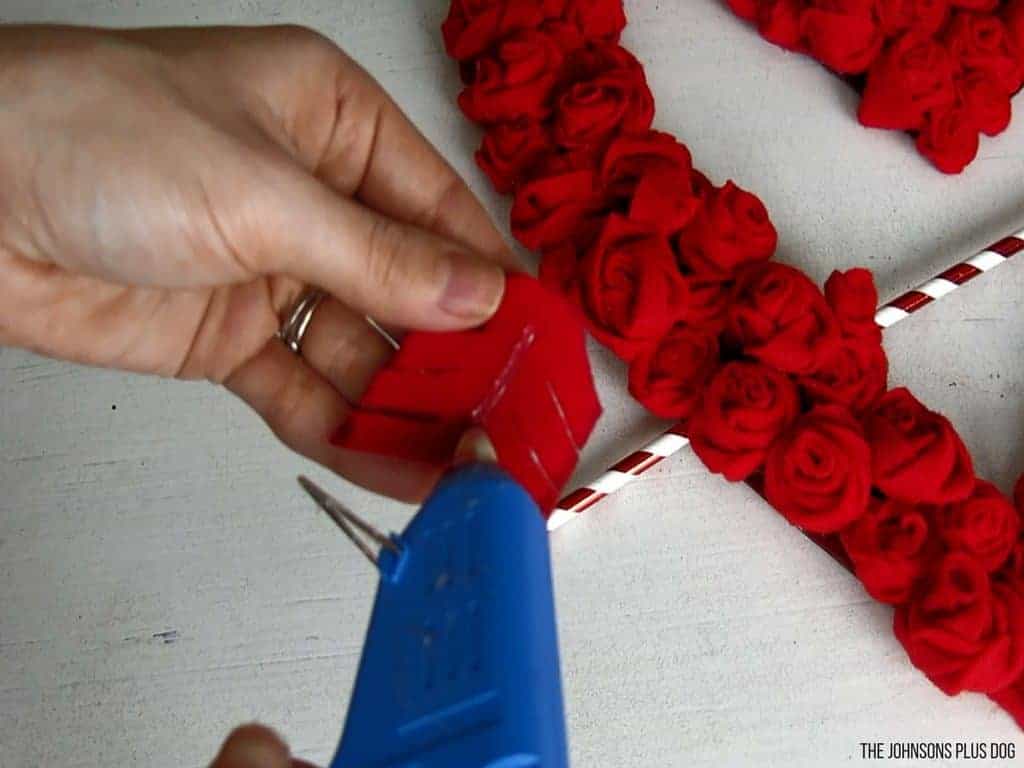
Step 4. Attach felt roses to heart wreath.
After you get your flowers all rolled up, you can start gluing to your wreath. I wasn’t sure how many I was going to need, so I made flowers, then glued some…make more flowers and then glue some. You get the point.
Step 5. Add arrow.
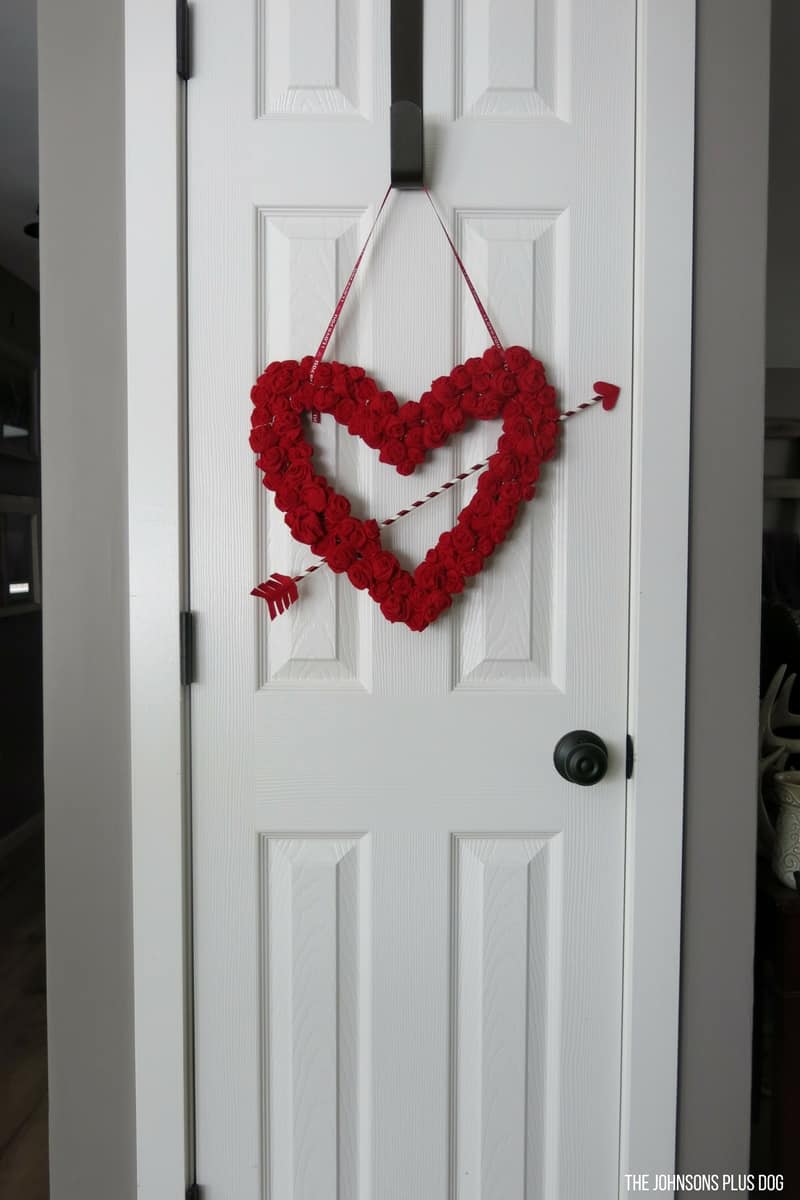
Now it’s time to get started on that super fun arrow! The cute arrow is my favorite part about this wreath.
I used two red and white striped paper straws for this. I actually had these in my craft stash from Christmas at The Dollar Tree.
One straw fit perfectly in the middle of the wreath. I just added some glue to the end of the straw and tucked it into place.

For the end of the arrow, I cut a 2nd straw in half and glued the ends in place, tucking them away behind some rosettes.

Ta da…

Next I cut out a heart (for the tip of the arrow) and fletching… that’s the technical term for the end of the arrow 🙂
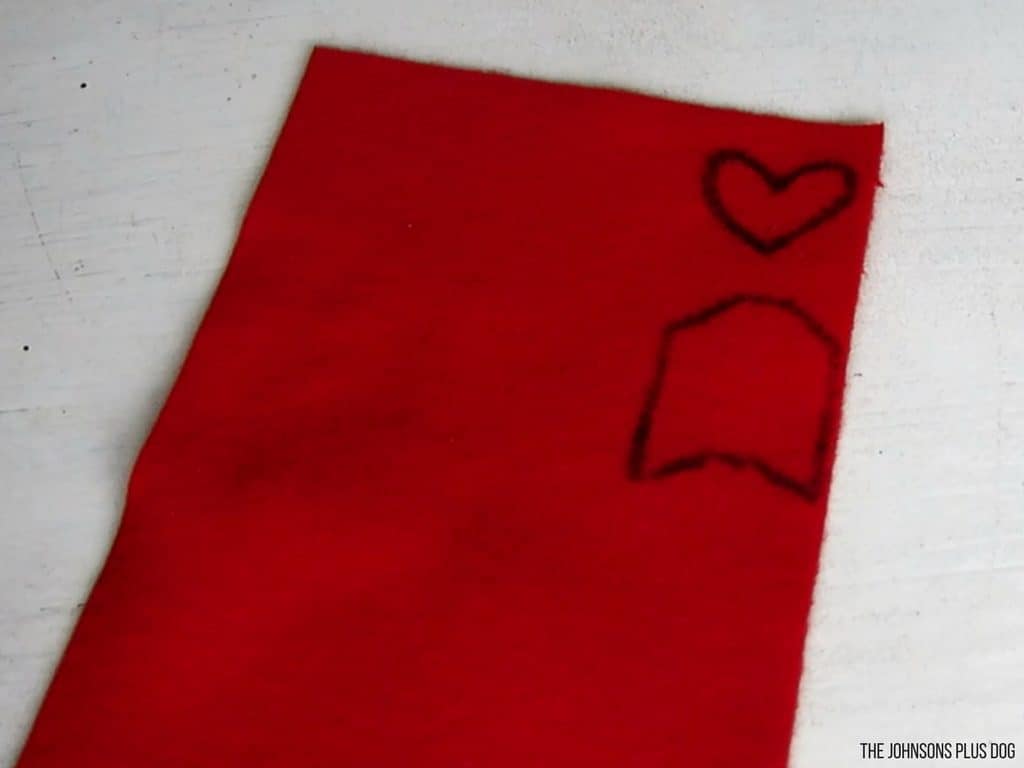
If you face the heart upside down, it looks like a cute point. Seriously… so cute, right?
I attached the heart to the straw with some more good ol’ hot glue.
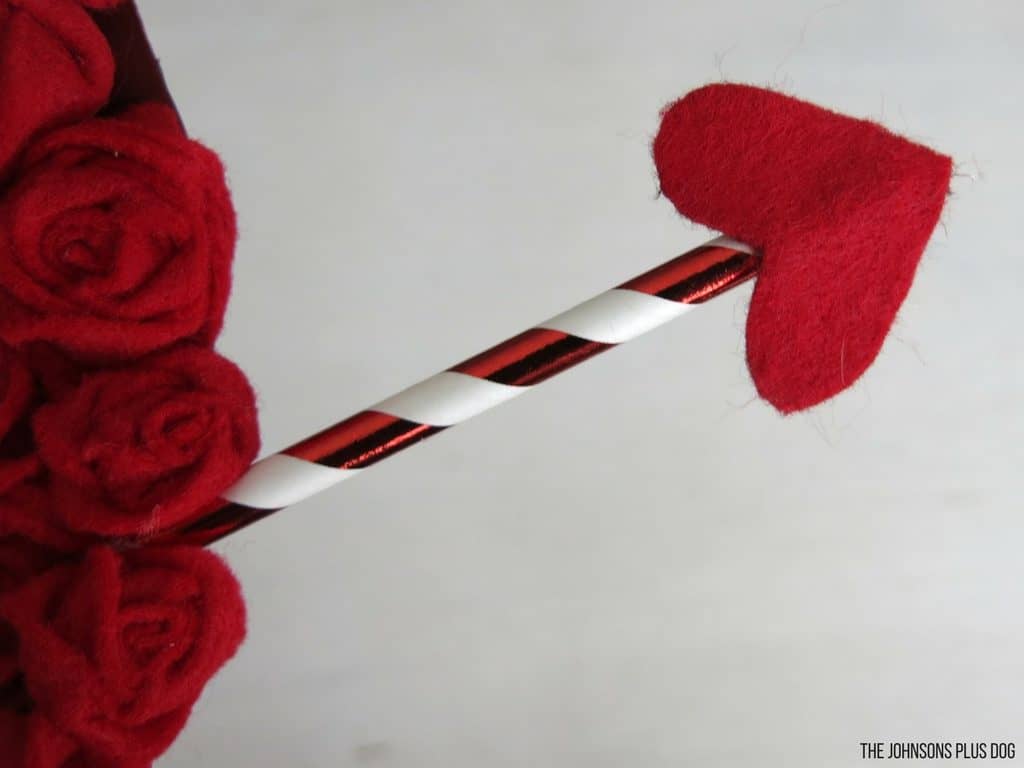
After I cut the fletching out of the felt, I added some slits to the sides and then glued this on to the end of the arrow.
Gah, I love it.

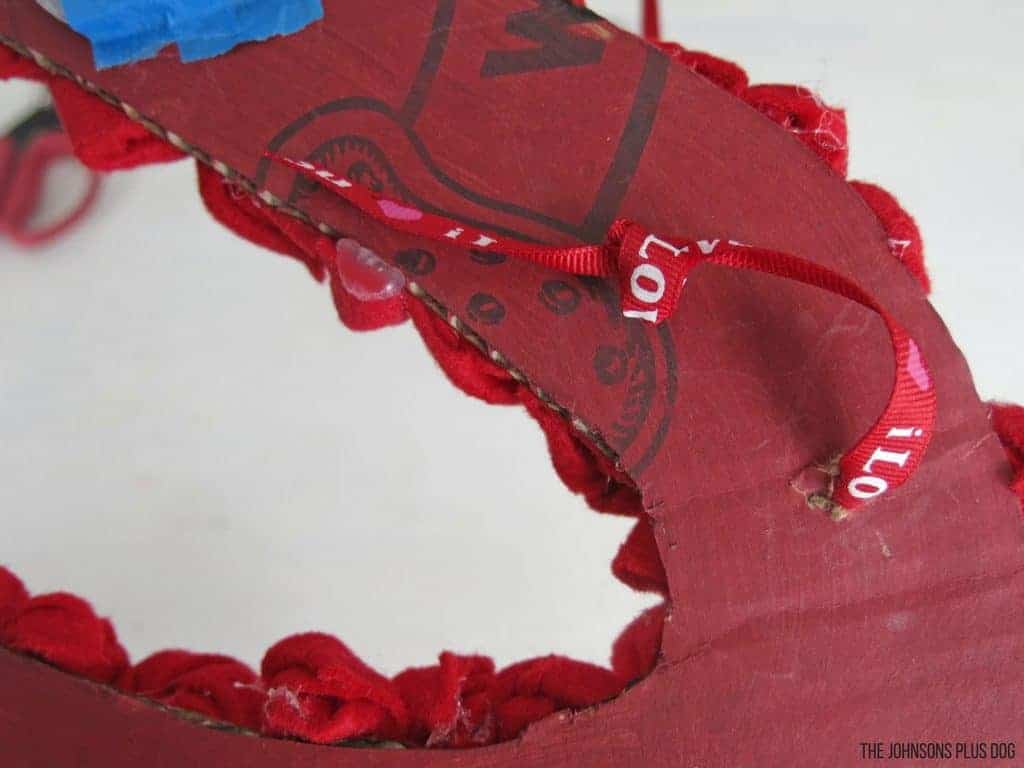
Step 6. Add hanger to wreath
Next, you’ll want to attach your hanger. I did this by poking a hole in the cardboard and pushing the ribbon through and tying a knot. Looking back, it would have been a lot easier to add the hanger at the beginning before you add the flowers…but if you forget like I did, it works afterward too!
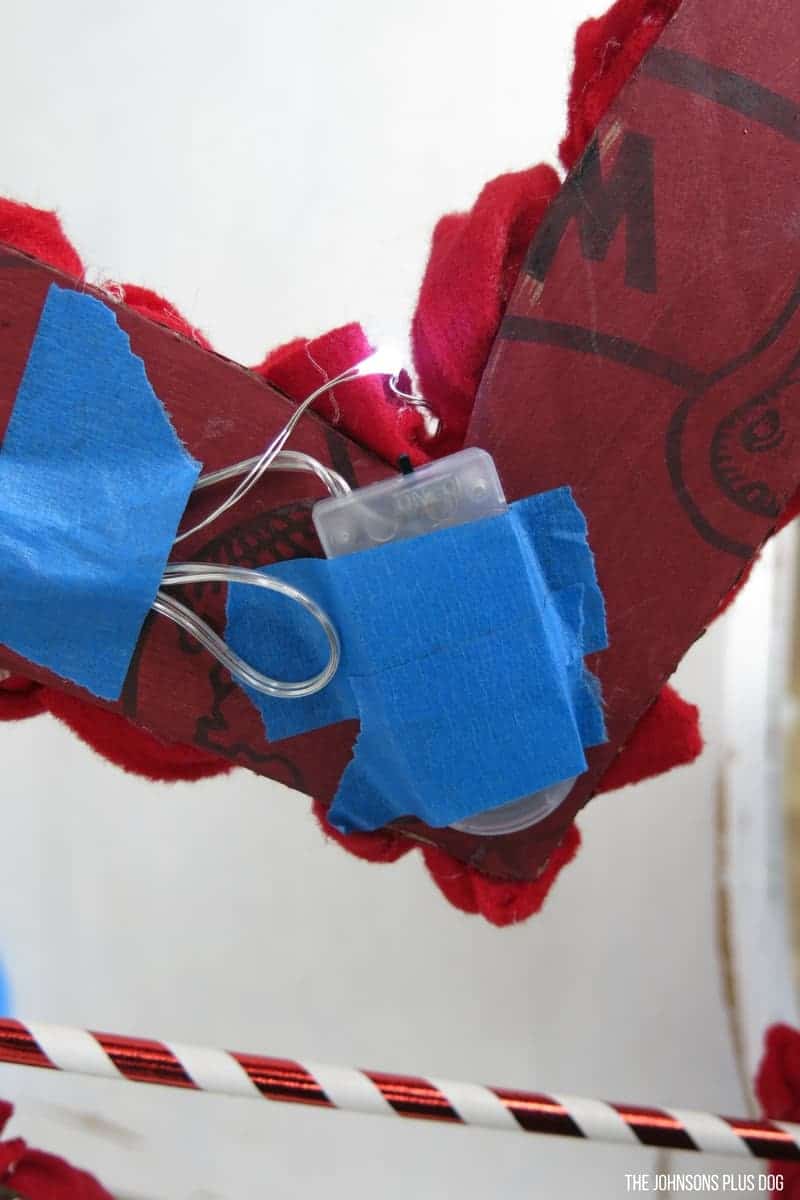
Step 7. Add fairy lights to your Valentine’s wreath
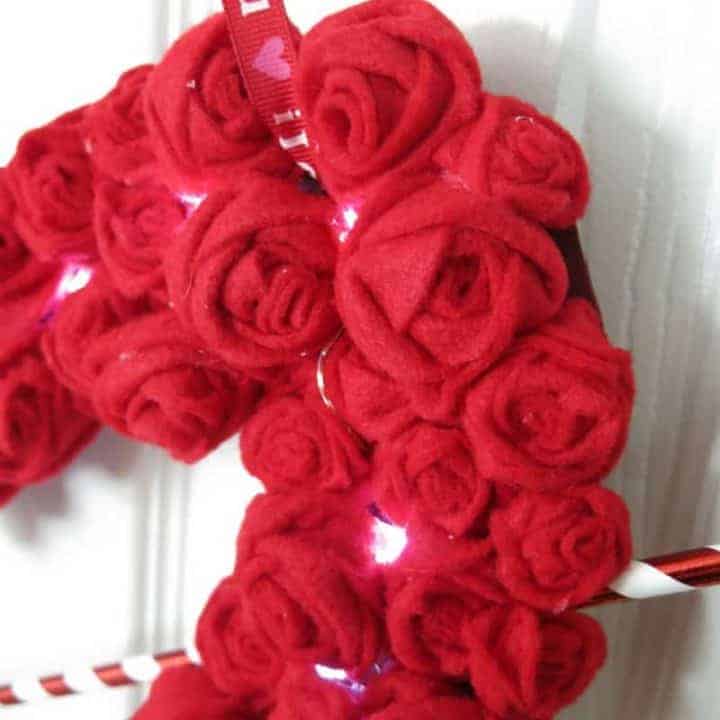
Now, this is where things get fun. The finished Valentine’s Day wreath DIY is a super cute wreath as soon as you get the hanger on, but I wanted to really make this one extra special, so…. boom.. It lights up!
I grabbed some battery powered LED fairy lights from Amazon. I taped it on the backside of the wreath and then pushed the light string in between the flowers…making my way all the way around the wreath.
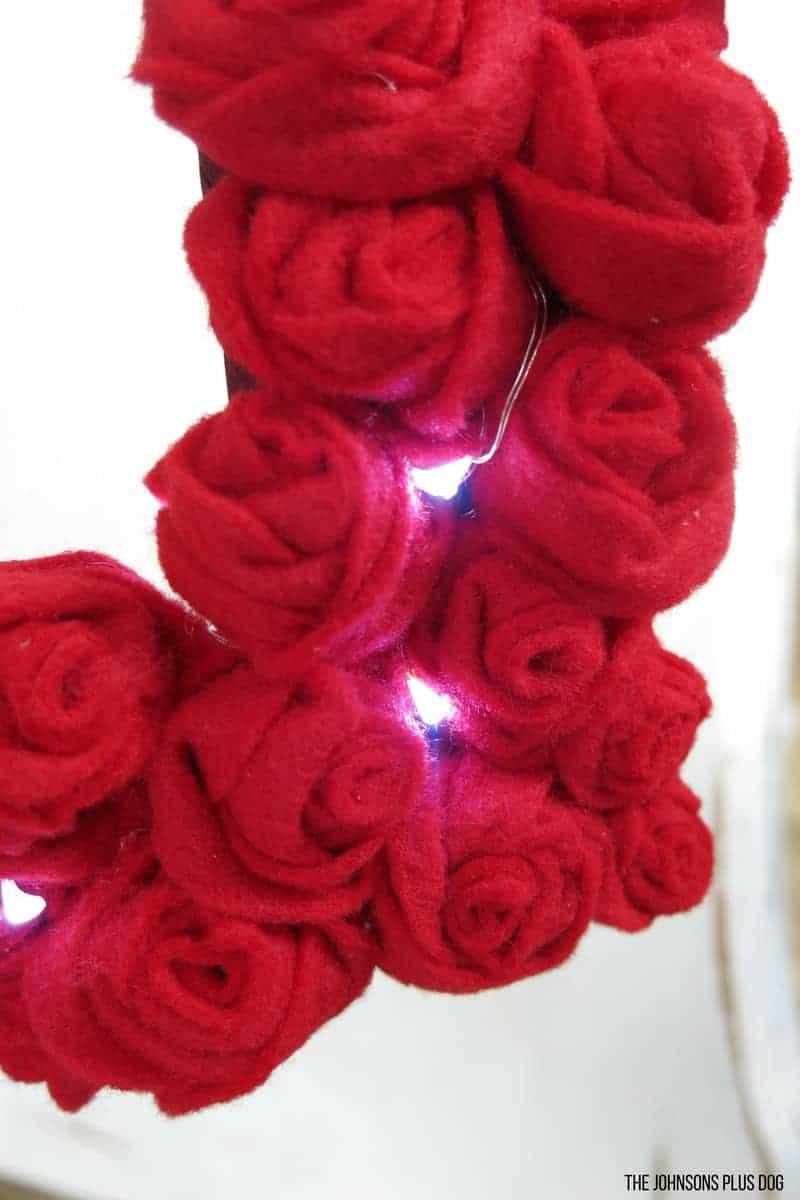
Here’s a view of the felt heart wreath with the lights turned off.
And on…

I just love how my felt rosette Valentine’s Day wreath turned out!
This would make a great V-Day gift for someone and you could even combine it with this fun and super easy DIY Valentine’s craft from Dollar Tree.

Even though this Valentine’s Day wreath DIY was really time consuming like I said, it was really fun to see it all come together… I mean remember where we started!? A freakin’ pizza box and some felt!
That’s really what I love about crafts in general. I love creating something out of nothing. I loving working with my hands and using them to create treasures out of LITERAL trash.
Don’t feel like crafting this Valentine’s Day? Check out these Etsy Valentine’s Day gifts!
What is your favorite thing about crafting? Do you have any good Valentine’s Day DIYs up your sleeve?
How To Make A Valentine’s Day Wreath DIY
This show stopping felt rosette Valentine’s Day wreath is adorable with all of the felt flowers, cute little arrow, and it even lights up! This is a great DIY project to decorate your front door for Valentine’s Day!
Materials
Instructions
- Cut a large heart out from the top of the pizza box (or another piece of cardboard)
- Drew another heart on the inside and cut it out.
- Paint the heart red.
- Cut felt pieces.
- Make felt roses.
- Glue the rosettes on your wreath.
- Add arrow.
- Add lights to wreath.


What a cute craft! I need to make like this something for Valentine’s Day!
Thanks Emily!! 🙂 It was fun to make!
This is so beautiful! I can’t wait to give it a try!
xo, Helene
http://www.circleskirtsandpetticoats.wordpress.com
Thanks Helene! Hope you have a great Valentine’s Day season.
This is so beautiful! It is so good that you can create something like this without buying a bunch of stuff. I got to try this out 😀
Thanks! I hope you’ll let me know how it goes. I pretty much just had to buy the felt and that was pretty cheap! 🙂
Oh my god! I love this~ It’s seriously so cute! If I was staying in town maybe I’d do it to be sweet 🙂
Thanks so much Jacqueline 🙂
How super cute is this! Those little rosettes are ADORABLE! I can see how this would take you all weekend lol I also have visions of those roses on pillows. Awesome craft!
Ya, they are so fun / really time consuming to make. But you can really use them for so many different projects. Pillows would be super fun!
Woah!! This is so fabulous! I have to admit that I’m. otherwise really in to the whole Valentines decor thing But I love anything crafty and this is so fun looking!
Ellie
http://Www.scotchandstilettos.com
Thanks Ellie! 🙂 It was really fun to make!
This is the first time we read something like this and we have to say that we love the idea. It’s something we need to try! Thanks for this great content 🙂
Thanks! 🙂 Let me know how it turns out if you give it a try.
So stinkin’ cute! I will be making this for husband for Valentines this year. Thank you so much for sharing!
Thanks !!! Let me know how it goes ! 🙂
I love this, going to show to my daughter, I know she will want to try, thank you.
Thanks Shirley! It was fun!!
This Valentine’s wreath is just lovely! Although I honestly don’t see myself having enough time to make one myself, your’ step by step directions are definitely easy to follow, and the photos are outstanding. Thanks for sharing!
Thanks so much !
This is amazing! I got to try this out