
Easy DIY Disco Ball Hanger

Learn how to make a simple DIY disco ball hanger with yarn and a basic macrame knot! This budget-friendly project takes just 30 minutes and adds instant fun to any bedroom, dorm, or party setup.
One thing that our daughter requested during her bedroom makeover was disco balls. We came up with a simple way to hang them from the ceiling using an easy macrame technique and yarn.
This easy DIY project only took us about 30 minutes total, and we spent less than $15 on the supplies! It adds so much character to her fun pink bedroom, doesn’t it?
Whether you’re hanging up a disco ball as party decorations for a dance floor, room decorations, or even adding fun decorations in dorm rooms, this disco ball hanger is a simple and trendy way to hang your disco balls or disco ball planters from the ceiling.
How To Make a DIY Disco Ball Hanger: Step-by-Step Tutorial

Supplies and materials you’ll need
Step 1. Cut 4 pieces of yarn

We were using a 6-inch disco ball, so feel free to keep all the measurements below the same if you want yours to be the same, or adjust as necessary.
If you’re making your disco ball hangers the same size as ours, start with 4 pieces of yarn cut to 6 feet long.
Step 2. Fold & tie off yarn pieces
Fold all four yarn pieces in half together and tie a simple knot at the top with an inch or two hanging out the top. This will be used to hang the disco balls on the ceiling hook.
Step 3. Separate strands in groups of two
Start by laying the yarn on a flat surface. Then pair the strands of yarn in groups of two and lay them separately. It doesn’t matter which pieces of yarn go together in pairs.
Step 4. Tie the first set of knots

Measure 12 inches below the big knot where all the yarn pieces are tied together, and tie another simple overhand knot in each pair of yarn strands.
Continue until all four pairs of yarn are tied, all lined up at 12″.
Step 5. Separate the strands again in pairs

Below the first set of knots, separate the yarn pieces in groups of two again, joining each piece together with its “next-door neighbor”.
Step 6. Tie the second set of knots

Repeat Step 4, tying the pairs together in an overhand knot. This time, measure 4 inches down from the first set of knots.
Step 7. Tie the bottom knot

Group all strands of yarn together. Measure 4 inches down from the second set of knots and tie them all together in another overhand knot.
Step 8. Put the disco ball in

Open up the knotted yarn and place your disco ball inside, resting on the bottom knot. Shift around the sets of knots so they are evenly spaced around the perimeter of the disco ball.

Step 9. Hang from the ceiling

The last step is to simply hang the macrame disco ball hanger from a ceiling hook or swag hooks.

You shouldn’t need to worry about the weight of your disco balls because they are so light, but if you’re concerned, you can make sure the ceiling hook lines up with your ceiling joists.

Alternatively, if you didn’t want to hang it from the ceiling, you could attach your disco ball hanger to your curtain rod or even a tension rod.

This fun hanger would also work great if you wanted to use disco ball planters, which are awesome! She just didn’t want any plants in her bedroom, so we opted for regular disco balls instead.
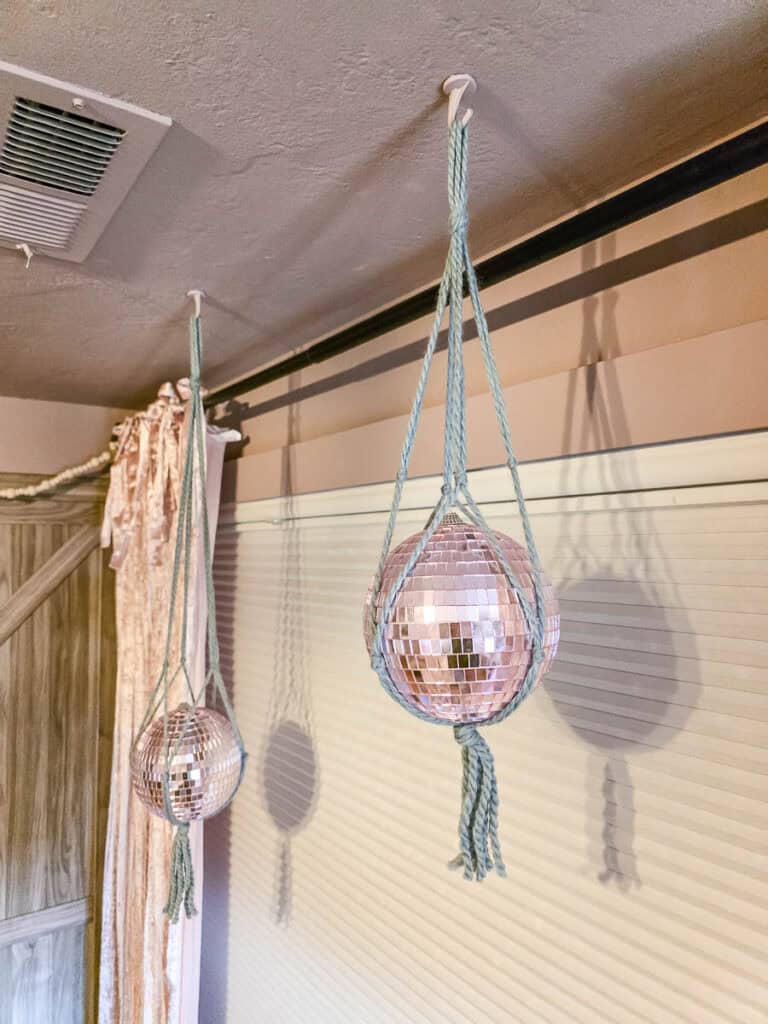
For just $15 and 30 minutes of time, this project is a win-win if you want that retro look in your space!

Let me know if you have any questions!
More about our
Daughter’s Bedroom