How To Make DIY Macrame Feathers

Learn how to make easy DIY macrame feathers, even if you have zero macrame experience. Using macrame cording and a very simple repeatable pattern, you'll create gorgeous boho-style macrame feathers that you can put together for a fun wall hanging.
Even if you don’t have any macrame experience, you’ll be able to follow along with this easy and simple macrame feathers pattern. Make one DIY feather or make a bunch and put them together for a boho feather wall hanging!
I’m going to break the whole feather-making process down step by step so you can follow along, even if you’re a total beginner.
While the macrame feathers were easy to make, they were certainly not quick. Bring your patience along with you for this craft tutorial, you’re going to need it!
Table of Contents
- Introduction
- FAQs
- Watch Video
- Supplies needed for macrame feathers
- #1: Cut centerpiece
- #2: Cut pieces of the sides
- #3: Knot side pieces to the center cord
- #4: Knot the bottom
- #5: Unravel
- #6: Cut edges
- #7: Spray with fabric stiffener
- #8: Attach felt sheet to back
- #9: Hang
- Macrame Feathers – After Pics
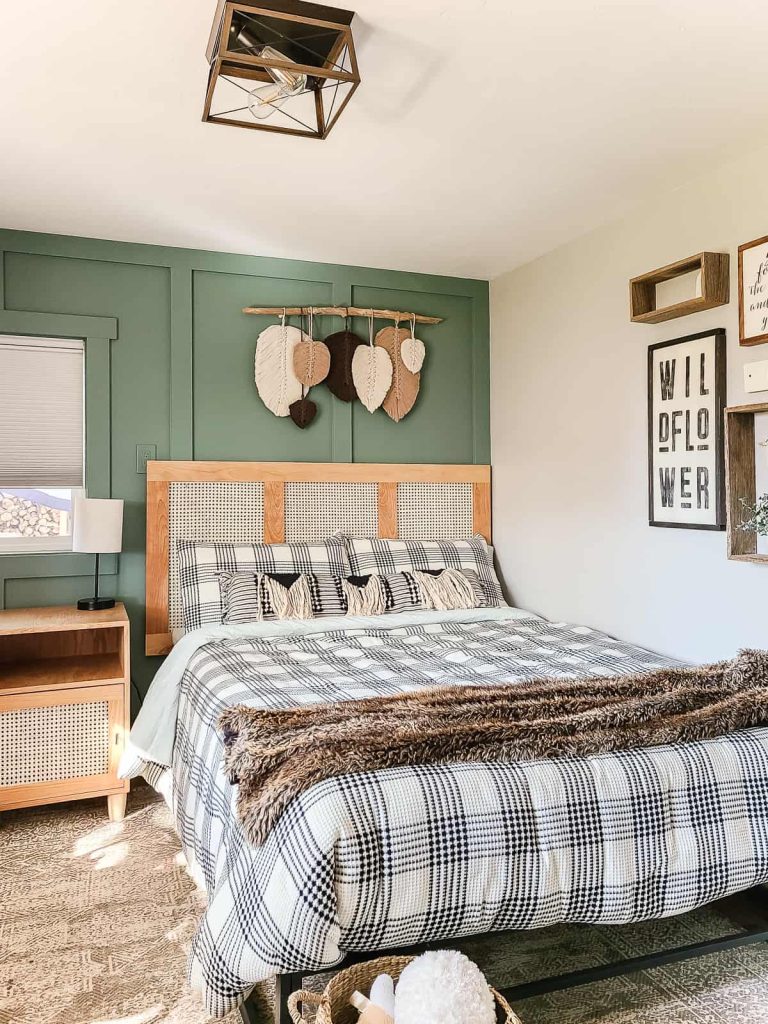
When we finished Quinn’s farmhouse girl nursery years ago, I made this beautiful boho yarn wall hanging to put above her white farmhouse crib. I loved it.
But then she grew up and could stand up and reach it from her crib.
Needless to say, it did not last long after that. RIP.
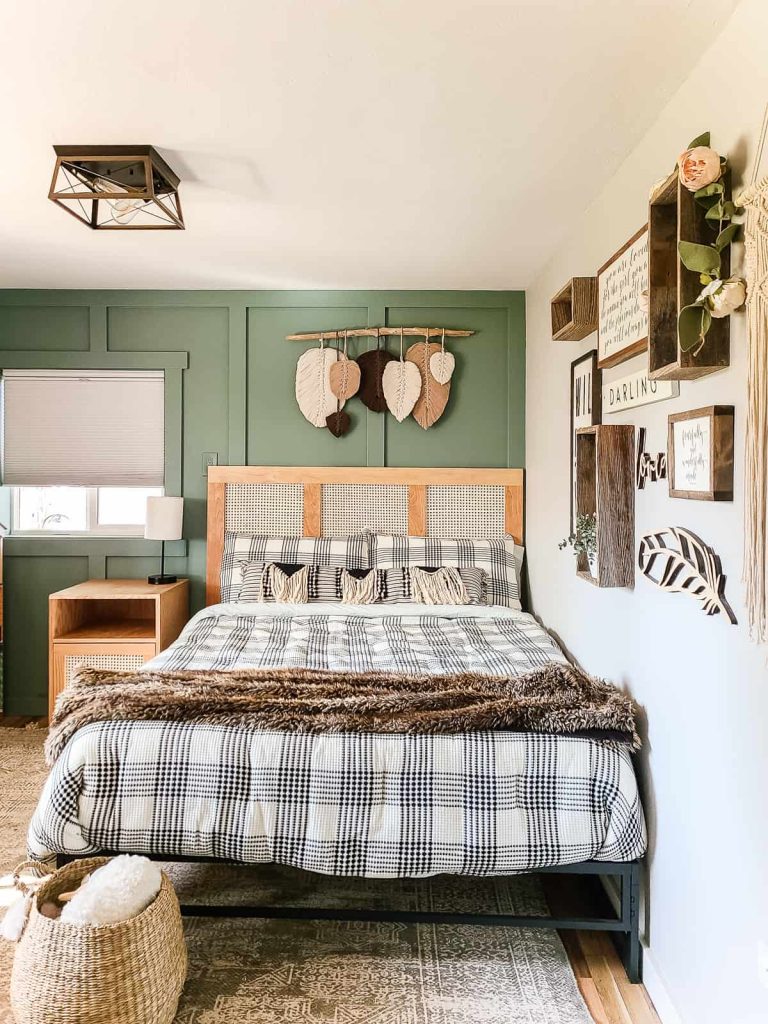
For the last few years the place above her crib and now big girl bed since we built this cane headboard, has been empty.
I’ve been meaning to make some wall decor to hang over the bed, but haven’t gotten around to it.
It seemed like the perfect time when I swapped out the bedding on her bed.
This DIY macrame feather tutorial contains affiliate links, but nothing that I wouldn’t recommend wholeheartedly. Read my full disclosure here.
FAQs about DIY Macrame Feathers
What size macrame cord should I use for macrame feathers?
I used 5mm macrame cording for our feathers. That is just what they had in stock at my local craft store.
You can totally use something smaller too. 2mm and 3mm would work well.
The only difference you’ll find with a smaller cord is that the middle part of the feather will be more or less thick/wide as you change the size of your cording.
The unraveled sides of your feather will also be a little less thick and fluffy with a small cord.
This could be a good thing though! As you’ll see in the step-by-step tutorial below mine require quite a bit of work to stiffen and lay flat because the sides were so thick and fluffy.
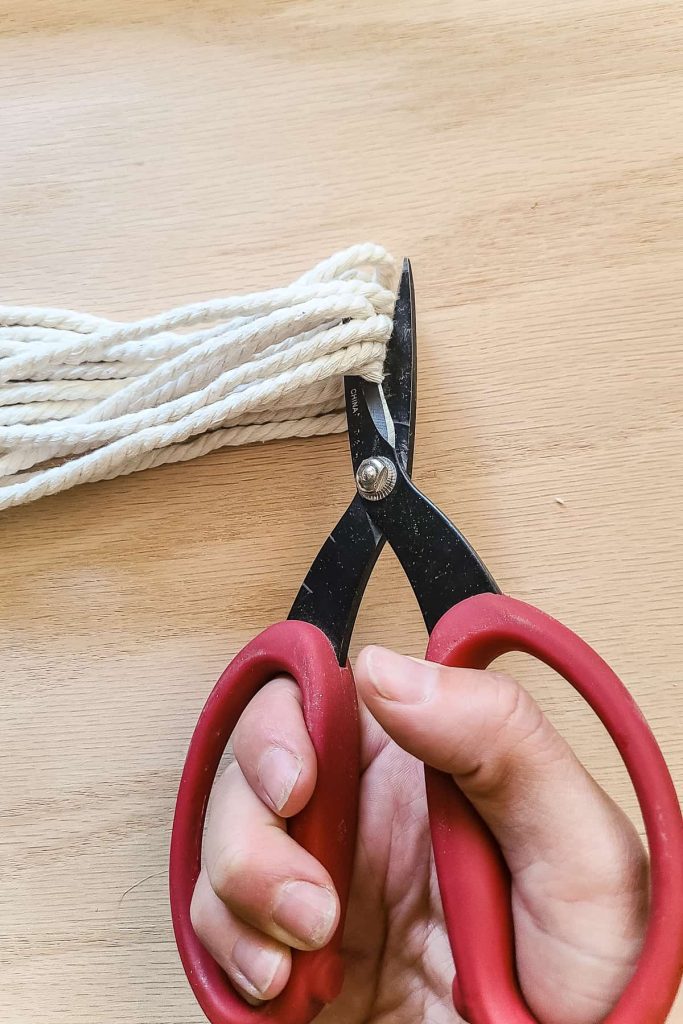
What kind of scissors do I need to use?
Fabric scissors, sewing scissors, or craft scissors will be your best type of scissors to use. Whatever you use, they need to be SHARP.
Fabric or sewing scissors are sharper than normal everyday scissors that you have laying around the house. The sharper the scissors the less the macrame will move when you cut it.
This makes a world of difference when you are trying to get a nice crisp line for the edges of your macrame feathers.
These scissors worked great for cutting through the cording.
These small detail craft scissors worked well for cleaning up the edges after trimming.
How do you unravel macrame cords?
Unraveling the macrame cording is one of the most frustrating steps of this tutorial. It was pretty time-consuming, so be patient.
I found that it works best to use a comb, rather than a pet hair brush. Work your way from the end of the string to the middle of the feather. You should be able to unravel several pieces at one time.
How do I stiffen the feathers?
Fabric stiffener is the best way to stiffen macrame cording once unraveled. You could also try hairspray as an alternative.
Depending on the size of your macrame feathers and the thickness of your cording, you may be able to get away with using only fabric stiffener to get the edges of the feather to lay flat.
Because mine were thicker, I also attached felt sheets with spray adhesive to the backside of the feathers after I had used fabric stiffener.
DIY Macrame Feathers: Video Tutorial
If you love DIY videos, don’t forget to subscribe to our YouTube channel!
Supplies needed for macrame feathers:
- Macrame cording, I used 5mm in three different colors
- Very sharp scissors, I used these for detail clean up after trimming with these scissors
- Pet brush or comb, I found that the comb worked better
- Fabric stiffener
- Felt sheets
- Spray adhesive
- Gloves
- Dropcloth
- Dowel or stick, if hanging on the wall
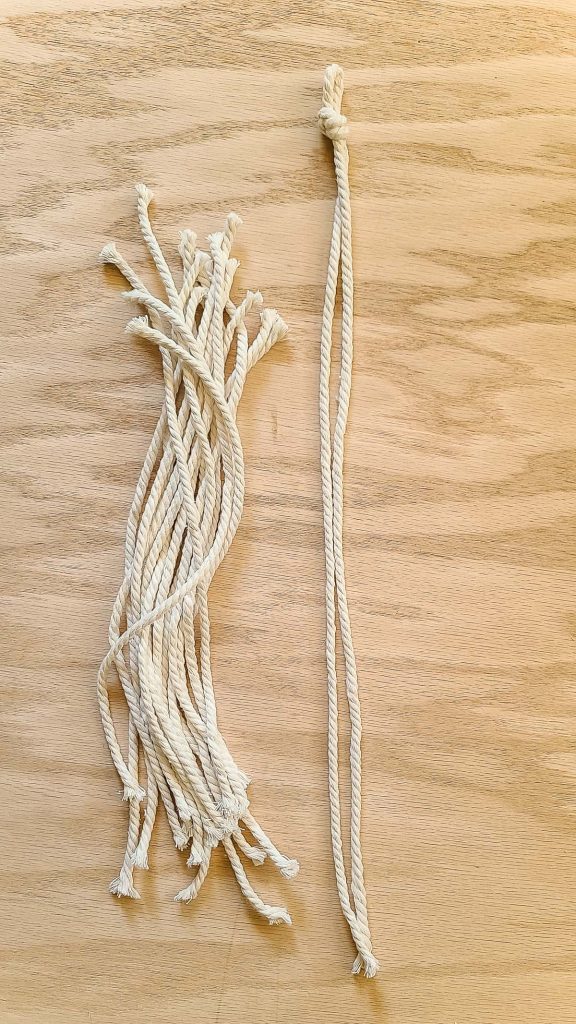
Step 1: Cut the centerpiece of the macrame cording
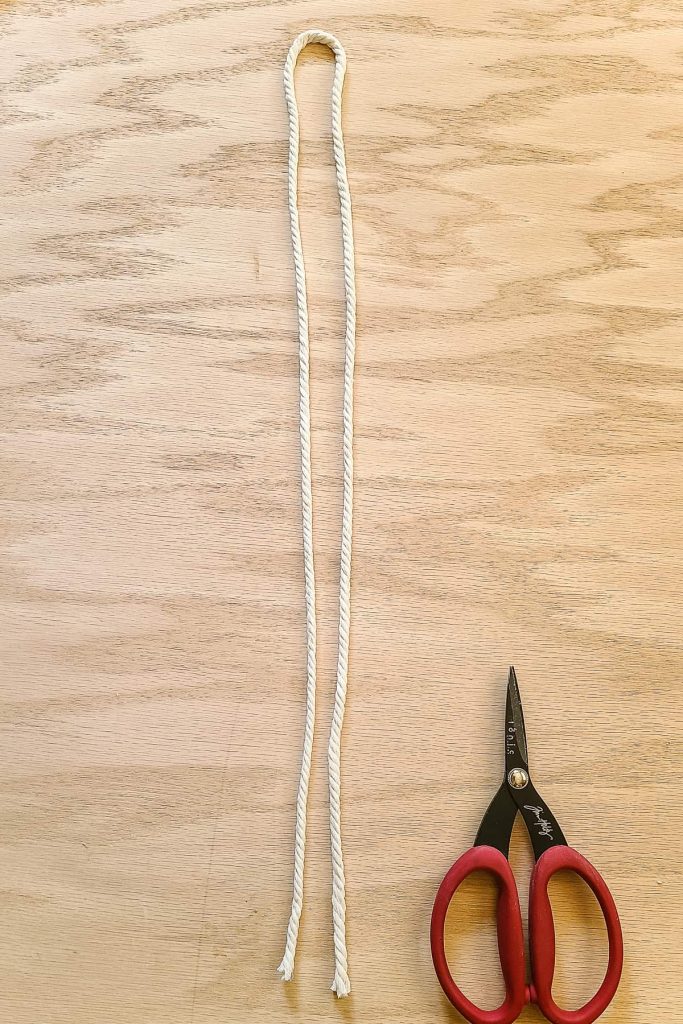
I made several different sizes of macrame feathers, so for each one, my centerpiece was a different length.
For the photos, I’m showing you how to make one of the larger macrame feathers. So my centerpiece is much longer than if I was making a smaller feather.
For this larger macrame feather, this centerpiece was approximately 30-35 inches long. Whereas, the smallest feathers were more like 15 inches long.
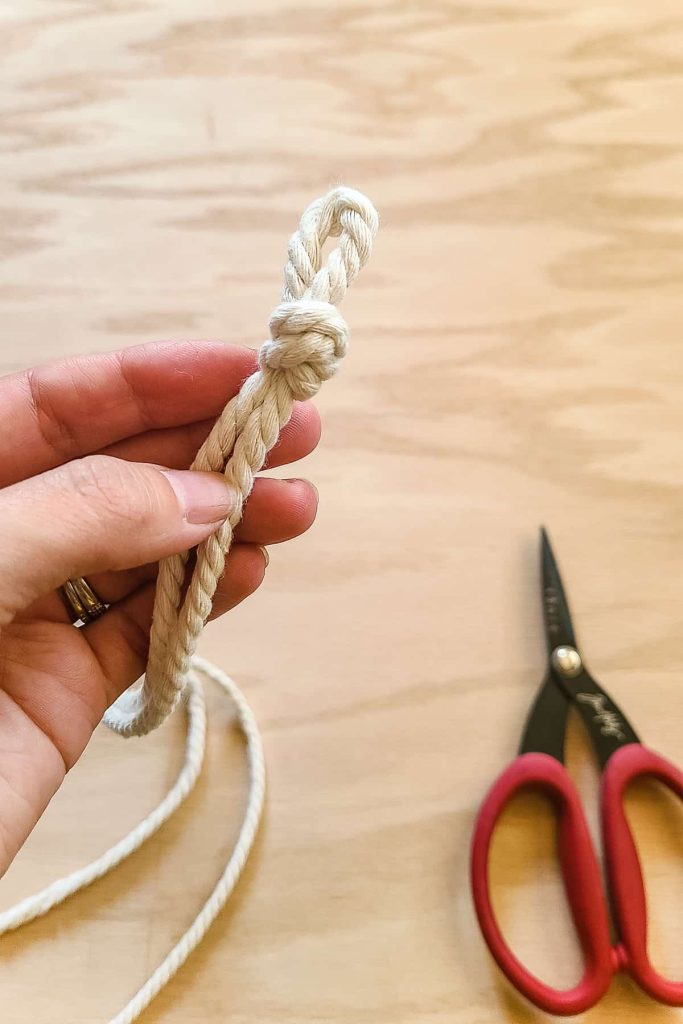
Lay the centerpiece down on a flat surface and fold it in half as shown.
Knot it at the top with a simple overhead knot. Leave enough excess above the knot for a piece of macrame cording to fit through. This is how your macrame feathers will hang.
Step 2. Cut pieces for the side of the macrame feather

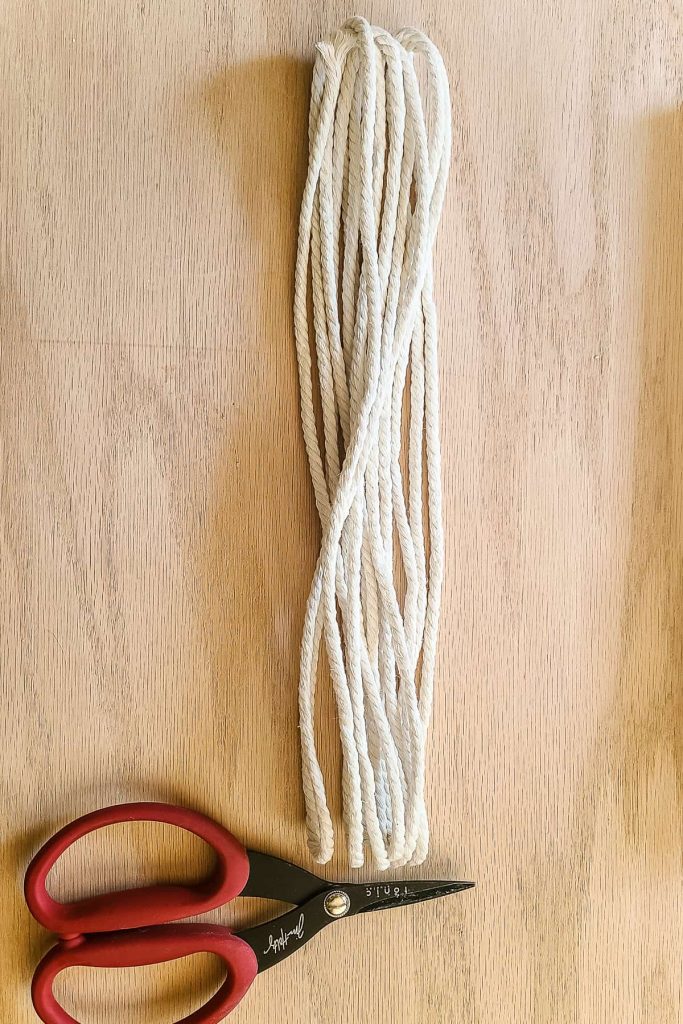
Next, you need to cut pieces of macrame cording for the sides of the feather.
The best way to quickly get a bunch of pieces cut at the same length is to wrap the cording around something that is roughly the same size as the piece you need.
Then you can slide the cording off the object and cut at each end. Voila!
I used a few different objects around our house for this when I was making various sizes of feathers.
- For the large feathers, I wrapped them around a large notebook that was about 12 inches tall.
- For the medium feathers, I wrapped them around a smaller hardback took that was approximately 9 inches tall.
- For the smaller feathers, I wrapped them around my cell phone, which is about 6-7 inches tall.
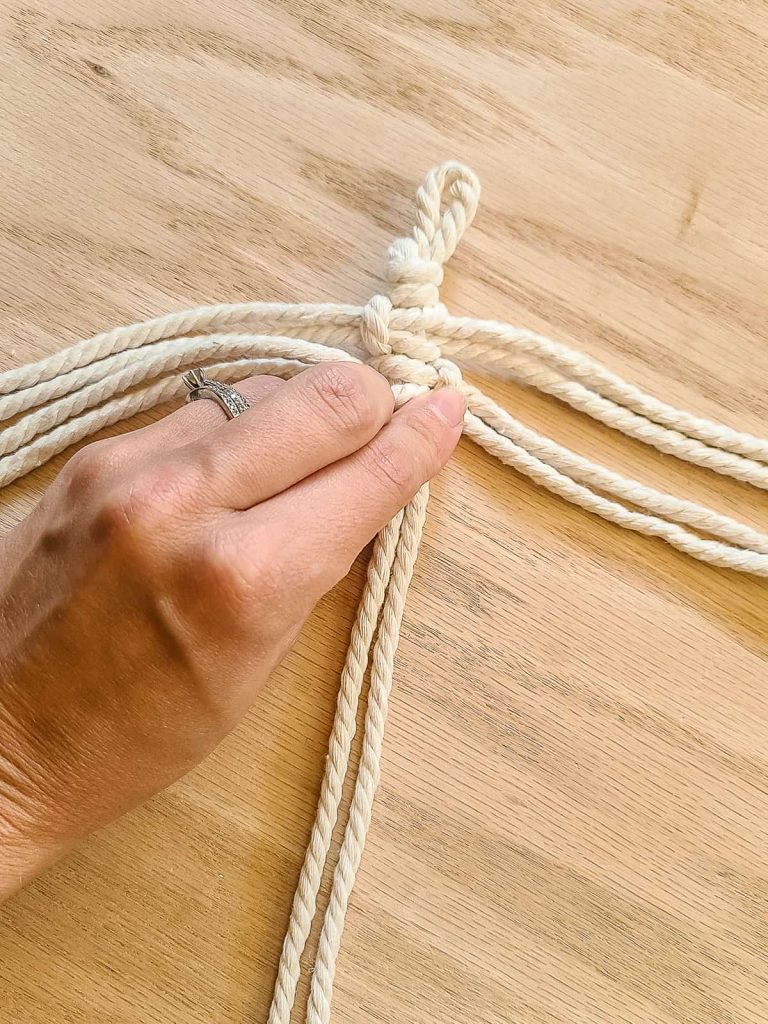
Step 3. Knot the side pieces around the centerpiece of the macrame, 2 at a time.
Now, this part can look kind of confusing, but I promise you’ll quickly get the hang of it after 1-2 times.
It may be easier for you to see it in action by watching the YouTube video that I put above the supply list. That breaks the whole knotting process down slowly.

If you want to get “technical” here, the type of knot that you are using on this is a square knot.
But here’s the general process of knotting the pieces for the macrame feathers:
- Take 2 pieces of cording from the pile that you cut in the previous step. Let’s call these Piece A and Piece B.
- Fold both pieces in half
- Put one piece (Piece A) under the center cord, positioned horizontally
- Take the loose ends of Piece A and put them through the folded end of Piece B (coming up from the backside)
- On the other side of the feather, take the loose ends of Piece B and put them through the folded end of Piece A (coming down from the front side)
- Lay both Pieces A and B flat
- Gently pull both pieces taut, grabbing the loose ends and pulling outwards
- Repeat the entire process, but this time position Piece A going the opposite direction under the center cord.
- As you continue tying pieces of the center cord, push them up toward the top.
- Be sure to leave enough center cord at the bottom to be able to tie a knot and unravel the rest and have it roughly be the same lengths as the surrounding pieces. These pieces will be the bottom point of your feather.
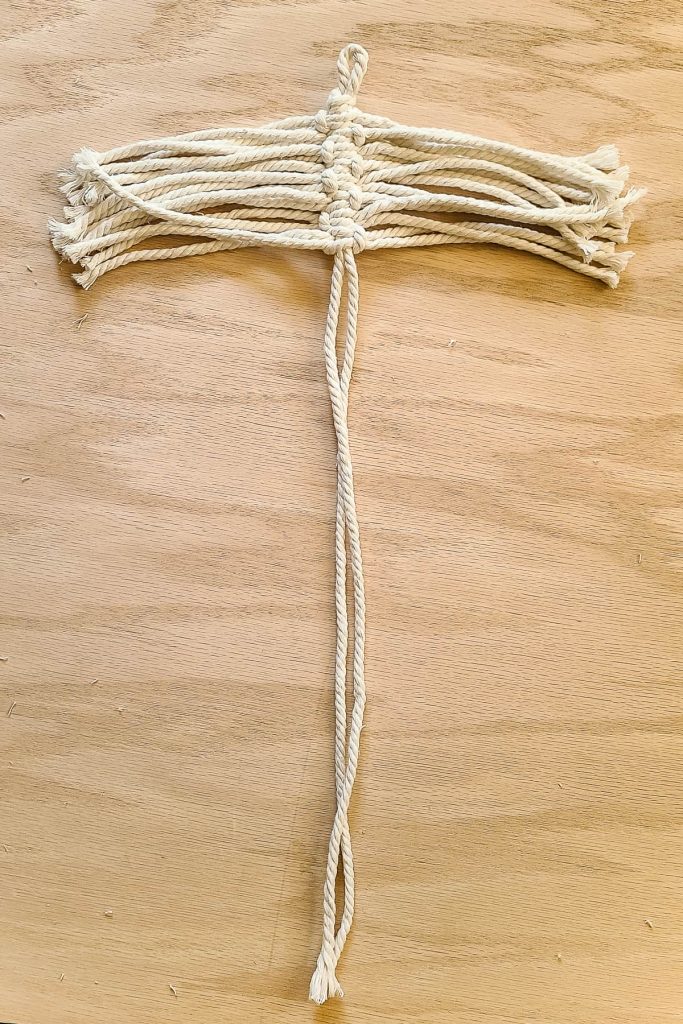
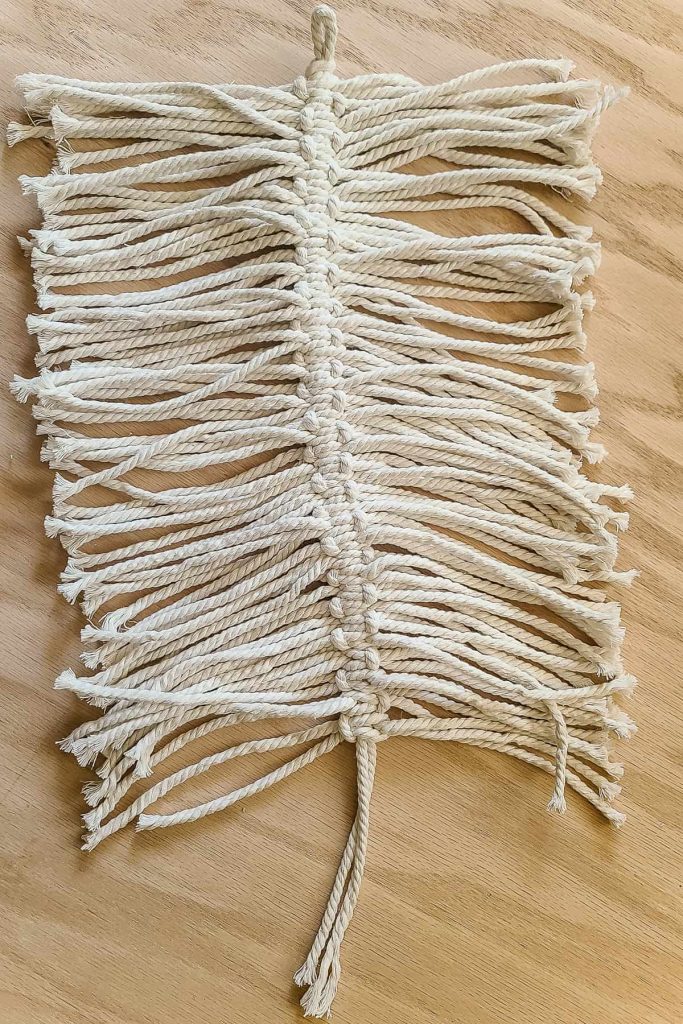
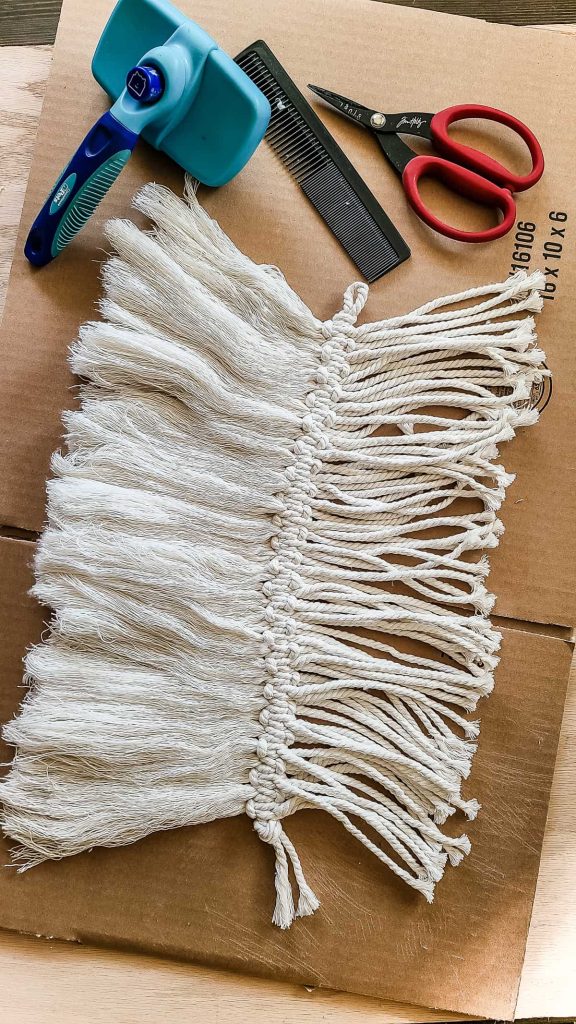
Step 4. Knot the bottom.
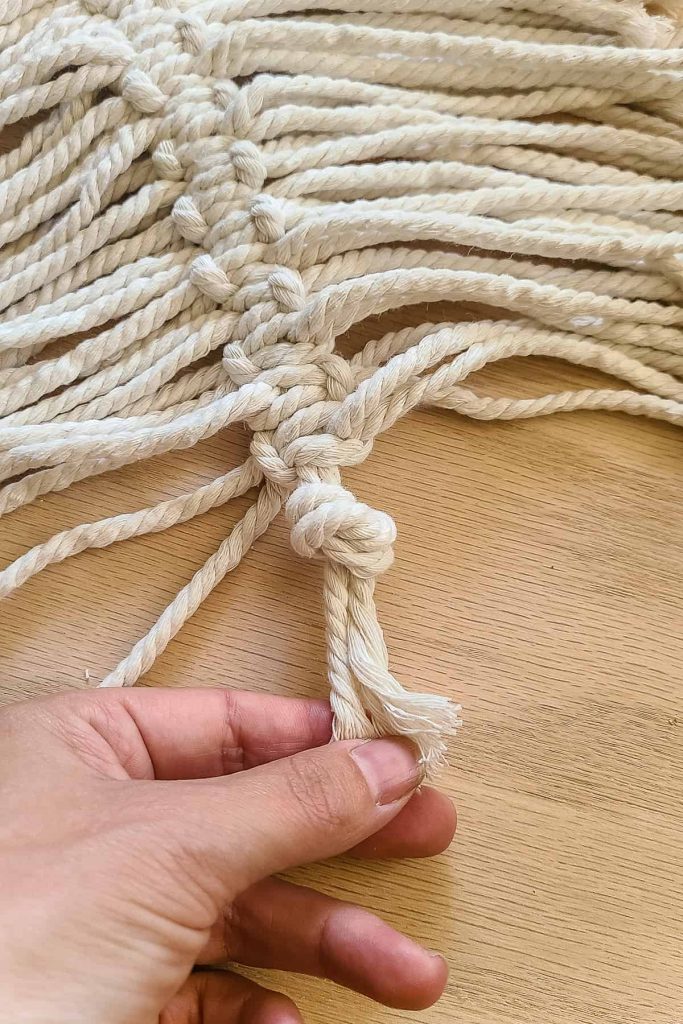
Next, add a simple overhand knot to the remaining center cord to hold all of the feather pieces in front.
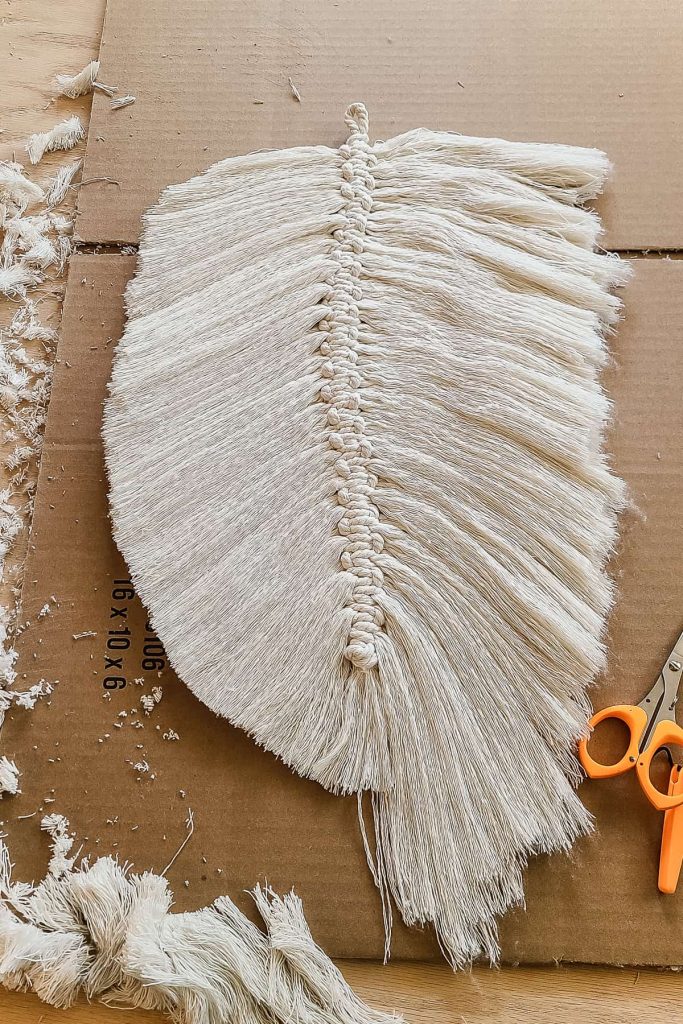
Step 5. Unravel the cording on each side of the feather.
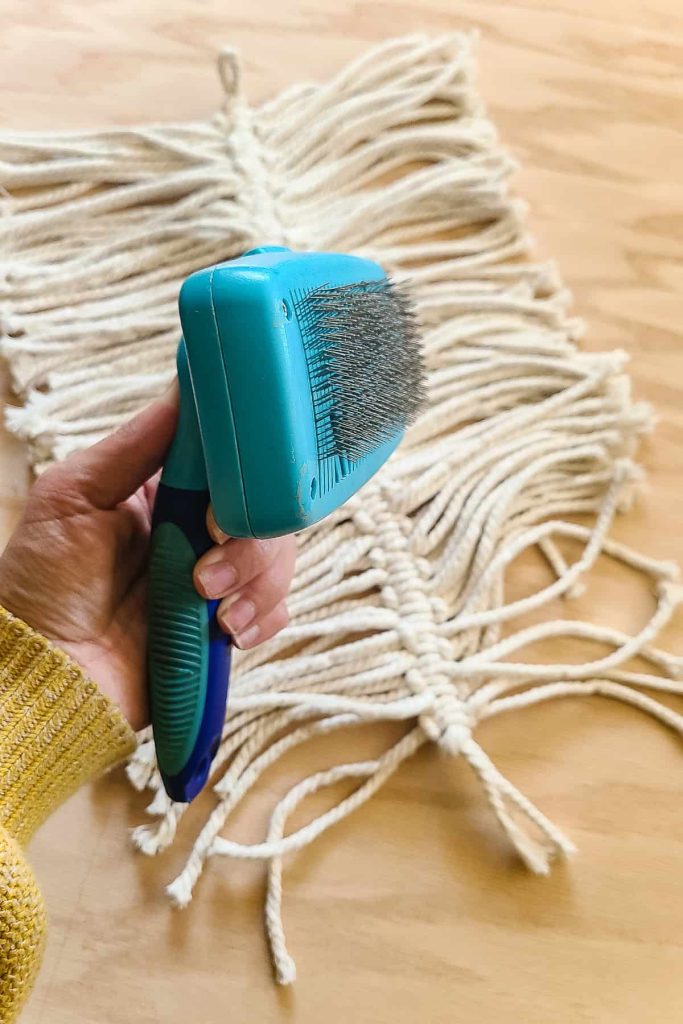
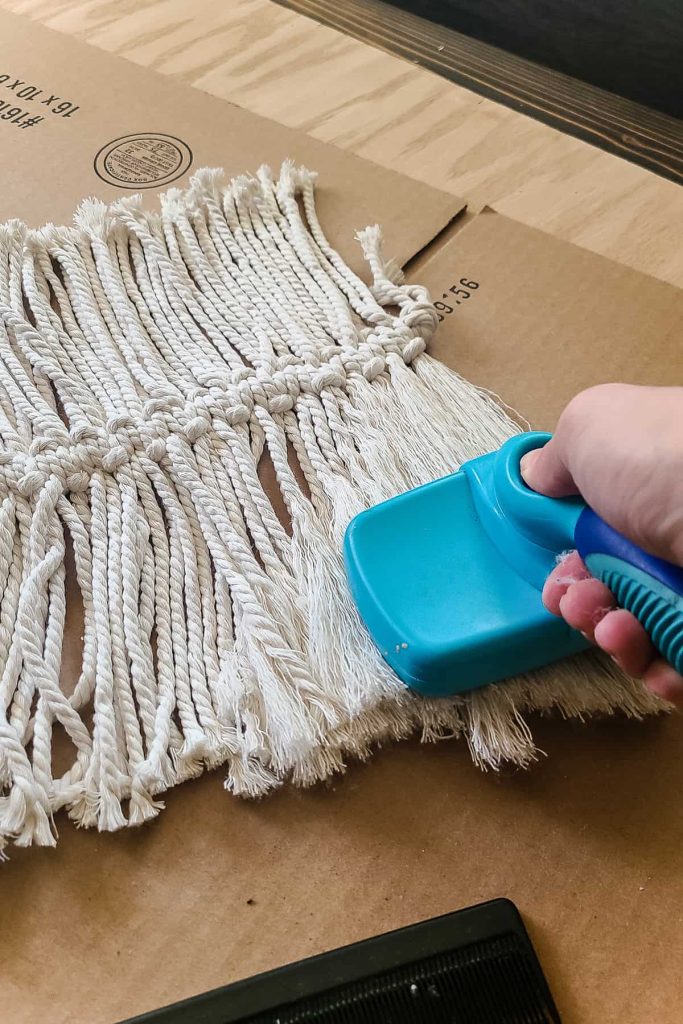
To unravel the macrame cording, I found that a comb worked the best. I also tried a pet hair brush because I’ve seen others use this. I preferred the comb instead. It required a little less effort.
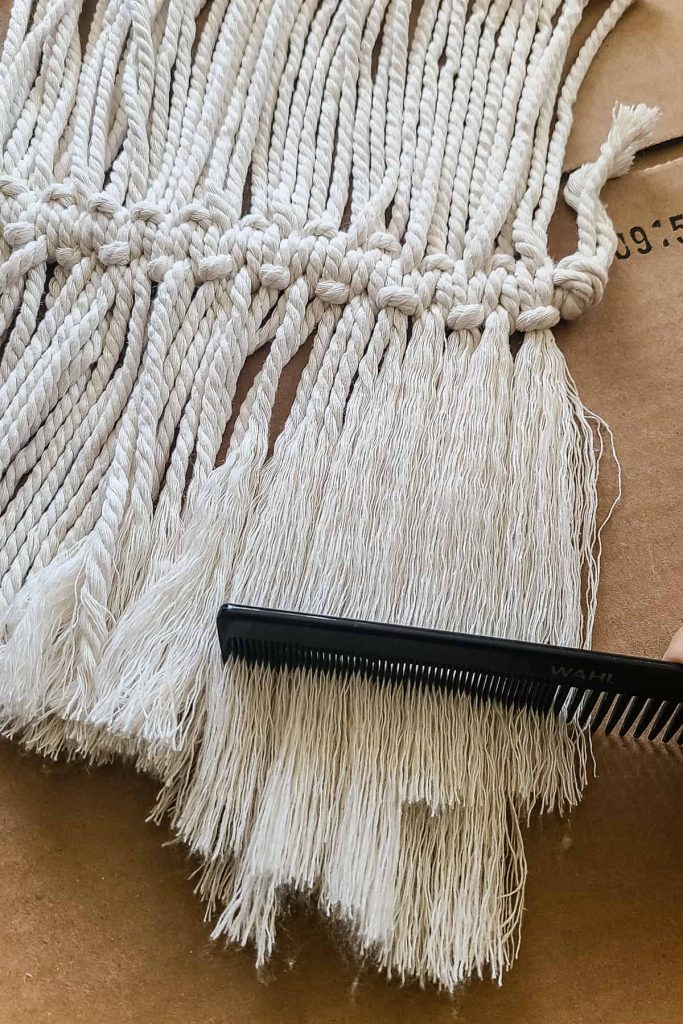
I used a scrap piece of cardboard as a base so I didn’t need to worry about it getting scratched.
Rather than starting at the top, it works much better to start at the end of each piece and work your way toward the middle of the macrame feather. This is similar to detangling hair, you always start at the bottom.
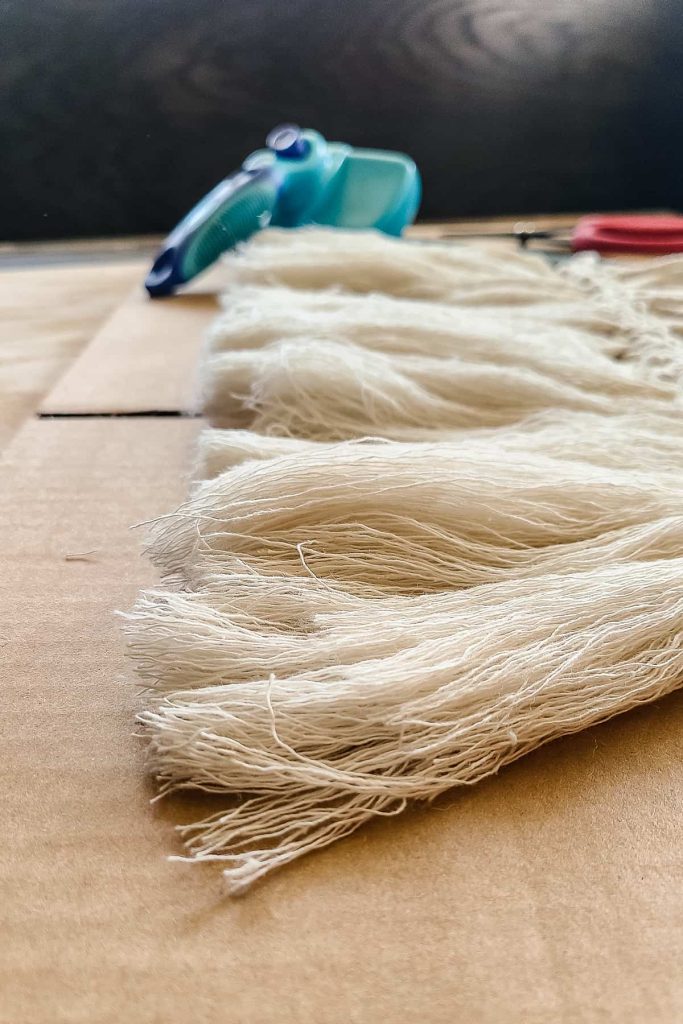
Warning, this step is fairly time-consuming. Take your worksurface and feathers to the couch and turn on a good movie to distract you while you craft!
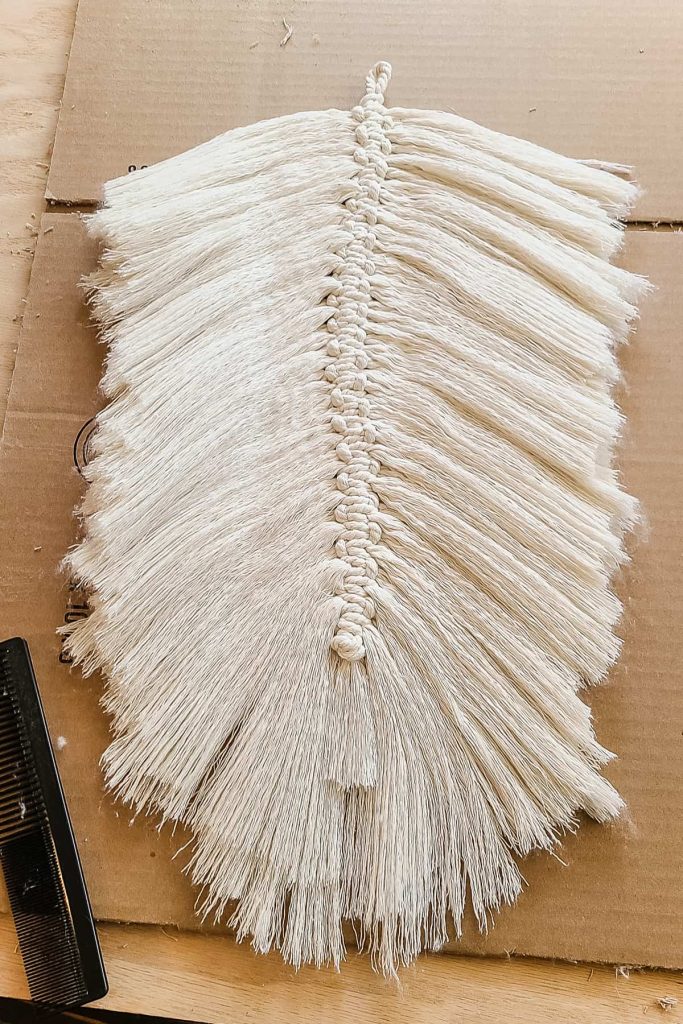
Step 6. Cut edges with sharp scissors.

Lay the feather on a flat surface and brush them out again with the comb. Make sure there are no tangles.
Brush them downwards to the desired angle. Grab super sharp scissors and start rounding out the feather shape.
Don’t cut off too much. Remember you can also go back and cut more if it doesn’t look right, but you can’t go backward if you cut too much.
You can decide if you want the macrame feathers to be skinny or fatter. It is totally up to you!
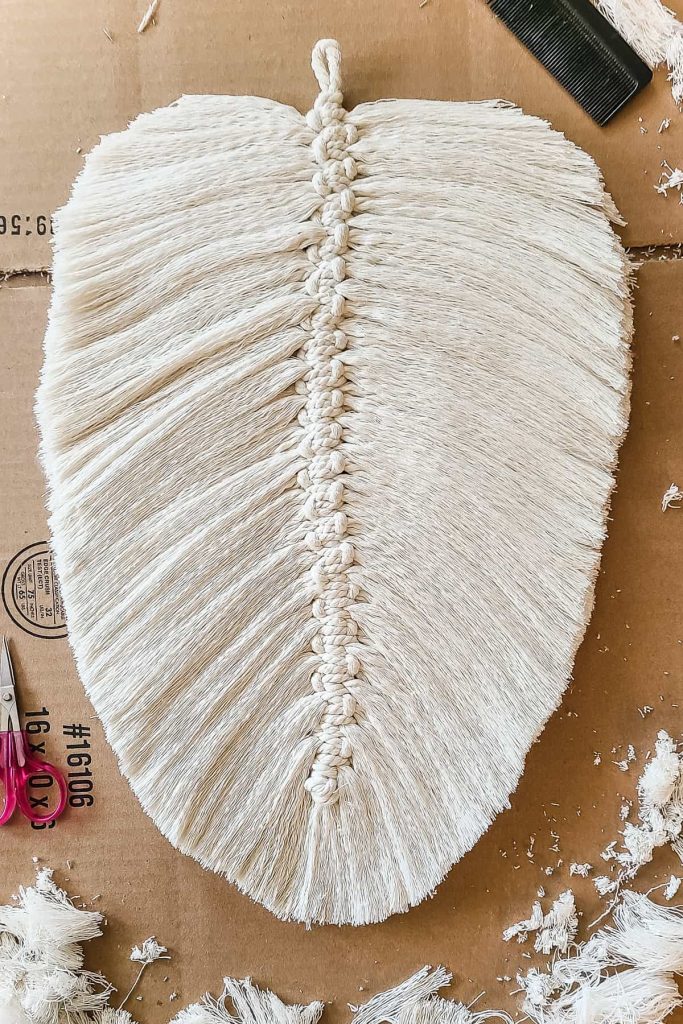
You may need to go back in a few times with the scissors to continue cleaning them up for a nice sharp line. This is where it comes in handy to have very sharp scissors.
The sharper your scissors, the less they will move the macrame pieces as you cut. This gives that sharp line to the edge of your macrame feather!
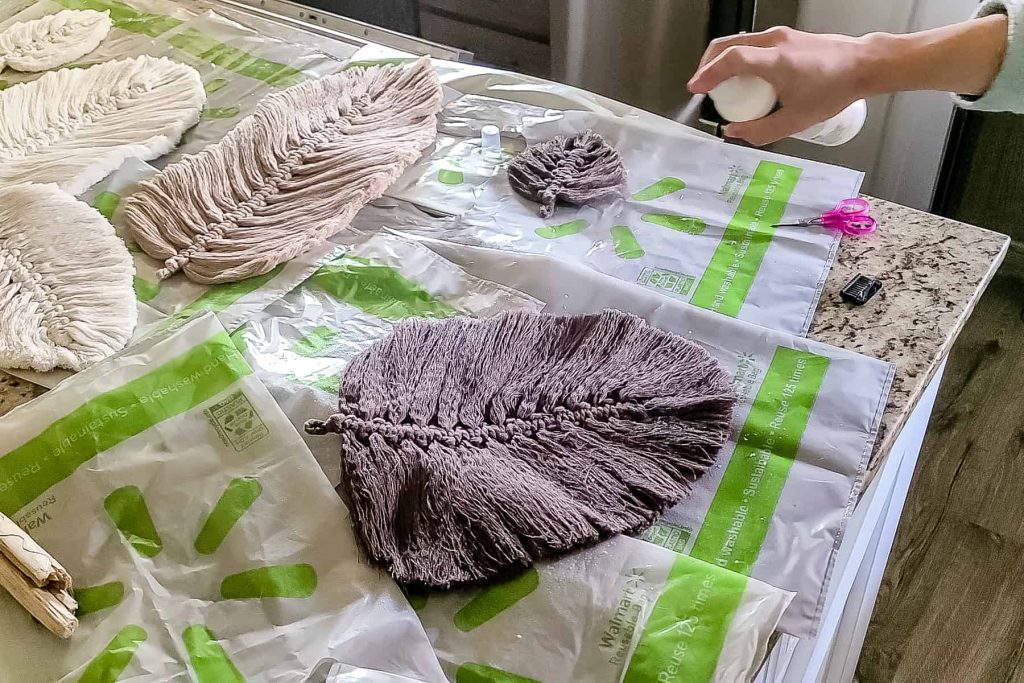
Step 7. Spray with fabric stiffener.
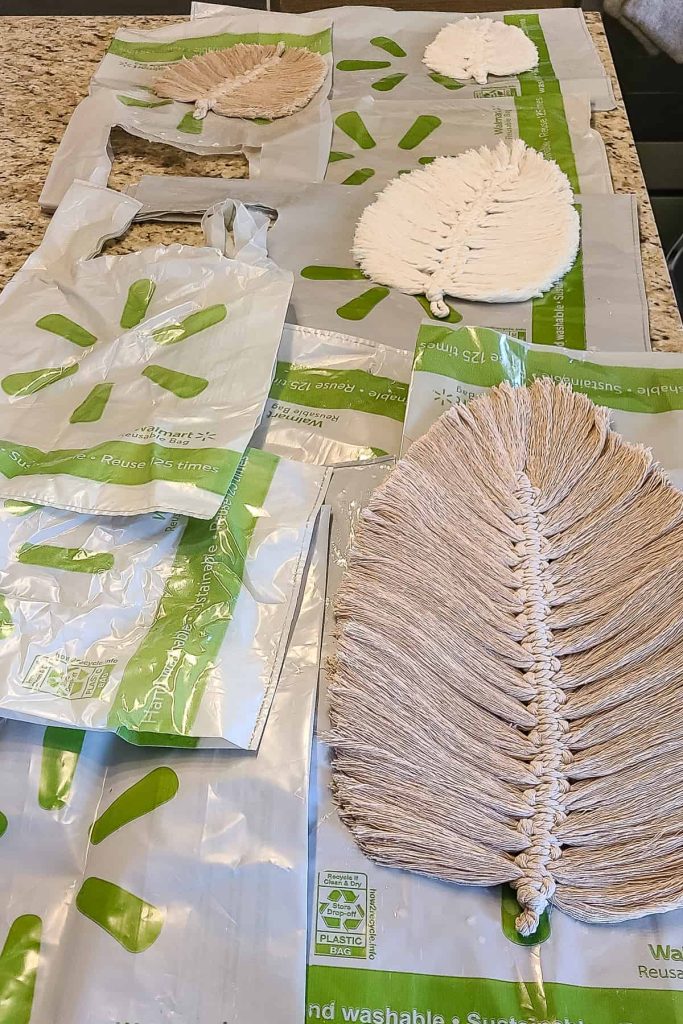
Once you’re happy with the shape of your macrame feather, lay it on top of a piece of plastic to protect your surface. Trash bags or shopping bags work great.
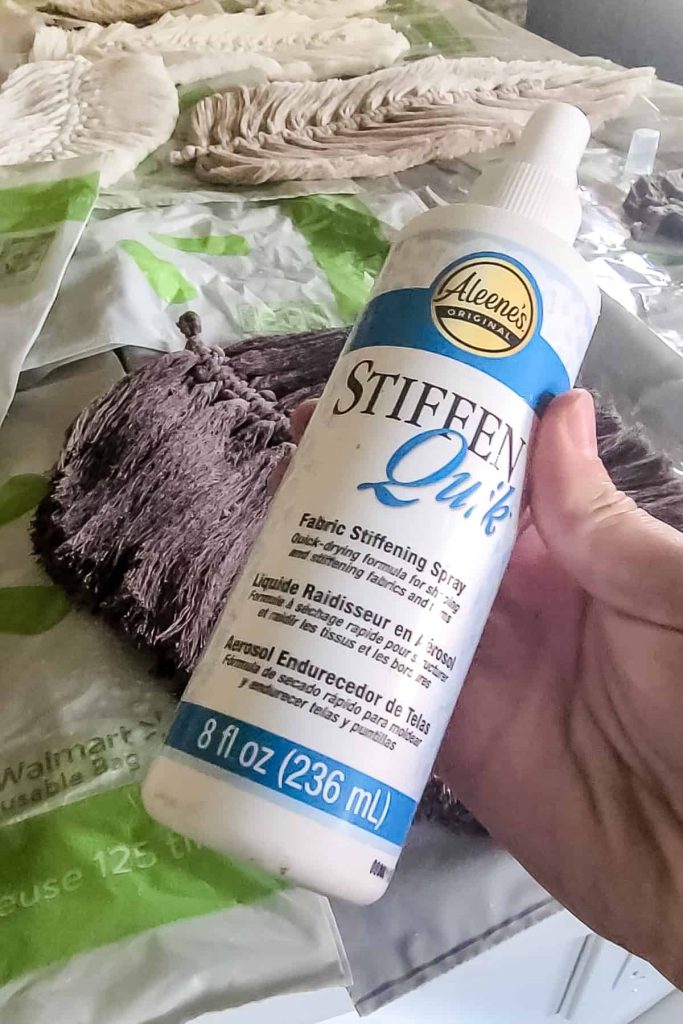
Spray with fabric stiffener on both sides of the feather. Let it dry for 2 hours before adding another coat.
Given the fact that I used 5mm cording to make my macrame feathers, they were pretty thick. This means that they were much heavier and it was harder to get them to stiffen.
I used 3-4 coats of the fabric stiffener which definitely helped, they still required the use of a felt sheet on the back to reinforce them.
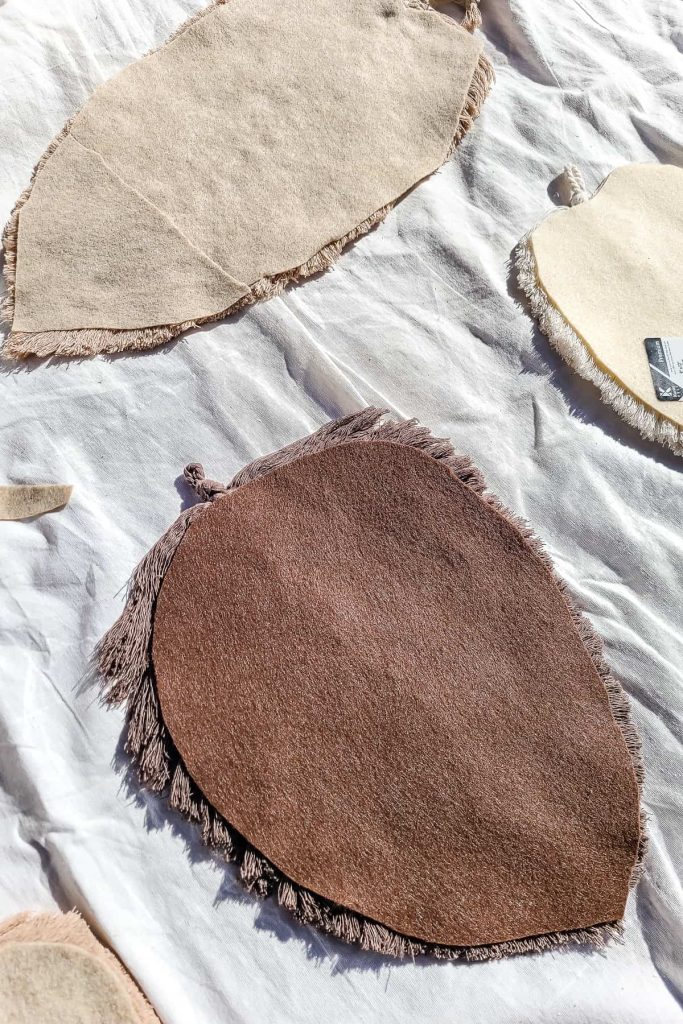
Step 8. Attach a felt sheet to the back of each feather.
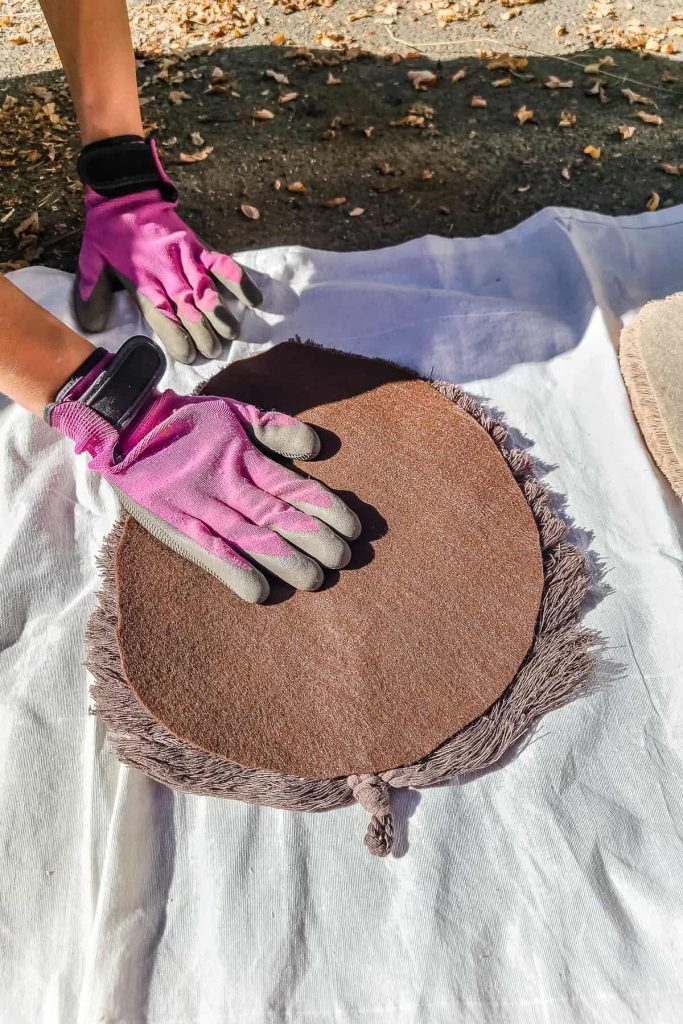
As mentioned above, my feathers were pretty thick so the fabric stiffener wasn’t enough to get them to lay flat when they hung on the wall.
To reinforce them further I added felt sheets to the backside of each feather attached with spray adhesive.
I found felt sheets that matched the color of each feather at the craft store.
Lay each feather flat over the sheet of felt and trace it roughly. Cut out the feather tracing from the felt, going inside of the tracing slightly. You want the piece of felt to be a little smaller than your feather so it is not seen.
You may need to go back afterward and make the felt piece smaller after you cut it out.
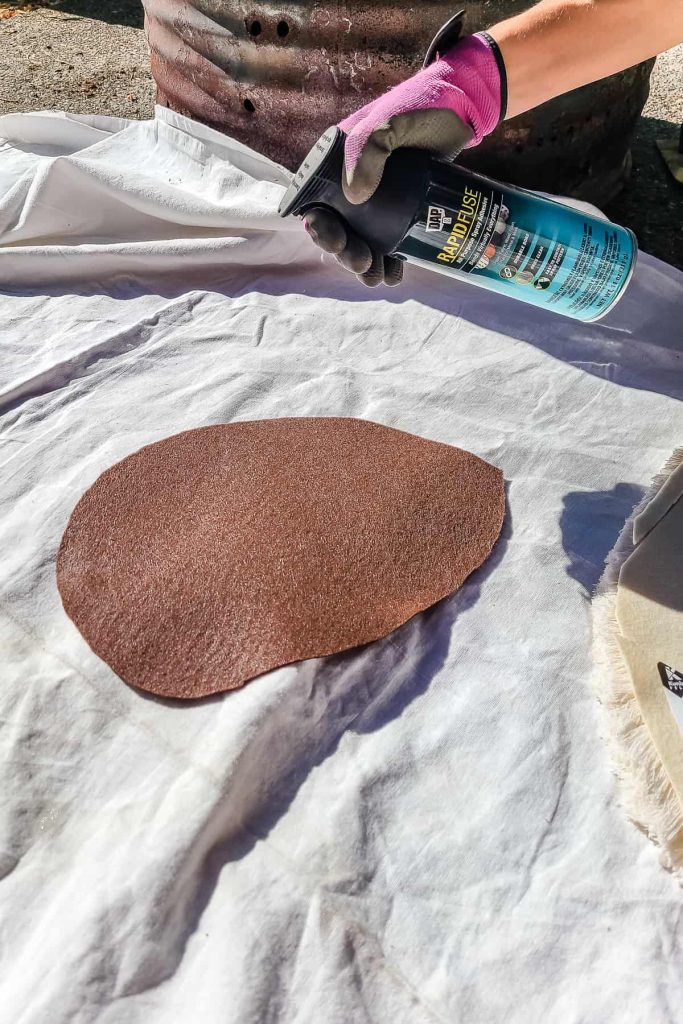
Next, take the feathers and the cut felt pieces outside and protect your surface. I used a drop cloth.
Spray adhesive can be a huge mess, so it is best to wear gloves. Trust me on this one. I’ve learned from experience that this stuff is super hard to get off your hands!
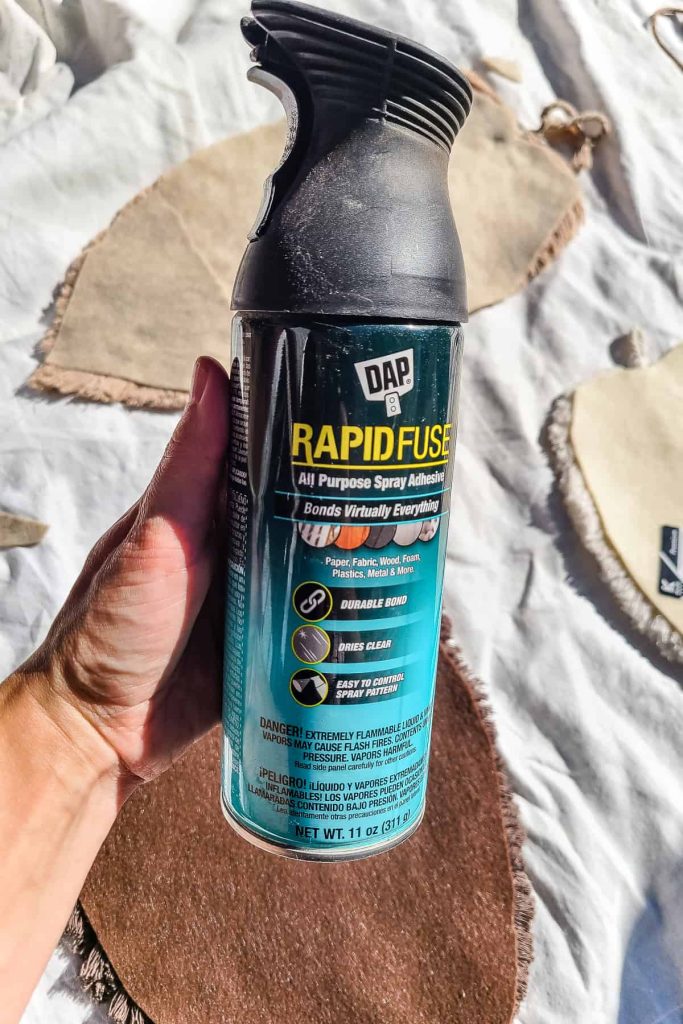
Shake the bottle of spray adhesive well. Spray it on the felt sheet and then press it into place on the back of the feather.
Let them dry for 2 hours before moving.
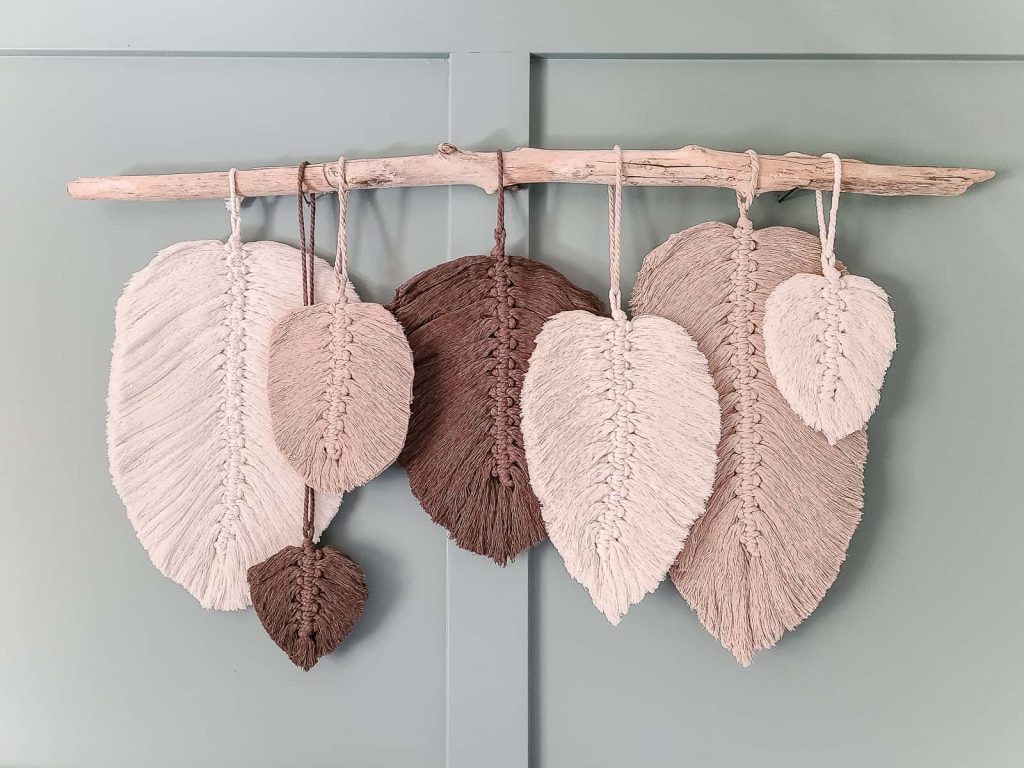
Step 9. Hang macrame feathers on a dowel or stick.
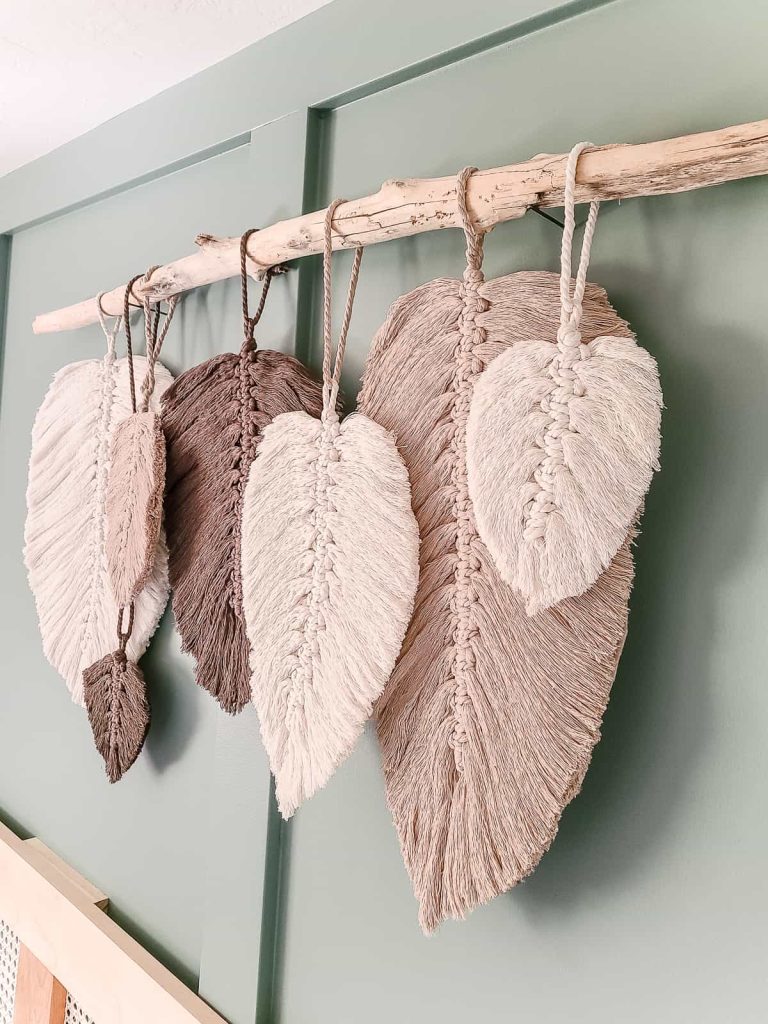
Bring your macrame feathers inside. Add a piece of coding through the top loop of the feather and tie it into place on the dowel or stick that you’ll be using on the wall.
We used a piece of driftwood that we got years ago on our first vacation as a family of 4 to the Oregon Coast.
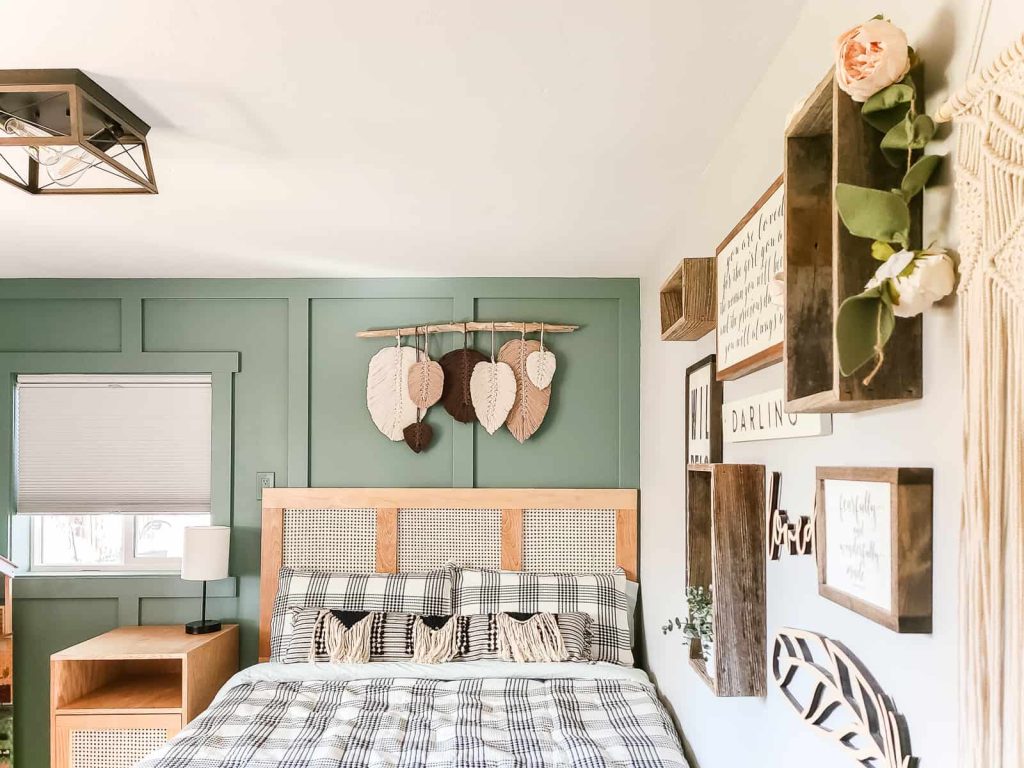
DIY Macrame Feathers: Reveal
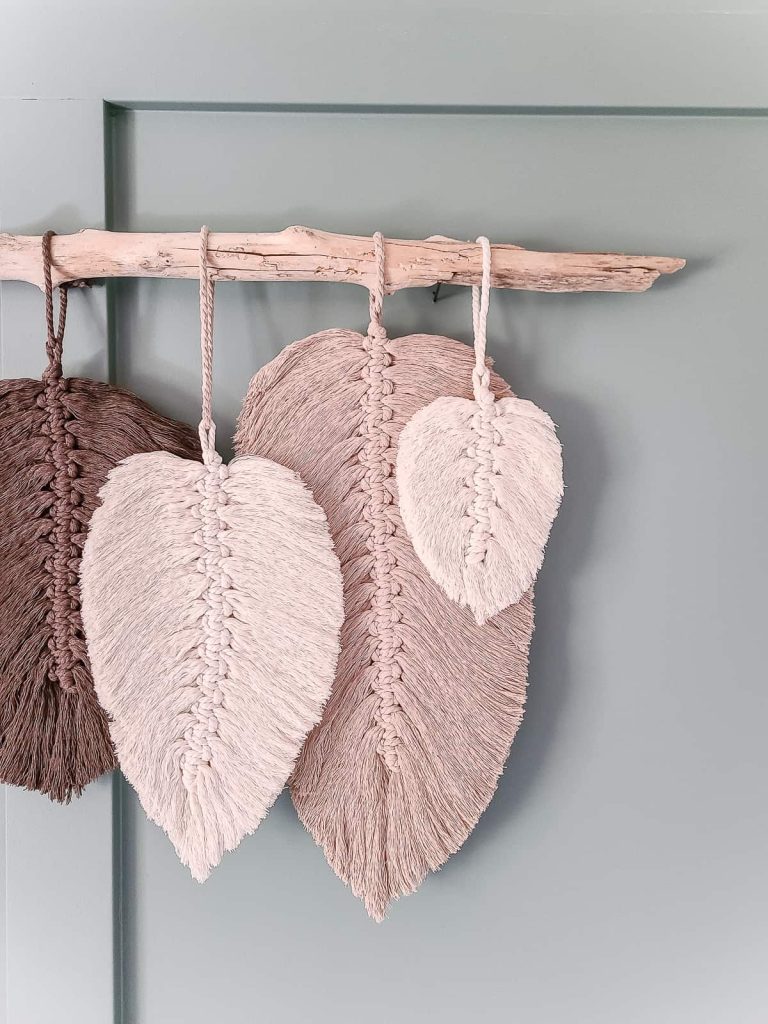

Where would you hang macrame feathers in your house?
Let us know in the comments below!

How to Make Macrame Feathers
Learn how to make easy DIY macrame feathers, even if you have zero macrame experience. Using macrame cording and a very simple repeatable pattern, you'll create gorgeous boho-style macrame feathers that you can put together for a fun wall hanging.
Materials
- Macrame cording
- Very sharp scissors
- Pet brush or comb, I found that the comb worked better
- Fabric stiffener
- Felt sheets
- Spray adhesive
- Gloves
- Dropcloth
- Dowel or stick, if hanging on the wall
Instructions
- Cut the centerpiece of macrame cording. For the larger macrame feather, this centerpiece was approximately 30-35 inches long.
- Next, you need to cut pieces of macrame cording for the sides of the feather.
- Knot the side pieces around the centerpiece of the macrame, 2 at a time.
- Next, add a simple overhand knot to the remaining center cord to hold all of the feather pieces in front.
- Use a comb to unravel the cording on each side of the feather.
- Cut the combed edges with sharp scissors to create the feather shape.
- Spray with fabric stiffener.
- Attach a felt sheet to the back of each feather using spray adhesive. This will keep their shape.
- Hang macrame feathers on a dowel or stick.


Great instructions. My macrame feathers turned out awesome. Thanks
Awesome, so glad you were able to use our tutorial.
Great instructions. My macrame feathers turned out awesome. Thanks
Awesome, so glad you were able to use our tutorial.