Stenciling Floor Tiles with Paint

Are you wondering "can you paint a tile floor?" The answer is YES! Learn how to start stenciling floor tiles in your bathroom for a cheap and easy DIY!
Thank you to Rust-Oleum for sponsoring this stenciling floor tiles tutorial! All opinions are entirely my own. This post also contains affiliate links, but nothing that I wouldn’t recommend wholeheartedly. Read my full disclosure here.
We’re knee deep in our latest renovation project – our small guest bathroom. I don’t even actually know if you could call it a renovation project because really we’re not renovating it!
Instead of a full renovation, we’re giving it a super budget-friendly makeover with paint (lots of paint), wall coverings… (did someone say shiplap?…UPDATE: Check out how the DIY vertical shiplap wall turned out here!), DIY wall art made with wood shims and scrap wood and refreshed decor (the cabin theme is gone, thank heavens!).
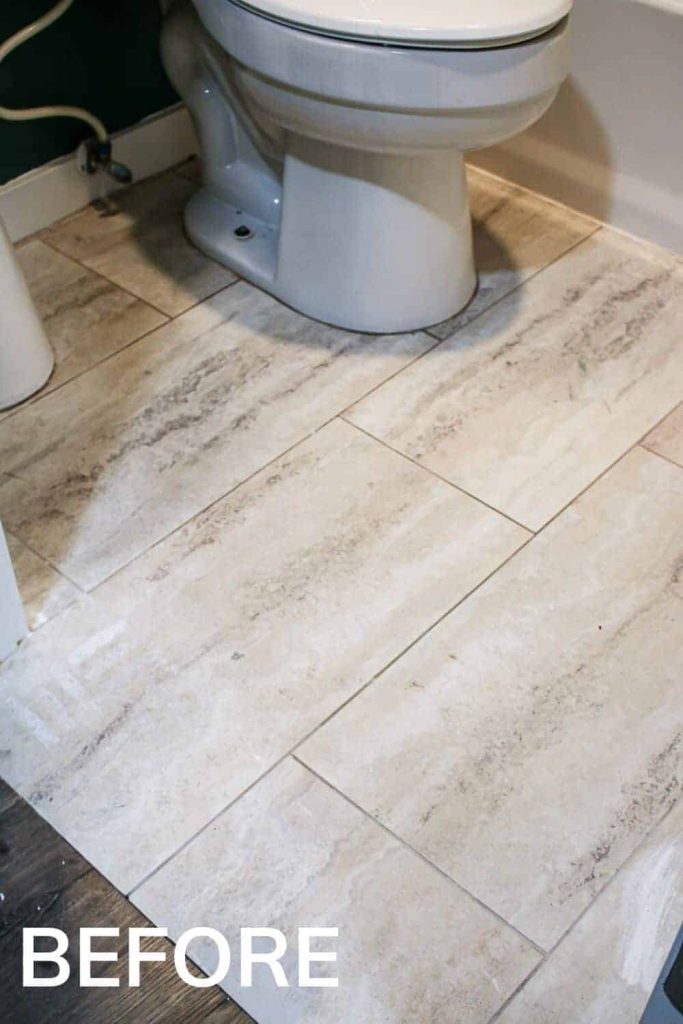
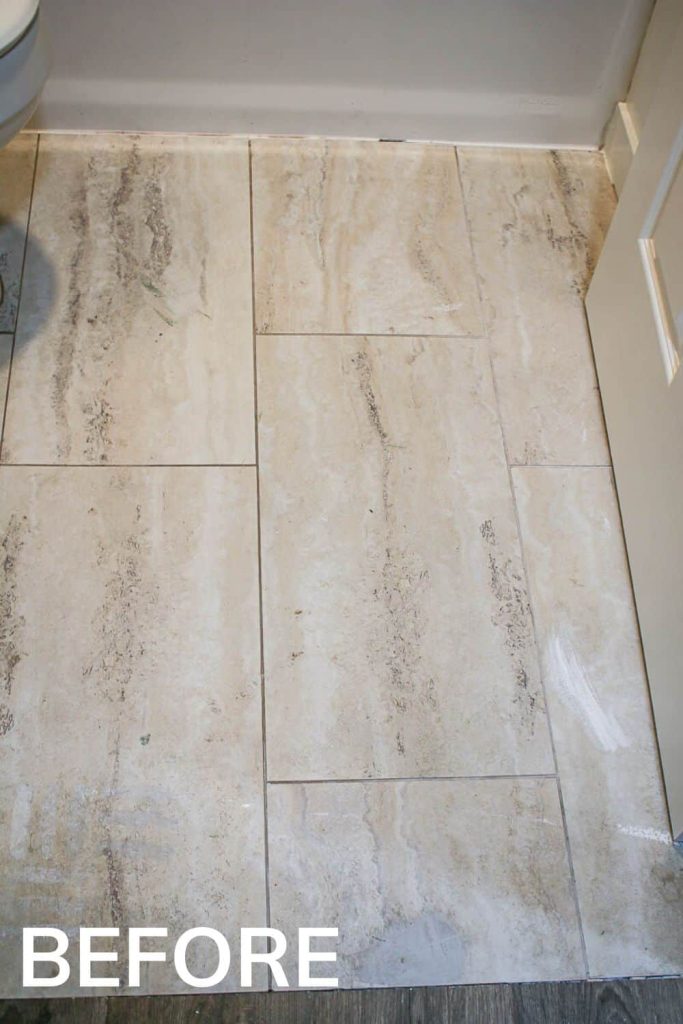
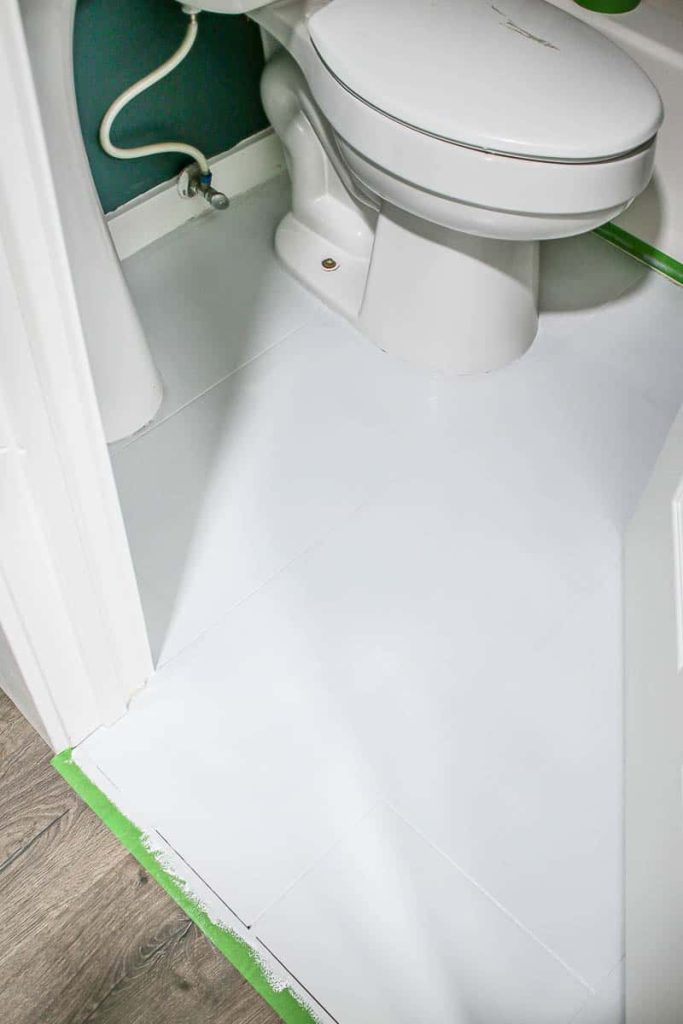
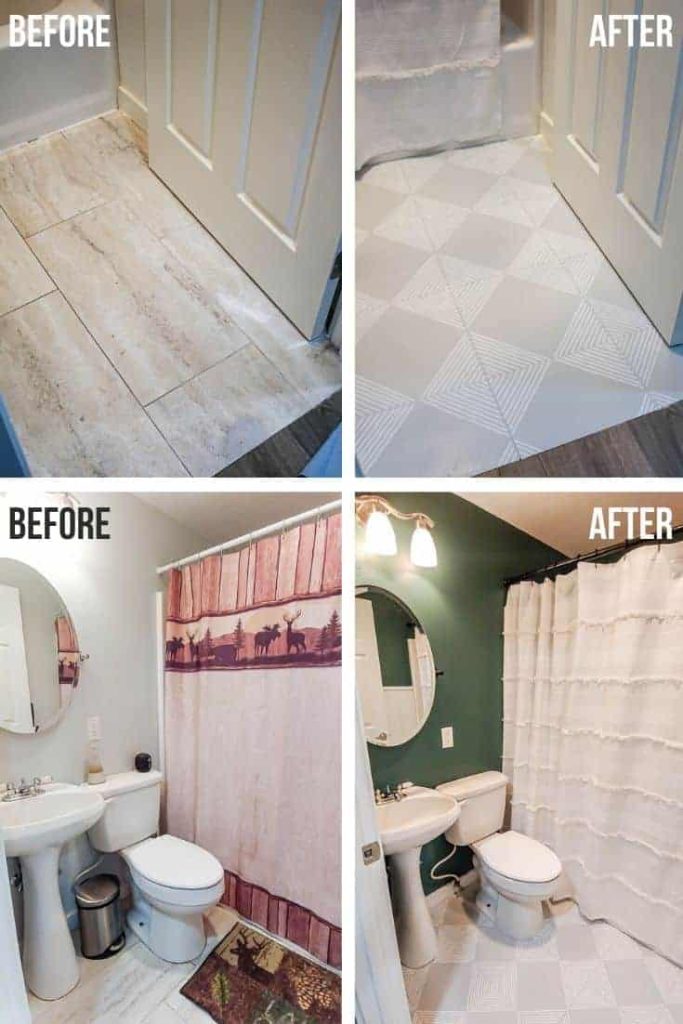
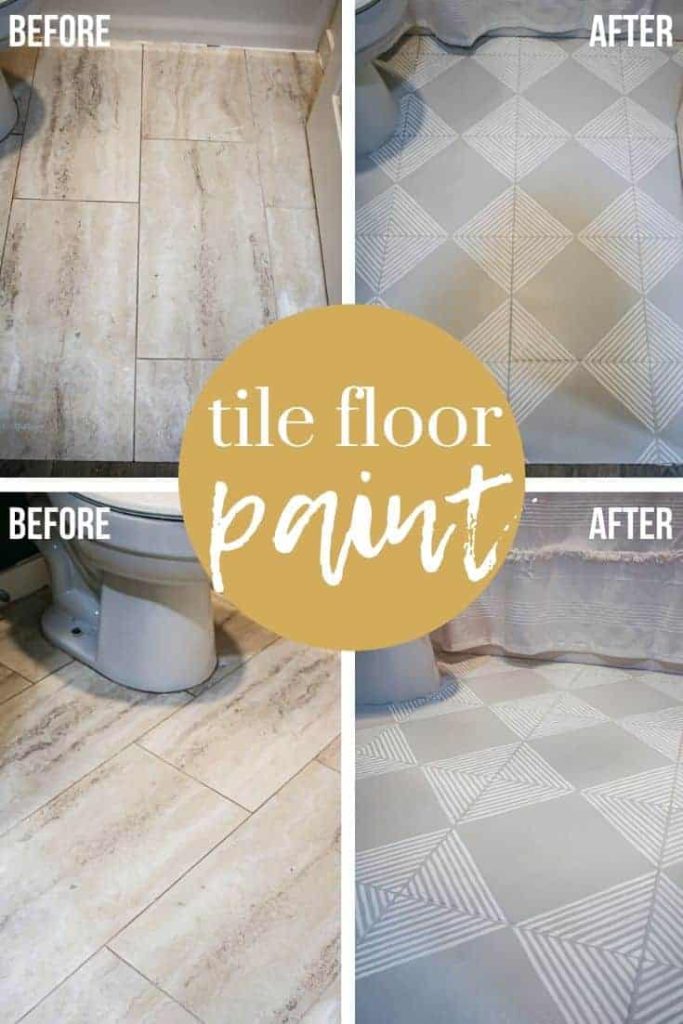
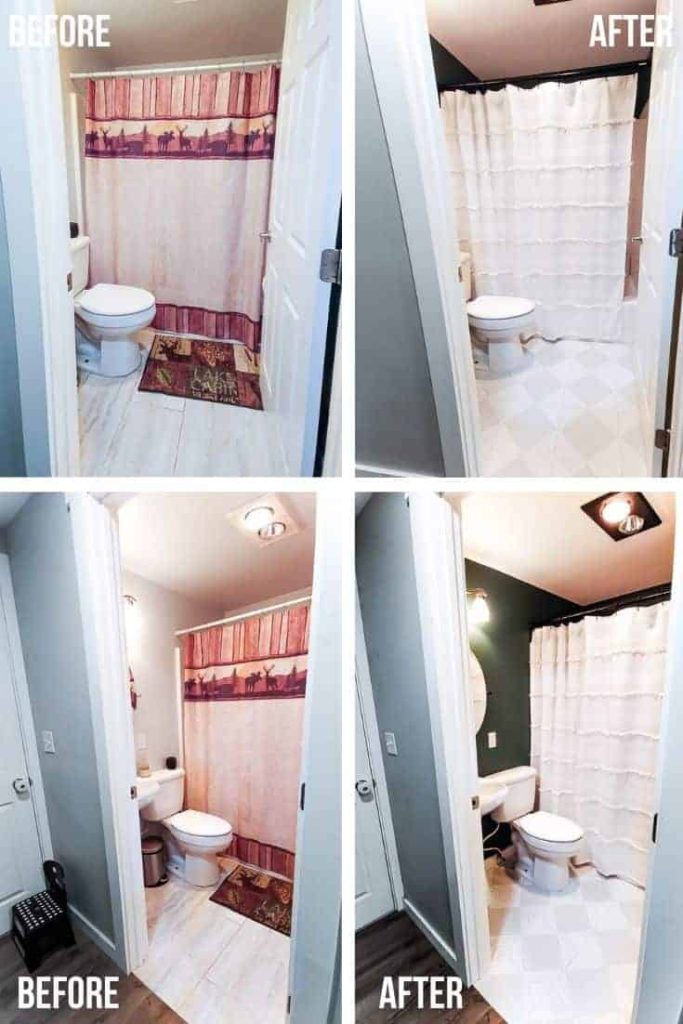
With this budget-friendly makeover, we needed to do SOMETHING about these outdated tile floors – which were tan, cheap and boring. Since we’re not doing a full renovation of this bathroom right now, we’re working with what we have and we’re going to paint the floors with bathroom floor paint!
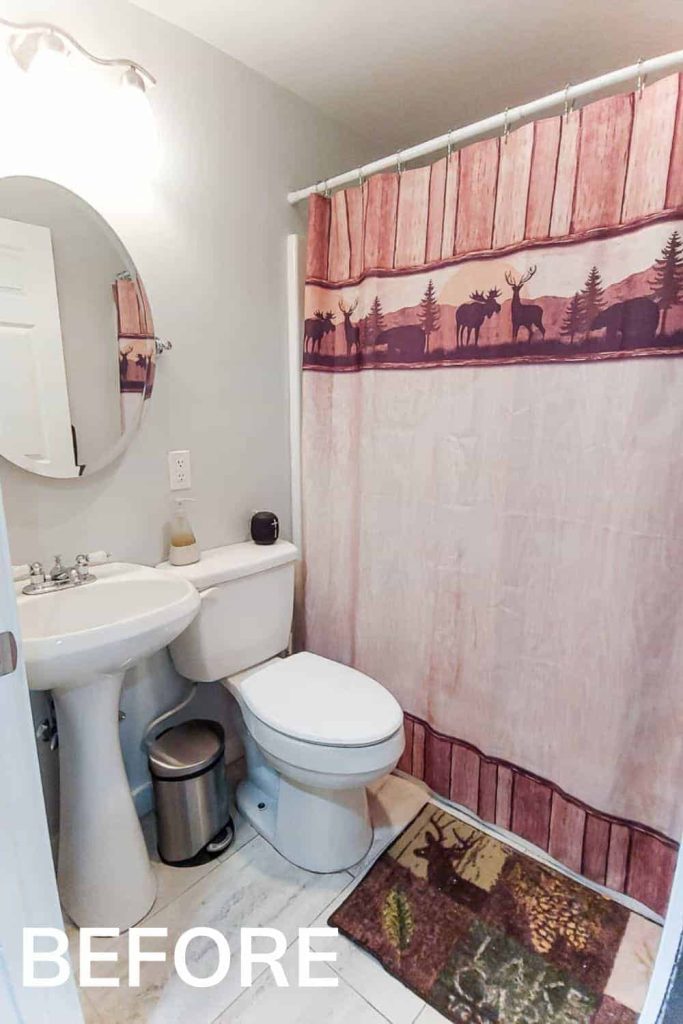
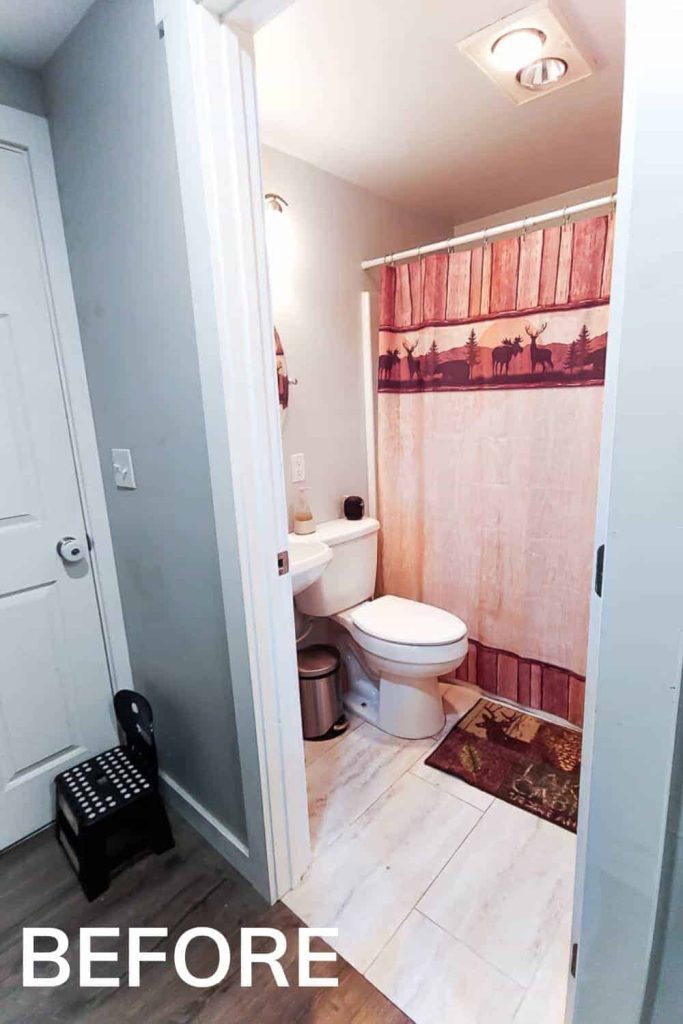
Now, are you ready to see the before pictures to see what we’re working with?? Unless you’ve seen our home tour from when we first moved into this house, you’ve probably never seen this bathroom (once you see the before pictures, you’ll know why I never share it!)
BATHROOM TILE MAKEOVER: BEFORE PICTURES
Painting and Stenciling Floor Tiles: Frequently Asked Questions
Can you paint an entire tile floor?
Say WHAAAAT?!? Maybe you’re wondering “can you paint a bathroom floor?” And the answer is YES, my friends!
Over the years I’ve seen people online painting tile floors over and over and so many of them were using paint that is not designed for floors or heavy use. A lot were even using chalk paint! As good as it looked, I always cringed thinking that it probably won’t last long.
What kind of paint should you use on ceramic floor tiles?
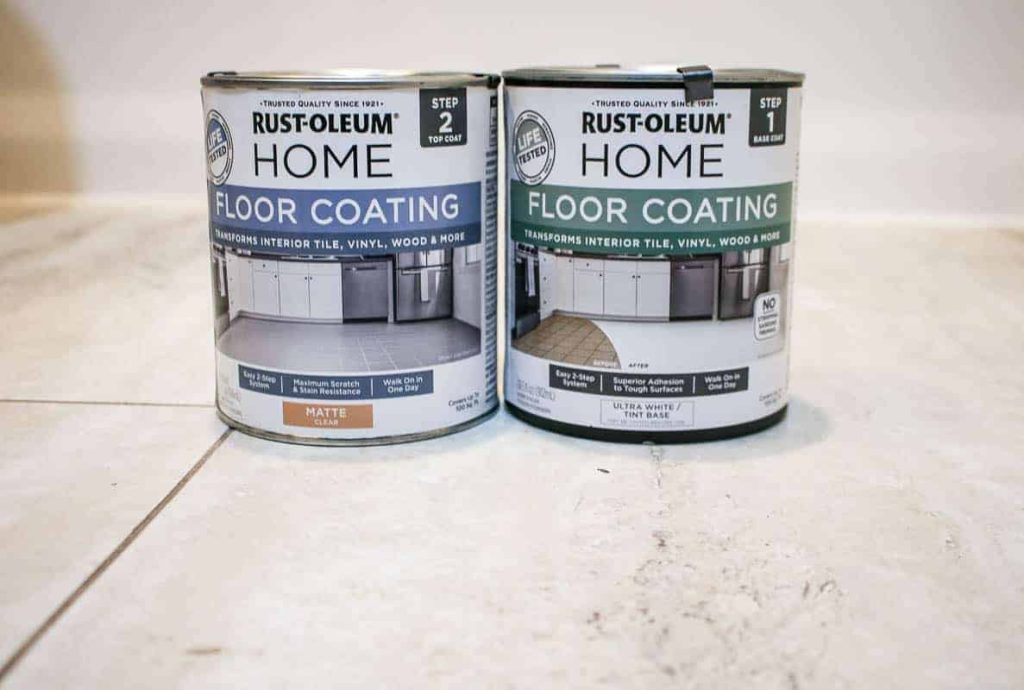
Then my friends at Rust-Oleum came out with a line of Rust-Oleum HOME Floor Coating that is made JUST for floors.
It’s extremely durable, easy to use, and allows you to paint your old tile floors without stripping, sanding, or priming first.
And the best part is that you can use it on not only ceramic tile floors but porcelain tile, concrete, hardwood, laminate, vinyl, and more!
What floor paint colors are there?
The fun part about using bathroom floor paint is that there are SO many color choices!
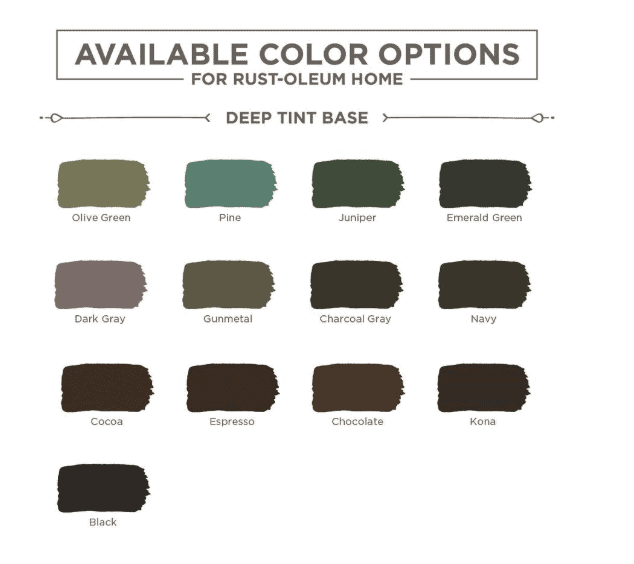
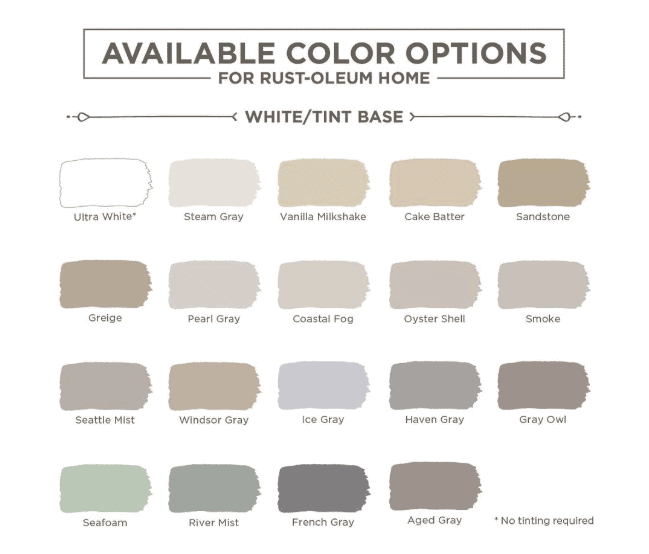
You can even play around with all of the floor paint colors with this color tool.
What about painting other tile in a bathroom (not floors)?
If you’re thinking about painting other tile in your bathroom (like maybe a backsplash or even a shower!), you’re going to want to use something like Rust-Oleum’s Speciality Tub & Tile Refinishing Kit, rather than the floor coating. I love how this bathtub turned out after using the kit!
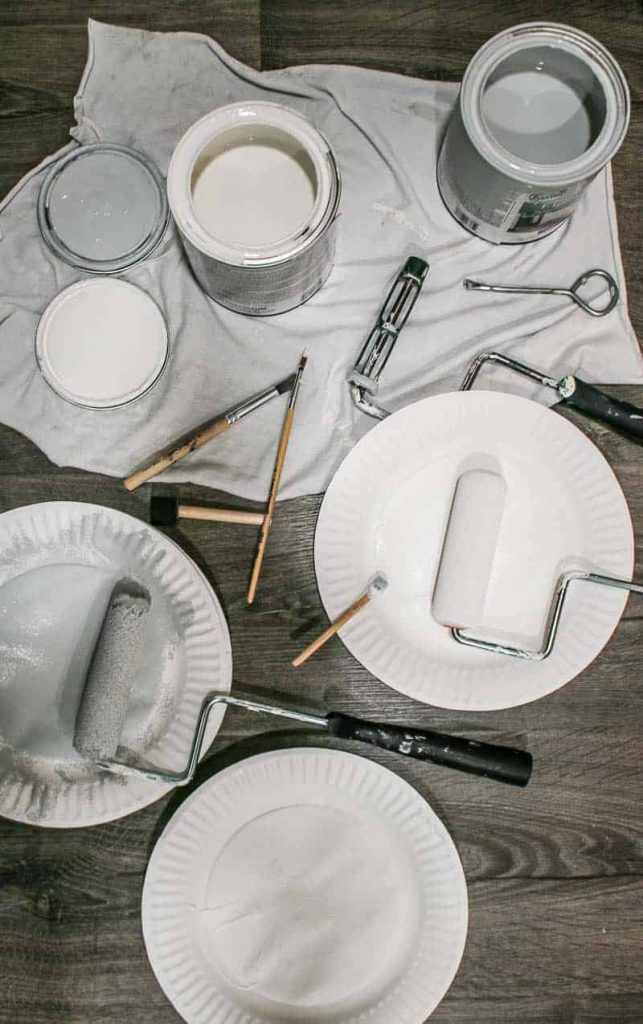
What you need for stenciling floor tiles:
- Rust-Oleum HOME Floor Base Coating (Smoke), 1 Qt – buy it here
- Rust-Oleum HOME Floor Base Coating (Ultra White), 1 Qt – buy it here
- Rust-Oleum HOME Floor Top Coating (Matte Finish), 1 Qt – best deal to buy in a kit because they don’t sell the 1 Qt size individually online
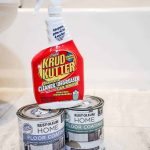
- Krud Kutter Cleaner/Degreaser
- Paint trays
- Angled paint brush
- 4 inch paint roller
- 3/8″ nap roller cover, 2 (for base coats)
- 1/4″ nap roller cover, 1 (for top coat)
- Dense foam roller, 1 (for stenciling)
- Tile floor stencil – I used this one in 12″ size and got two
- Paper plates (or more paint trays)
- Delicate Surfaces painter’s tape
- Small artist paint brushes
Note about the supplies: If you need two colors for stenciling a tile floor, like I did, your best deal is to purchase a kit like this with the base colored coating + top coat + cleaner and then separately purchase the 2nd color individually.
How to Paint a Tile Floor: Video Tutorial
If you love DIY videos, be sure subscribe to our YouTube channel!
How to Paint a Tile Floor Step by Step
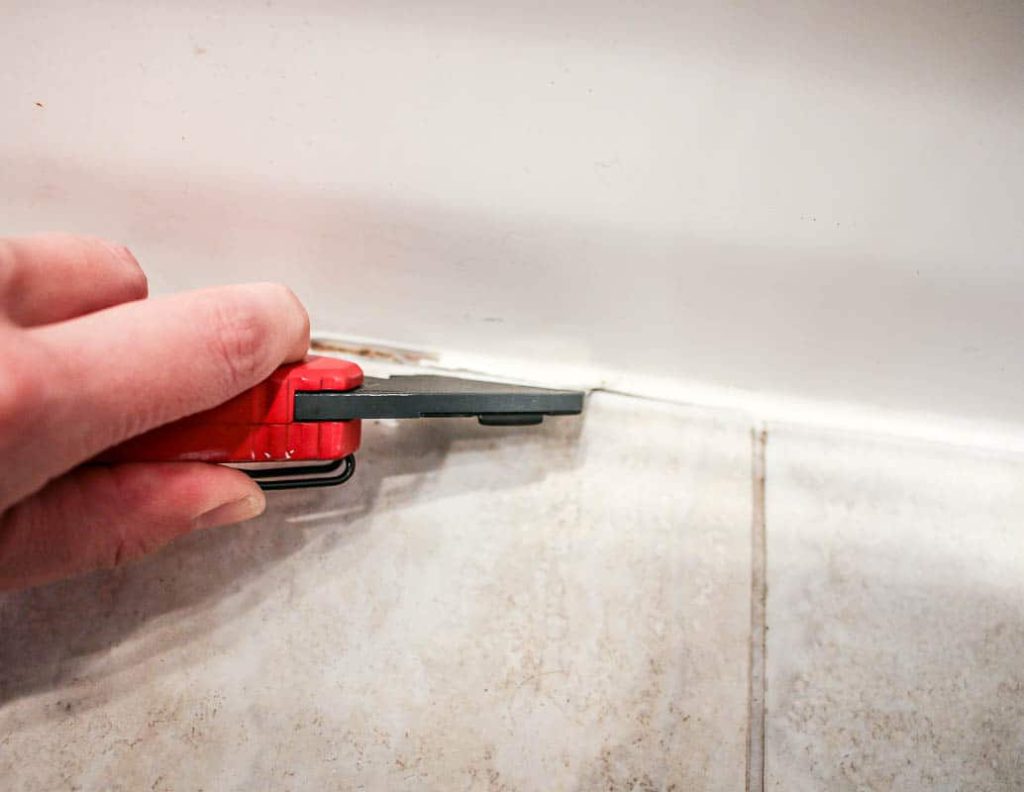
Step 1: Remove old caulk.
If you have any existing caulk on the floors, you want to remove that first. To remove the old caulk, use a sharp utility knife to score the edges of the caulk in between the floor and the caulk line & the tub, and the caulk line. Then with needle-nose pliers, pick out the caulk. Continue until all old caulk has been removed.

Step 2: Clean tile floors well.
You definitely need to start with super clean floors before painting your tile. Krud Kutter is the best for this because it’s a super-duper powerful cleaner that will remove dirt and grime.
Simply spray on and wipe clean with paper towels or a rag.
Step 3: Test floors for paint adhesion.
As recommended by Rust-Oleum on the can of floor paint, you should test your flooring first to make sure it doesn’t need to be sanded. Even though this took some extra time and patience, I’m glad that I took the extra step just to make sure our floors were ready for painting!
To test your tile floors for adhesion:
- You just paint the base coat on a small section about 3 inches by 3 inches
- Wait 12 hours to dry
- Make an X in the paint with a utility knife (don’t go too deep, you just need to get through the painted surface, not actually mark up the flooring!)
- Press duct tape over the painted area
- Remove quickly
- If more than 10% of the base coat comes off on the duct tape, you need to sand your floors before painting.
- If sanding is needed, use 60 – 80 grit sandpaper.
Happy to say that absolutely NO paint came up with the duct tape test on our floors, so we didn’t need to sand first. Whew! On to the next step!
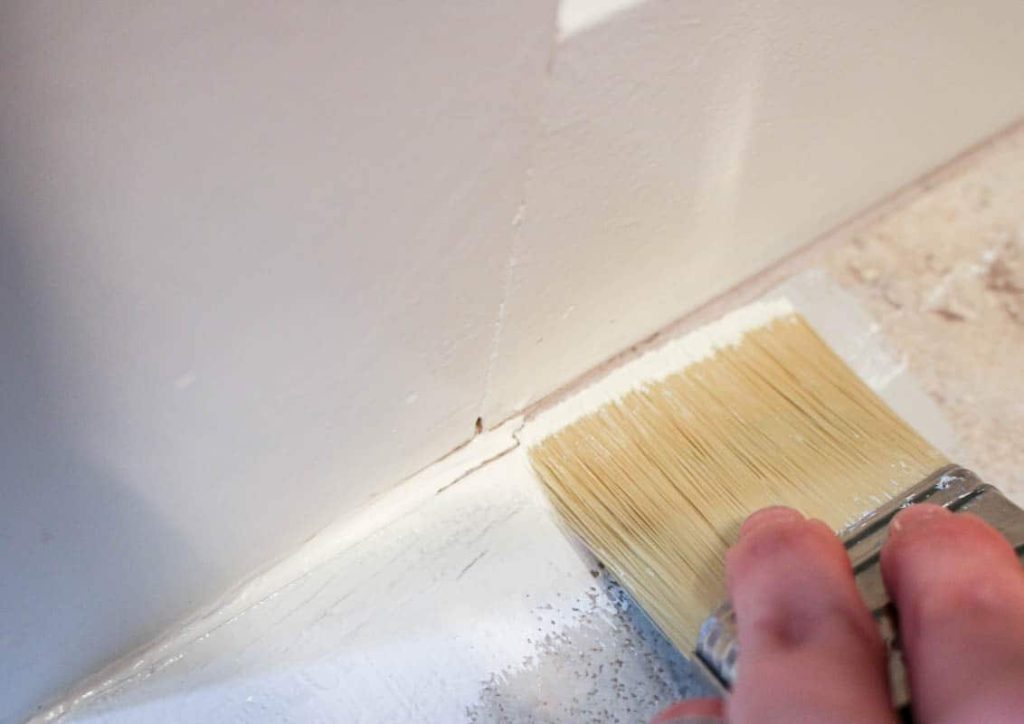
Step 4: Apply base coat of bathroom tile paint.
I started with the first coat of white base coat (no color tinting). Start by going around the room and around any edges (like the toilet and sink if you’re painting bathroom floors like me).
Alternatively, you could tape off your baseboards with painter’s tape. I didn’t do this because my baseboards were freshly painted so I was worried about the paint peeling up on the baseboards since the paint wasn’t fully cured yet!
Work your way out of the room so you don’t have to step on the wet paint.
*Note: I chose to do a layer of white base color coat in my bathroom before moving onto the colored base coat. However, looking back, I probably could have skipped this step entirely and moved right onto applying the colored base coat right after cleaning the floors. But ya know, hindsight’s 20/20.
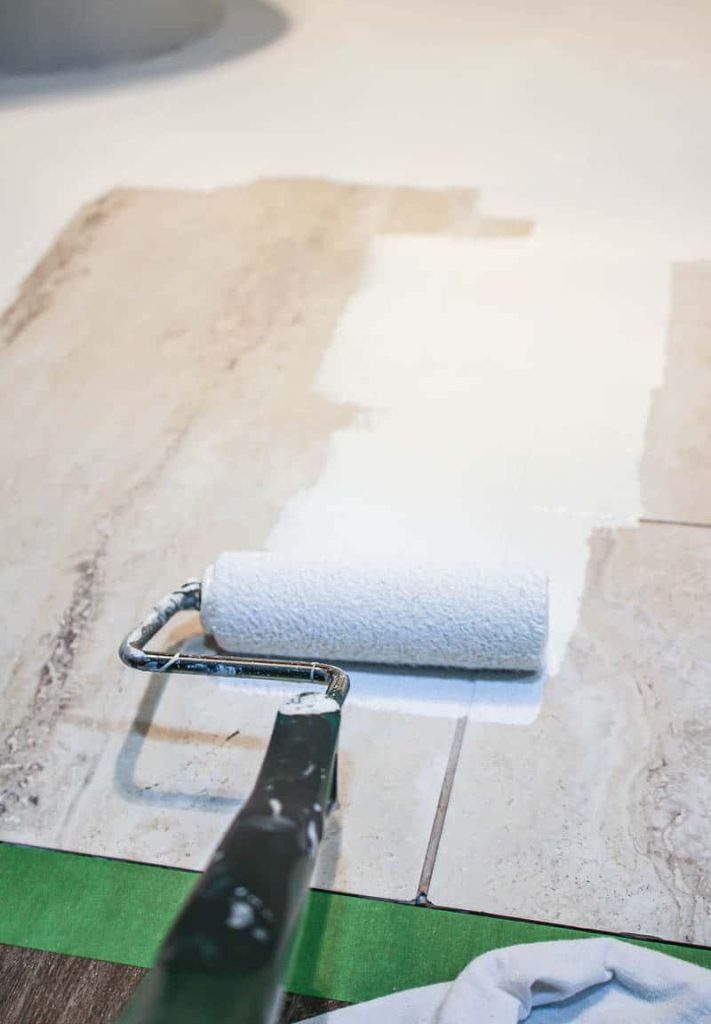
Step 5: Colored base coat.
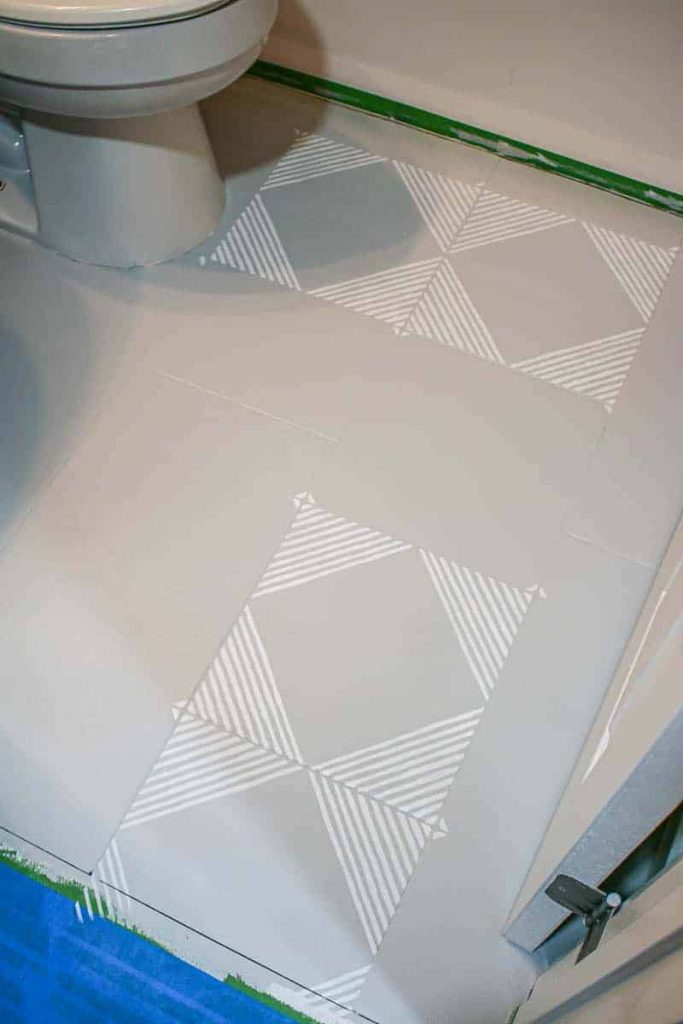
After waiting 6 hours to dry, I painted with the colored base coat. For my bathroom floor paint color, I chose Smoke, which is a great neutral gray color!
I ended up needing to do two coats of the colored base because I could still see a few specks of the white underneath. Wait 6 or more hours in between coats for drying.
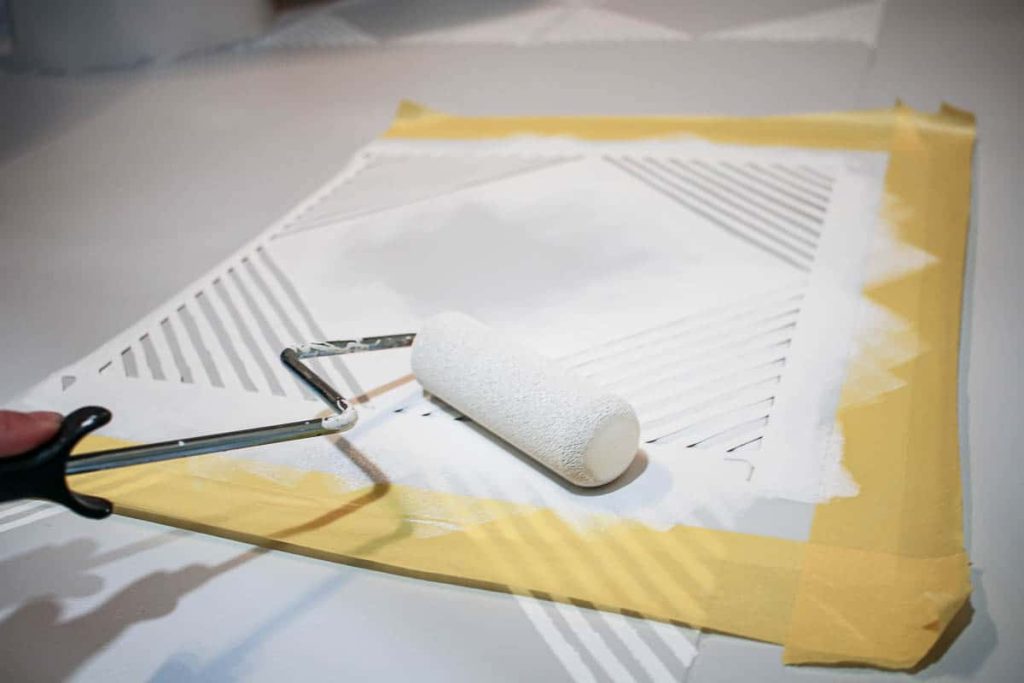
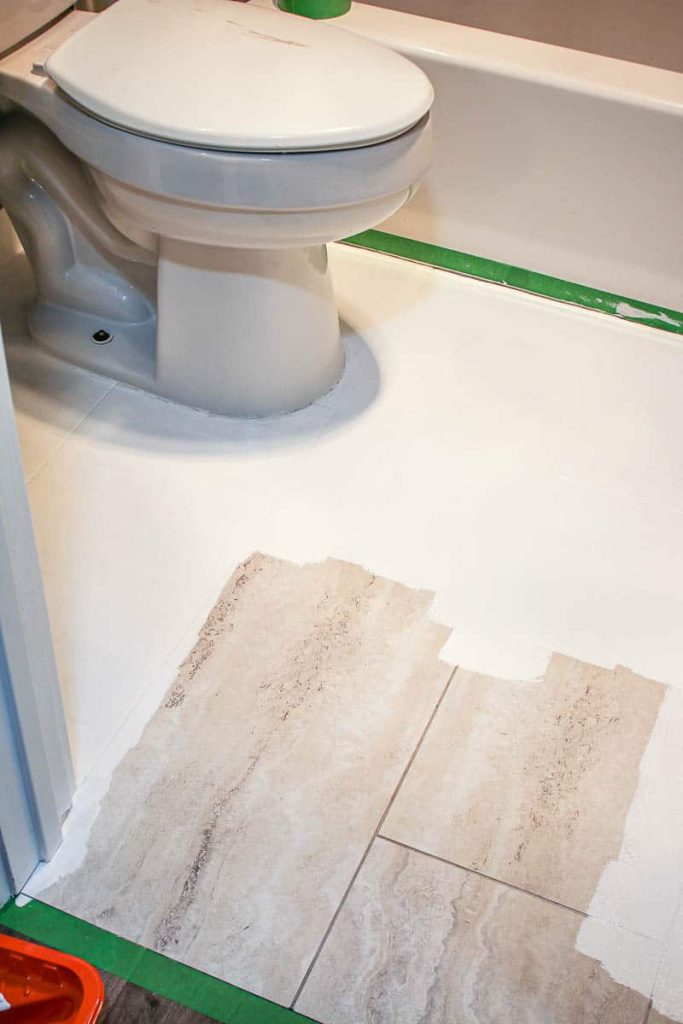
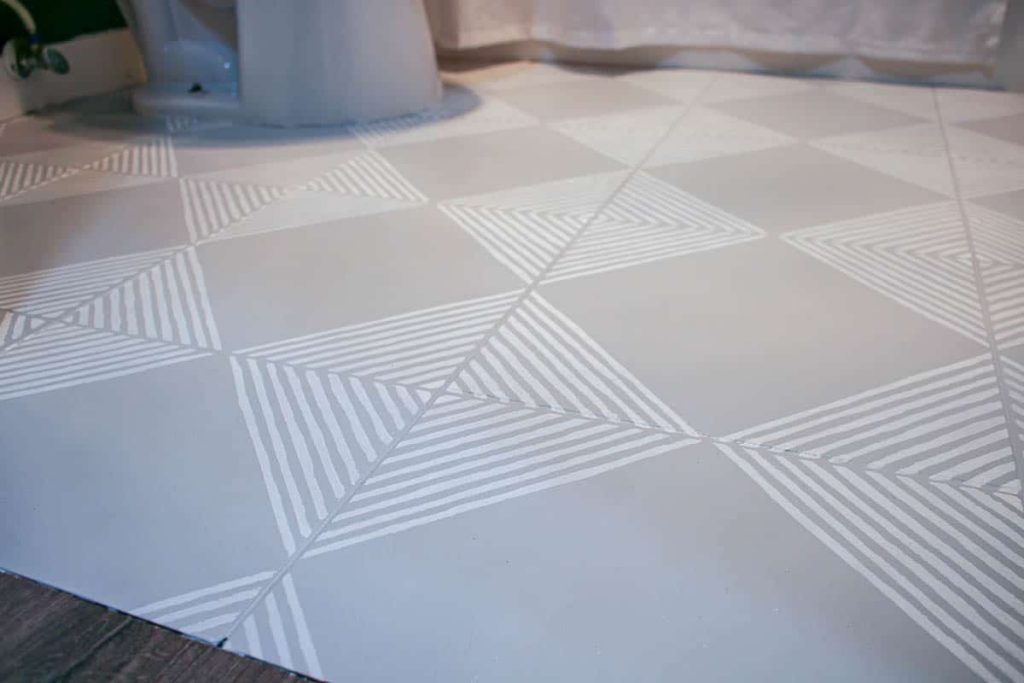
Step 6: Stenciling floor tiles.
Now it’s time to move on to stenciling! Even though our bathroom is super small, the tile floor stencils took me an ENTIRE day do.
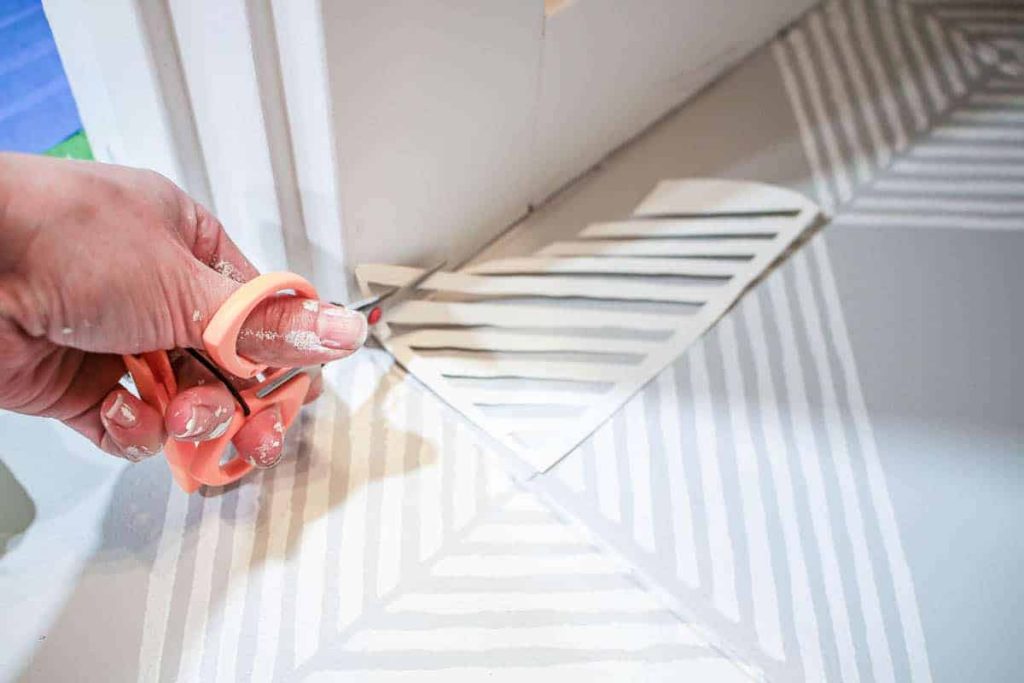
I honestly think the smaller the room, the harder, because you end up having to do a lot of cutting with the tile floor stencils to make it work around the edges of the room, sinks, and toilet.
Here’s the basic process for stenciling floor tiles:
- Start in the middle of the room and plan out your design. To help you visualize (and not make mistakes), lay out the stencils and paint a few of the registration marks so you know where the stencils will be laid out.
- If you will be able to tile a full-sized stencil row along the edge of the room, start there. For my small room, all of the edges needed to be done with cut stencils, so I started in the middle of the room.
- First do you full-size stenciled areas in the middle. Line up stencils and gently tape down with Delicate Surfaces Painter’s Tape to hold in place.
- Use a dense foam roller loaded evenly with not too much paint (roll out excess on paper towels or paper plates).
- Roll over the stencil until you have an even coat on the tile floor stencil.
- Use a medium pressure with the roller, rather the pressing hard. If needed, do layers of paint instead of pushing too hard – which will lead to paint bleeding under the stencil.
- Carefully pull up stencil to check for coverage.
- Use the registration marks on the stencil to line up your stencils and continue working.
- When it comes time to start cutting your stencil up for the edges and to work around items like the sink and toilet, plan carefully starting with the largest pieces first and working your way down to small cut-out stencils. Even though my bathroom is very small, there was A LOT of cutting needed, and in the end, I had just a couple of small pieces left which made it hard to finish. For this reason, I definitely recommend getting at least two stencils!
Pro Tip
The biggest mistake with stencil tile floors is having too much paint on your roller, which leads to bleeding under the stencil.
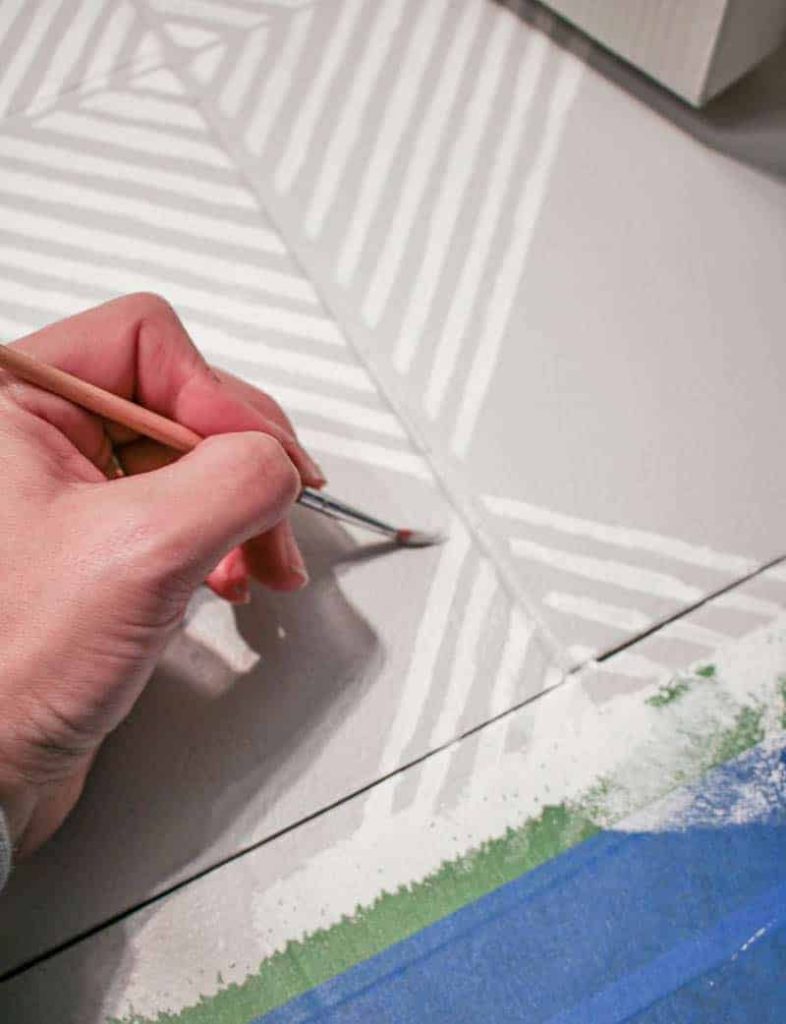
Step 7: Touch up stenciled floors.
Wait 6 hours and you can go back in and touch up with a small paint brush.
Even though you can take measures to prevent the stencil bleeding, there will always be some touch up required.

Step 8: Finish stenciling floor tiles with a top coat of floor coating.
Wait 6 hours and then you’re ready to seal the bathroom floor paint with the top coat. I used the matte finish.
To apply the topcoat, start by gently wipe the floors with a baby wipe or slightly damp paper towel (or lint-free cloth). Learn from my mistake here! I didn’t take this step and ended up getting small hairs and dirt in the topcoat that was hard to get out once I started.
If needed, go around the edge of the room and anything you’re painting around with an angled paintbrush. Then use a 1/4″ nap roller to roll on the topcoat in a thin even coat allowing it not to puddle.
Work your way out of the room so you can avoid walking on the floors. Wait 12 hours before using light foot traffic on the floors. Allow a full 7 days for the floors to fully cure (where you can clean as normal and put furniture back in place).
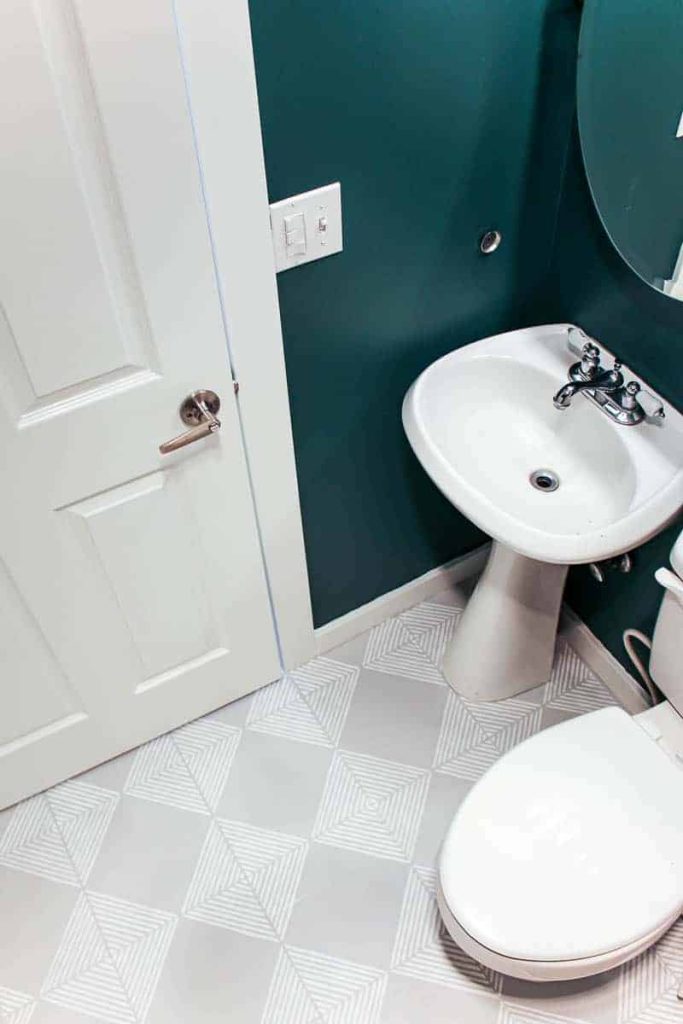
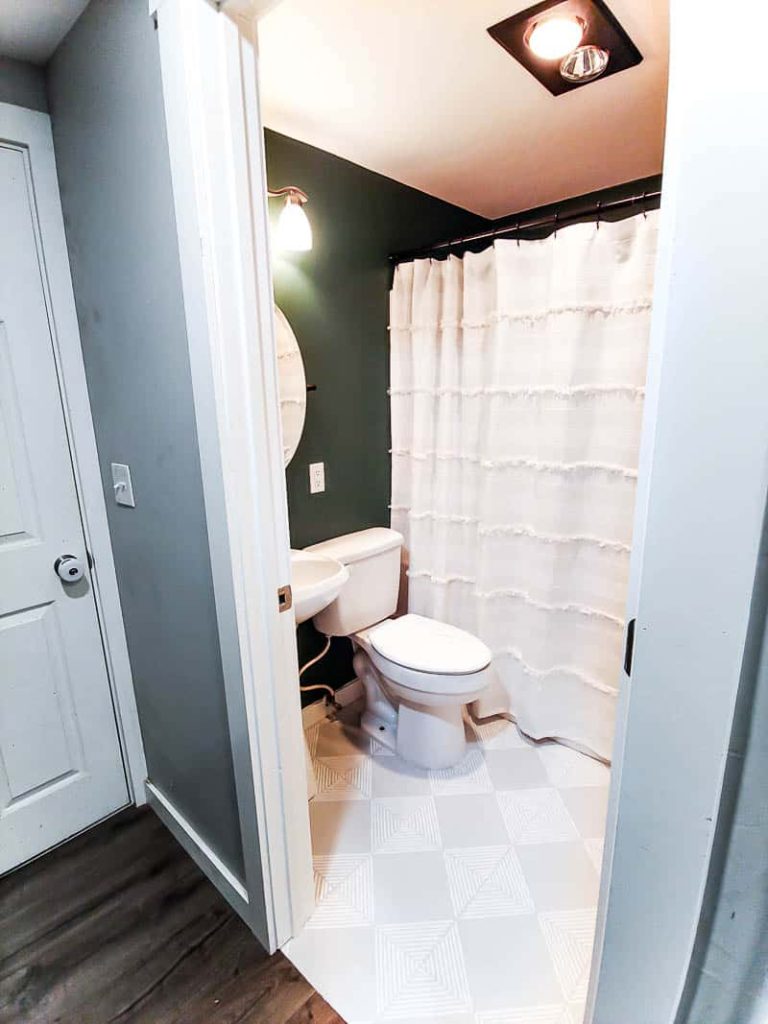
After: Gray and White Stenciling Floor Tiles!
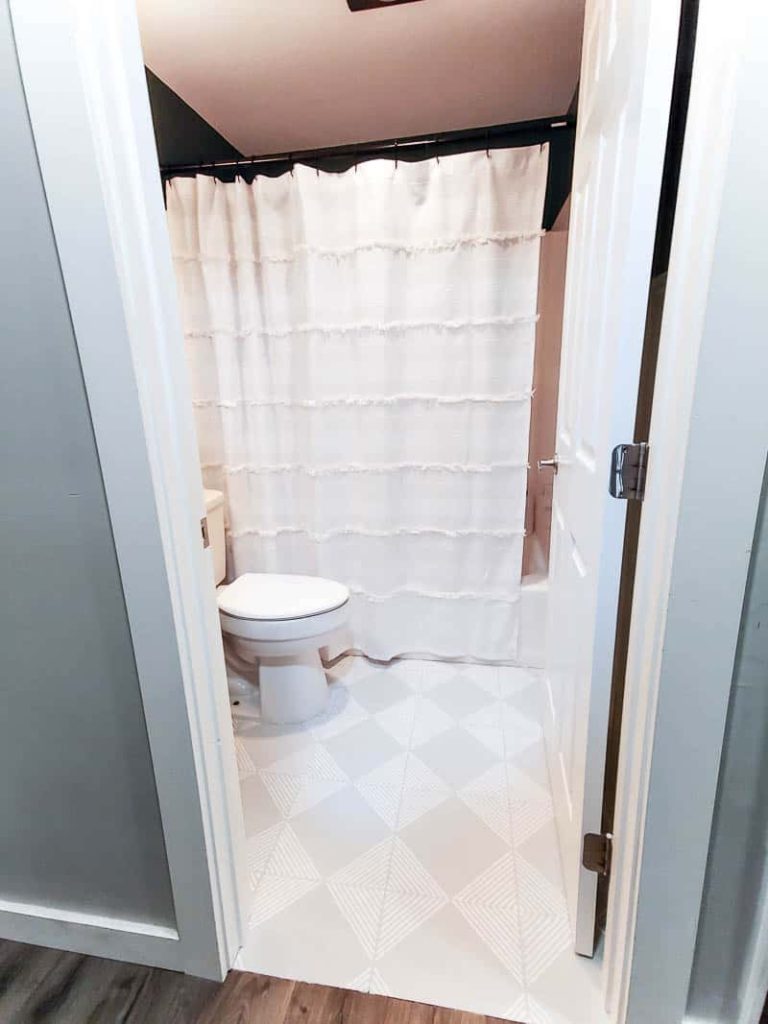
Ta DA!!!!!!! Isn’t she pretty?!
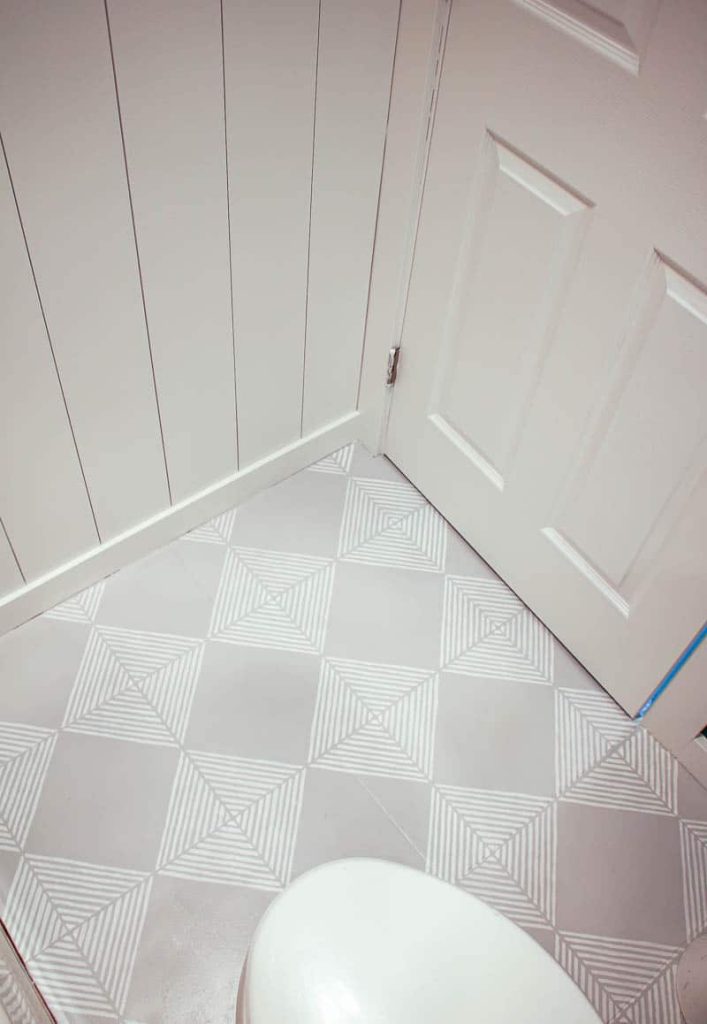
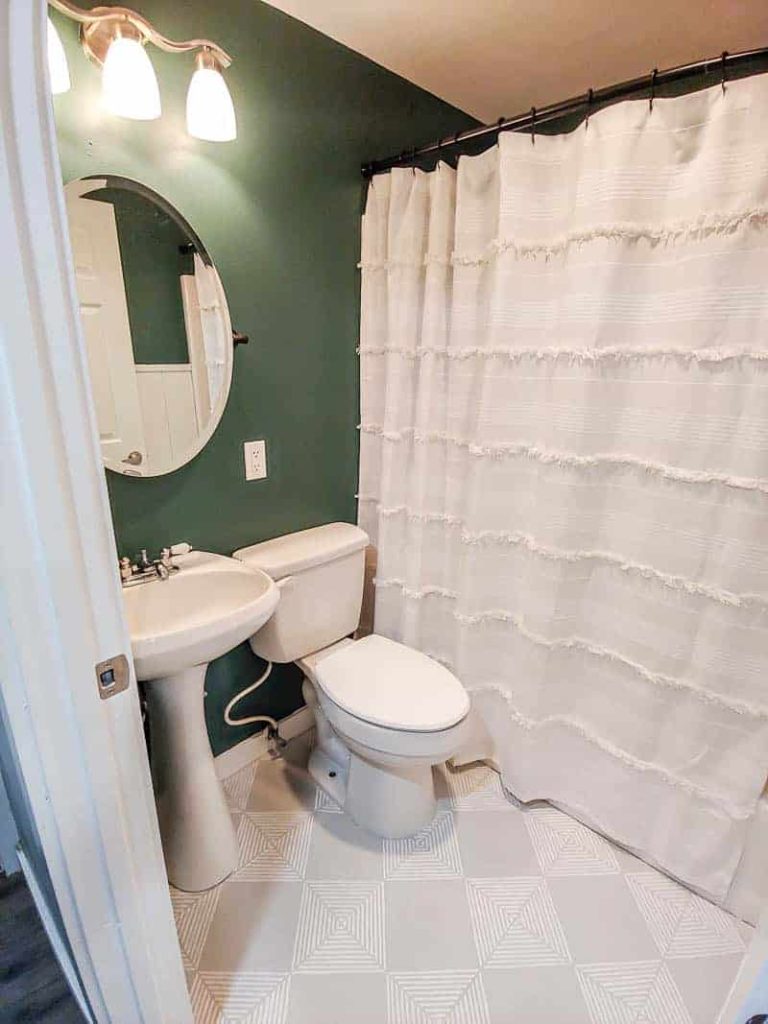
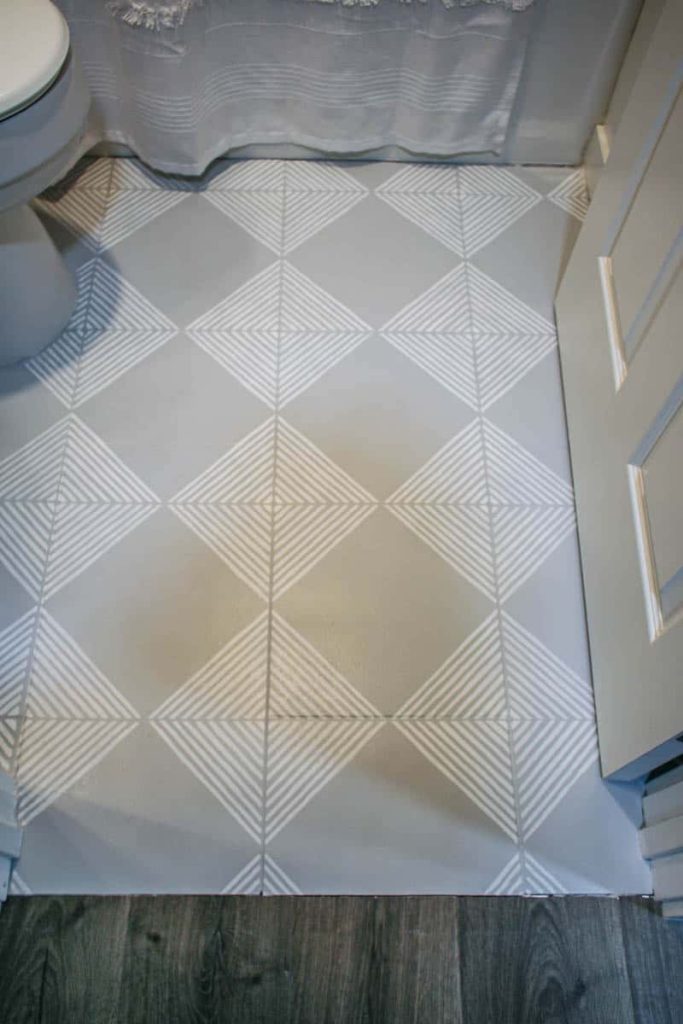
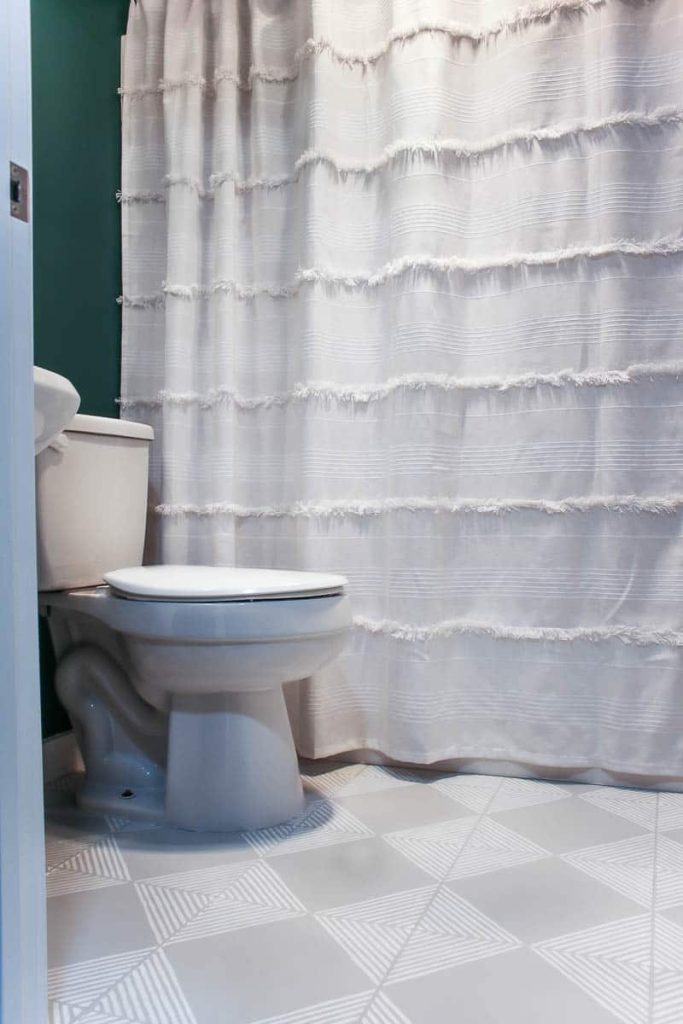
I’m pretty obsessed with how it turned out! I LOVE the stencil pattern and think it added so much character to the room!
Pretty amazing, right?
Before we wrap things up, let’s take another look at the dramatic before and afters, shall we?
I love that there’s a product that allows you to completely reimagine a space without even replacing your floors.
This project is perfect for beginners who aren’t quite ready to fully renovate a bathroom and tile a bathroom floor or those of us that want to save money and do a budget-friendly makeover.
Do you have ugly floors in your house? What room would you try this tile floor paint?
Let us know in the comments below!

How To Paint Tile Floors
Materials
Tools
- Paint trays
- Angled paint brush
- 4 inch paint roller
- 3/8" nap roller cover (2) - for base coats
- 1/4" nap roller cover (1) - for top coat
- Dense foam roller (1) - for stenciling
- Tile floor stencil - I used 12 inch and got 2
- Paper plates or more paint trays
- Small artist paint brushes
Instructions
- Remove old caulk.
- Clean tile floors well with Krud Kutter.
- Test floors for adhesion.
- Apply base coat of bathroom tile paint.
- Add colored base coat.
- Stencil.
- Touch up stenciled floors.
- Add top coat of floor coating.
Notes
- Note about the supplies: If you need two colors for stenciling a tile floor, like I did, your best deal is to purchase a kit like this with the base colored coating + top coat + cleaner and then separately purchase the 2nd color individually.


Hi,
I tried this in my kitchen. I chose a light grey but it looks so white I think they might have send me the wrong one. I did not get great results. I left roller marks, especially in the front of the kitchen which is the most noticeable 🙁 I tried fixing it but it looks uneven and now the roller marks are not there but the top coat finish is not even. It looks shinier in some part, basically it looks bad 🙁 It was extremely hard working with this kit, 🙁 Did you use a semi gloss top finish? Do you have any tips to how to fix this?
Hi Lidia – so sorry you had troubles working with the kit. The color I used was called Smoke Gray and it is a very light neutral gray, but still has contrast when compared to the Ultra Pure White I used to stencil with (which had no tint). I didn’t have any roller marks at all. Did you use the right nap of roller as directed on the can (3/8″ for base coat & 1/4″ for top coat)? That can make a big difference. You should apply the base coat in a 4’x4′ section and maintain a wet edge while rolling. When using a small section like this you’ll avoid having the paint starting to dry before you go over it again (which can cause the roller marks). Did you already apply Step 2 with the finish?? If not, you should be able to make sure you’re using the right nap roller and then reapply the base coat.
It mentions in the instructions ( https://www.rustoleum.com/~/media/DigitalEncyclopedia/Documents/RustoleumUSA/TDS/English/CBG/rohome/ROC-173_Rust-Oleum_Home_Floor_Coating_Kits_TDS_3.ashx ) that dried product can be removed with lacquer/thinner if you need to remove it and start over. 🙁
Also for the top coat finish- we used Matte, not Semi Gloss.
Hi.. your tiles are rectangular… the stencil had a square pattern. Did you just ignore the grout lines? I’m not seeing the true grout lines in the finished project though. Magic?!
Yes, there’s one or two spots where the grout lines of the stencil didn’t match the actual tile. I show it a little closer in the video if you want to see them. They aren’t very noticeable, so it’s part magic and part giving up perfectionism 🙂
Did you name the source of the stencils anywhere? I didn’t see it. I’ve got a room with tiles set on the diagonal, and think stencils like that might help make it less obvious.
Here’s a link to the stencils: https://www.etsy.com/listing/633646749/nola-tile-stencil-geometric-cement-tile