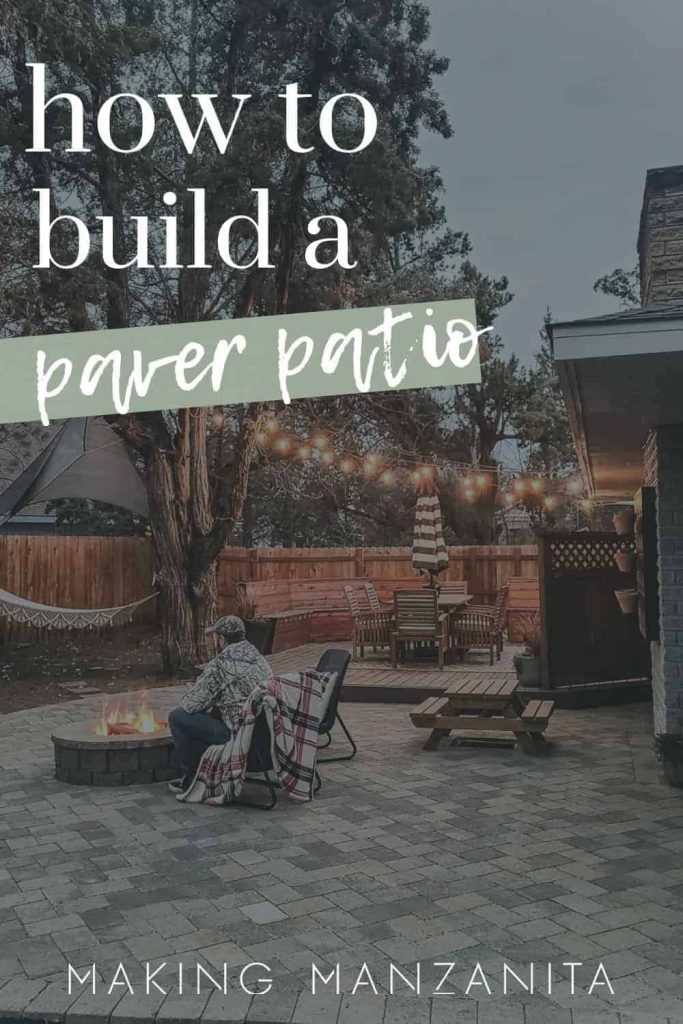
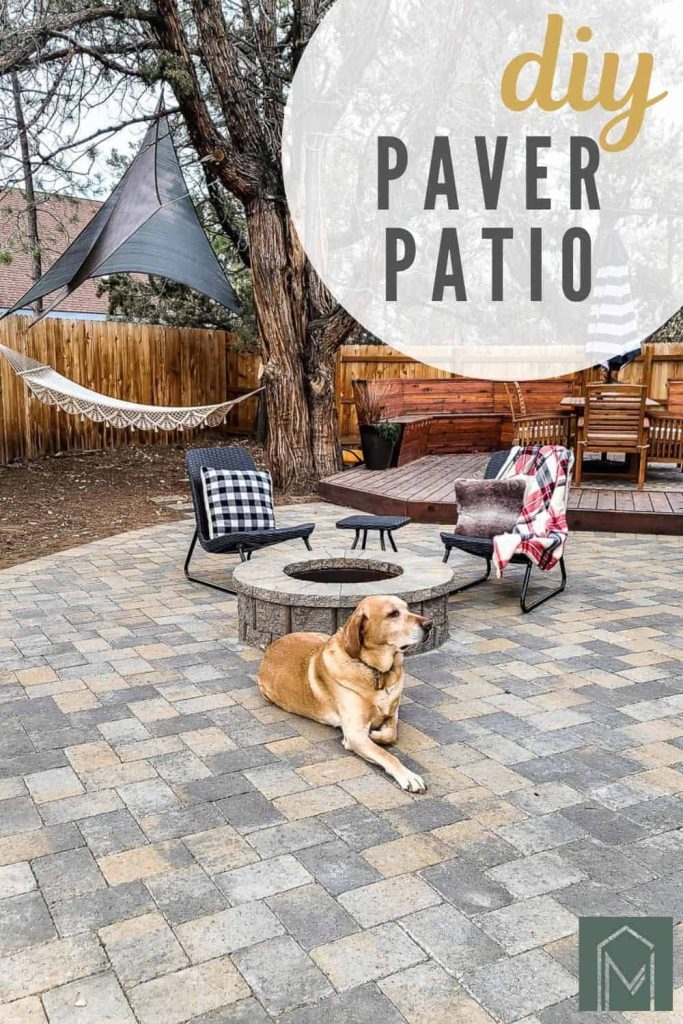
How To Build A Paver Patio with Fire Pit

Do you dream of a cozy fire pit in your backyard with a gorgeous paver patio for entertaining? We've got you covered with this step by step tutorial for how to build a paver patio with fire pit, which includes a video!
Thank you to Keystone Hardscapes for sponsoring this paver patio with fire pit tutorial! All opinions are entirely my own. This post also contains affiliate links, but nothing that I wouldn’t recommend wholeheartedly. Read my full disclosure here.
This paver patio project has been a LONG time comin’. We’ve been planning this big backyard makeover for over a year now. The paver patio with fire pit was a dream that we’ve had all along and I’m so glad we finally made it happen.
And this is a dream that I want to see YOU make happen too! That’s why we’re breaking this way down and spilling all of the details on how we built this paver patio in our backyard.
Hopefully after reading this step by step tutorial you’ll be armed and ready to tackle your backyard and add a paver patio DIY style.
If you have any questions, don’t hesitate to ask us in the comments below and we’ll do our best to answer them!
Do you want to see more of our big backyard makeover??
- Family Friendly Backyard Plan: Our Next Big Project (BEFORE Pictures)
- Large Chalkboard For Backyard With Live Roof
- Easy Garden Tool Storage In Backyard Shed
- DIY Build for Outdoor Vertical Garden Pots (With Free Plans)
- Mulch for Playground: Why We Chose Rubber Play Bark
- How to Plant Grass Seed
- How To Create A Cozy Patio
- How To Build A Paver Patio with Fire Pit
- How To Build A Fire Pit With Pavers
- Our Backyard Makeover Before and After Pictures
- How to Build a Wood Fence In Your Backyard
- How To Make a Wooden Gate for Your Fence
- How To Lay Deck Boards (and hide the screws!)
Before Pictures
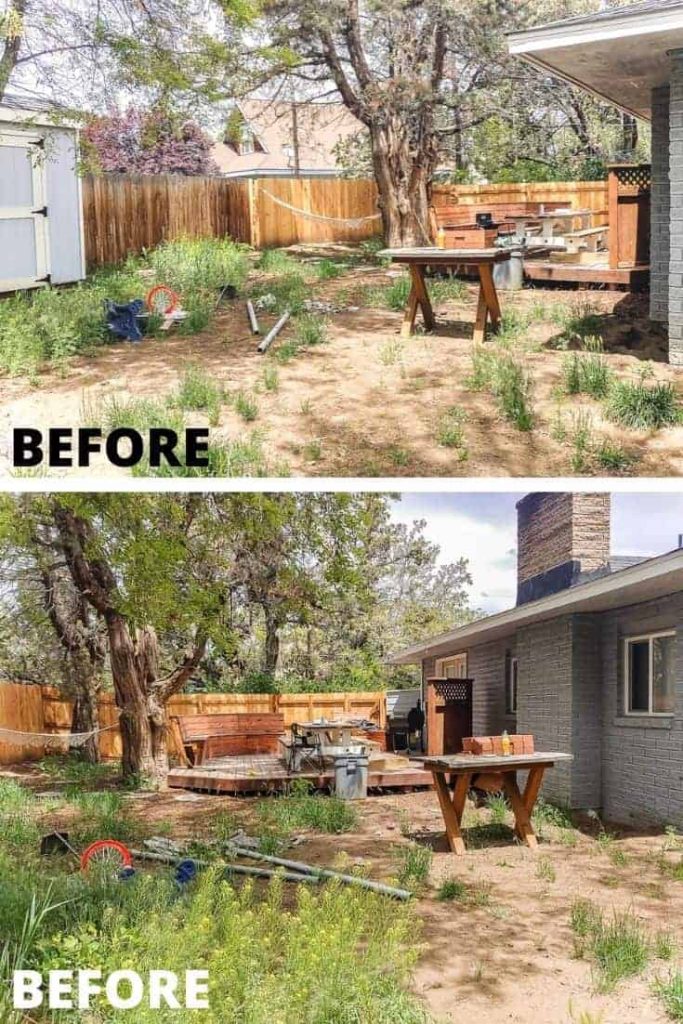
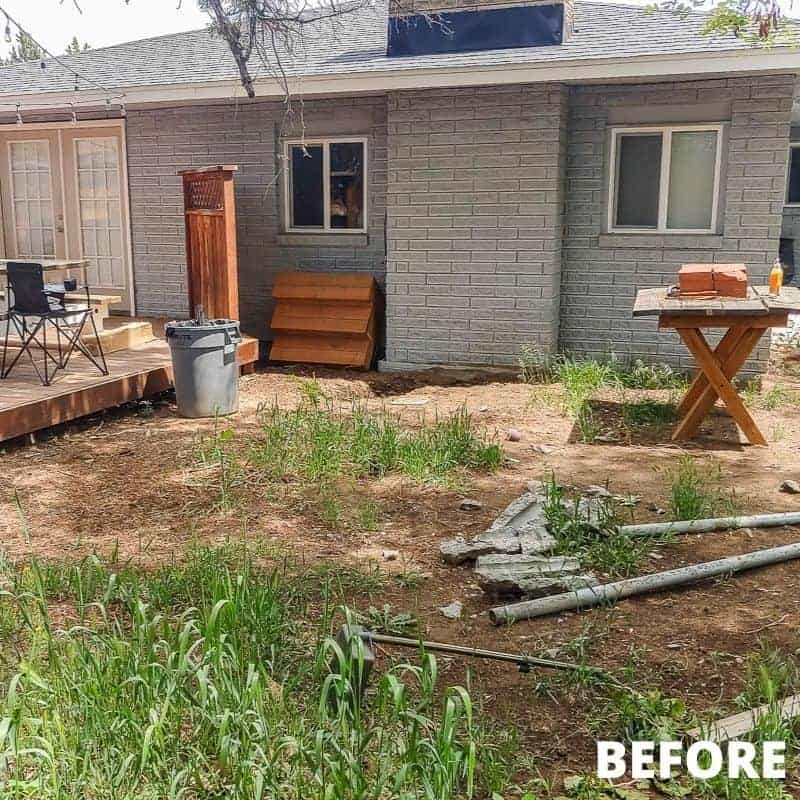
I know…I know…I KNOW! I hope you truly understand how much I love you guys after I’m here baring my soul with this hideous before pictures. These were last summer (before we started anything on our backyard makeover, of course!)
Paver Patio video tutorial
We wrapped up the entire process in YouTube video because some things are just easier to learn in video format, right?
If you love DIY videos, be sure to subscribe to YouTube channel here so you don’t miss the next one!
Paver Patio: Step-by-Step Tutorial
Supplies needed:
- Vintage stone “tumbled” 6×9 pavers in Victorian Blend color
- Retaining wall block
- Round fire pit kit with insert
- Mini track loader – rented from tool equipment shop
- Plate compactor – rented from tool equipment shop
- Level
- Line level
- String
- Yard stakes
- Dead blow hammer
- Landscape adhesive
- 3/4″ minus gravel
- Paver base sand
- Play sand (for on top of pavers)
- Wet/dry diamond blade
- Tile saw
- Mason chisel
- Push broom
- Paver sealer
Step 1. Level ground and dig out to desired depth.
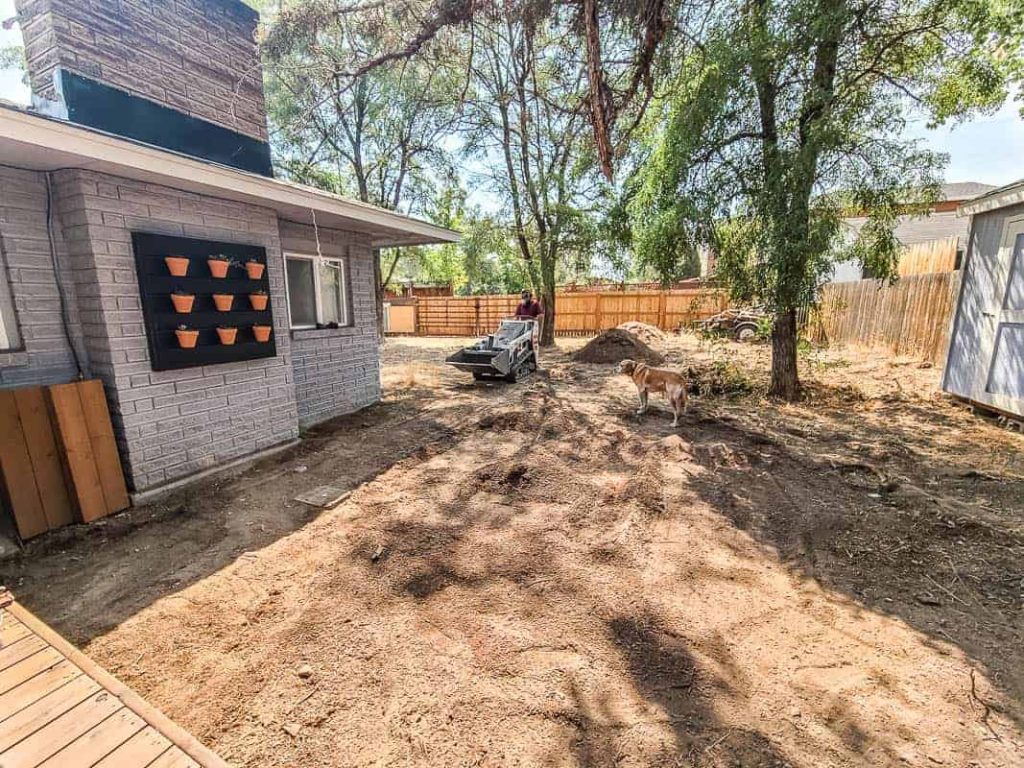
To get a great foundation for your paver patio, you’ll need a nice, flat surface. This is crucial for the success of your paver patio!
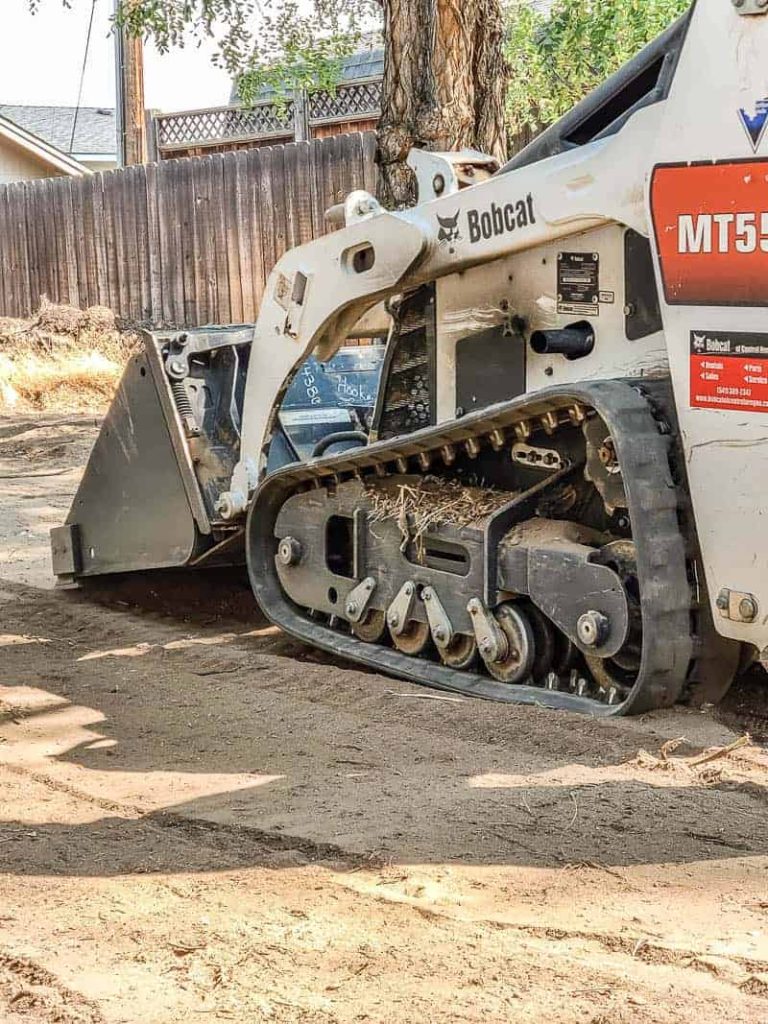
We rented a Mini Track Loader from a local tool rental company to level out the yard and move dirt. We used this to level out our entire backyard (which we also tackled this fall), but even if we were just doing the paver patio, we would still rent this because it really makes the hard job of moving dirt and leveling a breeze.
While you have the the track loader rented, dig the area down the dirt to the desired depth. Be sure to account for gravel layer, base sand layer and your paver height when figuring your final patio height. For reference, we did 4.5″ of gravel and 1 inch of paver base sand underneath our pavers.
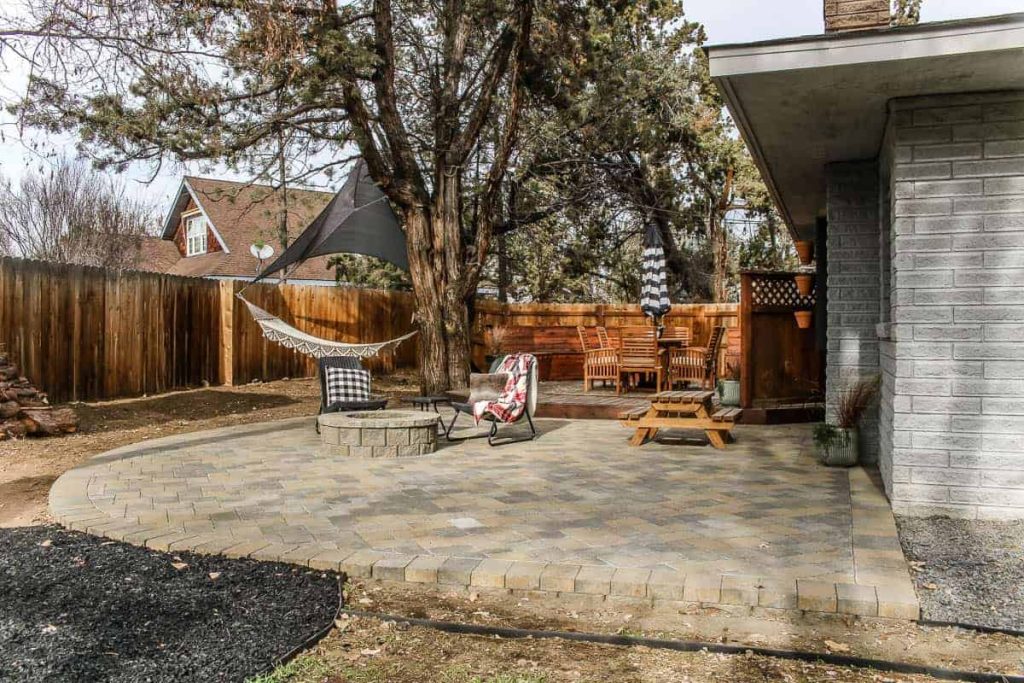
We designed our paver patio to be a raised patio, mean that there is a small step up to the paver patio.
Here’s why we decided to go with a raised patio:
- We wanted the paver patio to meet up with our wood deck, which was already raised pretty far off the ground.
- We didn’t have to dig out the ground as far.
Step 2. Set up your slope.
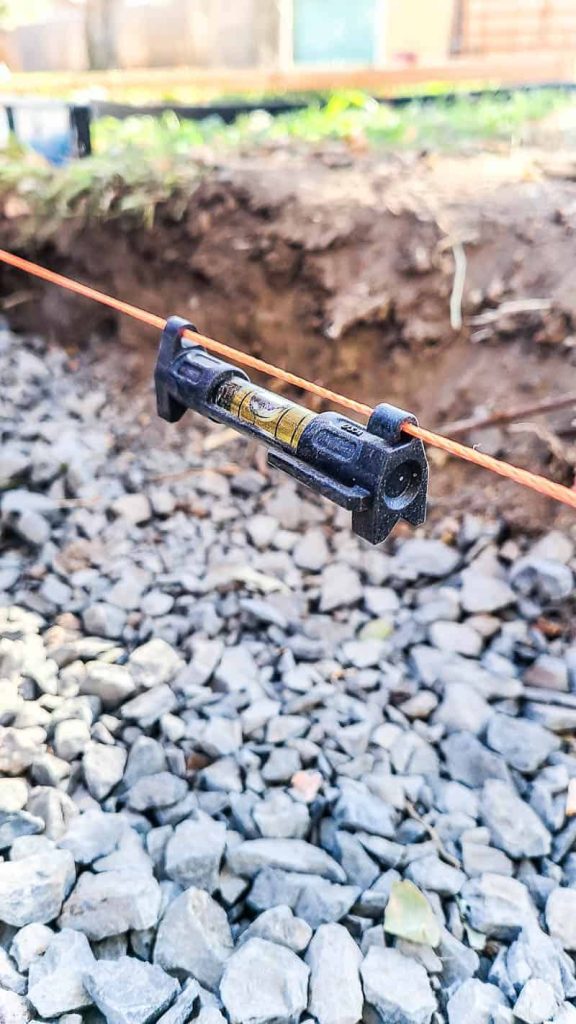
You have to be sure you think about draining anytime you are installing a paver patio. We sloped ours away from the house at a 1/4″ per foot.
To achieve the proper slope start by driving in stakes at opposite ends of your patio. Run a string line at your finished patio height and attach a string level to your string. Adjust the string on the stakes until you achieve the 1/4″ bubble drop in your string level. This will insure that your patio will drain away from your house.
Step 3. Start with edge.
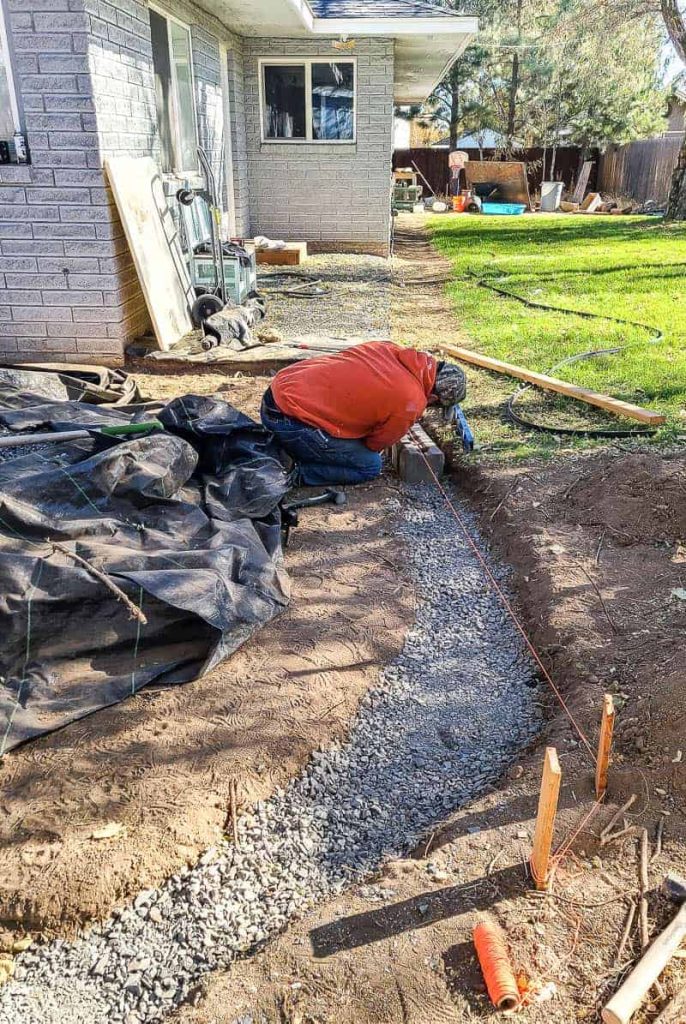
Since we were doing a raised patio, we used retaining wall blocks installed in a trench around the perimeter of the paver patio area.
If you are building a raised paver patio, dig down a trench. for your retaining wall pavers and fill the trench with 3/4″ minus (state spec) gravel and tamp down.
Note: if you are installing a retaining wall you’ll want to repeat the string level step above and create the 1/4″ bubble slope in your retaining wall.
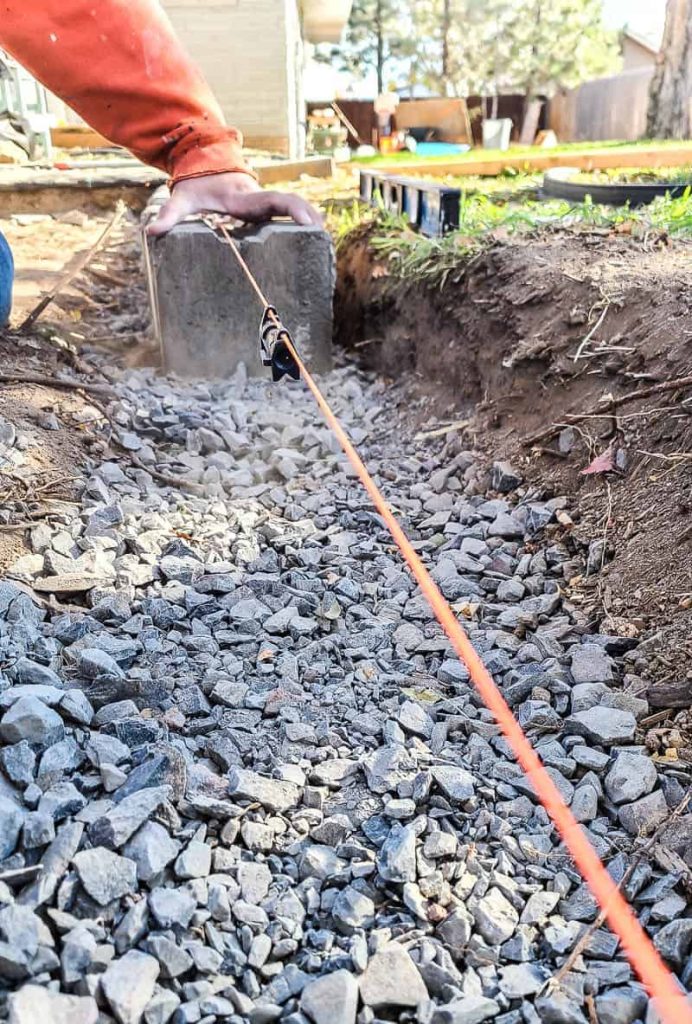
Place your retaining wall blocks down on top of the gravel and ensure that it lines up with your string line as you go (to make sure you’re set up correctly for drainage). Hammer into place with a dead blow hammer. Fill the inner core with more gravel.
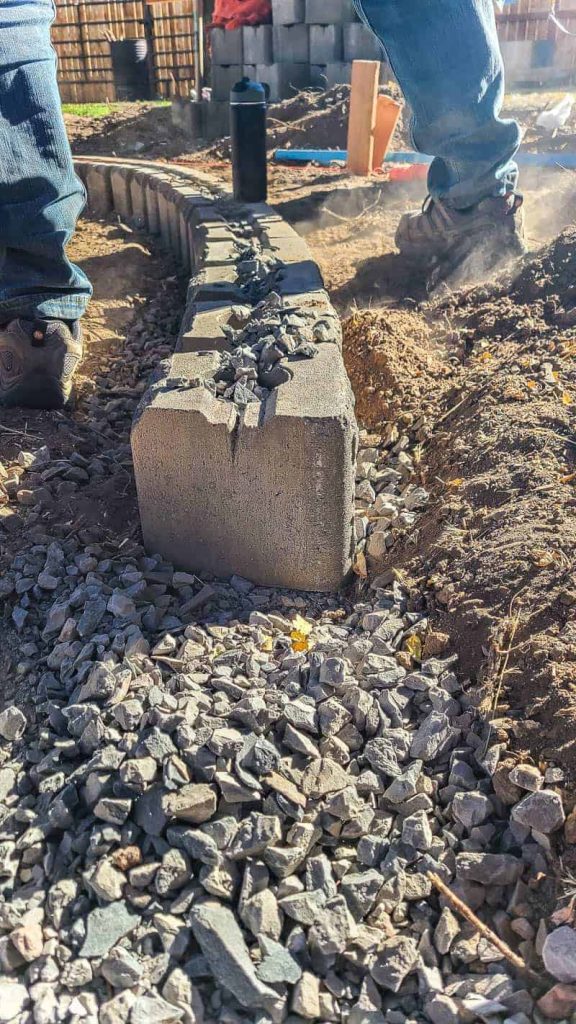
On the outer edge of the trench, back fill with more gravel and dirt.
Step 4. Lay landscape fabric and gravel base and compact.
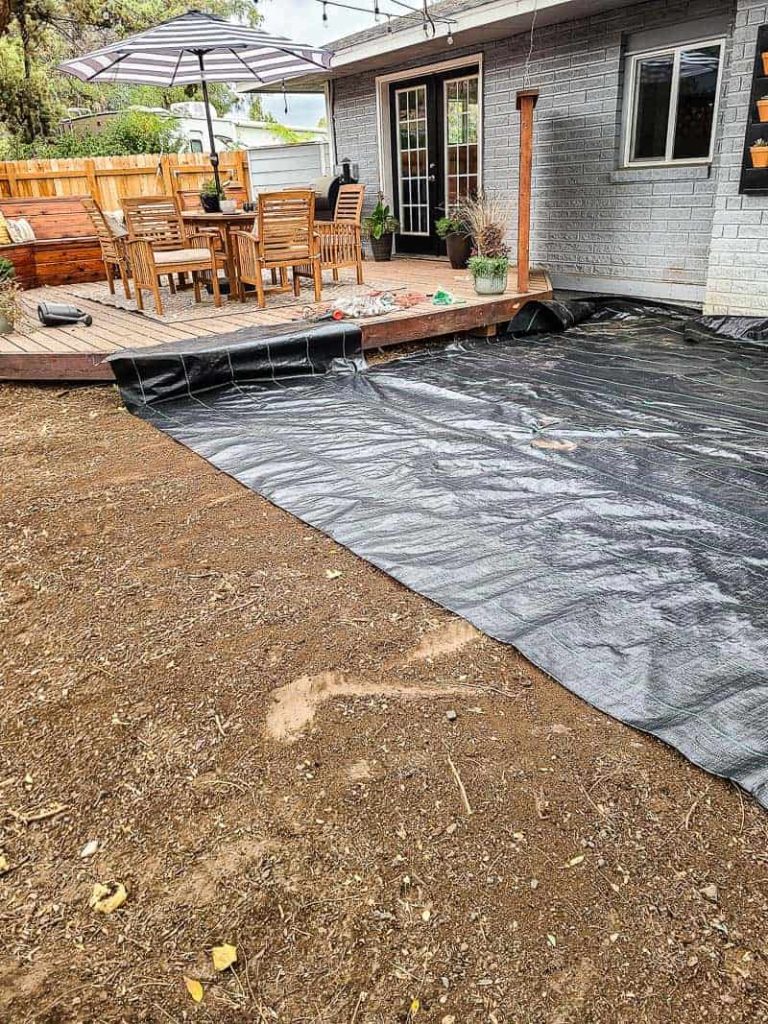
Next, make sure the dirt inside the trenched area is level and then put down landscape fabric.
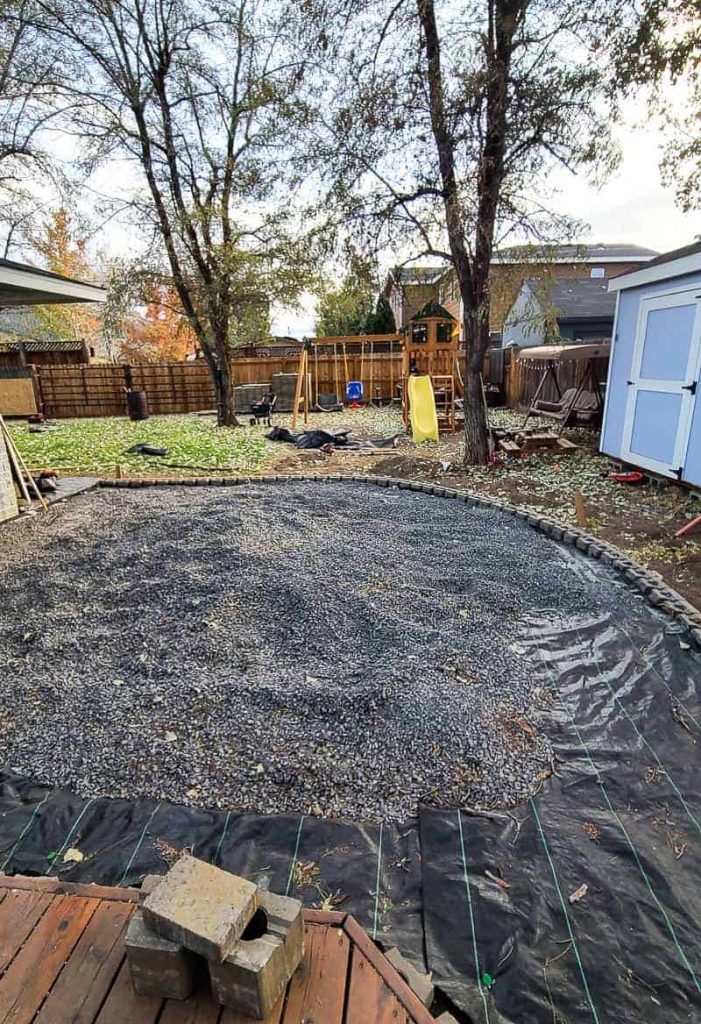
Then bring in your 3/4″ minus gravel and spread evenly. We did 4 1/2 inches of gravel base. Once this base is compacted it ended up around 4 inches.
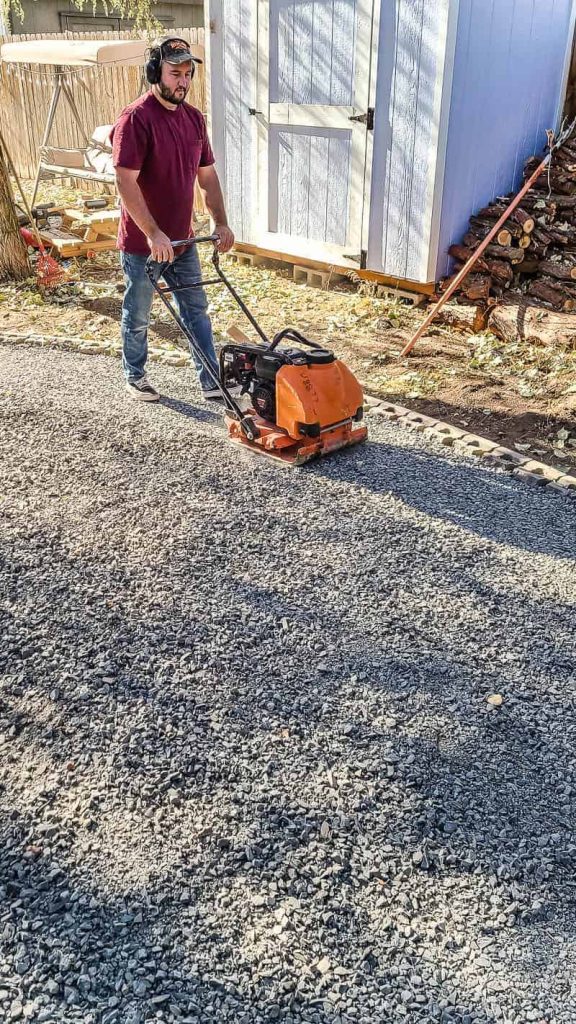
Once you have the gravel spread evenly to the retaining wall, use a Plate Compactor to press the gravel together. You can rent this at a local tool/equipment rental shop.
If your paver patio is small, you could get away with tamping the gravel by hand….but it’s not fun and this was well worth the rental fee.
It is best to compact in a circular fashion and compact your entire gravel base at least 2 to 3 times. This makes sure that the gravel is completely compact and adds life to your paver patio.
When using the plate compactor, you should compact in 4″ increments if you plan on having a gravel bed more than 6″. You lose the ability to compact lower layers when you go over 6″.
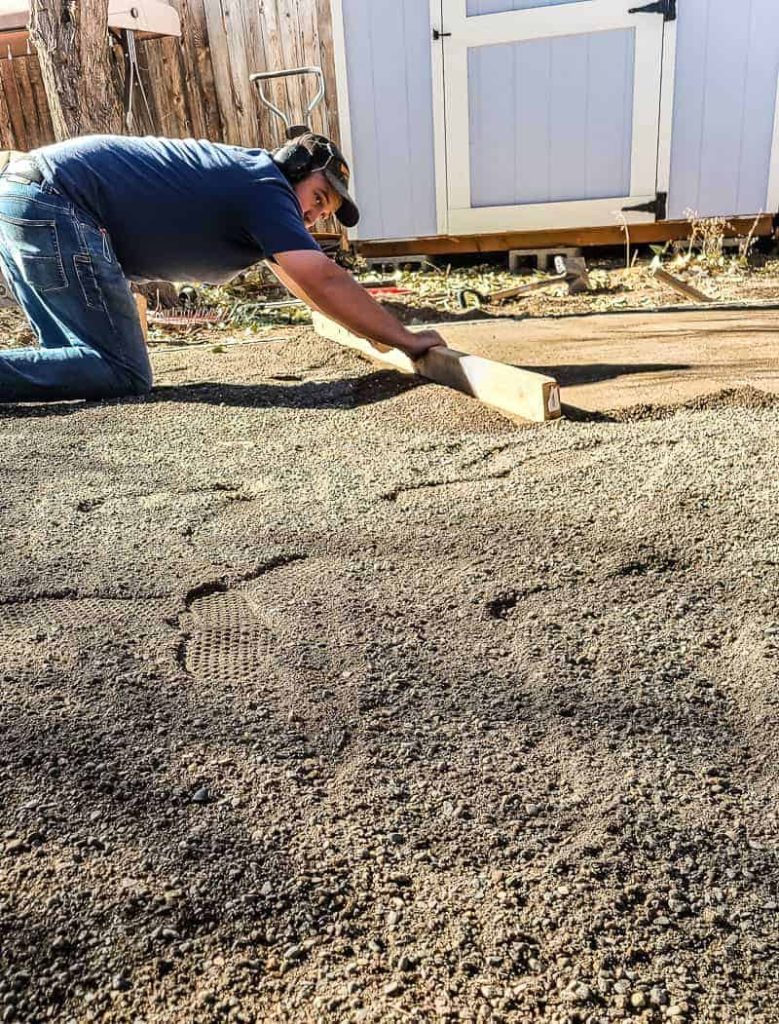
Step 5. Lay paver base sand.
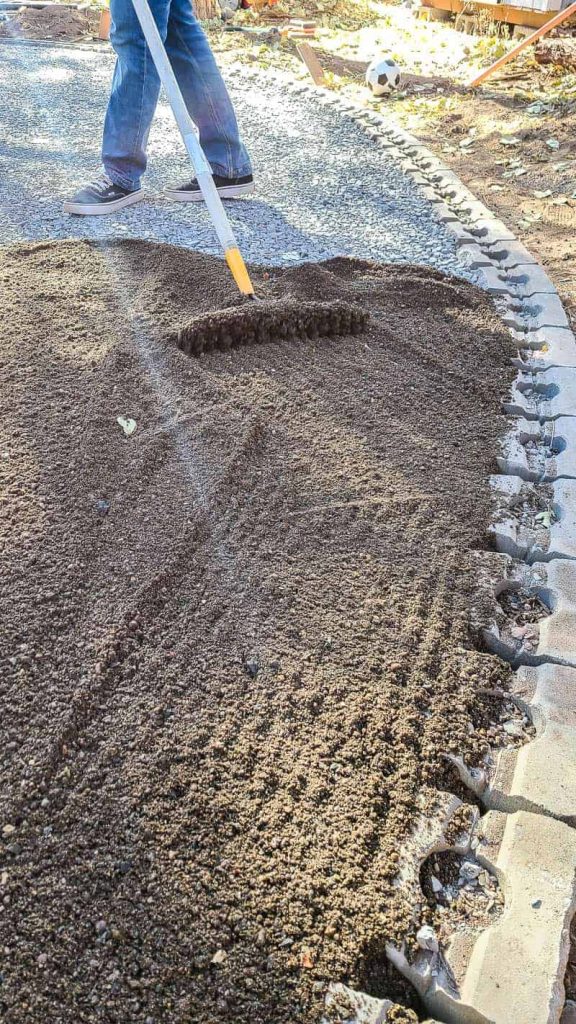
After your gravel bed is compacted, it is time to bring in your sand layer. We added 1 inch of paver base sand.
Also fill in the remaining spaces in the core of the retaining wall blocks on the edge with sand.
Same as we did with the gravel spread evenly spread evenly with a sturdy landscape rake.
To get things nice and flat, grab a 2×4 and start leveling your base layer and be sure to maintain a proper slope for drainage. You do not want to compact the base sand layer. If the sand layer is compacted it will not hold your bricks in place when you tamp them down.
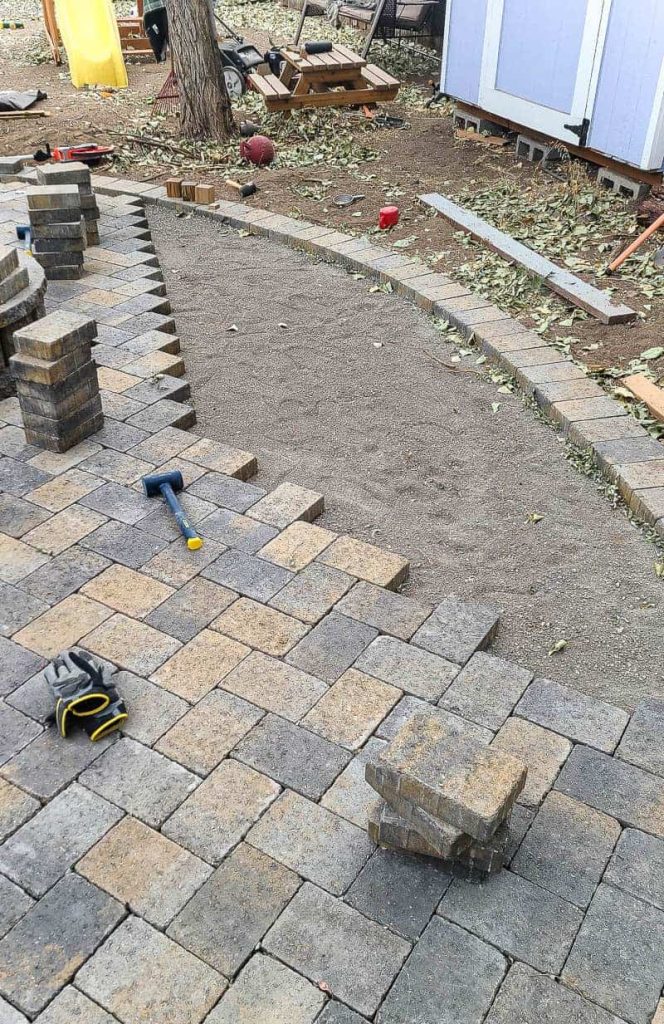
Step 6. Add pavers for edging on retaining wall block.
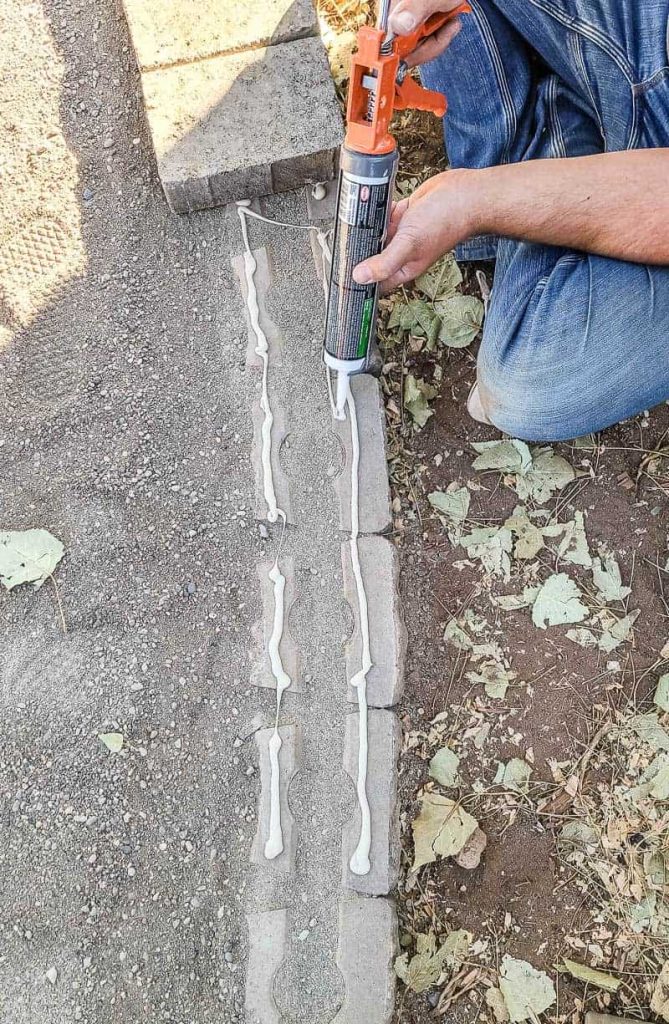
Next start gluing down your paver border to your retaining wall blocks with landscape adhesive.
If you have curves like we did, you can cut pavers to handle the angles. We opted just to put down the pavers whole and fill in the spaces between each paver.
Step 7. Add fire pit.
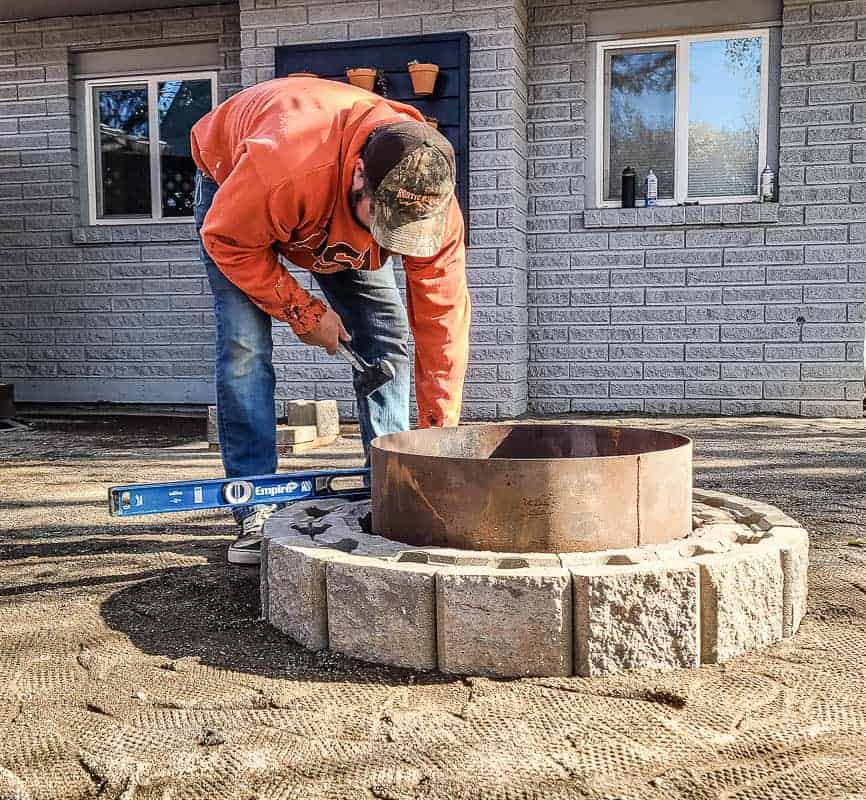
If you’re adding a fire pit to your paver patio, you’ll want to add that now. We’re putting together a whole separate tutorial on how to do this, so be sure to check that out if you’re planning to add a fire pit.
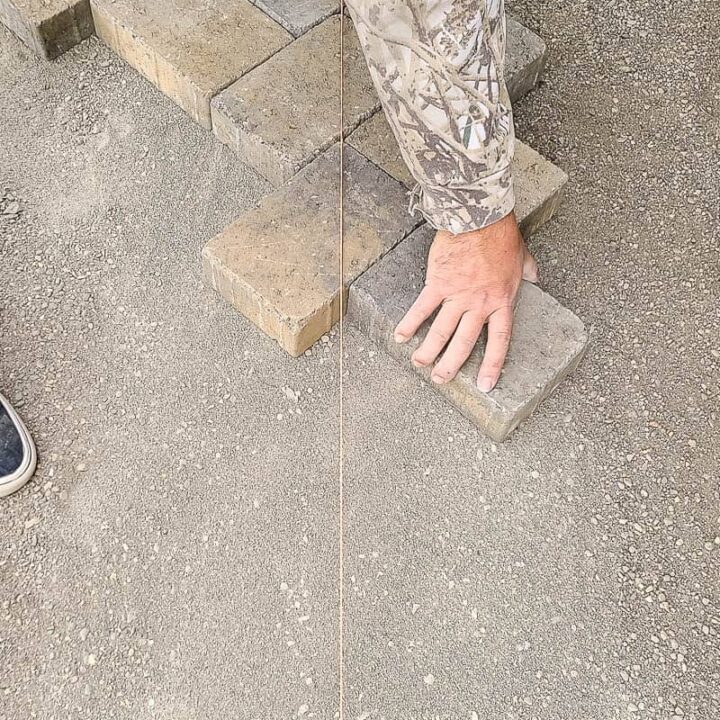
Step 8. Lay pavers.
Next its time to decide where to start laying your pavers. We started close to the top of our slope to ensure we have a good runoff for drainage purposes.
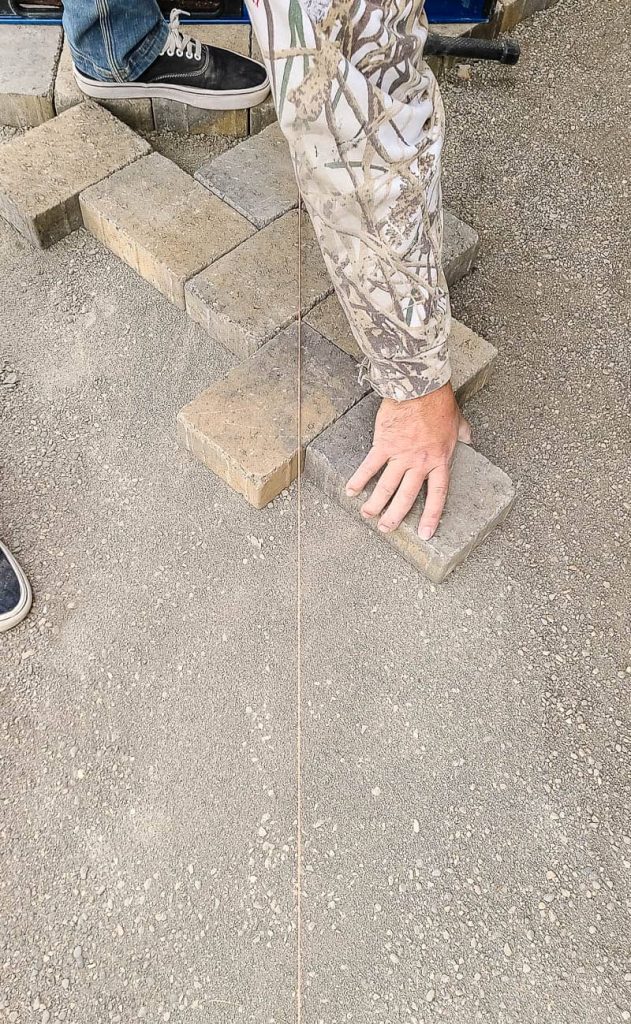
When you are ready to start laying your pattern put in a string line that is squared off with your patio/house. This will ensure you lay your pattern straight.
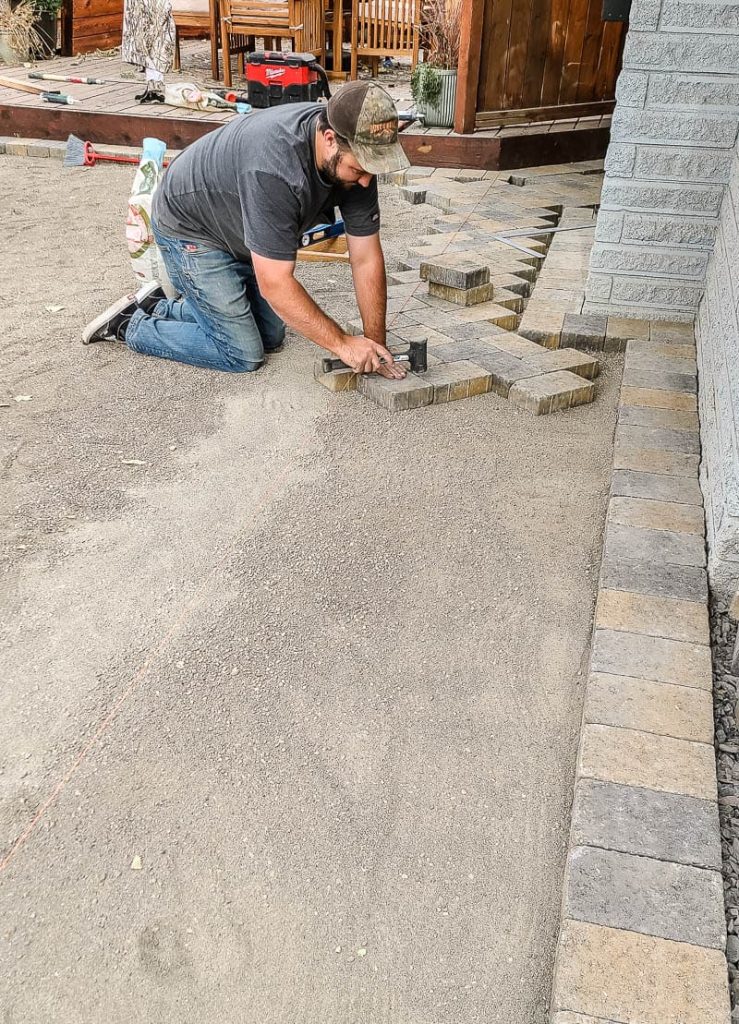
Add the first pavers along that string line and work off of that.
Try to lay your pavers row by row. This ensures that your pattern stays consistent throughout the patio and you’ll avoid running into issues getting the pavers to fit. If you have to go around objects take extra care to keep your pattern consistent as you work around them.
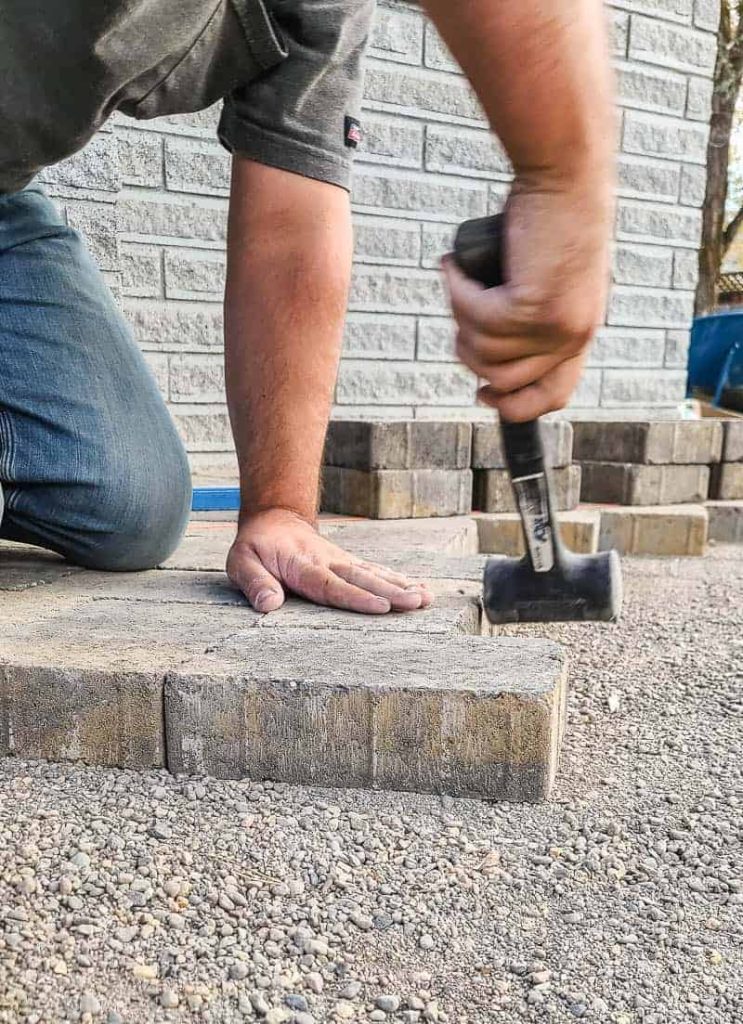
Gently use your hand to smooth the paver base sand before placing the paver into place. Then follow up with a few hits with a dead blow hammer to make sure the new paver stone is level with the surrounding bricks and a tight fit.
Step 9. Cut pavers for edges.
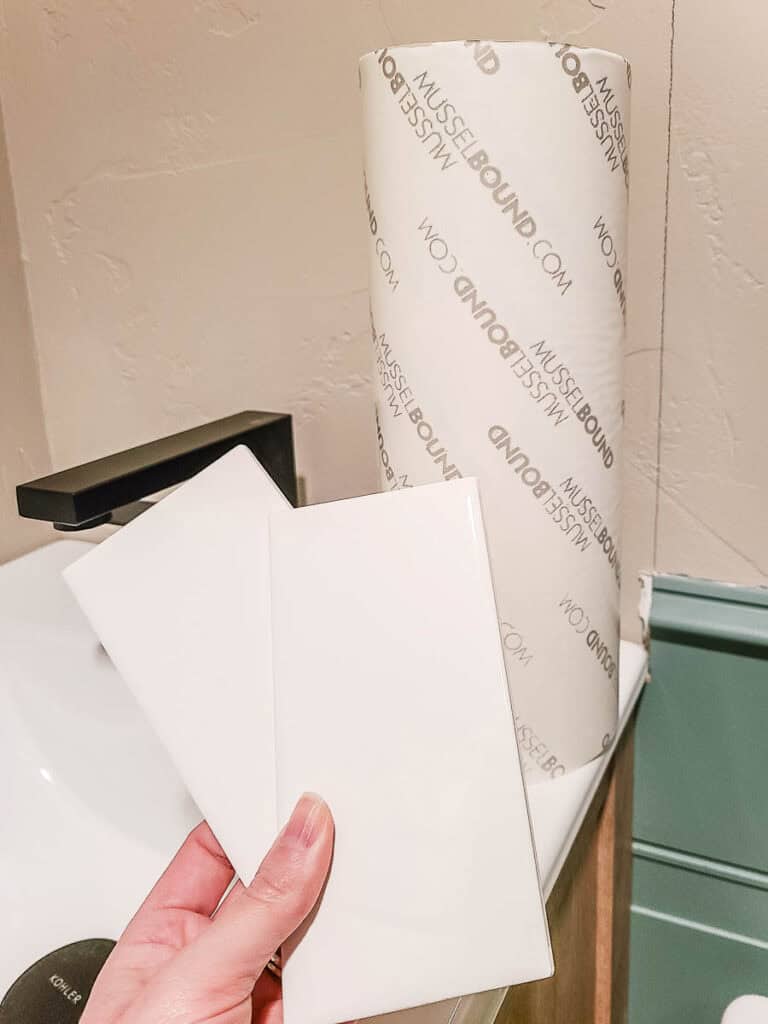
There are a lot of different ways to cut pavers to fit in with your edging. We aren’t going to go in to all of them here. We had a nice big tile saw from when we remodeled our bathroom (see more here).
We opted to get a 10″ wet/dry diamond blade and dry cut all of our pavers using the saw in the picture below.
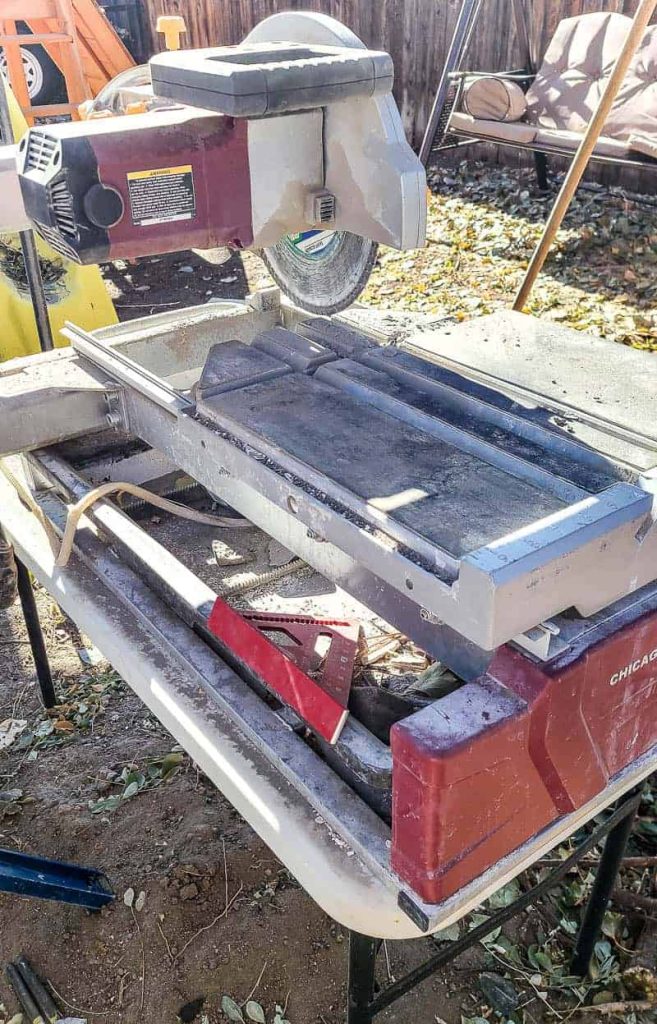
When you decide on how to cut your pavers the act of cutting is very simple. Just mark both side and cut your paver to fit.
Be sure to rough up your cut edge with a mason chisel if you are using tumbled stone like we did.
Place the cut pavers in one by one and tap into place with a dead blow hammer.
Step 10. Cover with paver sand.
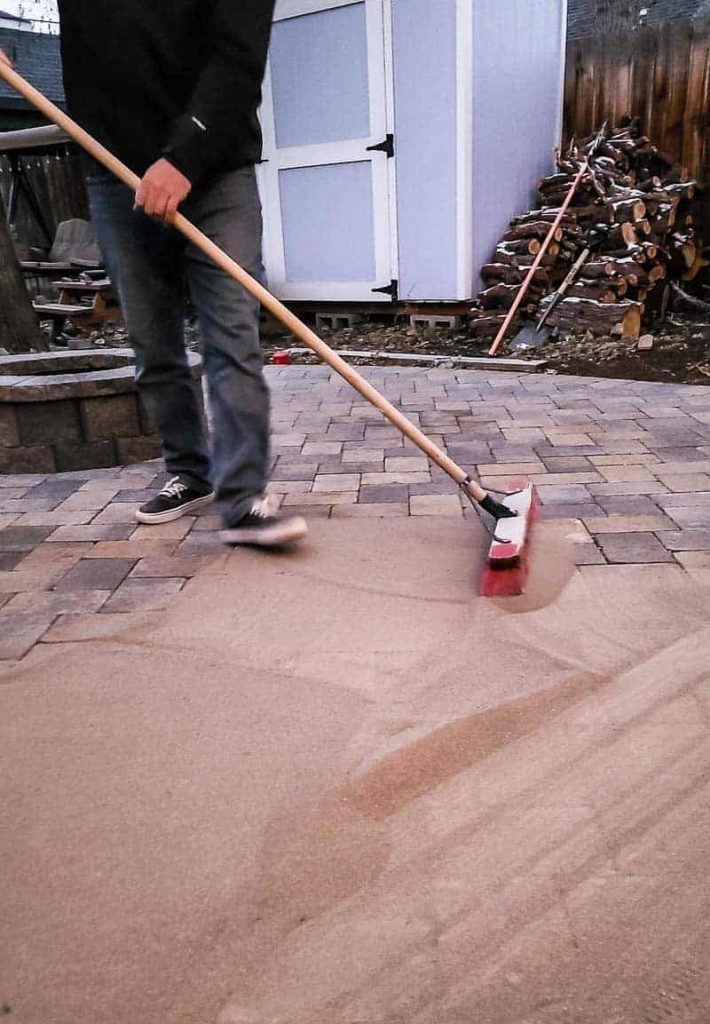
After you lay all your cut pavers and completely fill in your patio you get to start filling the spaces with paver sand. The best way to get this done is to pour the sand on the patio and use a push broom.
Try to push the sand in by pushing the sand and various angles.
Once you completely fill the cracks, remove the excess sand and lightly water the patio. Once that drys repeat the same steps 2-3 times to really pack in the sand.
And optional last step is to seal your patio to ensure the bricks color stays true longer. The weather is already too cold here to do that final step, but we’ll definitely be following up in the spring to get them sealed and plan to use this sealer.
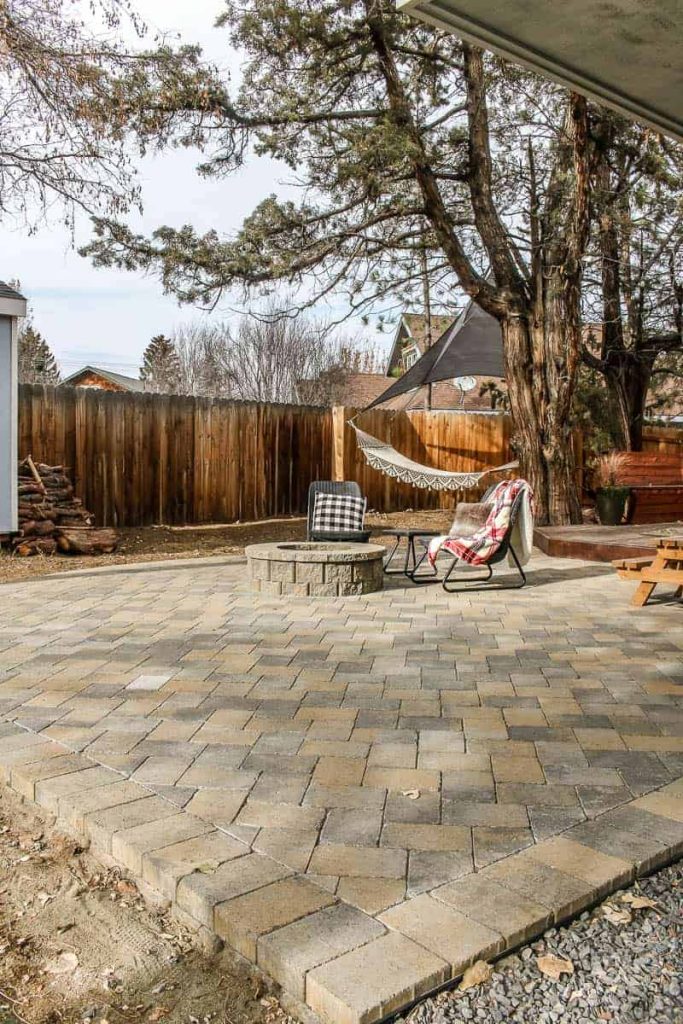
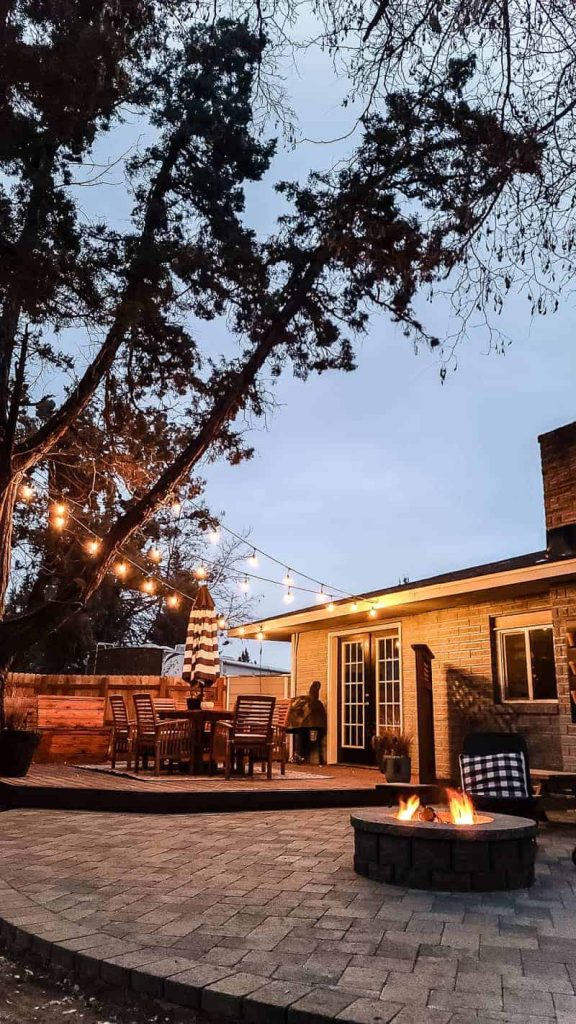
Are you ready to see the finished paver patio with fire pit?
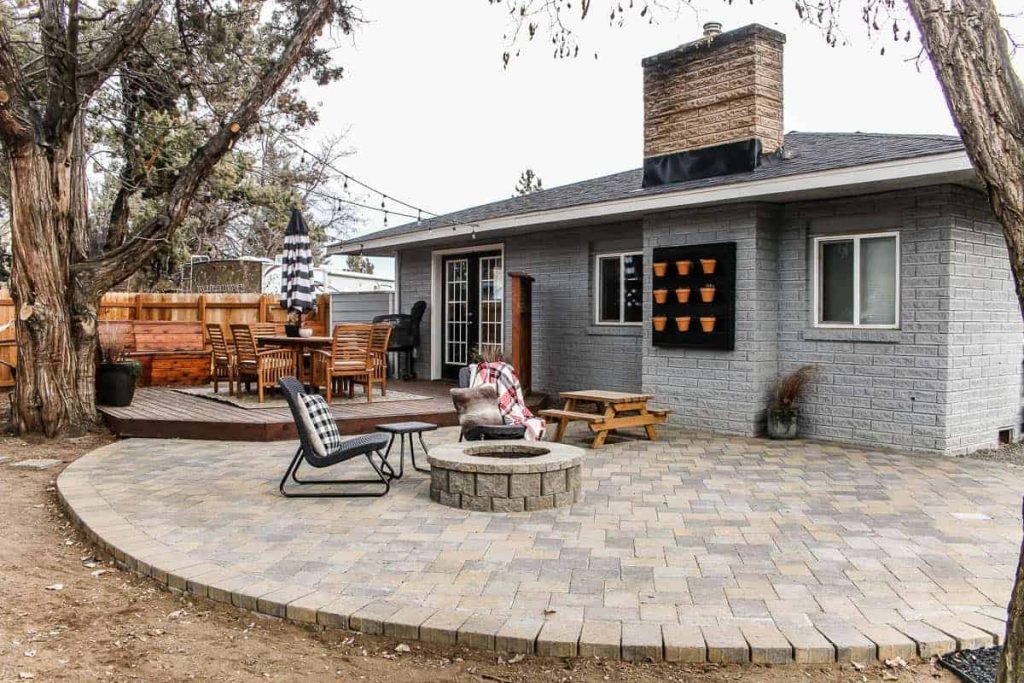

AH! It’s SO SO good, right ? !
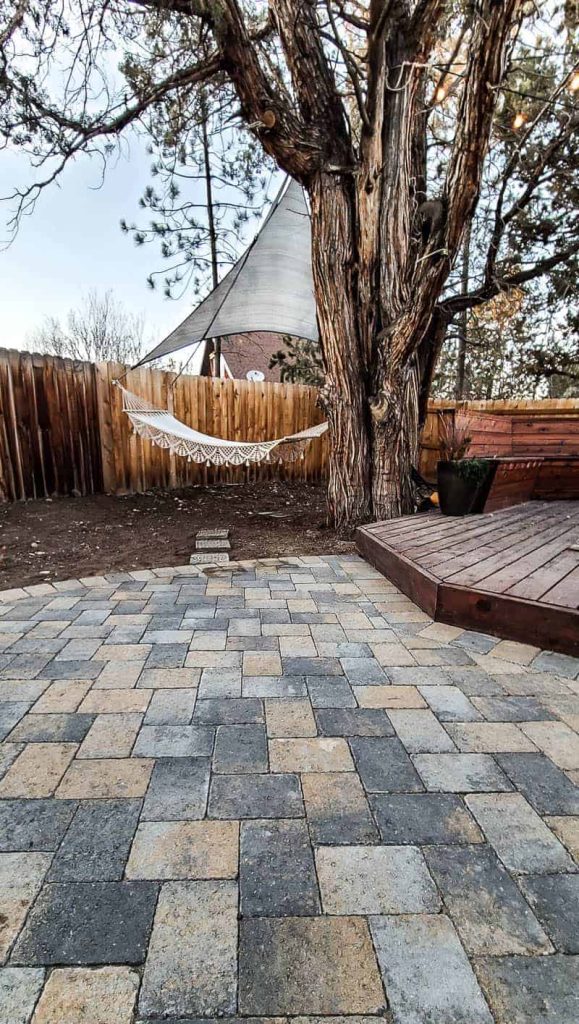
I absolutely love the stone that we used from Keystone Hardscapes. The variation in color is perfect and the tumbled finish really makes it look like the patio has been here forever!
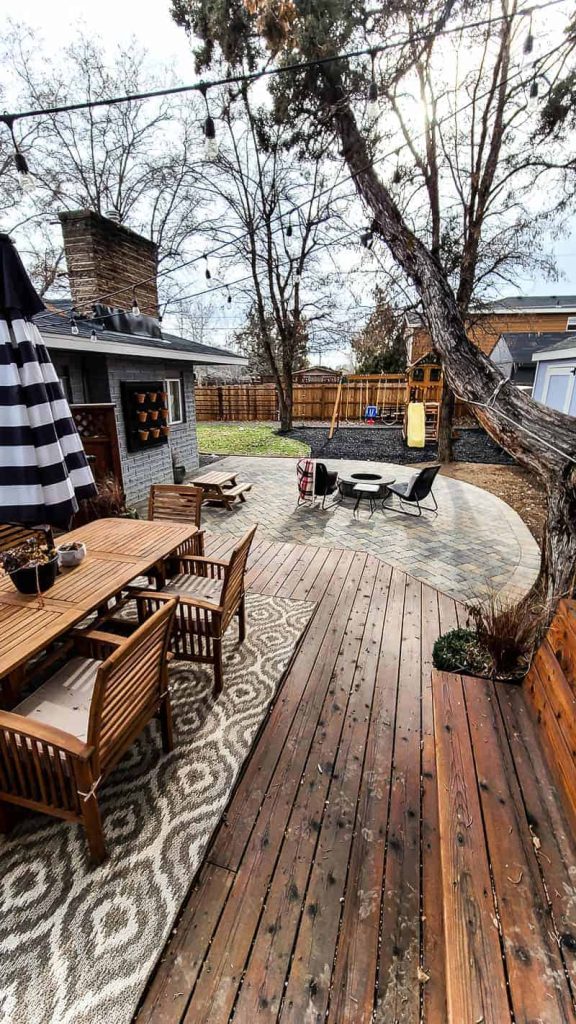
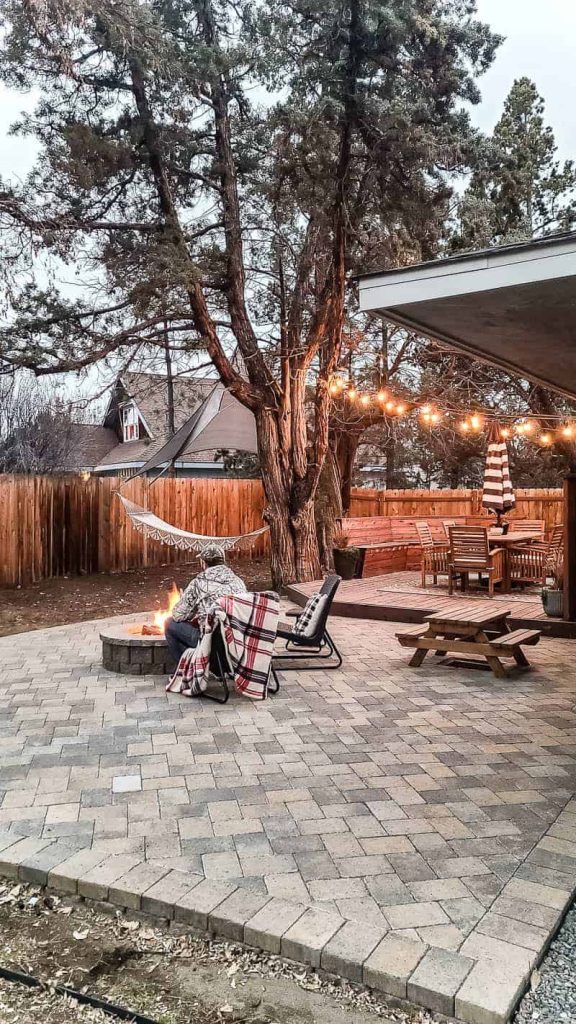
Here’s a picture that shows the whole side of the yard from the wood deck over the paver patio and fire pit and looking into the playset area.
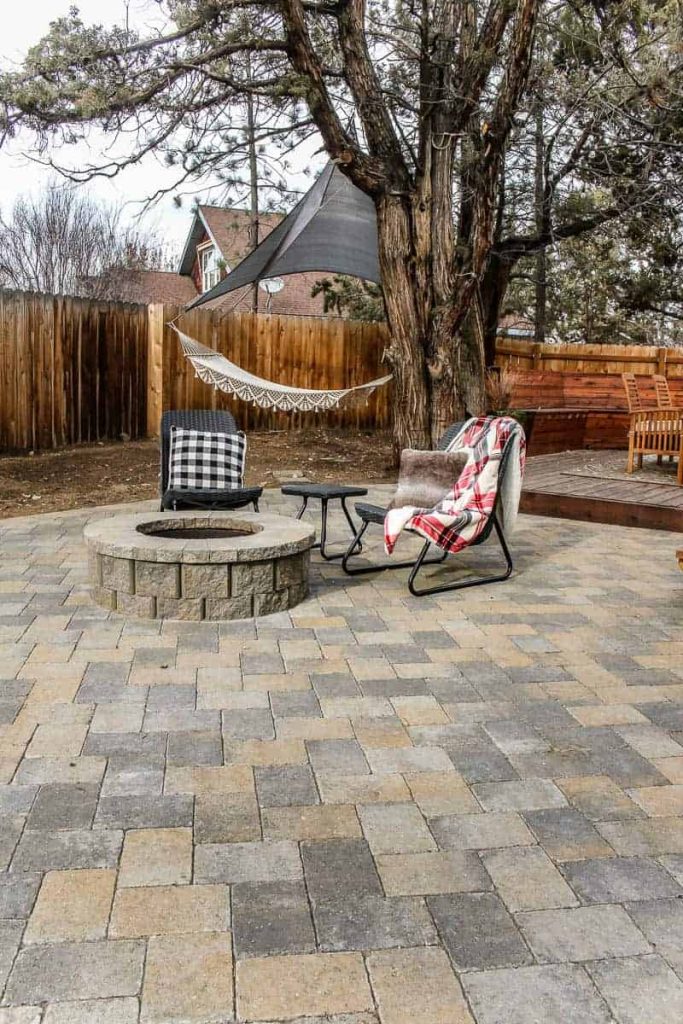
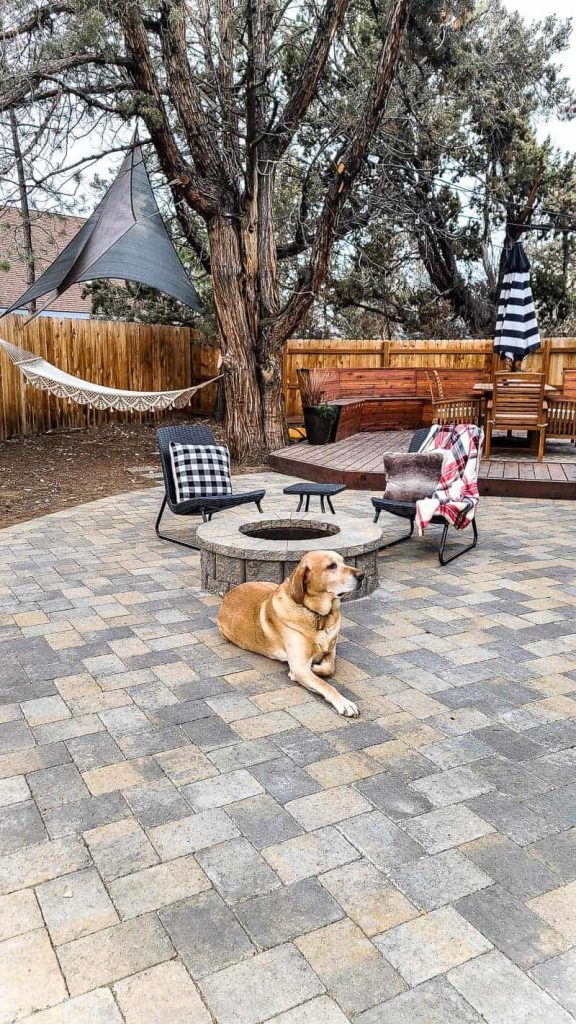
And now are you ready to see the fire pit roaring with pure coziness?!
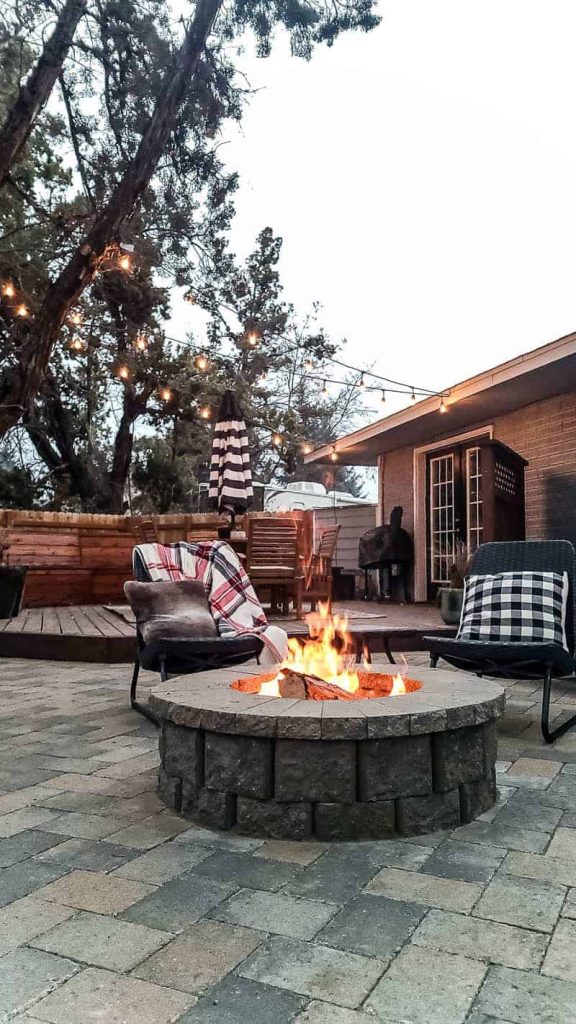
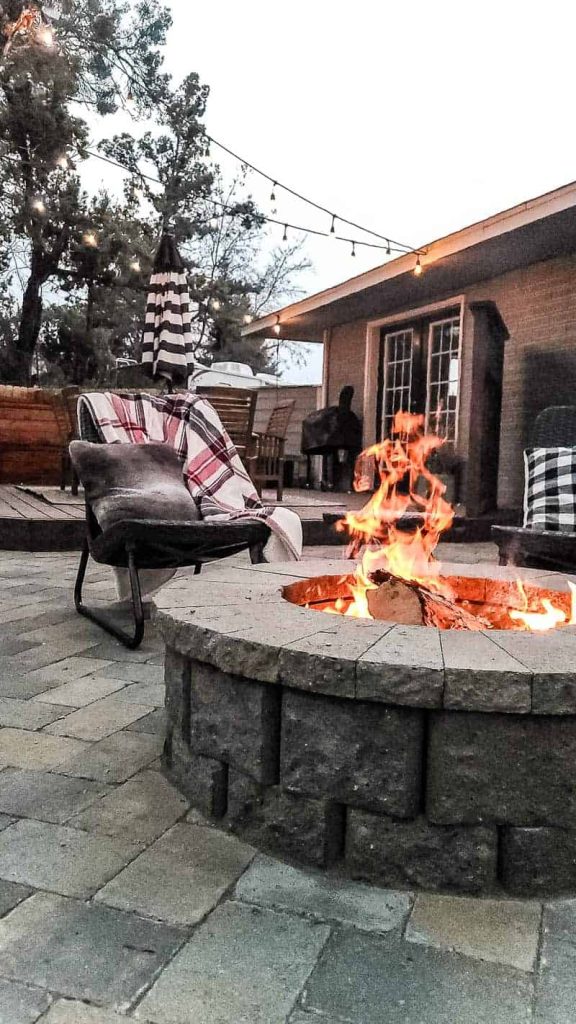
It’s perfection.
I can already envision the fun family nights we’re going to have out here complete with smores and cuddles.
And the best part of this whole tutorial has GOT to be these crazy jaw dropping before and afters…I’m shocked.
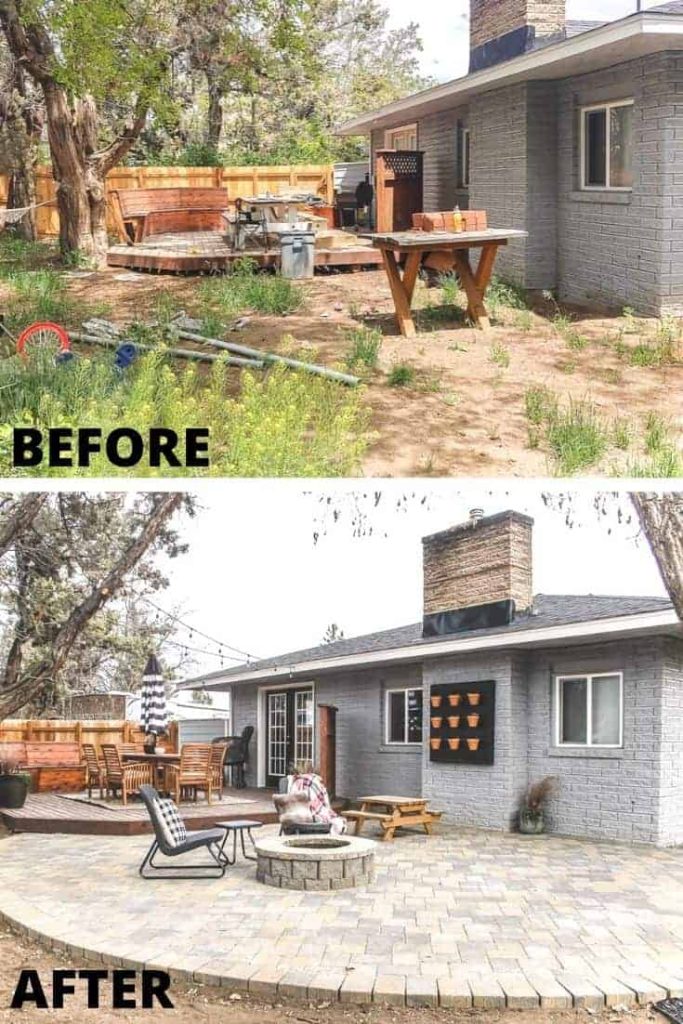
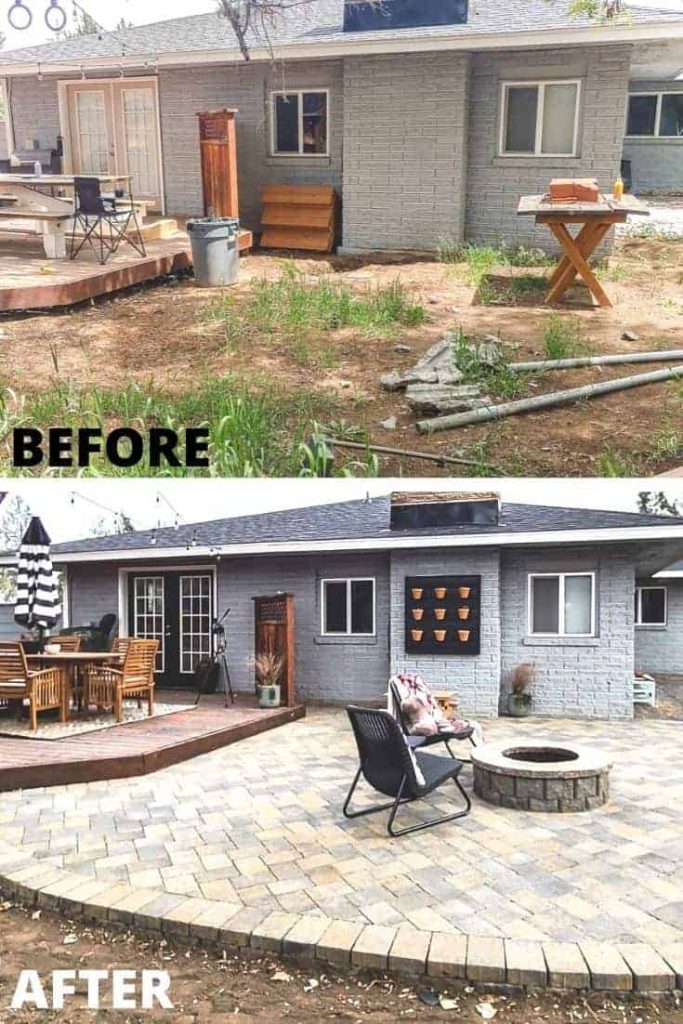
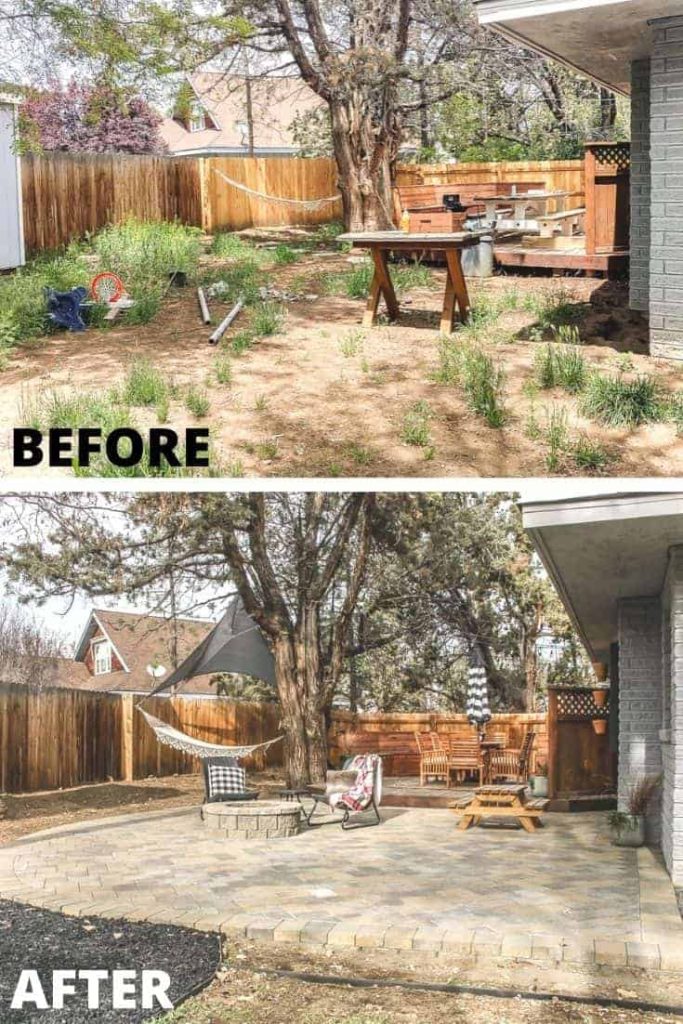
What a crazy transformation, right?!
Would you install a paver patio with fire pit in your backyard ?
Let us know in the comments below!
How To Build A Paver Patio with Fire Pit
Materials
- Vintage stone "tumbled" 6x9 pavers in Victorian Blend color
- Retaining wall block
- Round fire pit kit with insert
- Landscape adhesive
- 3/4" minus gravel
- Paver base sand
- Play sand (for on top of pavers)
- Paver sealer
Tools
- Mini track loader
- Plate compactor
- Level
- Line level
- String
- Yard stakes
- Dead blow hammer
- Wet/dry diamond blade
- Tile saw
- Mason chisel
- Push broom
Instructions
- Level ground and dig out to desired depth. Be sure to account for gravel layer, base sand layer and your paver height when figuring out your final patio height. For reference we did 4.5" inches of gravel and 1 inch of paver base sand underneath our pavers.
- Set up your slope with a string level so that you slow the water away from structures. We sloped ours 1/4" per foot.
- Start with your edge. Since we were doing a raised patio, we used retaining wall blocks arranged in a trench filled with 3/4" minus gravel around the perimeter of our patio area. Be sure your edge follows your slope line for drainage. Hammer block into place and fill inner core with gravel.
- Lay landscape fabric and gravel base inside patio area and compact it with a Plate Compactor. We did 4.5 inches of gravel bed.
- Lay paver base sand in an even layer of entire patio area. We did 1 inch. Level with a 2x4 and check your slope again for drainage.
- Add pavers for edging on retaining wall and secure with landscape adhesive.
- Add firepit if desired.
- Lay pavers in desired pattern. Add the pavers one row at a time. Use a dead blow hammer to make sure each paper is level with surrounding bricks and a tight fit. Continue laying pavers until entire middle section is done.
- Cut pavers as needed to fit around options and for edges. We used a tile saw with a 10" wet/dry diamond blade to cut down to size.
- Cover with paver sand.
- Seal with paver sealer if desired.


Absolutely love it!
Thanks Madeline!
Awesome job! Looks beautiful! I know how hard a job this is to do it right. Fabulous—enjoy your patio fire ? pit! I’m envious!
Thanks! Yes it was so much more than I thought it was going to be but we love it 🙂
Those before and after images are just amazing. I can only imagine the amount of time and effort spent to create that amazing patio and firepit pavers. I am a local paver myself, and I am in awe of this work. Kudos!