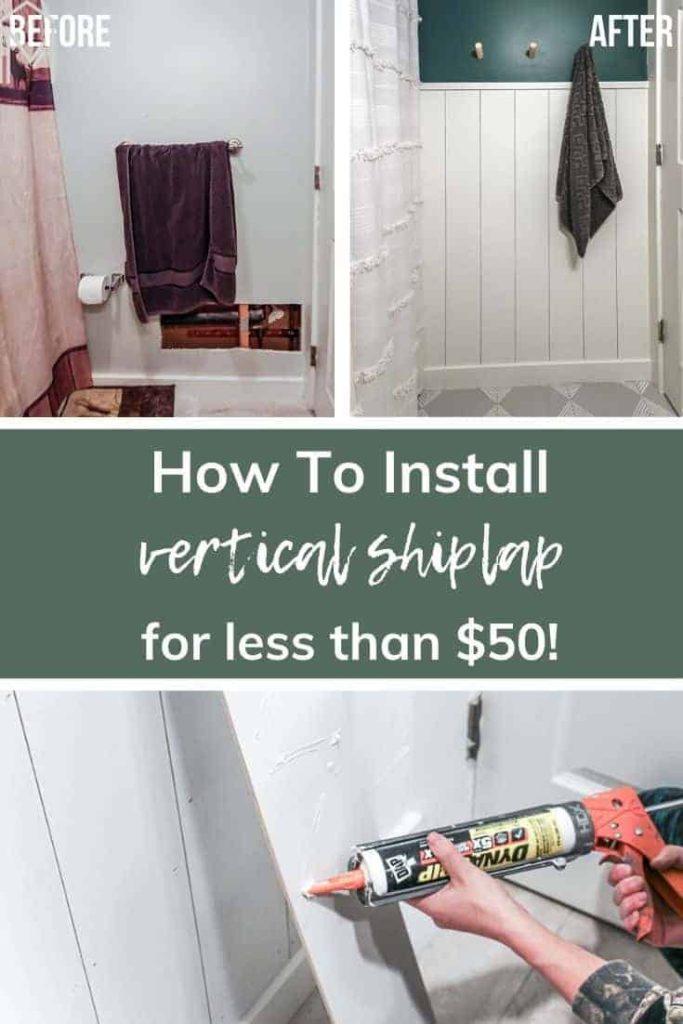
DIY Vertical Shiplap (Cheap & Easy)
If you are looking for a cheap and easy DIY project to instantly update your home, give DIY vertical shiplap a try! The modern look of the shiplap installed vertically works perfectly with the modern farmhouse home.
Thank you to DAP Products for sponsoring this DIY Vertical Shiplap project! All opinions are entirely my own. This post also contains affiliate links, but nothing that I wouldn’t recommend wholeheartedly. Read my full disclosure here.
There’s just something about shiplap! I love how it instantly upgrades a room and gives it so much character! I also love that it’s very easy & cheap to install (especially if you make your own faux shiplap). Whether you put it in the laundry room or the bathroom – it’s always a good idea.
I couldn’t wait to try my hand at faux shiplap again in our guest bathroom makeover, but this time I tried something new – VERTICAL SHIPLAP!
Table of Contents
- The Bathroom Wall Before Installing the Vertical Shiplap
- How To Install Vertical Shiplap – Video Tutorial
- Materials for vertical shiplap:
- Tools for vertical shiplap:
- How to Install a Vertical Shiplap Accent Wall
The Bathroom Wall Before Installing the Vertical Shiplap

Here’s the wall that we’re working with…warning: it’s pretty rough! Yes, there was a hole in it (from when we installed this farmhouse sink cabinet on the other side of the wall in our laundry room).
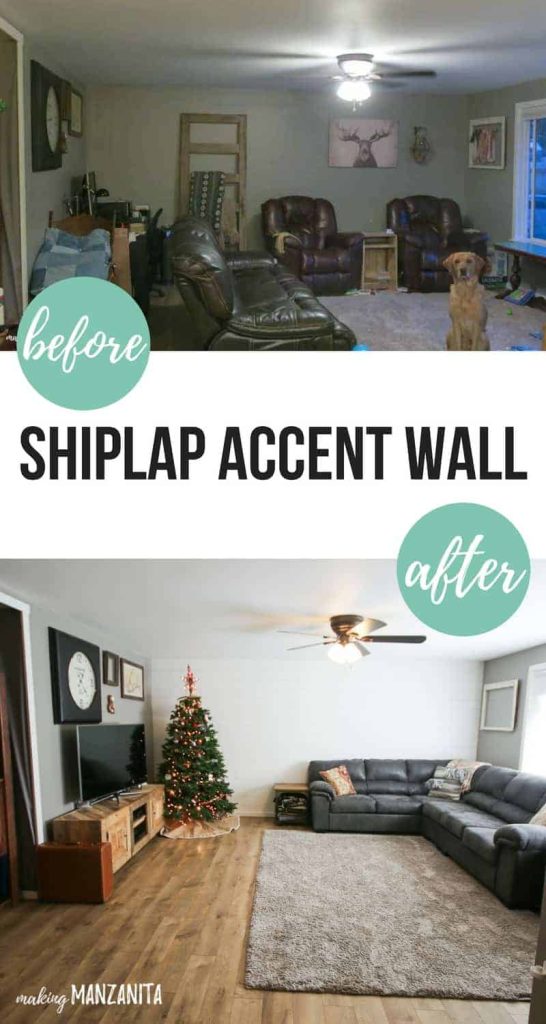
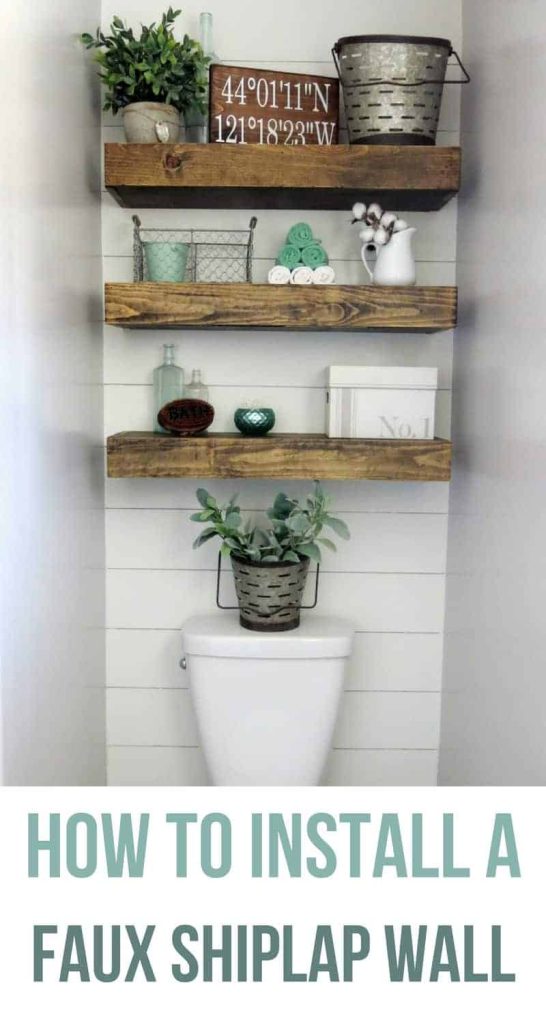
Now I know you guys LOVE shiplap walls because I’ve done two other shiplap wall tutorials and turns out they are consistently my top-trafficked blog posts!
My other shiplap tutorials:
(Click photo to see tutorial)
How To Install Vertical Shiplap – Video Tutorial
If you love DIY videos, don’t forget to subscribe to our YouTube channel!
Materials for vertical shiplap:
- 1/4″ Underlayment Plywood
- DAP DynaGrip Heavy Duty Max Construction Adhesive
- DAP Fast Dry Spackle
- Primer
- DAP Alex Flex Caulking
- Paint (learn more about Behr Snowy Pine paint color here)
- Casing trim for top edge
Tools for vertical shiplap:
- Table saw
- Miter saw
- Staple or brad nail gun – we used this
- Air compressor
- Caulk gun
- Nickels (yep, like the kind from your coin purse!)
- Putty knife
- Sanding block
- Paint brush
- 4 inch roller cover & frame
- Paint tray
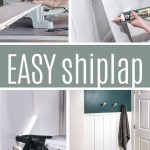
How to Install a Vertical Shiplap Accent Wall
Step 1. Prep the wall.
The wall on which you are installing the vertical shiplap should be clean and flat. If there are holes, patch them and fill them with spackle.
You don’t necessarily need to worry about matching texture, but holes should be filled.
If you’re taking a room down to the studs or working with new construction, I would NOT recommend installing this type of faux 1/4″ shiplap directly to studs. You should have drywall behind the shiplap.
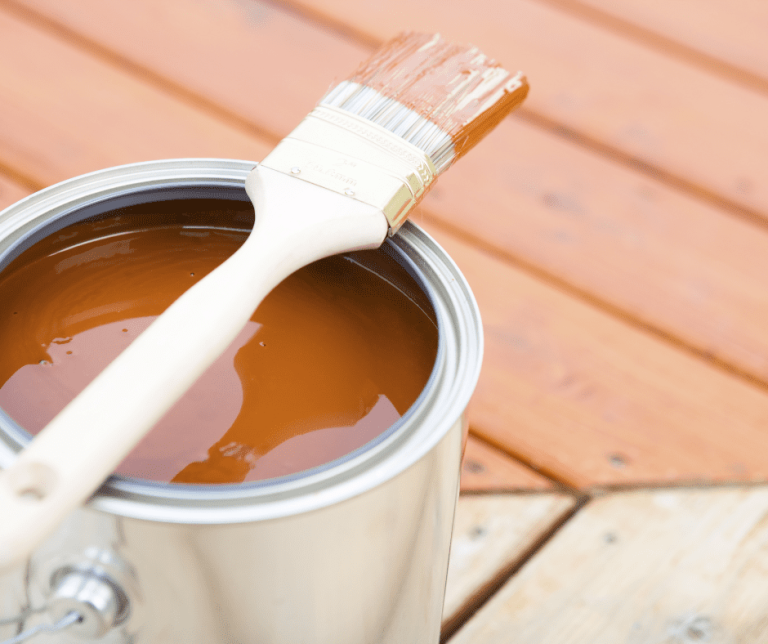
Step 2. Prime or paint the wall.
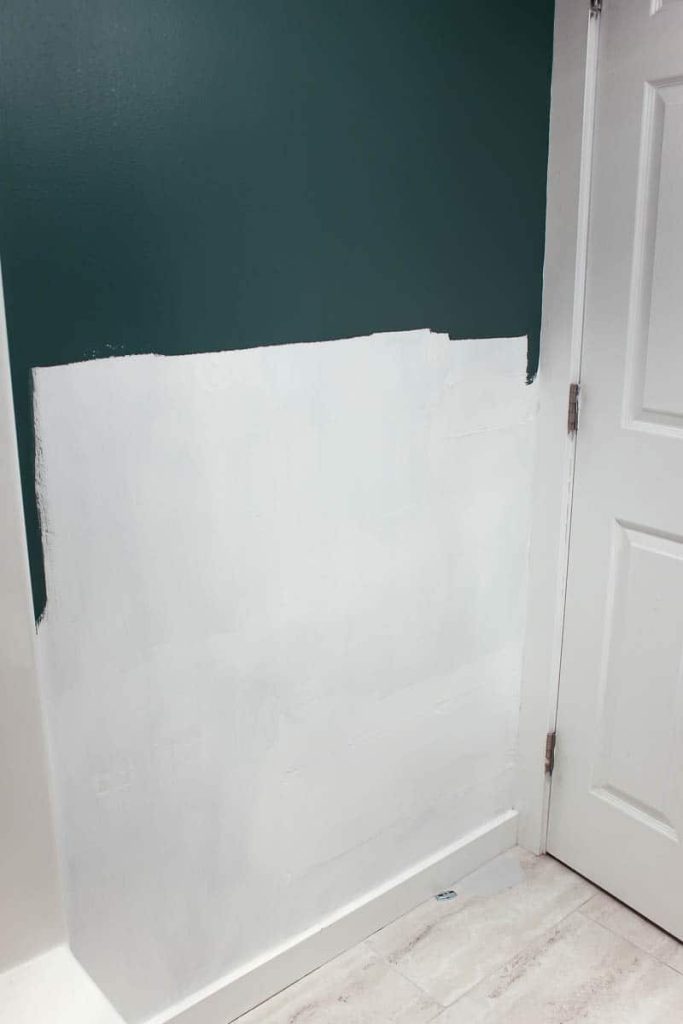
If you have large patched areas on the wall as I did, you can start by applying a primer to the wall. We used this primer, which is made specifically for kitchen and baths. Learn when and why you need to use primer in this article.
If your wall doesn’t have large patched areas and is already painted, you can start by painting the wall behind the shiplap the color that your shiplap will be.
Even though the gaps in between the shiplap are small, you will be able to see the color of the wall, so you definitely need to paint the wall behind before installing the shiplap.
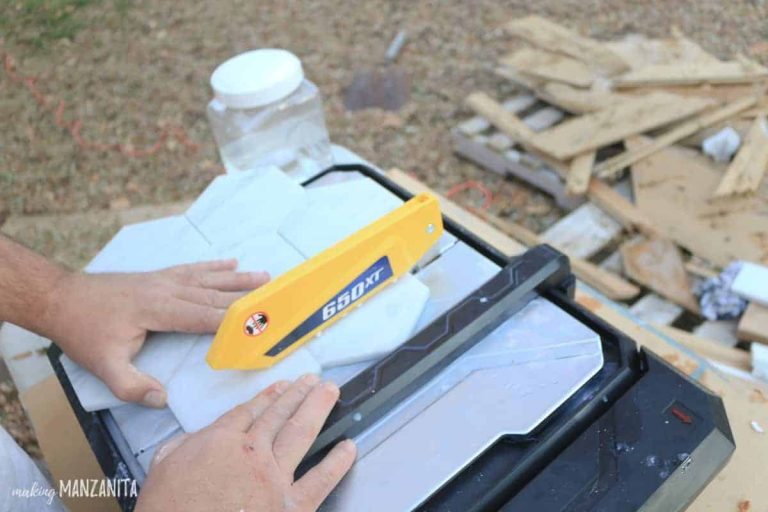
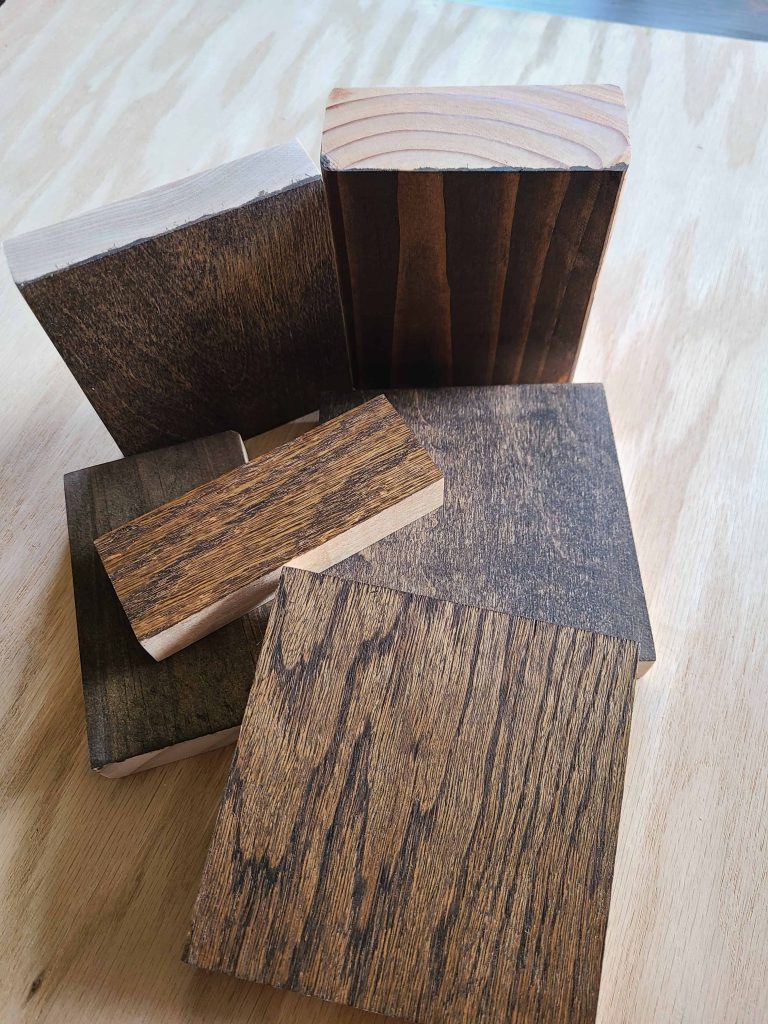
Step 3. Cut plywood down to size.
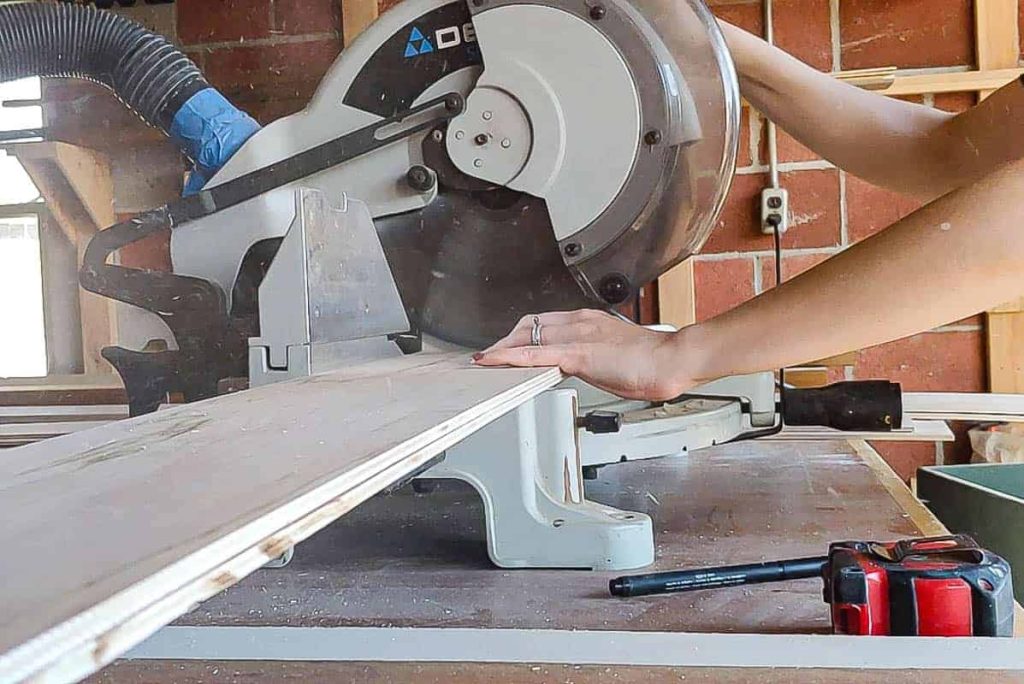
Using the table saw, rip the 1/4″ plywood sheet down into slats. The width of the shiplap is up to you, but we used 6 inches for our vertical shiplap wall.
How to cut plywood without a table saw:
- You can try getting the wood cut when you purchase at Home Depot or Lowe’s. I’ve heard from several people that were able to get it cut down in-store in 6-inch slats, but others mentioned that their local stores had a policy of not making cuts under 12″, so check with your local store!
- You can also use a circular saw with a rip fence, or a Kreg Rip-Cut Guide or clamp down another piece of wood to use a guide for your circular saw, which we did here (see step #3 in this post for pictures of how we set that up)
If you’re only going partway up a wall (like we did), you’ll also want to cut the shiplap slats to the correct length using a miter saw (Learn why the miter saw is the best type of saw for this job).
We brought our vertical shiplap wall up about 40″.
Step 4. Prime all sides of shiplap slats.
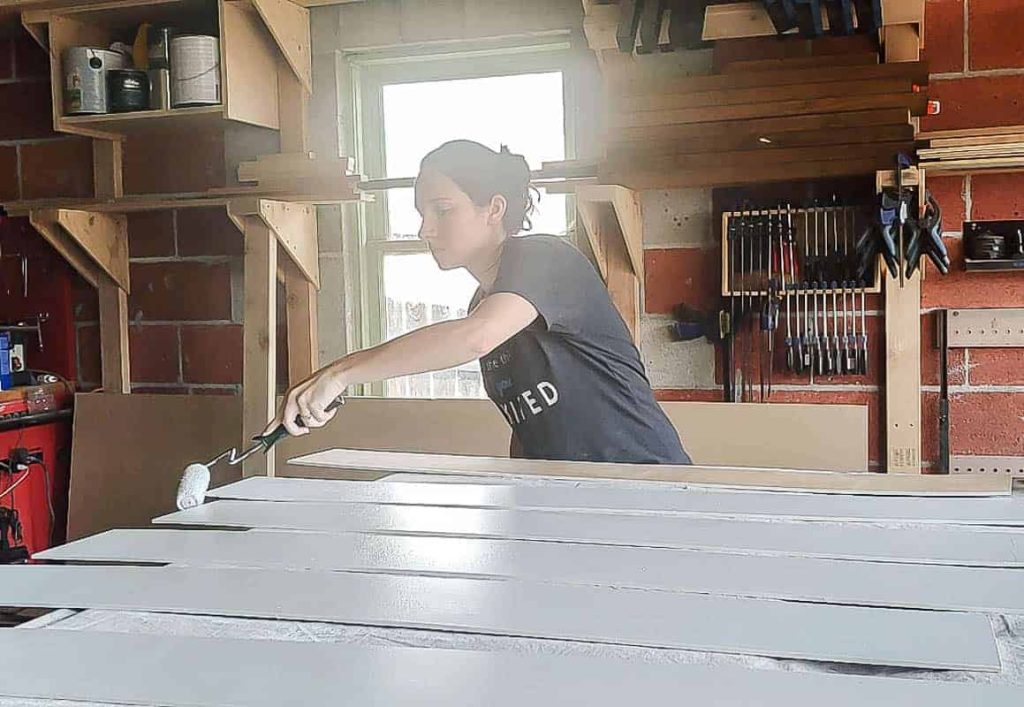
Painting shiplap is always easier before installing, so by painting it first you’ll save time and energy.
Since this shiplap is going in a bathroom, I recommend doing a solid coat of primer that’s made for bathrooms, like this one, painted on all sides and edges of the vertical shiplap before installing.
Learn more about the best primer for bathrooms here.
Step 5. Attach shiplap to the wall vertically.
Start at one corner and work your way across the wall. To attach the vertical shiplap to the wall, apply construction adhesive to the back of the shiplap slat and press it hard into place.
Make sure your first piece is level and then nail or staple it into place.
We used staples instead of nails to attach our shiplap because we knew there were some water pipes in the wall and didn’t want to risk hitting one. That is one of the reasons why we added the construction adhesive as an extra measure to secure.
With vertical shiplap, you’re not able to attach every piece of shiplap to a stud (like you are with horizontal shiplap), so it’s always a good idea to add construction adhesive for vertical shiplap.
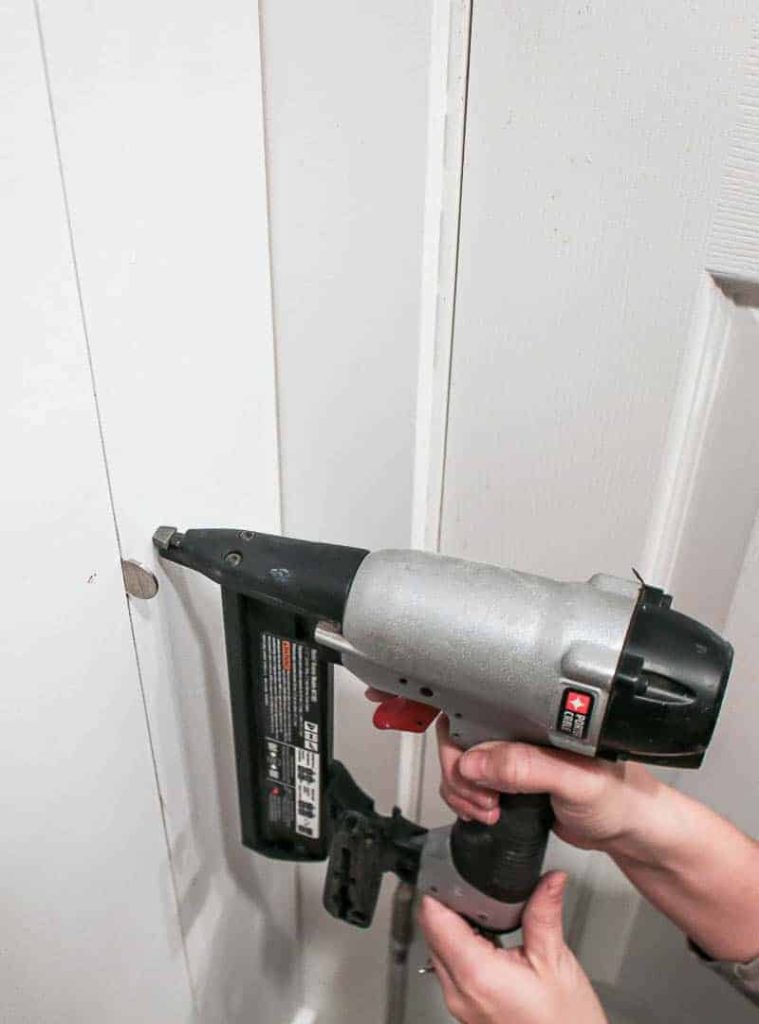
In between each piece of vertical shiplap, use a nickel as a spacer. I slid the nickel up and down and used it as a spacer guide when attaching each slat to the wall.
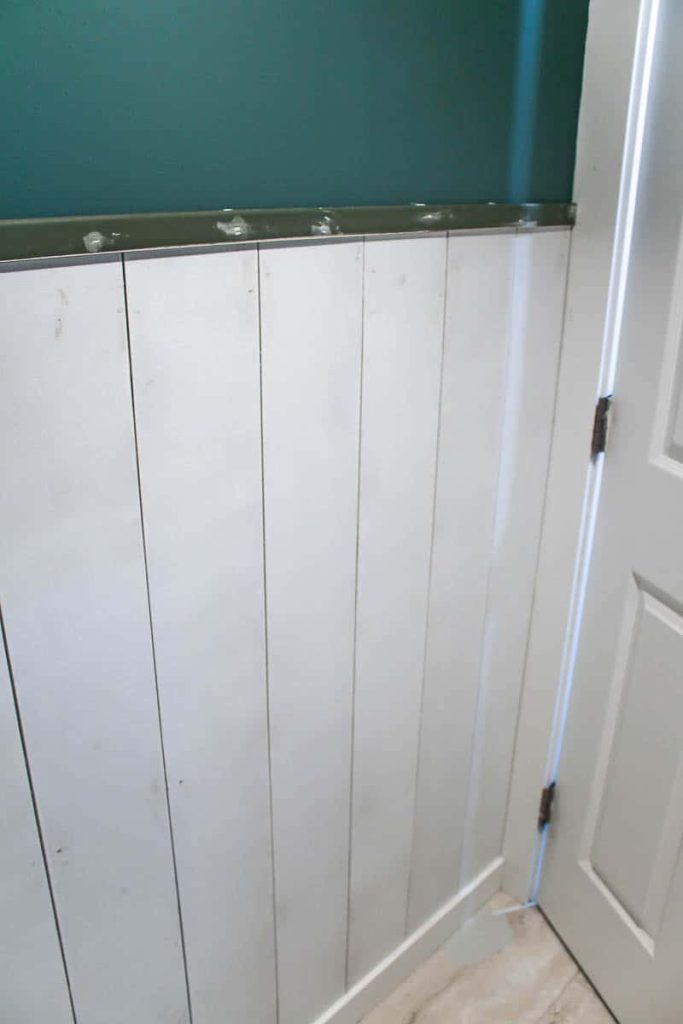
Step 6. Add trim.
If you’re taking your vertical shiplap partway up the wall, attach a piece of trim to the top of the shiplap slats with construction adhesive and staples to finish things off.
Step 7. Fill holes.
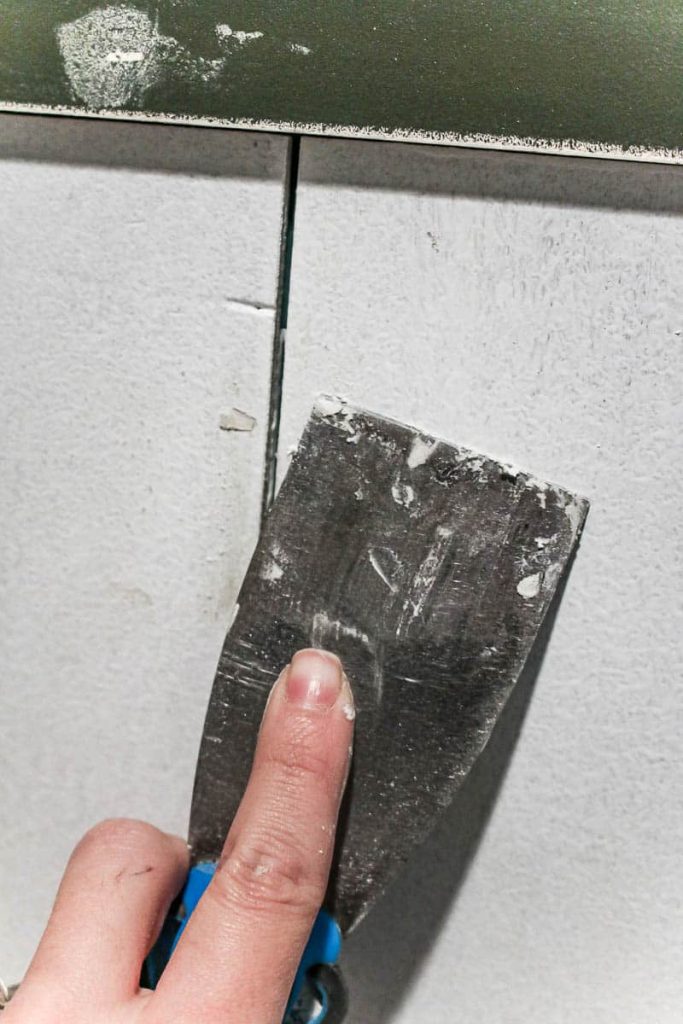
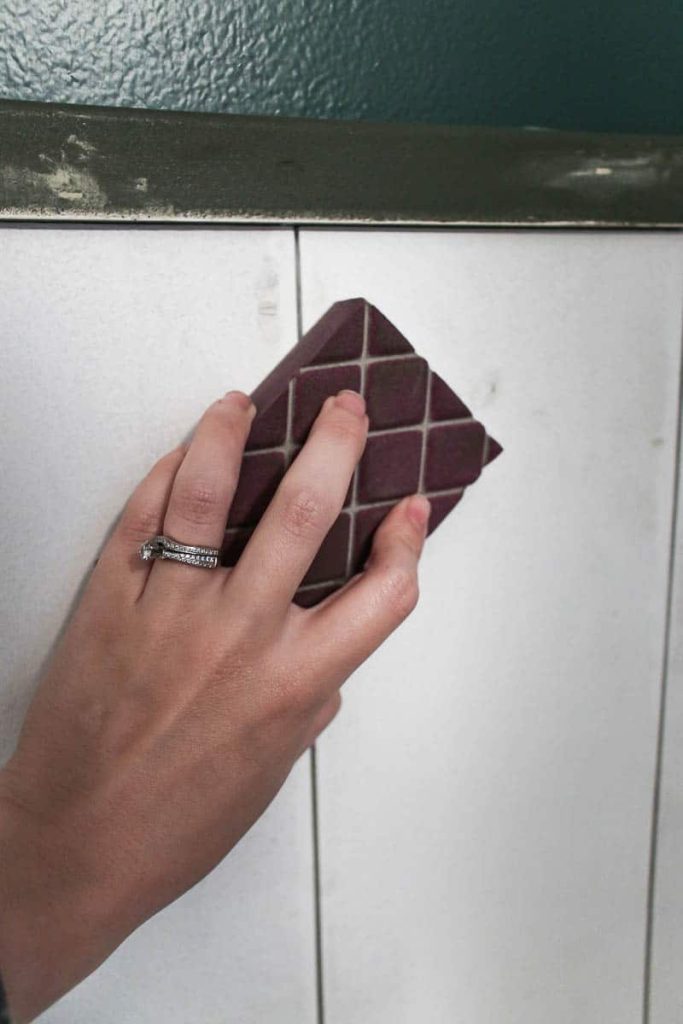
Next, you want to fill all nail or staples holes with spackle and a putty knife. Wait to dry and sand smooth.
We love this spackling because it’s ready to paint in just 15 minutes and you only need to do one coat. Learn the difference between spackle, caulk, and wood filler in this article.
As the last step, I usually put primer over the nail hole areas to make sure there is no “flashing” when the shiplap is painted.
Flashing is when the finish of the paint looks different on the patched areas and can be prevented by priming over the spackled areas before painting.
Filling nail holes is actually optional. For a more rustic look, you can leave them exposed as we did on this plywood shiplap wall in our old living room.
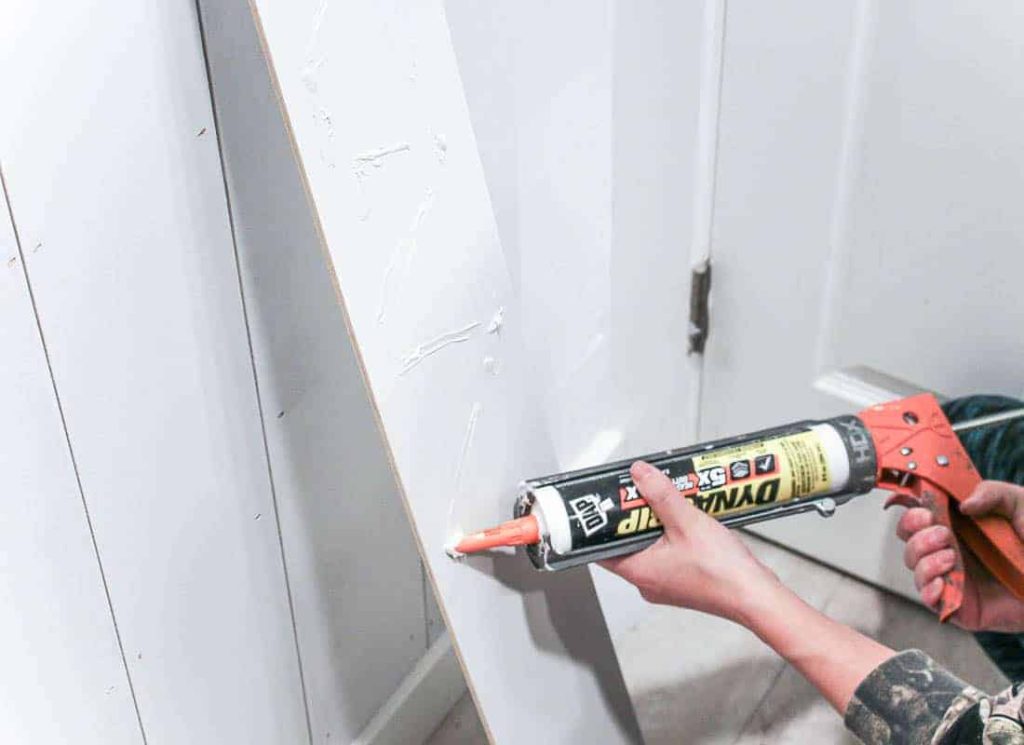
Step 8. Caulk corners and edges of shiplap.
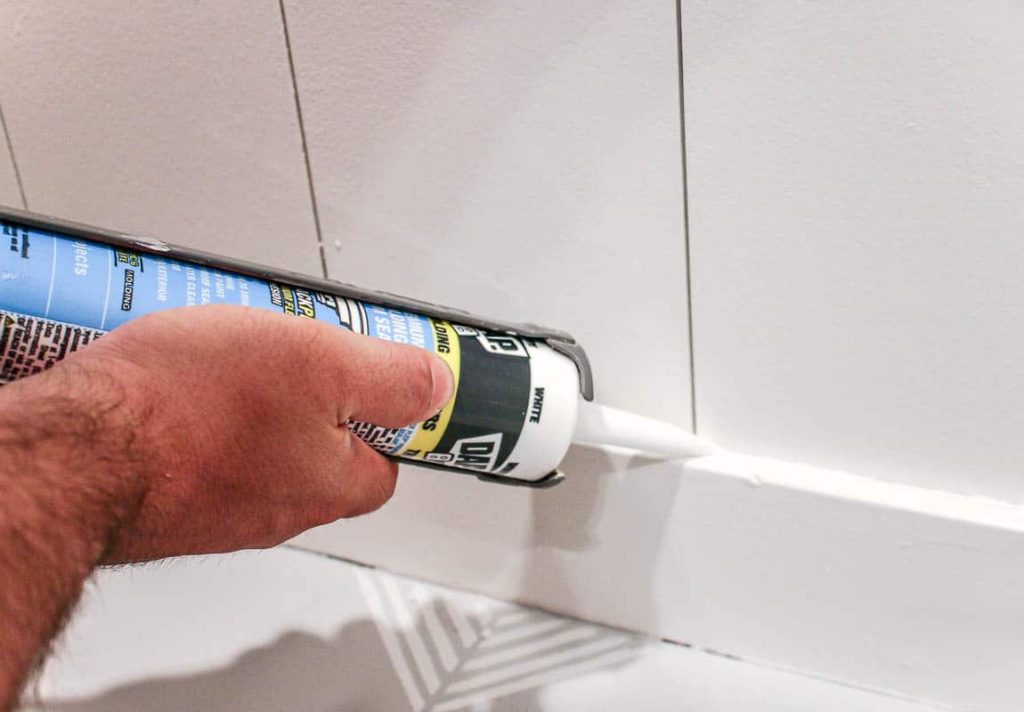
Lastly apply a thin bead of Alex Flex caulk with a caulking gun to any corners or edges of the shiplap wall, including where the shiplap meets the baseboards and where the baseboards meet the floor if the flooring is a hard surface.
Smooth (or “tool”) the caulk immediately with your finger or a caulking tool.
If you find the caulk is sticking, you can slightly dampen your finger or add some soap to your finger to prevent this. This caulk is paintable within 30 minutes!
If you are confused about what type of caulk to use or how to apply it, check out our article full of caulking tips and tricks.
Step 9. Paint vertical shiplap.
Now it’s time to paint your wall. I did two coats of this color in a semigloss finish, which is the same paint that we use on all baseboards, trim, and doors in our home.
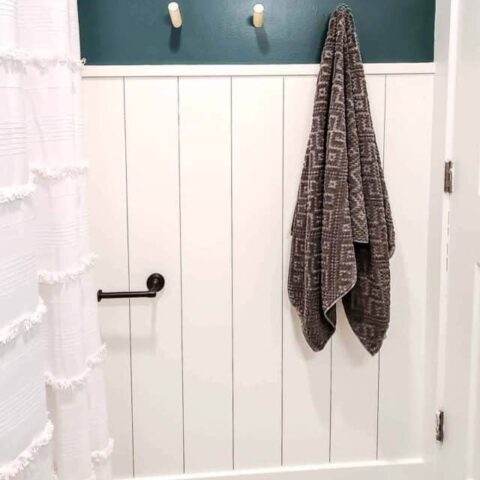
All done!
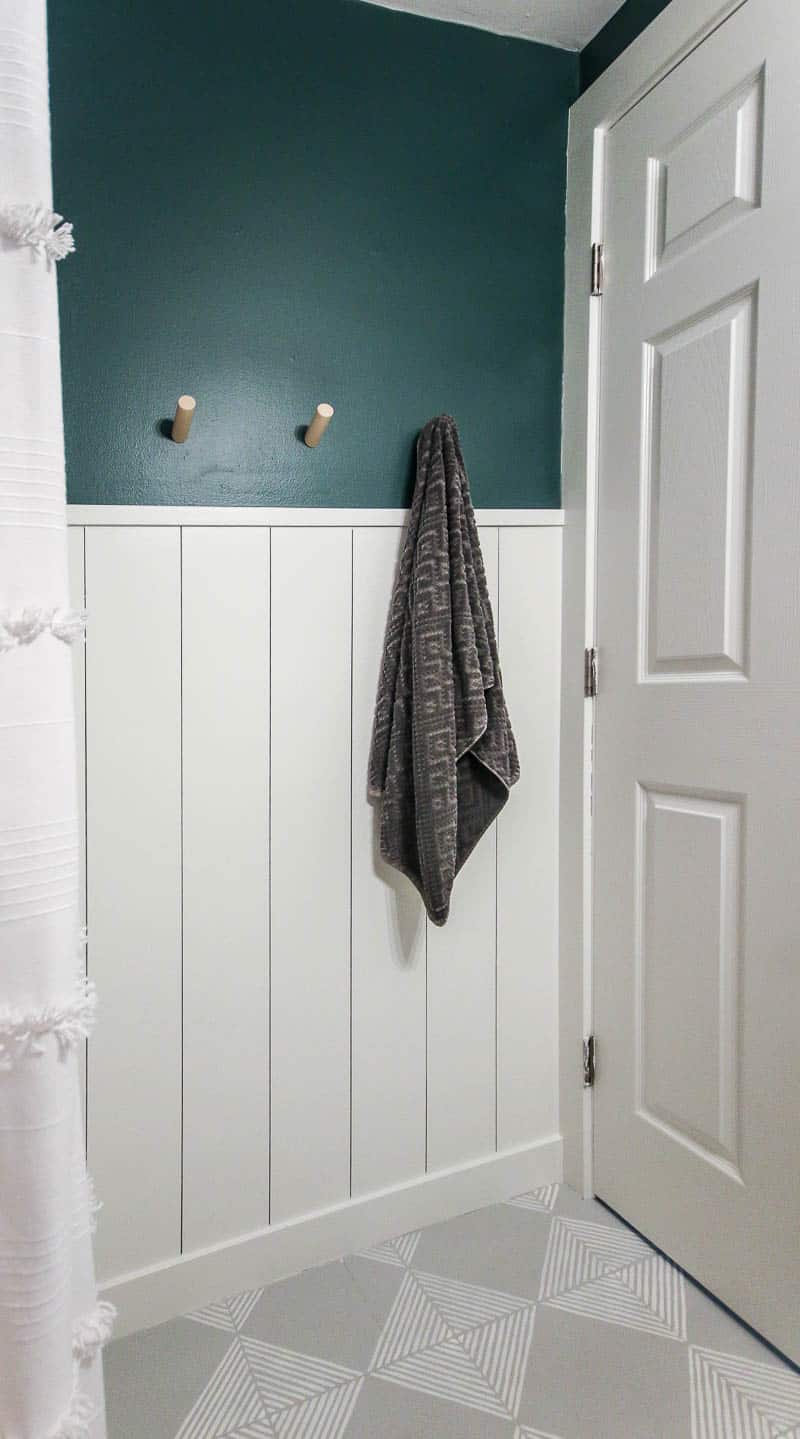
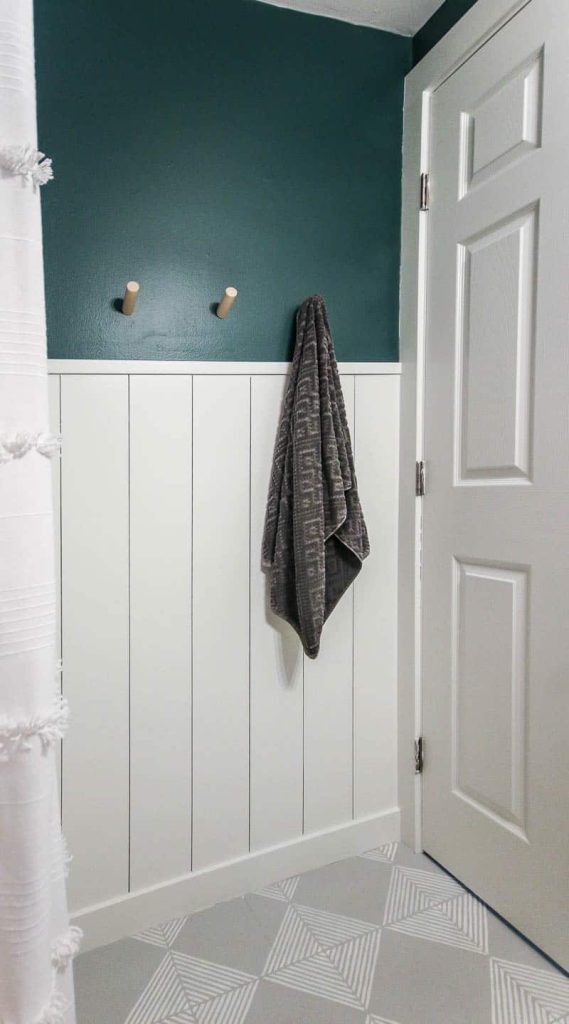
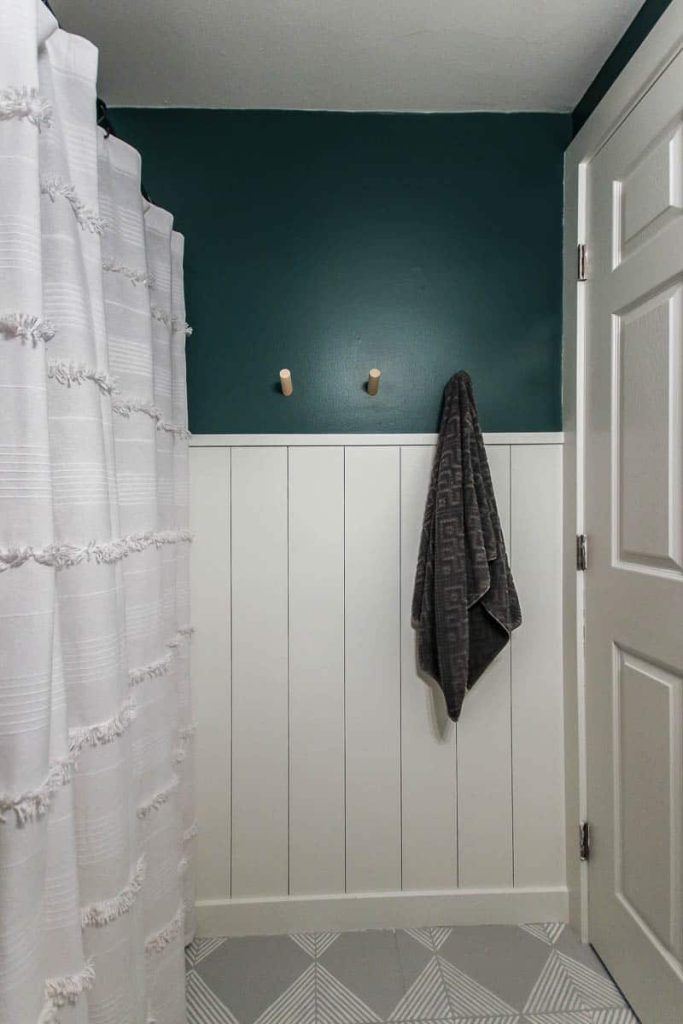
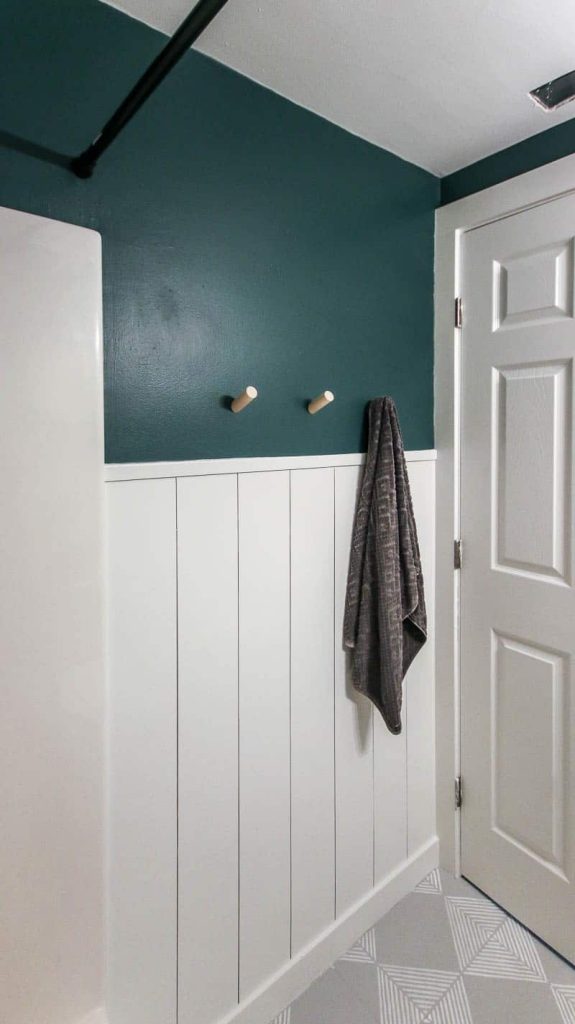
Doesn’t the vertical shiplap look great??? It looks great with our newly painted tile floors too, don’t you think? Check out the full tutorial for how to paint tile floor here!
Not only is this shiplap super easy to install, but it’s also SO easy on the budget!
We’re talking $12ish dollars for the wood to make the shiplap and roughly $20-30 dollars in materials (assuming you have most of the tools needed).
Nothing beats a DIY project that comes in under $50, right?
Even if you’re a beginner something like vertical shiplap is a great project to start on!! You can follow along with this simple step-by-step tutorial for all of the in’s and out’s.
Where would you install vertical shiplap in your home??
Let us know in the comments below!
How To Install DIY Vertical Shiplap
Love the look of shiplap walls? Here's how to install a stylish vertical shiplap wall for cheap! This half-shiplap wall is a simple DIY that adds a touch of farmhouse style to any space.
Materials
Tools
- Table saw
- Miter saw
- Staple of brad nail gun
- Air compressor
- Caulk gun
- Nickels
- Putty knife
- Sanding block
- Paint brush
- 4 inch roller cover & frame
- Paint tray
Instructions
- Prep the wall. Fill holes and clean if necessary.
- Prime or paint the wall. It should be the same color that your shiplap will be.
- Cut plywood down to size. We ripped to 6 inch wide slats.
- Prime all sides of shiplap slats
- Attach shiplap to wall vertical with construction adhesive and secure with nail or staples. Use nickels as spacers.
- Add trim to top.
- Fill holes with spackle and sand smooth. Add primer over spackled aress to prevent flashing.
- Caulk corners and edges of shiplap with Alex Flex caulk.
- Paint vertical shiplap.

Nice job on that shiplap wall! What is the flooring in that after completion picture?
Thanks! That floor was another fun DIY projects. We painted the original tile. Here’s the full tutorial: https://www.makingmanzanita.com/how-to-paint-tile-floor-with-stenciling/
I love beautiful! What a gorgeous transformation.
Thank you!