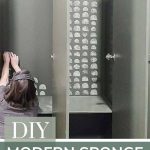
Modern Sponge Painting | Semi Circle Pattern in Back of Locker Cabinets

If you're looking for a super cheap and easy way to add a stamped wall in your house or even some visual interest in the back of a cabinet or bookshelf, you're doing to love this modern sponge painting technique!
Do you remember the sponge painting from the 90’s??
Fun fact: I had a multi-color sponge-painted wall in my bedroom as a kid (along with a matching comforter and wallpaper border.) But it didn’t look anything like the modern sponge painting that I’ve been seeing all over the internet.
If you haven’t heard….Sponge painting is BACK!! But with modern patterns and fun designs. It’s super easy and unbelievingly cheap.
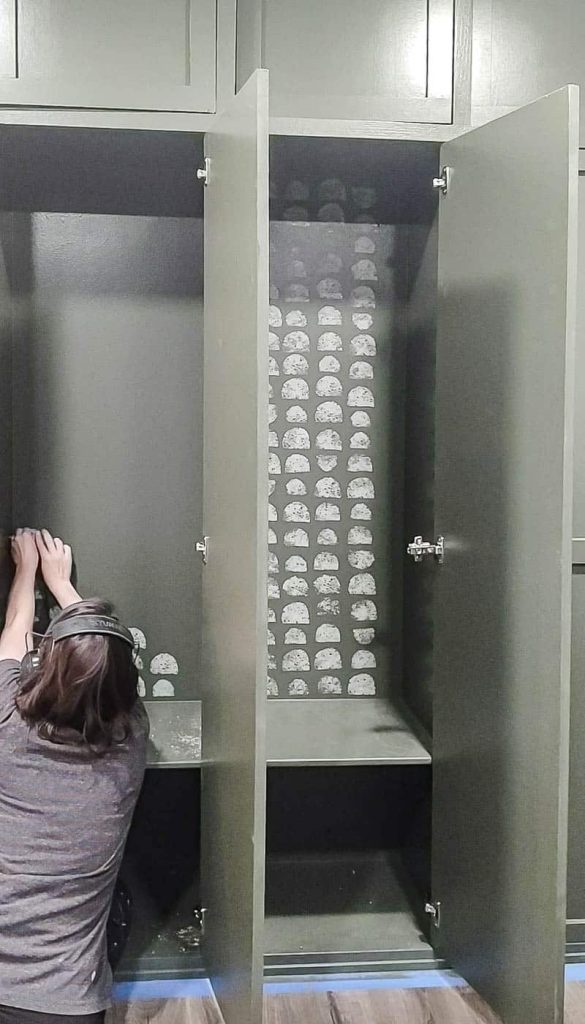
I knew when we were building our DIY mudroom lockers that I wanted to find a way to add some visual interest to the back of the cabinets. I tried my hand at wallpaper and whew, that is A LOT harder than it looks. It didn’t work out as planned. (P.S. I’ve since then tried my hand again at wallpaper – this time peel and stick and it worked out much better)!
So I pivoted and decided to try sponge painting a fun and modern design and I went looking for pattern ideas and inspiration!
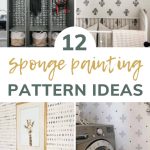
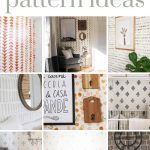
12 Modern Sponge Painting Ideas
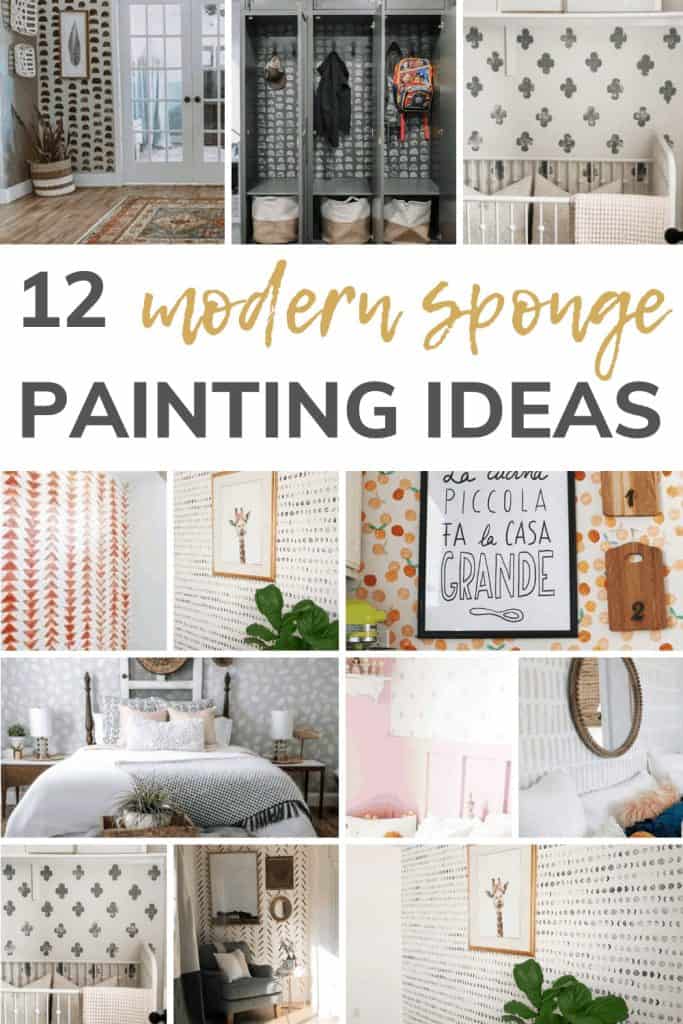
I’ve seen so many fun stamped wall ideas and patterns, here are some of my favorites:
Sponge Wall Ideas (Stamped Patterns)
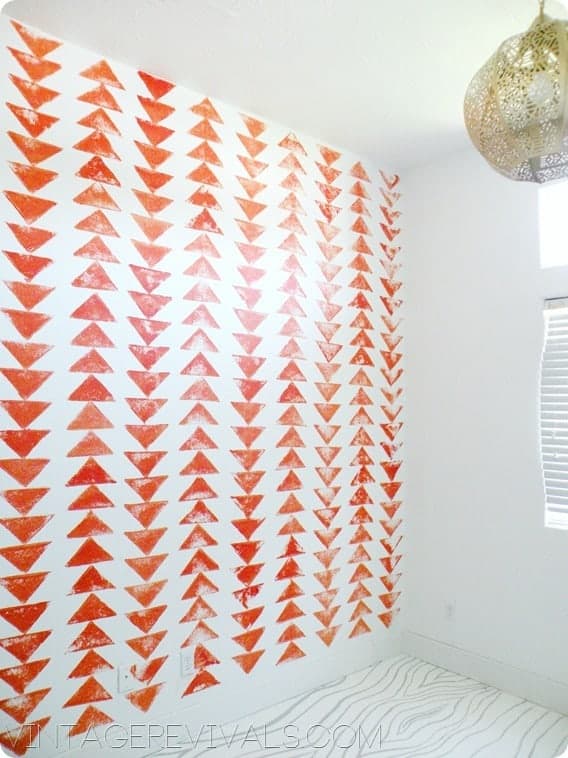
Make your own stamp using wood and an old sweatshirt to add this amazing tribal chain wall to your living space. I love the distressed and weathered look of this wall treatment! You can do it yourself in just a few hours.
You could take this pattern in any direction you want to, but this one is alternating one row up and one row down. I think it's absolutely perfect and I'm wondering where in the house I can add this stamped wall pattern idea.
Read more for the full tutorial to do it yourself!
Create a focal wall on little to no budget with this sponge wall idea. All you need is a kitchen sponge, black paint, and some painter's tape.
The best part of this budget-friendly stamped pattern is that it doesn't have to be perfect! Embrace the imperfections. Some stamps will be full-on paint, some will be more faded. That's the beauty of this technique.
Read more for the full tutorial to create this stamped focal wall in your space.
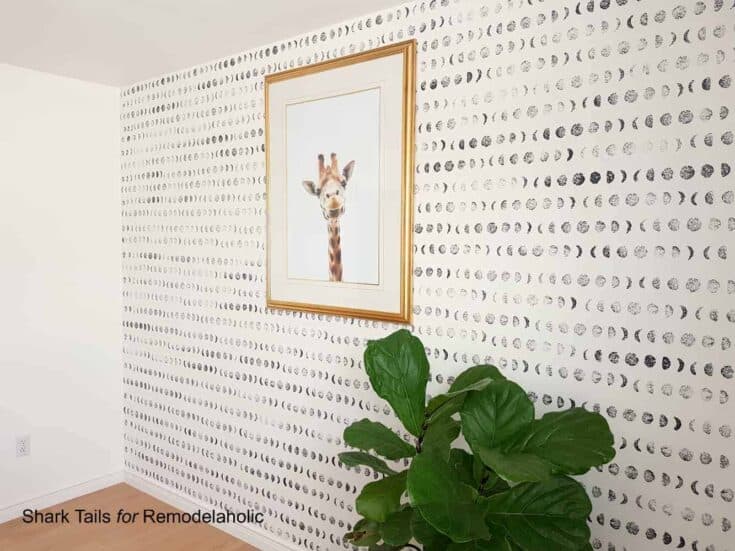
Oh my! I have all the heart eyes for this one! The phases of the moon stamped onto the wall and it looks just like wallpaper!
You may think this one is going to be hard to do, but it's not! You can make a handle to hold all your moon phases together in a row and then stamp away.
Read the full tutorial to add this amazing sponge wall idea to your space!
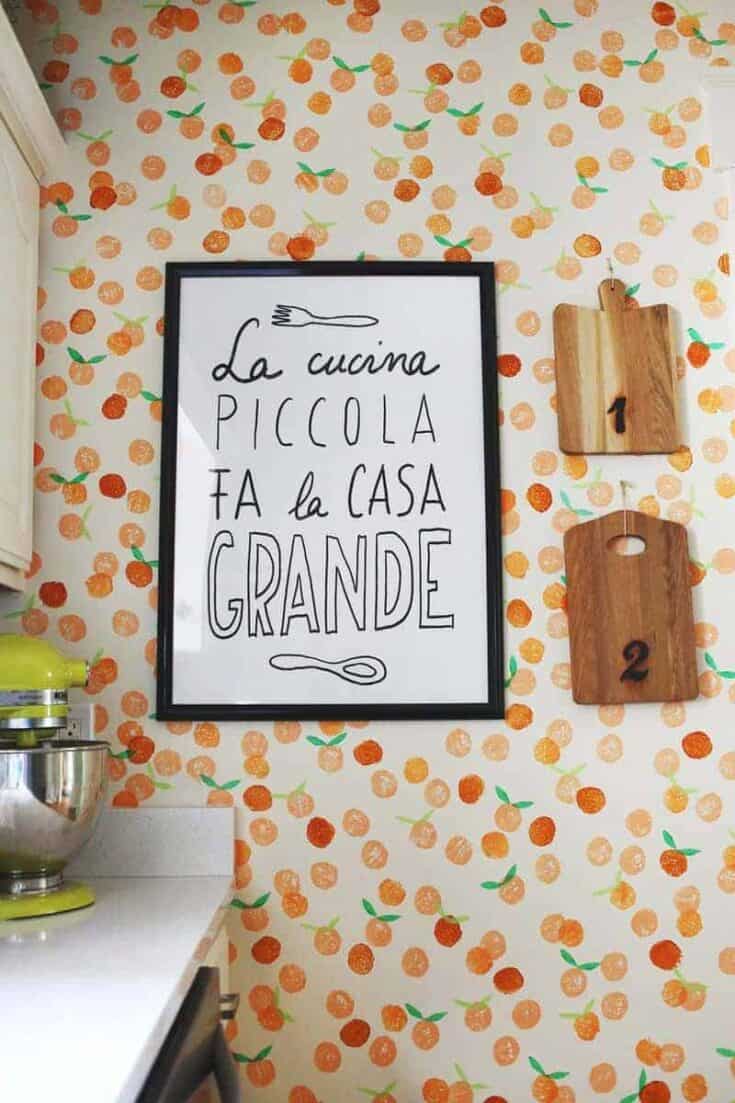
This fun and colorful sponge stamped clementine wall is such a fun design for the kitchen. You'll need three shades of orange paint for the clementines and two shades of green for the leaves.
This budget-friendly accent wall idea will look like wallpaper when you're all done. No filling in the circles needed, you want that imperfect look.
Read more for the full details on how to do this sponge wall idea yourself.
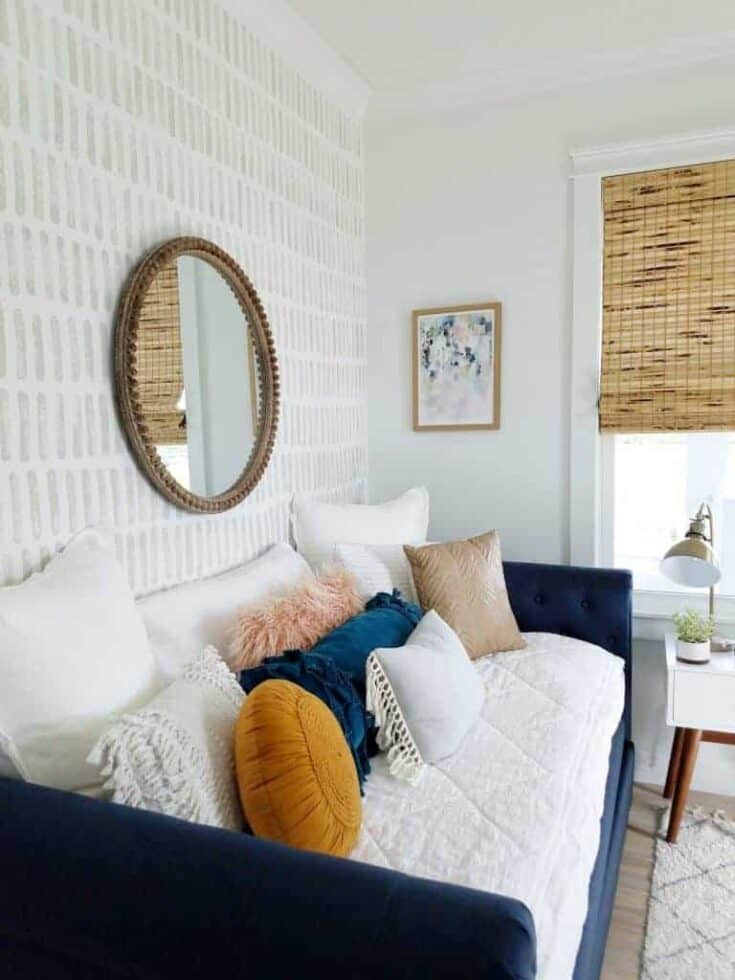
The look of a sponge stamped wall doesn't have to be perfect. That's the beauty of this accent wall DIY project. All you need is a kitchen sponge and some leftover paint in the color of your choice and you are all set.
Dipping once in paint and then stamping on the wall for four or five stamps gives the pattern depth and movement. I love this one and it really looks like expensive wallpaper.
Read more for the full tutorial to do this stamped pattern on your wall.
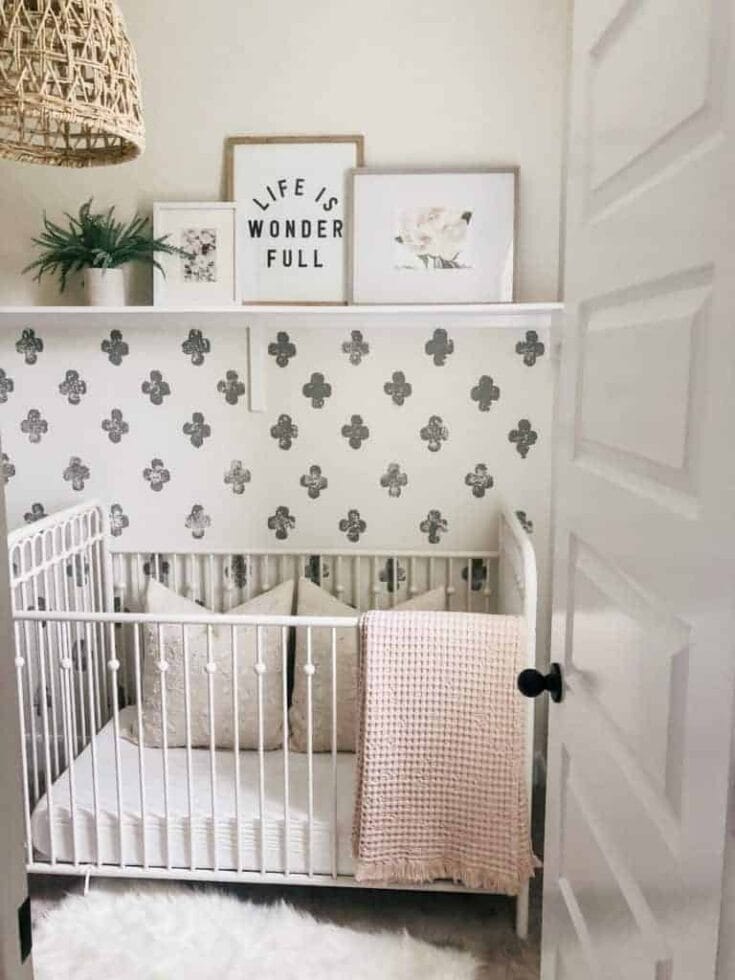
Get the look of wallpaper with just a couple of dollars using this sponge wall idea. You can cut your sponge into any shape you like, but this one is the shape of a flower and I think it makes a cute boho design on this nursery wall.
If you're doing a small wall you can most likely eyeball the placement of your design, but if doing a larger wall you will want to measure or use a level to make sure your pattern is uniform.
Read more for the details of this cute boho sponge wall idea.
Do love the look of wallpaper, but don't want to commit to what can be considered a permanent wall treatment? Let's be real, yes wallpaper can be taken down, but it isn't always an easy process.
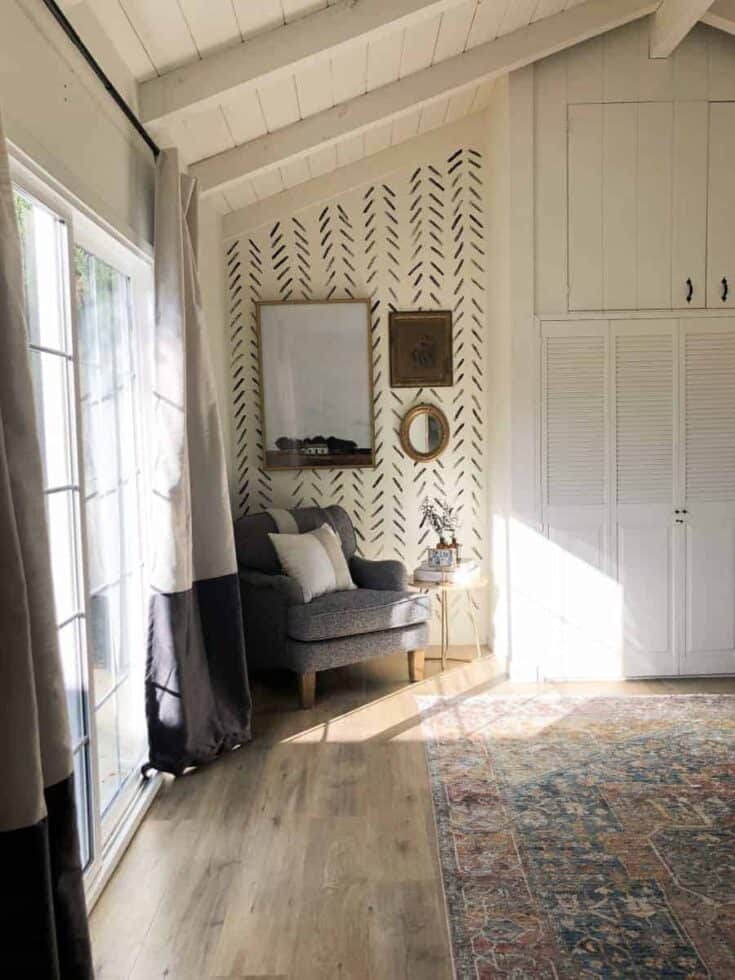
Try a sponge stamped wall treatment instead. This leaf pattern is easy to do and you can paint over it anytime you decide you want a change.
Read more to get the details to make this stamped pattern on your wall.
Wallpapering a wall takes a lot of time and a lot of work. Sometimes even a few choice words when you don't get the patterned lined up it should be. Sponge painting eliminates the stressful process of adding a wall treatment to your wall.
I found this one on Instagram and had to share it! You can do this sponge wall idea in your room in just a couple of hours and for $0. The crosses are made using a sponge and the black dots are added using a craft brush.
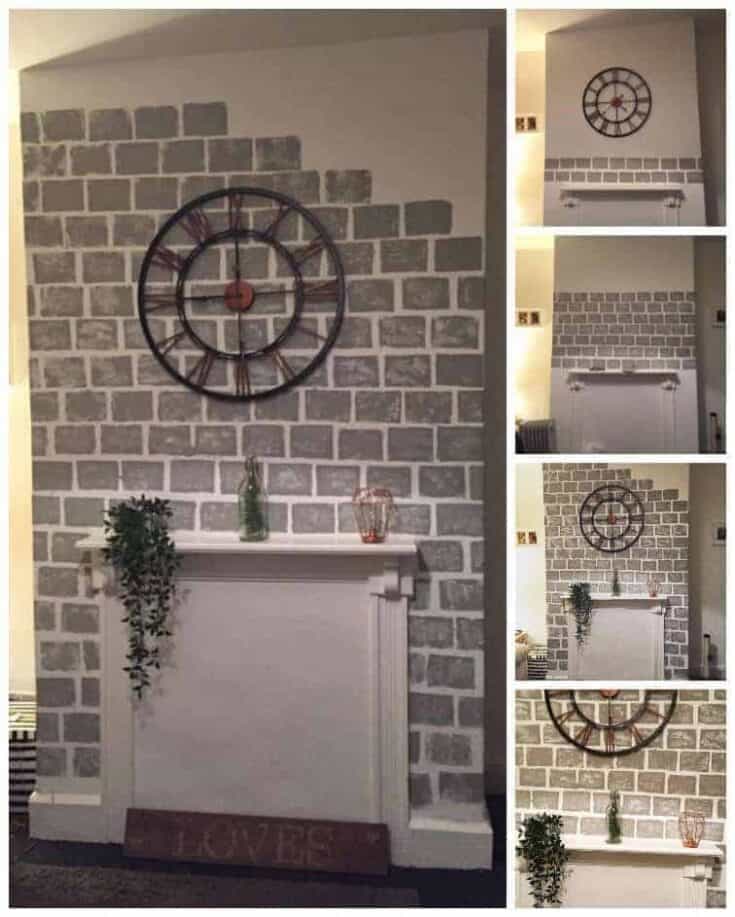
Every fireplace deserves a chimney and surround, even a faux one. Add a faux brick wall using a stamped pattern with a sponge.
You can complete this sponge wall idea in under an hour and on a tight budget for a focal point that will look great in your space.
Read more for the tutorial to do this project yourself.
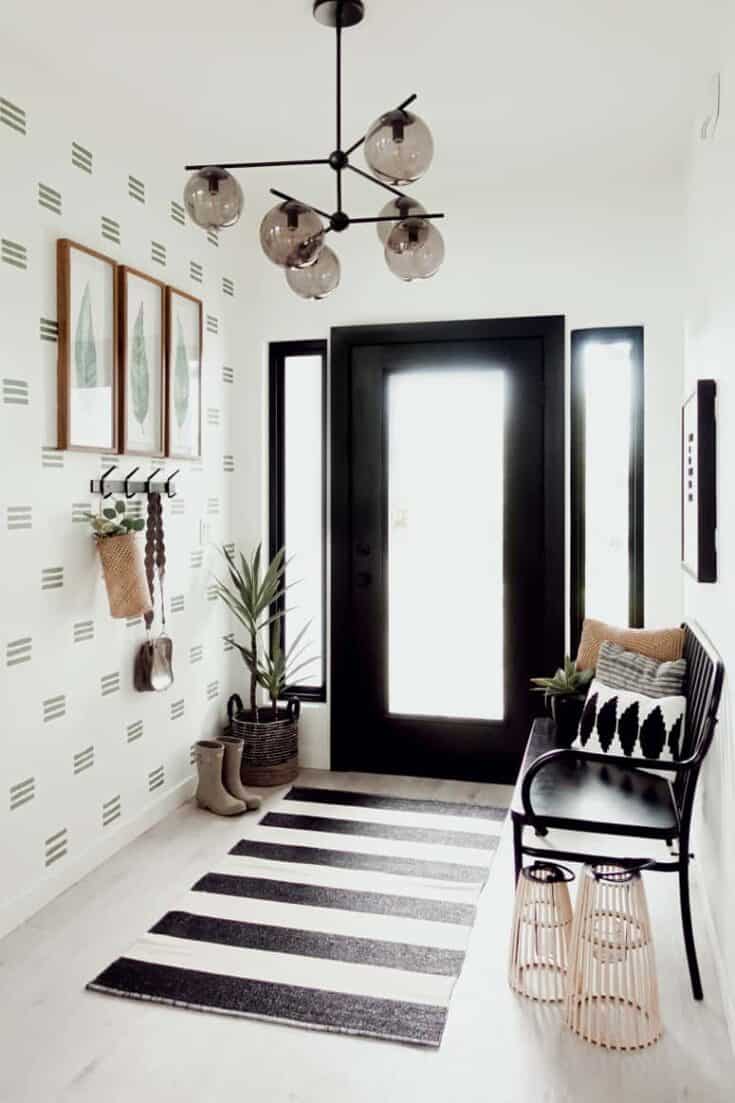
I love the color used for this sponge wall idea. It really adds the perfect amount of color to this black and white entry. All you need is paint in your favorite color and a kitchen sponge. Easy peasy.
Pick your pattern and to make sure you get those lines straight, use a level to make sure your lines are straight. Stamp three lines and repeat until you're all done.
Read more for tips to make this accent wall in your space.
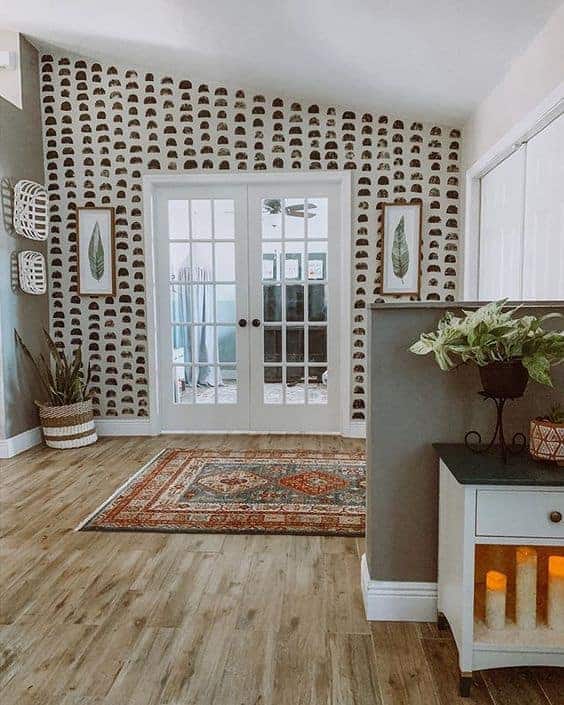
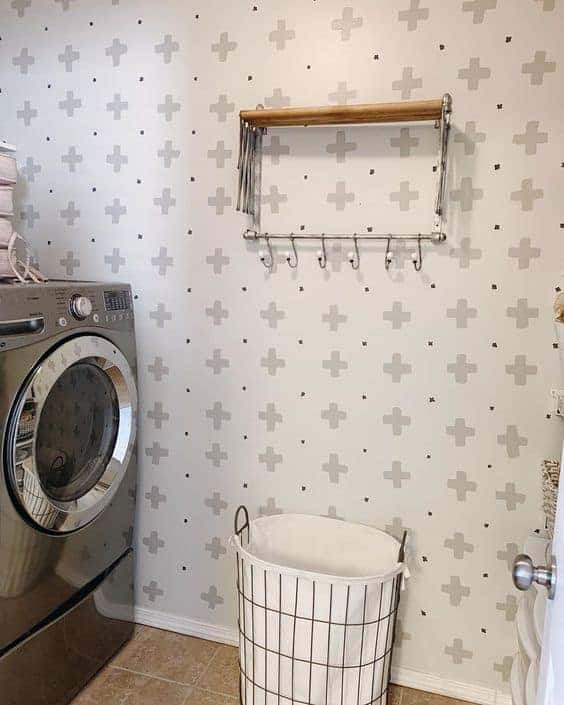
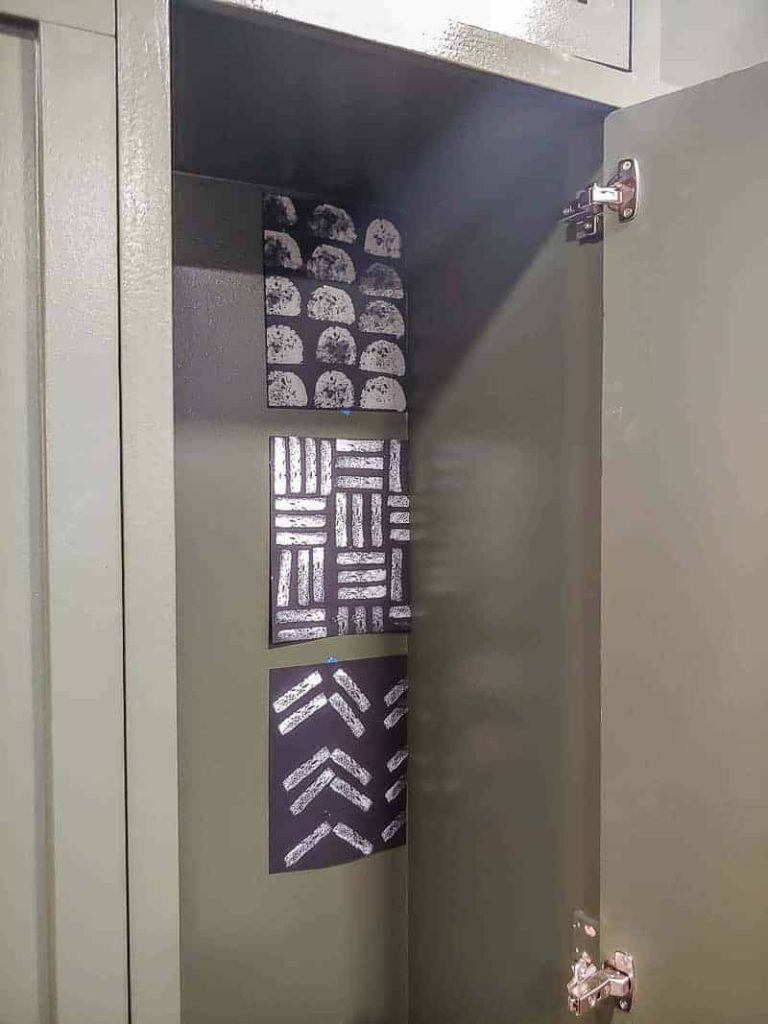
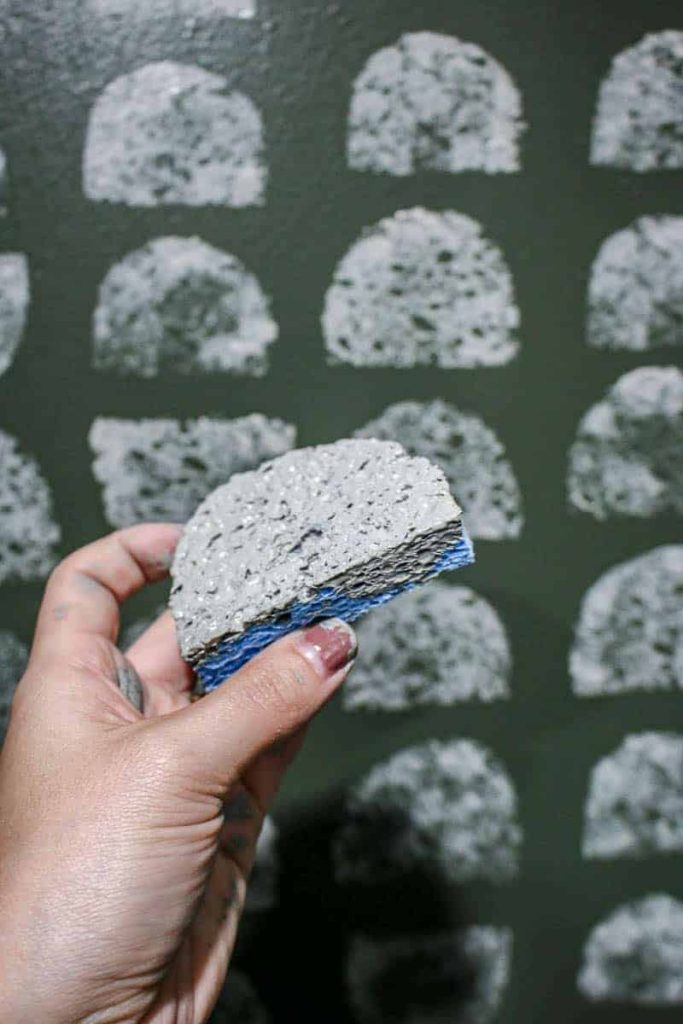
I know I have said this about all of them, but I really do love this one! It's similar to my stamped locker cabinets and I love how easy it was to do. All you need is paint and a sponge cut in the shape of a semi-circle.
Your semi-circles don't have to be perfect, in fact the imperfection of this design is what makes it in my opinion. It's the perfect accent wall for any boho style living space. To get that imperfect look, don't dip your sponge for every stamp. Stamp three or four then refill the sponge with paint.

For less the $14 dollars you create this hexagon stamped paint pattern in your living space. This pattern takes a bit more care and control of where you place the sponge, but you can still do an entire wall in a couple of hours.
Keep a q-tip handy for drips and stamp four or five times before refilling your sponge with paint to create the different variations in color and texture.
Read more for the full tutorial for sponge wall idea.
Modern sponge painting: video tutorial
I put together a quick video that walks you through the process that helps go along with the step-by-step tutorial below:
If you love DIY videos, be sure to subscribe to our YouTube channel here!
This post also contains affiliate links, but nothing that I wouldn’t recommend wholeheartedly. Read my full disclosure here.
Modern sponge painting: step-by-step instructions
Step 1. Figure out the stamped wall pattern you like best.
Take a look at the patterns I mentioned above, take a search on Pinterest, and check out the #spongewallmovement and #spongewallchallenge hashtags on Instagram for so many ideas,
I found it helpful to test out a few designs on some paper and tape to the area that you’ll be painting. This is the best way to get a feel for how it will look in your space.
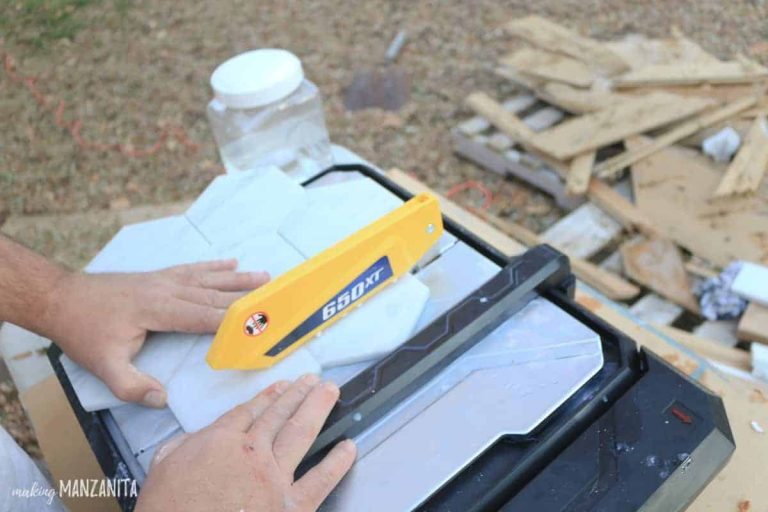
Step 2. Cut your sponges.
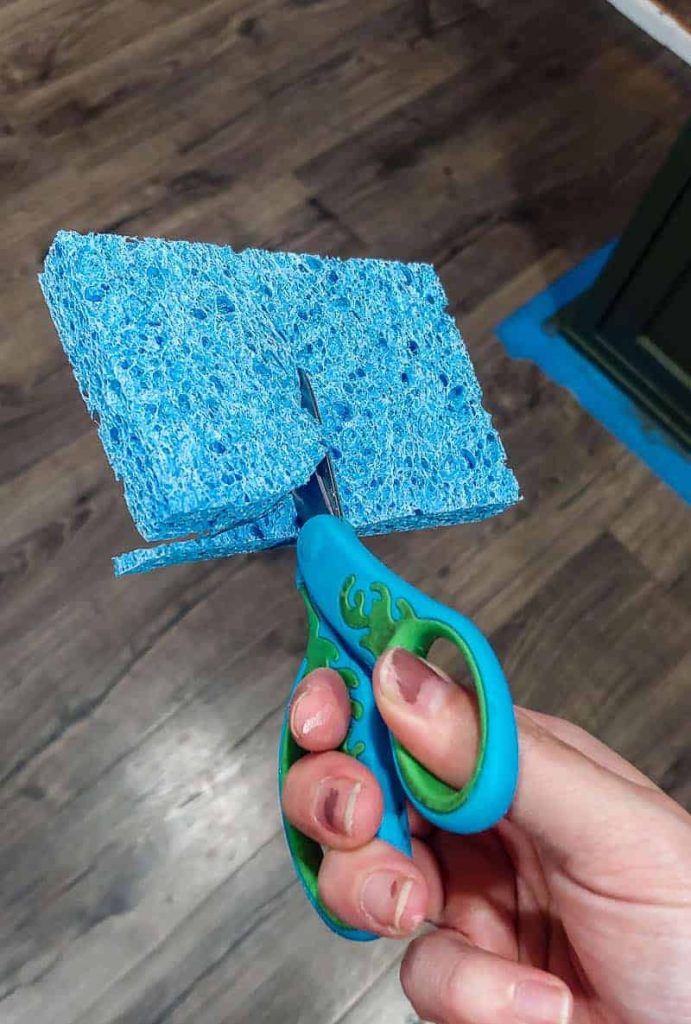
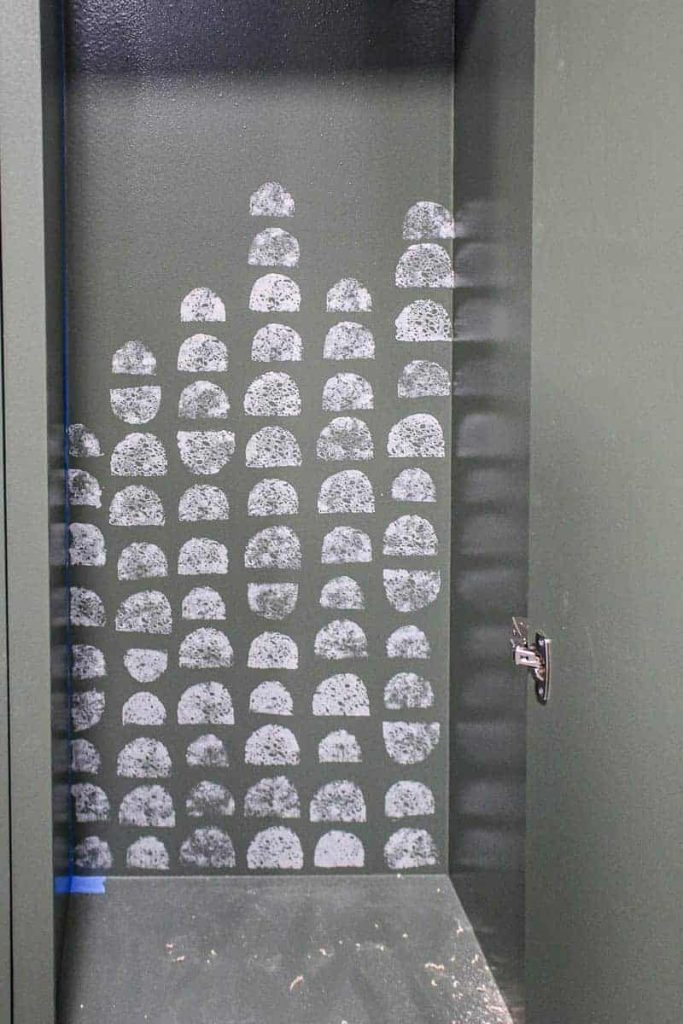
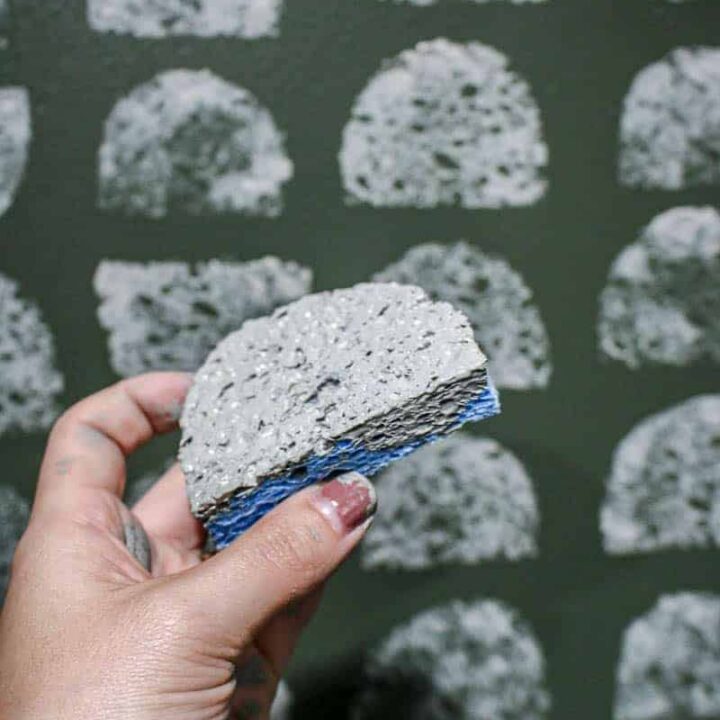
I decided to go with a semi-circle pattern, so I used scissors to cut down the sponges.
Since the locker cabinets are a pretty small space, I wanted to go with a small semi-circle so I cut them out of the short edge of the sponge.
If you wanted something larger, you could cut the semi-circle from the long edge of the sponge.
I wanted a lot of variation in my stamped design, so I cut up 4 different semi-circles which are all a little bit different.
Step 3. Sponge paint design.
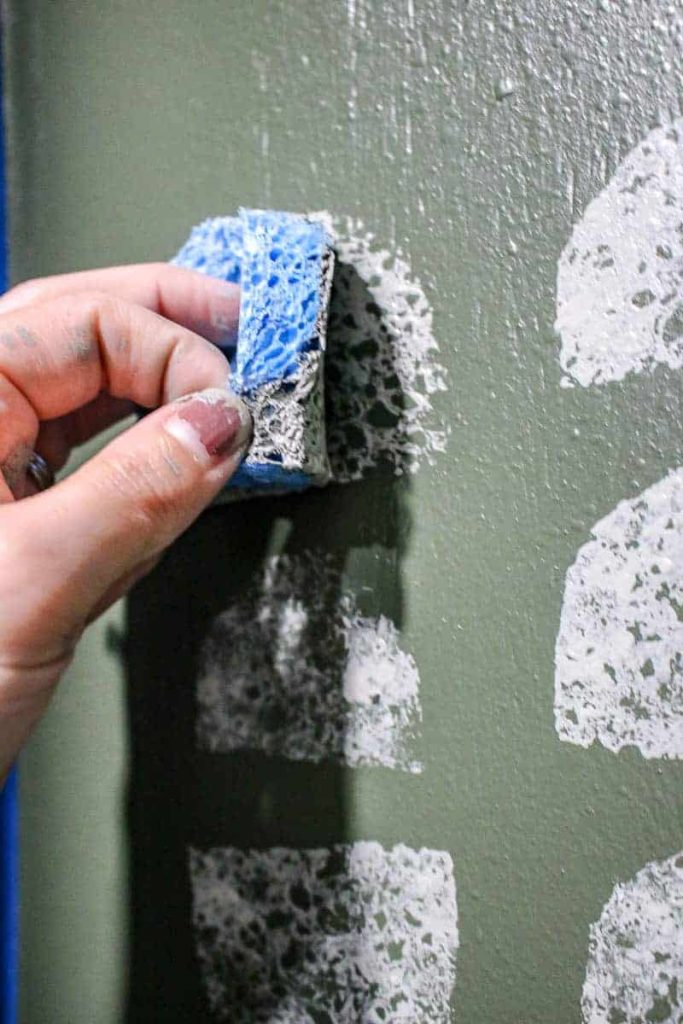
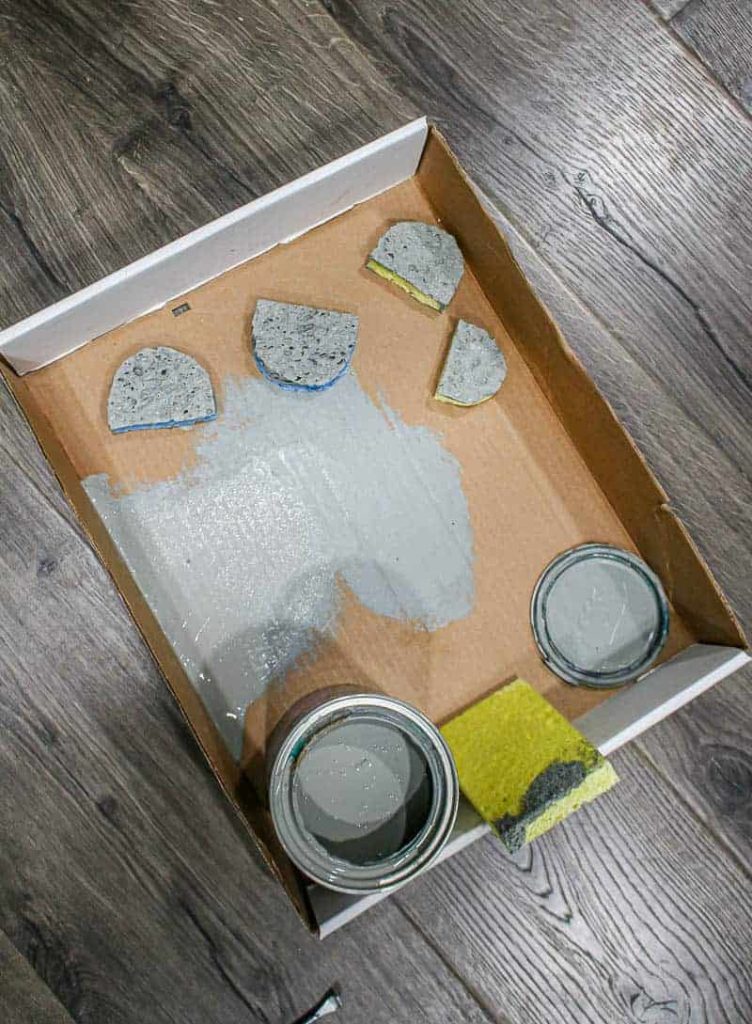
Pour your paint into a paint tray (or the lid of a cardboard box like I used). The key when you’re stamping with sponges is to not get too much paint on the sponge before stamping. Dap off your excess on the tray, paper plates, or cardboard.
I worked my way up the back of the cabinet in rows. I was able to get at least 3-4 stamp repetitions off every time that I loaded up the stamp with paint.
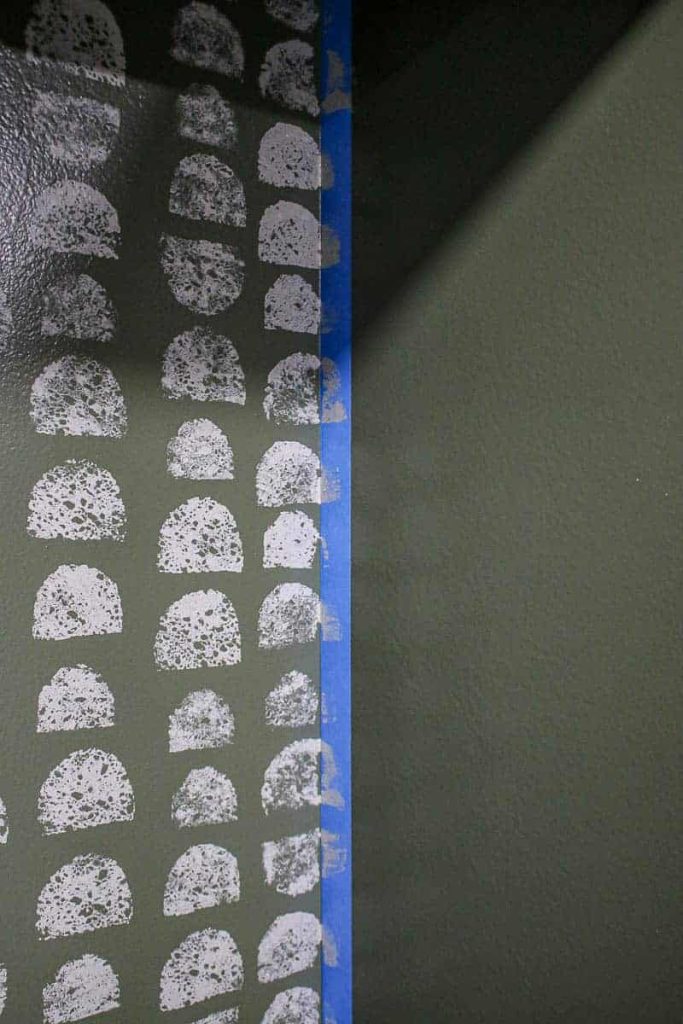
Tape off any corners of your wall or furniture with painter’s tape where the sponge will only partially be stamped.
To get more variation on your sponge wall, press lighter on some and harder on others.
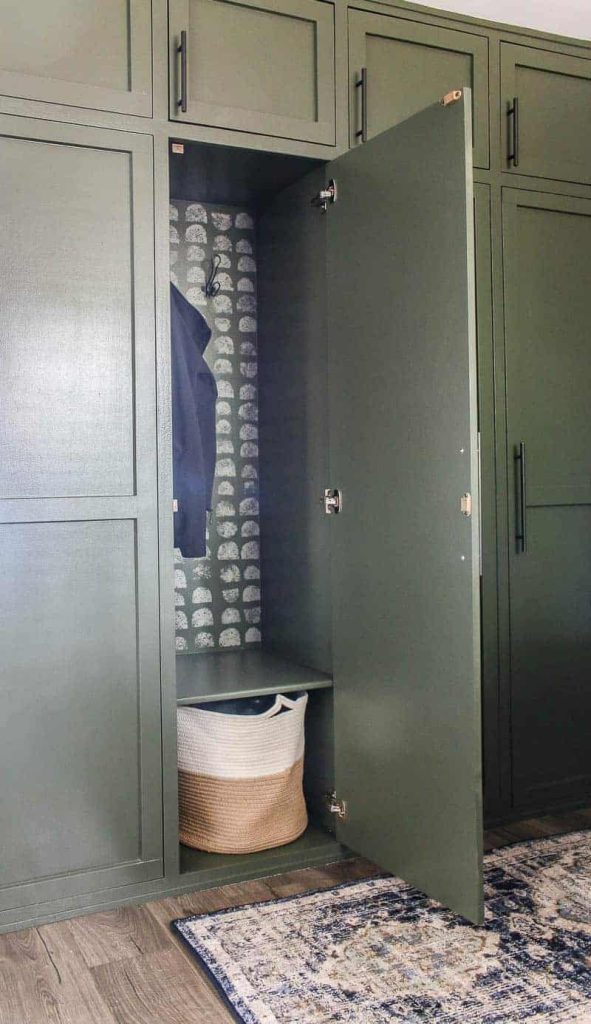
I absolutely LOVE how the semi-circle pattern turned out. I think it added so much character to the back of the cabinet and is such a fun little “surprise” when you open the locker doors.
Sponge painting sure has come a long way from the ’90s. The modern sponge painting patterns are SO fun, don’t you think?

Stamping with kitchen sponges is a super cheap and easy way to add an accent wall to your home or add more character to the back of a cabinet, bookshelf, or furniture. It’s a great way to decorate a house for no money!
Where would try sponge painting in your house??
Let us know in the comments below!

Room Sources:
- Learn how to build the DIY mudroom lockers
- Cabinet paint color
- Stamped paint color
- Baskets in the bottom of lockers
- Runner rug
- Hooks
- Hardware – small size and large size
Want to see more of our laundry room makeover?
- Modern Farmhouse Laundry Room Design & Decor Ideas
- Easy German Schmear Tutorial On A Faux Brick Wall
- How To Build Pipe Shelves: Laundry Room Shelving
- How To Make Wall Stencils
- Farmhouse Sink Cabinet For Laundry Room (With Free Plans!)
- DIY Mudroom Lockers With Doors
- Modern Sponge Painting | Semi Circle Pattern in Back of Locker Cabinets
- 18 Modern Boho Runner Rugs
- Home Command Center for Busy Family That’s Customizable and Gorgeous
- How To Organize Cleaning Supplies | 15+ Clever Ideas
How To Do Modern Sponge Painting
Love the look of sponge painting? Here's how to create a modern sponge painting design using simple sponges and paint, and create a fun mudroom cabinet!
Tools
- Scissors
- Box or paper plate
Instructions
- Figure out stamped wall pattern (take a look at the ideas shown at the top of post)
- Cut your sponges.
- Sponge paint design.
Related: Other Interior Painting Articles
- Choosing Front Door Paint Colors (& How To Paint A Door)
- Two Tone Walls in Bedroom: How To Paint Straight Lines
- Mountain Mural Tutorial (Featuring Behr Paint Colors Trends)
- Behr Chic Gray Paint Reveal (+ The Best Order of Painting A Room)
- Modern Sponge Painting | Semi Circle Pattern in Back of Locker Cabinets
- How To Paint An Arch Like A Pro
- A Basic Paint Sheen Guide for Interior and Exterior Surfaces
- How To Cut In Paint without Painter’s Tape
- How To Paint A Ceiling With A Roller
- Behr Fashion Gray | Paint Color Overview and Review
- How To Paint A Room For Beginners | Ultimate Guide
- Tips for Painting Baseboards and Trim
- Black Bamboo Behr | Paint Color Overview and Review
- Behr Meteorological | Paint Color Overview and Review
- Behr Falling Snow | Paint Color Overview and Review
- 16 Gorgeous Green Accent Walls
- Snowy Pine Behr Paint Overview
- In The Moment Behr Paint Color Overview
- 22 Front Door Paint Colors to Inspire You
- Master Bedroom Colors | 20 Great Paint Color Ideas with Pictures
- Behr Midnight in NY Paint Color Overview
- Graphic Charcoal Behr | Paint Color Overview and Review
- Do I need Primer Before Painting?
- How to Paint a Room Fast
- How To Clean Walls Before Painting
- Interior Painting Tools List – 17+ Must-Haves for Homeowners
- Cost to Paint a Room – DIY vs Hire Comparison
- How to Transform Walls with Just Paint: 20+ Wall Painting Ideas