How to Paint a Room Fast

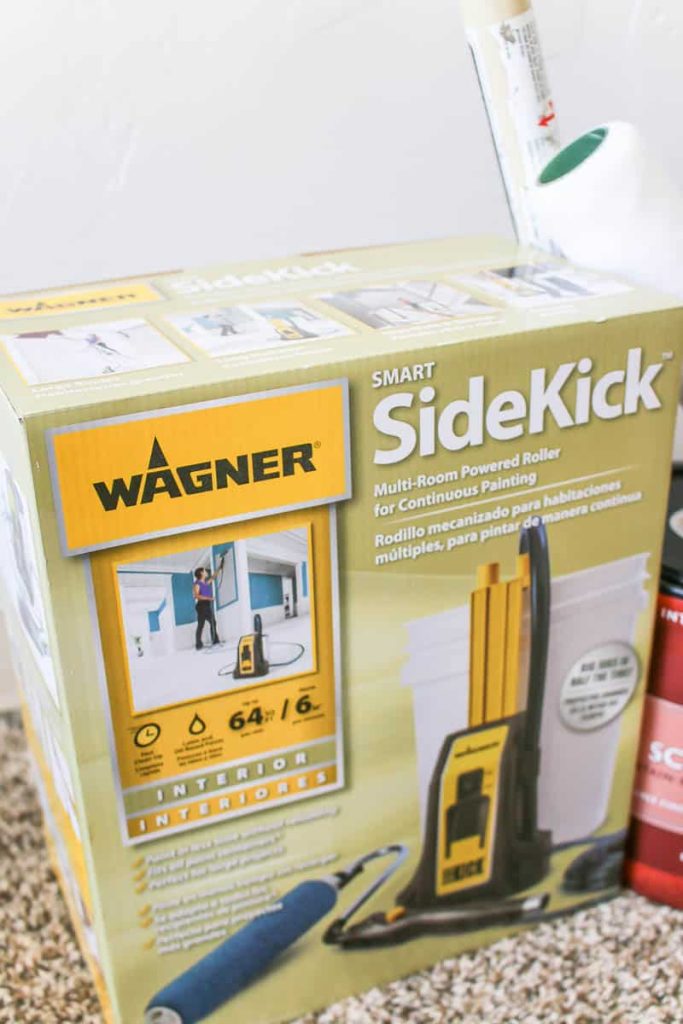
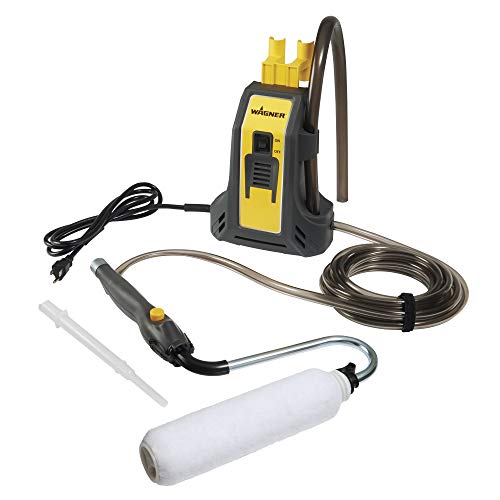
If you are looking for the fastest way to paint a room, give the Wagner Sidekick Power Roller a try! This electric roller makes it easier than ever to paint a room fast. No more paint trays or reloading paint rollers and brushes. Save time and paint a room faster with an electric roller!
This how to paint a room fast tutorial contains affiliate links, but nothing that I wouldn’t recommend wholeheartedly. Read my full disclosure here.
As much as I love a fresh coat of paint, the hassle and work required gets old fast! Until we discovered the Wagner Electric Roller, we spent at least twice the time painting that we do now.
We got significantly better coverage with the Sidekick than with a traditional roller. Plus, we needed fewer coats of paint and only slight touch-ups were necessary!
The Power Roller is ideal for painting large rooms or multiple rooms at one time. It also allows for continuous painting to get the job done faster. The roller is surprisingly easy to use and only takes about ten minutes to clean, so if you are looking to paint a room quickly, this tool is just for you!
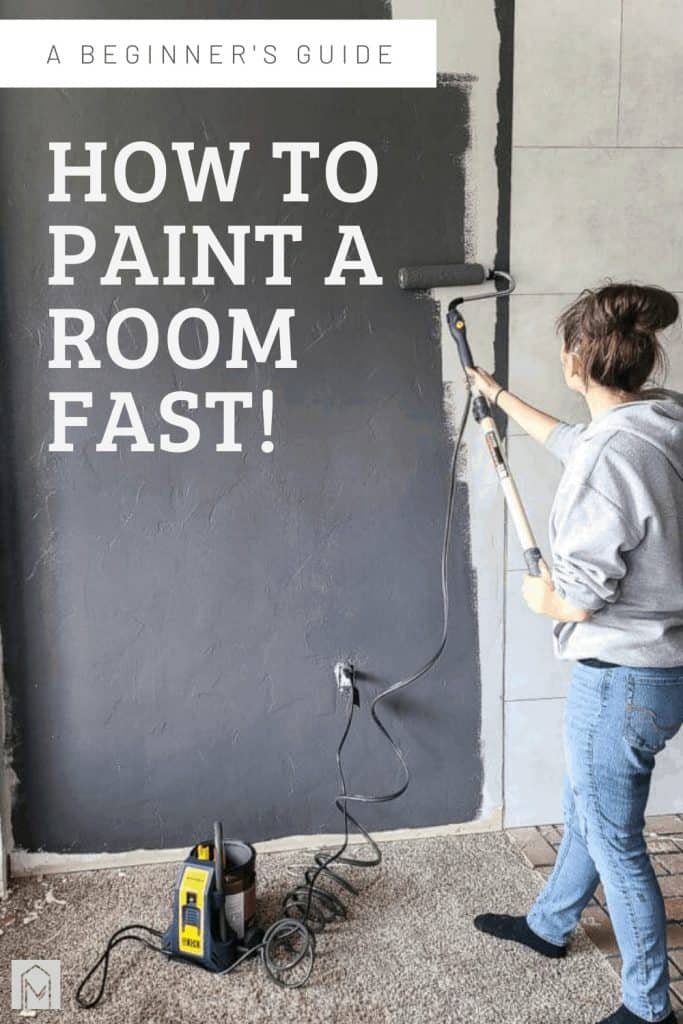
We used the Smart SideKick power roller for the first time when painting the walls in our living room and it was so helpful!
How to Use the Wagner Sidekick Power Roller: Video Tutorial
If you are a beginner painter, make sure you understand the task you are about to undertake. As simple as this electric roller makes the job, painting can be an expensive task (depending on how many walls you’re painting) and one that you should try to do correctly the first time around.
Just like with any other paint project, you will want to make sure your room is prepped and the edges are “cut in” with paint before you begin.
We also highly recommend cleaning the walls before painting. The paint rolls on so much smoother after removing the dust and grime that accumulates in our homes.
How does an electric power roller work?
This roller is best to use with oil and latex-based coatings and fits one- or five-gallon paint containers (you need to use the extension tube for a 5-gallon bucket). Plus, it’s just as easy to take apart as it is to put together.
The machine is simply clamped to the paint can or bucket of paint, and then a suction tube pulls the paint through the tube and into the roller for continuous paint flow.
But worry not! The paint will not spray or splatter, and there’s no risk for dripping or running paint. The flow is controlled directly from the roller’s handle with a simple button.
If you need more paint, you simply press the button for more. As the roller becomes saturated with paint, press the button again to stop the flow of paint.
With the press of a button, you can re-load your roller in seconds, and never stop working. There’s no need to return to the paint tray, roll the roller, and then return to the wall ever again! The Power Roller is a back-saver and even has an extension connection for reaching high walls and ceilings.
I also love that the manual and directions are easy to follow, and all of the parts are easy to clean and maintain.
The Fastest Way to Paint a Room: Using a Power Roller [Step-by-Step Guide]
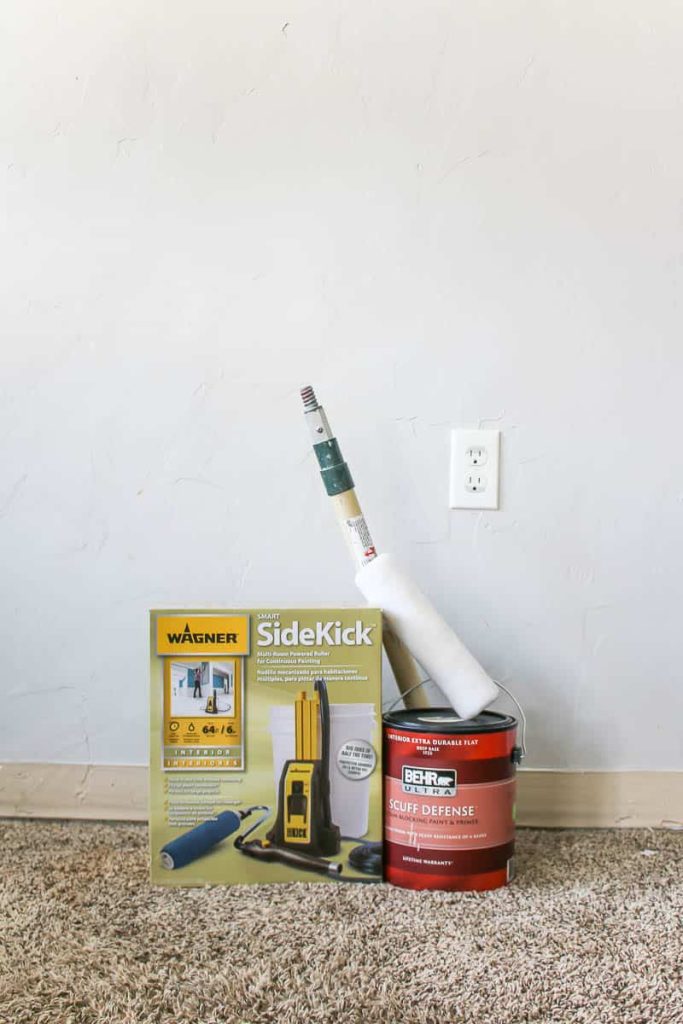
Supplies needed for painting a room faster:
- Wagner Smart Sidekick Power Roller
- Paint color
- Paint stick
- 5-gallon bucket (for cleaning)
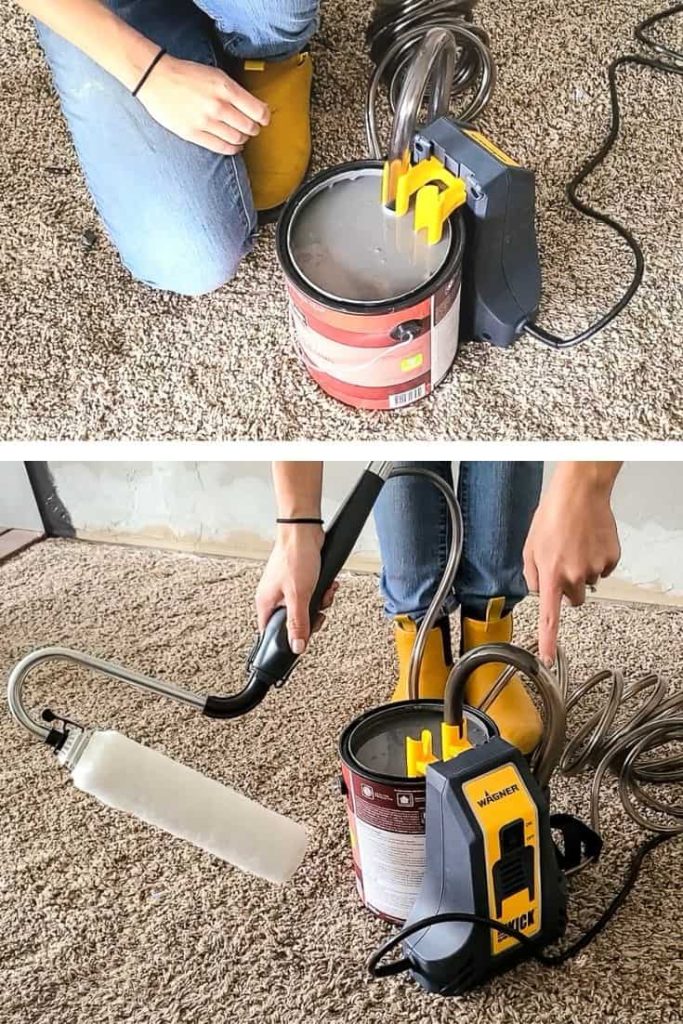
Step 1: Getting the Paint Ready
Make sure your paint has been shaken and stirred with a paint stick before using.
Remove the lid from the paint can and place the can onto the ledge of the Sidekick. Then, push down the yellow clamp to secure the paint can in place. You will hear it click into place.
Insert the suction tube into the paint and push it all the way to the bottom of the can. Then, slide the tube into the tube-shaped holder on the clamp. Make sure the tube is touching the bottom of the paint can.
If you’re using a 5-gallon bucket, you’ll need to use the extension tube for the bucket.
Step 2: Attach the roller
As you watch the video (above, or you can watch it here on YouTube), you will notice there is a paint roller cover and a metal bar that the paint roller slides onto. Much like a regular roller, you want to work with a clean paint roller each and every time you paint.
The metal bar has holes in it that allow the paint to come out. You’ll notice that the roller cover for the Smart Sidekick has small holes on the inside of the roller cover that allow the paint to be released into the roller. Don’t worry – you can order more roller covers for the Sidekick here.
To attach the paint roller, slide the roller onto the metal bar and clip it into place. Then, insert the base of the metal roller into the roller handle and clip it into place.
I’ll be honest – the clip connecting the roller cover to the metal bar is very tight and when you go to remove it, it will require some muscle power. You may want to practice a couple of times before it’s all messy with paint so you know how to take it all apart.
Step 3: Begin painting
Now is the fun part! After all of the pieces are attached, plug the machine in and press the power button on the machine attached to the paint can.
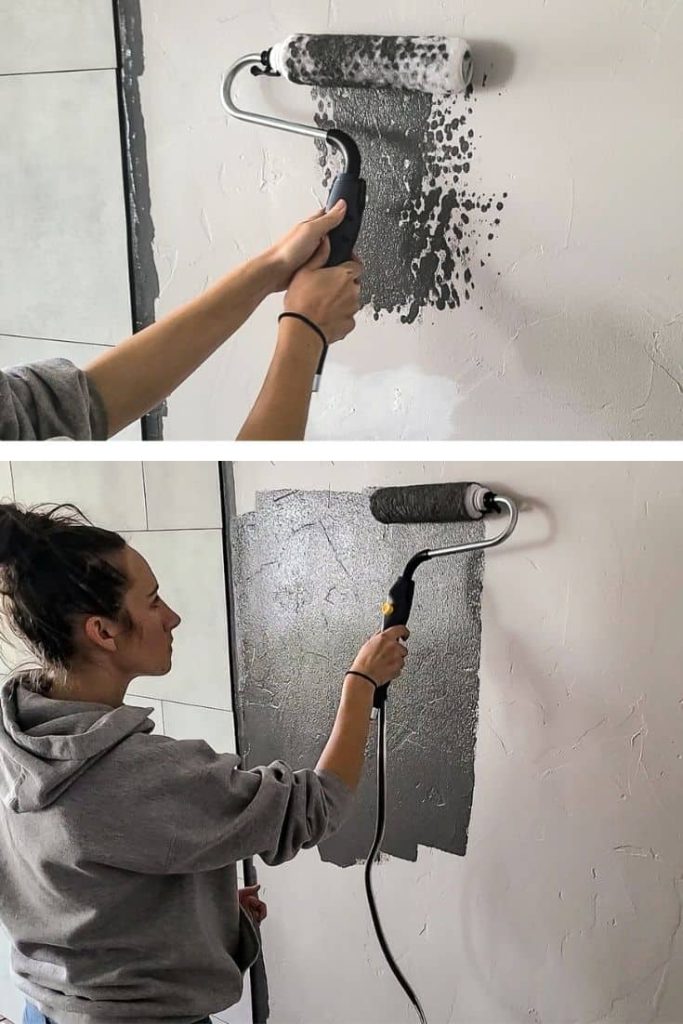
To activate the paint suction, press the yellow button on the handle of the paint roller. Immediately, you will notice that the paint will begin circulating through the hose attached to the roller.
It’s fun to watch the paint come up the tube and into the roller!
The paint will begin to saturate the roller as more paint is suctioned upward. Immediately, you’ll notice that the paint will begin coming through the hose that is attached to the roller.
At this time, place your roller on the wall and begin rolling as if you were painting. The paint will come through as splotchy and in dots at first, but the paint will continue to saturate the roller and will begin to cover the wall evenly.
After the paint roller is fully saturated, press the yellow button on the handle once more to stop the flow of paint. Be careful not to oversaturate the roller to prevent it from dripping, splattering, or sliding against the wall.
This process may seem intimidating at first, but once you get practice in, you’ll have a better understanding of when to turn the machine off and on.
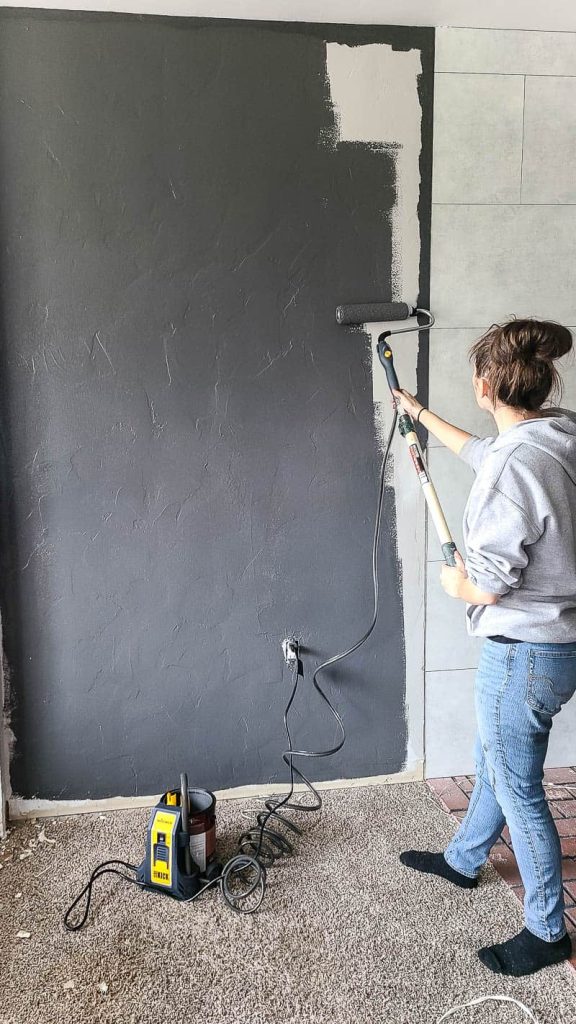
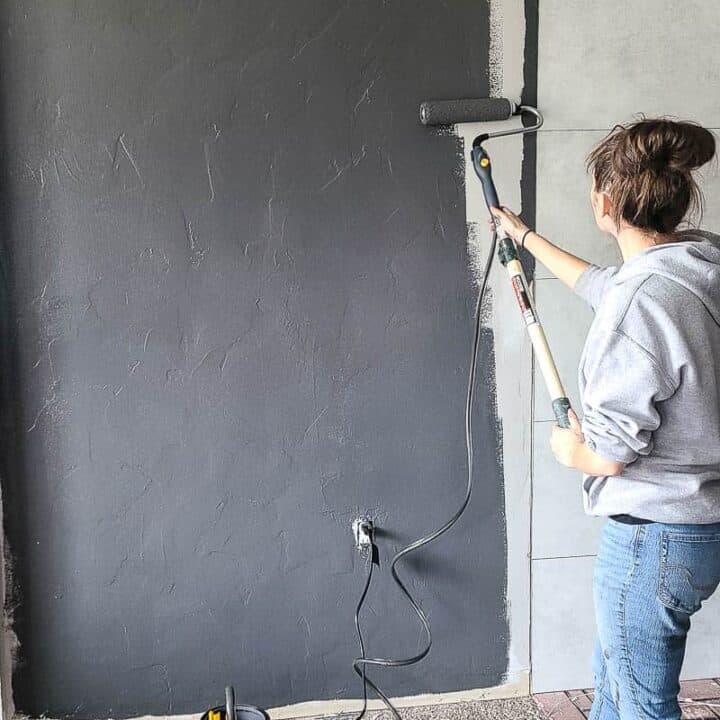
Continue rolling along the wall until there is a smooth, even coat of paint applied, pressing the yellow button for more paint as needed. After the first initial paint flow, the roller will become saturated much faster, so be cautious.
For the best results, I recommend working in three-foot sections, rolling in a W or M pattern for even coats of paint. Once you are done with a section, do one slow, solid swipe from ceiling to floor with the roller to finish the section smoothly and without roller marks.
Step 4. Cleaning the Wagner Electric Paint Roller
Clean-up is a breeze and doesn’t involve dirtying your kitchen sink or any of the other hassle from a traditional roller.
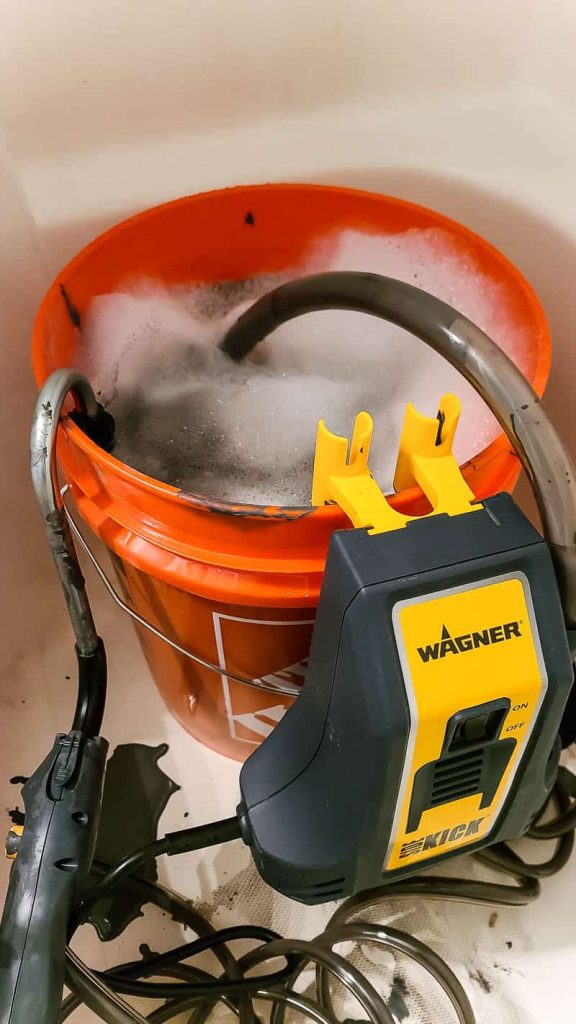
Basically, it’s a similar process to the painting, but water is circulated through the machine instead of the paint.
To clean the machine:
- Fill a 5-gallon bucket with soapy water. Then, insert the suction hose into the bucket.
- Remove the paint roller and place it inside the bucket or throw it away. Place the roller handle inside the bucket, as well.
- Turn the Sidekick on and run for 10 minutes to allow the soap and water to clean the suction tube until it is free of paint.
- Empty the bucket of soapy water and refill it with clean water. Run the machine again for 5 more minutes to remove soap residue.
- Remove the suction tube from the bucket and continue running the machine to fully empty the hose of water.
- Allow the suction tube to dry before storing.
I was able to save so much time with this tool. No more bending over to reload a paint roller, dripping paint, or sore backs! I love the result. The paint looks so smooth, and I did it in half the time.

How to Paint a Room Fast
Wondering what's the fastest way to paint a room? Using the Wagner SideKick power paint roller will cut your painting time in half. Here's how to use this easy painters tool!
Materials
- Wagner Smart Sidekick Power Roller
- Paint color
- Paint stick
- 5-gallon bucket (for cleaning)
Instructions
- Make sure your paint has been shaken and stirred.
- Place the can onto the ledge of the Sidekick, the push down the yellow clamp to secure the paint can in place.
- Insert the suction tube into the paint and push it all the way to the bottom of the can. Then, slide the tube into the tube-shaped holder on the clamp. Make sure the tube is touching the bottom of the paint can.
- Attach the paint roller by sliding the roller onto the metal bar and clipping it into place. Then, insert the base of the metal roller into the roller handle and clip it into place.
- To activate the paint suction, press the yellow button on the handle of the paint roller. Paint will start flowing through the tube to the roller.
- Once the roller becomes saturated, begin painting your wall. Once the roller is fully saturated, press the yellow button to stop the flow of paint. Press it again when you need more.
Cleaning your Wagoner Electric Paint Roller
- Fill a 5-gallon bucket with soapy water. Then, insert the suction hose into the bucket.
- Remove the paint roller and place it inside the bucket or throw it away. Place the roller handle inside the bucket, as well.
- Turn the Sidekick on and run for 10 minutes to allow the soap and water to clean the suction tube until it is free of paint.
- Empty the bucket of soapy water and refill it with clean water. Run the machine again for 5 more minutes to remove soap residue.
- Remove the suction tube from the bucket and continue running the machine to fully empty the hose of water.
- Allow the suction tube to dry before storing.
Notes
Be careful not to oversaturate the roller to prevent it from dripping, splattering, or sliding against the wall.
After the first initial paint flow, the roller will become saturated much faster, so be cautious.
For best results, I recommend working in three-foot sections, rolling in a W or M pattern for even coats of paint.
Recommended Products
As an Amazon Associate and member of other affiliate programs, I earn from qualifying purchases.
Related: Other Interior Painting Articles
- Choosing Front Door Paint Colors (& How To Paint A Door)
- Two Tone Walls in Bedroom: How To Paint Straight Lines
- Mountain Mural Tutorial (Featuring Behr Paint Colors Trends)
- Behr Chic Gray Paint Reveal (+ The Best Order of Painting A Room)
- Modern Sponge Painting | Semi Circle Pattern in Back of Locker Cabinets
- How To Paint An Arch Like A Pro
- A Basic Paint Sheen Guide for Interior and Exterior Surfaces
- How To Cut In Paint without Painter’s Tape
- How To Paint A Ceiling With A Roller
- Behr Fashion Gray | Paint Color Overview and Review
- How To Paint A Room For Beginners | Ultimate Guide
- Tips for Painting Baseboards and Trim
- Black Bamboo Behr | Paint Color Overview and Review
- Behr Meteorological | Paint Color Overview and Review
- Behr Falling Snow | Paint Color Overview and Review
- 16 Gorgeous Green Accent Walls
- Snowy Pine Behr Paint Overview
- In The Moment Behr Paint Color Overview
- 22 Front Door Paint Colors to Inspire You
- Master Bedroom Colors | 20 Great Paint Color Ideas with Pictures
- Behr Midnight in NY Paint Color Overview
- Graphic Charcoal Behr | Paint Color Overview and Review
- Do I need Primer Before Painting?
- How to Paint a Room Fast
- How To Clean Walls Before Painting
- Interior Painting Tools List – 17+ Must-Haves for Homeowners
- Cost to Paint a Room – DIY vs Hire Comparison
- How to Transform Walls with Just Paint: 20+ Wall Painting Ideas