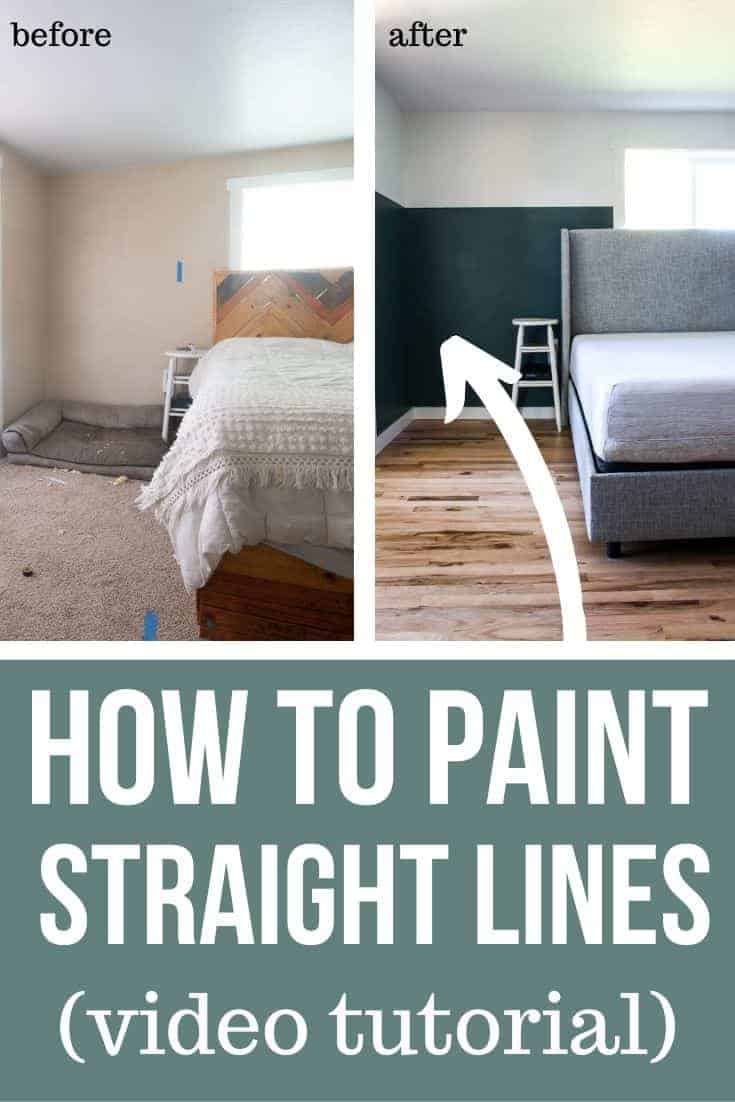
Two Tone Walls in Bedroom: How To Paint Straight Lines

Wondering how to paint straight lines? This tutorial for our beautiful two tone walls will teach you just that! I just love how the paint in our bedroom turned out.
Thank you to FrogTape for sponsoring this two tone walls tutorial! All opinions are entirely my own. This post also contains affiliate links, but nothing that I wouldn’t recommend wholeheartedly. Read my full disclosure here.
I mentioned in our hardwood floor tutorial that we had been staring at paint swatches for a year and a half in our master bedroom.
It’s true.
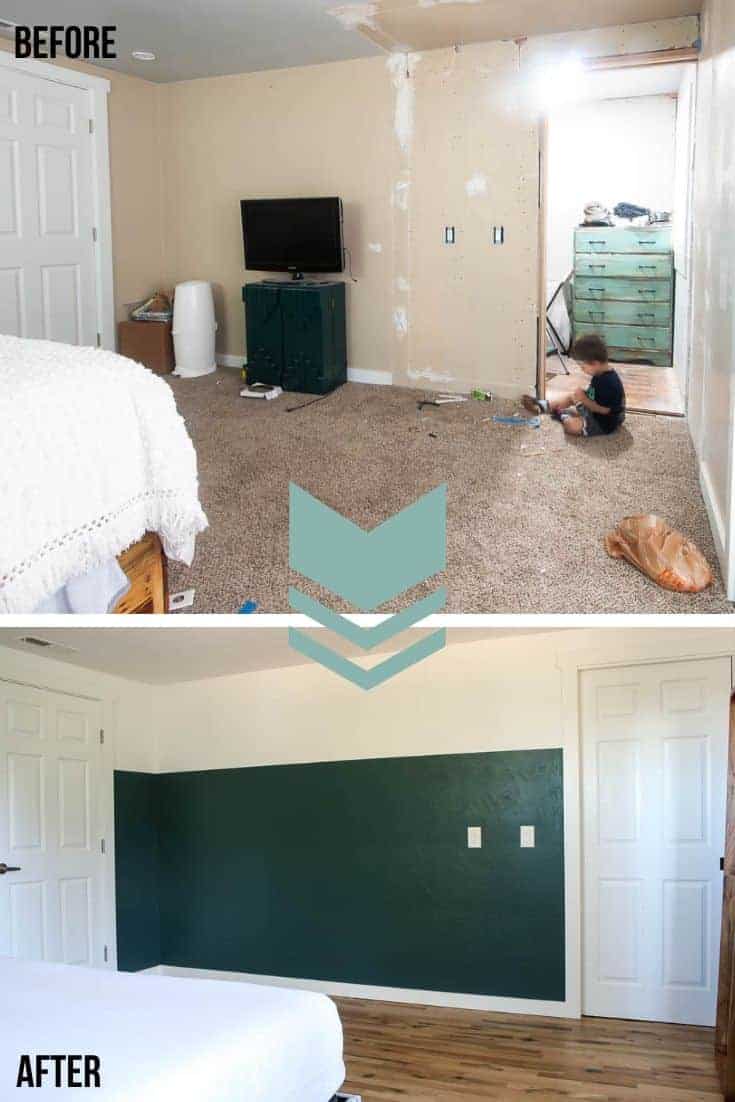
The room was a disaster filled with gross brown carpet, tan walls with paint swatches, and patched walls that were never re-textured.
Before Pictures
Here’s what we started with:
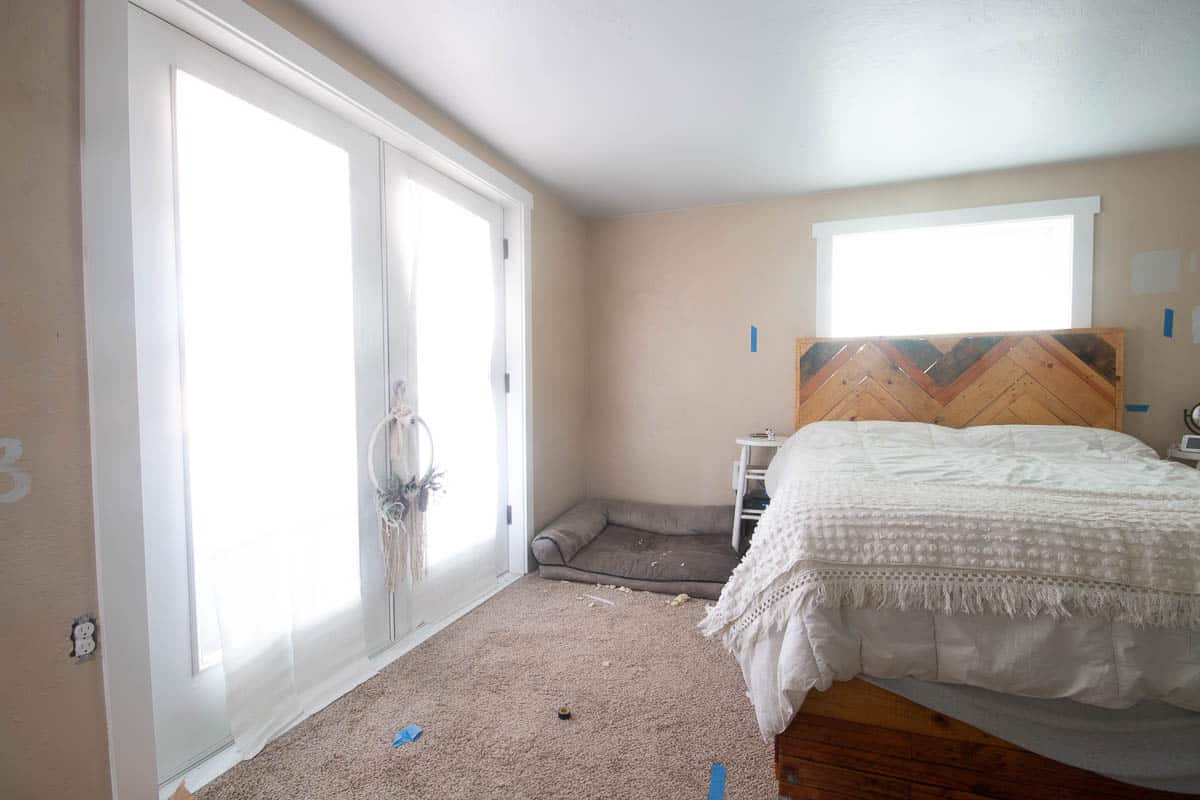
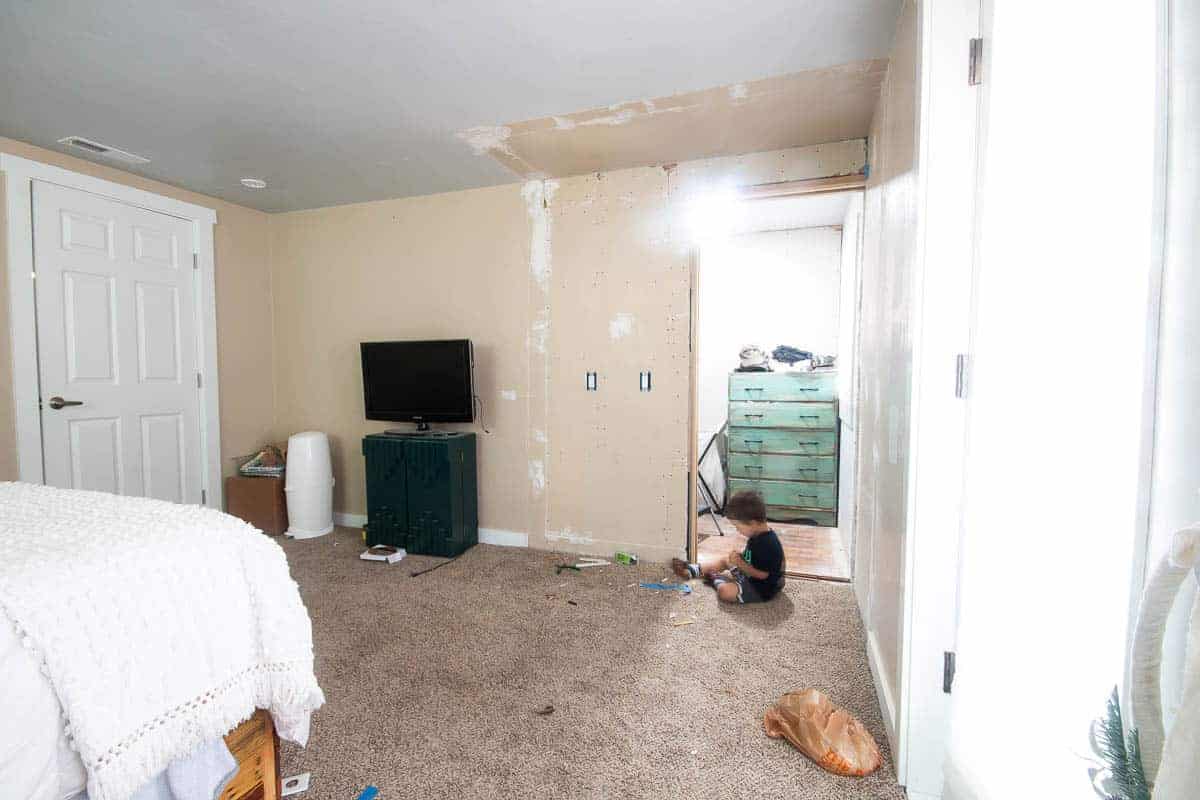
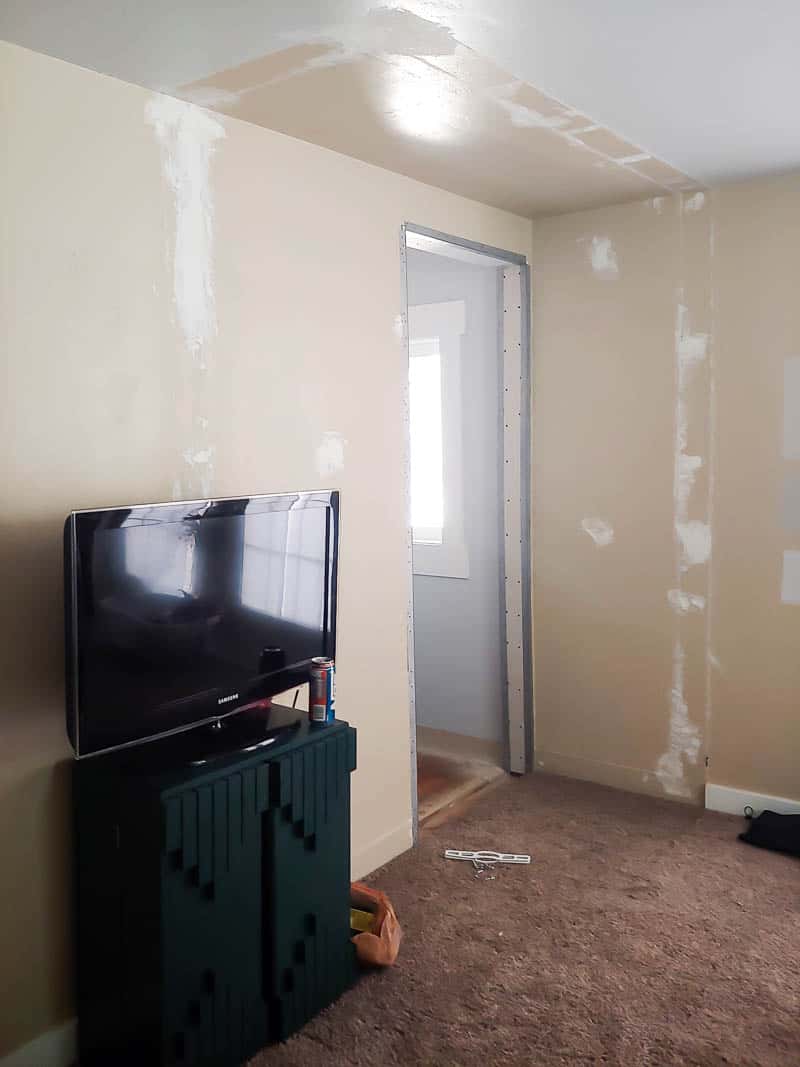
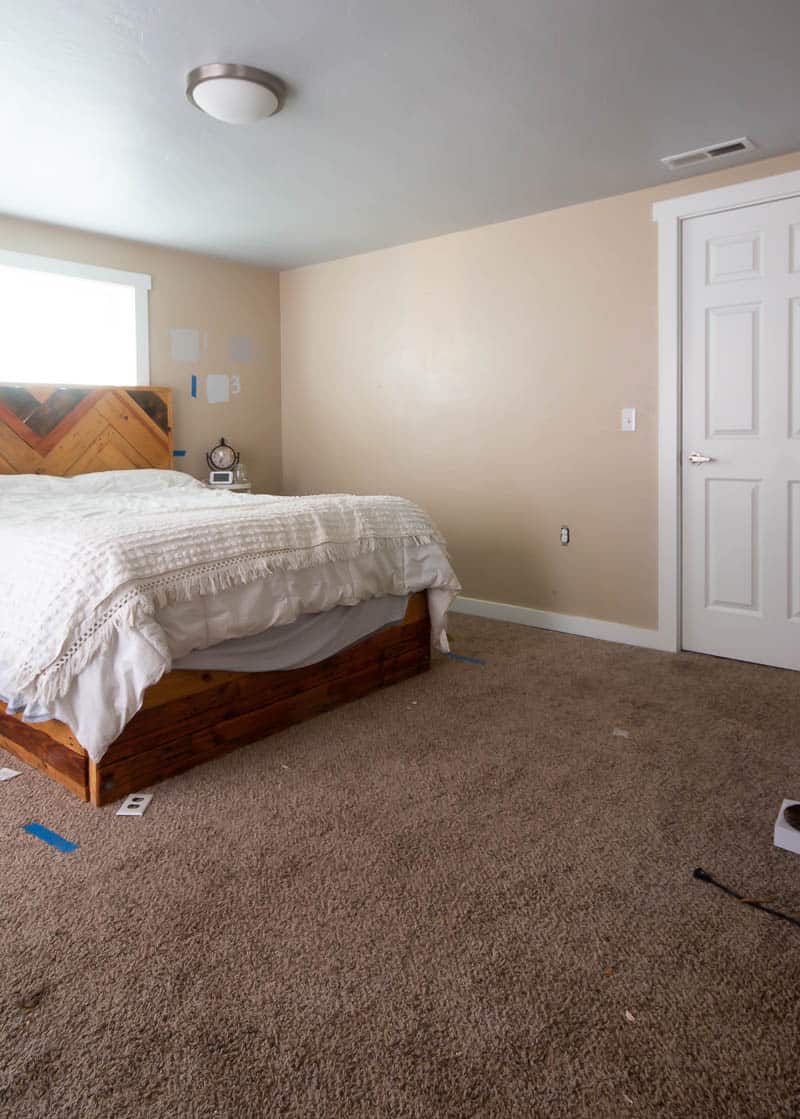
Yikes, right?
Well, I can’t WAIT to show you how it looks now and teach you how to create two tone walls in your house too.
P.S. we also got rid of the U-G-L-Y carpet recently! Check out our new hardwood floors here!
UPDATE: Check out the finished master bedroom reveal here!
How to Paint Two Tone Walls: Video Tutorial
So we’re going to make this really easy for you…we made a video tutorial too! So you can either watch the video below…or read the full tutorial.. or both if you’re really jazzed about it all.
If you love DIY videos, be sure to subscribe to our YouTube channel!
Step By Step: How to Paint Straight Lines on Two Toned Walls
Supplies:
- FrogTape (we used this delicate surface tape)
- Tape measure
- 4 foot level
- 9 inch paint roller
- Paint roller cover
- Paint brush
- Paint tray
- Canvas drop cloth
- 2 colors of paint
Step 1: Decide the height of two tone walls.
First, take your tape measure and decide just how far up you want the two tone walls to start.
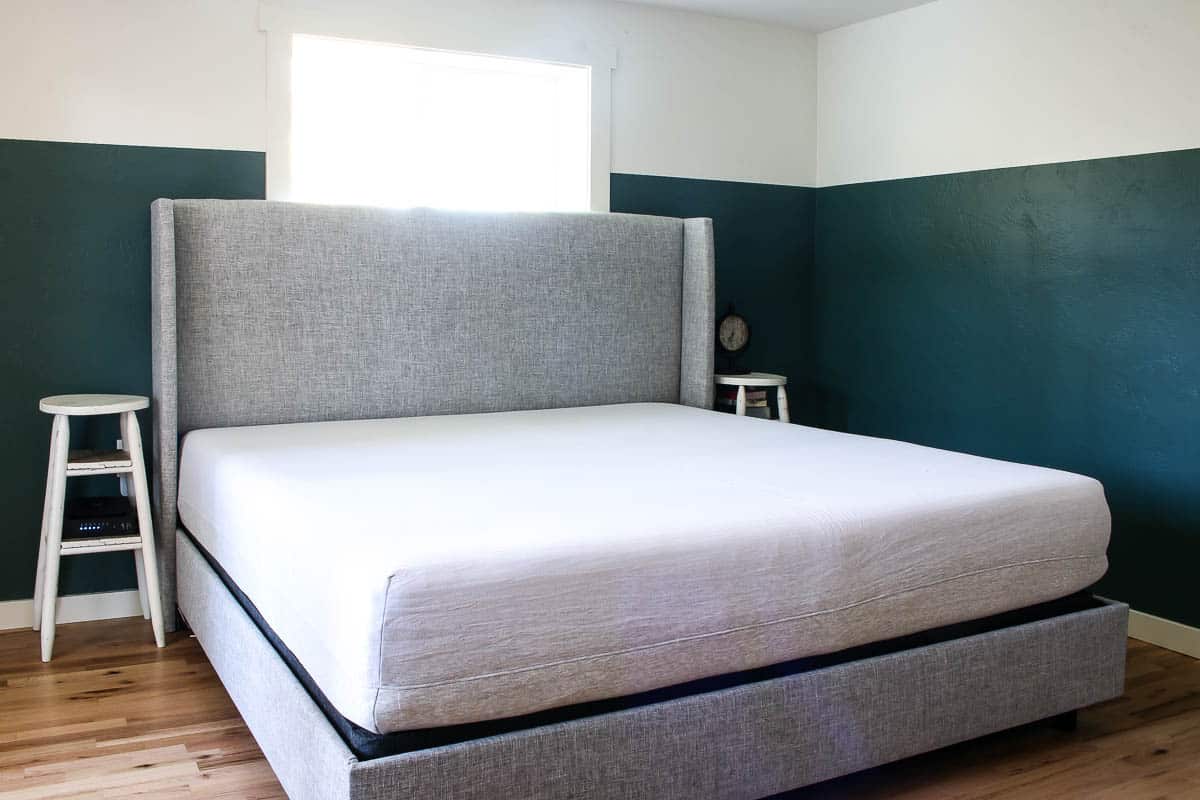
I decided that I wanted my darker color to stop at my eye level. There really wasn’t any rhyme or reason than that and I just love having the two tone walls right where I can see them.
I also wanted it to intersect with all of the wall decor, which will be hung at eye level.
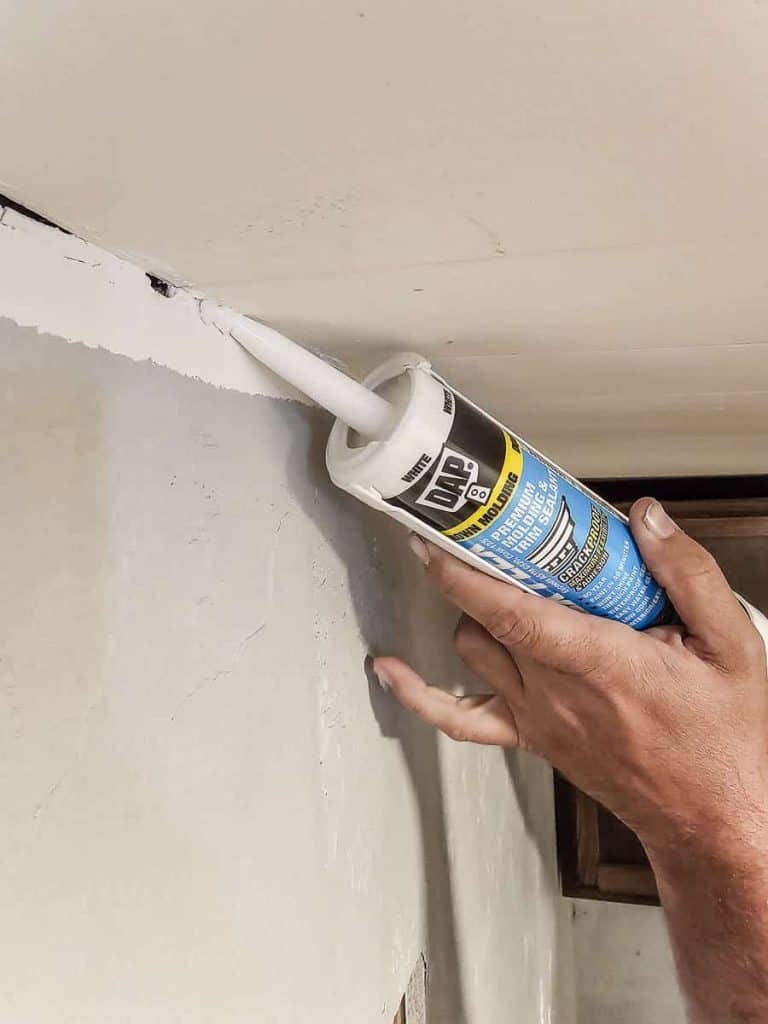
Step 2: Paint ceilings & trim (optional).
If you’re going to be repainting your ceiling and trim, do that first. I would recommend it. If you’re going to all of the trouble to paint the walls, new paint on the trim and baseboards and ceiling makes everything feel nice and fresh.
Step 3: Paint the top color.
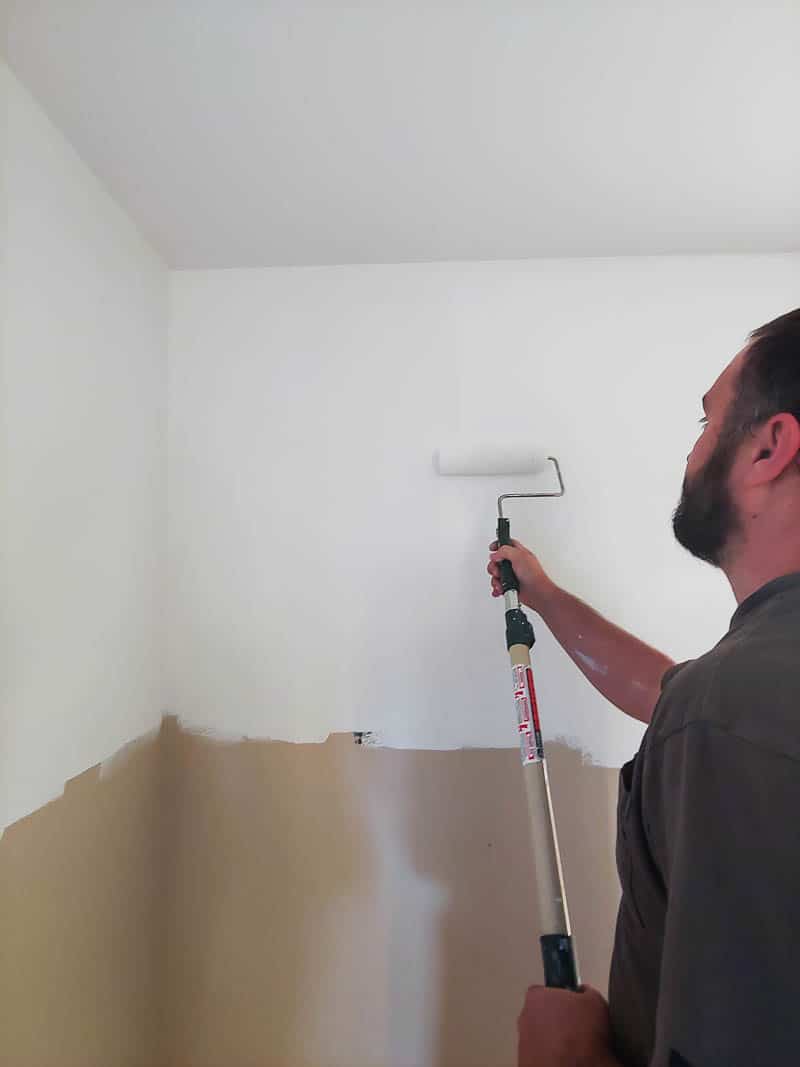
When we are painting a room, we already start at the top and work our way down. So we painted the top color (this perfect white color).
We were very sure to paint beyond where we knew our line would be to transition our two tone walls.
Step 4: Wait for the paint to dry.
Now you should really wait as long as possible for that top layer of paint to dry. This helps the paint cure, which is helpful when you are placing the tape on top of it.
We were on a time crunch and wanted to paint the 2nd color the very next day (just about 24 hours later), so we opted to use FrogTape’s delicate surface painter tape. It is designed for fresh paint (that has dried for at least 24 hours). And spoiler alert, it worked like a CHARM.

Step 5: Draw a level line around the room.
Actually, maybe I should preface this step with another one – take a deep breath.
To be completely honest, remaining calm while you try to put a PERFECTLY straight and level line around your entire room is harder than it seems.
If you followed along on our IG Stories, you know that when Logan and I were getting our line on the wall we tried 3 times (YES, 3 times!) before getting it right.
Granted we had purchased a laser level (just for this project, might I add)….and it was always off by an inch…three times in a row.
So we settled on this method when putting up a level straight line. It’s old school, but it works perfectly!
Measure and make a mark on the wall where the line will be where the two tone walls change color. Once you have the mark drawn, grab your 4 ft level.
Start your first line by getting the “bubble” perfectly in the center, and I mean perfectly! If you don’t try to get the bubble perfectly center the line will move over the course of an entire room by a noticeable amount. This is the key for how to paint straight lines.
Continue making your way around the room making a level line.
Step 6: Apply FrogTape.
After your line is drawn, grab your FrogTape and start putting it directly on the line for your two tone walls.
Again you have to be as exact as possible just like when you were drawing the line. Any slight differences will result in a line that changes noticeably over an entire room.
Step 7: Activate the paint block technology.
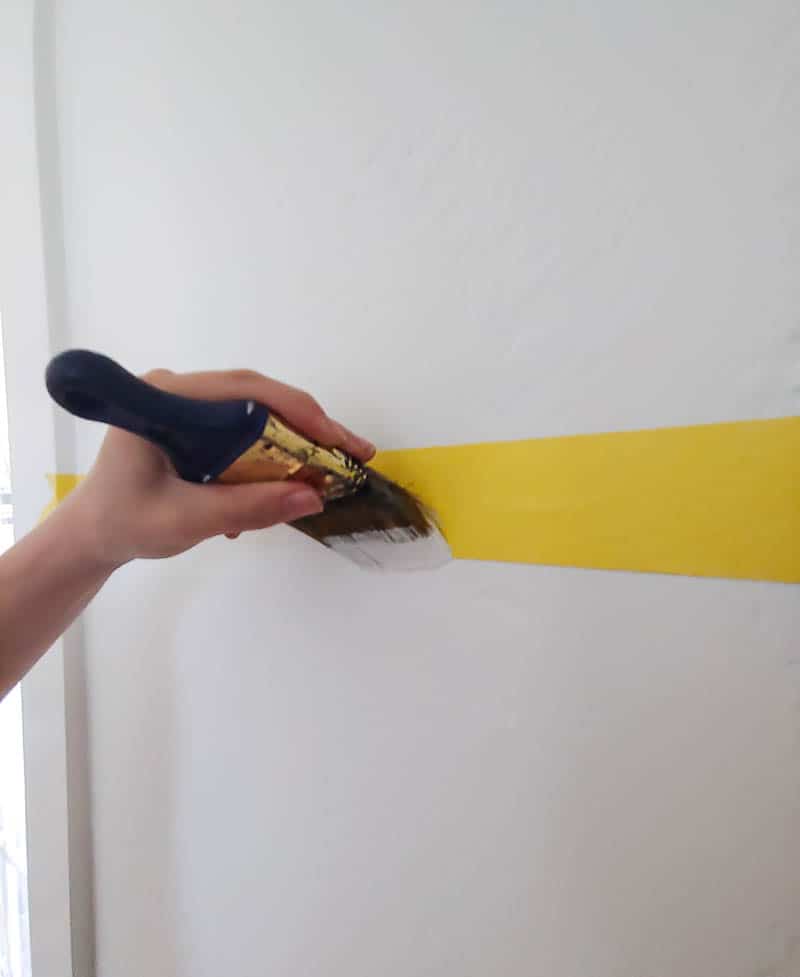
Once your tape is up you’ll need to activate the paint block technology of the FrogTape. It’s activated by the latex in the paint, so all you need to do is simply take the first layer of paint you did and paint over the bottom side of the tape.
This method is the key for how to paint straight lines and preventing any bleeds that may occur due to texture and other imperfections on your walls.
Let the paint on the tape dry thoroughly before moving on.
Step 8: Paint the bottom color.
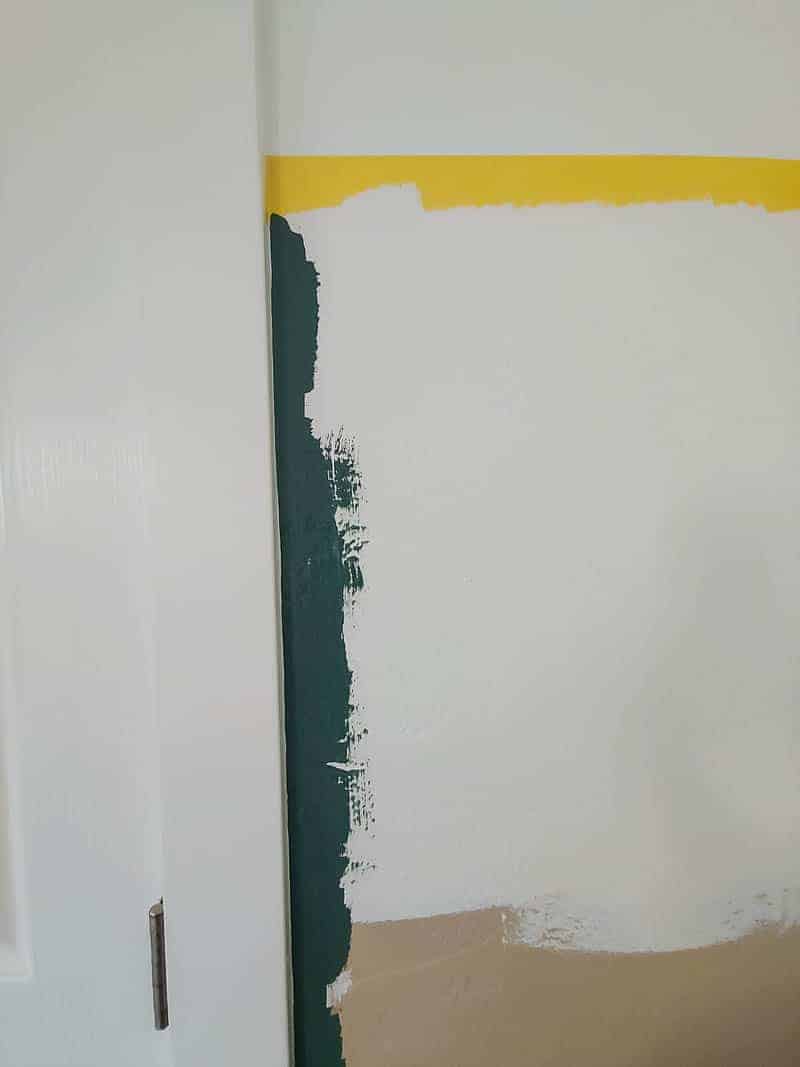
Now it’s time to finally paint the bottom color of the two tone walls. Start by carefully cutting in around trim, doors, and baseboards. If you’re not very experienced with cutting in, definitely tape things off first.

Then just grab your paint roller and tray and slap on the second color you chose for your two tone walls. Just be careful when you get up to the tape not to roll up too far and pass the tape.
Step 9: Remove the tape right away.
This next step is super important. If you asked how to paint straight lines then you don’t want to skip this.
Once you get your bottom color paint on, you need to take off the tape as soon as possible. This prevents the tape from taking off any other paint on the wall.
Peel slowly and at a 45-degree angle if possible.
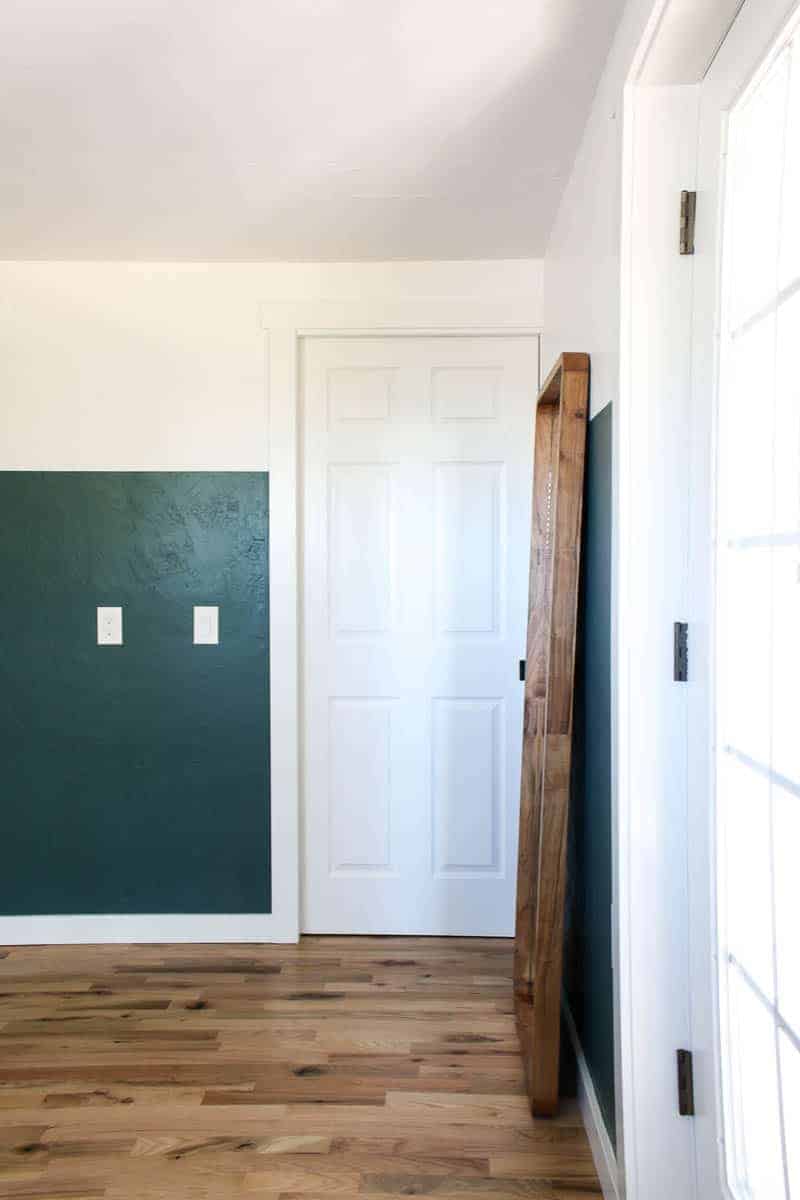
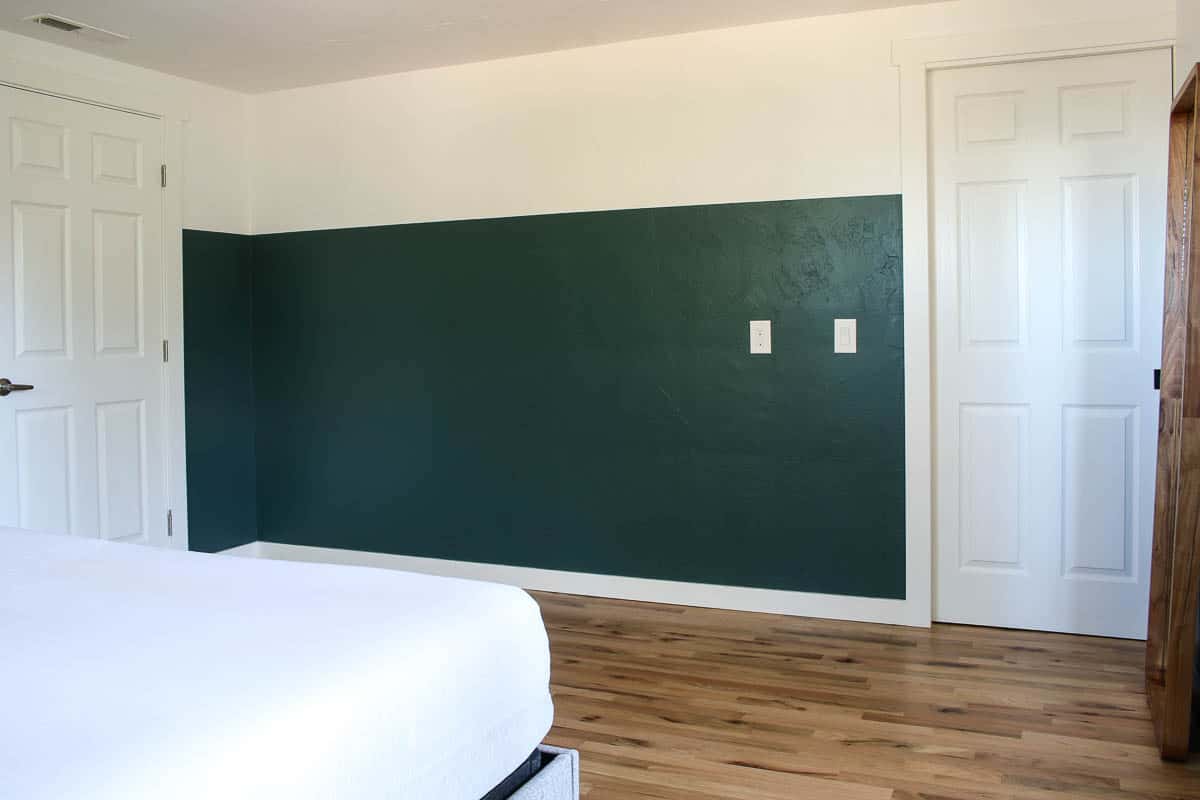
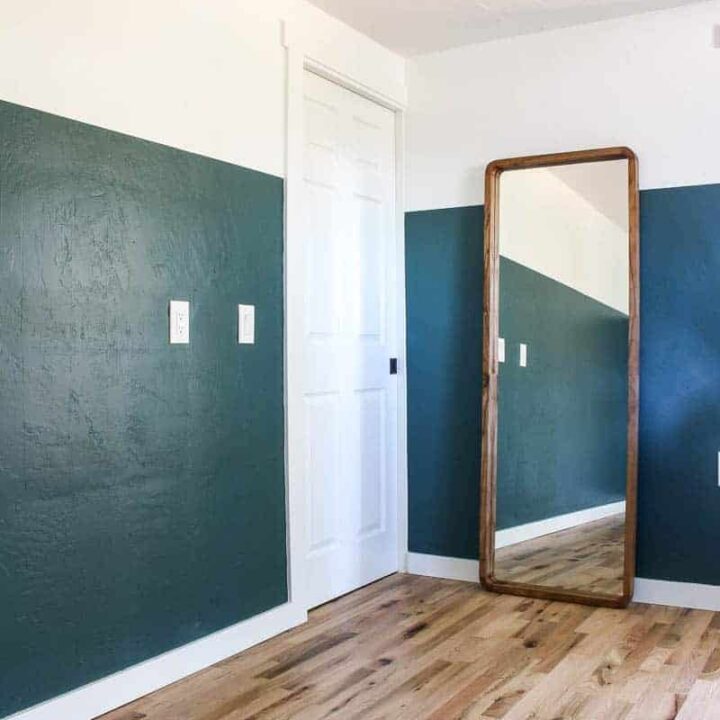
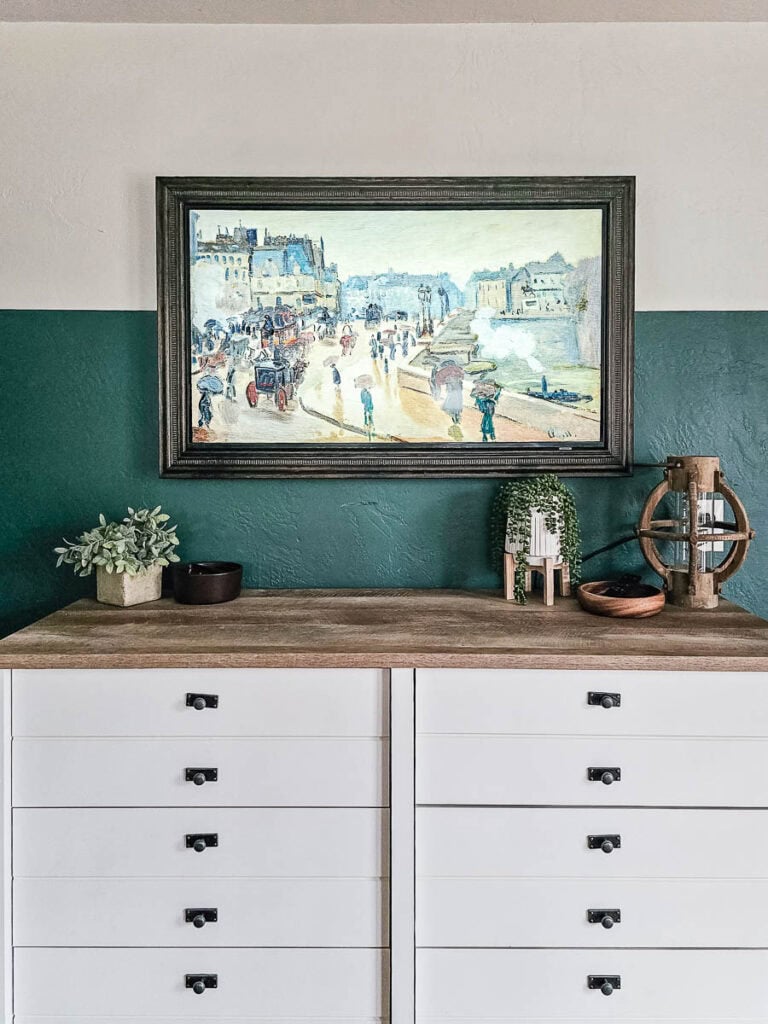
Look at those super crisp and straight paint lines!
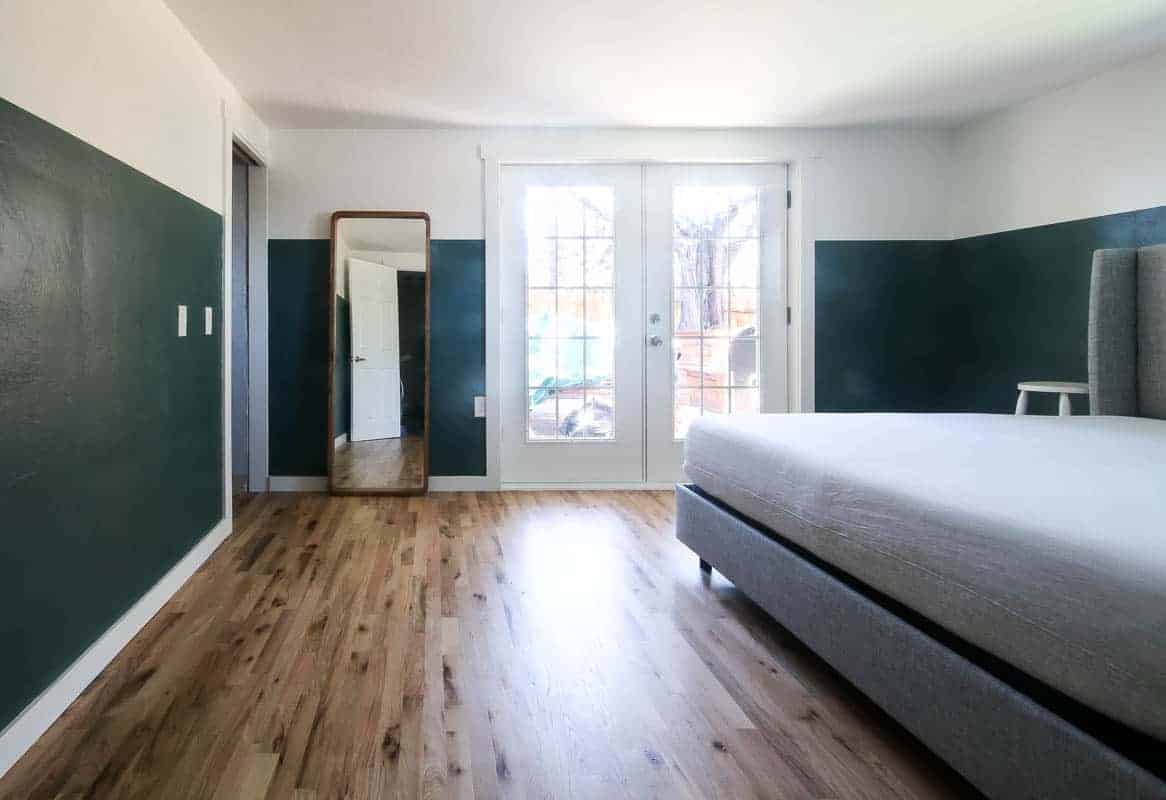
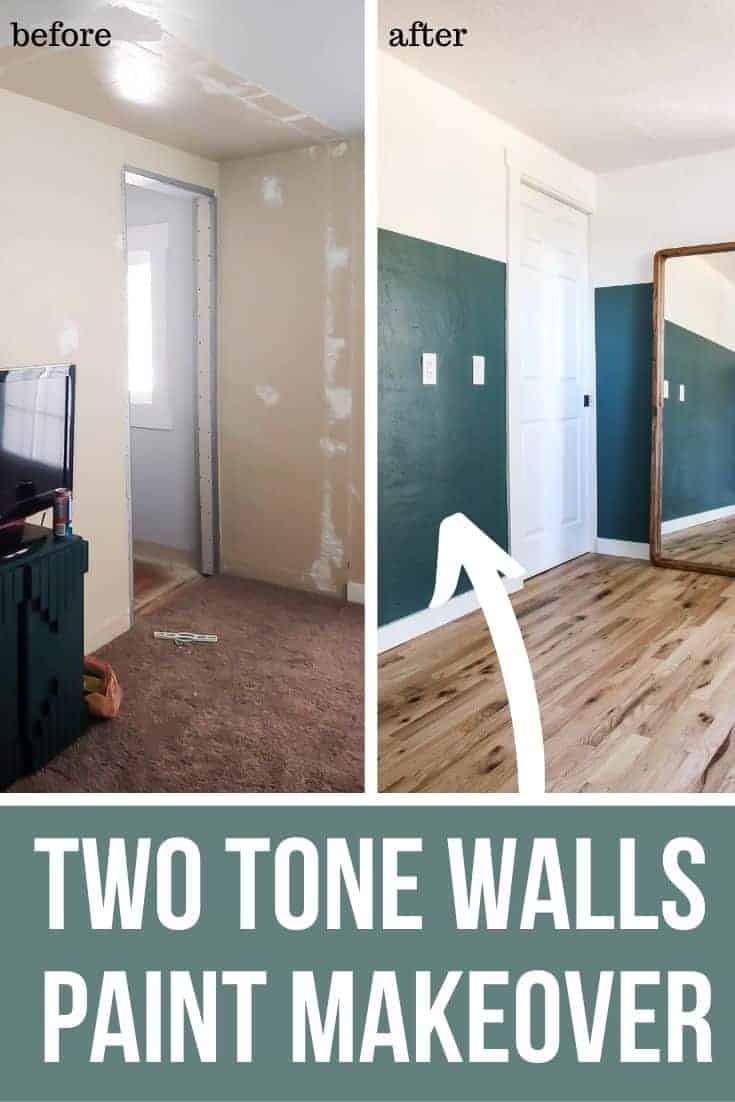
I’m SO obsessed with how our master bedroom is turning out. With the new hardwood floors and these gorgeous two tone walls, it’s making for a crazy great transformation – am I right?
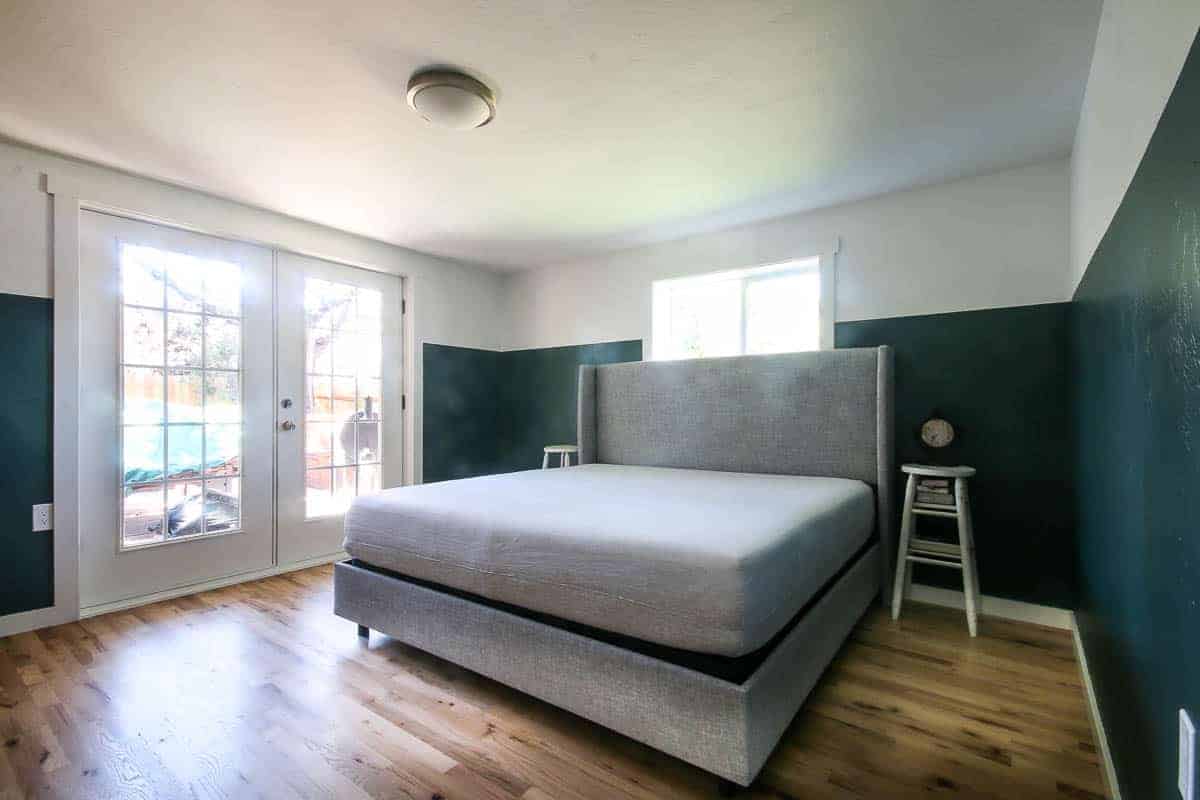
These two tone walls make such a big difference and create a unique and unexpected look in the bedroom, which I love.
I’m so glad that we decided to incorporate a dark and moody color – which I haven’t really done in any of our homes yet. It is bold and some say risky…but I’m in love.
I can’t wait to get it finished off with decor, furniture, and bedding! (Update: Check out the finished master boho bedroom here!)

Let’s take one more look at the crazy before and afters!
Where would you paint two tone walls in your home??
Let me know in the comment below.
How To Paint Two Tone Walls in Bedroom
Want to learn how to paint straight lines, the expert way? Here's how we achieved two tone walls in our bedroom, and our expert trick for painting straight lines around the whole room.
Materials
- FrogTape
- Canvas drop cloth
- Dark Green Color
- White Color
Tools
- Tape measure
- 4 foot level
- 9 inch paint roller
- Paint roller cover
- Paint brush
- Paint tray
Instructions
- Decide height of two tone walls
- Paint ceiling and trim (optional)
- Paint top color
- Wait for paint to dry
- Draw level line around room with pencil
- Apply Frogtape along line
- Activate the paint block technology by painting the first (top) color over the edge of the painter's tape
- Paint bottom color
- Remove tape right away
Related: Other Interior Painting Articles
- Choosing Front Door Paint Colors (& How To Paint A Door)
- Two Tone Walls in Bedroom: How To Paint Straight Lines
- Mountain Mural Tutorial (Featuring Behr Paint Colors Trends)
- Behr Chic Gray Paint Reveal (+ The Best Order of Painting A Room)
- Modern Sponge Painting | Semi Circle Pattern in Back of Locker Cabinets
- How To Paint An Arch Like A Pro
- A Basic Paint Sheen Guide for Interior and Exterior Surfaces
- How To Cut In Paint without Painter’s Tape
- How To Paint A Ceiling With A Roller
- Behr Fashion Gray | Paint Color Overview and Review
- How To Paint A Room For Beginners | Ultimate Guide
- Tips for Painting Baseboards and Trim
- Black Bamboo Behr | Paint Color Overview and Review
- Behr Meteorological | Paint Color Overview and Review
- Behr Falling Snow | Paint Color Overview and Review
- 16 Gorgeous Green Accent Walls
- Snowy Pine Behr Paint Overview
- In The Moment Behr Paint Color Overview
- 22 Front Door Paint Colors to Inspire You
- Master Bedroom Colors | 20 Great Paint Color Ideas with Pictures
- Behr Midnight in NY Paint Color Overview
- Graphic Charcoal Behr | Paint Color Overview and Review
- Do I need Primer Before Painting?
- How to Paint a Room Fast
- How To Clean Walls Before Painting
- Interior Painting Tools List – 17+ Must-Haves for Homeowners
- Cost to Paint a Room – DIY vs Hire Comparison
- How to Transform Walls with Just Paint: 20+ Wall Painting Ideas


I love it! The color you chose is perfect!!
Thanks, I love how dark and moody it is! Always a good choice for a bedroom.
I totally want to do this in our bedroom! Love that green and the two-tone look is so pretty. Thanks for always sharing how you do projects like this!
So glad you found it helpful! It’s such a fun idea for a bedroom.
The color you picked is so pretty! You guys always do the best projects!
Aw thanks friend!
I love the color you chose, It looks great.
Thanks Carol!
Wish the window wasn’t partially covered by bed, painting awesome
Thanks! 🙂 Yes, you could definitely order a lower bed if you wanted 🙂
How would this work if you have cathederal ceilings? We own a manufactured home that has the cathederal part of the ceilings running the whole lenght of the center of our home. I love this look but not sure it would work for us. Thanks
I think it would still look good. If you want to visualize it first, you could also put up some tape on the walls where the line would be and see what you think.
Did you apply two coats of the green paint? If so, did you remove the tape after the first or second coat?
We did two coats of the green paint and removed the tape immediately after finishing the 2nd coat. 🙂
Thanks for the fab tutorial, I now have fabulously straight lines!
So relieved! It looks awesome!
Awesome, so glad that you found it helpful.
Hi there! I’m
Curious if you painted the white colour the same as your ceilings/trim?
Thanks so much.
LOVE it
No, on the ceilings we used flat white ceiling paint – which we typically use on all ceilings in our home.
Hi there. Once you added the yellow tape and added the first color,
How long did you wait before applying your lower green color? Dry to touch (one hour) or dry to recoat (4 hours)? Thank you.
You’ll want to wait the time for dry to recoat (ie: 4 hours).
You said to take the tape off right away after painting the darker bottom color, but what if it needs more than one coat? Thanks in advance. Hoping to try this this weekend!
Leave the tape if you need a second coat. The key here is to remove the tape while the paint is still wet.
Hi there! Did you use a paint with a reflective quality in it for the dark green? It looks shiny in the photos…
Probably just the light in the photos, it is eggshell (same was the white color). 🙂
Hi there! Did you use a paint with a reflective quality in it for the dark green? It looks shiny in the photos…
Probably just the light in the photos, it is eggshell (same was the white color). 🙂