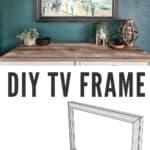
How To Build A DIY TV Frame

Thank you to Kreg for sponsoring this DIY TV Frame! All opinions are entirely my own. This post also contains affiliate links, but nothing that I wouldn’t recommend wholeheartedly. Read my full disclosure here.
We have the famous “Frame TV” in our living room and I love it. I get questions about it every time we have guests over. I love that it looks like a picture frame on the wall when it is not in use and that it sits pretty flat against the wall.
But truth be told, the Frame TVs are pretty spendy. So when we needed a new TV in our bedroom – I wasn’t about to spend a lot of money on a fancy TV that doesn’t get used often. Especially when you can buy a relatively nice TV for only a couple of hundred bucks.
We found this Samsung Smart TV, which was a little more expensive than the cheapest options. But we opted for this one because it was thinner and would sit closer to the wall when mounted – like the Frame TV does.
Then we added this slim-fit wall mount, which is made to hold the TV extra tight against the wall.
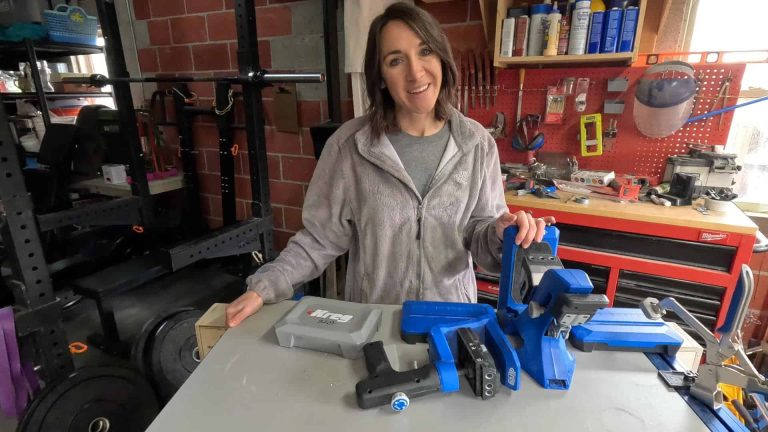
Kreg 720PRO Pocket Hole Jig
If you’ve been following Making Manzanita for a bit, you know that we are big fans of the Kreg pocket hole system.
Pocket hole joinery is definitely one of the easiest ways to join wood in woodworking projects. It’s our favorite hidden weapon for beginning woodworkers!
We decided to use pocket hole joinery on the inside of the TV frame so we didn’t have to worry about patching any nail holes on the sides of the frame. Everything is hidden inside the frame!
Want to learn more? I wrote a super detailed guide & created a video all about how to set up your Kreg 720PRO Pocket Hole and use it, so be sure to check that out too!
We teamed up with our friends Kreg again for these TV frame plans and are sharing them online for free, now available on KregTool.com!
Kreg’s website is chocked full of so many easy-to-follow FREE woodworking plans! I promise that you are going to find so much inspiration while you’re there! It is a goldmine!
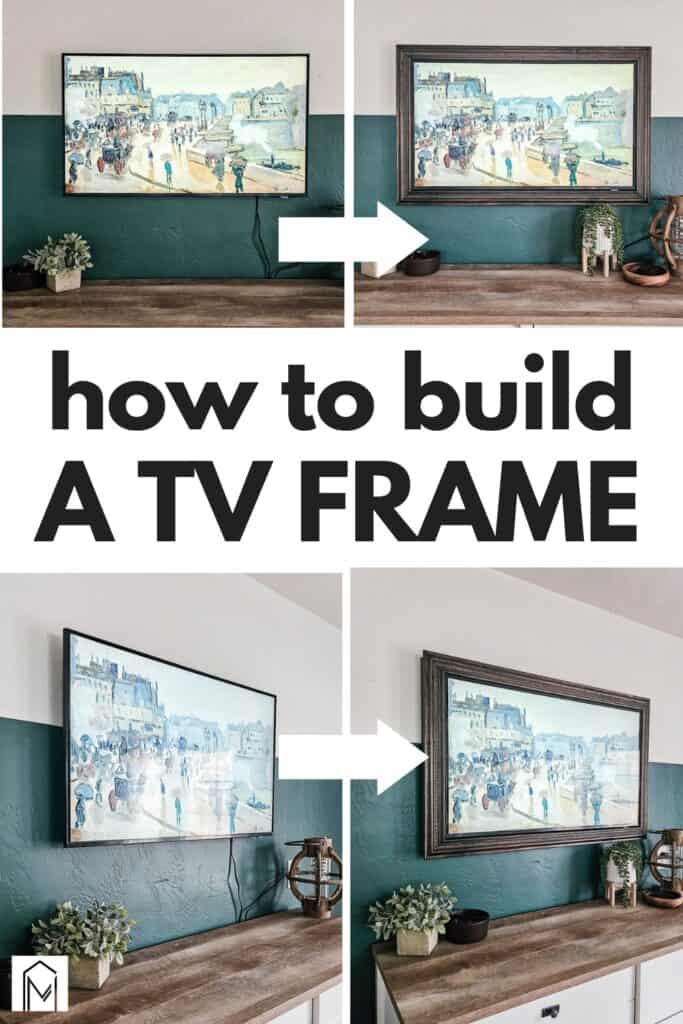
How To Build A DIY TV Frame: Step-by-Step Tutorial
Tools & materials you’ll need
This project uses pocket hole joinery, which is great for beginners! We used the 720Pro jig, but you could use any pocket hole jig! If you’re not sure which jig is right for you, check out this guide.
Step 1: Cut the Wood
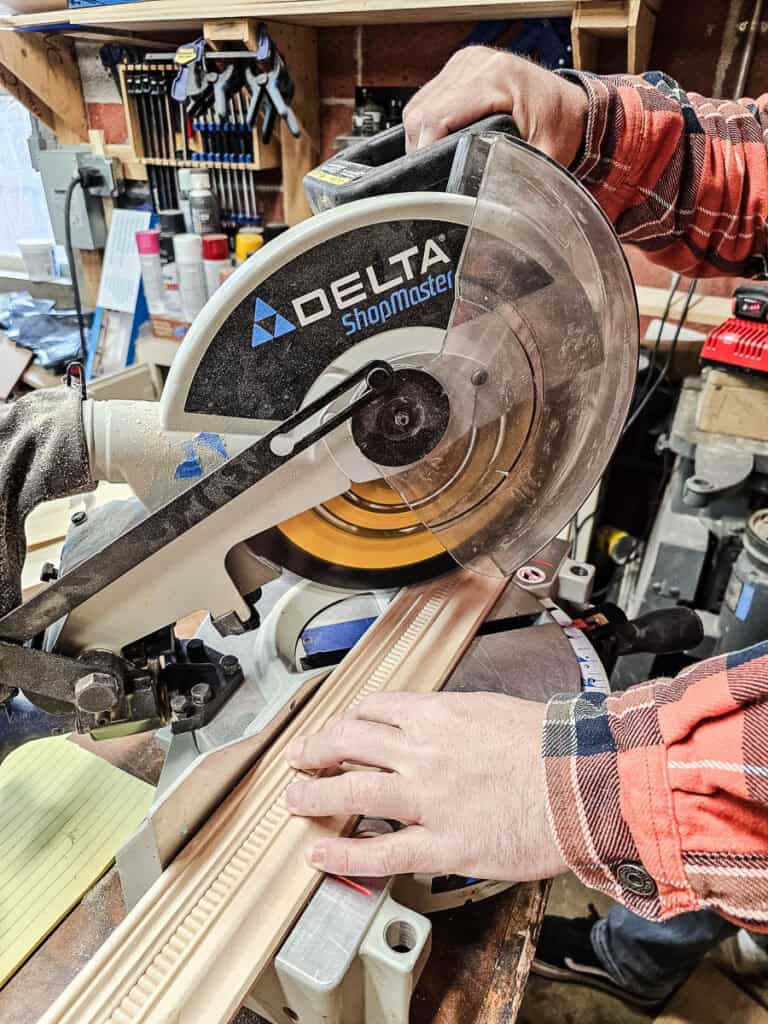
- Follow the cut list in the woodworking plans, which you can download here.
- Use a miter saw for length cuts and a table saw for rip cuts.
- Cut the molding and quarter round with 45-degree miter cuts at the corners.
- Always measure angle cuts from the short side for consistency.
Step 2: Drill Pocket Holes
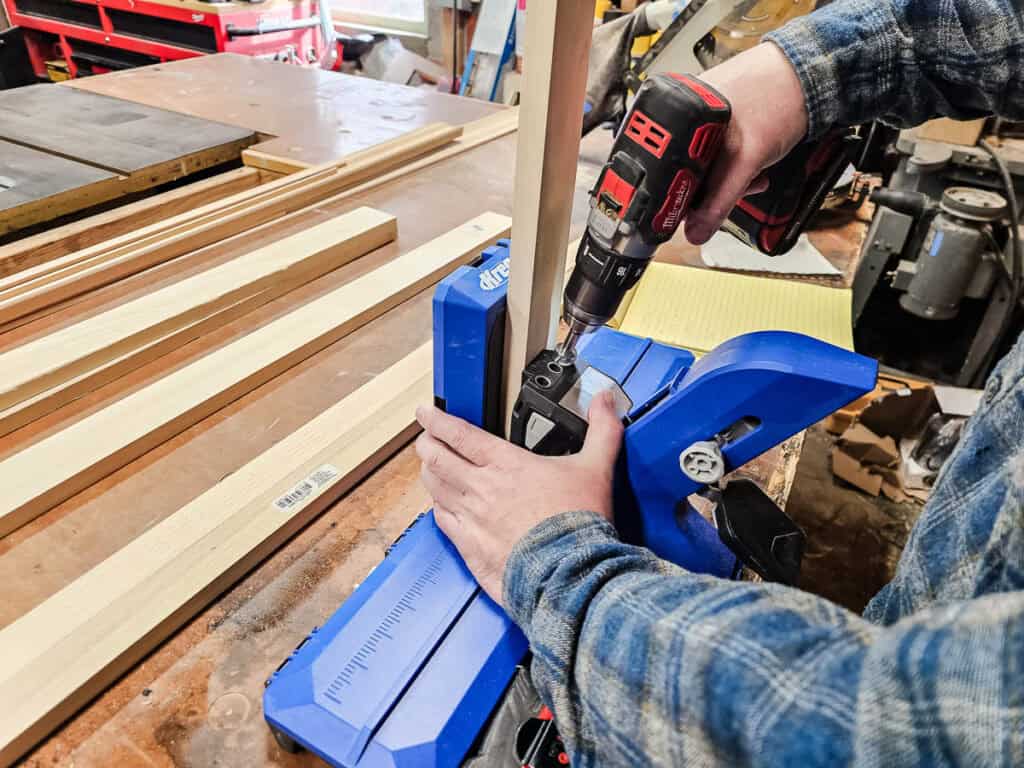
- Drill pocket holes on the frame pieces as shown in the plans. We used the 720Pro jig.
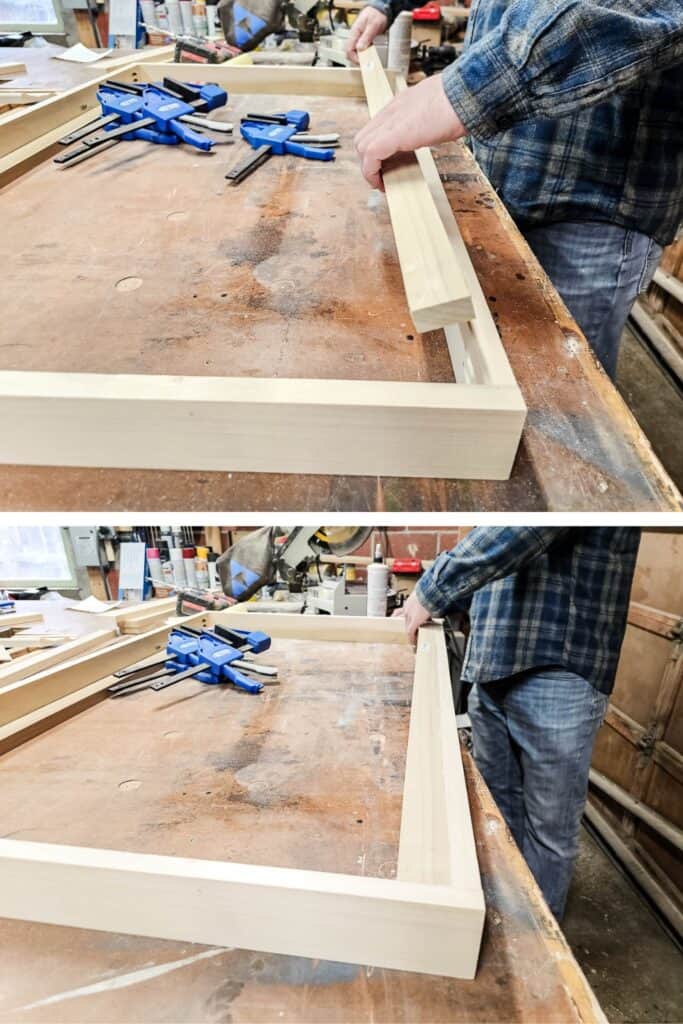
Step 3: Assemble the Frame
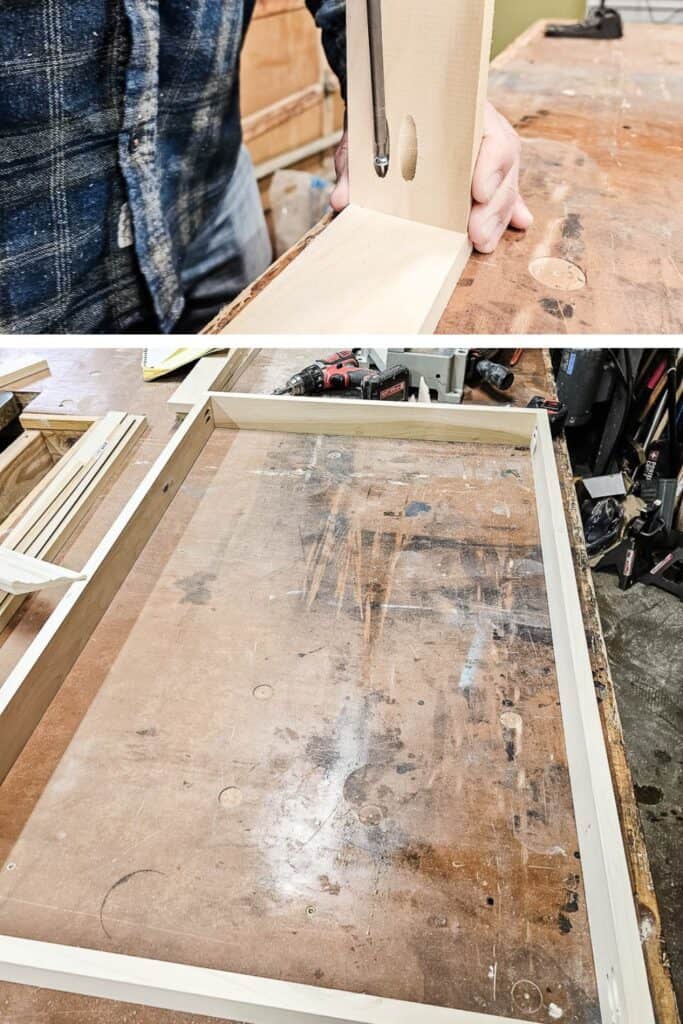
- Using the pre-drilled pocket holes and 1 1/4″ pocket hole screws, assemble the frame that will fit around the TV and hide the TV from the side view.
- Large clamps or a clamp table will help keep everything square while assembling.
- No need to fill the pocket holes—they’ll be hidden inside.
Step 4: Add the Nailer Boards
- These create a wider surface on the front of the frame for securing the molding.
- Use wood glue and clamps to attach the nailer boards inside the frame.
- Let dry completely before moving on.
Step 5: Sand
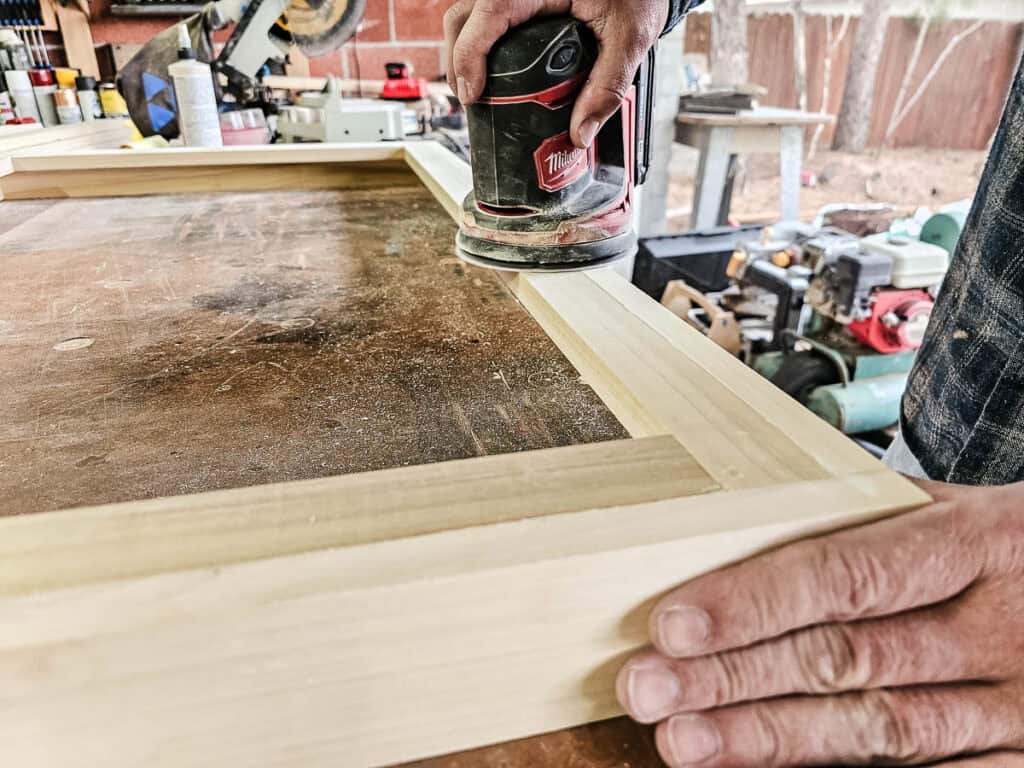
- Use 80-grit sandpaper to sand the frame and nailer boards flush.
- This ensures a smooth surface for the face frame molding.
Step 6: Attach the Molding
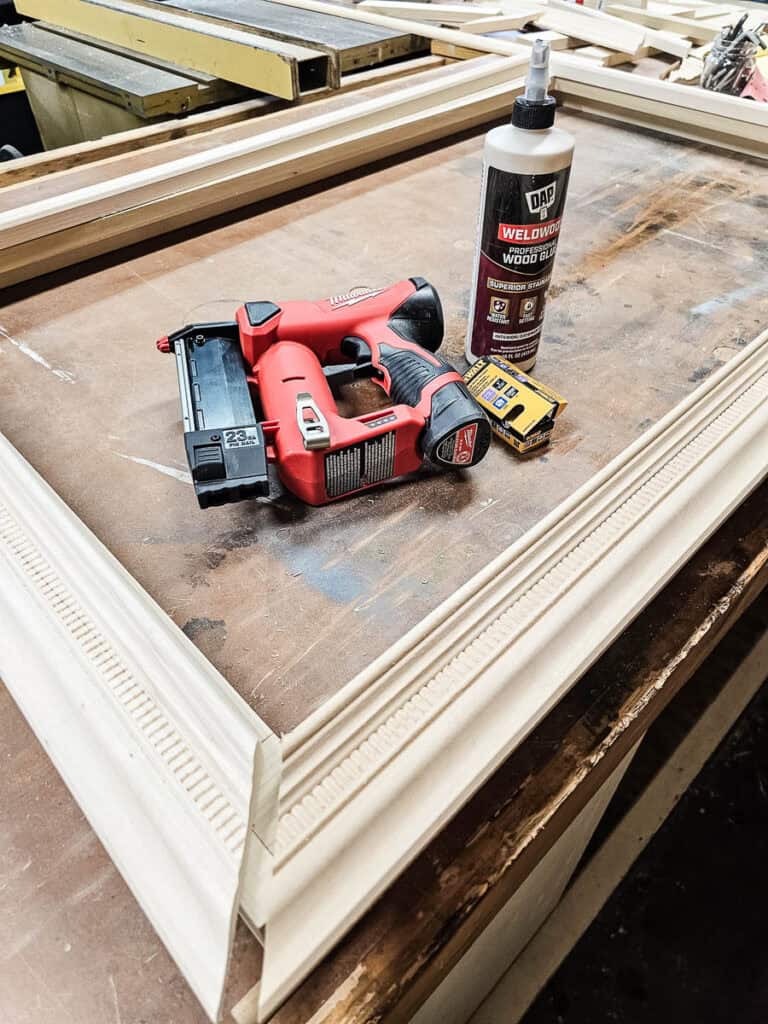
- We used chair rail molding, but any similar trim will work.
- Don’t clamp directly onto the molding—it’s too delicate. If you must clamp, use plenty of padding.
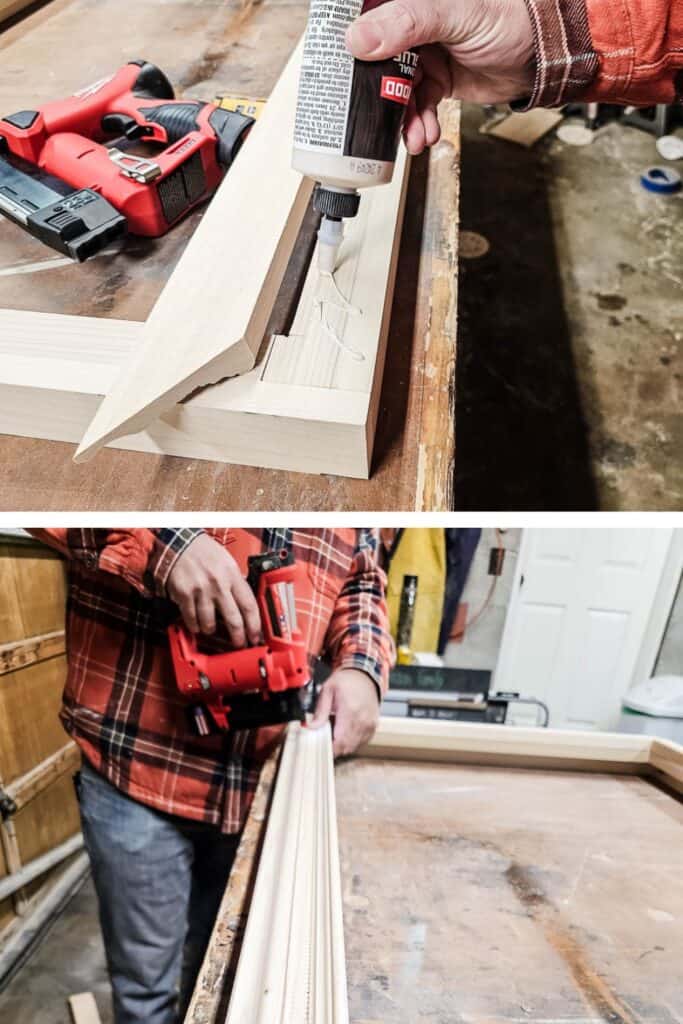
- Apply wood glue on both the frame/nailer board and the back of the molding.
- Carefully align your 45-degree angles in the corners and secure with a pin nailer using 1” pin nails.
Step 7: Final Sanding
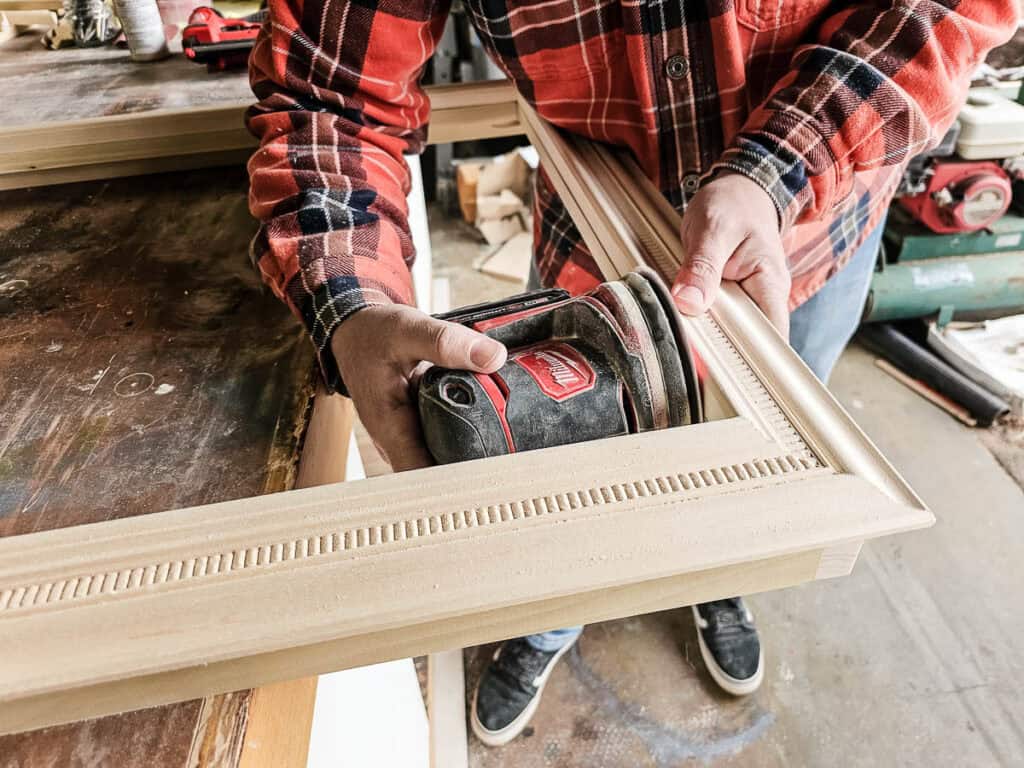
- Once the glue dries, sand the inside edges of the frame with orbital sander so that it becomes flush with the molding:
- 80-grit → 150-grit → 220-grit
- Lightly sand the surface of mitered corners by hand with 220-grit until they’re seamless.
- Be careful not to scratch the finished surface of the molding.
Step 8: Attach Quarter Round

- Use a pin nailer to secure quarter-round molding to the back edges of the frame.
Step 9: Stain, Putty and Seal
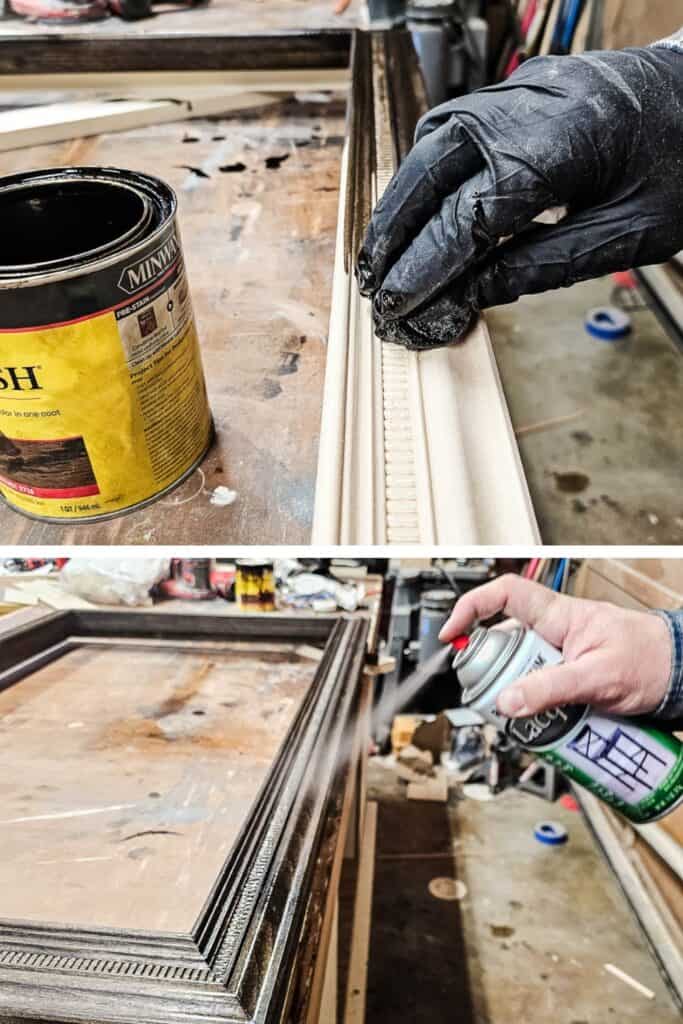
- Dust off the frame and apply stain (we used Minwax Dark Walnut).
- Once dry, fill mitered joints with a matching wood putty.
- Finish with a spray lacquer for protection.
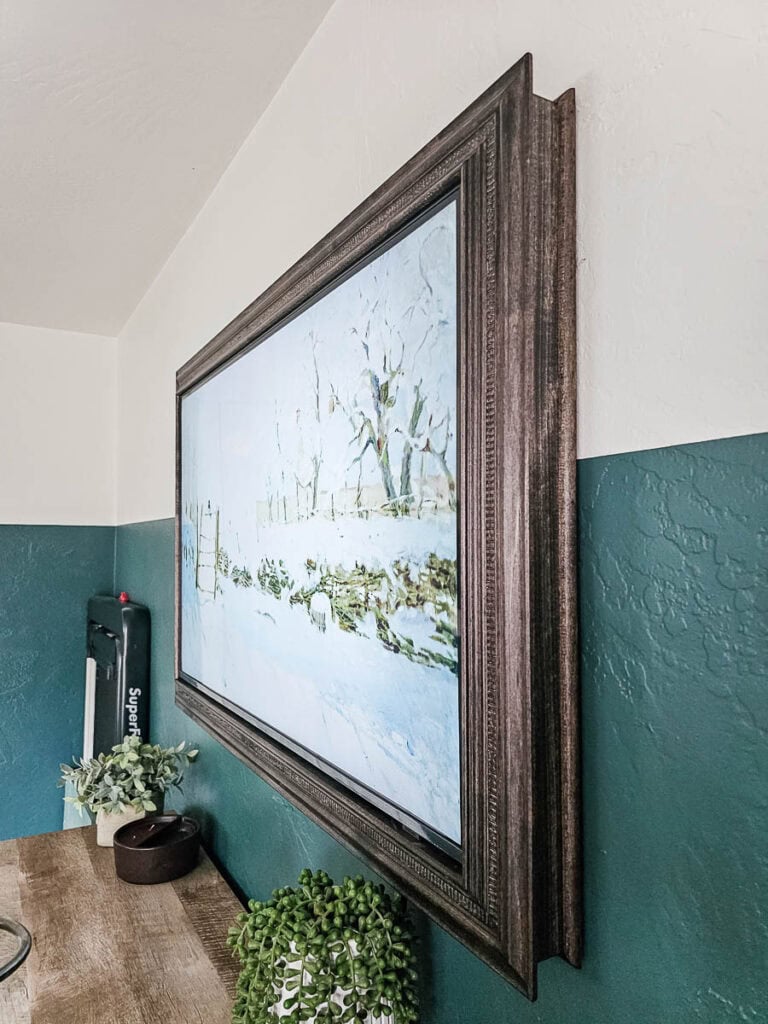
Step 10: Hang It Up
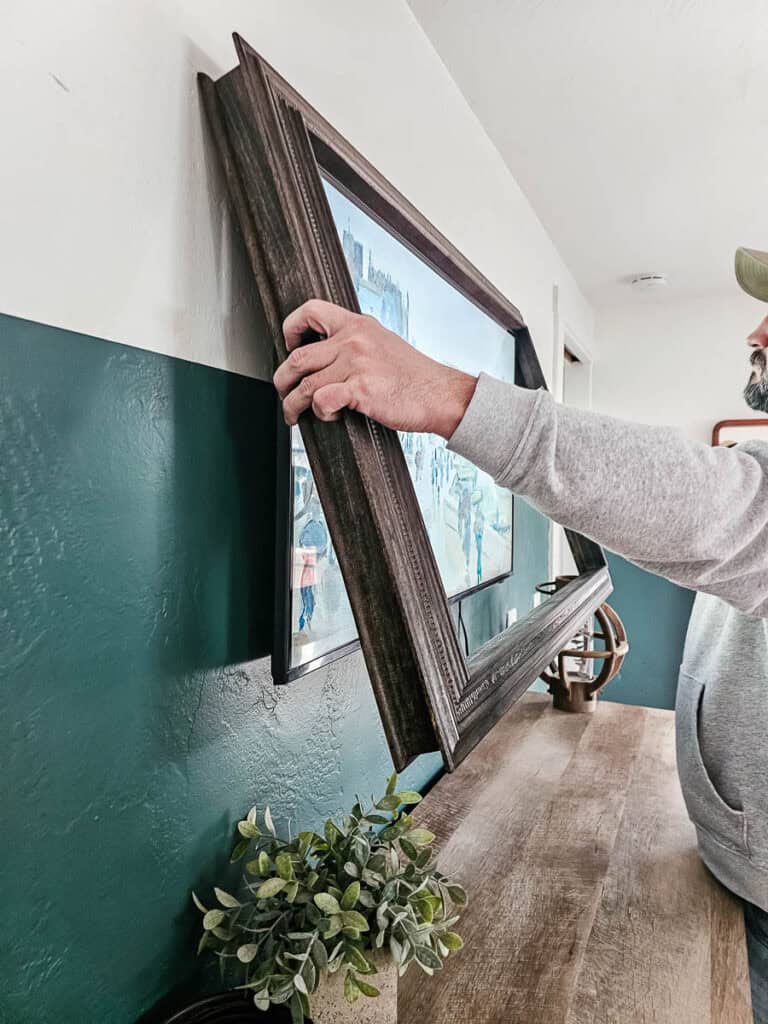
- Place the frame over your TV—ours stayed in place without extra support.
- If your TV has buttons or controls that stick out, you may need to chisel out a small section inside the frame for clearance.
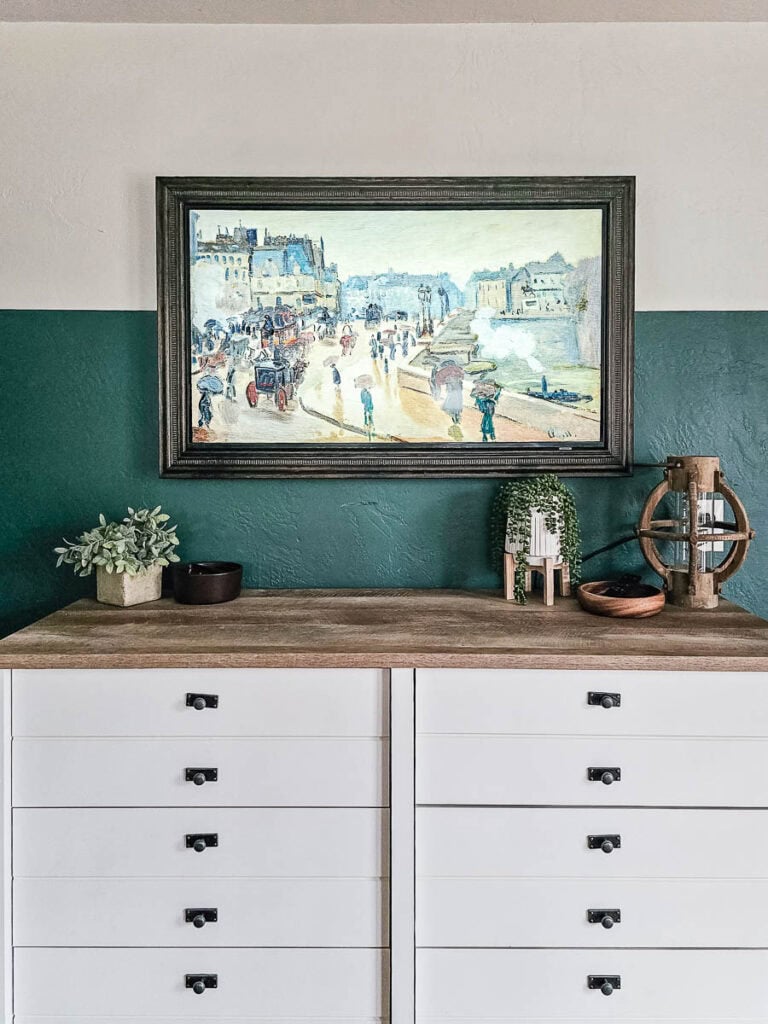
Doesn’t it look amazing?!
If you want to build your own DIY TV frame for your non-“Frame TV”? We’ve done all the hard work for you! All you need to do is hop over to Kreg’s website and check out the full tutorial.
At the bottom of the tutorial on Kreg’s website, you’ll also see a link to download the free plan to get all of the detailed measurements and a cut list!
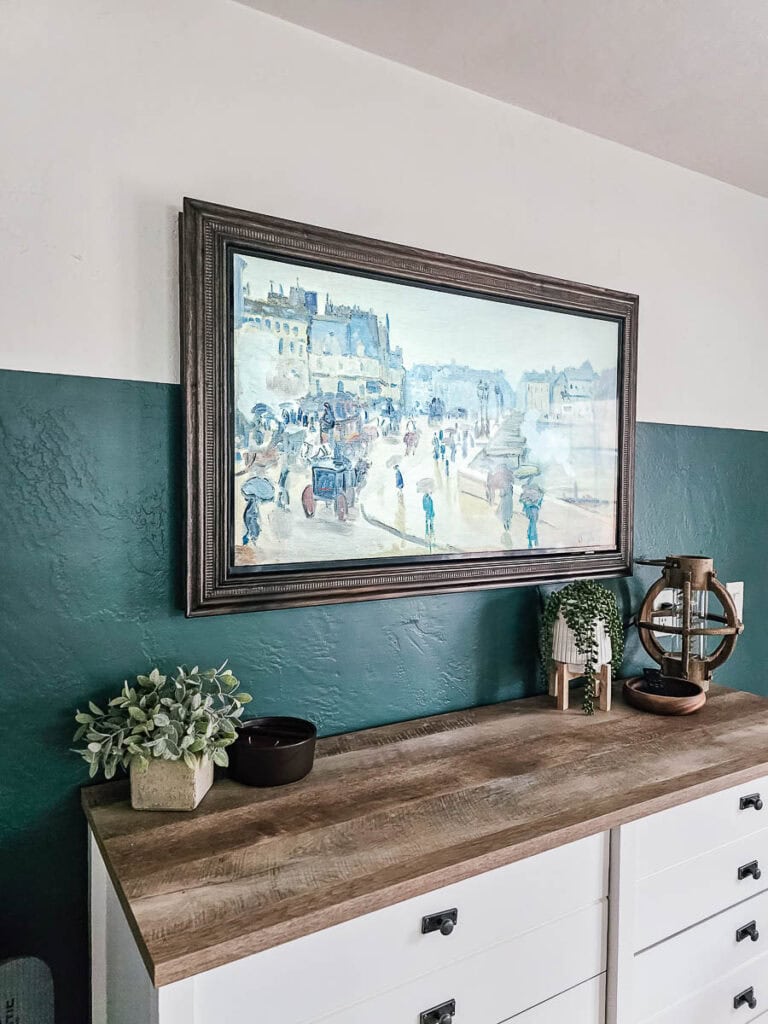
It makes SUCH a huge difference – adding cozy charm and character to our bedroom!
Just look at the before and after pictures below!
Related – Projects that use a pocket hole jig
- Kid’s Cabin Bed
- Table Top
- Planter Box for Front Porch
- Outdoor Plant Wall
- Farmhouse Sink Cabinet
- Mudroom Lockers
- DIY Desk Calendar & Wooden Pencil Holder
- DIY Dress Up Storage for Kids
- Picture Ledge DIY
- DIY Firewood Rack with Roof
- DIY Cane Headboard
- Boho Nightstand with Cane
- DIY Behind the Couch Table with Outlet
- DIY Headphone Stand
- DIY Cookbook Stand
- Easy DIY Grill Utensil Holder
- DIY Deck Box for Outdoor Toys
- DIY Towel Rack Made With One Board
- DIY Tool Organizer for Kreg Tool Stand
- DIY Mail and Key Holder
- DIY Step Stool for Toddler
- DIY Trash Can
- DIY Spice Rack
- DIY Book Holder
- Easy DIY Magazine Shelf
- DIY Clamp Rack
- DIY Chicknic Table
- DIY Bike Rack
- Small Bookshelf
- DIY Laptop Tray