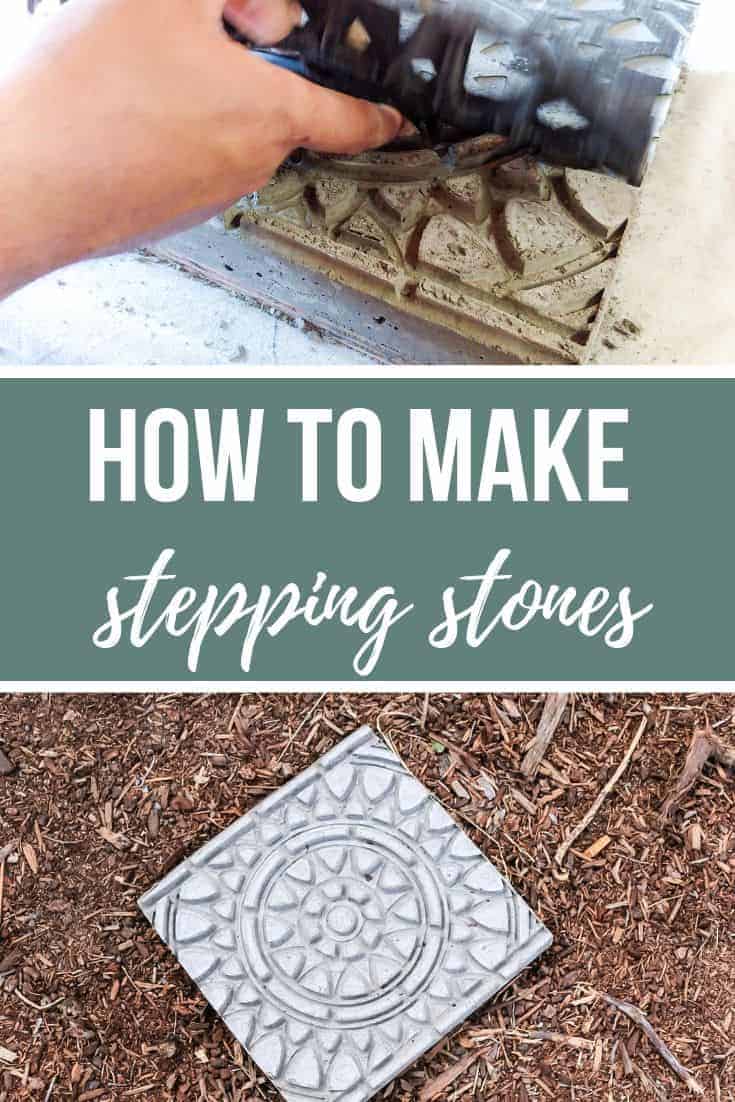
How To Make Stamped Garden Stepping Stones

Do you need some garden stepping stones, but you want something cute with lots of character?! Make your own! I love the unique pattern that we stamped into these DIY garden stepping stones. They were so fun and easy to make with concrete!
I partnered with Hometalk on this garden stepping stones post and it contains affiliate links, but nothing that I wouldn’t wholeheartedly recommend anyway! Read my full disclosure here.
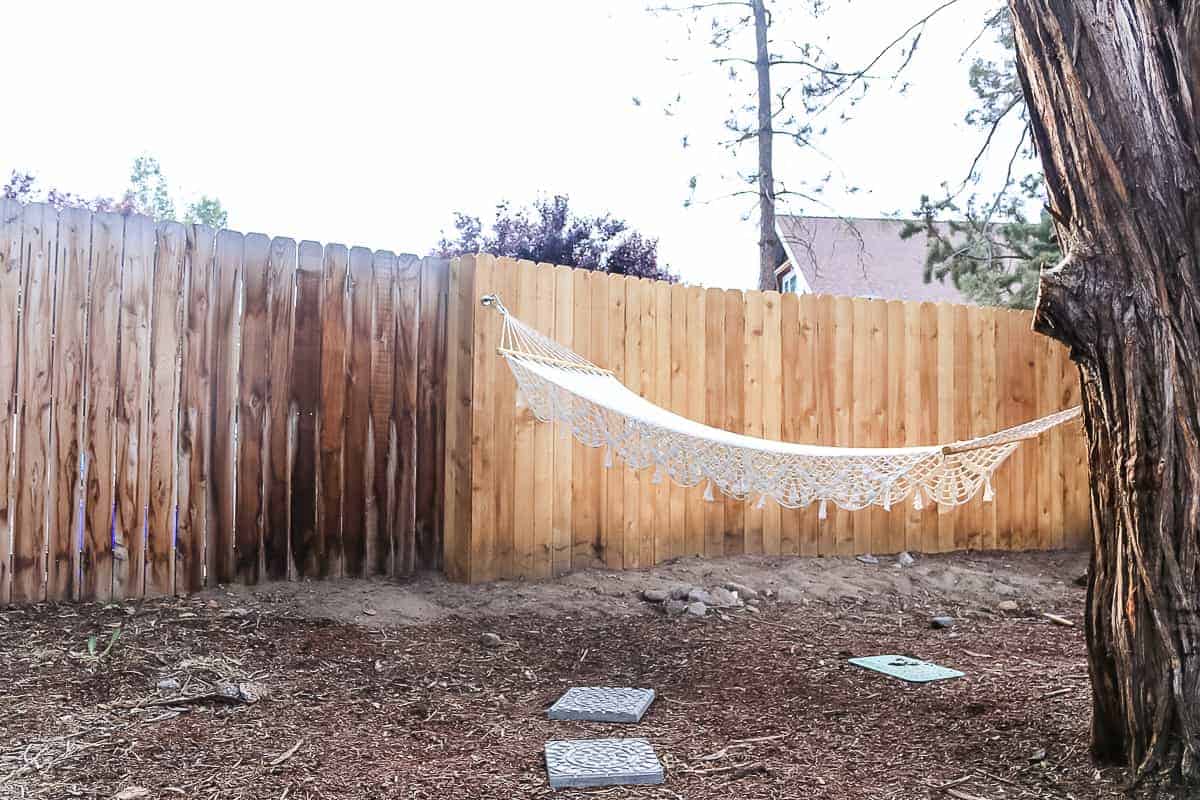
Ever since we built the wood fence and hung the hammock up in our backyard, I’ve been thinking about making some stepping stones or adding natural stones to go in front of the hammock that had some fun character to them.
We had originally put down some mismatched (boring) ones that we had laying around the backyard….but it was missing something.
The macrame hammock was just calling for something with a boho pattern!
So when we had some leftover concrete after we made this concrete side table, it was obvious that we should make some decorative stepping stones, right?
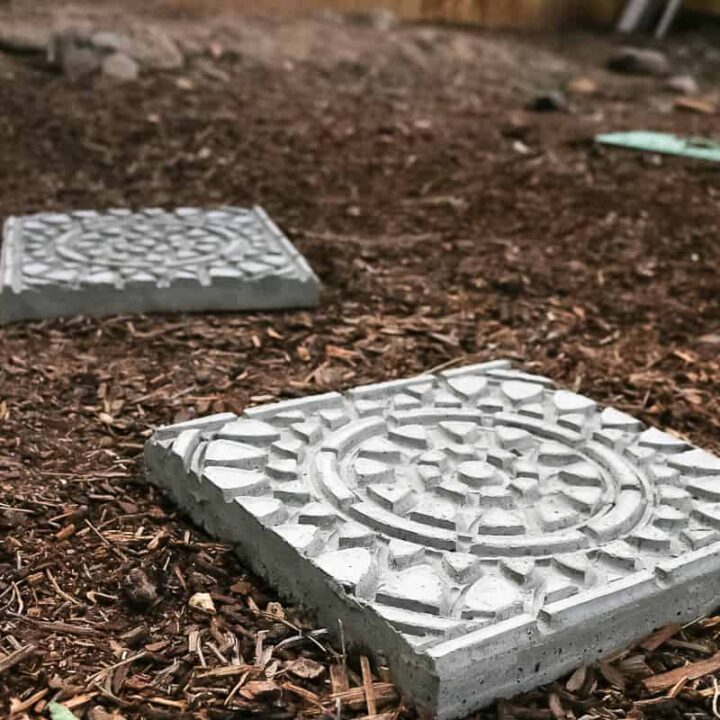
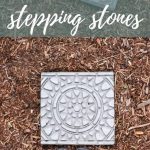
These easy DIY garden stepping stones made with concrete were stamped with a RUBBER DOORMAT! Yep, you read that right. Just a simple doormat and it created the cutest pattern!
Even if you’ve never done a DIY project with concrete before, these stepping stones are seriously SO easy and are a great way to add some DIY concrete pavers to any garden space!
DIY Garden Stepping Stones FAQs
Can you reuse the rubber mat as a concrete stamp more than once?
Yes, you can use it again and again! You have to wait for the concrete to dry before removing the mold and the rubber mat.
What do you put under the poured concrete, that easily removes from the bottom of the stepping stone?
A piece of plywood is cut down to size so that it slides into the 2×4 mold but is nice and snug so that the concrete doesn’t go through the cracks.
Once you put the rubber mat on top as a stamp, I used another piece of plywood to press the mat down to get it nice and level/flat.
Do you use screws or nails on the frame?
Be sure to use screws on the frame so you can unscrew it after it is dried.
Does the concrete come out of the mold easily?
Yea, we just unscrewed the wood mold and it came right off with no issues.
Many readers have also suggested spraying vegetable oil (PAM Spray) on the rubber mat before placing it in the concrete to help remove it easily. We didn’t do this and, again, had no issues…but if you’re worried – you could try the oil method!
When do you remove the rubber mat?
I waited until the concrete had fully set to remove the rubber mat.
To remove the mold and mat after it’s dried – simply unscrew the wood mold and gently peel off the rubber mat stamp.
How much of the bag of cement did you use for each stone?
I didn’t ever figure out an exact measurement, but we probably did about 1/4 of a bag per stone.
How much is the weight of the stepping stone?
Each stepping stone was about 1/4 of a bag of 60 lb concrete so about 15 pounds for each raised stone.
Are the wooden molds reusable?
Yes, the molds are reusable, but the tricky part is waiting for it to dry. If you only wanted to make one mold, you could only make one stepping stone at a time and they take a day or two to dry (depending on your weather and humidity!)
To remove the mold and mat after it’s dried – simply unscrew the mold and gently peel off the rubber mat.
Do they have to be one shape?
No, you can make molds and use various materials to make different shapes and different features. You can make a variety of styles of concrete stepping stones for any outdoor use.
Will the garden stepping stones hold up in the winter?
I didn’t have any cracks in ours and they were out all winter last year in the cold Pacific Northwest through the snowy season, but you could always move inside over winter if you wanted.
How To Make Your Own Stepping Stones with Concrete: Step-by-Step
Supplies:
- 2×3
- Plywood
- Wood Screws
- Drill
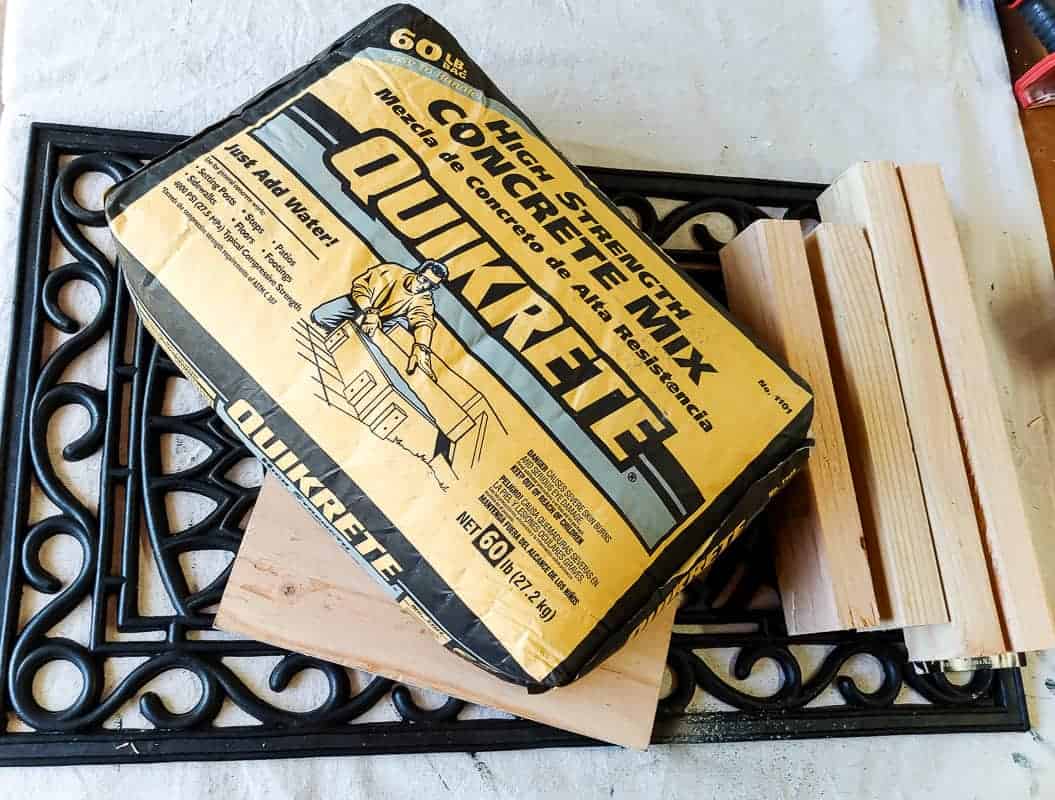
- Concrete Mix
- Rubber Door Mat
- Utility Knife
- Bucket
- Sponge
- Concrete Trowel
- Rubber Mallet
Step 1. Build stepping stone mold.
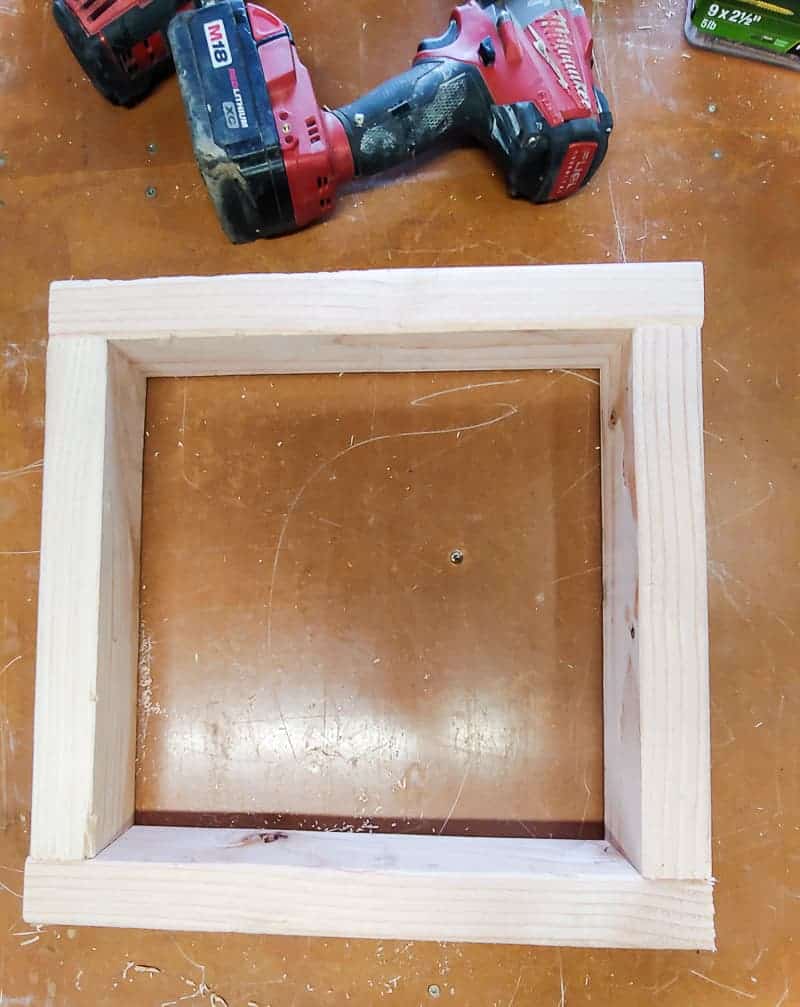
We decided to build 1-foot square stepping stones, so we cut our 2×3 pieces down to size so that the inside perimeter would be 12 inches.
The corners of the mold (which is really just a box) are joined together by just drilling pilot holes and then screwing in wood screws.
In the bottom of the wooden mold fits a piece of plywood (not shown in the above picture) cut down to size so that it slides in but is nice and snug so that the concrete doesn’t go through the cracks.
Step 2. Cut rubber door mat down to size.
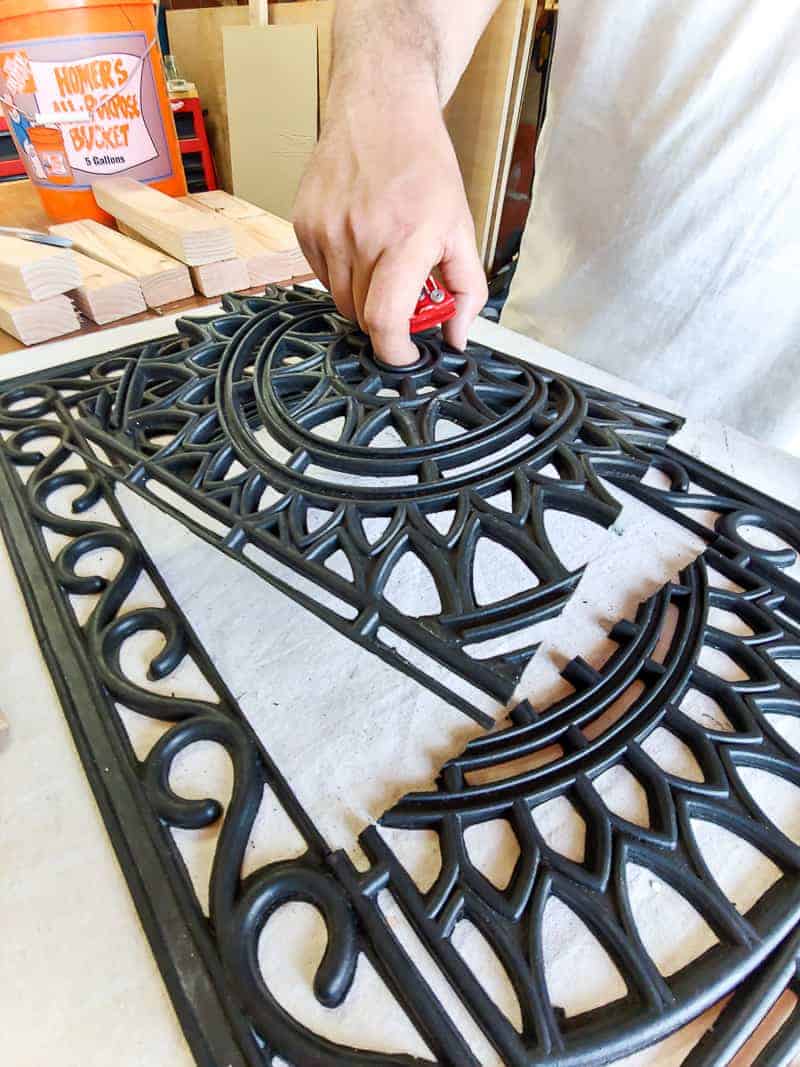
Next figure out what part of your rubber doormat you want to use as your concrete stamp. Since ours had a kind of circle design, we chose to cut out a square from the middle of the mat.
If you find a doormat with a less symmetrical design, like this, you could probably make two stamps out of it.
Step 3. Mix concrete.
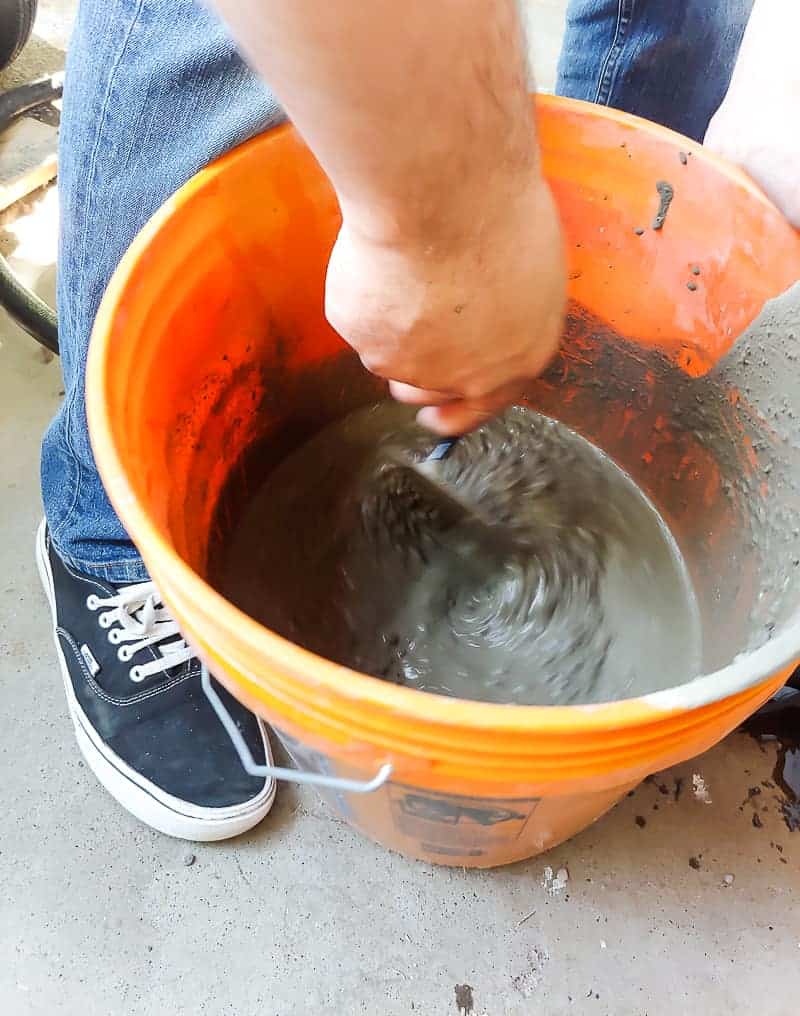
Grab a bucket, your bag of cement, and a trowel for mixing. Add water while stirring until you get the right consistency. Be sure you only mix enough for one stepping stone at a time (unless you have more than one stamp made from the rubber mat).
Step 4. Pour concrete into the garden stepping stone mold.
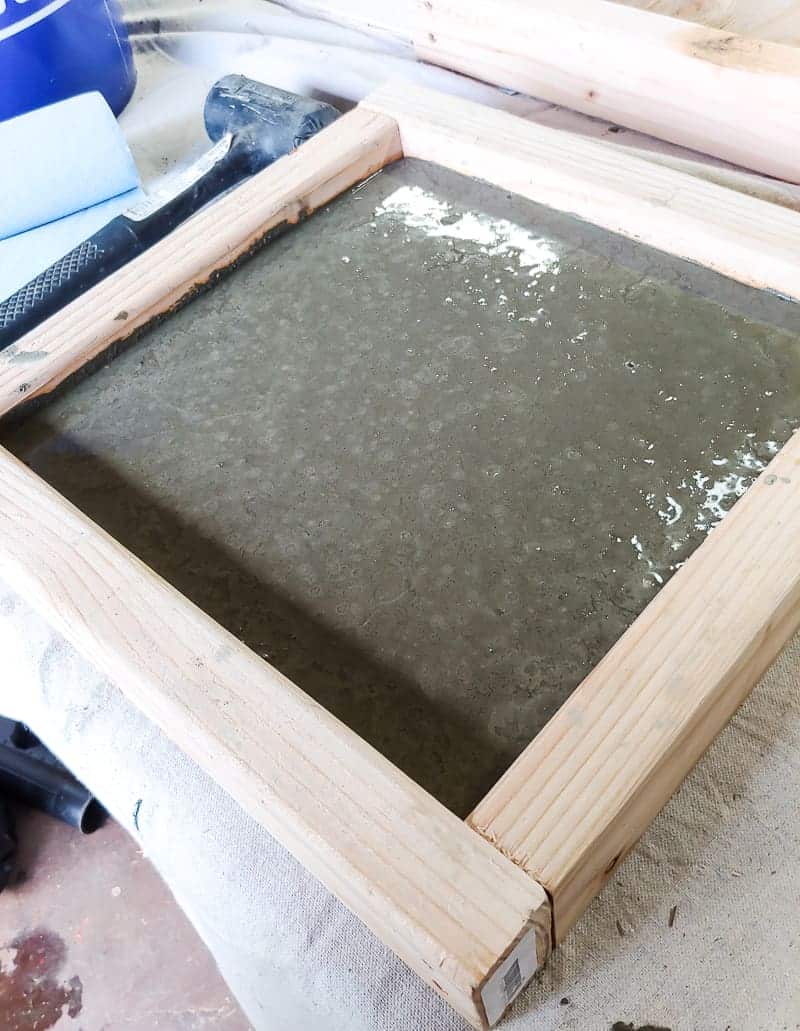
Next just simply pour the concrete into your wooden mold. Be sure to leave about 1/2″ or so to allow room for the rubber door stamp.
After you fill the mold, tap the edges of the wooden mold with a rubber mallet several times. This helps get the air bubbles out of the concrete.
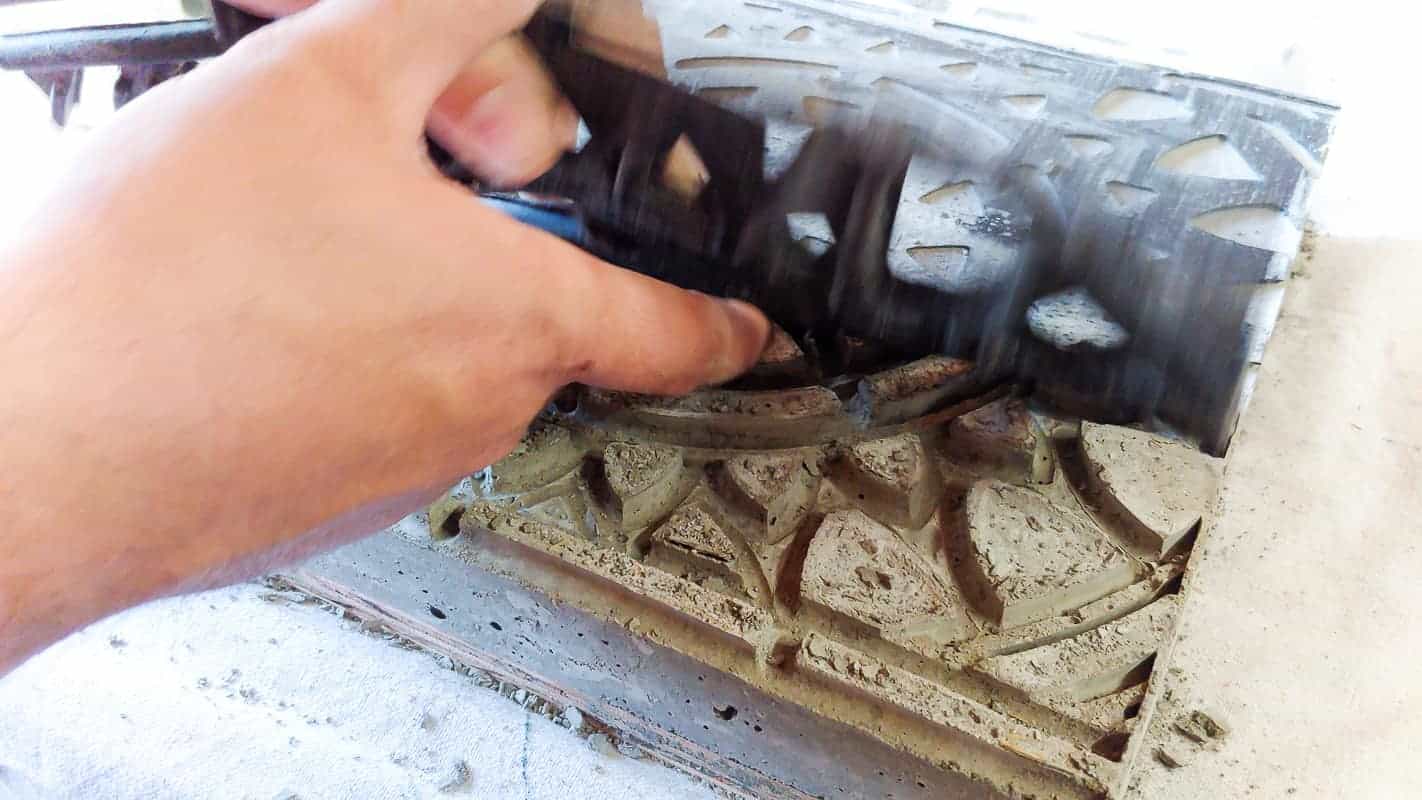
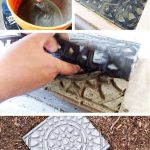
Step 5. Stamp with a rubber door mat.
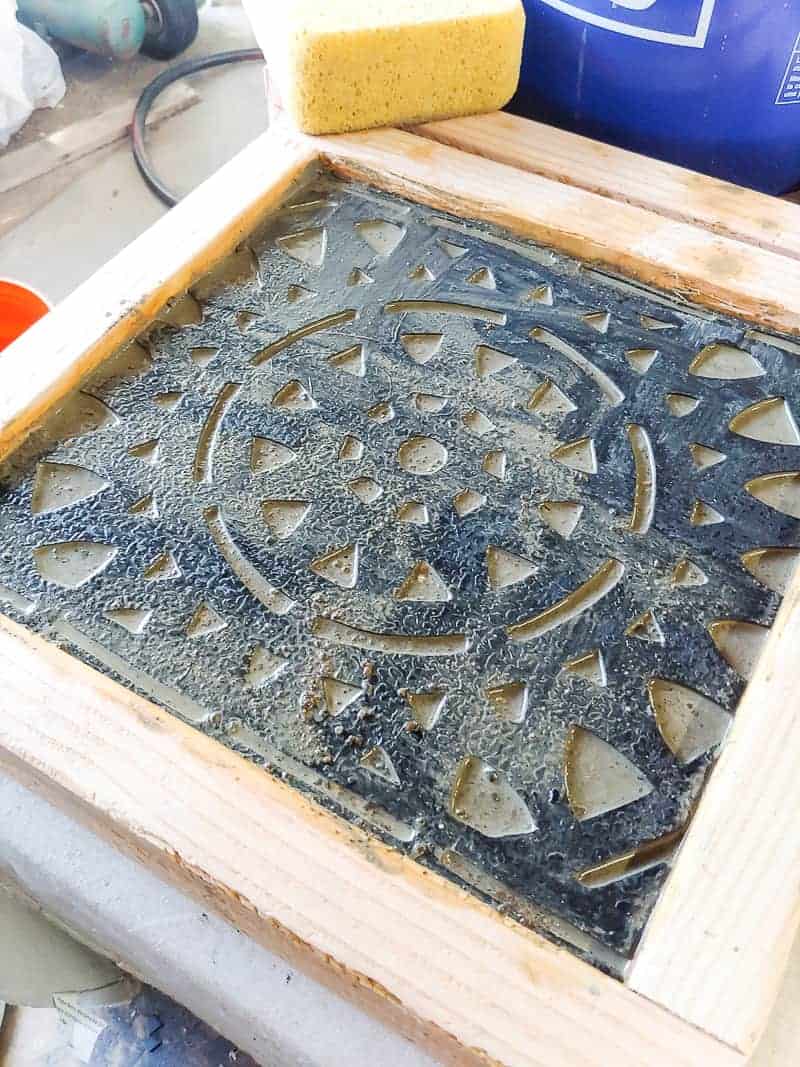
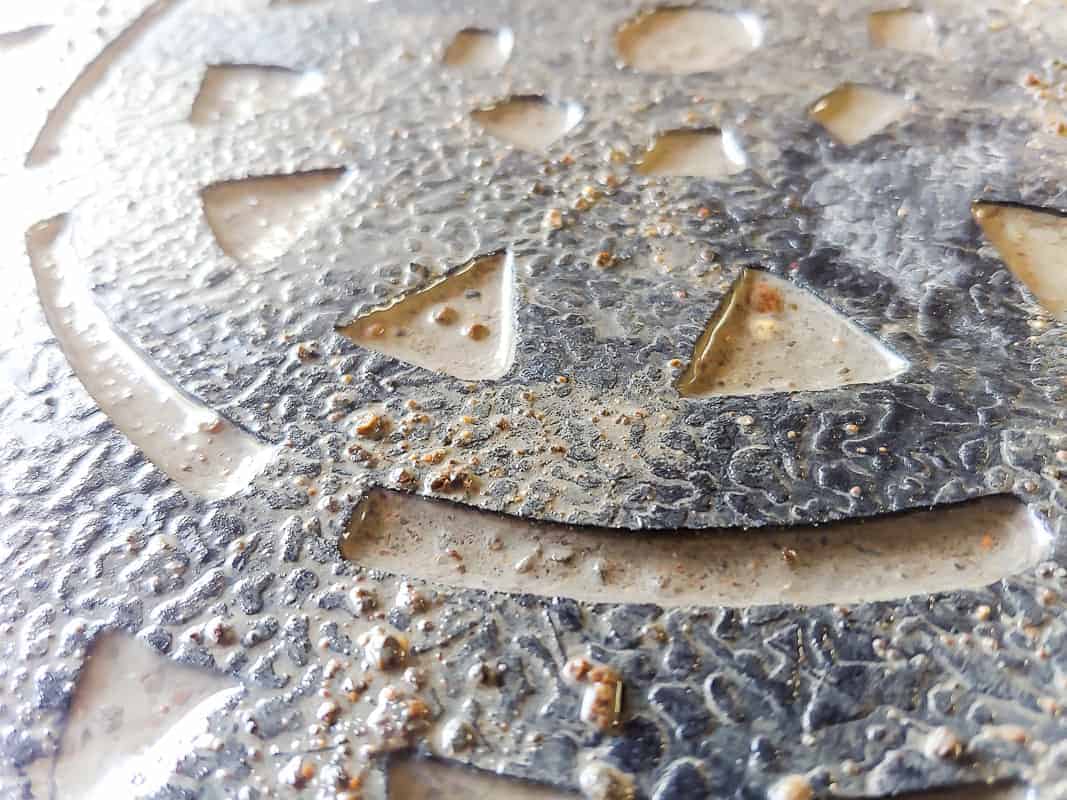
Wait until the concrete sets up a little bit. You want to be able to put your finger on the top of it and have the fingerprint stay. Then lightly lay the rubber door mat stamp on top of the garden stepping stone.
Lay another plywood square on top of the rubber door mat and press down evenly.
Remove the plywood gently and wipe any extra concrete off the top of the stamp with a wet sponge.
Tap the edges of the mold with a rubber mallet again after you get the stamp in.
Step 6. Let dry.
The concrete stepping stone takes about 1-2 days to set up and dry, but this may be different based on your temperature and humidity. Be very careful when working with wet concrete and give it plenty of time to dry.
Step 7. Remove the doormat and mold.
After everything is dried, unscrew the wooden mold and gently remove the rubber doormat.
Enjoy!
Now you can put your cute garden stepping stone in place and enjoy!
If you want to make more than one, you can start the process over again if you only have one rubber doormat stamp. Whatever your particular needs are you can keep making more stepping stone pieces.
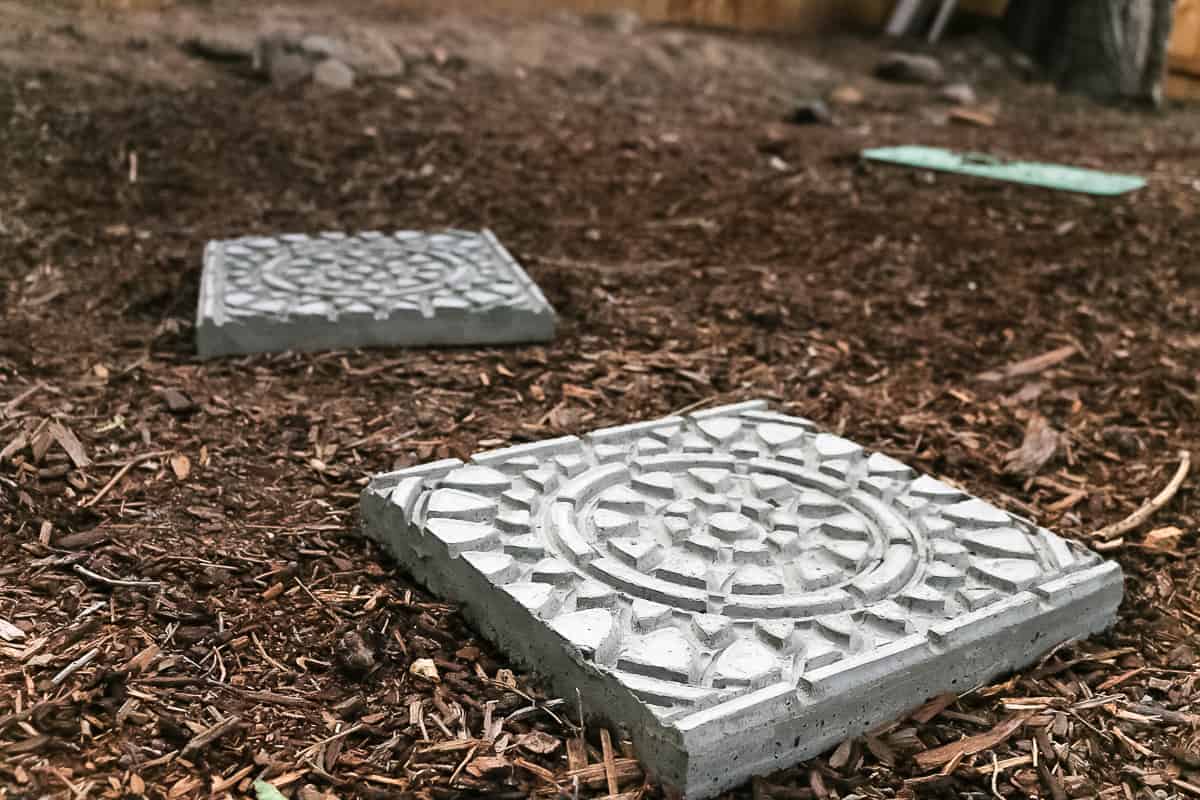
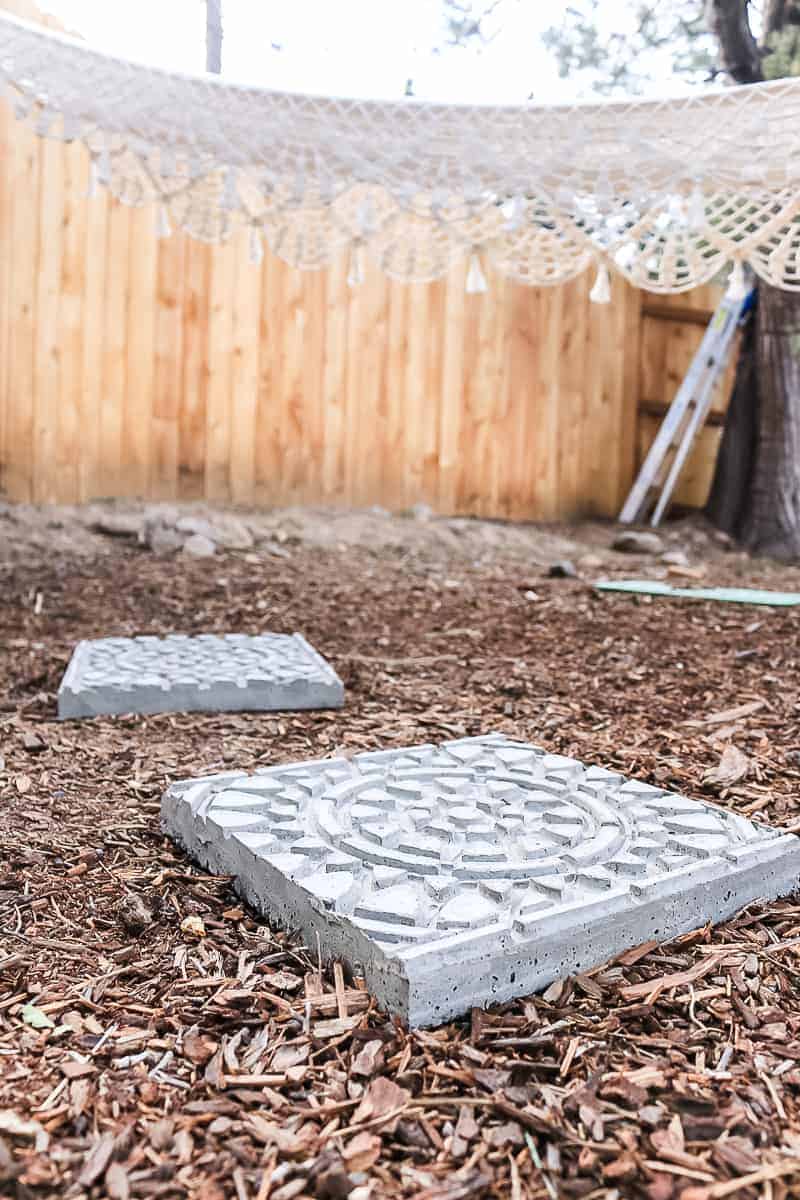
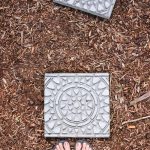
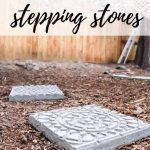
Would you look at just how much character they added to our little hammock area back by the deck? I love what this DIY stepping stone path did for our outdoor space and who would have thought you can make them all from cement mix and a rubber doormat?
They really finished off the space with the hammock in a wonderful way.
After we removed the wooden mold and stamp, the design really started to look “boho” to me – which, of course, I love.
This is one of my favorite DIY projects and really added a lot of decorative elements and unique features to our yard. This is such a simple way to use different materials to get that classic look for any space.
I really love the design of these garden stepping stones. Don’t you? Such an easy way to get a personal touch into your outdoor space. This stepping stone project was super easy and gave a unique look to our garden pathways.
They really are a great idea to add interesting hardscape elements to your yard.
Where would you put your own stepping stones!?
Let me know in the comments below!
How To Make Stamped Garden Stepping Stones
Do you need some garden stepping stones, but you want something cute with lots of character?! Make your own! I love the unique pattern that we stamped into these garden stepping stones. They were so fun and easy to make!
Materials
- 2×3
- Plywood
- Wood Screws
- Concrete
Tools
- Drill
- Utility Knife
- Bucket
- Sponge
- Concrete Trowel
- Rubber Mallet
- Rubber Door Mat
Instructions
- Build stepping stone mold.
- Cut rubber door mat down to size.
- Mix concrete.
- Pour concrete into garden stepping stone mold.
- Stamp with rubber door mat.
- Let dry.
- Remove door mat and mold.
- Enjoy!
Do you want to see more of our big backyard makeover??
- Family Friendly Backyard Plan: Our Next Big Project (BEFORE Pictures)
- Large Chalkboard For Backyard With Live Roof
- Easy Garden Tool Storage In Backyard Shed
- DIY Build for Outdoor Vertical Garden Pots (With Free Plans)
- Mulch for Playground: Why We Chose Rubber Play Bark
- How to Plant Grass Seed
- How To Create A Cozy Patio
- How To Build A Paver Patio with Fire Pit
- How To Build A Fire Pit With Pavers
- Our Backyard Makeover Before and After Pictures
- How to Build a Wood Fence In Your Backyard
- How To Make a Wooden Gate for Your Fence
- How To Lay Deck Boards (and hide the screws!)


you mention a video….but I don’t see a link anywhere on here to access it… I’d like to see it, can you advise? ….. “In the bottom of the wooden mold fits a piece of plywood (not shown in above picture, but can be seen in video) cut down to size so that it slides in but is nice and snug so that the concrete doesn’t go through the cracks”
Hi Paula – thanks for letting me know that the video wasn’t there! It must have gotten deleted on accident. I’ve added it back in at the bottom of the post so you can watch. It’s a replay of a live video on Facebook.
I love these stepping stones. I’m not much of a DYI’er when it involves hardware or concrete, so I’ve got a few questions. I guess I’m more of a “crafter”, haha.
1) What do you put UNDER the poured concrete, that easily removes from the bottom of the stepping stone?
2) Similarly, does the mat easily separate from the stepping stone? I worry it would be stuck.
3) How do you get the 12×12 board OUT of the frame once you’ve pressed it all down together (mat+wet concrete)? Or can you just leave it all together (board+mat+concrete) until fully set/dry (1-2 days)?
4) I need to make about 5 stones. Do you think one mat will hold up through the making of 5?
thank you!
Hi Sheryl!
1) We put in a piece of plywood into the bottom of the mold that slides in nice and snug so that the concrete doesn’t go through the cracks.
2. I had no problem pulling off the mat from the concrete after it was dried, but if you’re worried, I’ve heard that some people have used Pam cooking spray to get things not to stick to concrete. You could spray that on the mat before using, but again…I didn’t have any issues.
3) I left everything together until it was fully dried (board, mat, concrete, mold). To get everything out once dried, start by unscrewing the wooden mold and then gently remove the board and mat.
4) Yes, I think the mat would last through 5 stones.
I’ve also added in a video into the post so you can watch the stones being made which will probably answer any other questions 🙂
I am so happy I just found this by accident as I was looking for something else . I have always wanted to try something different so I am ready to dive in . Now is the time to catch up on somethings I have put off doing . Staying home during the Pandemic . Take care everyone!
So glad you were able to find our tutorial, it’s such a fun project! 🙂
You absolutely have wonderful stories. Cheers for sharing with us your blog.
Wow..I’m going to make nice stepping stones and ordanley stones…thankyou
awesome, have fun!
Thanks for this great idea. The rubber mat is no longer sold. If anyone has a link to a similar one, please post. Thanks!
Thanks for letting me know about the link! I was able to find the same rubber mat sold on Amazon. Here’s the link: https://amzn.to/3MwiHdq I’ll update the blog post as well.