What To Do With An Old Mailbox – DIY Garden Tool Storage

Wondering what do with an old mailbox? Make a cute and functional DIY garden tool storage to hold your mini shovels, garden gloves and shears. What a perfect way to upcycle an old mailbox!
Ever since we built our DIY cedar raised garden beds in our backyard, I’ve wanted someplace handy to keep garden tools near the garden beds.
It was a tad inconvenient having to walk all the way around the house to go into the garage to grab my gardening gloves and any other tools I needed (like the mini shovel or shears).
One day my hubby and I were wandering around our local ReStore and I spotted this old mailbox that had seen better days.
It was dirty and beat up, but I could see right past that. I saw potential, so we walked around the store for a bit longer while I thought about what to do with an old mailbox.
And then it dawned on me! We could make this into a DIY garden tool storage box!
This old mailbox is the perfect outdoor decor project for you to tackle this Summer.
Combine it with this garden hose wreath and this Hello Sunshine sign or these DIY garden stepping stones or this DIY concrete side table and your outdoor spaces will be styling!
I only spent $3.50 on the old mailbox at the thrift store. Just a little creativity and Mod Podge really transformed this mailbox into an adorable and unique solution for my garden tool storage needs.
Not only does it provide storage for my garden tools, but the old mailbox is super cute with the floral design on the outside and a bright, colorful inside.
I’m also using this DIY garden tool storage tutorial.
If you ask any crafter, Mod Podge pretty much makes our world go ’round. I love how many different projects you can use Mod Podge for! I use Mod Podge to make tons of different projects (like these vintage book page Easter eggs) and hacks.
My favorite hack is to seal my stencils for wood signs so the paint doesn’t bleed underneath when making signs.
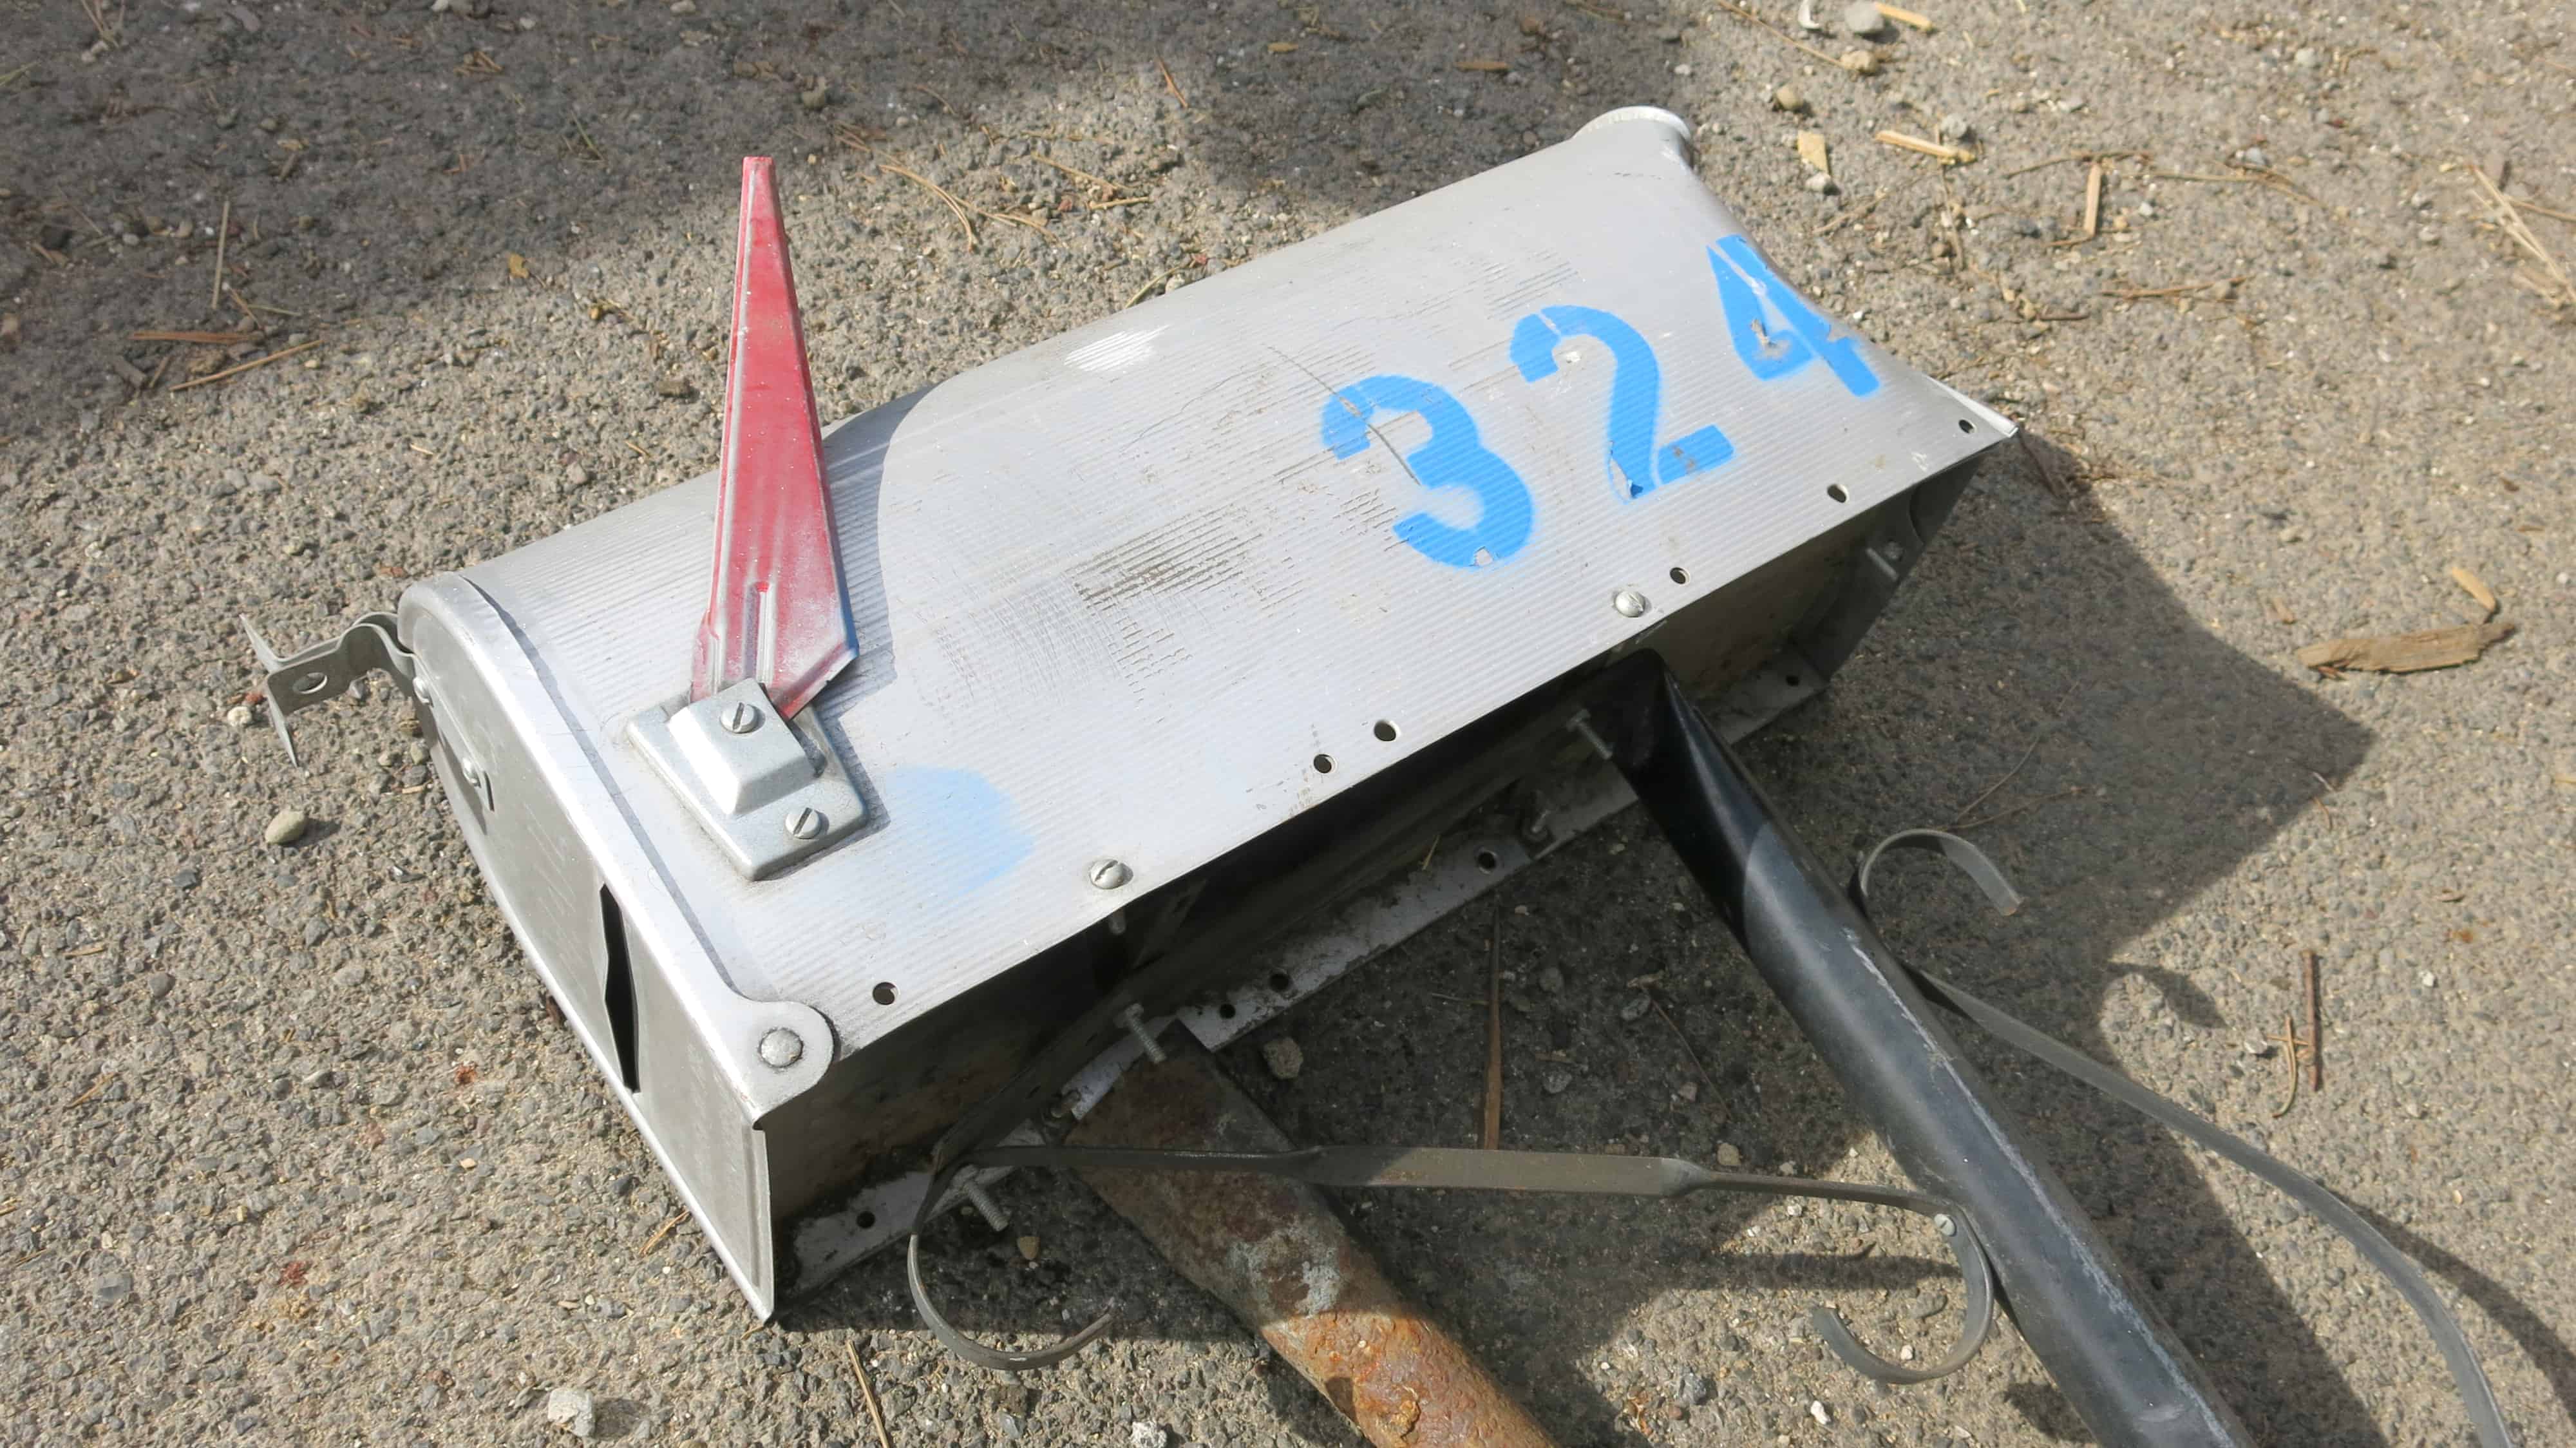
Before Pictures – Old Mailbox
It started with an old mailbox…
This DIY garden tool storage tutorial contains affiliate links, but nothing that I wouldn’t wholeheartedly recommend anyway! Read my full disclosure here.
Old Mailbox Idea – How To Make A DIY Garden Tool Storage Box
Supplies for DIY Yard Tool Storage From Old Mailbox
- Old Mailbox
- Outdoor Spray Paint
- Floral Napkins
- Scissors
- Foam Paint Brush
- Hard Coat Mod Podge
- Fabric (to cover inside)
- Post Hole Digger
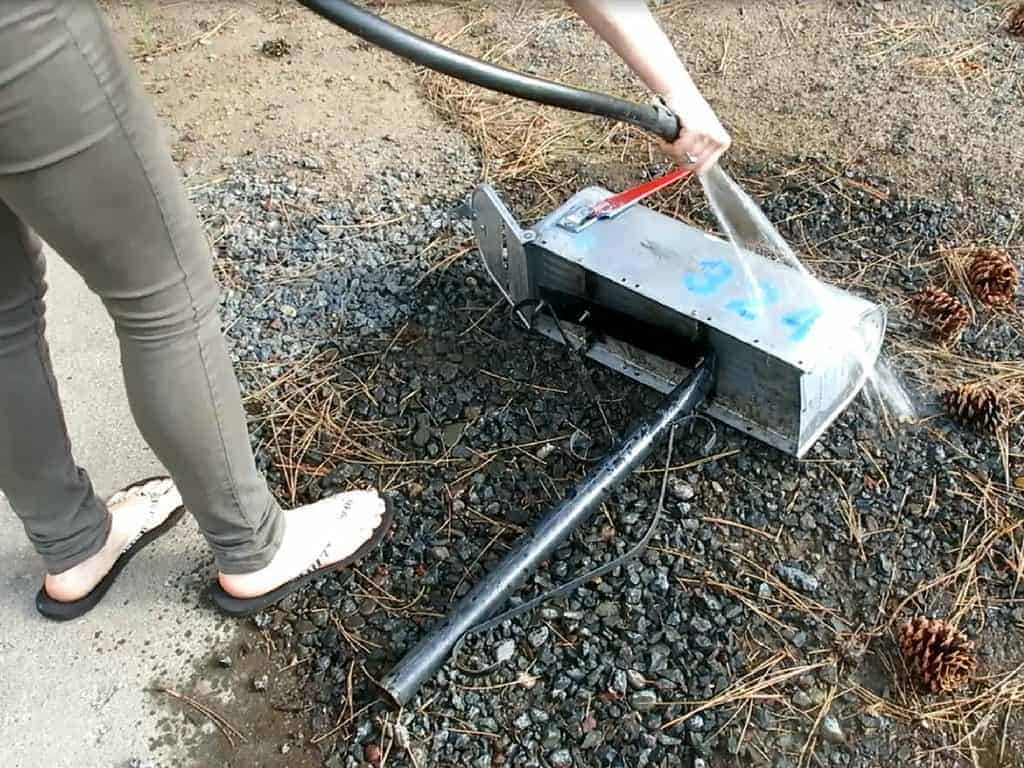
Step 1. Clean old mailbox.
Since you’re working with an old, grimy mailbox you should definitely clean both the mailbox and post. I just used a garden hose to rinse them off and then wiped them down with a wet paper towel.
If your mailbox has rust, you should scrape that off first as well…
Here’s a simple tutorial on how to remove rust from metal before you paint.
Step 2. Spray paint mailbox with outdoor spray paint.
Once the mailbox and post are clean, you can get them painted. I gave them a few coats of outdoor spray paint. To get a nice finish, be sure to check out our spray painting tips and tricks for beginners.
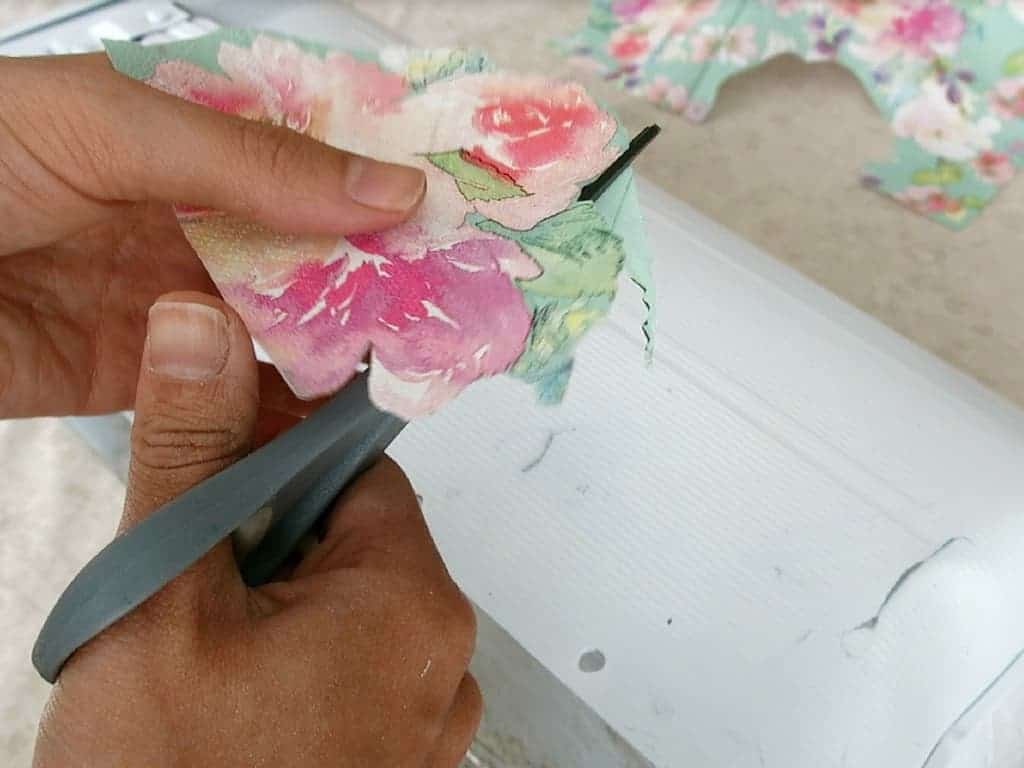
Step 3. Cut out flowers from floral napkins.
To get the floral effect on the mailbox, cut out individual and groupings of flowers from floral napkins or tissue paper (or even scrapbook paper, although it will look a little different with that material).
This can take some time, so just pull up a seat in the living room and watch some T.V. while you do this part. Alternatively, you could decoupage the entire napkin on the mailbox.
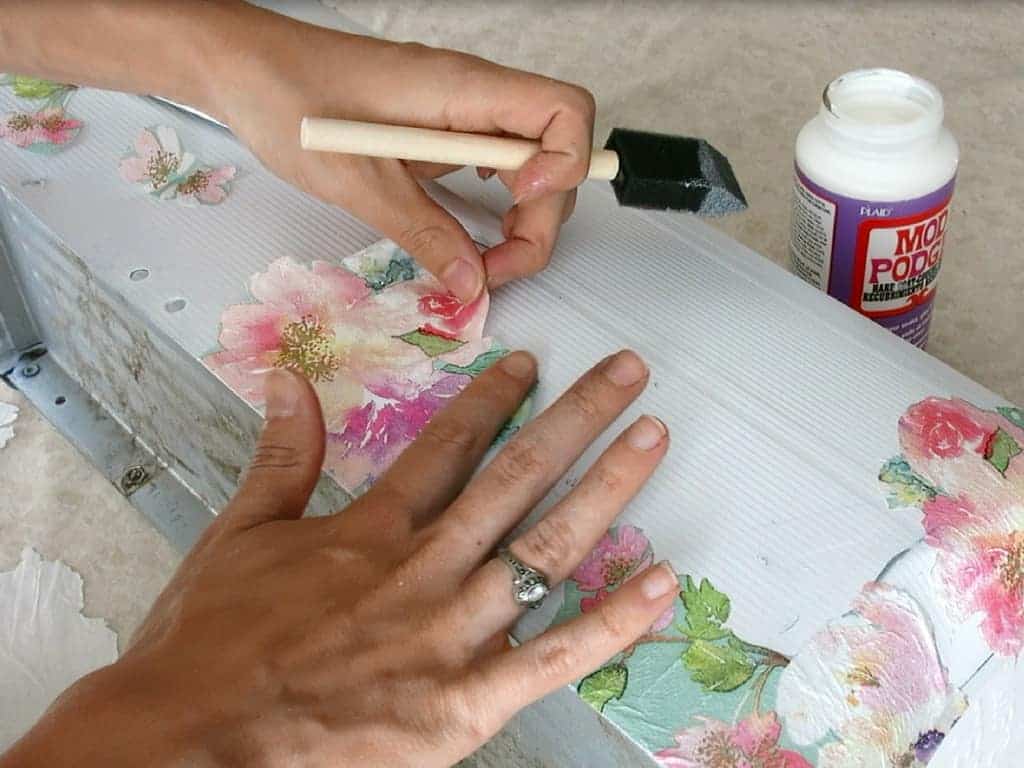
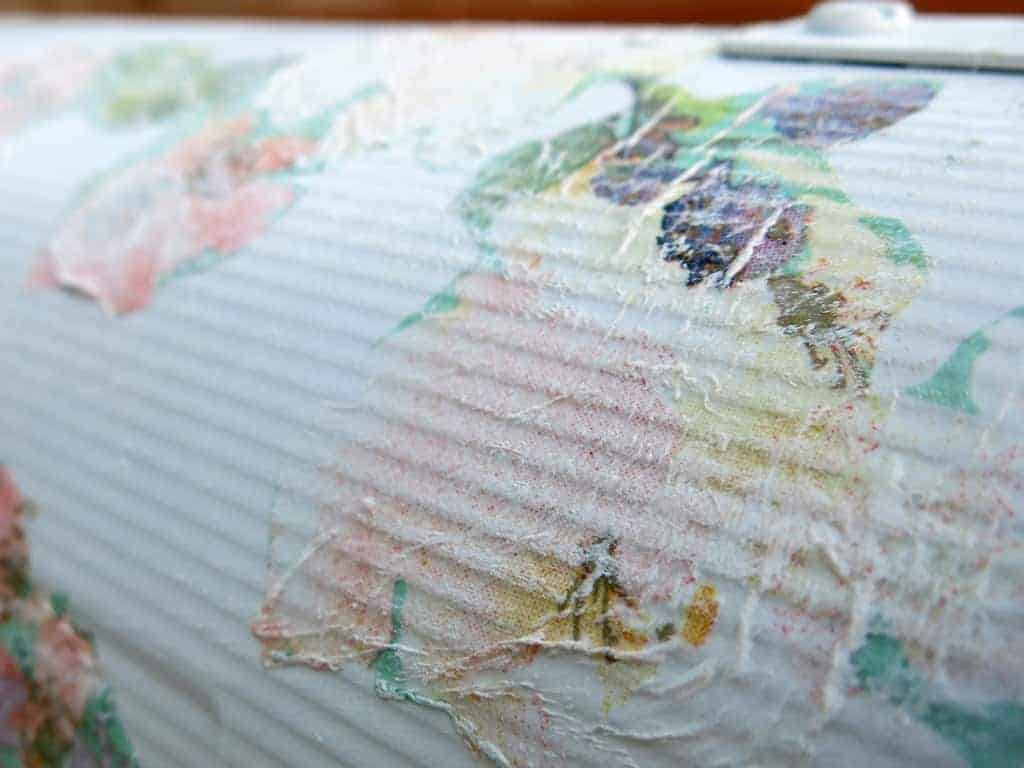
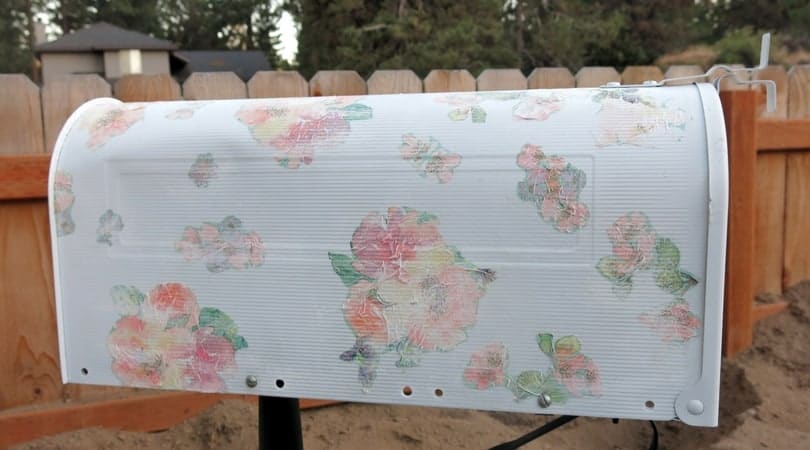
Step 4. Attach flowers to old mailbox with Mod Podge.
Using a foam paint brush, gently brush the back of the napkin with Mod Podge and lay onto the mailbox. Smooth out any wrinkles and then brush more Mod Podge on top of the napkin piece. Let dry fully.
Optional: I didn’t love how the flowers looked after this step, they were a little too bright for me…so I decided to dry brush them with a bit of white acrylic craft paint. The paint really stuck onto the ripples in the napkins and I love how it made the surface of the garden mailbox distressed looking. I achieved the look I was going for, subtle and soft.
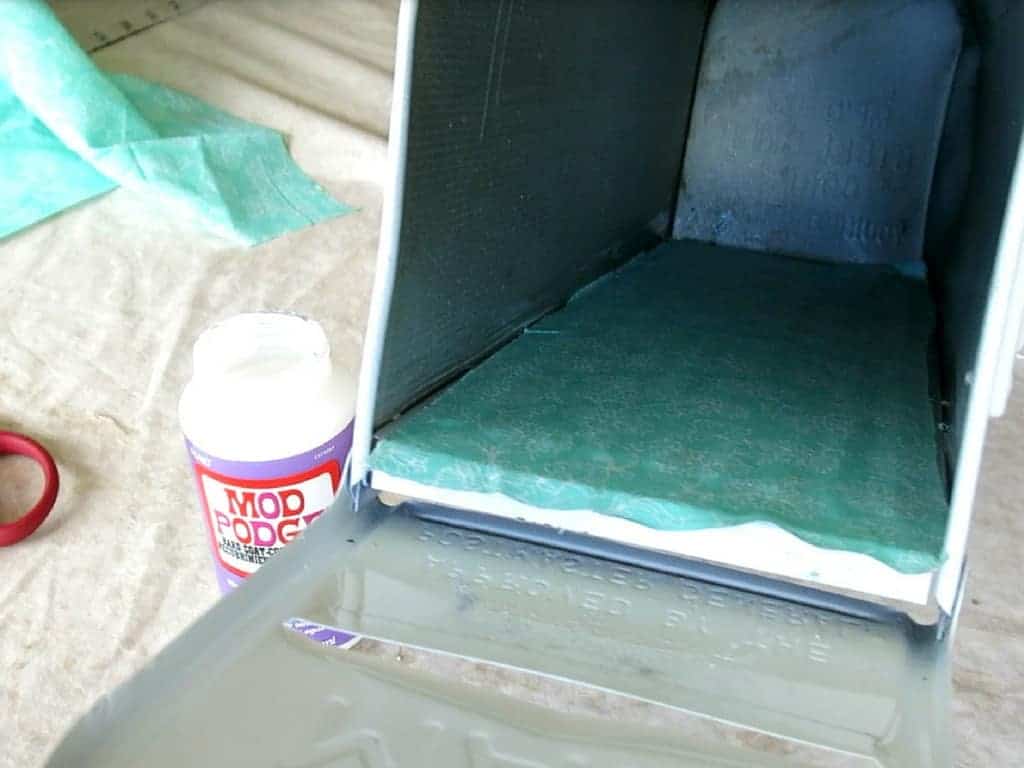
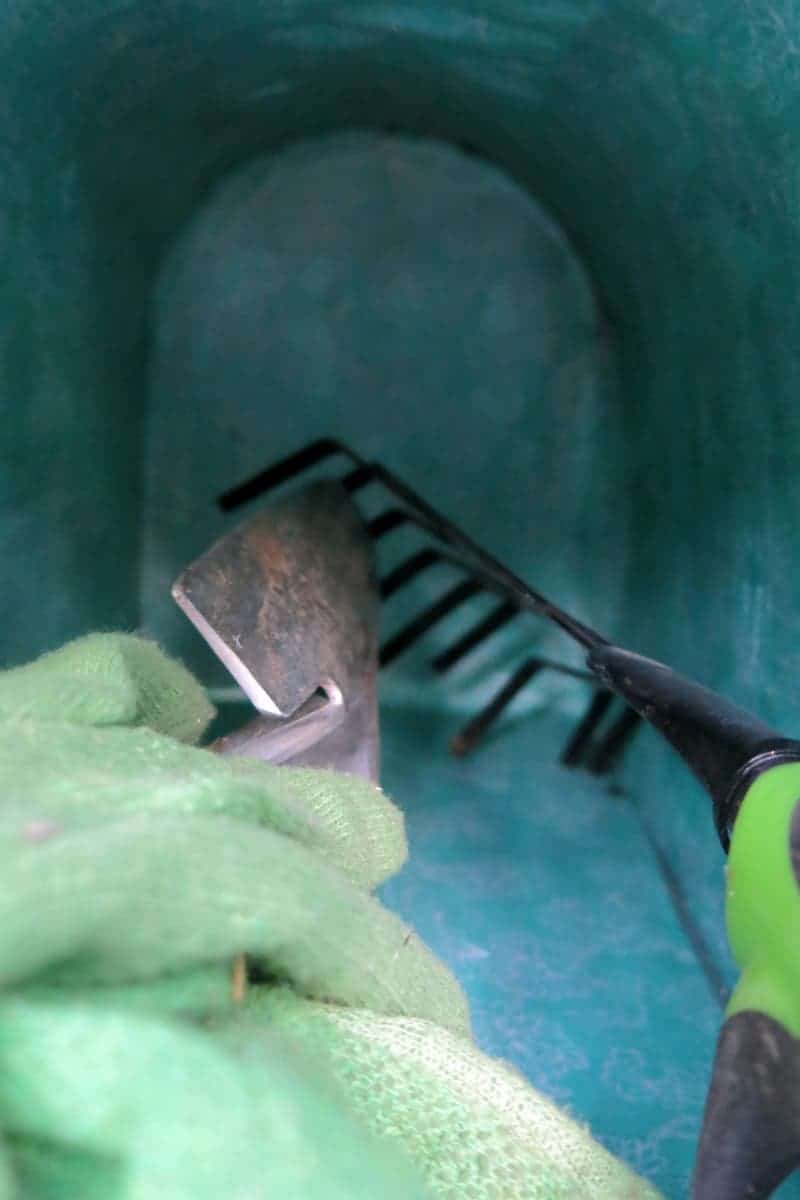
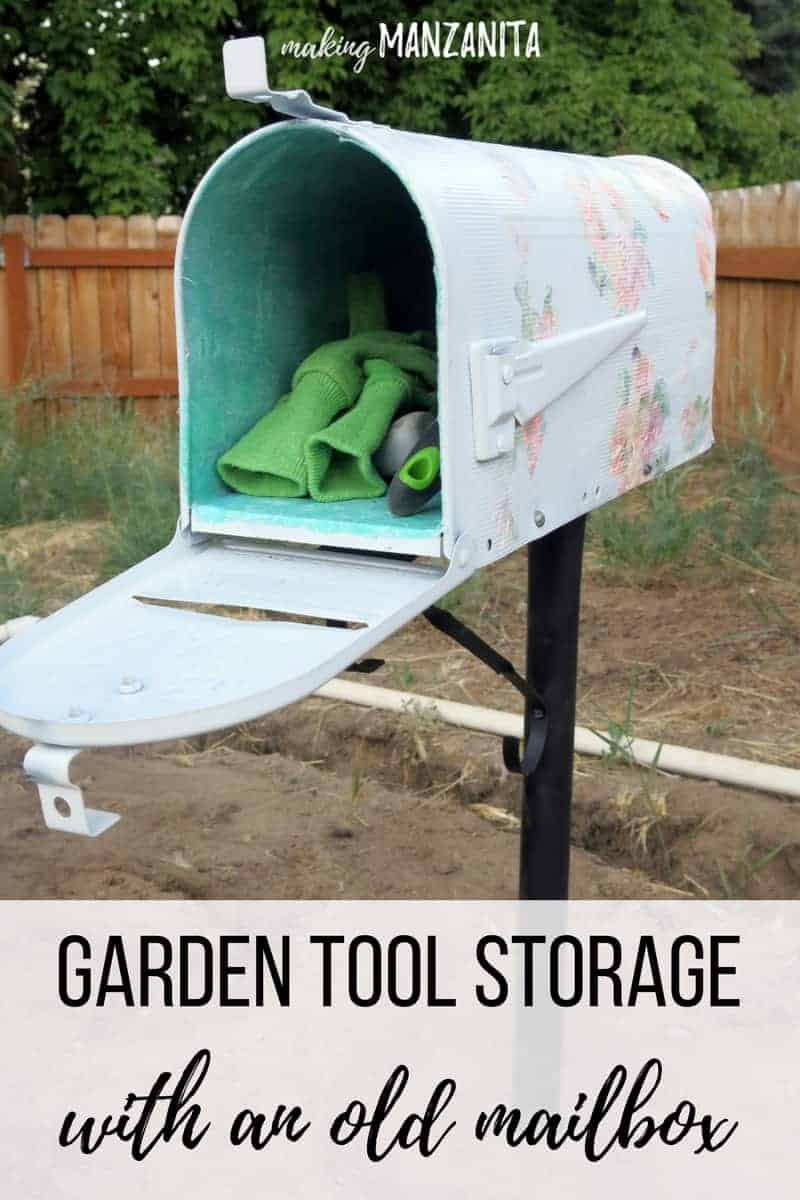
Step 5. Attach fabric to the inside of the mailbox.
I cut my fabric down to size and then used more Mod Podge to cover the inside of the mailbox. Working in small sections and using a foam brush, apply a thin layer of Mod Podge on the inside part of the mailbox and lay your fabric over the top. Smooth out any bubbles or wrinkles with a credit card.
Seal the fabric by applying a few coats of Mod Podge (Hard Coat) on top of the fabric. This will allow the fabric to be washable. You can wipe it down…this will come in handy when you put garden tools with dirt on them after you’ve been gardening.
This step of applying the fabric actually turned out to be harder than I thought it was going to be. My best advice is to work in small sections of fabric. I probably should have cut the top piece of the fabric into smaller pieces rather than working with one big piece.
I love how it made the inside of the mailbox feel bright and cheerful.

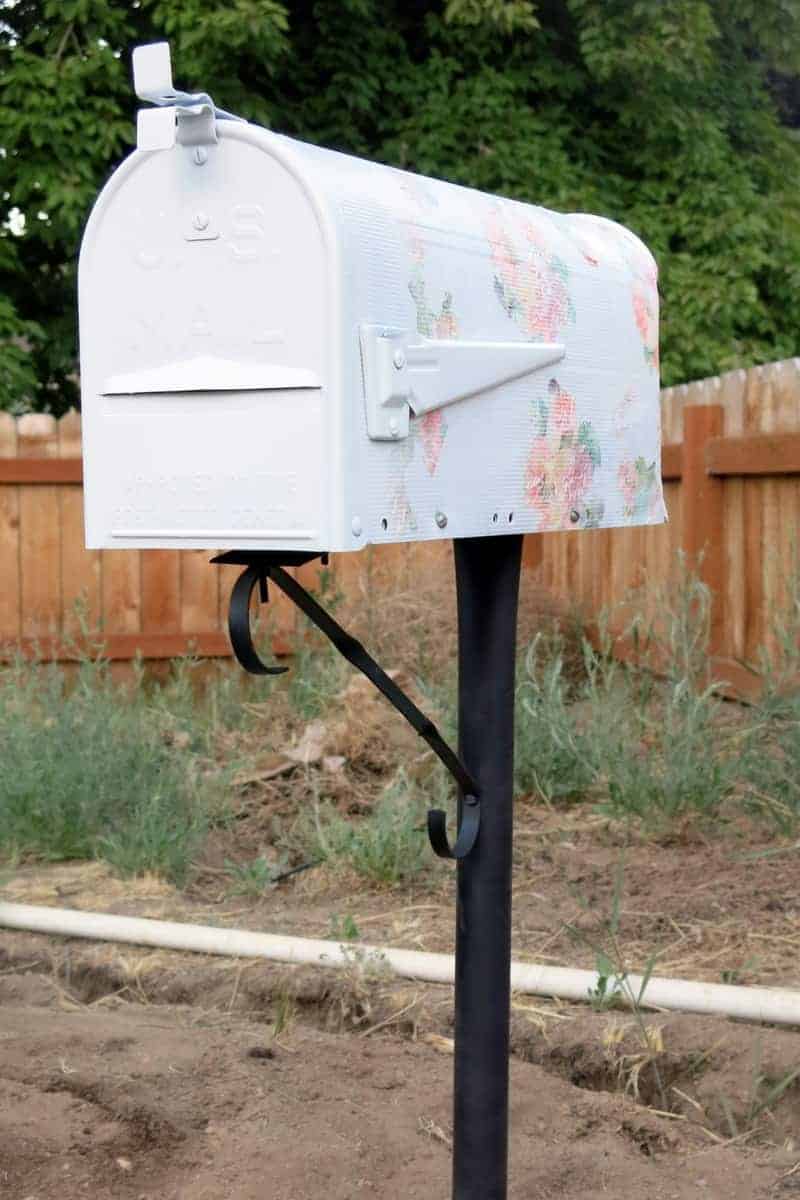
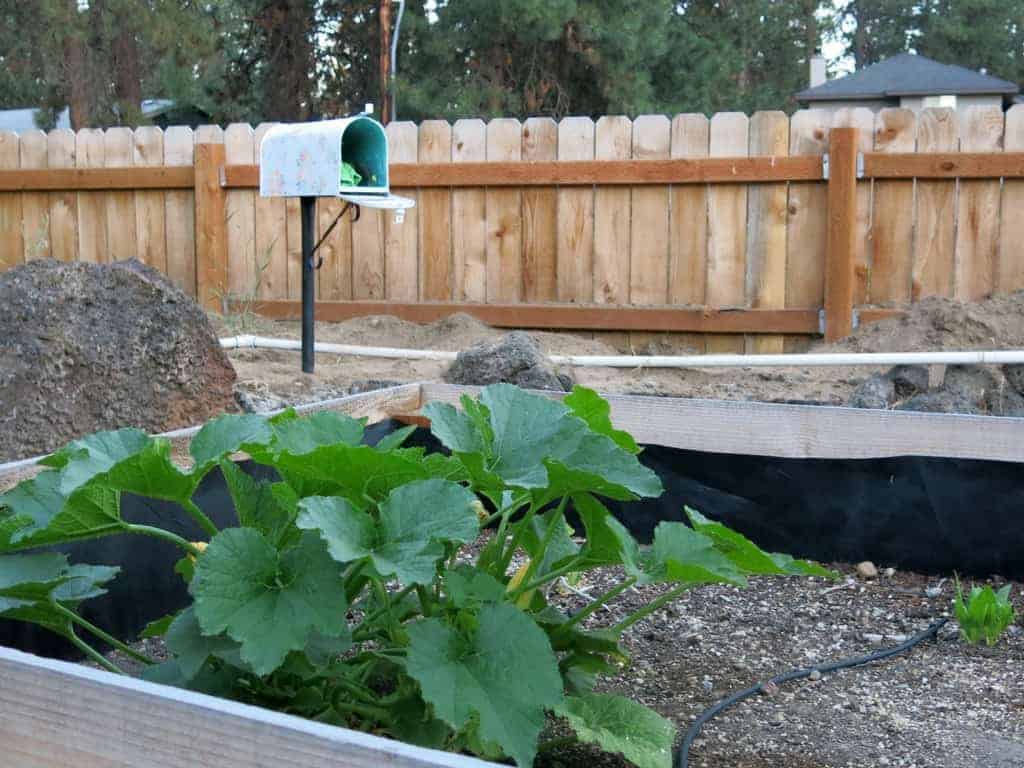
Step 6. Put garden tool box in the ground.
We put our DIY garden tool storage into the ledge near our raised garden beds. Because it was up on a ledge, we only ended up using the upper half of the post, along with some PVC that slid right into the bottom of the post.
To put the mailbox into the ground, we used a post hole digger to dig down about 1 foot.
After dropping the post into the ground, we filled the hole half full with gravel (making sure the post is level as we filled it).
To finish it up, we filled the rest of the hole with dirt and packed it down.
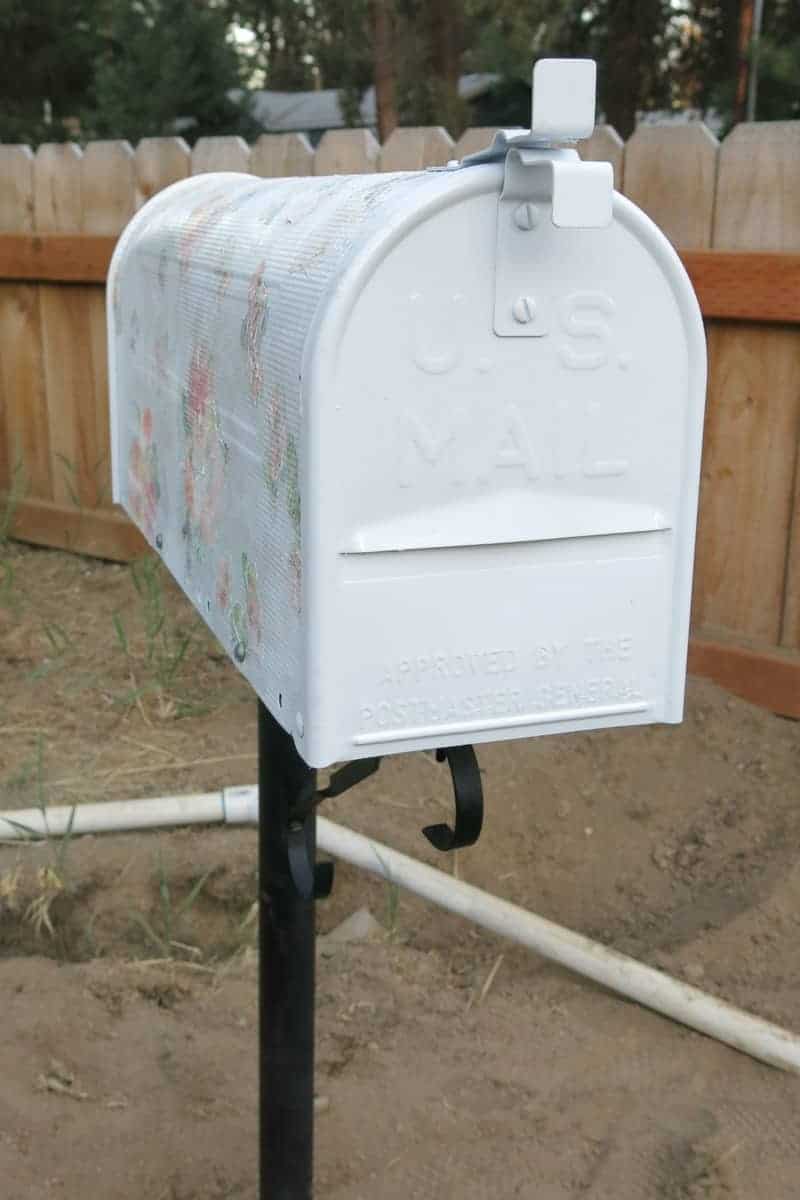
The DIY garden tool storage from old mailbox is so handy. My gardening tools and gloves are right there when I need them.
I can’t help but smile when I see this garden mailbox. The fun floral design on the outside and cheerful colors on the inside are perfect.
I’m so glad that I went with my gut and dry-brushed the exterior after placing the napkins down. It’s just the perfect amount of distressing without distressing 🙂
This garden tool storage from old mailbox makes gardening so convenient…speaking of gardening, would you like to see a little update on how things are going since I shared the DIY cedar raised garden beds with you?
My garden tools are just a couple of steps away from my garden.
If you’re looking for a great garden tool storage option for your garden tools, keep your eye out at thrift stores and Craigslist for old mailboxes.
With just some creativity, you can transform the old mailbox with genius garden tool storage that is adorable!
What would you do with an old mailbox?
Let me know in the comments!

How to Make Garden Tool Storage from Old Mailbox
I spotted this old mailbox and knew it was calling to be upcycled. Here’s how I created functional and cute garden tool storage from old mailbox.
Materials
- Old Mailbox
- Outdoor Spray Paint
- Floral Napkins
- Fabric
Tools
- Hard Coat Mod Podge
- Scissors
- Foam Paint Brush
- Post Hole Digger
Instructions
- Clean old mailbox and post.
- Spray paint old mailbox and post with outdoor spray paint.
- Cut out flowers from floral napkins.
- Attach flowers to old mailbox with mod podge.
- Attach fabric to the inside of the mailbox.
- Put DIY garden tool storage in the ground.
An adorable project for keeping tools rust free and within hands reach Chelsey, pinning to my garden board its so darn cute!
Such a cute idea. Just started Modge Podge this year, made a Dragon bureau for my son, and a side cabinet. My son loves them!
Those projects sounds awesome Gale!!
I love it! So pretty AND useful! you rocked it!
Jeannee@shepherdsandchardonay
Thanks so much Jeannnee! 🙂
What a terrific idea and it goes in the garden so beautifully.
Thanks Debra!
So pretty and the old mailbox got a serious upgrade and now is so useful as a garden tool storage!
Thanks so much!
This is so clever and handy to have the garden tools right where you need them — in pretty storage!
Very nice!
Thanks Patricia!
Very cute indeed!! I have been thinking of updating my real mailbox in a similar manor but thought I would use fabric on the outside. Is there a reason you used paper on the outside instead of fabric?
None besides that fact that I found those paper napkins and just FELL IN LOVE with the flower print and colors 🙂 Fabric would work also!!! Let me know if you end up trying this project. I’d love to see how yours turns out! Thanks 🙂
This is a great idea… I have been looking for a place to store the spouts for our metal 5 gallon gas cans…leaving them on the top of the cans means they get knocked off into the dirt. Also the gaskets dry out. This would be ideal and we have an old one since the PO went centralized on our area.
ALSO… as a retired Mail Carrier.. I can tell you that spiders and even small scorpions can get into any mail box… be sure to CHECK GLOVES before putting them on.
Yes, that’s a great idea for storing your gas can spouts. Thanks for the tips about the gloves. I will definitely be on the look out 🙂
I took a old one and painted it a bright blue, wrote Garden Tools on the side and put in one of the first flower gardens we started after we moved here 20yrs ago. In that time the door got bent and a bird made a nest in there because there were NO TOOLS in there. lol! We decided it needed it worse, so we left it. But I love your idea too!
Sounds like a lovely little home for the bird! 🙂