Easy DIY Plant Pot Cover with Fluted Texture

Trying to figure out how to disguise plastic plant pots too? You'll love this easy DIY plant pot cover. I decided to add half round trim to this DIY planter cover to mimic fluted furniture texture and I love how it turned out!
Thank you to DAP Products for sponsoring this plant pot cover tutorial. All opinions are entirely my own. This post also contains affiliate links, but nothing that I wouldn’t recommend wholeheartedly. Read my full disclosure here.
I love looking at gorgeous planters, but sometimes I can’t believe the prices. I decided to DIY my own plant pot cover on a budget!
I don’t know about you, but I’ve been seeing the whole fluted texture trend EVERYWHERE lately and I’m totally here for it. The best part about this trend is that it is SO easy to DIY yourself with wooden dowels or half round trim like I did.
Even though I made a plant pot cover for my project, you could definitely take these concepts and make other projects, like a fluted nightstand, coffee table, vase… you name it!

Plant Pot Cover Video Tutorial
If you love DIY videos, be sure to subscribe to YouTube channel for more.
Materials for plant pot cover:
- DAP Rapid Fuse All Purpose Adhesive
- 8 inch concrete form tube
- Matte black spray paint
- Half round trim pieces – I needed four 8-ft pieces
Tools for plant pot cover:
- Tape measure
- Sharpie
- Hand saw
- Clamp
- 150 grit sandpaper
- Spray paint trigger grip
Step 1. Cut concrete form tube down to size.
I decided to make our plant pot cover 8 inches tall, so I measured and marked a line down 8 inches on side of the concrete form tube.
To cut the concrete form tube, simply use a hand saw and cut carefully along the line you drew. It helps to clamp the tube down into place to prevent it from rolling around while you try to cut it.
After it is cut, you can smooth out the edge with sandpaper.
Step 2. Spray paint concrete form tube.
We’re going to be adding trim pieces to the outside of the concrete form tube, so it would be seeing, but just in case any slivers of the tube are seen from outside in between the trim, it helps to paint in the same color that your planter pot cover will be.
You also want to paint the inside of the tube so it looks cohesive.
Step 3. Cut trim pieces down to size.
Using a miter saw, cut your trim pieces all down to size. Be sure to watch the video tutorial above for a quick tip on how to get them all cut to the exact same length without having to measure each piece.
Step 4. Glue trim pieces to tube.
Once the concrete form tube is fully dry, you can glue it on your trim pieces. DAP’s RapidFuse All Purpose Adhesive works like a charm for this.
Just put the glue on the back of the trim piece and press and hold it in place for 30 seconds. The glue grabs in 30 seconds and will fully cure in just 30 minutes.
After that, it is strong as can be….like seriously strong.
If you’ve been a while, you know that we are big fans of the RapidFuse glue! It’s great for fixing things around the house and even works great for simple craft projects like this DIY footed tray, DIY wood wall art with wood shims, DIY key holder, poster frames, marble coasters, and Christmas tassel tree.
Step 5. Paint plant pot cover.
The last step is to spray paint the plant pot cover with more matte black spray paint. I think I did about 3-4 light coats. Let the spray paint dry before moving on.
Check out all of my tried and true spray painting tips here.

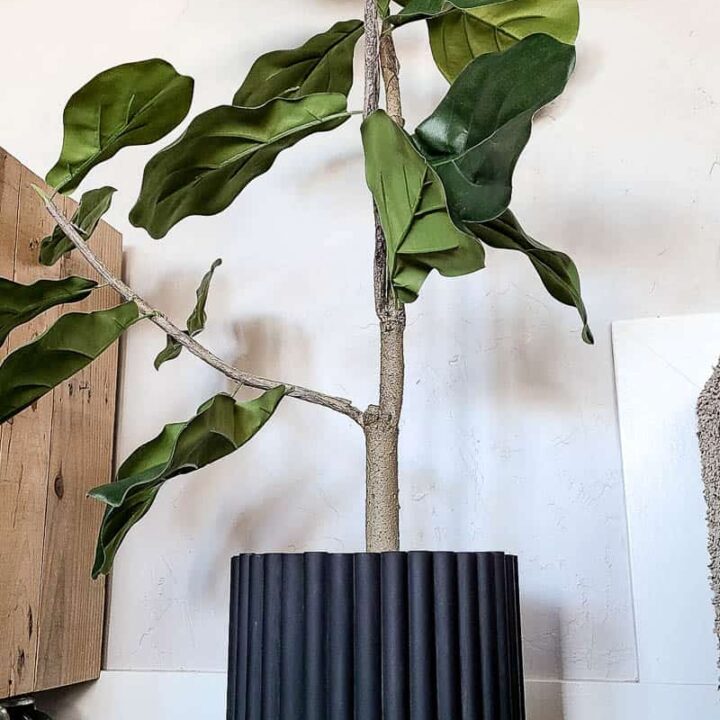
Then you simply just pop it on the floor and drop your plant pot into place. It will cover the ugly plastic pot on your plants (both real and faux). I love how it turned out and the fluted texture is just so cute, right!
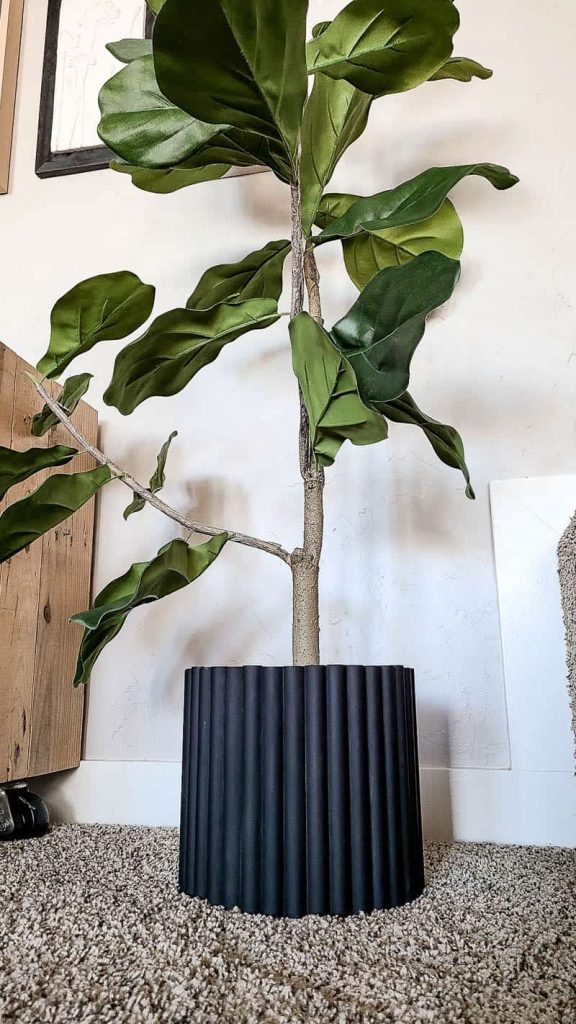
It’s the perfect match for our faux fiddle leaf fig tree that has an abnormally small and boring plastic pot that it comes in.
We even took this planter pot cover along with us after we renovated the living room. Check out the finished modern boho living room here.


So what do you think…? Are you here for the fluted texture trend too?
Let me know in the comments below!
How To Make A Easy DIY Plant Pot Cover with Fluted Texture
Materials
Tools
- Tape measure
- Sharpie
- Hand saw
- Clamp
- 150 grit sandpaper
- Spray paint trigger grip
Instructions
- Cut concrete form tube down to size with hand saw.
- Spray paint tube with black spray (inside and out).
- Cut trim pieces down to size with mite saw.
- Glue trim pieces to tub with Rapid Fuse glue.
- Paint plant pot cover with matte black spray paint.