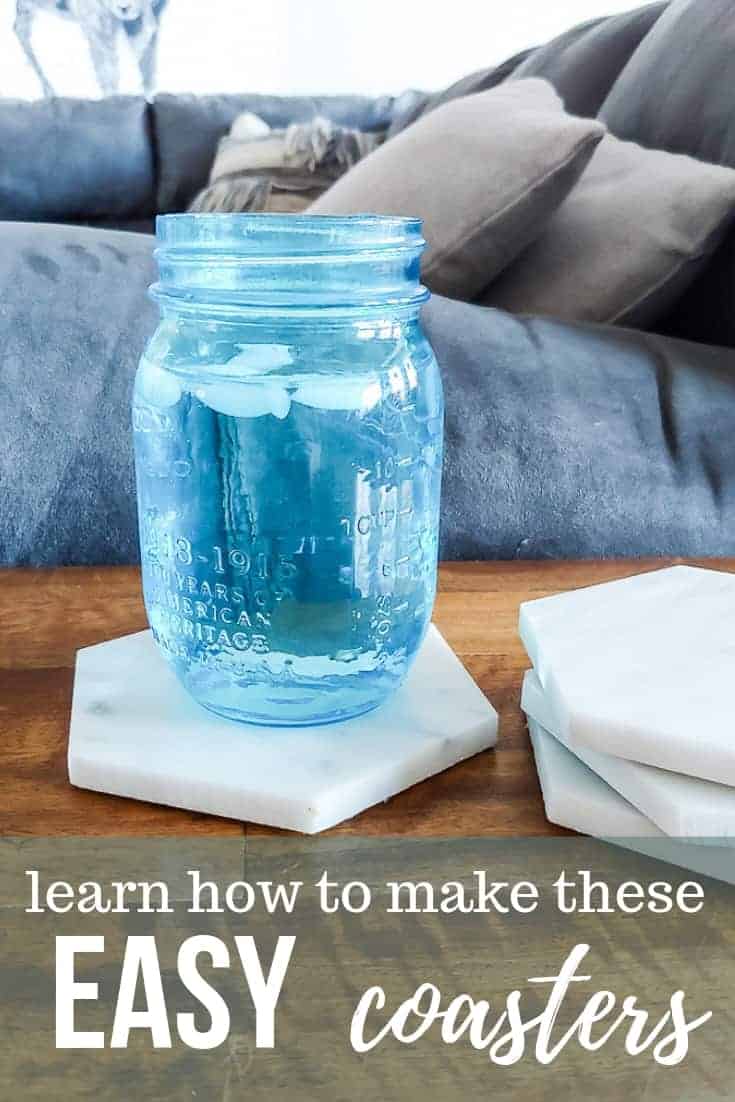
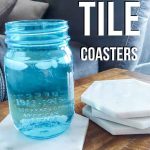
How To Make Easy DIY Tile Coasters with Leftover Tiles

Everyone needs a good coaster! Use up your leftover tiles to make marble coasters. This video tutorial will walk you through all the steps to make your own DIY tile coasters! Bonus: they make great DIY Christmas gifts.


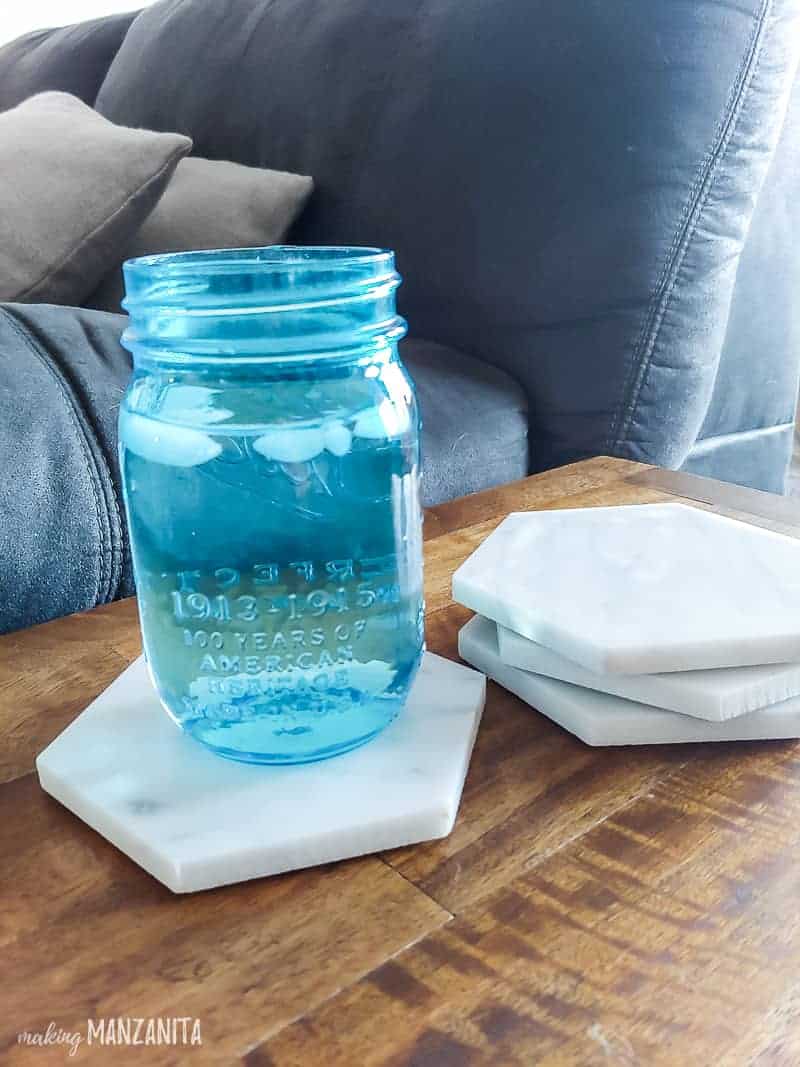
Everyone needs a good coaster. For so long we’ve had a coaster collection full of coasters we’ve picked up from restaurants and bars all over the world while traveling. But those disposable coasters have seen better days. They are dirty or lost or ripped or chewed on by the dog…or the kids.
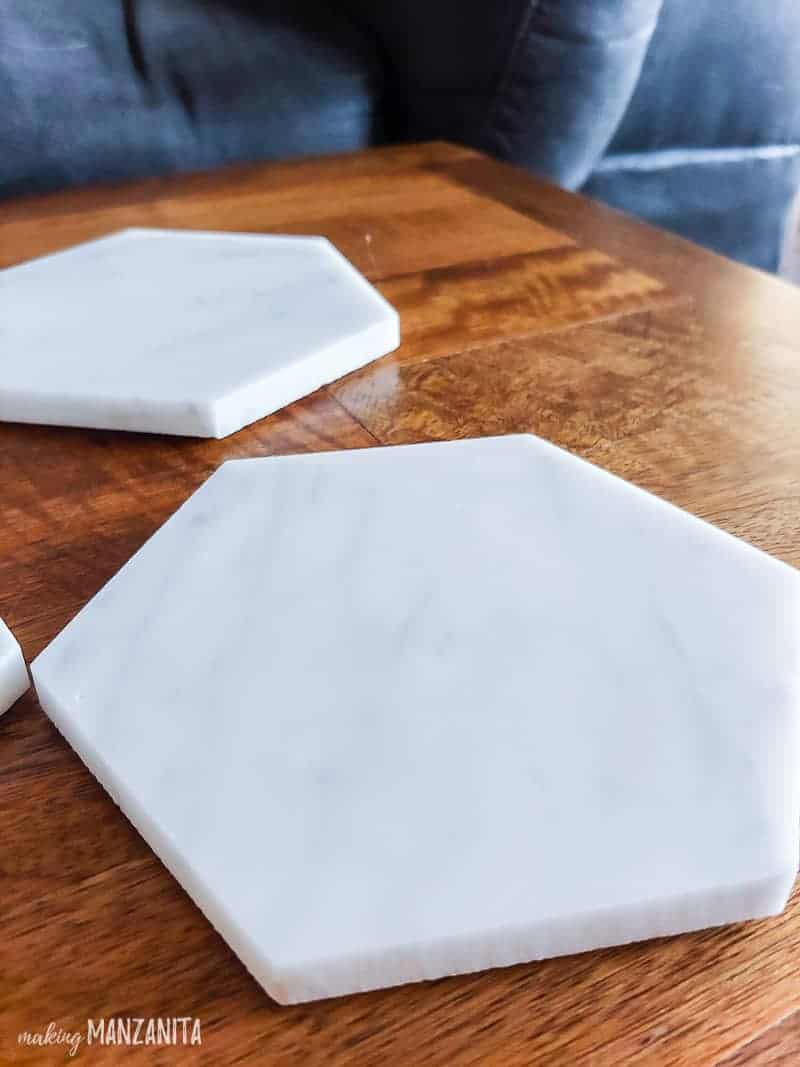
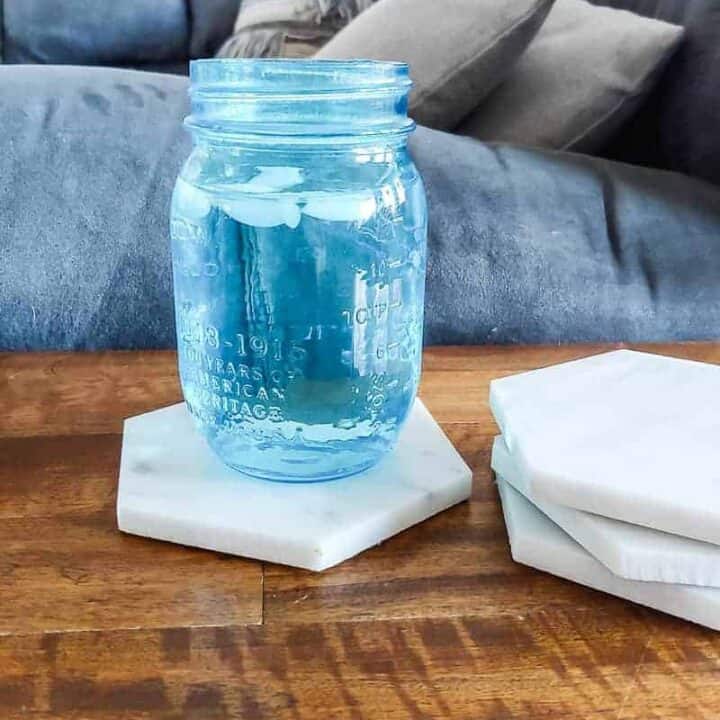
The point is…we needed some new coasters desperately. When I was staring at a box of leftover hexagon marble tiles from our farmhouse bathroom renovation, I knew I needed to come up with a fun DIY project for it.
After thinking more about it and staring at the 4-inch hexagon tiles, they are really the perfect size for DIY tile coasters! I had more than enough for us, so I decided to use them all up and make a bunch of marble coasters for DIY Christmas gifts.
Spoiler alert to my family….you’re probably getting a set of marble coasters this year!
If you find yourself with a pile of leftover tile pieces from your home renovation project, you’re going to love this good idea! Keep reading to learn how to whip up some super easy DIY tile coasters that will not only protect your precious coffee table but also add a touch of charm to your living room.
Plus, this is a fun project that you can totally tackle while the little ones are napping (or at least attempt to!). You’ve got to love those quick and easy DIY projects that only take an hour or two, right?
This DIY tile coasters tutorial contains affiliate links, but nothing that I wouldn’t wholeheartedly recommend anyway! Read my full disclosure here.
DIY Marble Coasters: Video Tutorial
I summed up this whole tutorial in a fun video for you guys. You can watch below. Turn your sound up because I talk you through some helpful tips for making your own marble coasters.
Do you love watching videos? Be sure to subscribe to my YouTube channel so you don’t ever miss a new video.
How To Make DIY Tile Coasters: Step-by-Step Tutorial
Supplies for DIY marble tile coasters:
- Marble hexagon tiles – we were using leftover from our farmhouse bathroom.
- We got ours here, but they have minimum order sizes.
- If you just want to get a small shipment to make DIY tile coasters, here’s something similar.
- Stone sealer
- Rag
- Foam paintbrush
- Heat gun
- Felt sheets
- Marker or pencil
- Scissors
- Cardboard
- Tape measure
- DAP Rapid Fuse Glue
Step 1. Remove the backing from the tile.
For the first step, you’ll need to remove the backing from the tile. We found it easiest to use a heat gun, which activated the glue that held the backing on the tile.
After giving it a little bit of heat, it was really easy to peel the packing off of the bottom of the tile.
Step 2. Apply sealer to the tile.
You will need to seal your tile with a stone sealer if you are using marble tiles like we were. Just brush it on with a foam paint brush and then wait 5 to 7 minutes and wipe it off.
If you are using porcelain or ceramic tiles, you can skip this step.
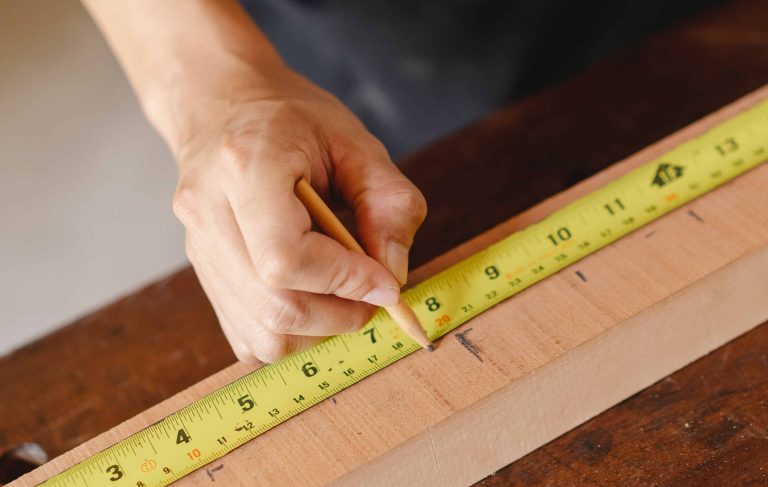
Step 3. Trace tile on cardboard.
Put your tile on the cardboard and trace it (with a pencil, not a Sharpie as I did, which left a mark on the tile). Then measure 1/4″ in around the board of the tile and make another line because you want the backing on the bottom of the coaster to be a little smaller so you can’t see it from the top of the coaster.
Cut the shape out along the inner line with scissors. This will be your template to trace on the felt to create the backing for your tile coasters.
Step 4. Trace on felt and cut out.
Hold the cardboard template onto the felt sheet and trace out several shapes. Trace as many shapes as tile coasters you are planning to make.
Next, cut out the shapes with scissors. Some regular house scissors may have trouble cutting through felt. The first ones I tried weren’t working very well, but I switched to these ones and they worked great.
If you didn’t want to use felt on your own coasters, you could also use a roll or sheet of cork for a cork backing.
Step 5. Glue felt pads to tile.
Now it is time to glue the felt to the back of the tile coaster. I used DAP Rapid Fuse Glue, which you know I love.
You’ll see in the video that we were using the brush applicator version of the Rapid Fuse, we figured out later that the regular applicator is a little easier to apply to the felt sheets.
If all you have is the brush applicator, that worked fine too! But if you’re buying it at the hardware store for these DIY tile coasters – grab the regular version instead.
Step 6. Wait for the glue to dry entirely.
After you glue the felt backing onto the tile, wait for the glue to dry entirely before stacking the tile coasters.
We found that the chemicals in the glue kind of left a mark on the tile next to it when it was stacked up if it wasn’t entirely dry.
I’d play it safe and wait about a day. We were able to get the markings off with some elbow grease and mineral spirits.
How to Make DIY Marble Coasters: Tips & Tricks
A couple of things we figured out after making a bunch of marble coasters for Christmas presents:
- You shouldn’t need to use a tile sealer if you’re working with ceramic tiles or porcelain tiles. However, I used marble – a porous stone that needs to be sealed before use. Otherwise, there would be water rings on the marble coasters.
- Even though I used a Sharpie to trace the tile onto the cardboard to make the template, I’d use a pencil if I were to do it again because the Sharpie left a black line on the edge of the tile that I was using for the stencil.
- You’ll see in the video that we were using the brush applicator version of the Rapid Fuse, we figured out later that the regular applicator is a little easier to apply to the felt sheets.
- After you glue the felt backing onto the tile, wait for the glue to dry entirely before stacking the tile coasters.
If you’ve been around a while, you know that we are big fans of the RapidFuse glue! It’s great for fixing things around the house and even works great for simple craft projects like this DIY footed tray, DIY wood wall art with wood shims, DIY key holder, poster frames, plant pot cover, and Christmas tassel tree. And it worked perfectly for these DIY coasters too!

Coasters are seriously such a great gift idea! Outside of just sealing the marble tiles and adding backing to the bottom, you could also customize them by adding scrapbook paper with a thin layer of Mod Podge underneath and more coats of Mod Podge over the paper. Just work carefully to avoid air bubbles or wrinkles in the paper.
You could also add a photo to the top of the tile using the same method of a thin coat of Mod Podge under the photo and more on top to protect it. Decoupage coasters like that make great gifts!
Beyond making coasters with leftover tiles, the good news is that there are SO many different ideas. You could make coasters with craft supplies like scrap wood, tissue paper, vinyl decals, and more. Get inspired by these 42 different DIY coaster ideas!
Voila! There you have it, folks – your very own set of DIY tile coasters made from those leftover tile treasures you had lying around. After your next renovation project, don’t toss the leftover supplies! You never know what you can turn trash into, right?
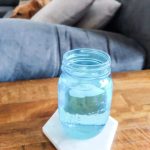
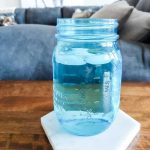
If you’re stumped on what to do with your leftover tiles from renovation projects, DIY tile coasters are a great option. You’ll protect your end tables and coffee table from your hot coffee cup while looking cute and adding style to your space!
They are SO easy to make and they make great handmade Christmas gifts. Remember that DIY gifts don’t have to be complicated and they certainly don’t have to break the back. With a little creativity and a few spare tiles, you can create these fun coasters that your entire family will love getting as a gift during the holiday season.
Have you ever made coasters before?
Let me know in the comments below!
How To Make Marble Coasters With Leftover Tiles
Materials
- Marble hexagon tiles
- Stone sealer
- Felt sheets
- DAP Rapid Fuse Glue
Tools
- Rag
- Foam paint brush
- Marker or pencil
- Scissors
- Cardboard
- Tape measure
Instructions
- Remove the backing from the tile. The heat gun helped activate the glue to loosen the backing so it peeled off easily.
- Seal the tile with a stone sealer.
- Create a cardboard template.
- Trace on felt and cut out shapes.
- Glue felt onto the bottom of the tile.
- Let dry.
Notes
- You shouldn’t need to use a tile sealer if you’re working with ceramic or porcelain tiles. However, I was use marble – which is a porous stone and needs to be sealed before use. Otherwise there would be water rings on the marble coasters.
- Even though I used a Sharpie to trace the tile onto the cardboard to make the template, I’d use a pencil if I were to do it again because the Sharpie left a black line on the edge of the tile.
- You’ll see in the video that we were using the brush applicator version of the Rapid Fuse, we figured out later that the regular applicator is a little easier to apply to the felt sheets. If all you have is the brush applicator, that worked fine too! But if you’re buying it for these DIY tile coasters – grab the regular version.
- After you glue on the felt backing onto the tile, wait for the glue to dry entirely before stacking the tile coasters. We found that the chemicals in the glue kind of left a mark on the tile next to it when it was stacked up if it wasn’t entirely dry. I’d play it safe a wait about a day. We were able to get the markings off with some elbow grease and mineral spirits.
Want more easy DIY gift ideas?
- Easy DIY Stovetop Potpourri Gift Idea with Free Printable Tags
- Homemade Mulling Spices for Christmas Gifts with Free Printable Tag
- 55+ DIY Christmas Gift Ideas on a Budget You Can Make For Less Than $10
- 36 DIY Wood Gifts You Can Make
- 20+ DIY Gifts For Him (Perfect for Dad, Husband, Boyfriend, or Brother!)
- DIY Bottle Opener – Gift Idea
- DIY Leather Bookmark – Easy Handmade Christmas Gifts


I couldn’t catch the name and brand of the better scissors u used. Could you tell me again?
Thanks
Gsondergaard
Better yet – here’s a link to the awesome scissors on Amazon – https://amzn.to/2UuZQld
Great idea and simple.
I fabric aprons, bags, table runner for the market and I always search for something new.