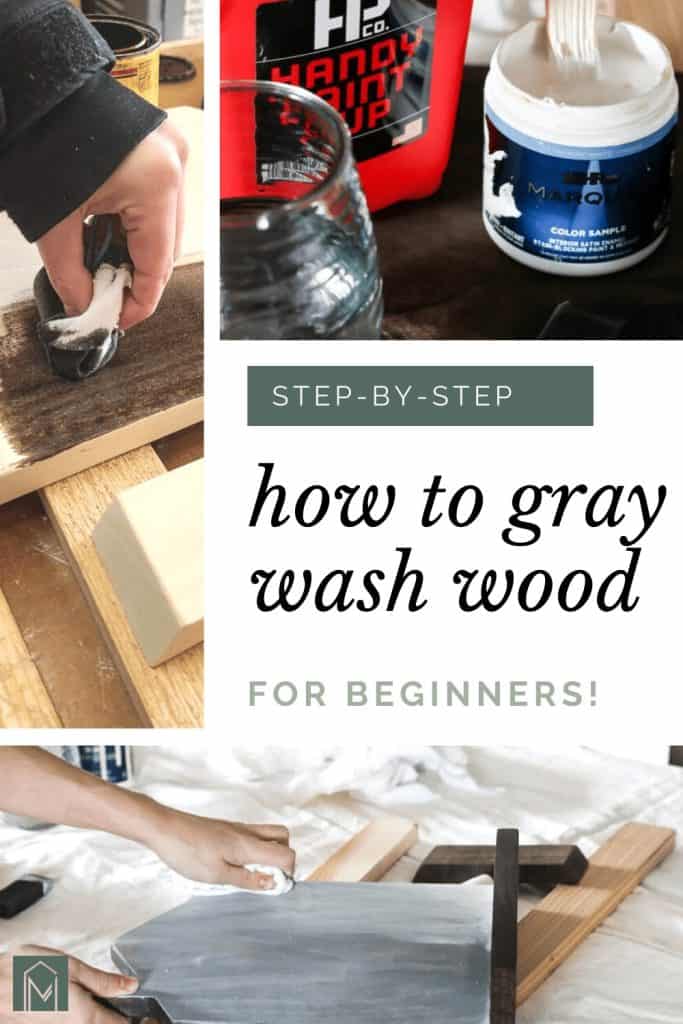
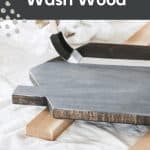
How To Gray Wash Wood

Do you love that Restoration Hardware and Pottery Barn gray wash wood style? Learn how to DIY it with this step-by-step tutorial for how to gray wash wood!
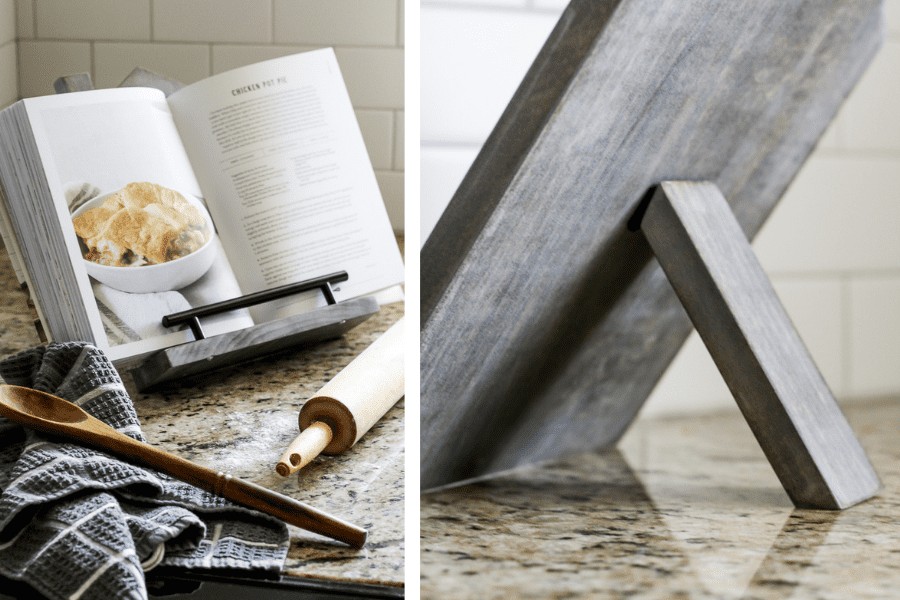
Earlier this week we shared our latest woodworking project – this DIY cookbook stand. It was so fun to make!
For the finish of the cookbook holder, I wanted a rustic-looking gray wash over the wood. There are a few different ways to accomplish this:
- Apply a gray wash wood stain (like this weatherwash aging stain or this weather gray wood stain)
- Add a watered down white paint over dark stained (or medium stained) wood
- Paint the entire piece with light gray paint and once dry do a watered down darker gray paint on top. You won’t be able to see the natural wood grain with this one, but the layered paint look mimics the wood grain.
- Use the dry brush technique with gray paint
I chose to try a dark stain combined with a watered-down white paint for the gray wash wood technique on the cookbook stand. Let’s jump right in!
Table of Contents
This how to gray wash wood guide contains affiliate links, but nothing that I wouldn’t recommend wholeheartedly. Read my full disclosure here.
Gray vs grey
Every time I go to write a blog post with gray, I never know whether to spell it gray or grey. So, I officially Googled it and figure out that gray is the American English spelling and grey is the British English spelling. Make sense.
So for the purposes of this gray wash tutorial (since our audience is primarily American), I’m going to spell this technique how to gray wash wood instead of how to grey wash wood, but for all intents and purposes, I mean the same thing as grey wash when I write gray wash.
Gray Wash Wood – Video Tutorial
If you love DIY videos, be sure to subscribe to our YouTube channel!
What You’ll Need For The Gray Wash Wood Technique
- Dark wood stain
- Lint-free paint rags
- White latex paint (We used Behr’s Snowy Pine paint color)
- Water
- Disposable cup (or Handy Paint Cup)
- Paint stir stick
- Foam paint brush
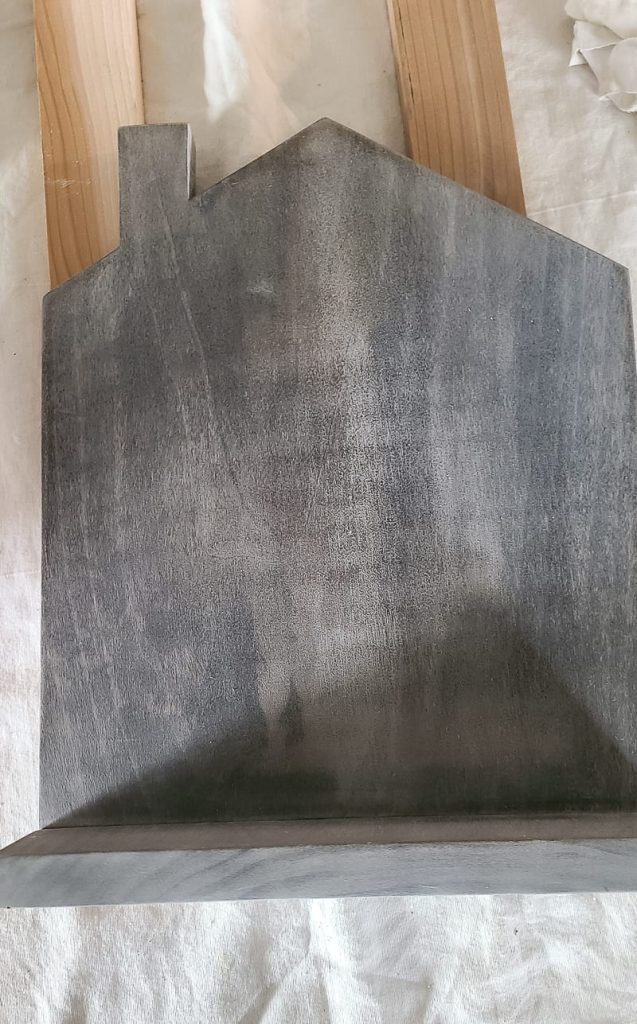
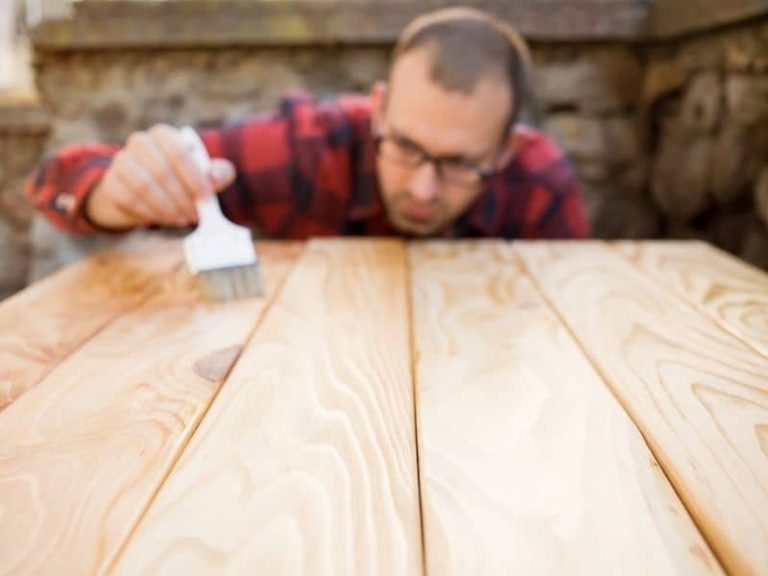
Step 1. Stain your wood with dark wood stain
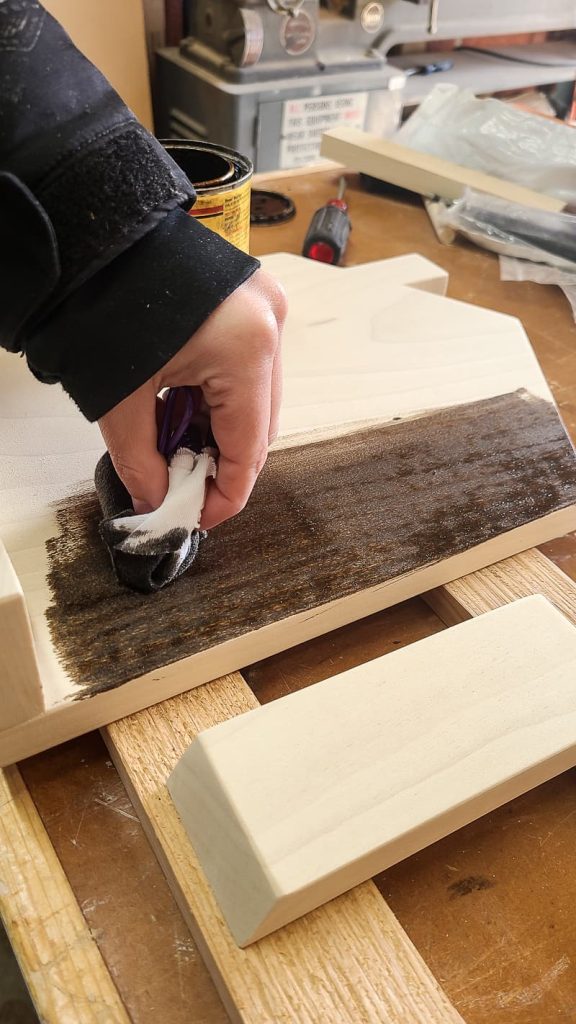
The first layer of the gray wash wood technique is a dark wood stain. If you are using new wood, like we were in our DIY cookbook stand, you can apply the wood stain directly to the wood with a staining rag.
Work the stain in the wood by wiping the rag with the direction of the wood grain. Let it sit for a couple of minutes and then wipe off the excess with a dry rag.
Let the stain dry thoroughly. Just check the instructions on the back of your can for a guide on how long it takes for the stain to dry.
If you’re wanting to do a gray wash over wood that is already stained and sealed, like furniture, you’ll want to lightly sand the glossy shine off of the piece first.
If the existing stain on the wood is already pretty dark, you can skip adding more dark wood stain.
What stain color should I use for a gray wash look?
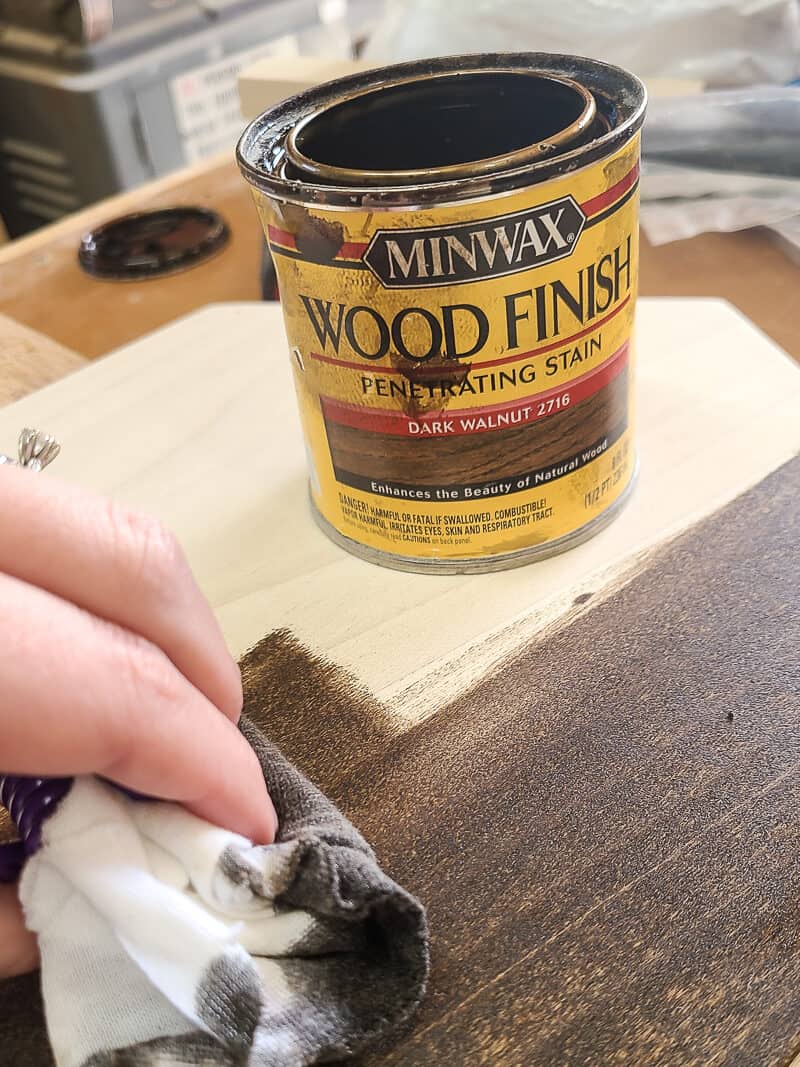
Dark Walnut by Minwax is a classic favorite for ours and we always have some on hand, so that is what I used. Other dark wood stains, like Coffee, Jacobean, or Ebony, would also work well.
Learn more about Dark Walnut stain color in our guide here!
Here are some other projects that we’ve used Dark Walnut stain on:
- Farmhouse Advent Calendar: We did a similar paint-over stain technique on this, but it turned out more like a distressed whitewash instead of gray. We stained it first with Dark Walnut and then roughly painted it over with white chalk paint (not watered down), letting some of the dark wood peek through.
- DIY Table Top For Beginners: We used Dark Walnut on this tabletop in our kitchen that has a white chalk-painted base.
- How To Make A DIY Bathtub Tray: The dark stain color makes this bathtub tray really pop against the contrast of a white bathtub.
- Shiplap Sign: The same dark wood stain was used on the frame of this fun wood sign.
- Bathroom Floating Shelves: These shelves look great contrasting against the white faux shiplap wall with the Dark Walnut stain color.
- Easy DIY Bench: Another win for Dark Walnut on this small bench.
- Wood Coasters: I love the way the darker stain looks on these coasters when they are up against the lighter wood of our coffee table in our living room.
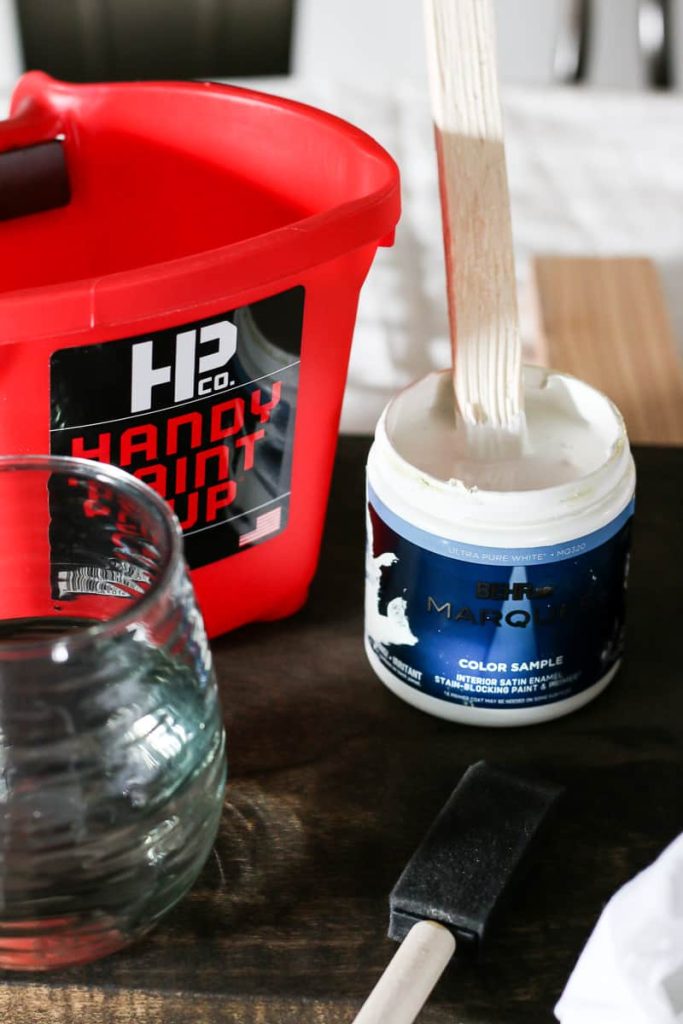
Step 2. Mix white paint and water
To get the gray wash look, we’re going to mix white paint with water at a 50/50 ratio. This watered-down paint is what gives it that “wash” characteristic, meaning that the paint cover is opaque and see-through. So even after the paint is applied over the stain, you’ll be able to see that wood grain.
You may be thinking…why are you using white paint for a gray wash? Shouldn’t we use gray paint?
Well, what happens when you mix white and black (the black in this case in the dark pulling in from the wood stain)? You get GRAY!
To mix the white paint and water, you can just use a plastic disposable cup and stir together with a paint stir stick.
As mentioned above, I used a 50% water to 50% paint ratio. If you want the gray wash finish to be darker than mine, go with more water. If you want it to be lighter, more like a whitewash, go with more paint.
For the paint, it doesn’t matter too much exactly what type of latex paint you use. Because the coverage isn’t important, paint quality is not of concern. You can simply have the paint counter at Home Depot or Lowe’s mix up the paint in one of the lower-quality paint samples.
We used the Snowy Paint paint color by Behr Paint in Marquee type of paint in a Satin paint sheen because we already had it on hand in our garage.
If you have a Handy Paint Cup that would work great too for mixing the paint and water. I love these because they have a built-in magnetic brush holder and a handle, which makes them super easy to carry.
Step 3. Apply watered-down paint wash over the stain
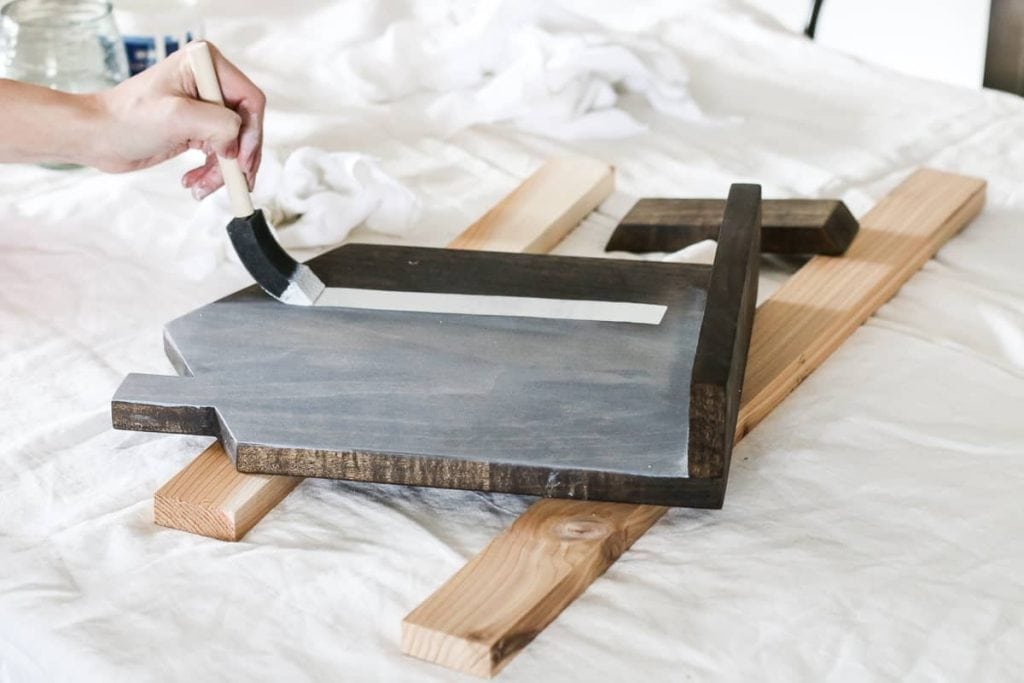
Next, you can add the water-down paint wash directly over the dried stain on your wood project. A cheap foam brush should work perfectly for this.
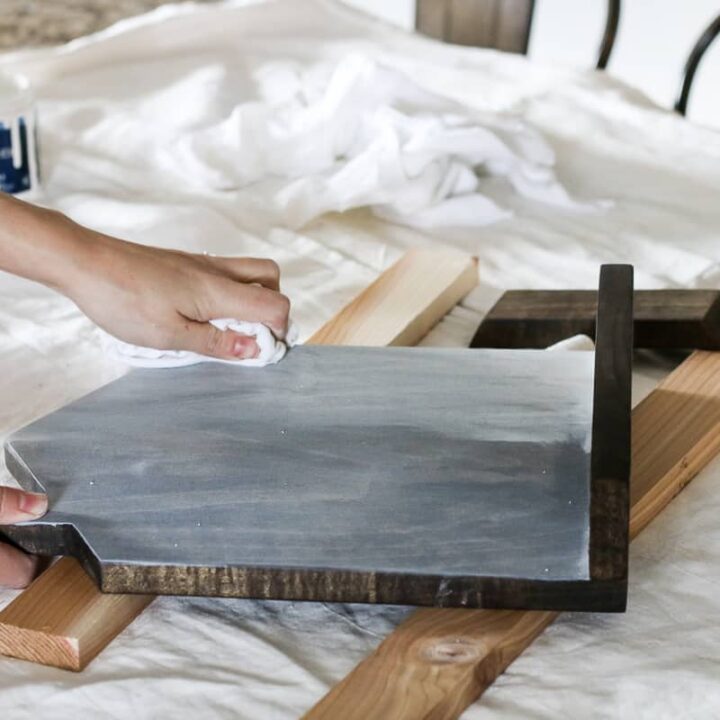
Step 4. Wipe off paint
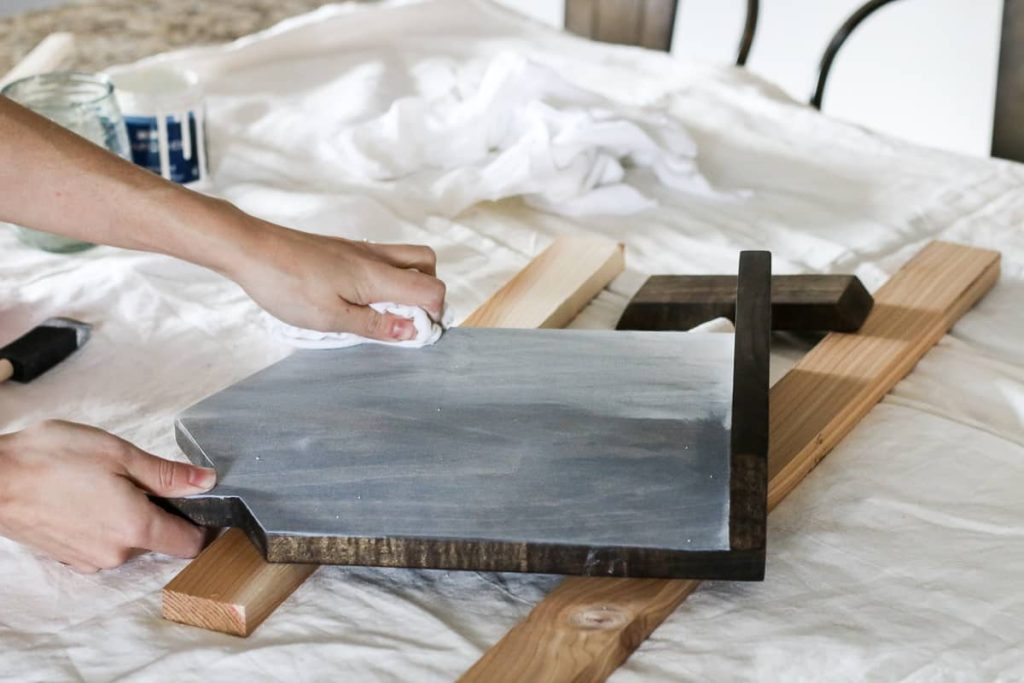
Within 30 seconds or so wipe off the paint from the surface with a dry lint-free rag. Depending on how small your project is, you should attempt to paint the entire surface and then move on to wiping off. That is if you can get the entire surface painted within 30 seconds or so.
I learned the hard way that any time you overlap any of the paint, you’ll be able to see the areas of overlap because they will be brighter.
Wiping the paint off is totally up to you, though! If you get the water-down paint added and you like to color, you don’t need to wipe it off. It will just be much whiter than mine.
Step 5. Sand
This step is optional and wasn’t planned. Once I got the gray wash paint added to the stained surface, I ran into some issues with imperfections where there were areas overlapping with 2 coats of paint instead of 1.
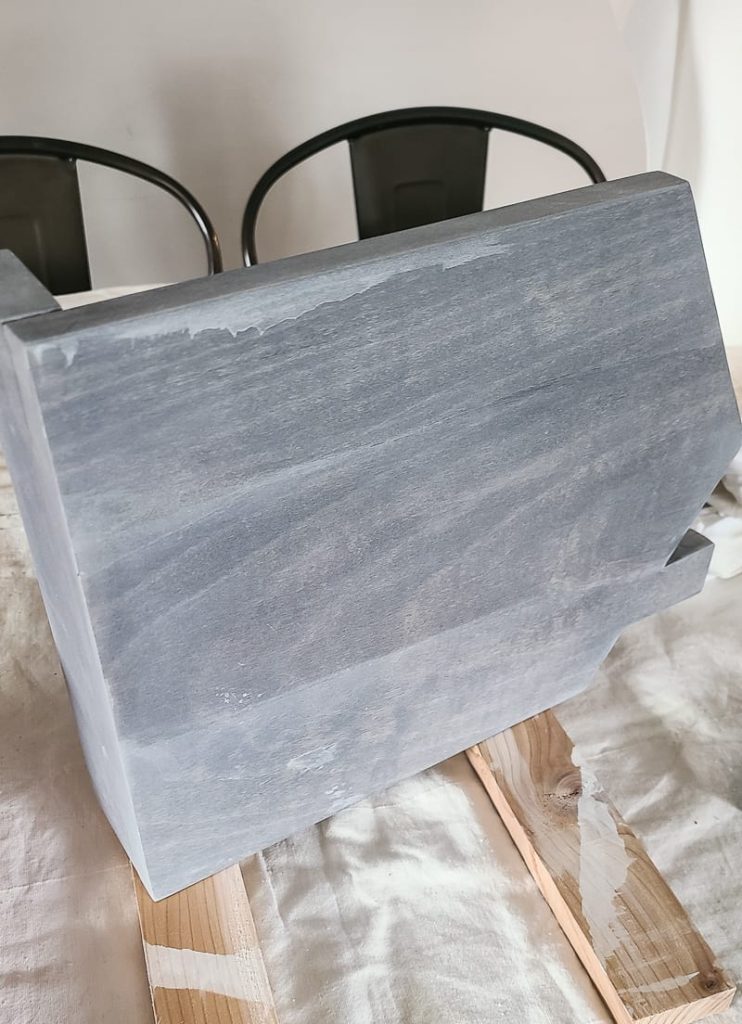
To fix this, I lightly sanded areas with a sanding block. This removed some of the paint, revealing the darker wood-stained surface. It also helped get rid of some of the areas of imperfection.
I was planning to sand lightly and then do a 2nd coat on everything to try to even things out, but I ended up really liking the sort of “distressed” look that the sanding brought, so I left it.
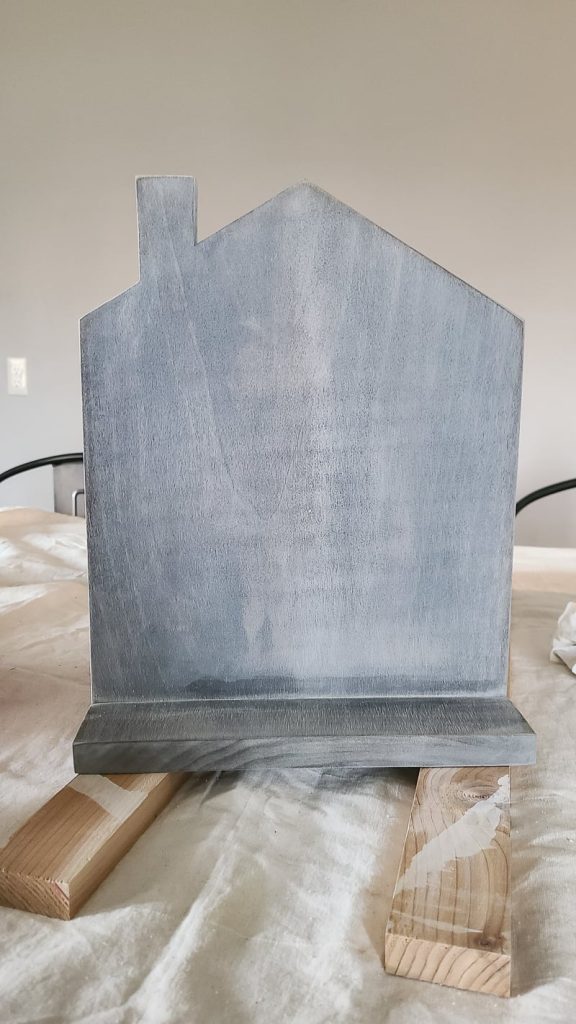
Step 6. Seal
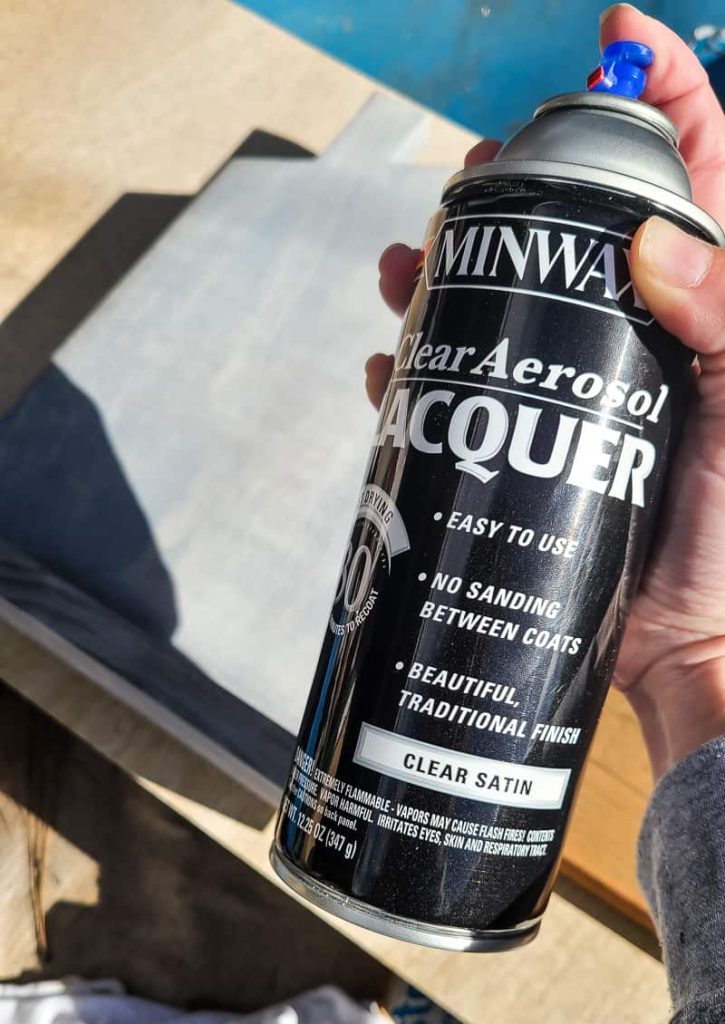
Once the furniture or woodworking project has had a chance to fully dry, you can seal it. I went with a clear spray lacquer finish because it is easy to apply, dries quickly, and does not yellow on light-painted surfaces.
You could also use Polycrylic as an alternative to lacquer.
Whatever you do, DON’T use polyurethane as a finish over your gray wash because it will appear yellow or amber-colored on the surface and I don’t think that is what you want!
Getting that Restoration Hardware or Pottery Barn gray wood look isn’t hard. By following along with our simple step-by-step tutorial for how to gray wash wood, you’ll get the look that you’re going for!
Have you tried this gray wash technique?
Let us know in the comments below!
How to Gray Wash Wood
Do you love that rustic gray wash wood style? Learn how to DIY it with this step-by-step tutorial for how to gray wash wood!
Materials
- Dark wood stain
- Lint-free paint rags
- White latex paint (We used Behr's Snowy Pine paint color)
- Water
- Handy Paint Cup
- Paint stir stick
- Foam paint brush
Instructions
- The first layer of the gray wash wood technique is a dark wood stain. If you are using new wood, like we were in our DIY cookbook stand, you can apply the wood stain directly to the wood with a staining rag.
- Mix white paint and water in a 50/50 ratio.
- Apply paint and water wash over stain using a foam brush.
- Within 30 seconds or so, wipe off paint using a lint-free rag.
- Lightly sand with a sanding block to get rid of any imperfections or overlap in paint. This step is completely optional.
- Seal with a clear lacquer or polyacrylic.

This was perfect for my library ladder. It looks beautiful- thank you so much
I bet this is beautiful on a library ladder!