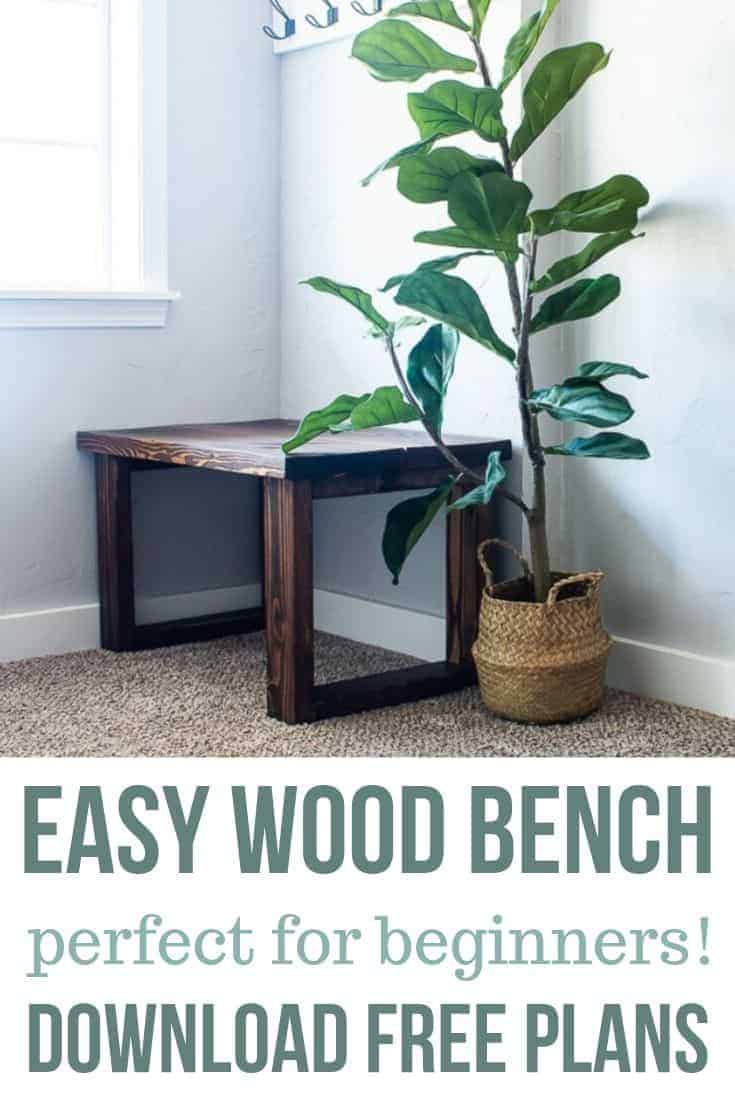
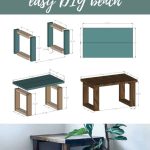
Easy DIY Bench For Small Entryway (With Free Plans)
Thank you to DAP for sponsoring this easy DIY bench! All opinions are entirely my own. This post also contains affiliate links, but nothing that I wouldn’t recommend wholeheartedly. Read my full disclosure here.
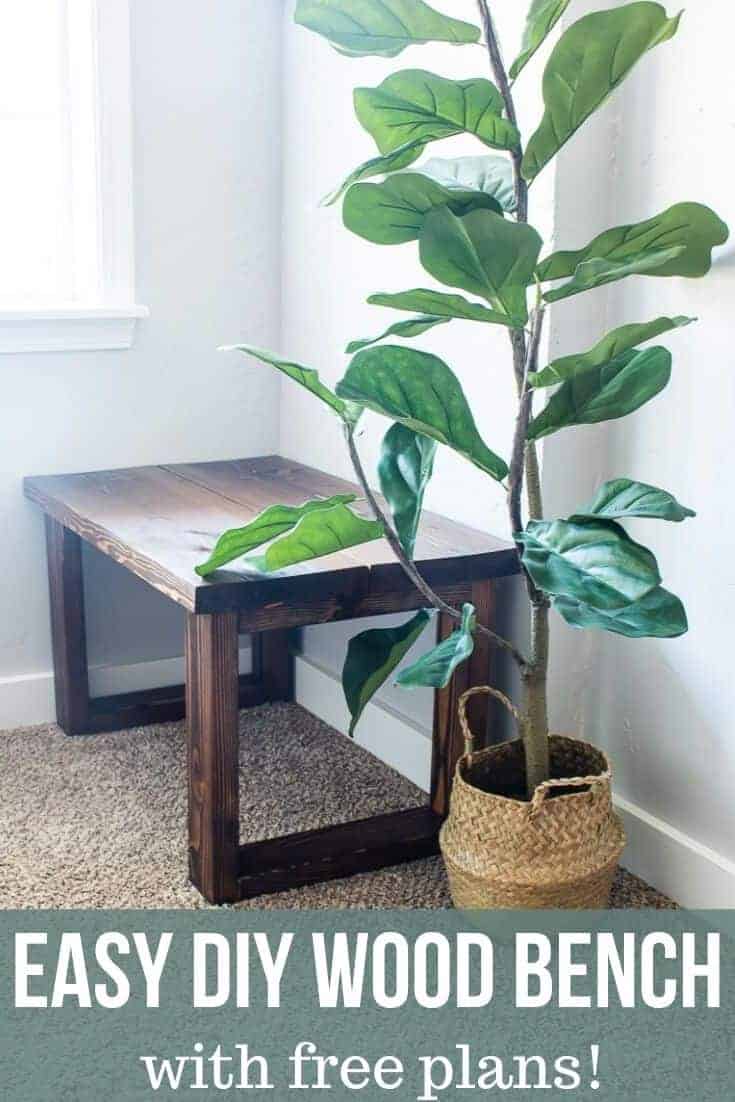
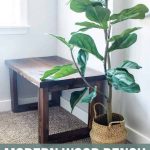
This DIY small bench is not only super cute, but functional too! It’s the perfect place to sit to take on and off your shoes in the entryway.
If you have a larger space to work with than just a corner of your living room and you’re trying to create a space that’s more than just shoes flung everywhere and a big, muddy mess, I recommend building these mudroom lockers with doors! Or check out these other mudroom ideas!
Our small entryway makeover is coming along! This is my 3rd weekly update and we’re showing you how to build this super easy DIY bench (with a video tutorial and FREE wood bench plans!)
If you want to catch up on our small entryway makeover, here you go:
Week 1 – 21 Entryway Makeover Ideas for Small Spaces
Week 2 – DIY Key Holder With Modern Farmhouse Style
Week 3 – Easy DIY Bench For Small Entryway – you are here!
Week 4 – Small Entryway Reveal!
Before we get started on the supplies and showing you how to build this DIY indoor bench, let me just say that this thing is SO SO so easy to make. I tend to rely quite a bit on my handy husband, Logan, for a lot of projects….but for this one I was able to tackle almost 100% by myself!
That means that if you’re a beginner when it comes to woodworking, this is a great project for you to try! I’ve also got plenty of other great beginner woodworking projects. Plus, information on all the tools you’ll need and the type of wood to buy!
The joinery is simple. The plans are free. The wood is pretty cheap. This one is for you, newbies.
Easy DIY Bench: Video Tutorial
If you love DIY videos, be sure to subscribe to our YouTube channel!
How to Build an Easy Wood Bench: Step-by-Step Tutorial
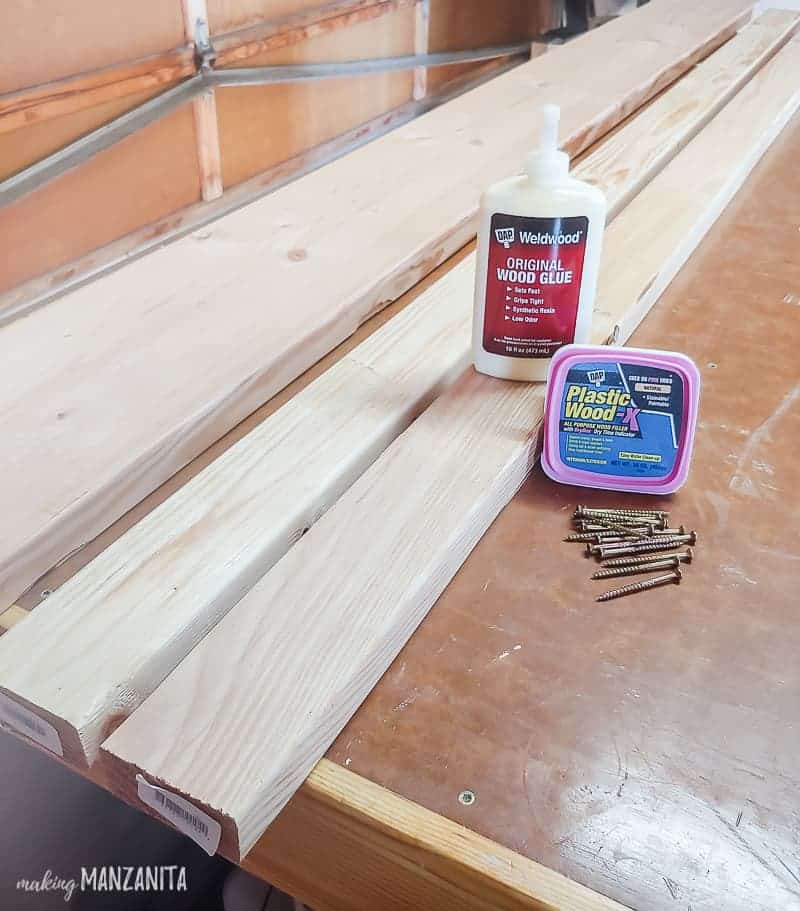
Supplies for simple DIY bench:
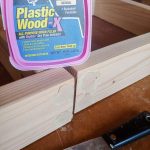
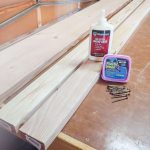
- DAP’s Plastic Wood X Wood Filler
- DAP Weldwood Wood Glue
- 2×4’s – I needed two
- 10 inch oak
- 2.5 inch construction screws
- Stain (learn more about Dark Walnut stain here)
- Wipe on Poly
- Staining rags
- Sandpaper (80 & 150 grit)
Tools for DIY bench:
- Miter saw
- Drill
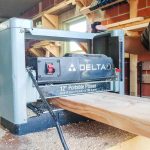
- Planer
- Orbital sander
- Clamps
- Putty knife
- Tape measure
Step 1. Cut the legs.
If you reference the free wood bench plans, you’ll see that the the legs of the bench are in a square format. So, build the legs first by creating a boxed shape with 2x4s.
We cut our 2x4s down to size using a miter saw. Then, we sanded all of the edges until they were nice and smooth.
Step 2. Cut the bench seat.
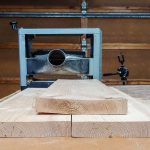
For the top of the bench, we used two larger boards that were sanded down to size. For this project, we used 10-inch boards and sanded them down to about 9 inches.
When you are working with larger boards like these, there’s a bigger risk of “cupping” or warping of the board due to moisture. (P.S. you should also be checking each piece of wood for warping or cupping when you are buying lumber).
When wood “cups”, the edges may appear higher than the center of the board. Usually, this can be easily fixed by running the boards through a planer, which is what we did.
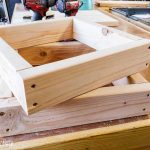
Step 3. Assemble the legs.
Now that our seat and legs have been cut, we will begin assembling the legs into a box shape.
For the top part of the box, I lined up the boards and secured them with clamps. Then, I applied glue to the bottom board and set it to the rest of the box.
Once the bottom of the box is glued, move the clamp down to hold the bottom in place.
After the glue has dried a little, drill pilot holes into the bottom where the clamps were.
I also drilled countersunk holes on top of the pilot holes to prevent the wood from splitting when drilled. This will also allow you to better fill in the drill holes with wood filler later.
Sand to get all board edges flush. If you have worked with wood before, you know that boards don’t always line up perfectly.
Now, apply wood filler to the screw holes on the legs. Make sure you apply enough filler so that it’s sitting on top of the wood. You don’t need to be super neat for this part as you will sand it down later.
After 24 hours and the glue has dried, sand down the wood filler until smooth.
Step 4. Stain the bench parts.
Now, it’s time to stain the legs and bench seat on all surfaces. We used a dark walnut wood stain, applied with a shop towel. As you apply, make sure you wipe off excess stain so it dries evenly.
I was unsure about what color to stain it. I’m so glad that I went with a darker stain. It provides a nice contrast to the lighter color on the coat racks and DIY key holder.
Step 5. Assemble the bench.
Now it’s time to complete the bench!
Lay the bench seat pieces on a flat surface, face-down. Then, place the legs on the bench into place.
You will have a little overhang, so make sure to measure so the legs are set evenly from each edge. Mark where the legs will go with a pencil.
Then, apply wood glue and put the legs into place where the pencil marks are.
We didn’t have clamps large enough to hold these pieces together, so we used finishing nails to hold the legs and top boards in place while we drilled pilot holes.
Drill pilot holes for the screws near where the angle of the legs meet to hold the legs and seat together.
We had construction screws that were a little too long for this job, so I drilled at an angle to avoid the top of the screw puncturing through the top of the bench.
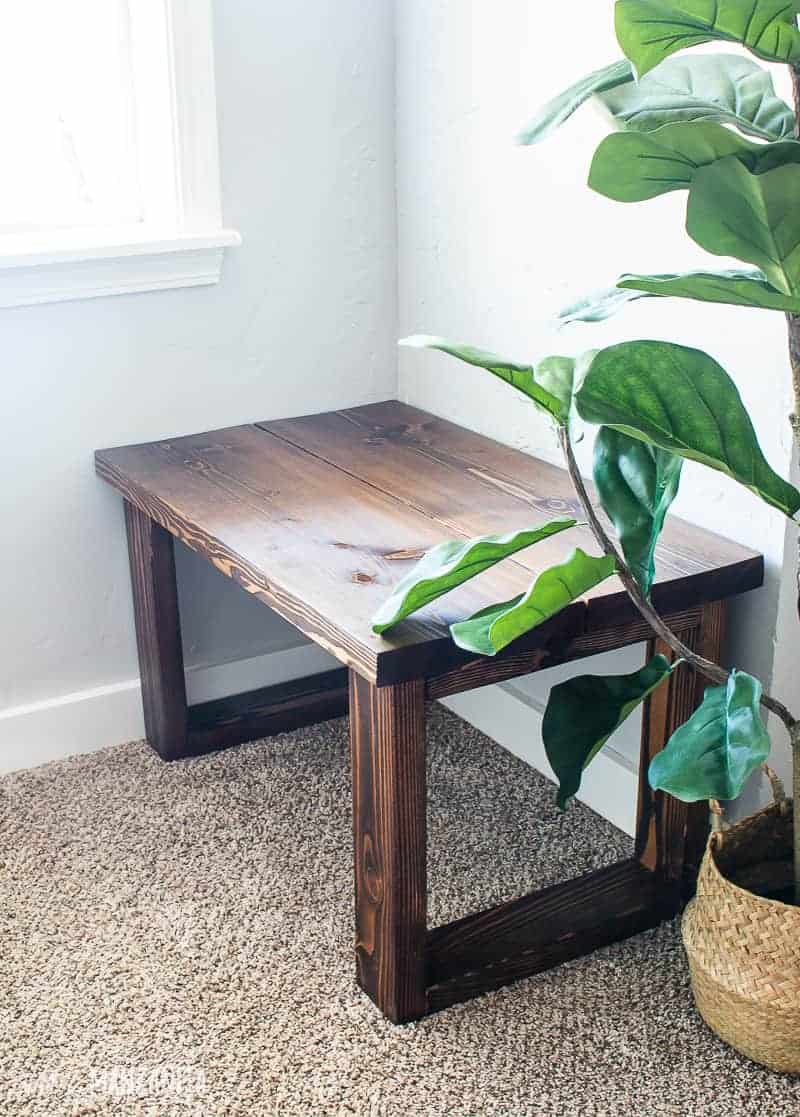
Finally, seal your assembled bench! We used wipe-on poly applied with a shop rag. Make sure to coat all surfaces of the bench – even the bottom.
If you’re trying to decide whether to use polyurethane vs polycrylic for your project, check out this article with an overview of each.
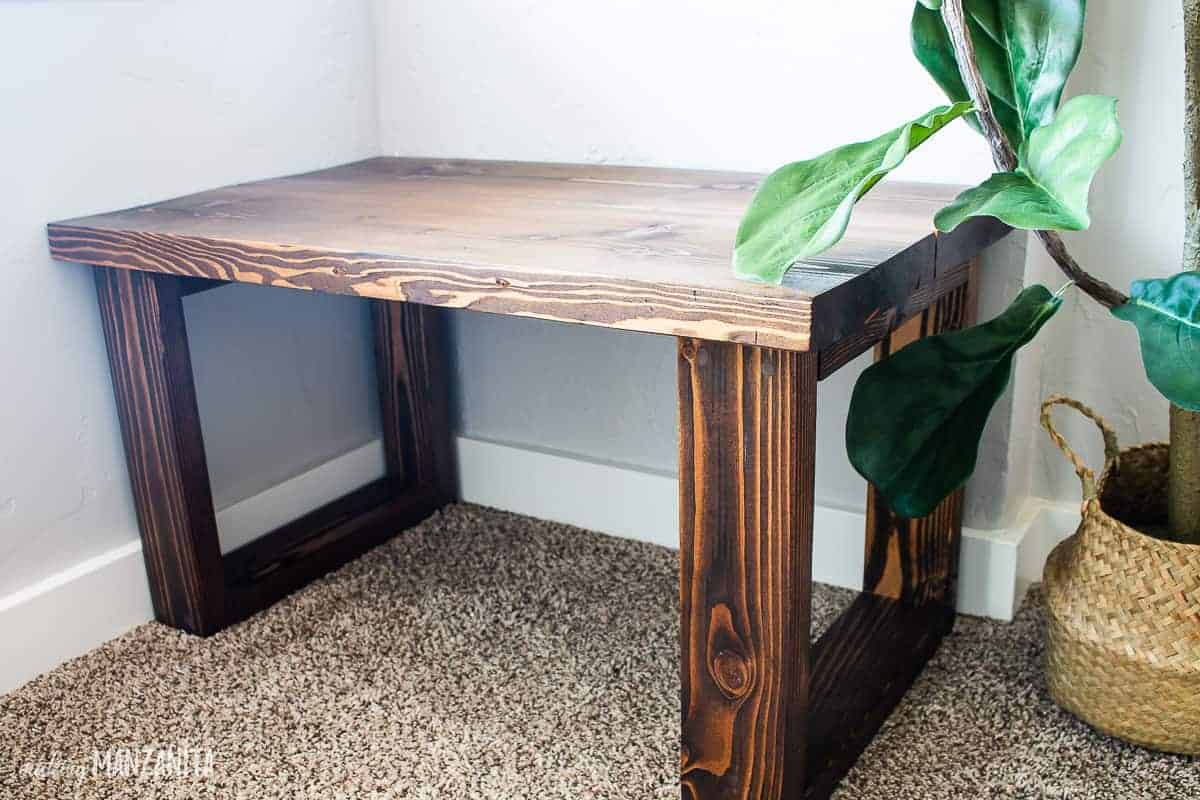
Allow everything to dry, and your simple wood bench is ready for your entryway!
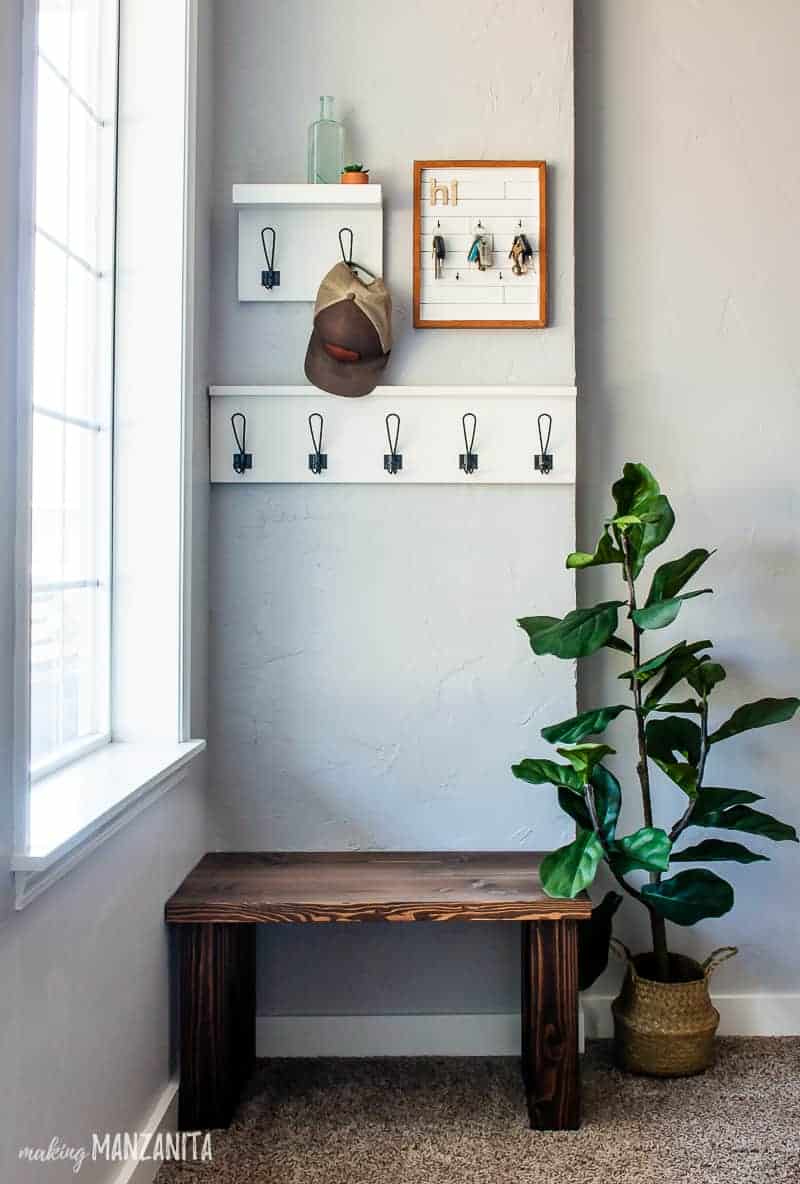
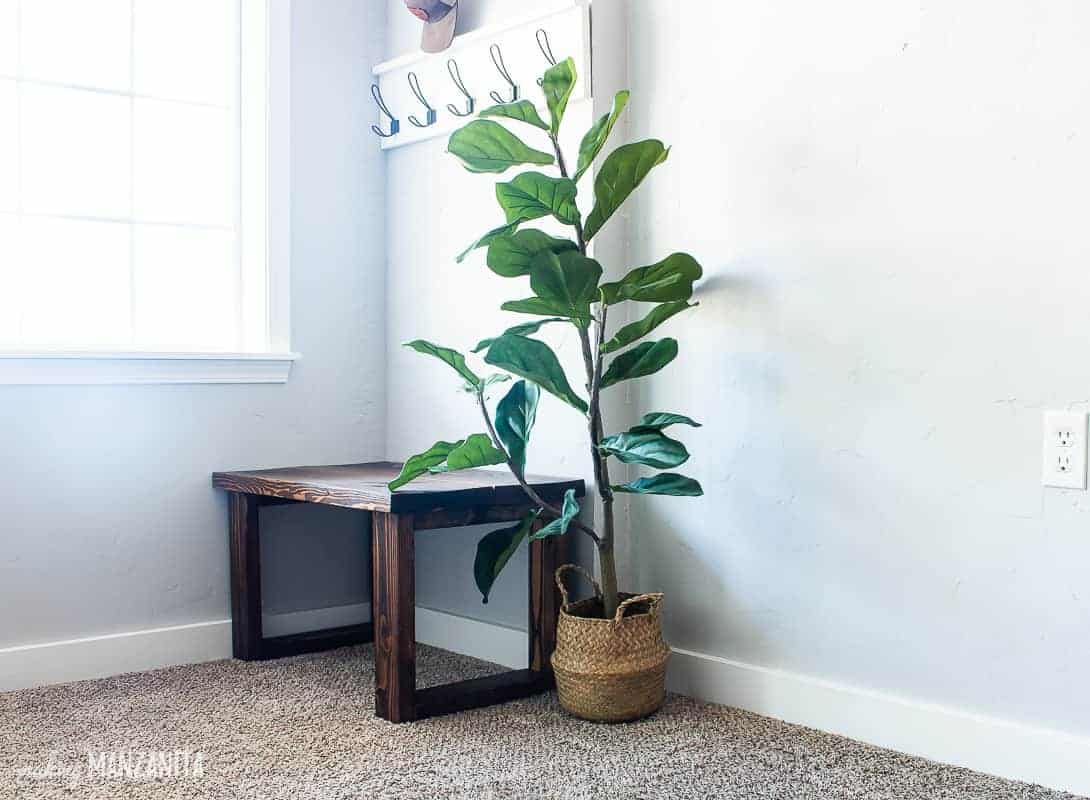
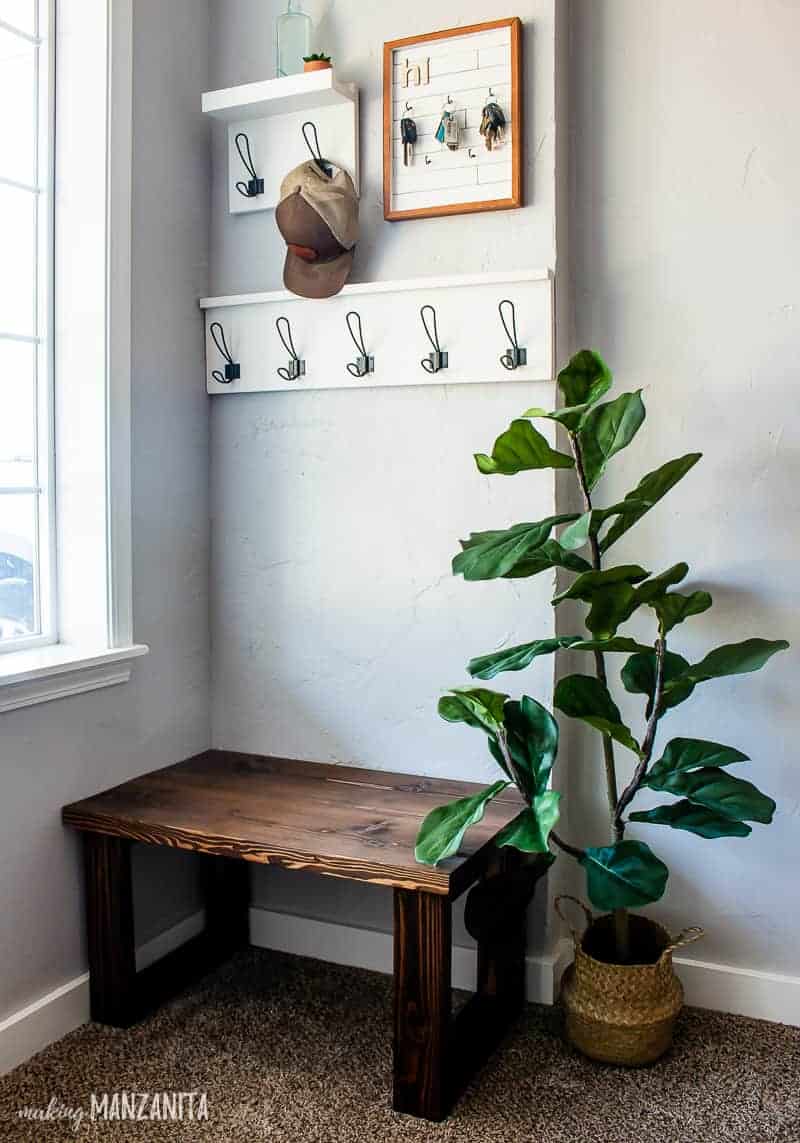
Isn’t it perfect? It is like it was made for that spot or something! 😉
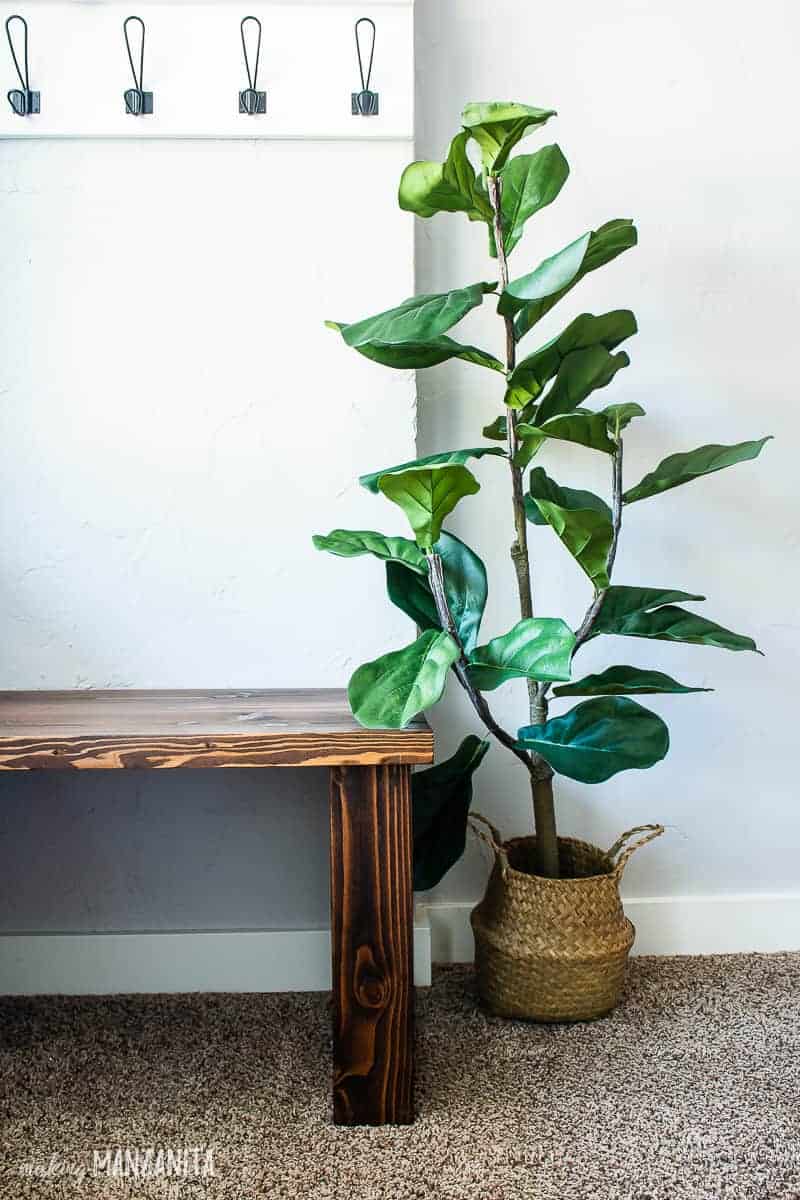
It was built to fit perfectly in this little corner and built to fit over a box that will slide underneath to hold our shoes.
I already have the box, but I’m going to be giving it a fun makeover before the big entryway reveal.
Download the free wood bench plans!
If you’re going to be making this DIY small bench too (and you totally should because 1. it is cute and 2. it looked pretty easy, right?) – you’re definitely going to want to download the plans. They will walk you through exactly what you need to do to make this bench come to life.
All you have to do is sign up below to get the plans sent directly to you.
I can’t wait to see how you guys use these indoor wood bench plans to create one for your house. Be sure to send me pics or tag me on social media @MakingManzanita.

What have you been DIYing lately?
Let us know in the comments below!
How To Build An Easy DIY Bench
Want to learn how to build an easy DIY bench? This post has a video tutorial and free indoor wood bench plans for you to download so you can make your own small entryway bench.
Materials
- Wood Filler
- Wood Glue
- 2x4s (Qty 2)
- 10 inch Oak
- 2.5 Inch Construction Screws
- Stain
- Wipe On Poly
- Staining Rags
- Sandpaper (80 & 150 grit)
Tools
- Miter Saw
- Drill
- Planer
- Orbital Sander
- Clamps
- Putty Knife
- Tape Measure
Instructions
- Cut legs for bench with 2x4s on the miter saw.
- Sand all edges of 2x4s.
- Cut top of bench.
- If there is cupping on the boards, plane them.
- Assemble legs for bench with wood glue and wood screws.
- Sand legs again to get them nice and flush.
- Fill screw holes with PlasticWoodX and let dry about 24 hours.
- Sand areas that were filled with PlasticWoodX wood filler.
- Stain legs & top bench pieces. Wipe off excess stain when finished with shop towel.
- Position & mark legs. Lay top bench pieces on a flat surface and set your legs into place. We had about an inch overhang on all sides. Mark the edges of the wood where the legs are supposed to go as shown in the video tutorial.
- Glue legs into place and add finish nails to temporarily hold the legs while you continue securing.
- Drill pilot holes and drill in construction screws.
- Seal all surfaces of the DIY bench with Wipe On Poly.


One Comment