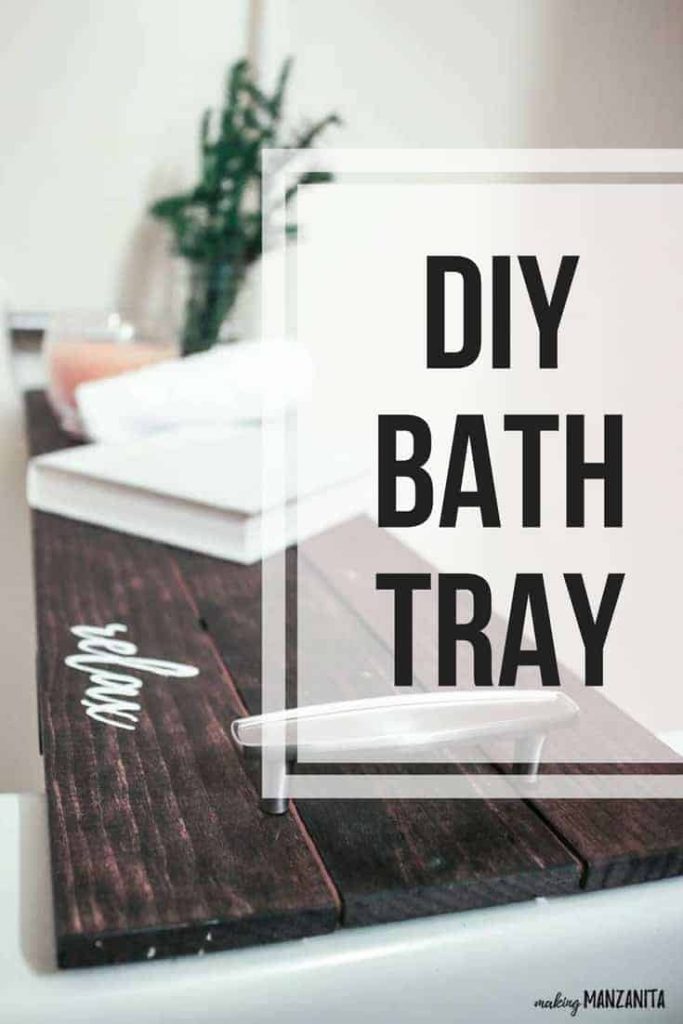
How To Make A DIY Bathtub Tray

There’s not many more better things in life than a nice, long, relaxing bath. Bubbles filled to the brim, candles flickering, music playing in the background, magazine just waiting to flipped through. I feel more relaxed just thinking about it. Don’t you?
Not only are baths relaxing, but they are good for your health! In fact, a daily bath has been proven to improve your mood and optimism, help muscle pain and even help you sleep better. Sign me up please!
Today’s project is a super easy DIY bathtub tray. This is the perfect handmade gift for anyone on your holiday shopping list who loves baths. This bath tray goes perfectly in this relaxation gift basket (with free printable tags!) for a fun and unique Christmas gift.
Table of Contents
Related – Other DIY Christmas Gifts You Can Make:
- DIY Christmas Gift: Leather Keychain
- Relaxing Bath Gift Basket (with free printable tags!)
- DIY Leather Bookmarks – Easy Handmade Christmas Gifts
- How To Make DIY Marble Coasters With Leftover Tiles
- Easy DIY Hexagon Cork Boards For Home Office
- Clothespin Magnets with Washi Tape
This DIY bathtub tray post contains affiliate links, but nothing that I wouldn’t wholeheartedly recommend anyway! Read my full disclosure here.
How to Make a DIY Bathtub Tray
Supplies for DIY bathtub tray:
- Wooden sign
- Standing block
- Wood stain
- Silhouette Cameo
- Adhesive shelf liner / contact paper
- Matte Mod Podge
- White acrylic craft paint
- Foam paint brush
- 2 cabinet pulls
- Drill
- 2 small pieces of 1/4” plywood (but you may not need these, I’ve explained how I’m using them in Step 8 below)
- Spray sealer
Step 1: Measure your bathtub.
First, you want to measure the width of your bathtub. If your tub curves, you probably want to measure the widest part.
Unlike this DIY tray we made with leftover tile and wood that we had to cut and assemble ourselves, this bathtub shelf uses a premade wooden sign that you can find at the craft store!
This premade wooden sign works perfectly for a standard-size tub like mine (approx. 39 inches). I love that it’s already assembled and everything, so you can save a little time on this DIY bathtub tray.
If your bath is a different size, no worries. You can grab some wood, cut it to the right size, and attach some cross boards on the back to keep the boards together. The rest of the steps for this tub tray will be the same.
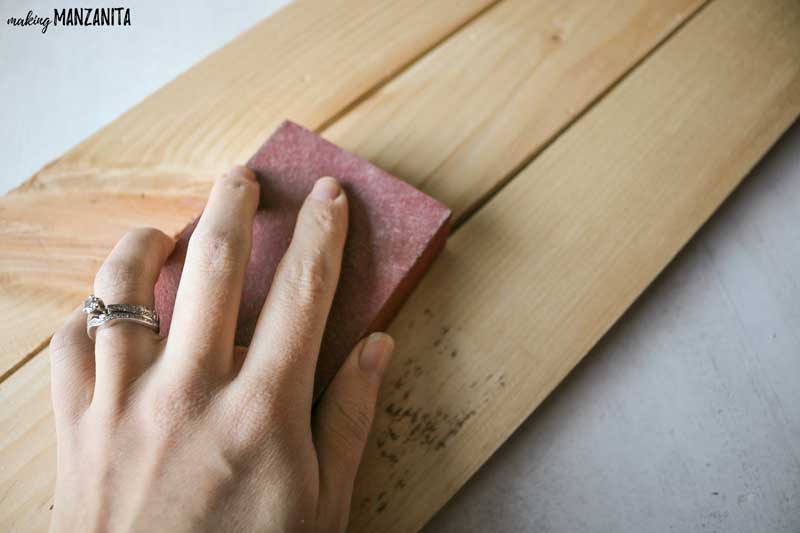
Step 2: Lightly sand wood sign.
The front side of the sign comes mostly smooth, but I did a light sanding on it to smooth out any imperfections. I also sanded the edges so they were a little more rounded and not as sharp.
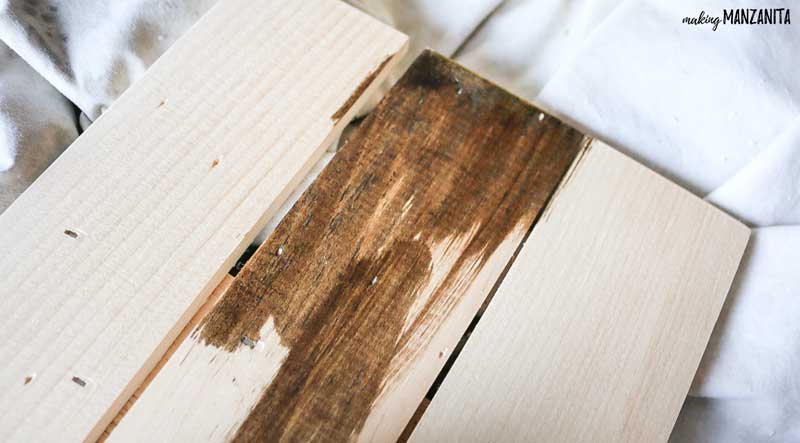
Step 3: Stain wood sign.
Next, stain your sign with a dark wood stain. I love this dark walnut stain, which I used.
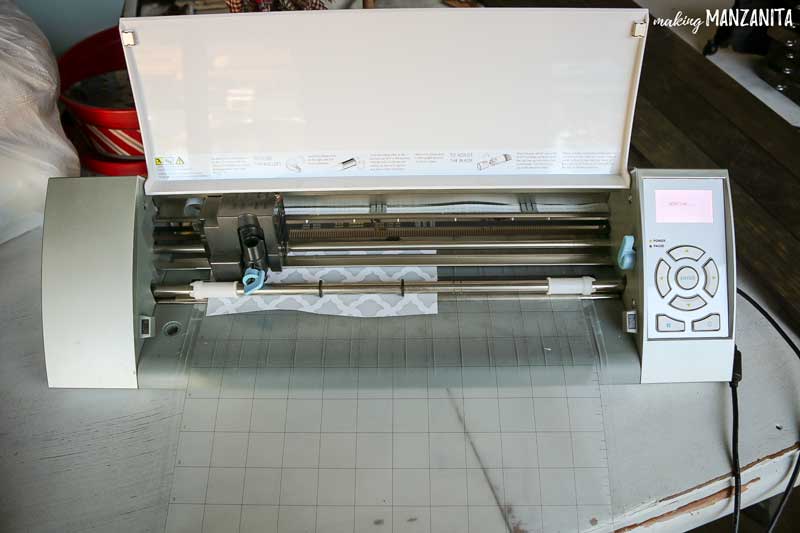
Step 4. Cut stencil.
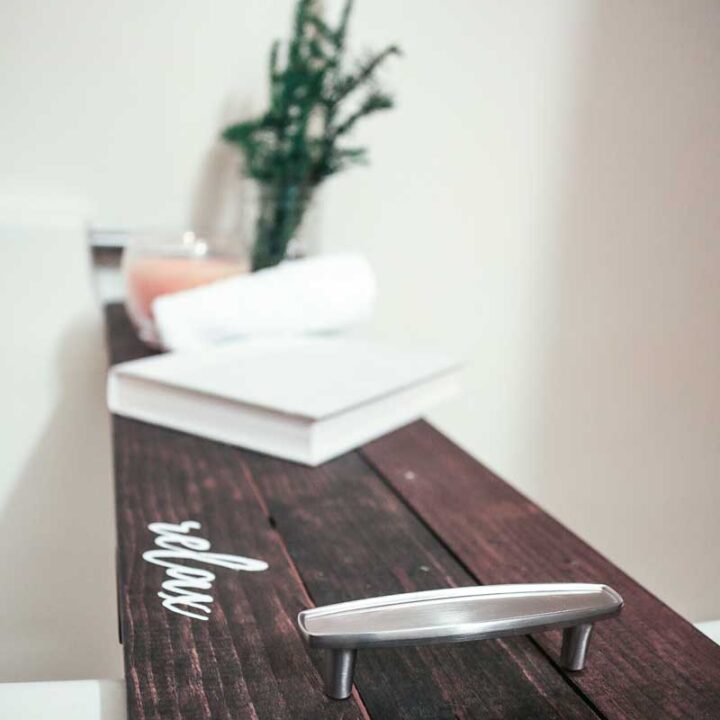
Now it’s time to make your stencil with the Silhouette Cameo. I chose to paint the word “relax”, which I think is perfect for this wooden bath shelf.
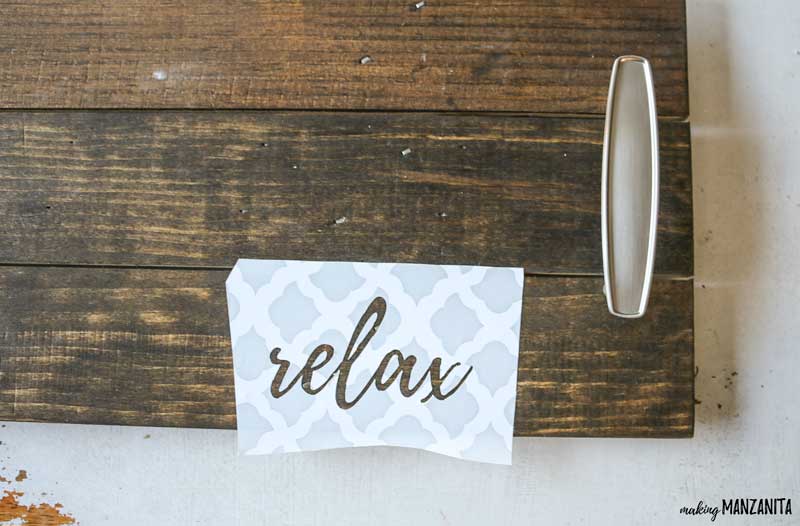
Step 5. Apply stencil.
I’m going to let you guys in on a little secret. I’ve found a way to seal my stencils before painting so they don’t bleed, be sure to hop on over to that post to get the full details on this little hack. You’ll do this magic little step before painting over the stencil.
I also used this little sign-making hack on this DIY bottle opener, this fun shiplap sign, this believe Christmas decor, this DIY farm sign, this leather sign and farmhouse centerpiece!
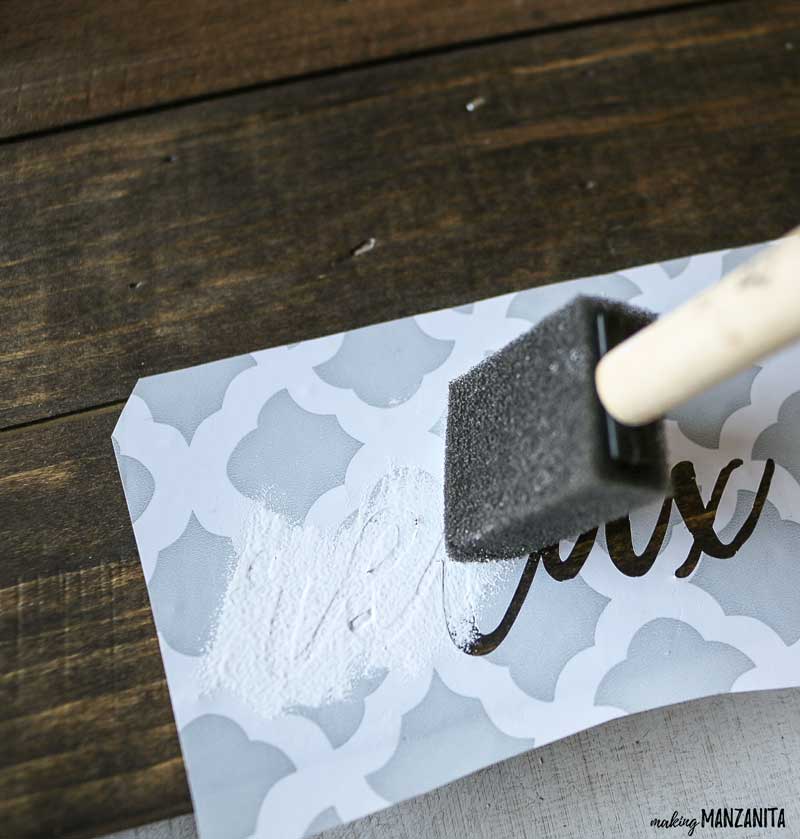
Step 6. Paint stencil.
After you’ve sealed the stencil, you can paint! I always use acrylic craft paint for stenciling because it works great and it’s so inexpensive to buy.
Using a foam paint brush, gently “pounce” directly down onto the stencil with the brush (rather than using brush strokes). This is one additional way you can prevent stencil bleeding.
Let it dry to touch and then remove the stencil.
Step 7. Seal tray.
Since the DIY bathtub tray is going to be around moisture, you definitely want to seal it. I always seal my wood DIY projects anyway (even if they aren’t going to be in the bathroom).
One of my favorite ways to seal wood projects is this spray sealant. It’s really simple to use. You just spray it on like spray paint and wait for it to dry.
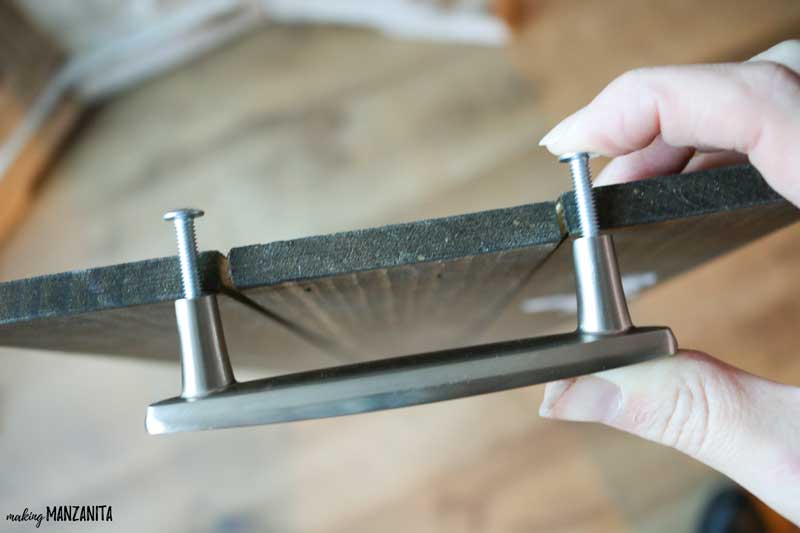
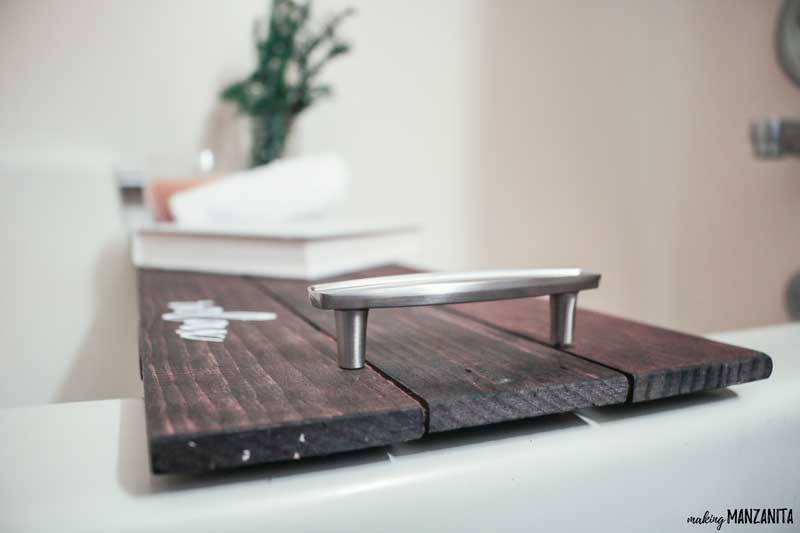
Step 8. Attach handles.
Here’s the thing…when I was shopping for the handles to go on each side of the rustic bathtub tray, I didn’t have the wooden tray with me.
When I got home, I realized that the handles lined up almost directly above the slats in the wood. I was worried that the wood might split up open on the edge or something, so we decided to add a small piece of 1/4” plywood to the underside of the bath tray under the handles as shown in the photos above.
If you’re making this bath tray and using this same wooden sign as your base, try to grab some handles that are a little wider so you don’t run into this issue. If you do have this same issue, it was a pretty easy fix, so no worries.
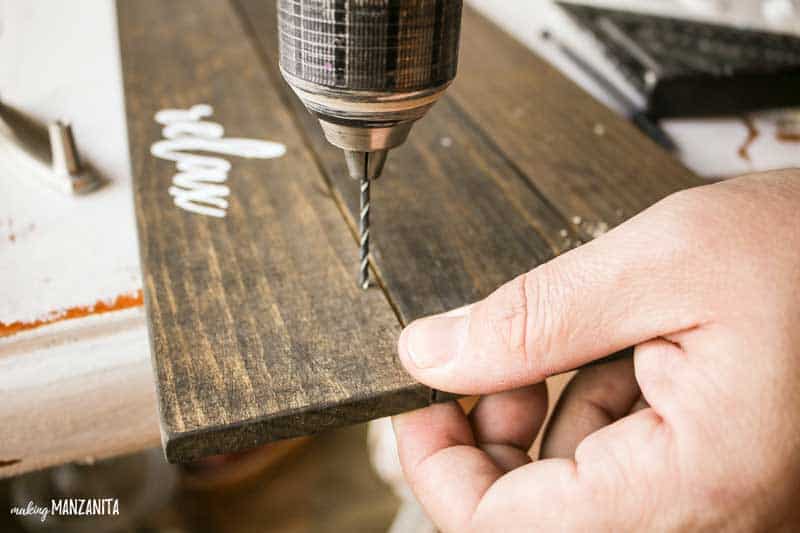

Measure where you want the handles, drill pilot holes and attach your handles to the tray.
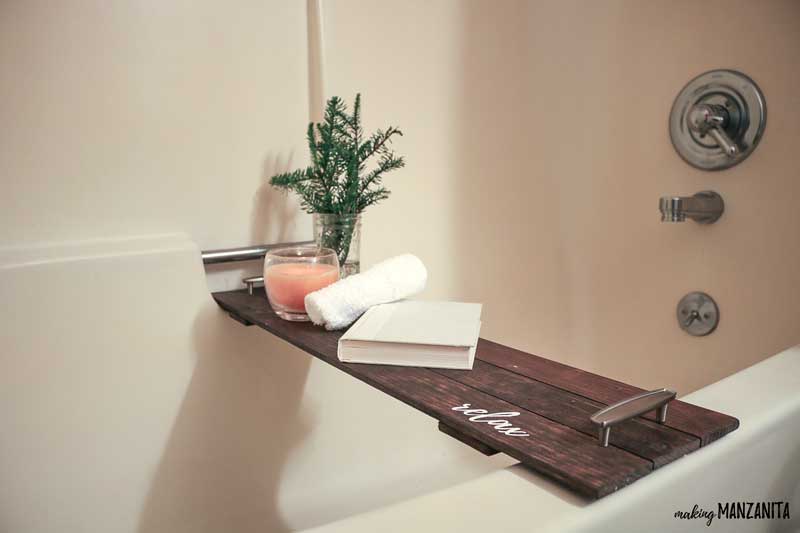
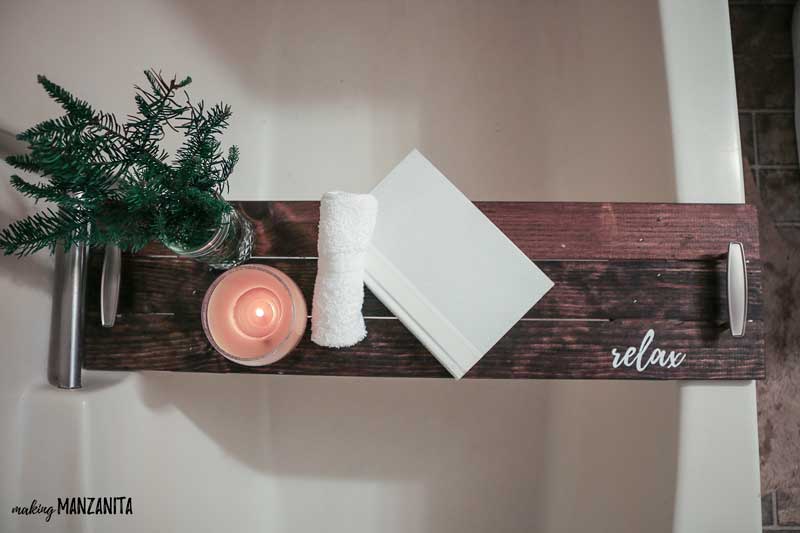
Step 9. Take a nice, relaxing bath.
And that’s it! Now you can fill that bathtub up, light a couple of candles and hop in for a nice bath! Now you have a snazzy table to hold your book, cell phone, glass…you name it. Relaxation is just around the corner.
If you’re looking to take the bath tray one step further, this bath table even has a holder for your wine glass stem!
This DIY bathtub tray was so easy to create, don’t you think? Anyone can do it! Not only it is functional and makes your bath time more convenient, but it’s so cute.
Who doesn’t love baths? This wooden tub tray makes a great handmade Christmas gift. Check out how to create a super cute relaxation gift basket to pair with this tray for a memorable gift!
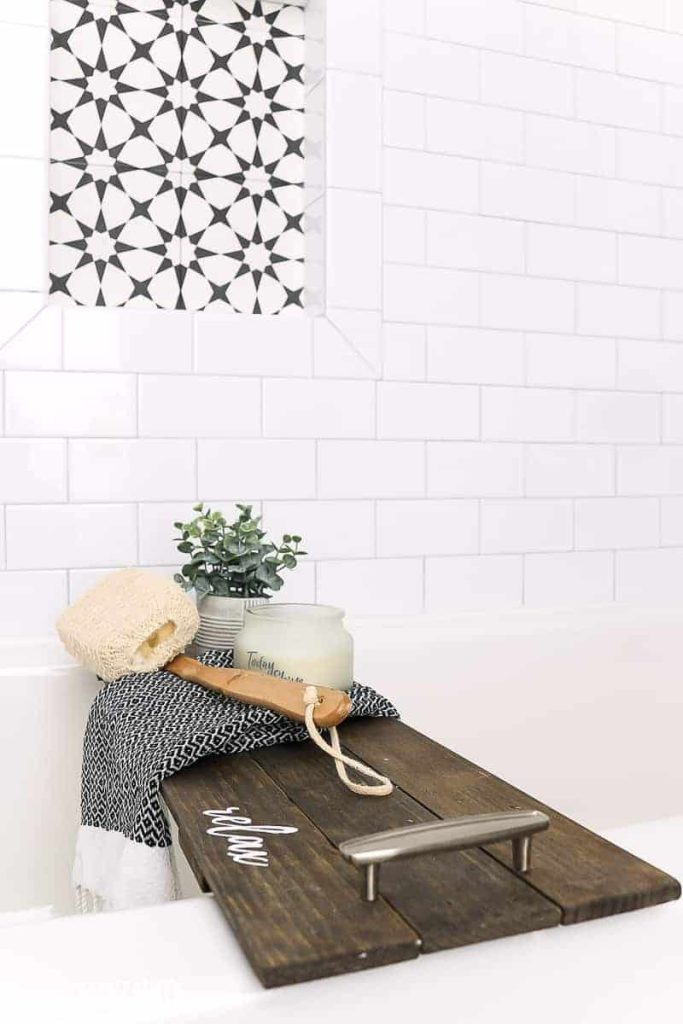
We even took the rustic tub tray along with us to our new house and here it is in our boho farmhouse bathroom!
What word would you paint on your DIY bathtub tray?
Let me know in the comments below!!
How To Make A DIY Bathtub Tray
This wooden bathtub tray is the ultimate way to treat yourself to some self-care! Hold your favorite book, a candle, and a calming plant while you enjoy a nice, long bath with this DIY bathtub tray project.
Materials
- Wooden sign
- Wood stain
- Adhesive shelf liner / contact paper
- Matte Mod Podge
- White acrylic craft paint
- 2 cabinet pulls
- 2 small pieces of 1/4” plywood
- Spray sealer
Tools
- Silhouette Cameo
- Foam paint brush
- Drill
- Sanding Block
Instructions
- Measure your bath tub.
- Lightly stand wood sign.
- Stain wood sign.
- Cut stencil.
- Apply stencil.
- Paint stencil.
- Seal tray.
- Attach handles.

Oh my gosh, this is oh-so-cute, and it looks so easy to make! I could seriously spend every night relaxing in a bubble bath LOL. And what a cute idea to stencil on it. (Yet another reason I NEEEEEED a cutting machine!) Pinning this to my woodworking board to share with others!!
Thanks friend !