Outdoor Wood Painting Tips + How to Use a Paint Sprayer

Are you working on outdoor DIY projects that need to be painted? Check out these outdoor wood painting tips and learn how to use a paint sprayer.
Thank you to Wagner for sponsoring this post with outdoor wood painting tips! All opinions are entirely my own. This post also contains affiliate links, but nothing that I wouldn’t recommend wholeheartedly. Read my full disclosure here.
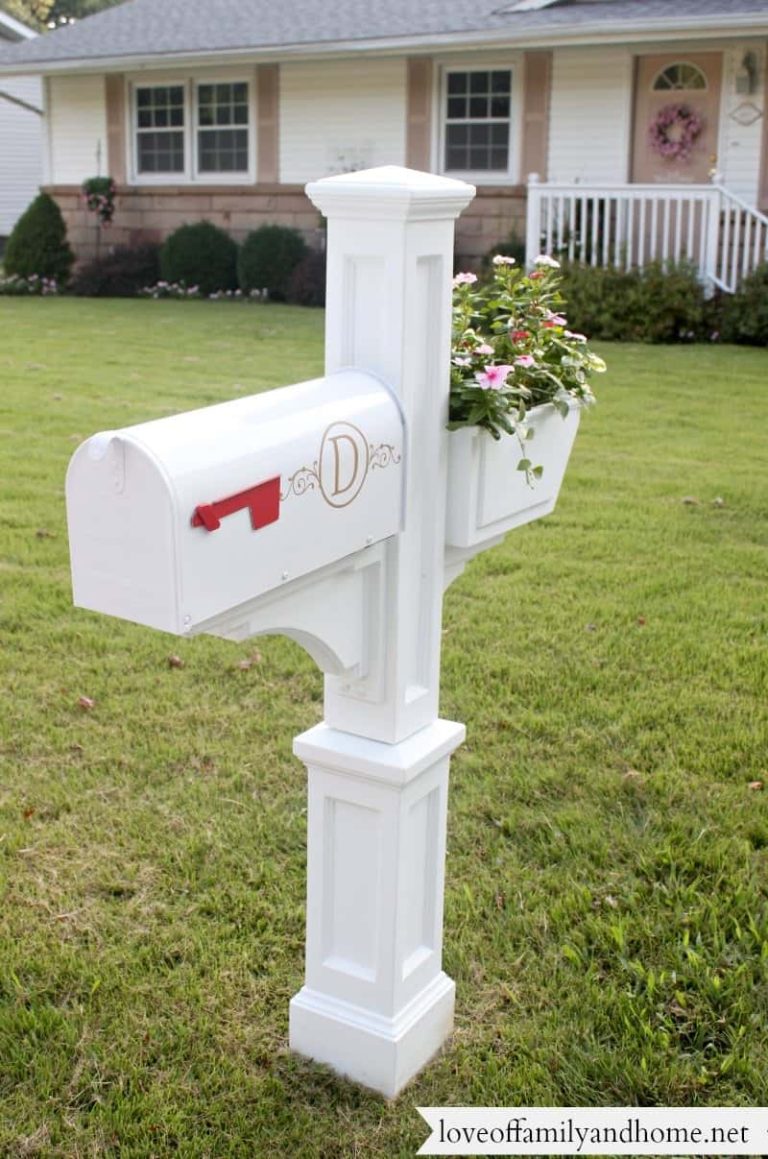
Did you see our plant wall that we revealed last week? Didn’t it turn out great?! I love it!
You may have noticed that we mentioned that we used a paint sprayer, so today we’re going to dive a little deeper into that process and give you some outdoor wood painting tips with a paint sprayer.
These tips are really applicable to any outdoor wood painting – like if you’re going to be painting outdoor wood furniture or DIY projects.
Table of Contents
Outdoor Wood Painting FAQs
Let’s kick things off by answering some FAQs about outdoor wood painting.
What type of wood should you use for outdoor wood DIY projects?
If you are making something that will go outdoors, the best wood to use is pressure treated. Pressure-treated wood is a type of wood that has gone through a process of coating wood with preservatives to help prevent decay and rot from termites, moisture, and fungus. You can learn more about pressure treated wood here.
Do you need to prime exterior wood before painting?
Primer is important for outdoor wood painting because it helps the paint adhere better
Primer is especially important when you’re using pressure-treated wood to prevent the chemicals on the wood from bleeding through the paint.
When painting outdoor wood, we recommend starting with a high-quality stain-blocking primer that can be used for outdoor projects. We usually use this primer or this primer. Read more here about when you need to use primer and when you can skip it.
What is the best paint to use on wood outside?
Always use high-quality exterior paint when painting wood outdoors. I always say that you should buy the highest quality paint that you can afford. For this project, we used Behr’s Marquee line of exterior paint.
We also used this same type of paint on our entire exterior at our old house so it works great if you are going to be painting your home’s exterior as well!
Supplies needed for outdoor wood painting with a paint sprayer:
- FLEXiO 3000 Paint Sprayer
- Spray Tent
- Exterior Paint
- Primer
- Roller & paint tray (if you want to roll on primer)
Step 1. Clean outdoor wood (if needed).
If you’re painting outdoor wood, there’s a good chance that you may be working on old outdoor wood furniture. If that’s the case, you definitely want to start by cleaning the furniture thoroughly.
- Scrub wood with a brush and soap (just dish soap works fine!)
- Finish with a pressure washer if you have one or a hose with a nozzle.
- Let the wood dry thoroughly before moving on to painting. This is very important because you don’t want to trap moisture in the wood once it is primed and painted.
I didn’t need to clean the wood because I was working with new wood on our plant wall project.
Step 2. Lightly sand wood.
Depending on the state of your wood (whether it’s new or old), you may need to sand more or less. But all wood should be, at the very least, lightly sanded before painting.
Step 3. Prime outdoor wood.
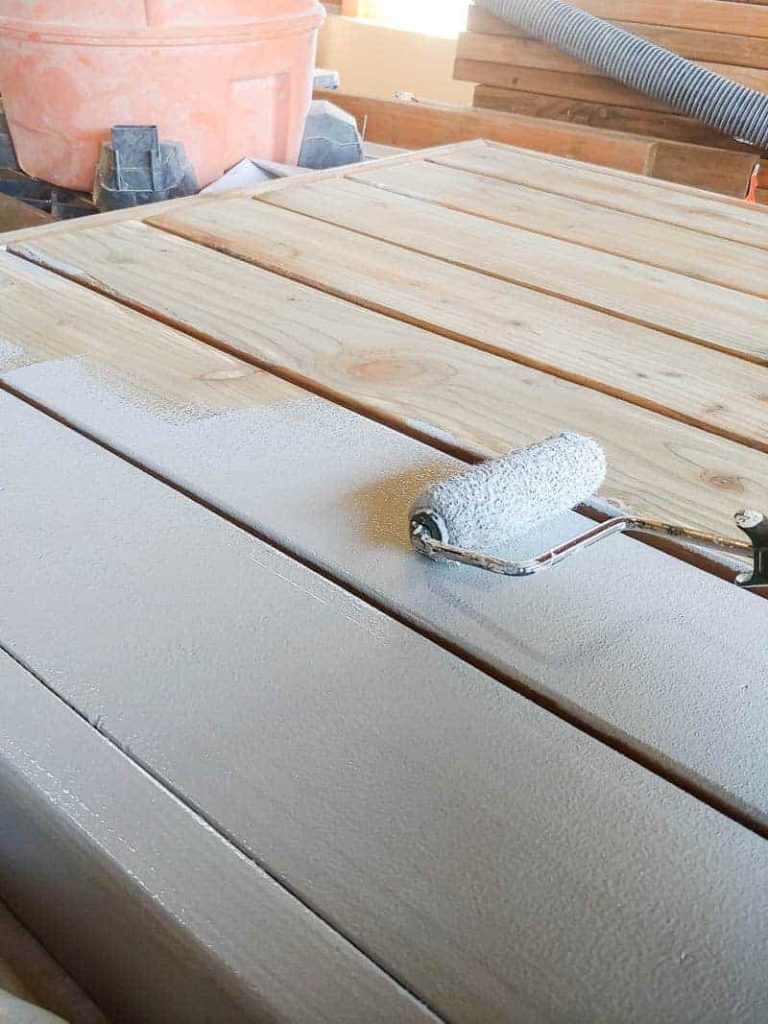
As mentioned above in the FAQ section, priming outdoor wood is very important. This is the primer that we used.
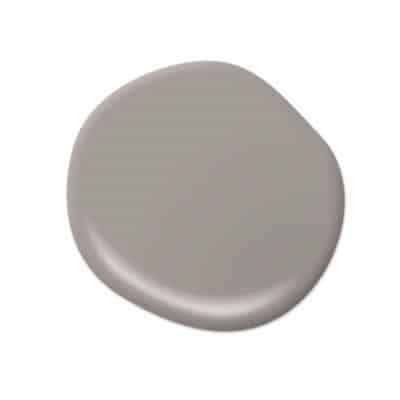
You’ll see that I went with the gray option, which is recommended when you have a dark paint color as the topcoat. It’s not completely necessary but helps topcoat coverage since it’s a darker base.
I opted to roll on the primer with a roller. You can run the primer through the paint sprayer if you’d like. Keep in mind that primer is thicker than normal paint, so you may need to thin it if you’d like to run it through the sprayer.
Once you’ve tried the primer in the sprayer and adjusted the settings and found it still needs thinning, start with 10% water. Only thin your paint as a last resort after you’ve adjusted the settings on the paint sprayer.
After you’ve primed the outdoor wood with either the paint sprayer or a roller, allow the primer to dry before painting. Read the instructions on your primer to get an idea of drying times.
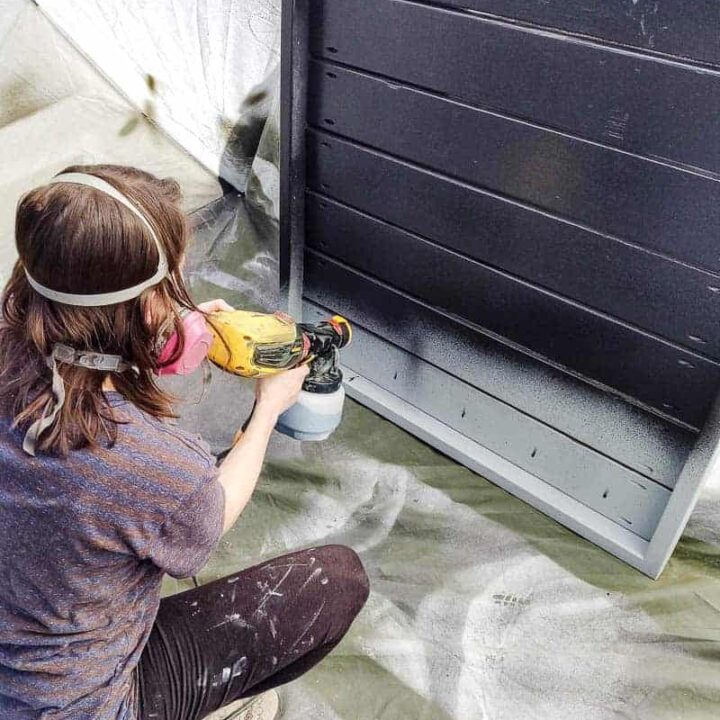
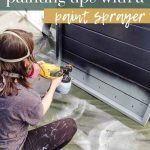
Step 4. Paint outdoor wood with a paint sprayer.
- Read manual. If you’ve never used a paint sprayer before, be sure to take a read (or three) through the detailed manual. You can also download the manual online on Wagner’s website if you want to read it before you purchase the sprayer.
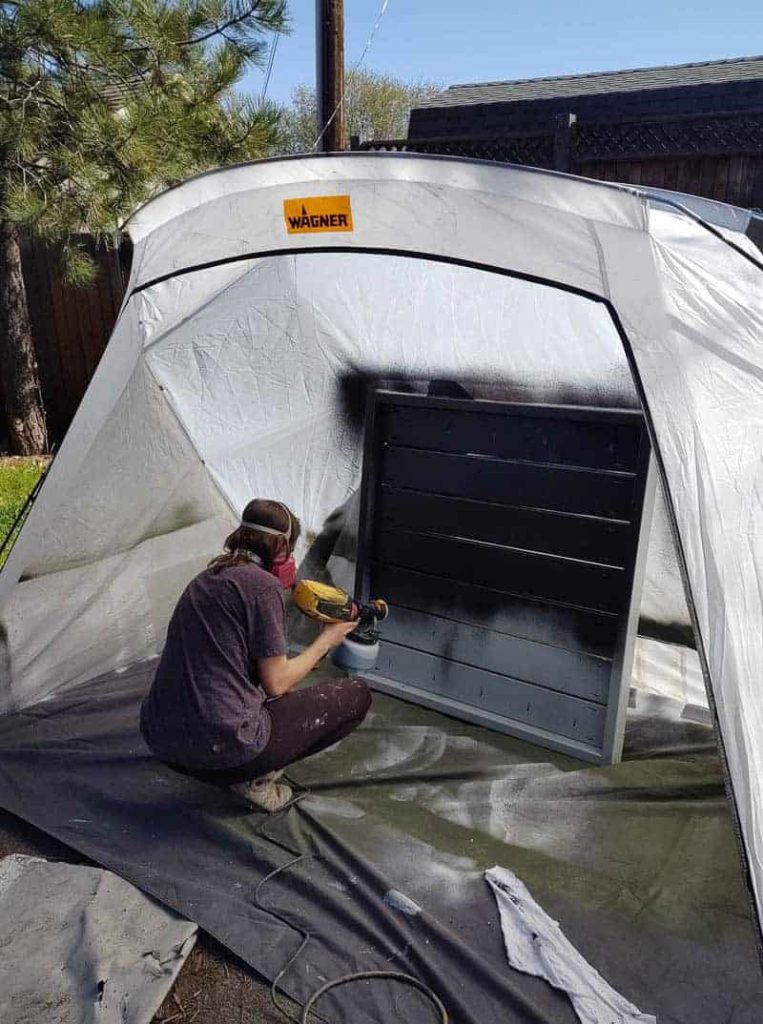
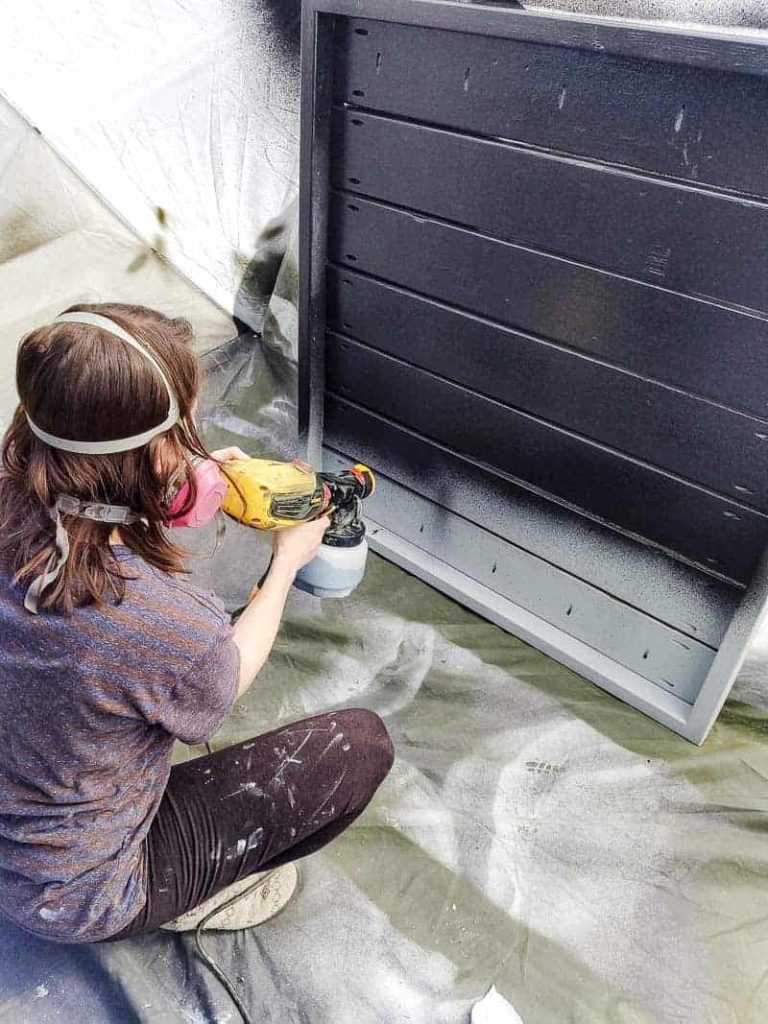
- Set up an area. Set up your painting area with the Wagner Spray Tent to prevent overspray and wind if you’re painting outdoors.
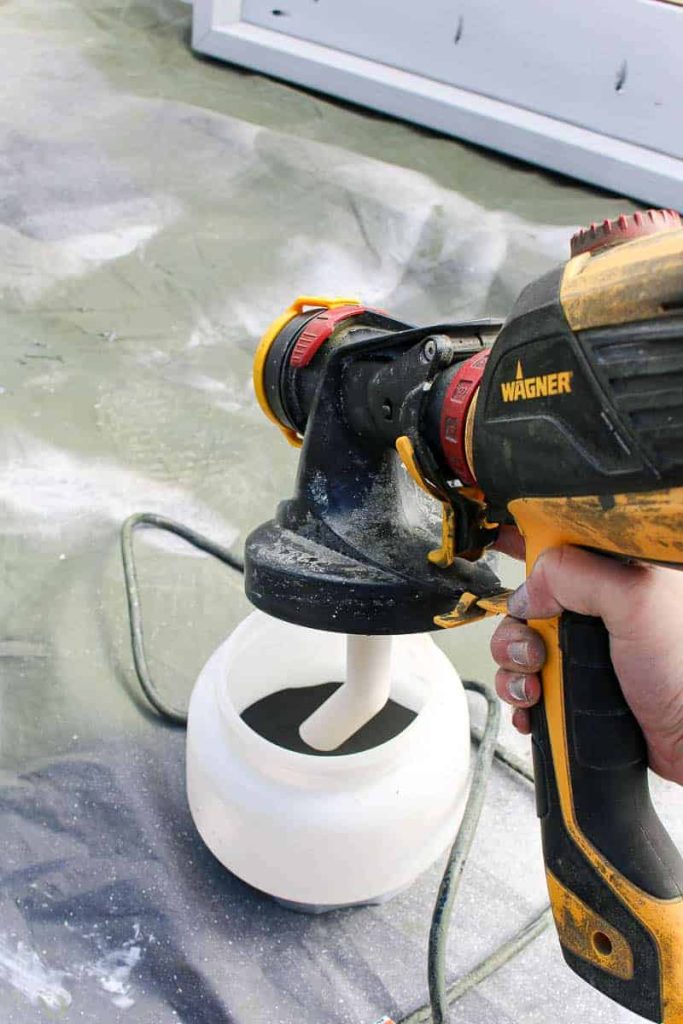
- Set up paint sprayer. Open the paint and stir well. Fill the cup with your paint. Before screwing the container onto the sprayer, be sure your pickup tube is aligned based on the direction that you’ll be spraying. If spraying downward, the angled end of the tube should be pointing towards the front of the nozzle (as you see I’ve done). If spraying upward, the angled end of the tube should be pointing toward the rear of the nozzle. Screw the container onto the sprayer and tighten it.
- Determine paint sprayer settings and test. Take a look at the manual to determine what settings you should start with and how to adjust them based on your paint type. You can test it out on some scrap wood or the practice poster that comes with the sprayer prior to starting on your projects.
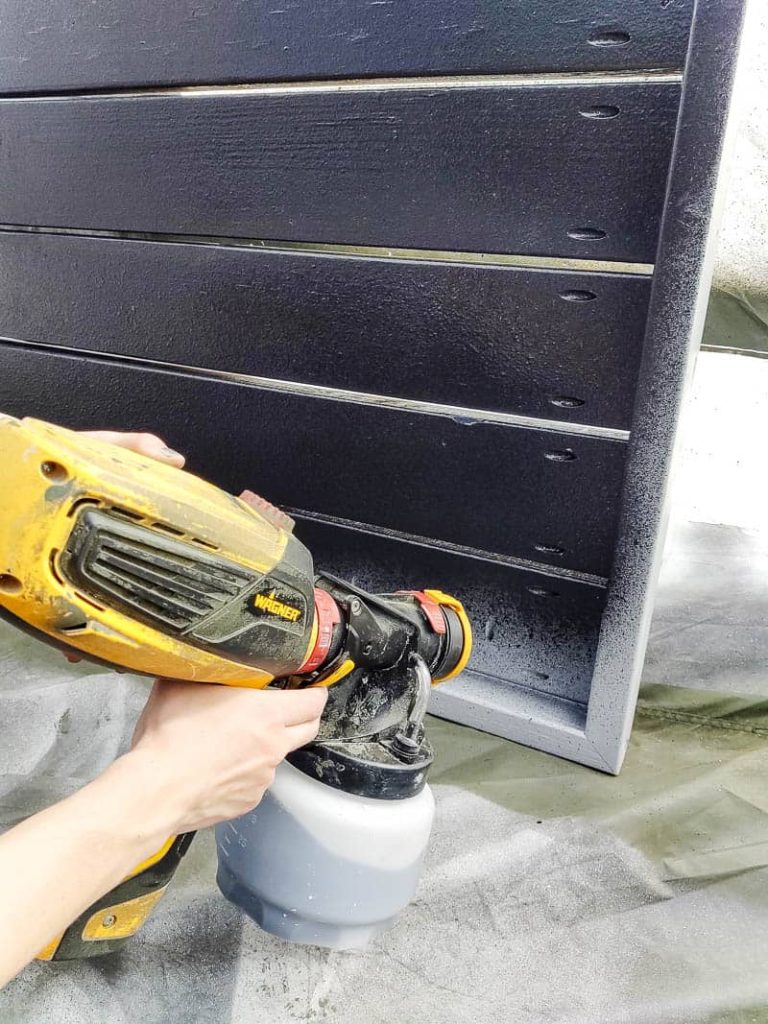
- Use the proper paint sprayer technique. Keep the sprayer 6-8 inches from the project and positioned squarely (works best to move with the sprayer and don’t flick your wrist) at all times and try to keep a consistent speed to get an even coat. Pull the trigger before the sprayer When spraying, always trigger the spray gun after the spray pass has begun and release the trigger before stopping the pass. Overlap each pass to get good coverage. Wipe the nozzle every few passes with a damp rag to remove any built-up or dried paint from the tip.
- Clean paint sprayer. Assuming you’re using water-based paint, you can simply run a half-full container of warm soapy water through the sprayer. Next, disassemble and wash with warm water. Allow it dry before putting back together.
- Keep an eye on the filter. As you continue to use your paint sprayer, be sure to regularly check your filters to see if they need to be replaced.
Ta DA!
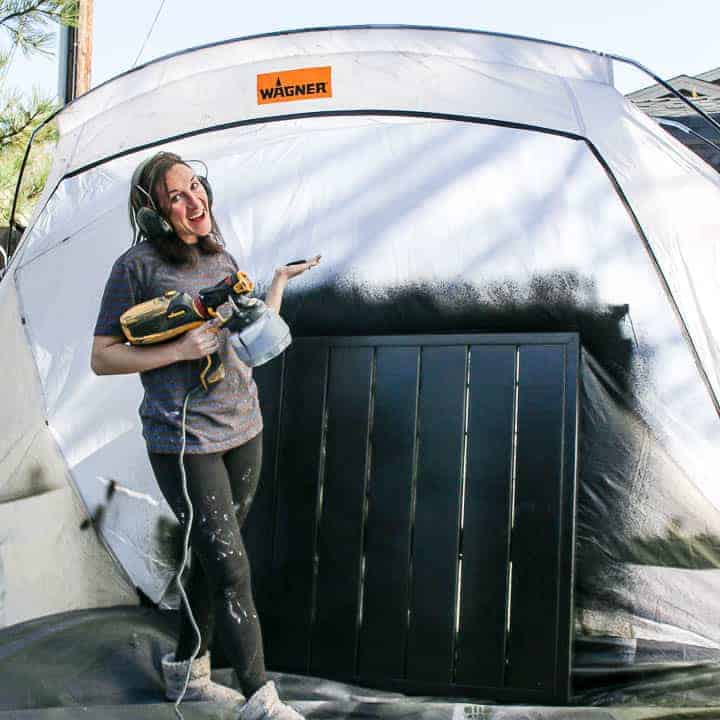
The paint sprayer worked like a charm on this project. I love that it easily gets into the nooks and crannies as well as the corners and even the pocket holes on the back of the plant wall.
If you have more questions about using the FLEXiO 3000, just let me know and I’d be happy to try to either help or point you in the right direction.
The best place to start is Wagner’s manual, which is super detailed and I found very helpful. Wagner also has great customer service so you can always give them a call if you’re stuck!
I’d still consider myself a beginner with the sprayer, but I’ve used it for three different projects now. I would say that practice makes perfect.
Every time I use the sprayer I seem like I get better and more comfortable with adjusting the settings on my project.
If you’re planning to use a sprayer to tackle a big and important project, start with a few simple projects like this plant wall or furniture makeovers (like this DIY kitchen table) to get the hang of things first.
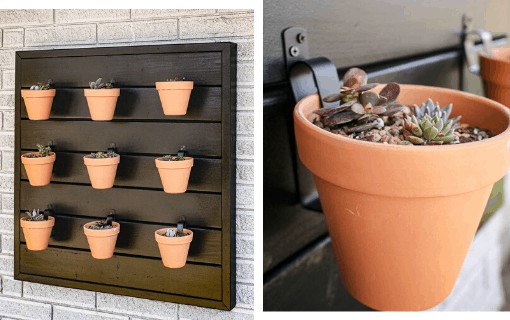

I love how our plant wall turned out! I can’t wait to keep working on giving our backyard a makeover this summer so that this cute planter wall fits right in.
What outdoor DIY projects are you working on this spring and summer?
Let us know in the comments below!

Do you want to see more of our big backyard makeover??
- Family Friendly Backyard Plan: Our Next Big Project (BEFORE Pictures)
- Large Chalkboard For Backyard With Live Roof
- Easy Garden Tool Storage In Backyard Shed
- DIY Build for Outdoor Vertical Garden Pots (With Free Plans)
- Mulch for Playground: Why We Chose Rubber Play Bark
- How to Plant Grass Seed
- How To Create A Cozy Patio
- How To Build A Paver Patio with Fire Pit
- How To Build A Fire Pit With Pavers
- Our Backyard Makeover Before and After Pictures
- How to Build a Wood Fence In Your Backyard
- How To Make a Wooden Gate for Your Fence
- How To Lay Deck Boards (and hide the screws!)
How To Use A Paint Sprayer
Working on an outdoor painting project? The Wagner paint sprayer gun is the perfect tool for the job! Here's how we used the paint sprayer and outdoor painting tent for easy outdoor painting projects.
Materials
Tools
- Paint sprayer
- Spray tent
- Roller & tray (if you roll on primer)
Instructions
- Clean outdoor wood (if needed).
- Lightly sand wood.
- Prime wood. I opted to roll on the primer because it's a little thick for the sprayer and would likely need to be thinned.
- Read manual of paint sprayer if it's new!!
- Set up painting area with spray tent.
- Set up paint sprayer. Open paint and stir well. Fill the cup with your paint. Before screwing the container onto the sprayer, be sure your pickup tube is aligned based on the direction that you’ll be spraying. If spraying downward, the angled end of the tube should be pointing towards the front of the nozzle (as you see I’ve done). If spraying upward, the angled end of the tube should be pointing towards the rear of the nozzle. Screw the container onto the sprayer and tighten.
- Determine paint sprayer settings and test. Take a look at the manual to determine what settings you should start with and how to adjust them based on your paint type. You can test it out on a some scrap wood or the practice poster that comes with the sprayer prior to starting on your projects.
- Use the proper paint sprayer technique.
- Clean paint sprayer. Assuming you’re using water based paint, you can simply run a half full container of warm soapy water through the sprayer. Next disassemble and wash with warm water. Allow it dry before putting back together.
Notes
- You can run the primer through the paint sprayer if you’d like. Keep in mind that primer is thicker than normal paint, so you may need to thin it if you’d like to run through the sprayer. Once you’ve tried the primer in the sprayer and adjusted the settings and find it still needs thinning, start with 10% water. Only thin your paint as a last resort after you’ve adjusted the settings on the paint sprayer.
- Be sure the pick up tube on the paint sprayer is pointed forward if you’re going to painting downward.
- Keep the sprayer 6-8 inches from the project and positioned squarely (works best to move with the sprayer and don’t flick your wrist) at all times and try to keep a consistent speed to get an even coat.
- When spraying, always trigger the spray gun after spray pass has begun and release trigger before stopping the pass.
- Overlap each pass to get good coverage.
- Wipe the nozzle every few passes with a damp rag to remove any built up or dried paint from the tip.

I have a sprayer and I love it, but some projects aren’t worth the mess of cleaning it afterwards if it’s something small
Totally agree Barb 🙂
Beautiful! Thanks for all the tips for spray painting.
You’re so welcome!