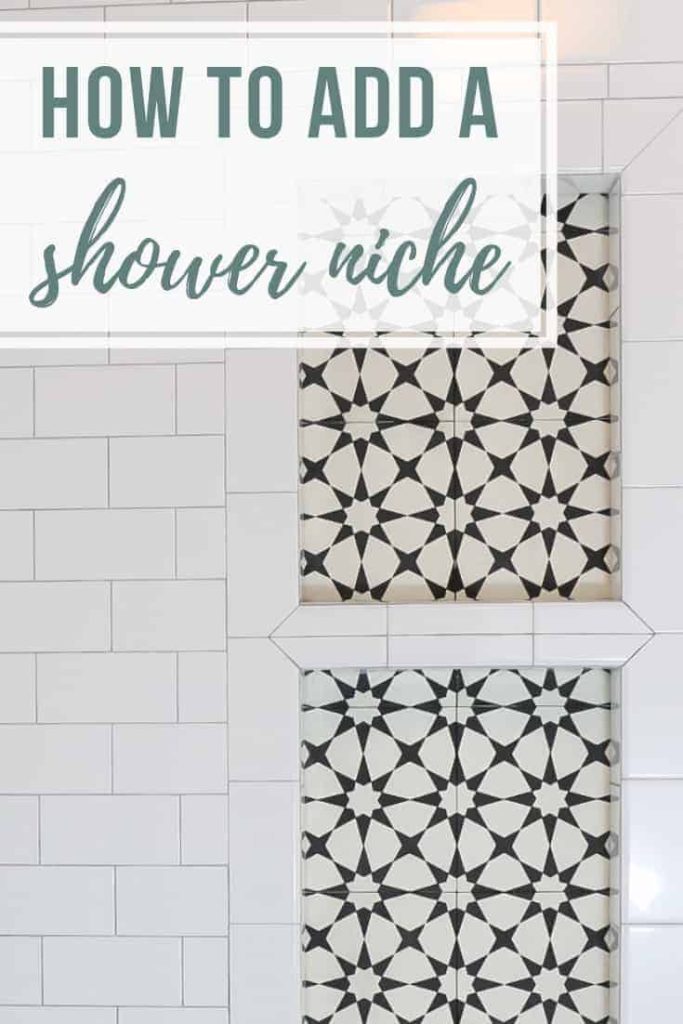
Shower Niche Installation Tips (& Why You Need A Prefab Shower Niche)

Want your shower to feel super custom? While you're remodeling your bathroom, add a shower niche for convenient storage and extra style. Learn all of our shower niche installation tips in this guide.
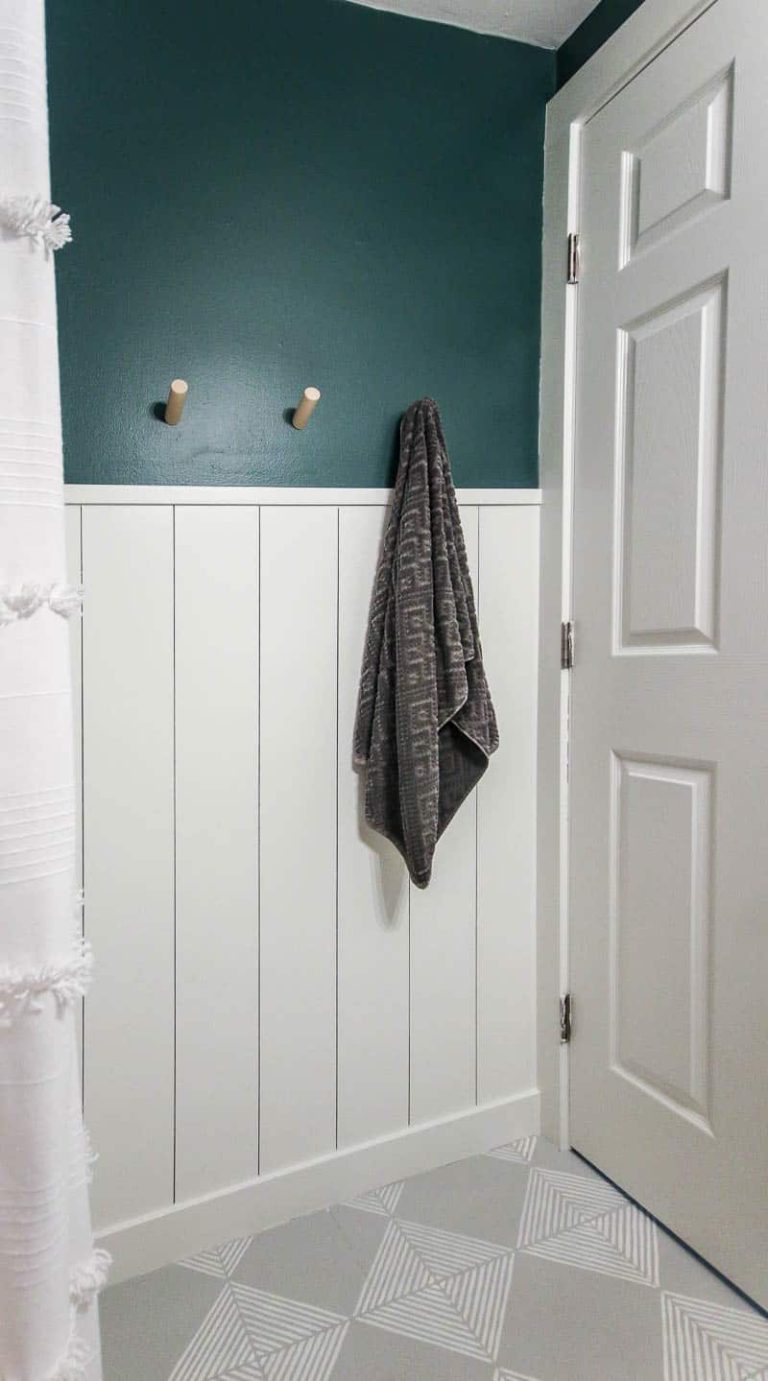
In both of our bathroom renovations in this house, we’ve added in a couple of shower niches (see kid’s bathroom reveal and see our master bathroom reveal). I definitely didn’t regret this decision and it was well worth the extra cost and effort.
It also gives you another chance to add in some coordinating tile and give the bathroom remodel a little “extra”, which I loved.
Shower Niche FAQs
Let’s start back at the basics…
What is a shower niche?
Shower niches are the convenient “windows” or “shelves” in the shower to place shampoo, body wash, and razors.
Why should you use a prefab shower niche?
We recommend using prefabricated shower niches that are made out of ABS (which is a thermoplastic resin named Acrylonitrile-Butadiene-Styrene or ABS for short), which is a lightweight, but very durable material. It is virtually indestructible without the clutter and leaks.
Most prefabricated shower niches are designed in a way so that the water doesn’t sit on the shelf. In other words, the bottoms of the shelves are slightly angled so the water falls out nicely, rather than puddling and causing problems later down the road.
What’s the best height for shower niches?
The shower niche should be installed at a convenient height to reach for bottles of shampoo, soap, etc. that will be stored in the niche. I like something around the elbow to shoulder height.
When shopping for your prefab shower niche, be sure that you get something tall enough for the largest possible bottles of shampoo (think Costco size bottles with a hand pump).
Learn more about the best height for a shower niche here.
This shower niche installation guide contains affiliate links, but nothing that I wouldn’t wholeheartedly recommend anyway! Read my full disclosure here.
How to Install a Prefab Shower Niche: Step-by-Step Instructions
Supplies needed:
- Prefabricated shower niche insert
- 100% Silicone
- Screws
- Tile – I love doing a coordinated accent tile on the back
- Thinset mortar
- Grout
Tools needed:
- Drill
- Trowel
- Painter’s tape
Step 1. Choose your shower niche insert.
We’ve always used the prefabricated shower niche inserts from the brand, Tile Redi. We know that you can definitely DIY the framing out of the shower niche, but these are designed so that this water doesn’t sit on the shelf.
The bottoms of the shelves are slightly angled so the water spills out nicely, rather than puddling and causing problems later.
The shower niche inserts generally come 16” wide so they fit directly between your wall studs, which are spaced out 16 on center.
This is the shower niche that we used in this bathroom.
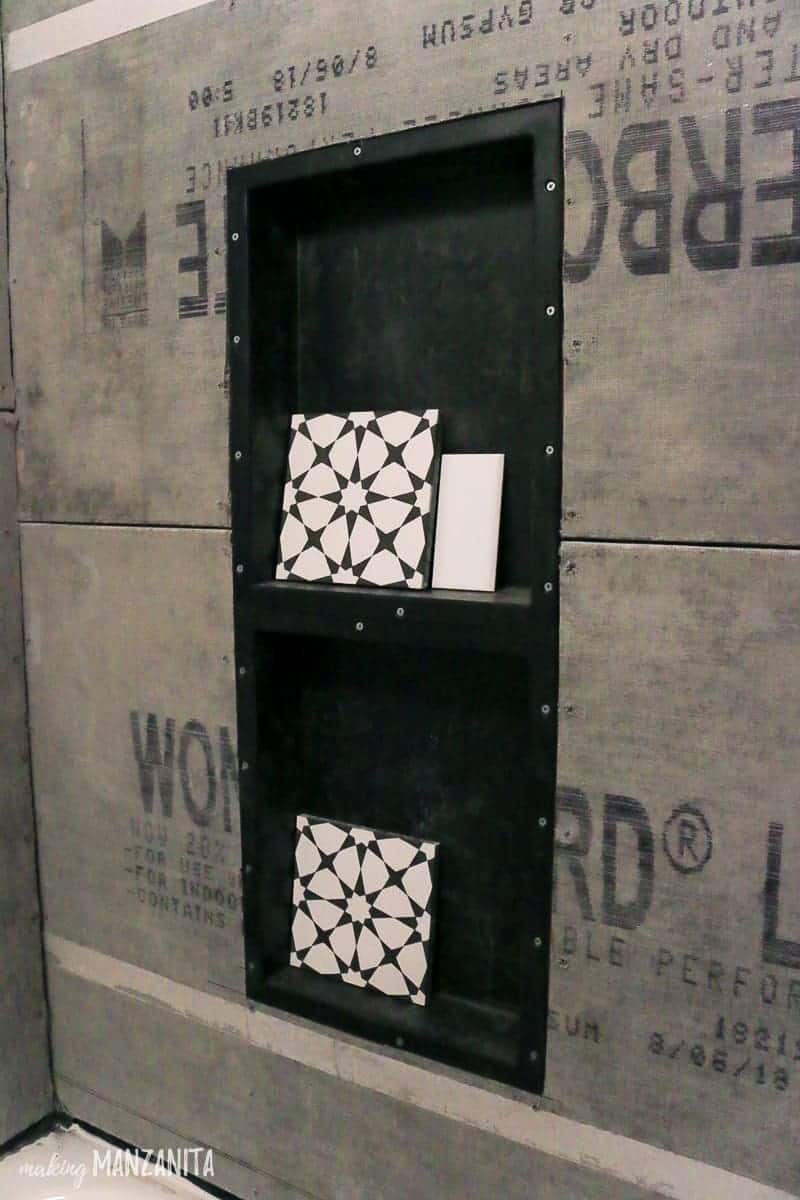
Step 2. Install shower niche.
You want to install the shower niche before you install your backer board for your shower if possible. Then you can cut your backer board around the niche when you install it.
Cut 2x4s to create horizontal framing in between your studs. Fasten the horizontal pieces to adjacent vertical studs so that it lines up with the predrilled holes on the top and bottom of the shower niche insert.
If desired, you can lightly sand the surface of the shower niche before installing to help the adhesion. We’ve never done that however and never had any issues.
Put shower niche in place and add one framing screw to each predrilled hole.
To learn the best shower niche height, check out this article! In general, you want to install the shower niche roughly 38″ to 60″ from the ground, which is elbow height to eye height for the average adult.
Step 3. Install backer board.
Install backer board around the shower niche. Try to get your cuts as close as possible to the shower niche edge.
Step 4. Waterproof shower niche with silicone.
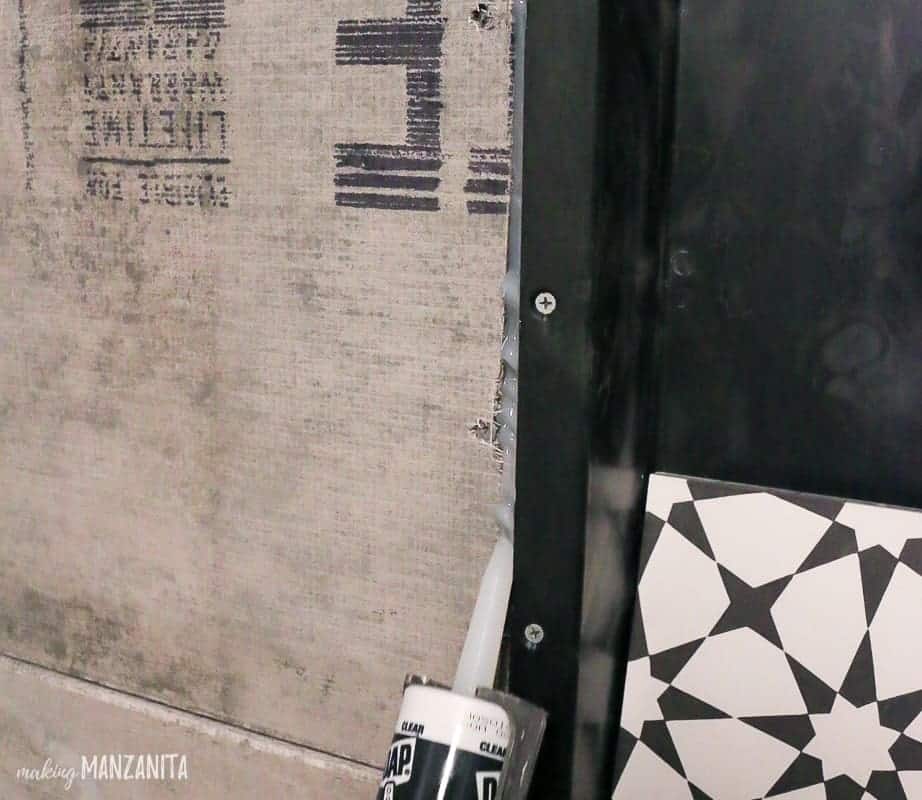
Apply 100% silicone over each screw head and fill the gap in between the niche and adjacent backer board.
Once the silicone is dry, you can waterproof it further with RedGard.
Step 5. Install tile in shower niche.
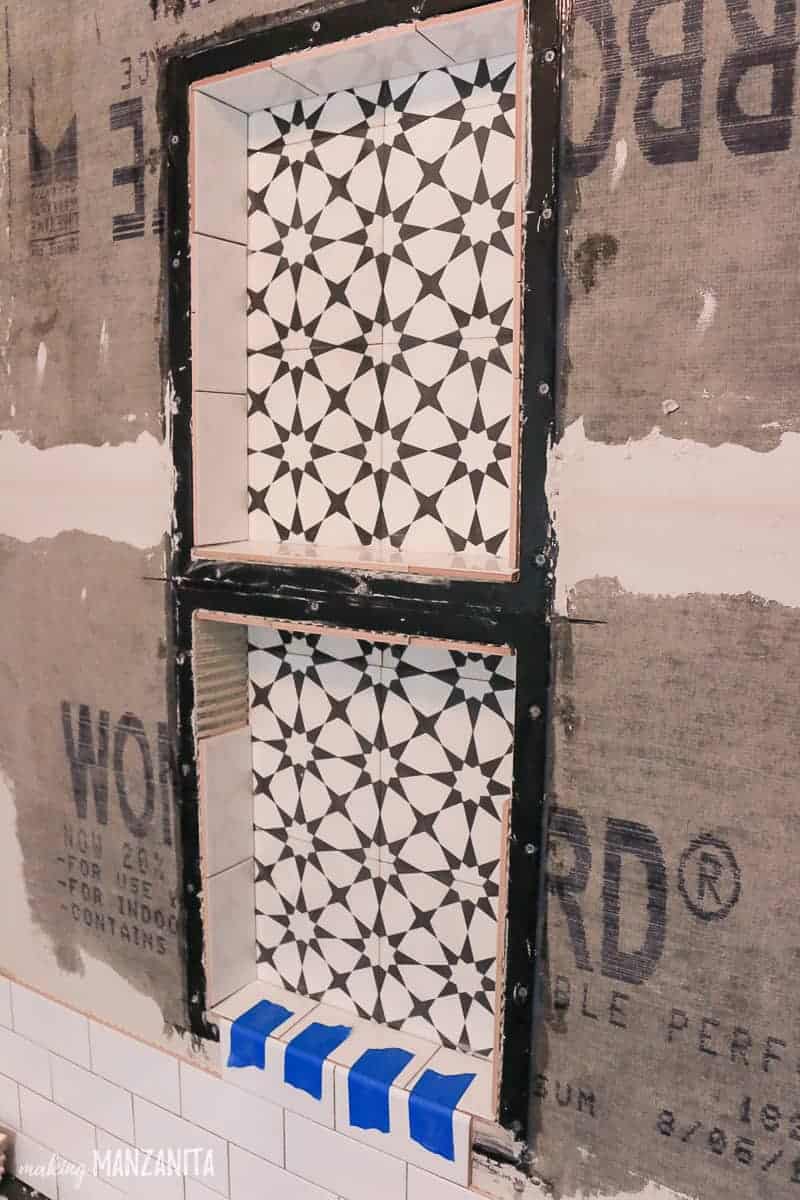
We always start with the back of the niche and I usually have a coordinated tile for some extra contrast.
Apply your thin-set mortar directly to the shower niche and back butter your tiles before pressing them into place.
How should you tile around the edge of a shower niche?
If you follow along on my Instagram stories, you know that the shower niche tile in our kid’s farmhouse bathroom took us a LONG time.
Much of the hold-up was figuring out how to border the tile around the outside of the niche.
I wanted something very specific (a picture frame border around the shower niche), which ended up taking us extra time to plan the tile cuts out and make sure the seams were going to line up accurately. Our brains seriously hurt after we finally got it all planned out.
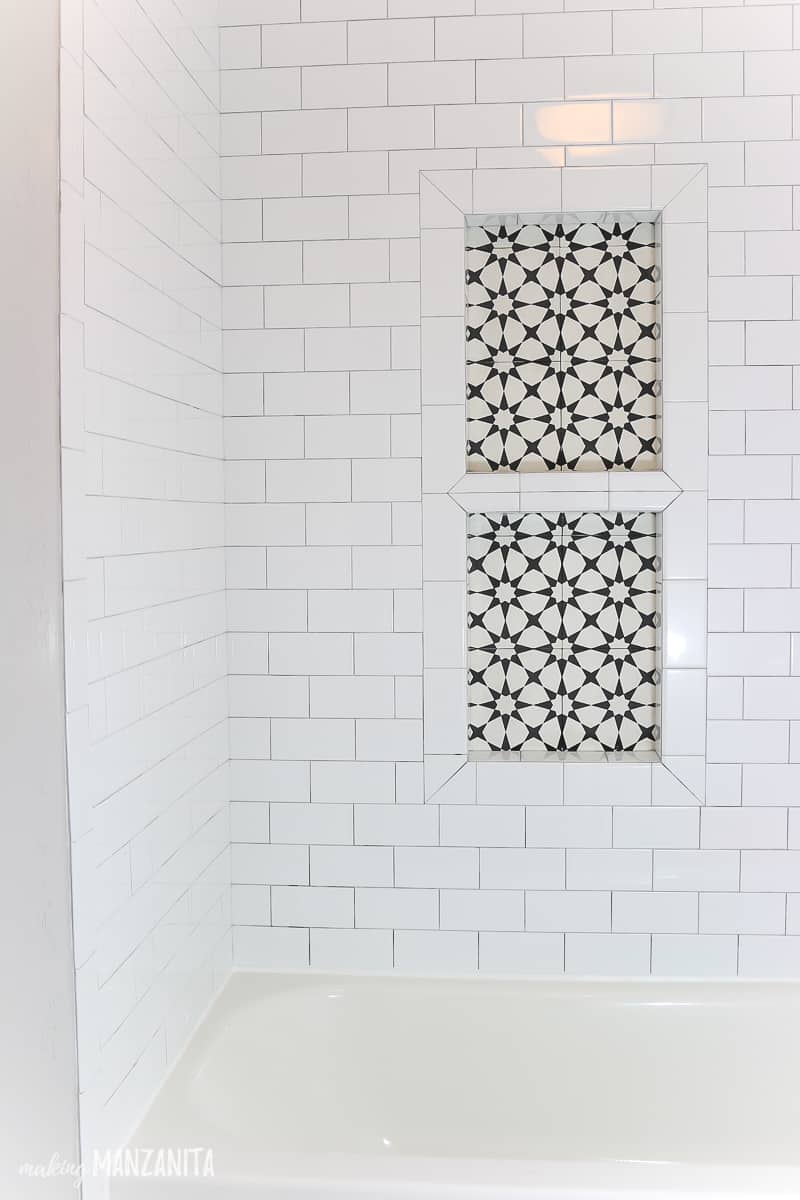
I think my favorite part of the entire bathroom is our cute little shower niche. The cement tile on the back adds so much character, don’t you think!?
There are so many different ways you could tile around the edge of niche during your shower niche installation, here’s a few examples:
- Picture frame border with mitered corners, like we did in this bathroom
- Rounded bullnose tiles on the edges of the niche like we did in our master bathroom
- Shiny metal trim like this
- Quarter round trim like this
- Thin flat trim like this
- Bulkier decorative trim with mitered corners like this
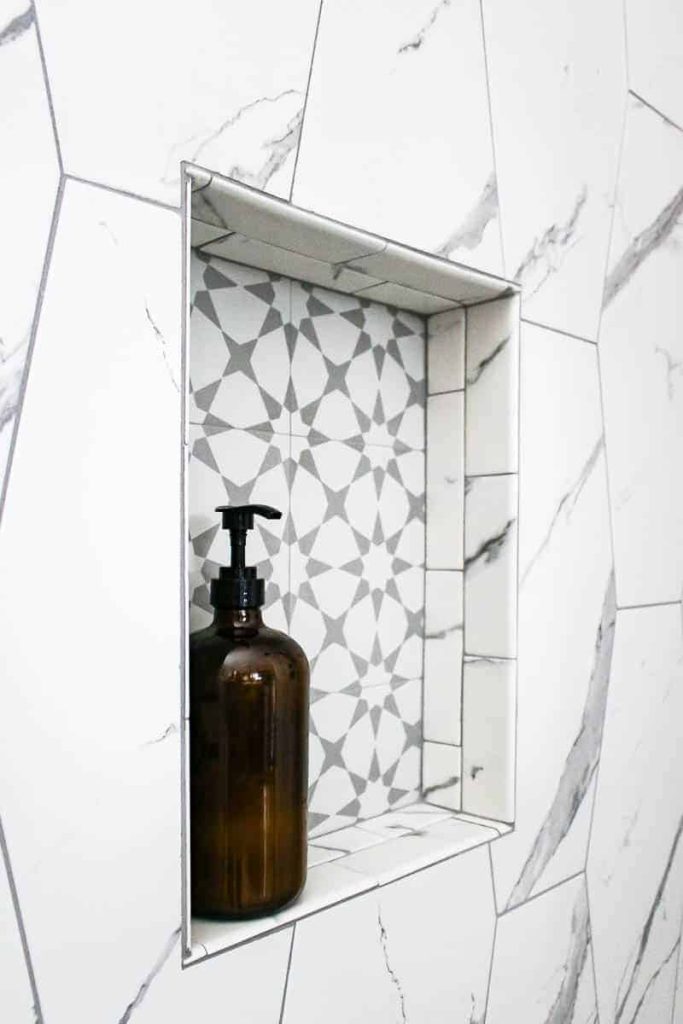
Here’s an example of another shower niche. This one is in our master bathroom. We used the same brand of prefabricated shower niches here.
Installing a shower niche during your bathroom is a great way to make your bathroom feel more custom. The extra storage is so convenient, you’ll definitely appreciate it later down the road. Using a prefabricated shower niche is the way to go for a leak-proof design that is ready to tile.
These shower niche installation tips will help you along the process. Have fun with your DIY shower!
What to read next…
DIY Shower Guide – If you’re planning a bathroom renovation and plan to install a DIY shower, this is a must read! Learn all of the different types of showers, what to consider when designing your shower, the correct order of installation and more. This DIY shower guide is your ultimate resource for installing your own shower.
Did you learn something new in this shower niche installation guide?
Let us know in the comments below!
Shower Niche Installation Tips
Learn how to install a shower niche with this step-by-step tutorial. Here, we install a prefabricated shower niche and tile to complete a farmhouse-style bathroom makeover.
Materials
- Prefabricated shower niche insert
- 100% Silicone
- Screws
- Tile - I love doing a coordinated accent tile on the back
- Thinset mortar
- Grout
Tools
- Drill
- Trowel
- Painter’s tape
Instructions
- Choose your shower niche insert.
- Install shower niche.
- Install backer board.
- Waterproof shower niche.
- Tile in shower niche.
so how high or wide do I build this niche in the wall so that it lines up with my tile so I’m not ending up with a little piece
Depends on size of shower, size of tile, size of grout lines, etc. We recommend doing a dry fit layout of the tile before starting to make sure you’re not getting small tile pieces.
Depends on size of shower, size of tile, size of grout lines, etc. We recommend doing a dry fit layout of the tile before starting to make sure you’re not getting small tile pieces.