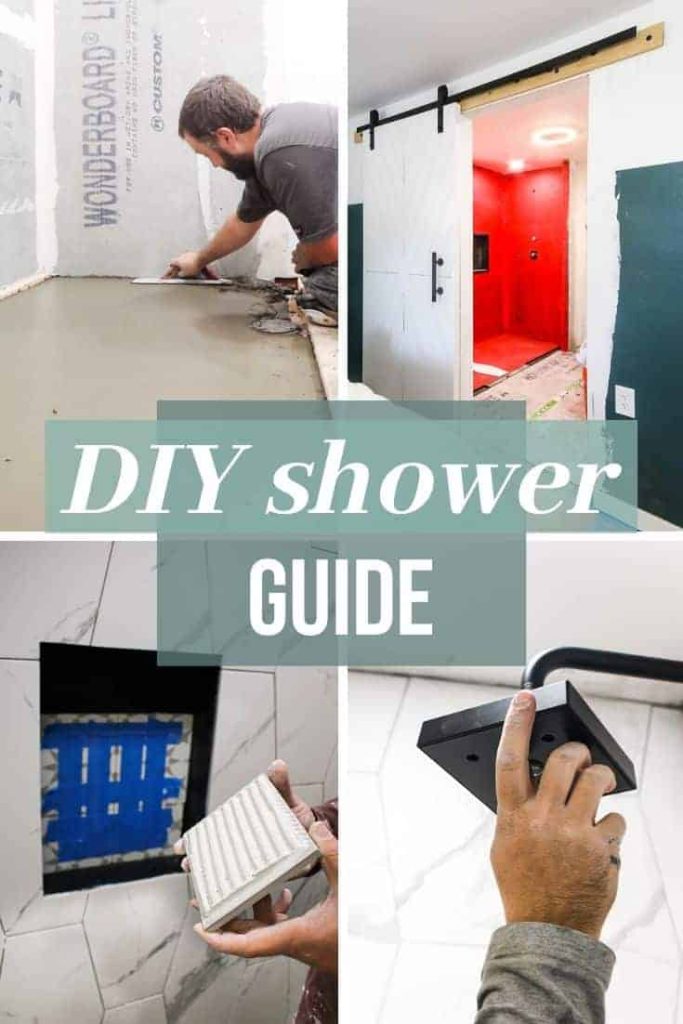
DIY Shower Guide: Everything you need to know for your DIY shower
When someone sees our recent bathroom renovation for the first time, their response is usually something like this
Danggggggg….. that’s a dream shower.
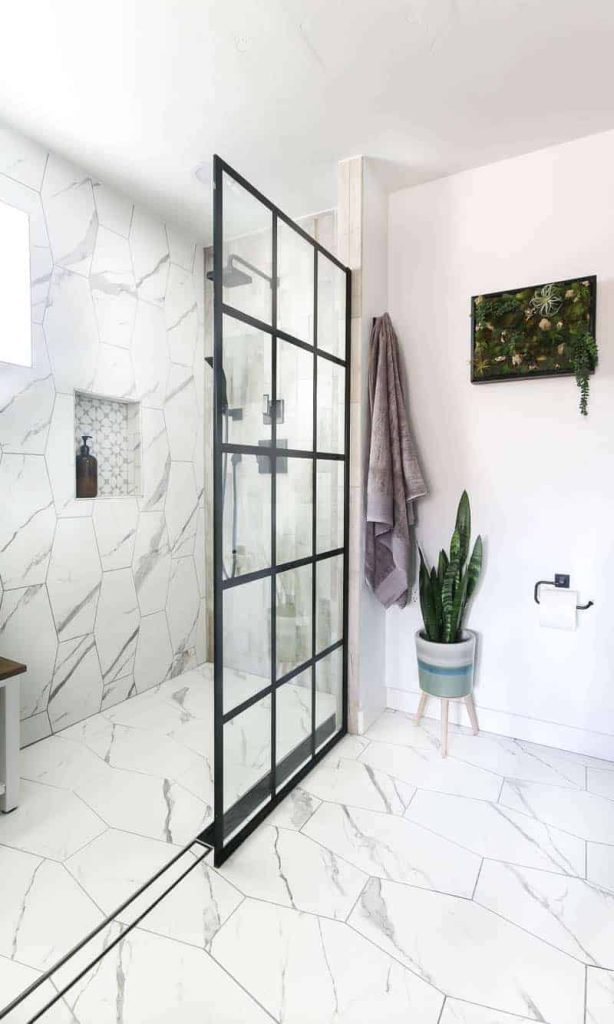
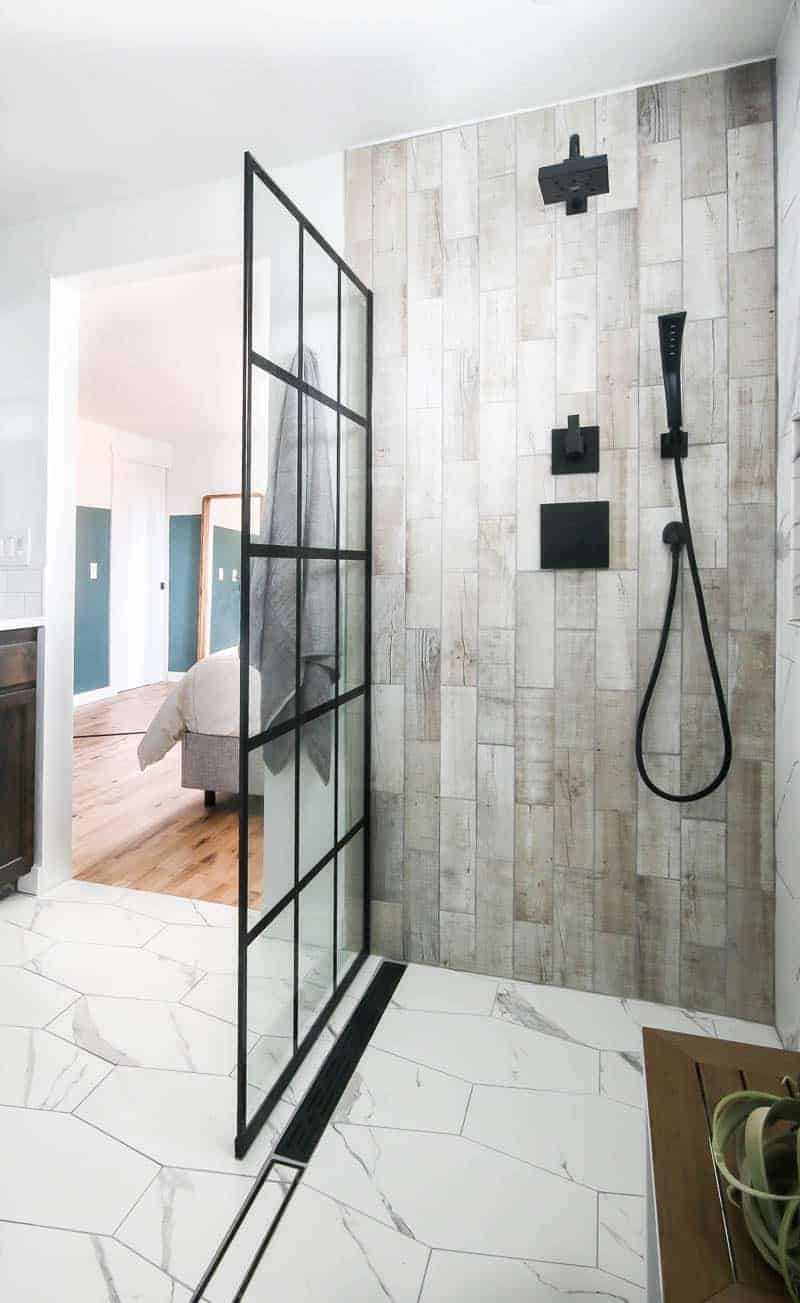
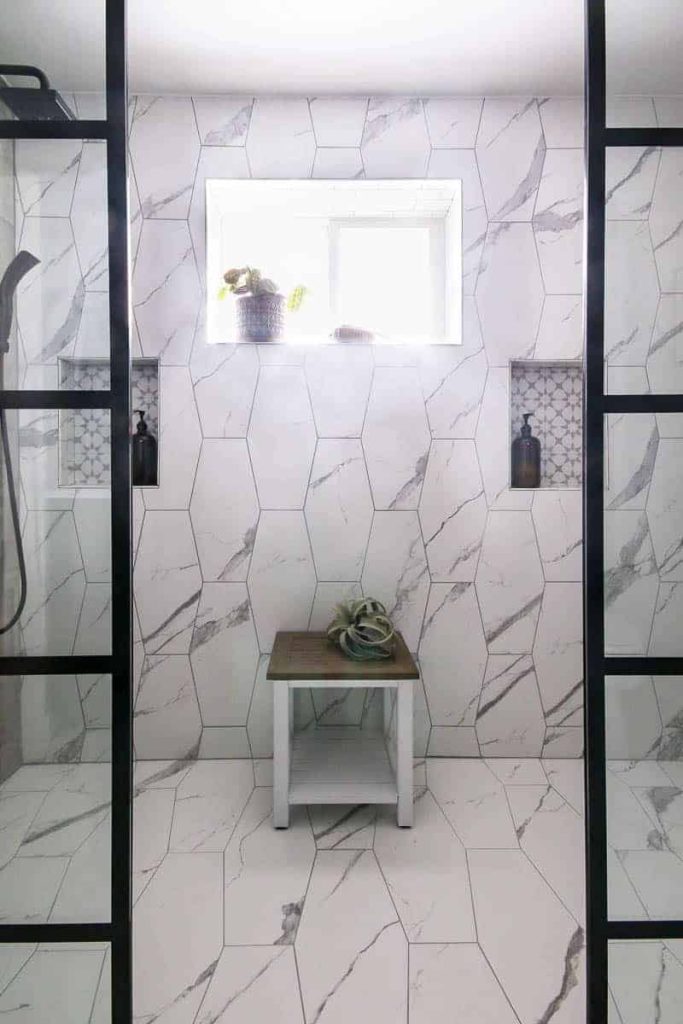
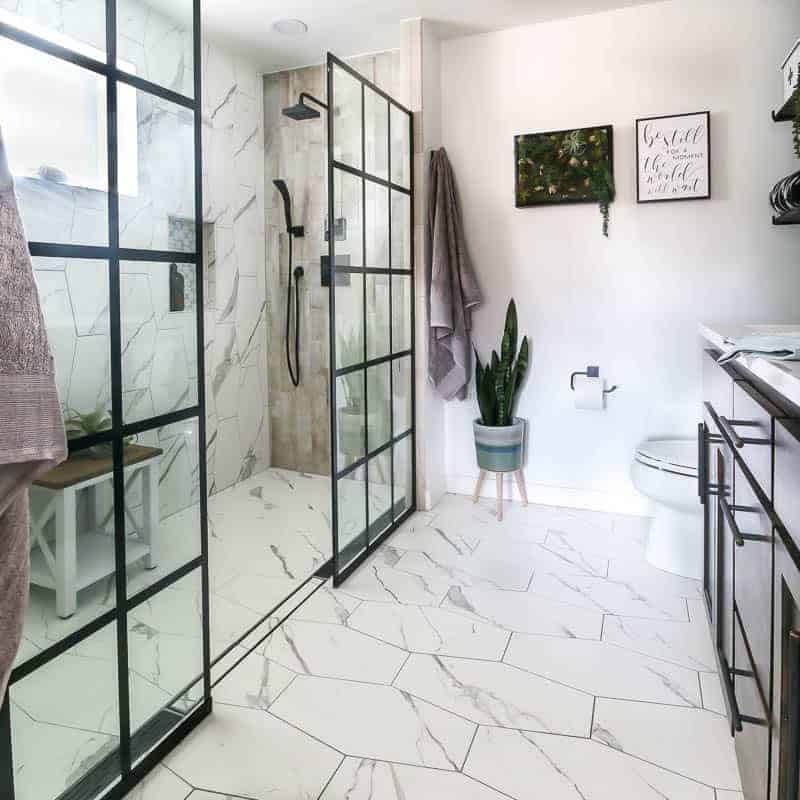
And really, truly….it is. It’s a shower that we dreamed up and made it happen. We knew creating a custom tiled shower with two types of tile, at a size that is way larger than normal, didn’t have a curb, incorporates a linear drain, has two fixed door panels and two shower shelves was a tall ask and a risk.
Our show stopping shower wasn’t easy, cheap or simple. But….like I said. It’s a dream shower.
Now if you’re planning a bathroom renovation, you may be thinking about installing your own shower as well. You can don’t have to dreamin’ up something quite as complex as ours. But the basic concepts that you need to know about DIY showers are the same.
So that’s why we created this DIY shower guide full of everything you need to know to DIY your own shower.
DIY Shower Guide: Table of Contents
This post contains affiliate links, but nothing that I wouldn’t recommend wholeheartedly. Read my full disclosure here.
Want to catch up and see more about our master bathroom renovation?
- Week 1: How to Demo A Bathroom
- Week 2: Modern Bathroom Design Plans
- Week 3: Everything You Need To Know About Large Format Tile
- Week 4: Can An Ensuite Bathroom Add Value To Your Home?
- Week 5: How To Build A Barn Door
- Week 6: The BIG Reveal
- DIY Hamper with Tile
- Bathroom Renovation Cost (Our REAL Numbers!)
- DIY Shower Guide: Everything You Need To Know
Types of showers
Tiled vs pre-fabricated shower
One of the first decisions you will need to make when it comes to your DIY shower is whether to go with a custom tiled shower vs a prefabricated shower. Prefabricated showers are, of course, a cheaper option – but you won’t get the amazing look and feel of tile.
Shower shapes
Once you decide whether you will use a pre-fabricated shower insert or go with the custom tiled route – you will need to figure out the size and shape of your shower. Showers literally come in ALL shapes and sizes, which can seriously be overwhelming! Here’s a summary of the most common types of shower shapes.
- Curved – great in corners!
- Square Corner – square enclosure in a corner
- Neo-angle – corner shower but with a notched corner
- Rectangular
- Bathtub with Shower – it is VERY common to have a shower combined with a bathtub. We did this in our kid’s bathroom. With this shower style, you can opt for a shower curtain or a sliding shower door.
- Custom – whatever your mind can think up…the sky is the limit, haha!
We chose a custom tiled shower over a prefabricated for more than a few reasons….we wanted to incorporate a fun tile to add to the overall design, we were participating in a tile competition (duh!), and lastly we were creating a DIY shower that wasn’t a standard size to fit the space we were renovating. Learn more about floor plan changes and the bathroom renovation plans here!
What to consider when designing your DIY shower
The design and placement of your DIY shower can really make your bathroom renovation simple OR super complicated.
If you can design your DIY shower to incorporate pre-fabricated shower pans or sometimes also called shower bases (which only come in certain sizes) and pre-made features like niches, then the process is more fun, rewarding, and enjoyable.
Correct order of a DIY shower installation
- Shower pan
- Backboard & waterproofing
- Tile
- Grout
- Install fixtures & doors
#1 Shower Pan: How do you make a custom shower pan (shower base)?
First of all, you need to be honest about your skillset and what you want to tackle yourself when considering a DIY shower, especially if it includes a custom shower pan.
After finishing our barrier-free (aka “curbless”) custom shower pan for our DIY shower, I can tell you that Logan’s skills were definitely put to the test along with his patience (a couple of times anyway) and he’s a pretty handy guy.
The hardest part was our DIY shower install was the custom shower pan. To be completely honest here, Logan ended up doing three (and a half) shower pans total because the first two did not set up right. It was SO frustrating!
You can follow along and see some of our frustration in this video with our Week 3 bathroom update – we also talk about what we did to create our custom shower pan in this video!
Now, keep in mind that we had just torn out our original bathtub because it had a leak that we discovered a couple of months before our renovation. Check out the damage from the leak here.
Leaks are no fun and usually require a ton of work to fix, so we wanted to be extra careful to get the shower pan right. So Logan was very particular about cracks and slope in the pre-slope of the shower pan.
All that to say unless you’re doing a really custom shower (like we were) we definitely recommend that you base your design and remodel around shower pans that are pre-made.
If you don’t do a pre-made pan or (also sometimes called a shower base) then depending on your subfloor type you’ll have 2 options to correctly set up your pan that you can find.

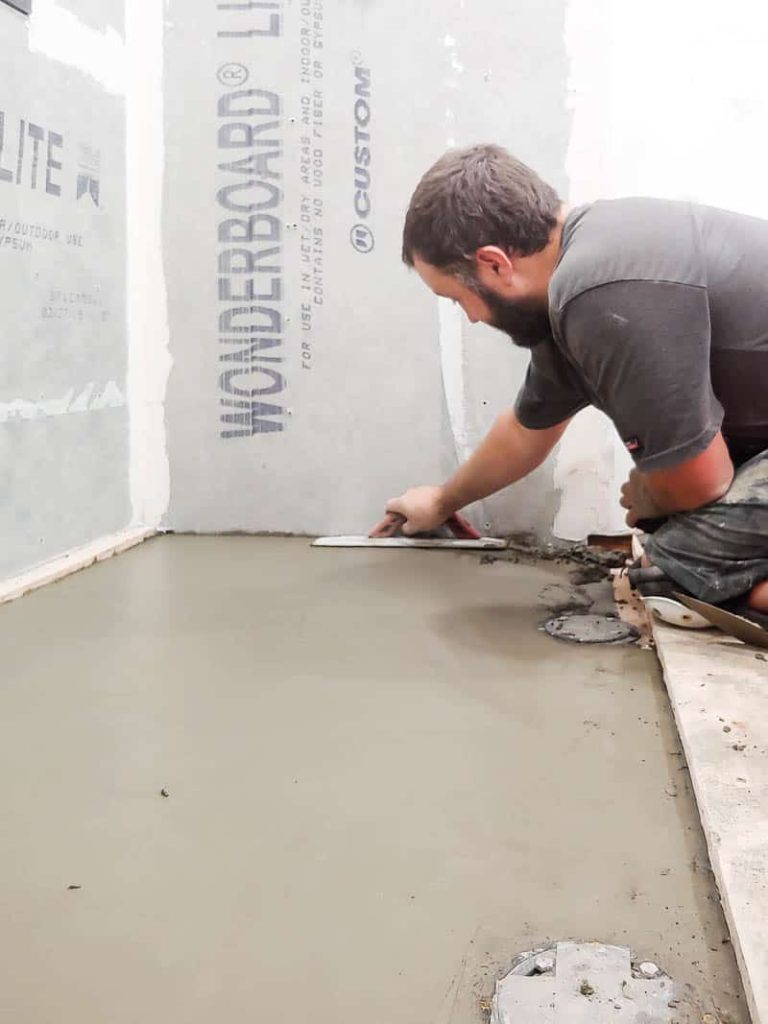
#2: Backboard & waterproof
With your shower pan done, it is time to get backboard up on your walls and your water proofing done.
There seem to be a million different ways to get waterproof your shower (in fact, we wrote a whole post about waterproofing your shower here during our last bathroom renovation). So we’ll try to keep this as simple as possible. Always do what your manufacturer instructions say to correctly waterproof your DIY shower. It’s really that simple, guys.
We used WonderBoard, which is a cement-based backer board made by Custom Building Products. (UPDATE: WonderBoard has since been discontinued. We usually use Durock now. Learn more about how to install Durock here).
We always look up manufacturer instructions when working with products for the first time. You can usually find detailed instructions in something called a Technical Data Sheet (or TDS), which can be found on the manufacturer’s website.
According to WonderBoard’s TDS found here, there were two ways you can waterproof a shower.
- Put up 4 mil plastic sheeting or 15 lb roofing behind the cement backer board that overlaps your shower pan liner down into your shower pan (this is what we did in our last bathroom renovation).
- Put up the cement backer board and paint with RedGard and overlap your shower pan liner.
We ending up going the RedGard route this time. Logan preferred this because, with the plastic sheeting, you have the screw in the backer board, which essentially breaks the seal of the plastic sheeting behind it. As we mentioned in this post, you should also cover all screw holes with 100% silicone.
The RedGard simplifies the process a bit and creates a smooth waterproof barrier on everything. Honestly, either way works for waterproofing your DIY shower – just do your research and make a decision for what works best for you!
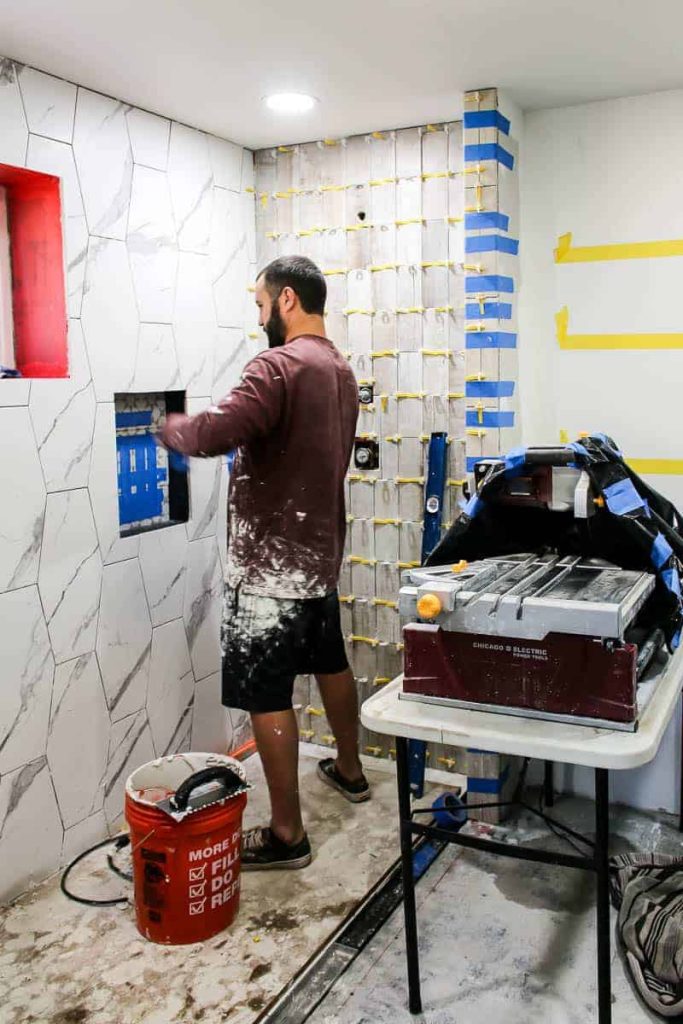
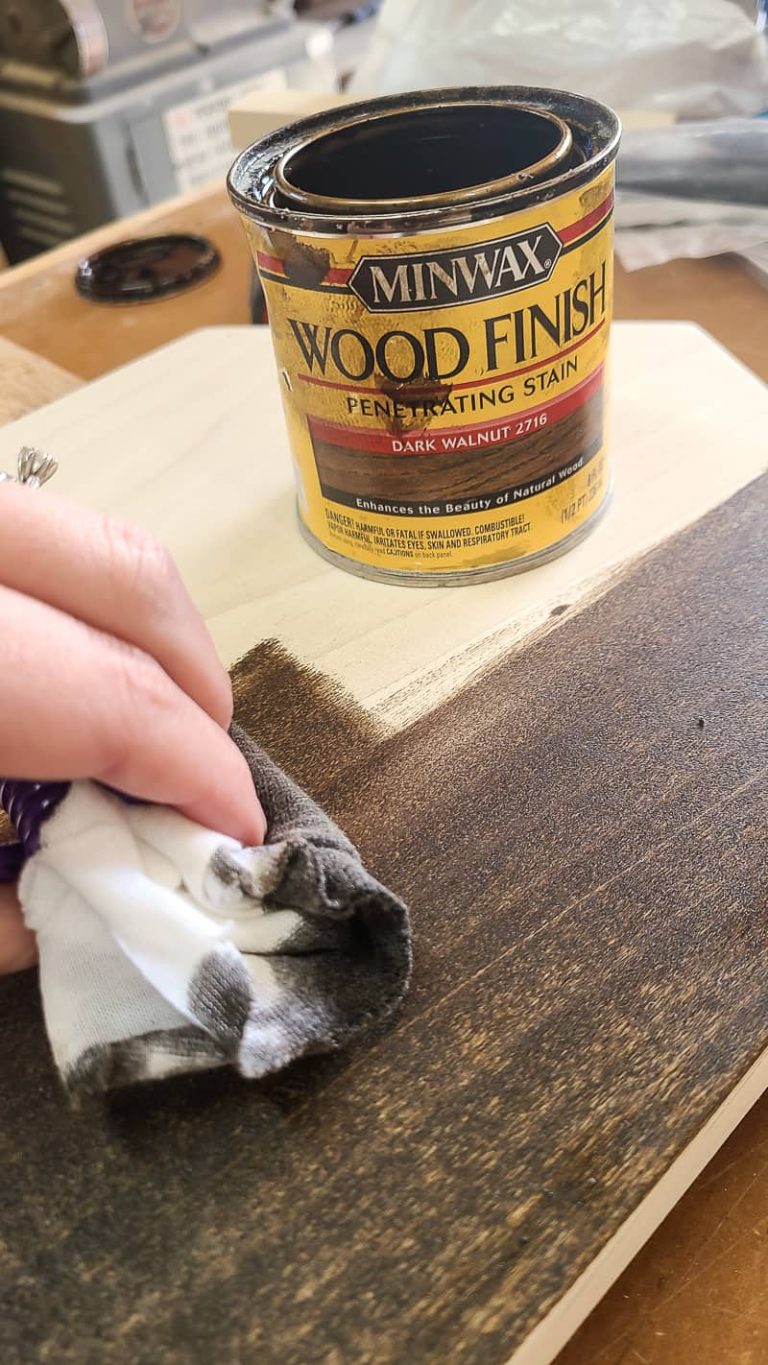
#3: Tile
After waterproofing, then the real magic happens with the tile.
Tiling is almost the same as painting – it’s such a big change that happens fairly quickly. Gotta love that immediate satisfaction.
What to use to attach tile?
When it comes to attaching the tile, you have a few different options for products:
- Thinset (also called thinset mortar)
- Mastic (also called tile adhesive)
- Epoxy mortar
This article does a great job going into more detail with a tile mortar guide, but what you need to know is that we recommend thinset for your DIY shower.
In general, when buying any type of mortar for your shower, always be sure to check that it can be used on floors and walls and that it is acceptable for wet areas.
What type of tile mortar should you use?
When you are deciding what type of thinset mortar to use for your DIY shower, you need first consider the SIZE and TYPE of your tile – which makes a big difference in your mortar selection.
- Tile Size – if you are using large format tile, you will need to to use large format tile thinset mortar for installation.
- Confused about what large format tile is? Don’t worry! I wrote a whole post about everything you need to know about large format tile here!
- Tile Type – For instance, if you are using a natural stone tile – you’ll need to use a natural stone tile mortar for installation.
What about trowel size for tile?
Now that we have the right mortar for all our tile, we want to get the right trowel size to spread the thinset on.
Again the correct trowel size is going to be based on your tile size. If you are unsure of what size trowel to use, it’s pretty convenient because there will be a guide of trowel sizes for tile on the back of your mortar bag when you buy it. It’s pretty handy so you can grab your trowels before you leave the tile section at the store.
However, if you want to plan ahead – here’s a great resource about trowel sizes for tile.
Want more detailed tips for shower tile installation? In this post, we talked about how to install a cement backer, how to add a shower niche, how to grout, and more! Read it here.
Pro tip – If this is your first time tiling, be sure to get QEP lash clips and wedges. We tried them out for the first time on this renovation and we loved them. They help you space your tile out properly and ensure everything is level and flush.
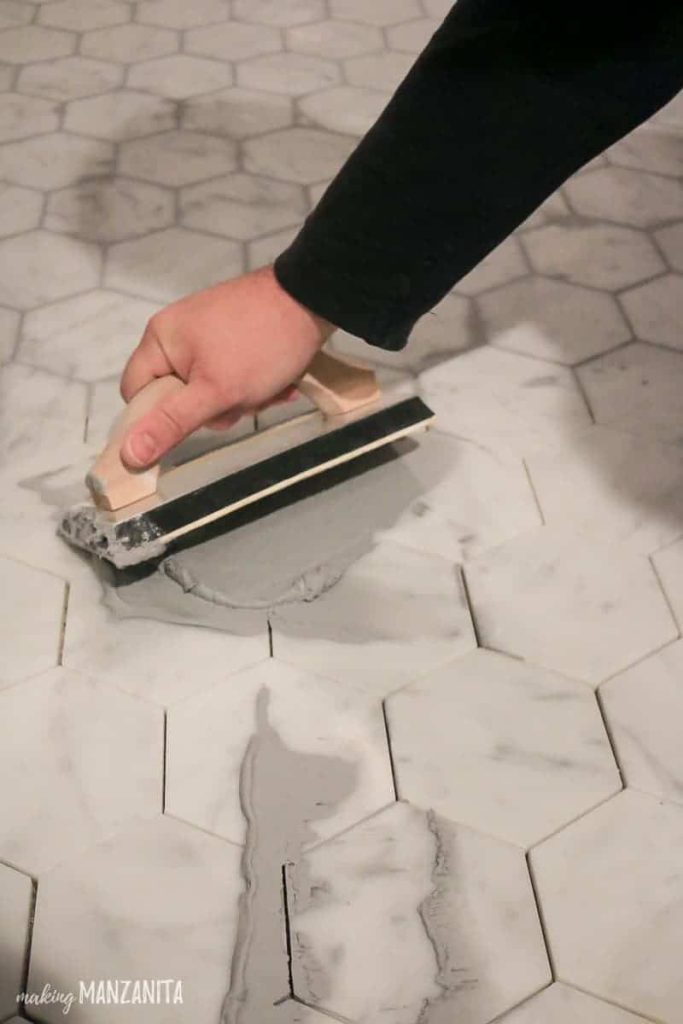
#4: Grout
After the tile is installed, wait 24 hours and then grout your tile. Grout also has many different options to choose from which can be overwhelming. Generally speaking, there’s:
- Non-sanded for grout lines under 1/8 of an inch
- Sanded for 1/8 of an inch and above
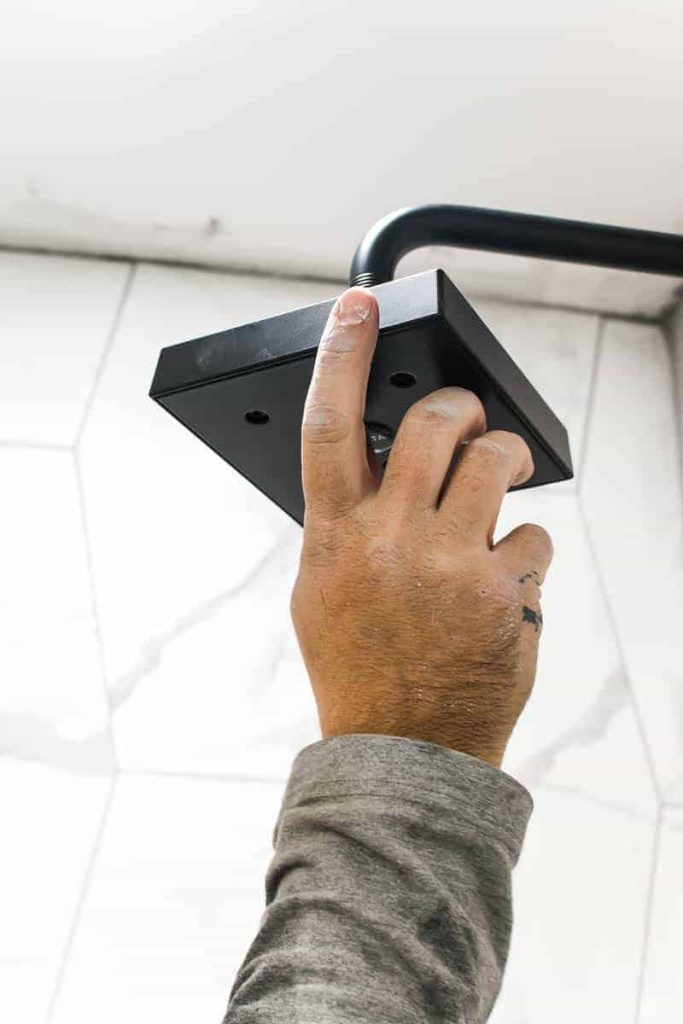
#5: Install fixtures & doors
This next part is definitely my favorite. Putting in all of the beautiful fixtures is the perfect finishing touch for your DIY shower.
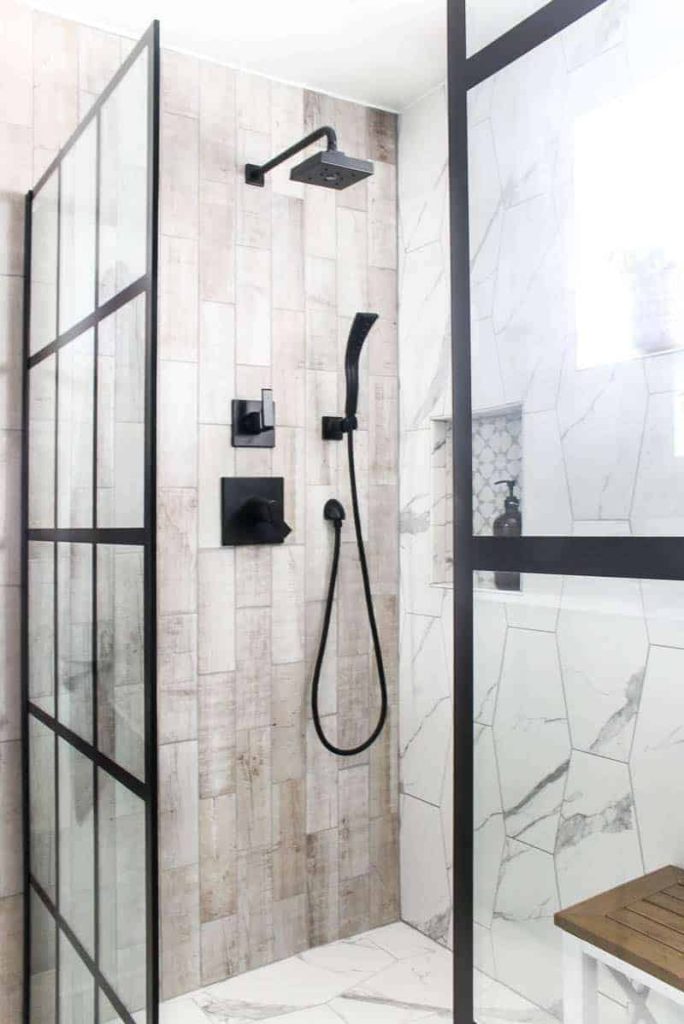
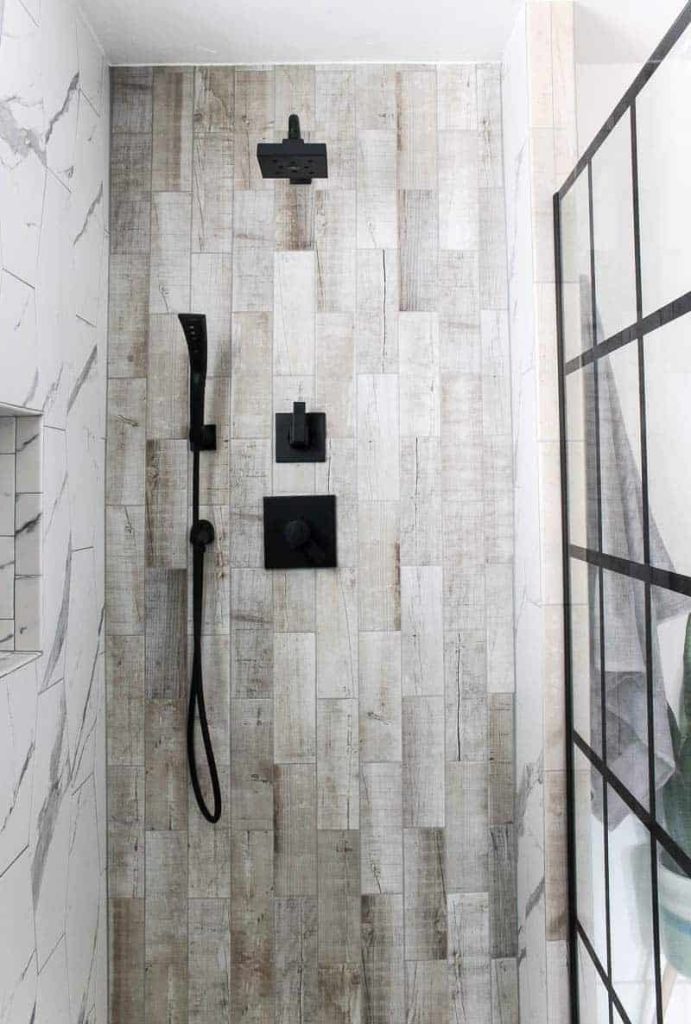
We ended up going with Delta’s Ara collection for the shower head and diverter. We needed the diverter because we wanted to add this hand shower to make the shower easier to clean.
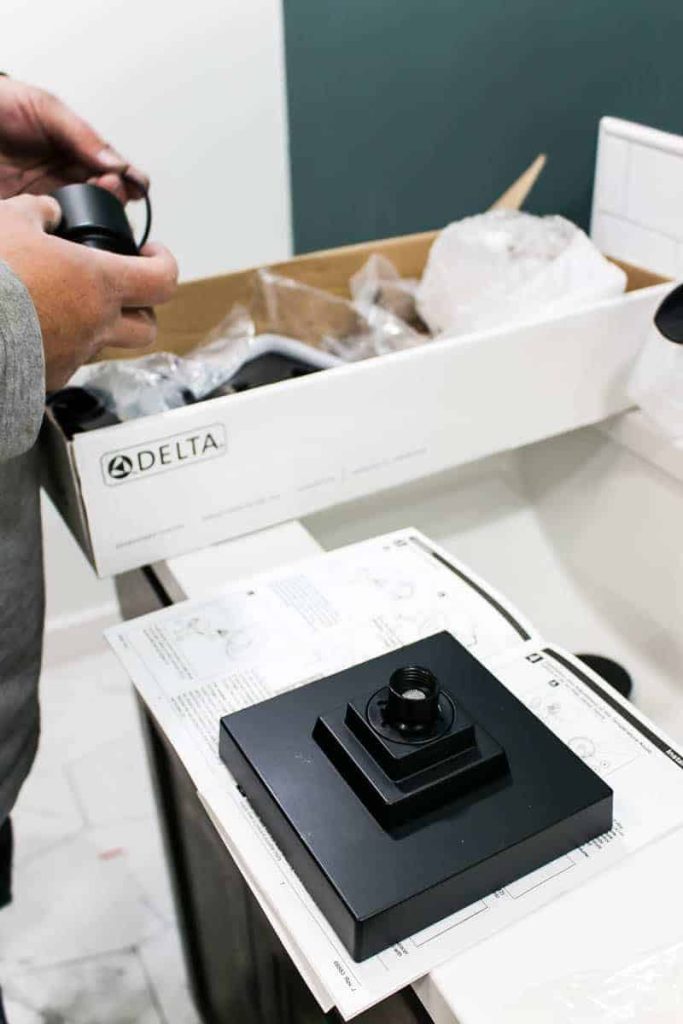
To install your fixtures, follow the included manufacturer’s instructions closely. Each showerhead and faucet is different so be sure to read carefully.
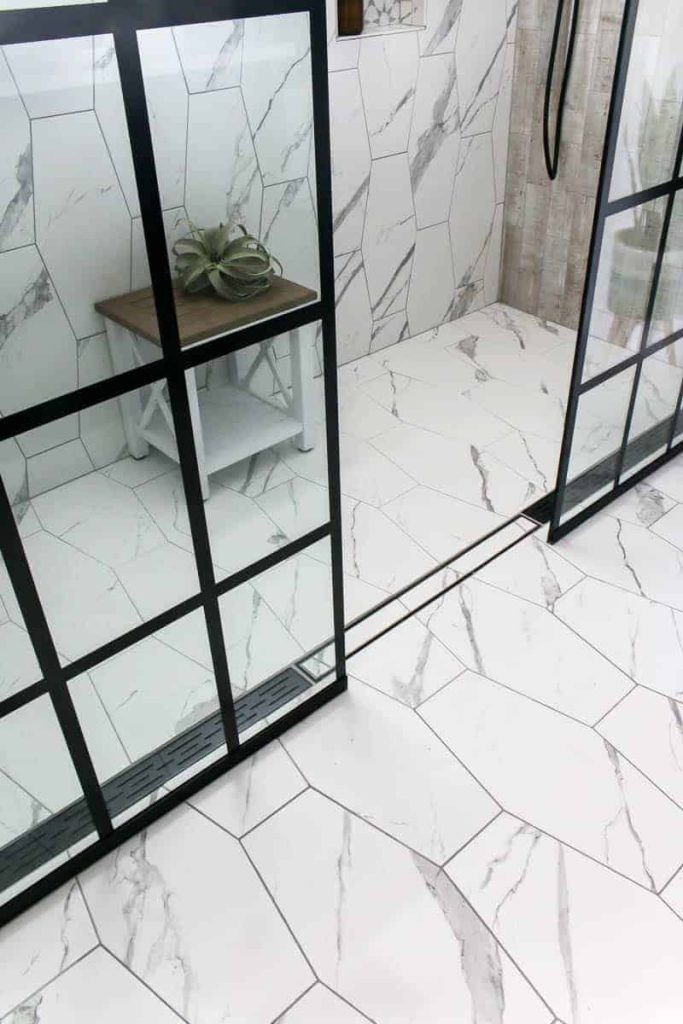
For the doors, we rounded out our DIY shower by adding a couple of fixed shower panels to give it a nice look and help direct water to our linear drains.
Installing your own shower is not for the faint of heart, but it’s totally a doable DIY project if you are going to be doing a bathroom renovation. And you will save a ton of money if you are able to do the shower install yourself!
For beginners, start with designing your bathroom to incorporate premade shower bases or even go with a prefabricated shower to keep things really simple.
For more experienced renovators, be sure to do your research before you start and read all manufacturer’s instructions as you plan and install your DIY shower.
Do you have any other questions about DIY showers??
Let us know in the comments below!