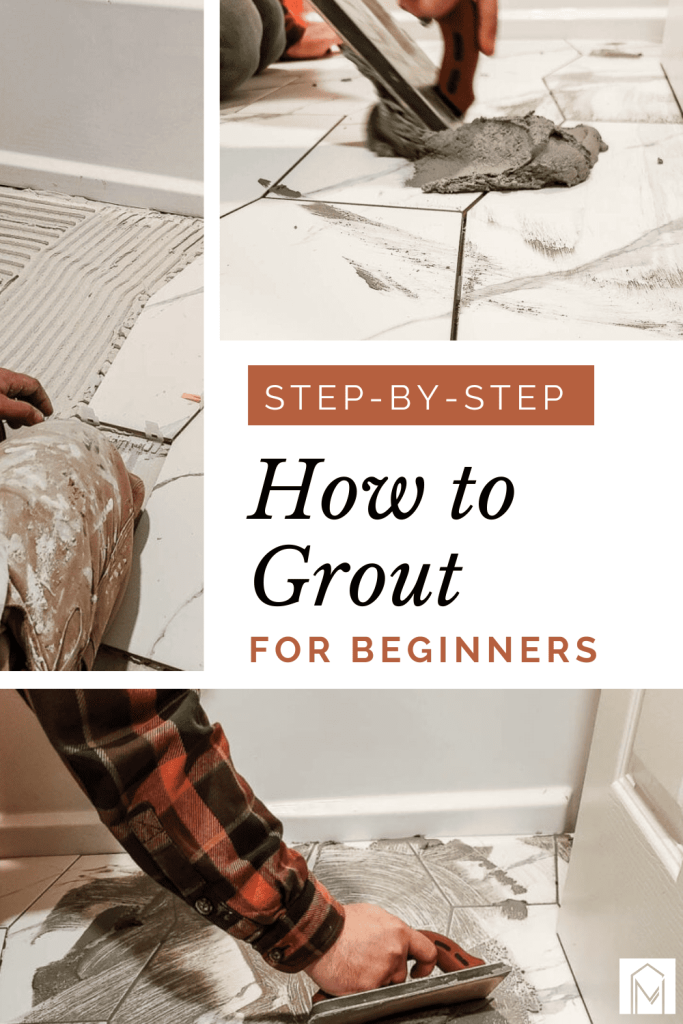
How To Grout Tile: Guide for Beginners

Attempting your first tile project and don't know how to grout tile? Follow along with this comprehensive step-by-step guide if this is your first time grouting tiles!
If you are attempting your first tile project, chances are that you’ve never grouted tile before! Grouting tiles is a fairly easy process, but it can definitely feel overwhelming if you’ve never done it before. No worries!
In this guide, we’re going to break down the basics of how to grout tile for beginners! Whether you’re renovating your kitchen or bathroom, grouting is definitely a skill that you’ll want to add to your toolbox. And the only way to learn when it comes to DIY is to DO!
Let’s start with some basics.
This how to grout tile guide contains affiliate links, but nothing that I wouldn’t recommend wholeheartedly. Read my full disclosure here.
Why do you need to grout?
Grouting in between your tiles isn’t just about looks; it’s about stability, waterproofing, and tile longevity.
- Grout fills the gaps between tiles, keeping them in place. No one wants a wobbly floor, right?
- Grout also creates a watertight seal, preventing moisture from seeping through the gaps. It’s like a raincoat for your tiles.
- Grout helps distribute weight and stress evenly, making your tiled surface more durable.
- And lastly, it will define each tile and create a clean and polished look.
There’s no chance you can skip the grouting process. It is a necessary finishing touch.
Main Types of Grout
There are basically two types of grout, sanded vs. unsanded. Both are sold as powdered grout and need to be mixed with water before being used. Both of these are a type of cement-based grout.
The primary difference between the two different types of grout is that you should use one when the gaps between tiles are more than an eighth of an inch and the other on gaps less than 1/8″. There are also a couple of newer types of grout on the horizon – epoxy and pre-mixed so we thought we’d mention those too.
Sanded Grout:
- For tile gaps more than 1/8”
- Increased stability
- Less likely to crack or shrink than unsanded
- Usually cheaper than unsanded
- Great for floors
- But if the gaps are more than 3/8”, need a special wide joint mixture
- This is what we usually use for sanded grout
Unsanded Grout (or Nonsanded Grout):
- For tile gaps less than 1/8”
- Has a smoother texture
- Easier to work into joints
- Easier on your hands and skin
- Won’t scratch types of tile with delicate surfaces, like marble or limestone
- This is what we usually use for unsanded grout
- For this tutorial below we were using the “Prism” line instead of the PolyBlend from Custom Building Products and we prefer PolyBlend because it doesn’t set up as fast, giving you more working time with the mixed-up grout, just our two cents!
Epoxy Grout:
- Super durable and resists cracks
- Not porous so it is completely waterproof and doesn’t stain
- More vibrant colors
- Dries really fast, so you need to be quick during the installation
- Harder to work with and harder to mix right
- Less forgiving to mess takes, hard to wipe off for clean lines
- Smells so good ventilation is a must
- Much more expensive than regular grout
- Does not need to be sealed because it is not a porous material
Pre-Mixed Grout:
- Another option, that is great for beginners, is using a pre-mixed grout
- It is ready-to-use, just open the tub and start grouting
- Most premixed grouts are acrylic-based and don’t have any cement
- Most premixed grouts are unsanded
- Don’t have to guess if you’re mixing the grout powder right, which can lead to a lot of issues if you get it wrong
- Less mess from not needing extra buckets and mixing supplies
- Color will be consistent versus traditional which may have uneven color if it isn’t mixed right
- You can put the lid back on the tub when done and use the rest later (unlike traditional which has to be thrown away if you mix too much)
- More expensive than traditional grout
- Only sticks to certain types of surfaces and tiles, so it isn’t versatile
- Longer drying time (sometimes days and weeks that you can’t be on it!)
- Has a tendency to crack in larger joints
- Just like epoxy grout, it does not need to be sealed because it is not a porous material
How wide should grout gaps be?
So if the main difference between sanded versus unsanded grout is based on the tile gaps, how do you know how wide your tile gaps should be? Well, it isn’t just a design choice. The gap size in your grout joints depends on your tile size and project.
- 1/16 to 1/8 inch: Perfect for most ceramic and porcelain tiles. It’s the Goldilocks zone.
- 1/8 to 3/16 inch: Good for larger tiles, like 12×12 inches or more.
- 1/4 inch or more: Reserved for extra large format tiles or when you want a bold grout statement.
What are common grout failures and how to prevent them?
There are a lot of things that can go wrong with your grout! Here are the most common ones and how you can prevent them:
- Cracks: The most common issue with grout. It can be because the grout had too much water, didn’t get mixed enough, you used unsanded grout on gaps more than 1/8″, or the tile shifts from not being installed correctly
- Stains: Didn’t seal it afterward. Reseal every 2-4 years
- Mold and mildew: Regular cleaning and reseal every 2-4 years
- Chips: Didn’t put enough grout in or didn’t cure enough
- Uneven color: Grout powder didn’t mix it right
- Crumbles: Didn’t mix it right (too much water or didn’t mix enough)
How long do you need to wait before grouting the tile after installing it?
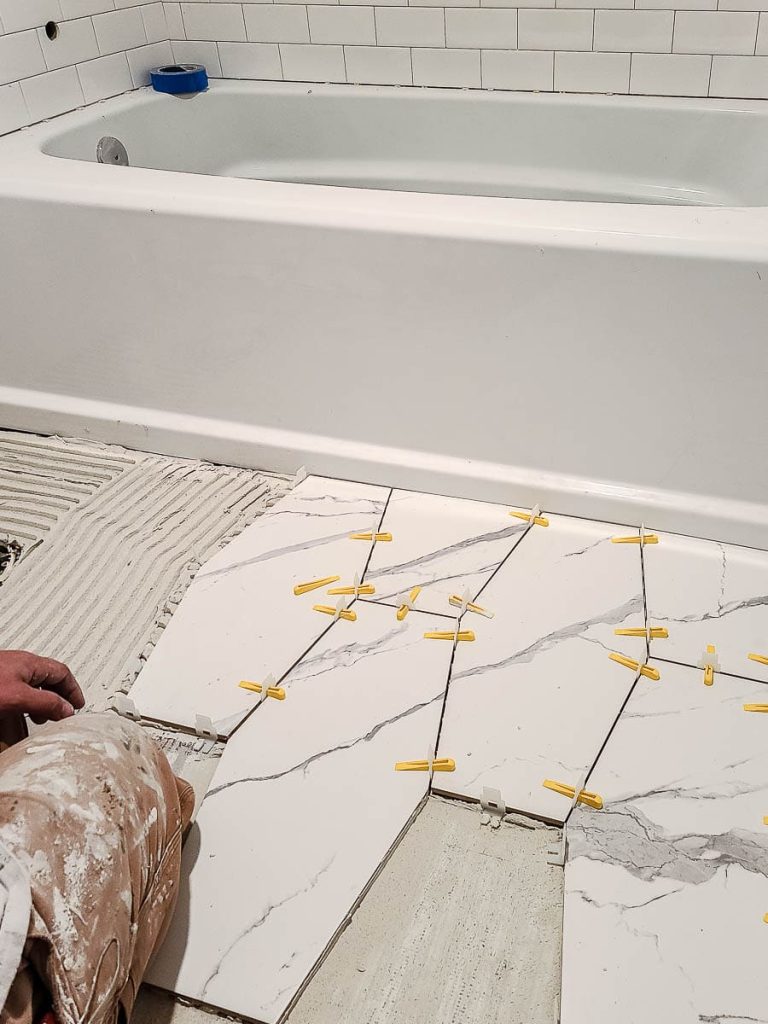
After installing the tile with mortar (or tile adhesive), close off the area and wait a full 24 hours before stepping on floor tiles or touching the wall tile to give it a chance to dry.
This isn’t just a “good idea”, this is necessary to make sure everything has time to dry before sealing up all of the gaps where the moisture will escape. If you grout too quickly, the moisture in the mortar doesn’t have anywhere to go.
How to grout tile: Step-by-Step
Supplies needed to grout tile
It is important that you use the right tools when it comes to grouting tile. Here’s what you’ll need:
- Two 5-gallon buckets
- Grout scraper (aka grout removal tool) or putty knife
- Grout – we were using this, but prefer the PolyBlend Plus line over Prism because it doesn’t set up as fast.
- Rubber grout float
- Two tile sponges
- Terry towels
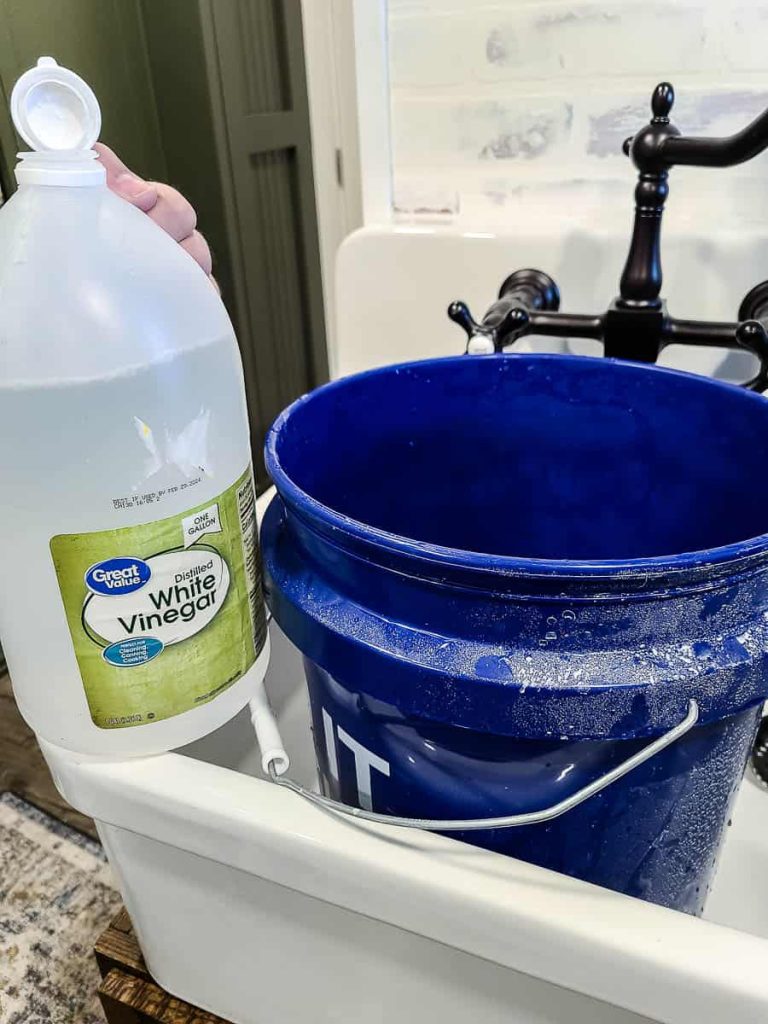
- Distilled white vinegar
- Grout sealer – we usually use 511 Impregnator Sealer with an applicator bottle, like this
Step 1. Plan and prepare
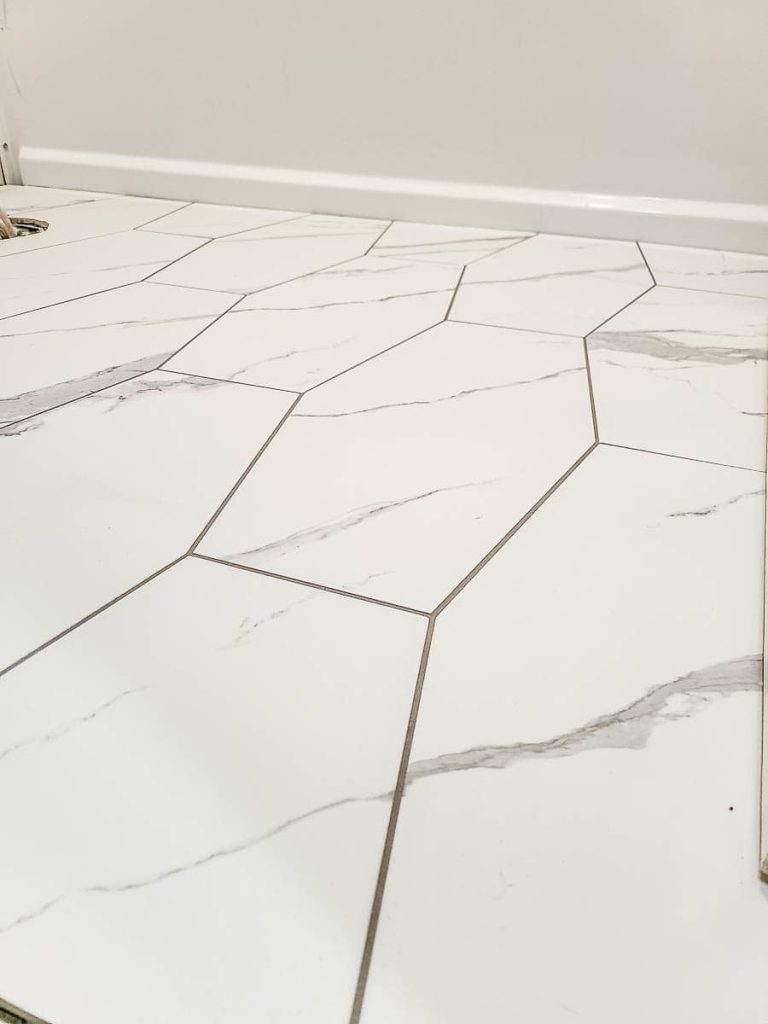
Before you even think about grout, you will have to choose a grout color. You can choose something to blend with your tile or contrast, which will help make the tiles stand out.
I usually go with something gray (almost always Platinum or Delorean Gray by Custom Building Products).
I avoid white because they stain easily and tend to show wear and tear quickly.
I also tend to avoid really dark grouts, like black, because it can be very tricky to get perfect grout lines and they are extremely noticeable if you have a high-contrast grout/tile combination.
Especially if you’re a beginner, I would recommend avoiding something high-contrast for your grout color so you can take some of the pressure off of yourself to get perfect grout lines.
If you just got done installing the tile, be sure to wait at least 24 hours before you grout to make sure it is dry.
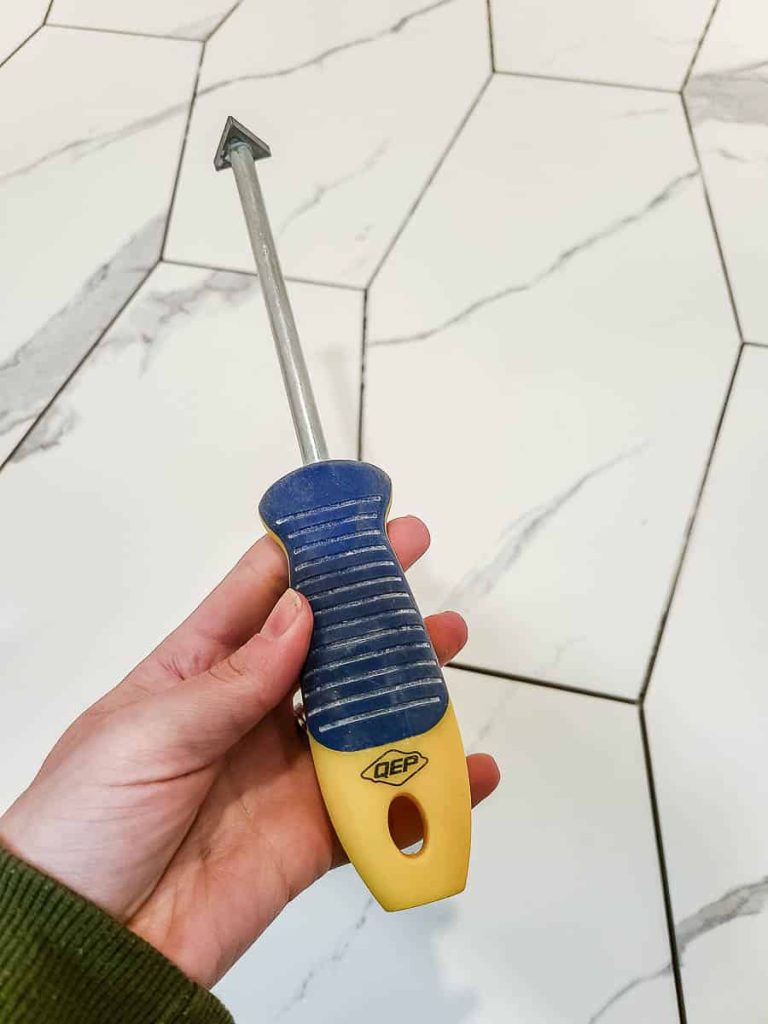
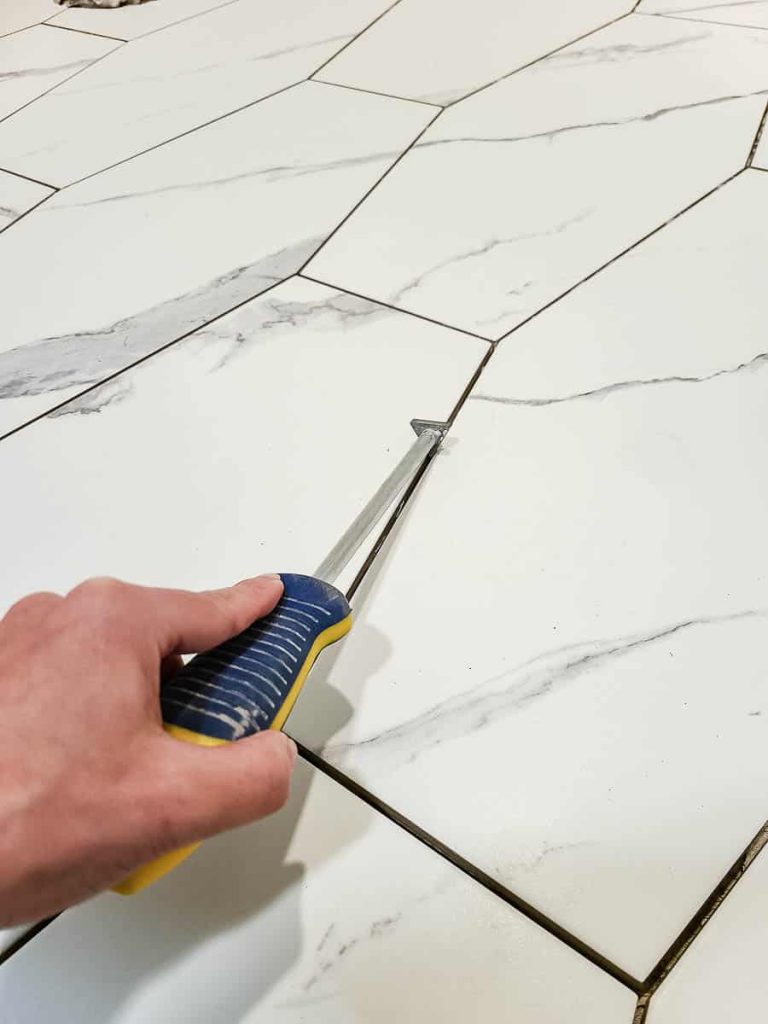
If there is any excess tile mortar that was squeezed up into the tile joints, you want to remove that before grouting the tile. The best way to do this is with a grout scraper which allows you to get into the gaps and scrape the excess mortar out.
Step 2. Get grout ready
If you are using a pre-mixed grout, simply open the tub and you can start grouting right away! But if you are using a traditional grout, you’ll need to mix the powder with water.
Based on the type of grout you are using, your instructions may vary slightly. So be sure to check and follow those!
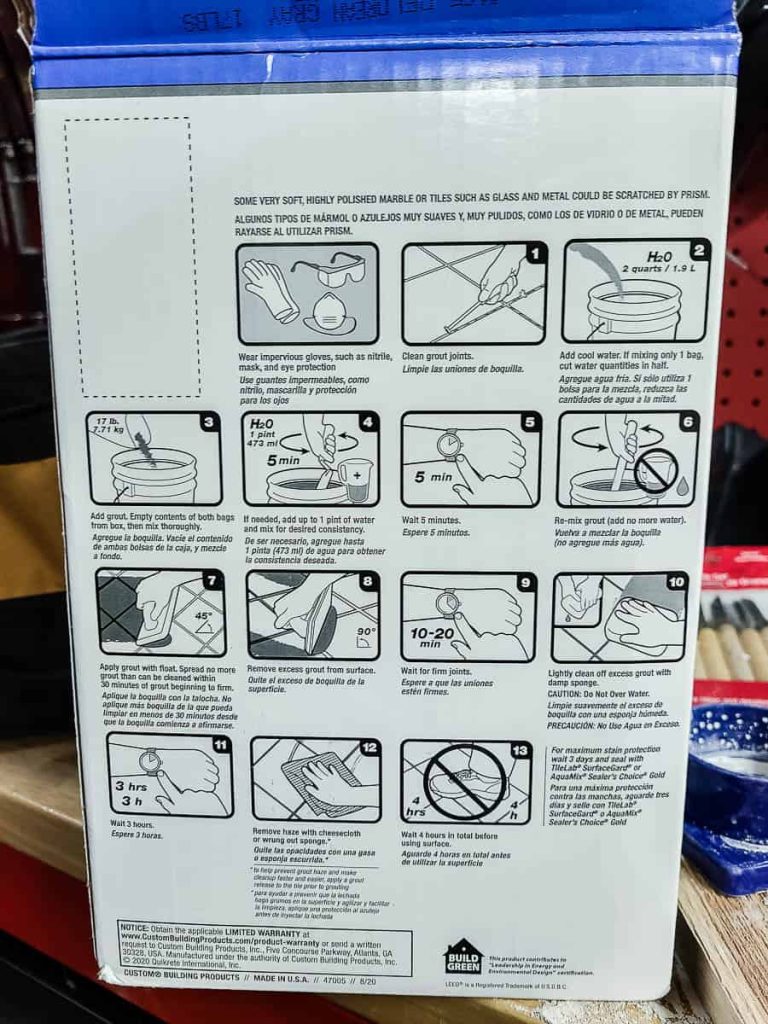
Pour the recommended amount of water into a 5-gallon bucket and add the bag of grout powder. Use cool water if possible.
Mix them together thoroughly for at least 5 minutes. The right consistency is about like peanut butter. Add up to 1 pint more water if needed to get the consistency right.
Let it sit for 5 minutes and then return and mix again, but don’t add more water.
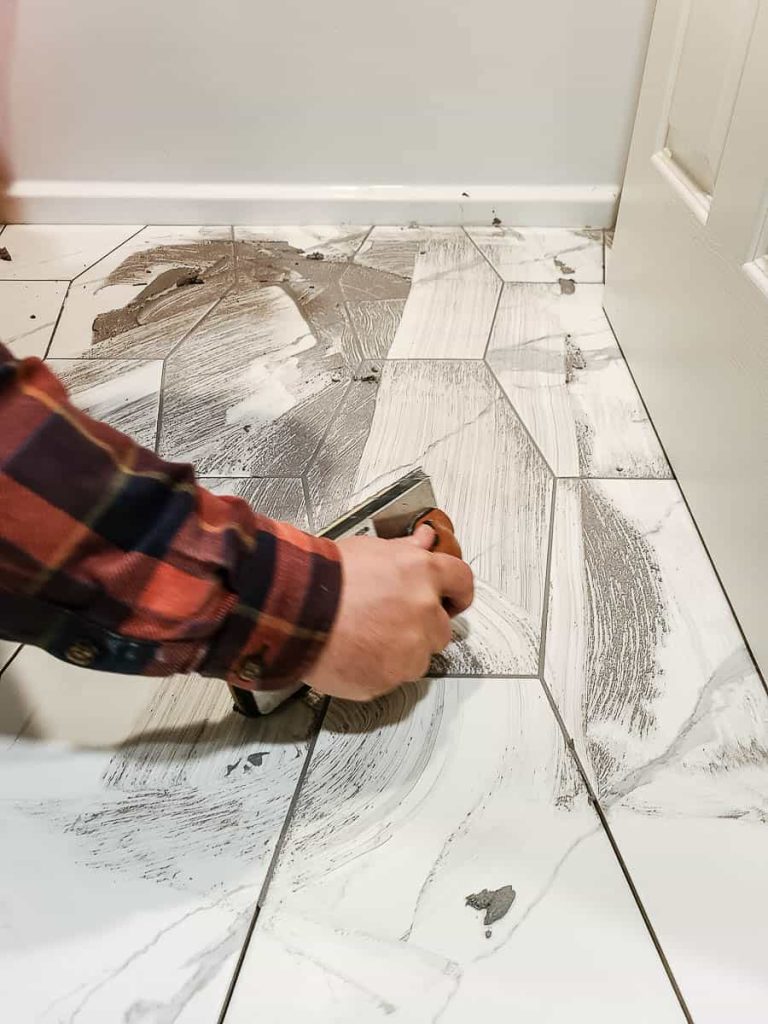
Step 3. Apply grout to lines between tiles
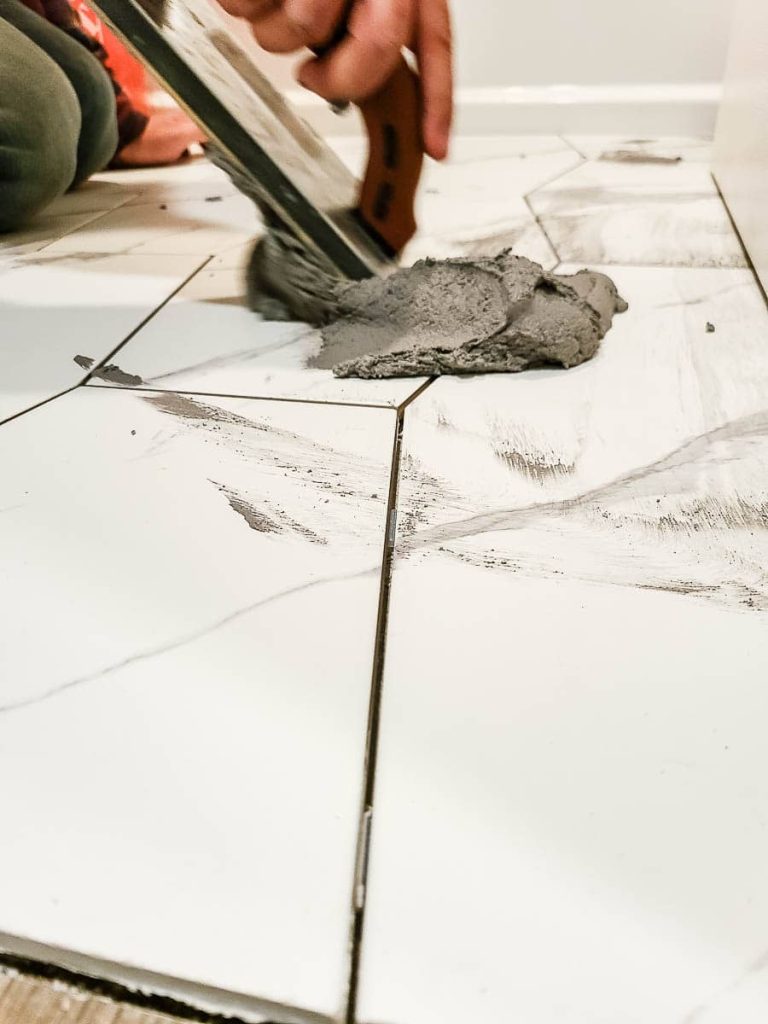
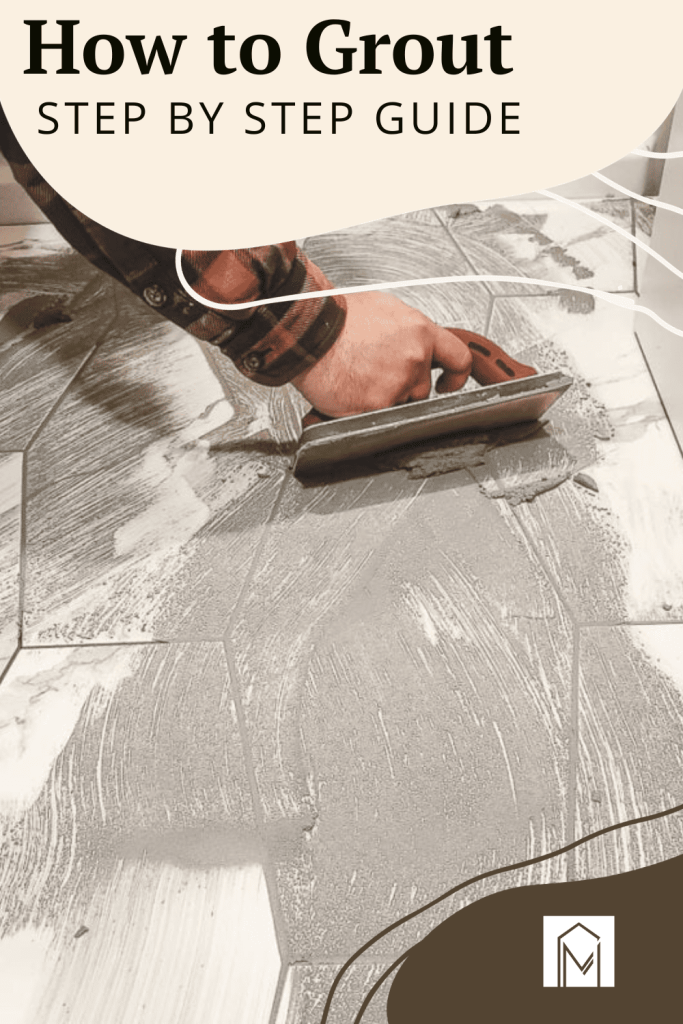
Now you can move on to adding the grout to the lines in between the tiles. Use a grout float to scoop the grout out of the bucket, much like you would scoop ice cream. Then glop it onto the tiles and start spreading it out with the rubber float.
When holding the grout float, angle your hand at a 45-degree angle from the tile surface and push down to get the grout into the tile gaps.
When adding the grout to vertical surfaces, like shower walls or kitchen backsplash, hold your grout float so it is angled upward and push the grout up to avoid dropping it all over the floor.
Be sure you’ve filled the entire joint with grout.
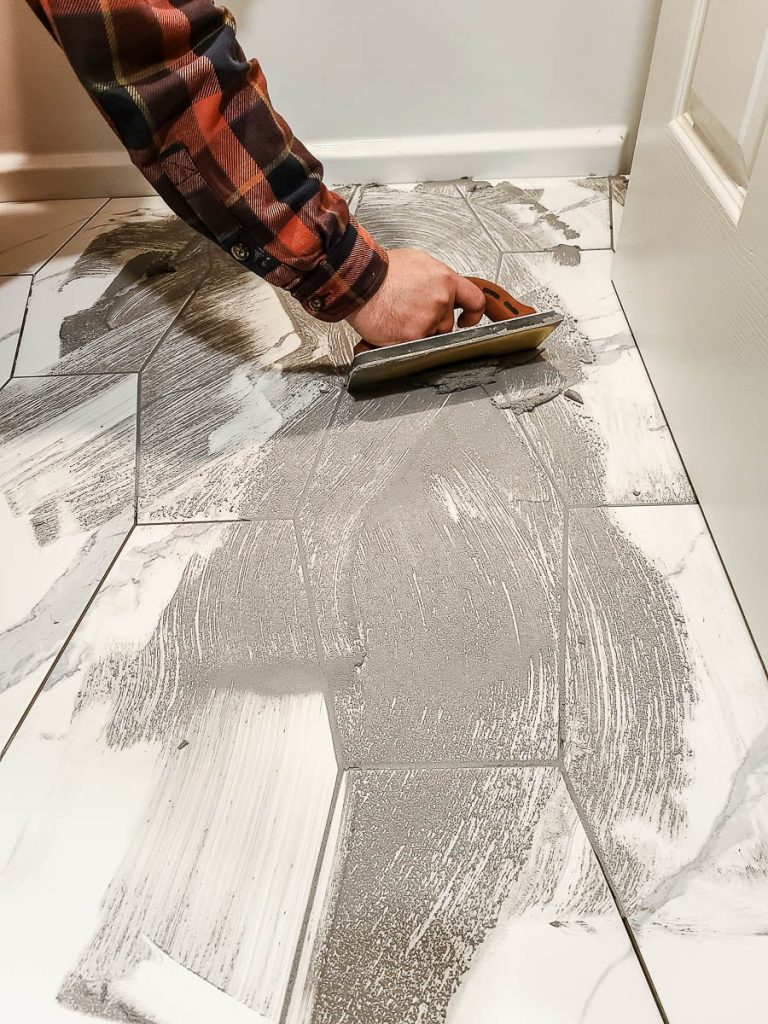
For best results, work in small sections, removing the excess as you go before it starts hardening. It is recommended to not spread any more grout than what can be cleaned within 30 minutes, which is when the grout will begin to firm up – which makes it pretty hard to remove. Especially if you’re a beginner, you need to work in a small area and clean as you go.
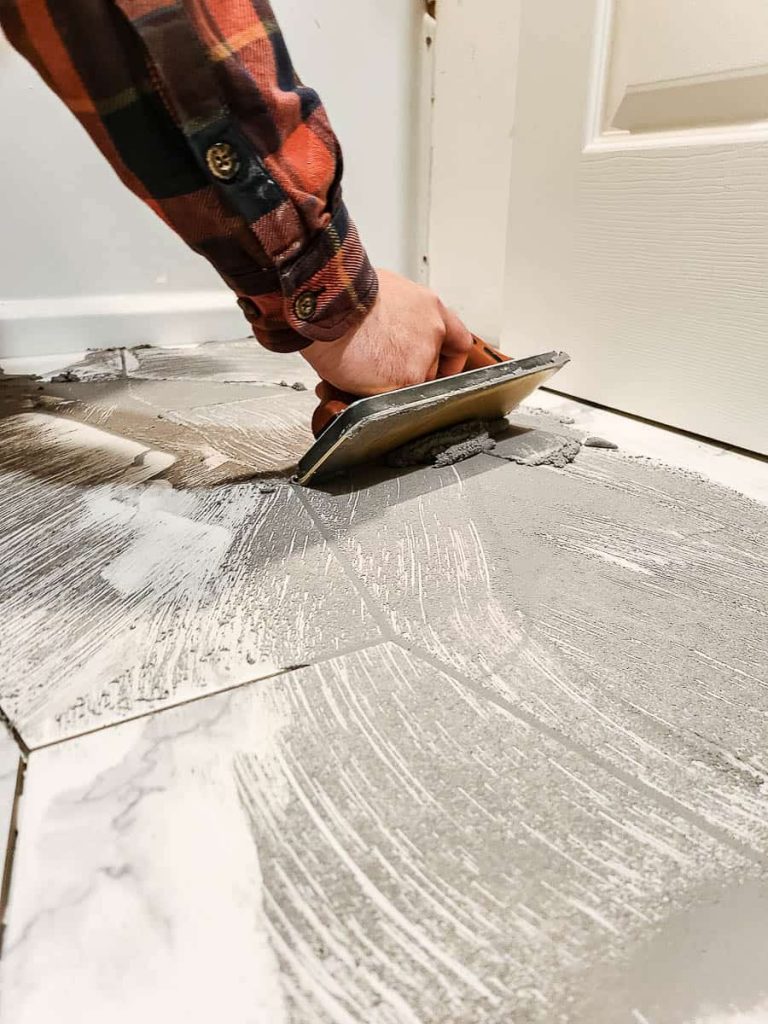
Once the joints are full of grout, wipe off the excess by holding your grout float at a 90-degree angle and moving in a large S motion.
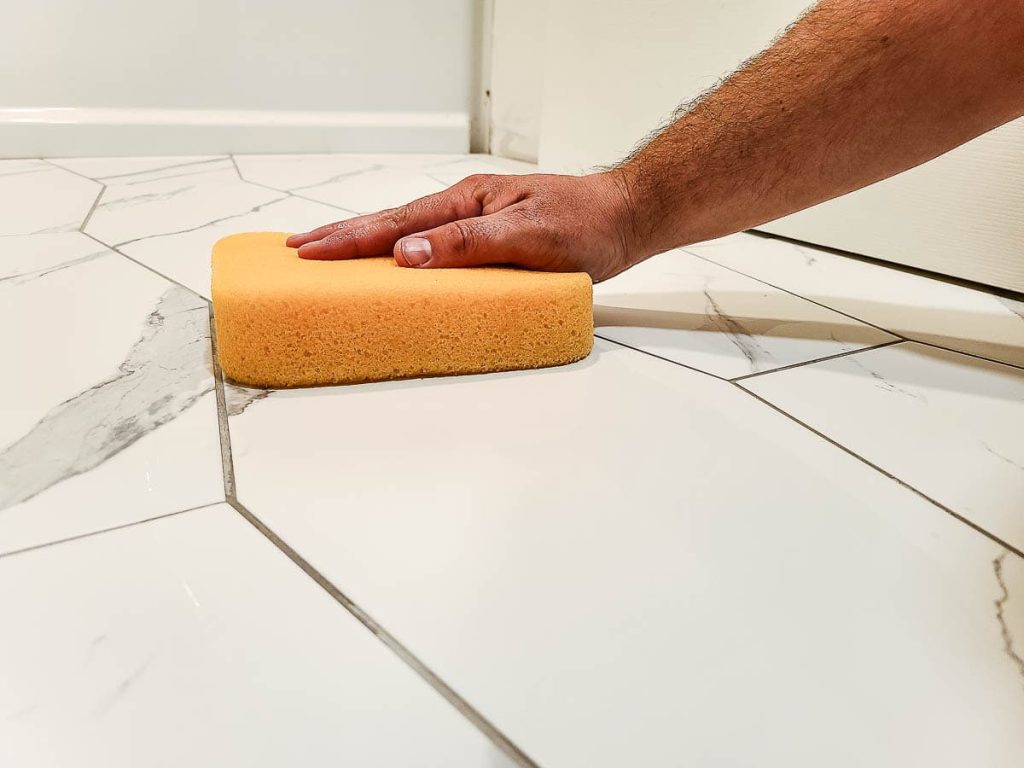
Step 4. Wipe excess grout off with a damp sponge
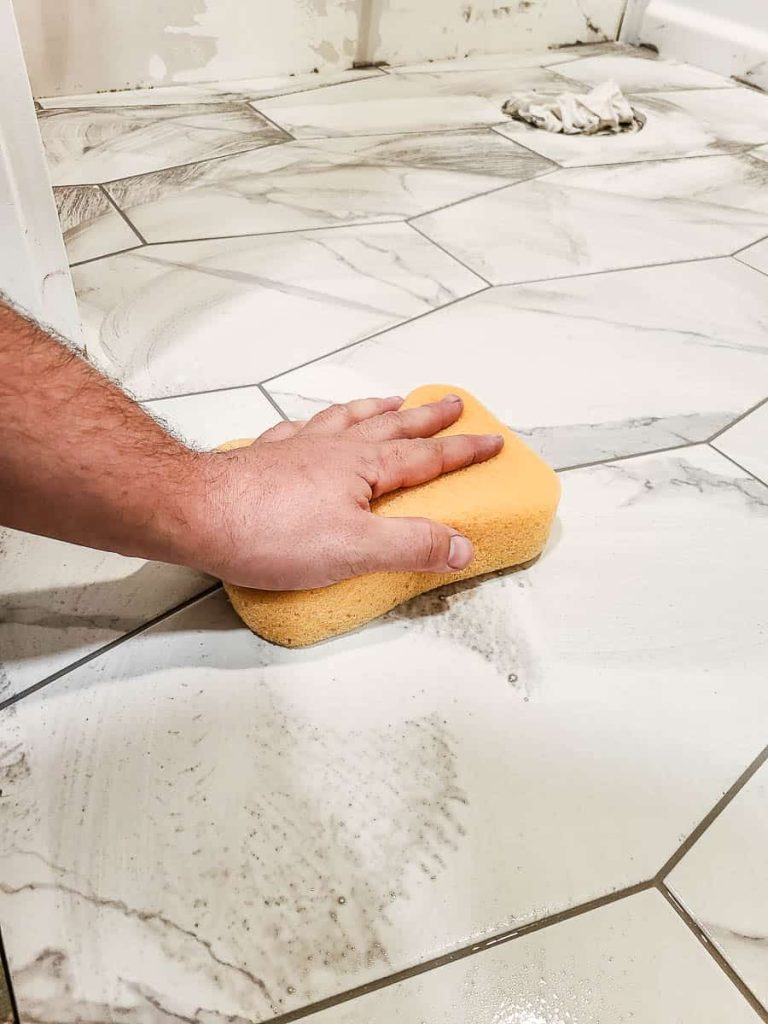
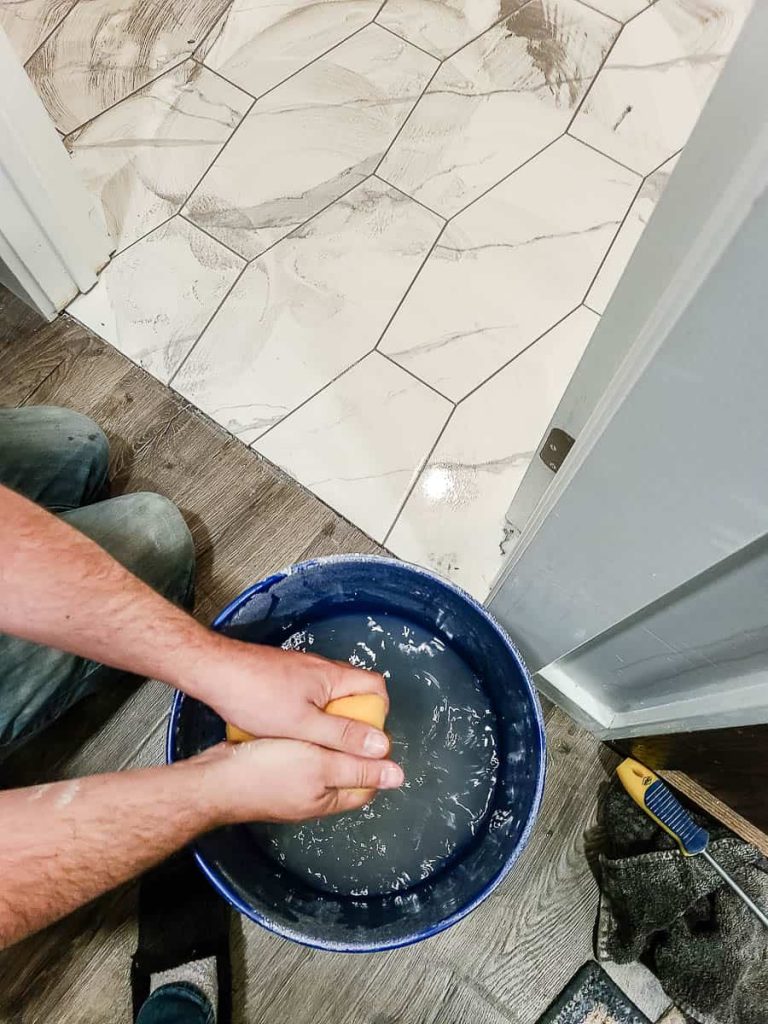
After 10-20 minutes (or the recommended time listed on your grout’s instructions), fill a 5-gallon bucket with clean water. Get a clean damp sponge for tile (don’t use a regular kitchen sponge) and fill it with warm water from the bucket.
Squeeze it out well so there is just a little water remaining in the sponge and wipe it gently on the surface of the tile, removing what remaining grout is on the tile surface.
Dip your sponge into the bucket of water to rinse it to keep it clean as you go. Continue until the tile surface is clean.
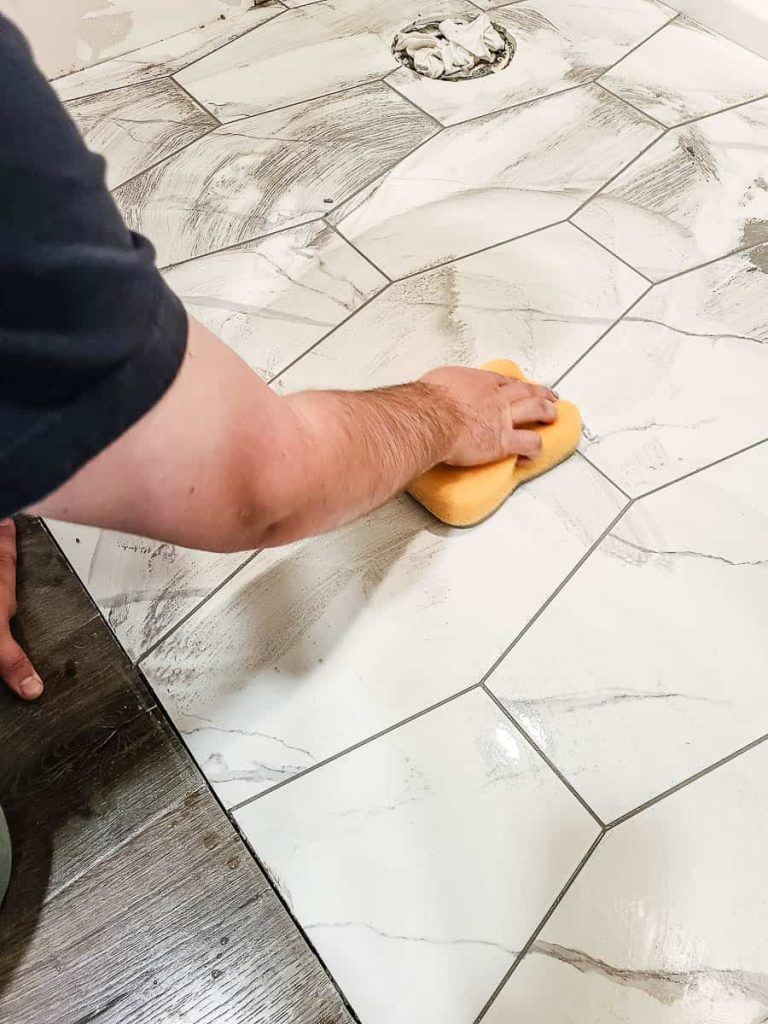
Pro Tip: Gently press your index finger down on the sponge and run it along each grout line with consistent pressure to get straight and professional-looking grout lines.
Keep in mind that there will be a little “haze” or residue left after this step, but we’ll tackle that next.
Tip: Don’t use the same sponge that you used for removing the grout in Step 4! Get a fresh and new one.
Step 5. Remove grout haze
After wiping the surface of the tiles with a wet sponge to remove the leftover grout, you’ll still notice a little leftover residue or film from the grout. This is called grout haze. Don’t worry, it is really easy to remove.
The grout we were using this time recommended waiting 3 hours before removing the grout haze. Other grouts may recommend waiting up to 24 hours, so check your instructions.
To mix together your own grout haze cleaning solution for ceramic and porcelain tiles, just mix together warm water with distilled white vinegar (4:1 water to vinegar ratio) in a bucket or a spray bottle and wipe the grout haze off with a clean cloth.
Keep in mind, however, that vinegar cannot be used on stone tiles, like marble. If you have marble or something else sensitive, you can try to wipe the haze off with a microfiber towel in a circular motion. Whatever isn’t removed with that method, can be taken off with a neutral cleaner, like this all-surface cleaner that is safe for marble tile.
Step 6. Seal grout
You may think that once it is cleaned up and dried, you’re done with your tile installation project. But don’t forget about the final step, which is to seal your grout. Sealing the grout is an important step and will help protect it from water and bacteria. Unless you are using Epoxy grout, which does not need to be sealed.
Before you seal the grout, it needs to be “cured” first. Check your manufacturer’s instructions for the exact recommendations, but most of them will be after 24-72 hours. Longer is better here, no need to rush this.
We usually wait about 7 days to make sure that all of the grout has completely dried. While waiting for it to cure, be sure to keep it very clean and dry so it doesn’t get stained while unsealed.
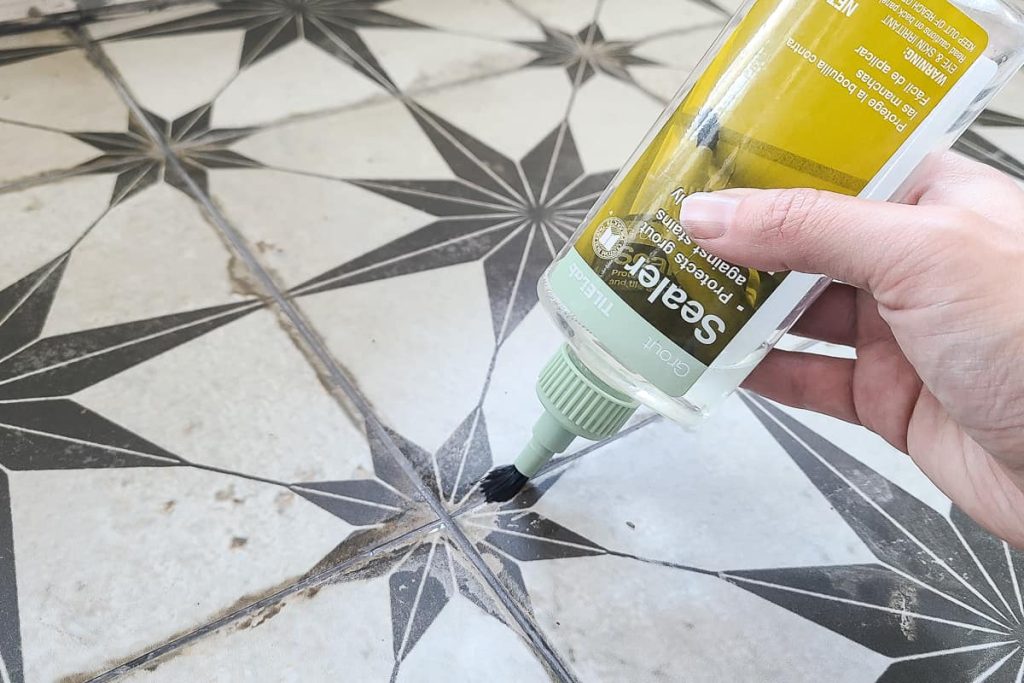
To seal the grout, we usually use 511 Impregnator Sealer with an applicator bottle, like this. The bottle comes with a grout sealer in it but doesn’t have much there. When it runs out, we fill that bottle with 511.
Using the applicator bottle, brush a thin layer of sealant directly onto the grout lines and leave it in place for 3-5 minutes to soak in. Start with a single thin layer on all areas of the grout, then you can apply additional coats if needed.
After a few minutes of drying, wipe away the excess sealant with a clean, dry cloth. Cotton paint rags work well for this. If you are applying more than one coat, wait 30 minutes between each coat. Everything should be dry within 2-3 hours.
Have more questions about the grout sealing process? Check out our full guide here!
There you have it: how to grout tiles for beginners! We hope this step-by-step guide has given you the confidence you need to grout tiles for the first time.
Remember that practice makes perfect when it comes to DIY. And things definitely won’t be perfect at first. Give yourself grace, time, and patience and you’ll be grouting tiles like a pro in no time!
Related – Want to see more articles about tile?
- 5 Different Types of Tile Explained
- How To Tile A Bathroom Floor
- How To Paint Tile Floor (With Stenciling)
- DIY Hamper With Tile Inlay
- Everything You Need To Know About Large Format Tile
- Removing Tile Floor Tips and Tricks
- What To Do With Leftover Tiles | DIY Tray With Leftover Cement Tile
- Why You Shouldn’t Buy A Cheap Tile Saw
- How To Install Subway Tile Backsplash
- Tile Removal: Kitchen Backsplash
- How To Make Marble Coasters With Leftover Tiles
- Shower Tile Installation Tips & Tricks
- 9 Modern Farmhouse Tile Ideas & Inspiration
- Shower Niche Installation Tips (& Why You Need A Prefab Shower Niche)
- Lash Tile Leveling System: Overview and Review
- How To Remove Grout Haze From Tile (The Easy Way)
- How To Grout Tile: Guide for Beginners
- How To Seal Grout: A Beginner’s Guide
- How To Cut Cement Backer Board
- How To Install Durock and HardieBacker Cement Boards: For Beginners
- HardieBacker vs Durock Comparison: What’s The Difference