Modern Bathroom Design Plans
Week 2 of our bathroom renovation is done! Today we are sharing the bathroom mood board and giving you all the details about our modern bathroom design (including renderings!)
If you’re hopping over here from the Jeffrey Court website (or if you’re new here) – welcome! Making Manzanita is all about making your house a home you love. My hubby and I (with our two small kiddos in tow) are renovating our 2nd fixer upper. We love teaching our readers everything we learn along the way. Our style is modern farmhouse with some major boho vibes, which you’ll see reflected in this bathroom renovation. Enjoy!
This post and the Renovation Challenge is sponsored by Jeffrey Court. All opinions are entirely my own and do not reflect that of Jeffrey Court. This post also contains affiliate links, but nothing that I wouldn’t recommend wholeheartedly. Read my full disclosure here.
Well, here we are again. Week 2 of the Jeffrey Court Renovation Challenge and we can’t wait to show you our progress.
First of all, if you missed last week’s post and video – you’ll want to start there! You’ll see how Demo Day ended with a trip to Urgent Care, ALLLLL the before pictures, and how we went from a bathroom to an empty room with the floor or walls. A lot happened last week, so be sure to catch up before moving on.
Want to catch up and see more about our master bathroom renovation?
- Week 1: How to Demo A Bathroom
- Week 2: Modern Bathroom Design Plans
- Week 3: Everything You Need To Know About Large Format Tile
- Week 4: Can An Ensuite Bathroom Add Value To Your Home?
- Week 5: How To Build A Barn Door
- Week 6: The BIG Reveal
- DIY Hamper with Tile
- Bathroom Renovation Cost (Our REAL Numbers!)
- DIY Shower Guide: Everything You Need To Know
Ok now….y’all caught up?
Today we’re going to be talking about the FUN stuff….the design!! And oh my goodness, I’m so excited to show you what we have planned, but before we do…let’s watch our little update video so you can see our progress behind the scenes this week.
If you love DIY videos, be sure to subscribe to our YouTube channel so you don’t miss the next one!
Ya see? Things are moving right along! More on this week’s progress later….but let’s switch gears here and talk about the modern bathroom design.
UPDATE: We’re all done with the bathroom now, check out how it turned out here!
Ready to hear about our modern bathroom design plans?
Now this bathroom wasn’t the worst thing that’s ever happened or anything. To be honest, it’s essentially brand new, which kind of made me feel a tad bit building ripping it to shreds last week. The flippers that we bought this house from only a year and a half ago put it in as apart of their flip. But it is boring….builder grade….cheap stuff with no character. It’s definitely not the master suite oasis of our dreams.
And there are a few reasons why we are renovating in this bathroom and giving it a modern bathroom design.
Why are you renovating this bathroom?
- We are converting the bathroom to an en suite — Since we added this bathroom to our house last year, the kids have their own bathroom now and we don’t have to share one as a family anymore. Woohoo! We’re closing up the doorway to the hall and opening the bathroom to the master bedroom.
- We found a leak a few months ago — If you saw last week’s post, you’ll remember that we found a water leak behind our bathroom which meant we had to pull the whole thing out and fix the water damage before it got any worse. So renovating this bathroom definitely moved up on our priority list.
- We are participating in Jeffrey Court’s Renovation Challenge — If you missed the memo, we are FLOORED to have been invited to participate in this season’s renovation challenge with Jeffrey Court. You can learn more about the challenge and what to expect for the remaining 4 weeks here….but, the short story is that YOU get to start voting next week for the winner! And we will seriously love you forever if you help us win.
What is changing with the layout?
When I say we are renovating this bathroom, I’m not exaggerating. We’re not just replacing the tile and the finishes. We are COMPLETELY reconfiguring the entire bathroom, making it more efficient and most importantly, opening up the bathroom to the master bedroom.
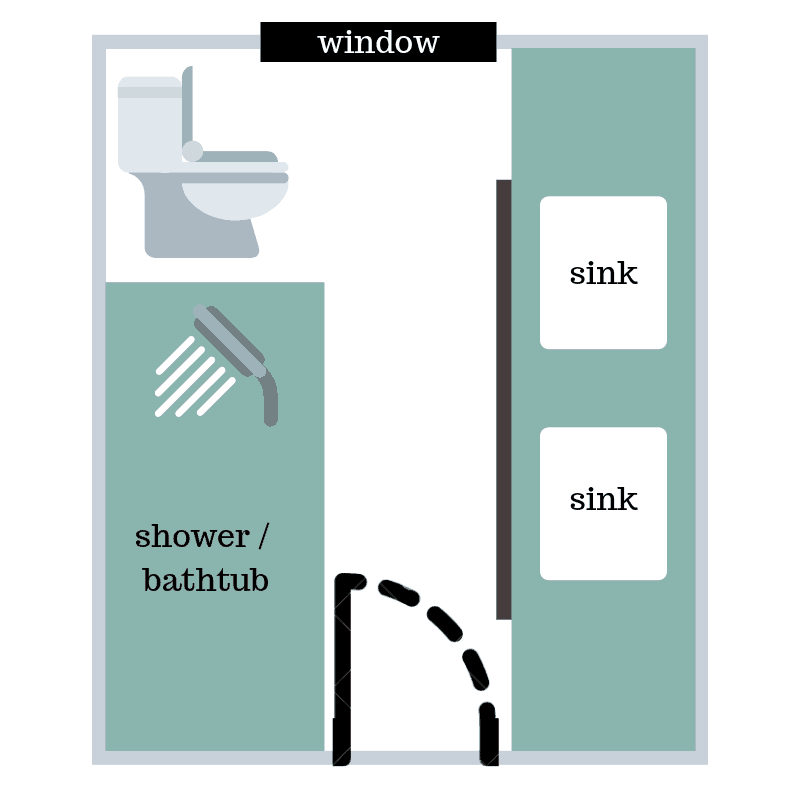
So, let’s start with the basics so you can really get an idea of what is changing in here.
Here’s the floor plan that we are starting with…..
And here’s what we are doing with our modern bathroom design…
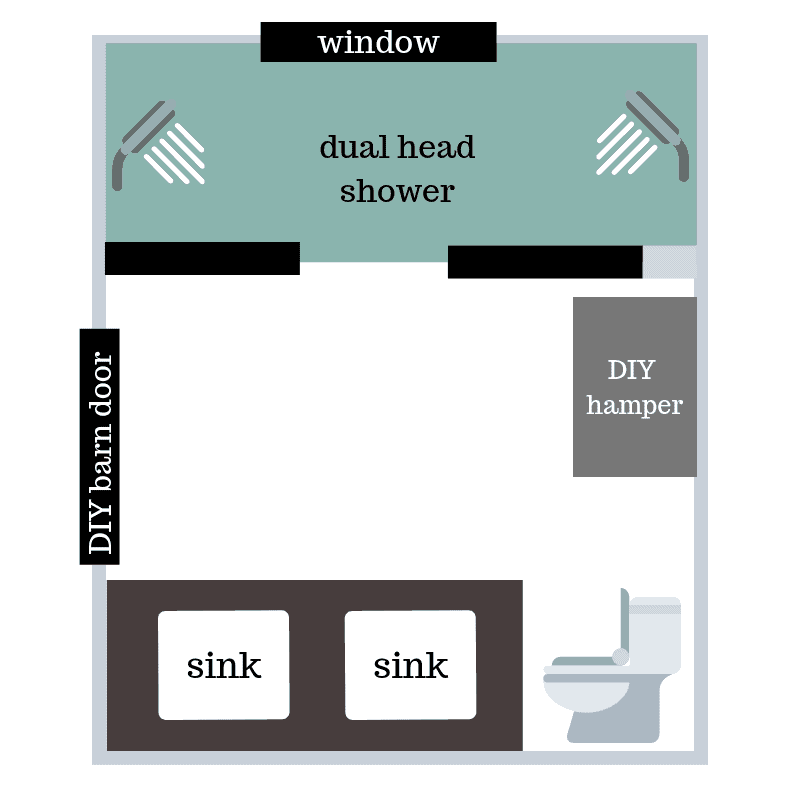

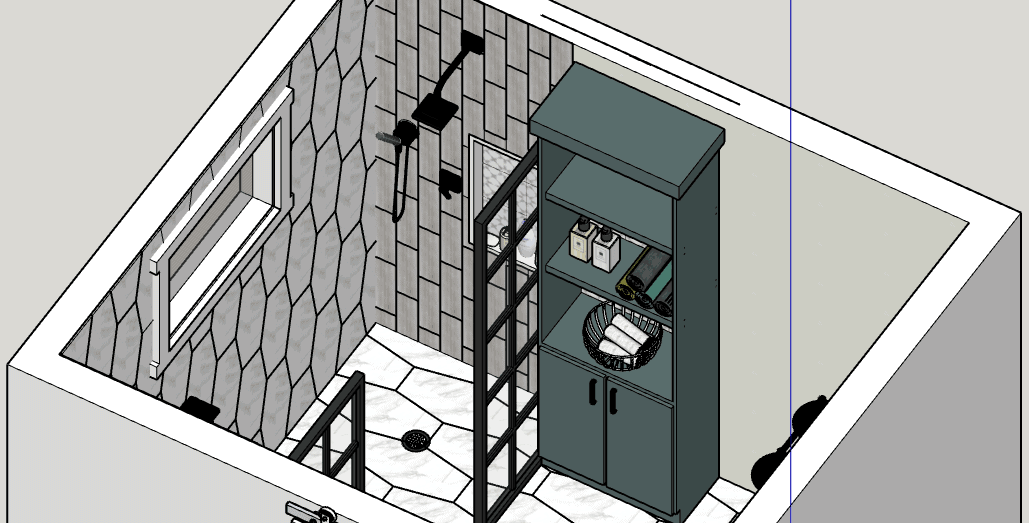
Every single freakin’ thing is changing.
Which is a little overwhelming, considering that we are trying to do this ALL in under 6 weeks and ALL BY OURSELVES. The only thing that we are hiring out in this entire renovation is the vanity countertop because….who in the heck knows how to cut countertops? Not us.
Ok….let’s change the subject before I go in full on panic attack just thinking about all that there is to do.
Now you’ve seen the layout, ready to see the bathroom mood board?
I love making mood boards for our renovation projects. It really helps see everything come together so you can get a feel for how the space will look.
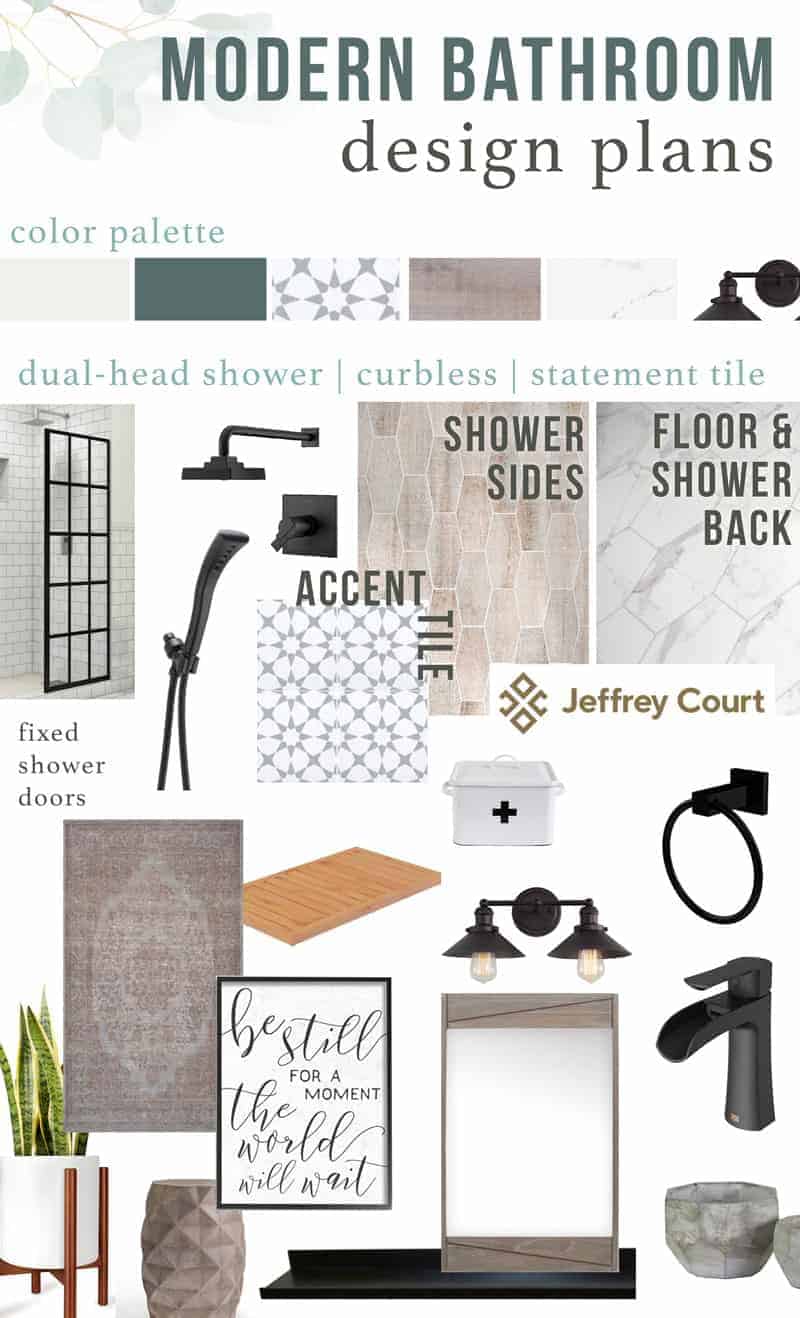
Modern Bathroom Design Mood Board Sources:
Want to Make Your Own Home Renovation Mood Board?
A mood board is a visual guide for your room makeover. It is sort of like a one-stop shop for all of the decor, furniture, and colors you’re bringing into the room.
A mood board is an easy-to-follow design plan so you can see how everything in the room fits together in one place to make sure everything looks cohesive before you make big purchases.
You don’t need to hire an interior designer to make your own mood board! In this article, I teach my entire easy process for creating an interior mood board for free using Pinterest and Canva!
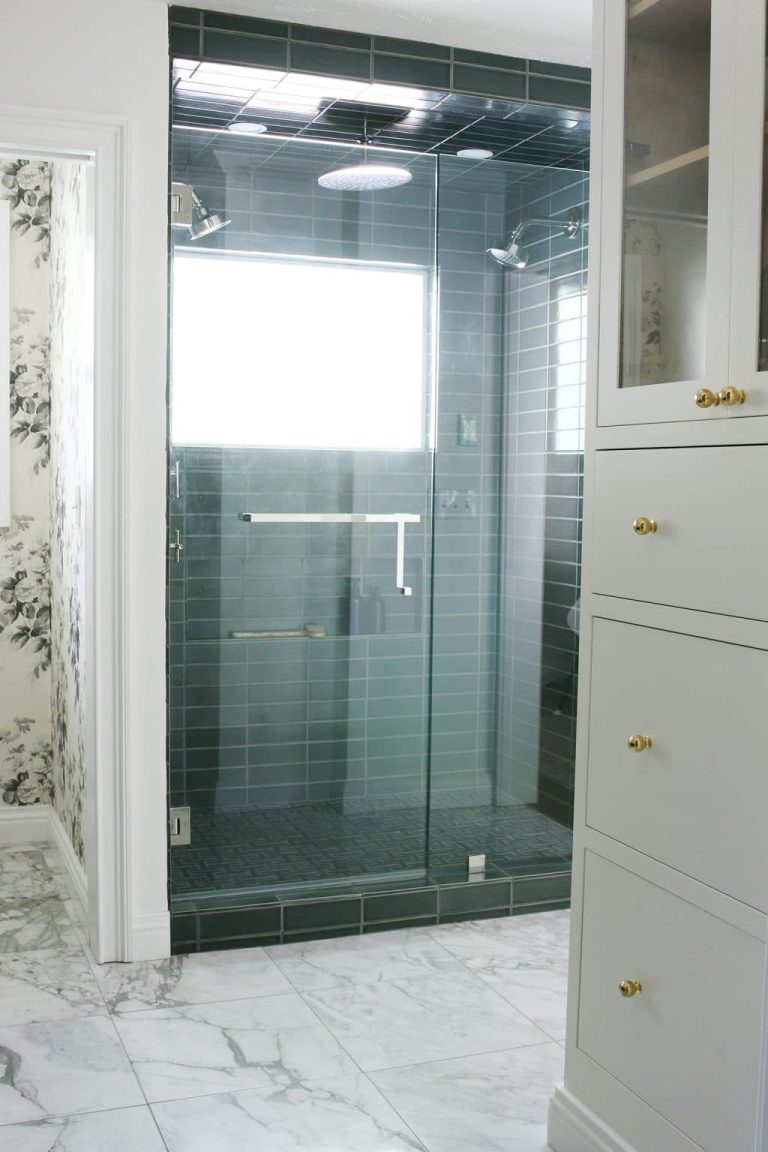
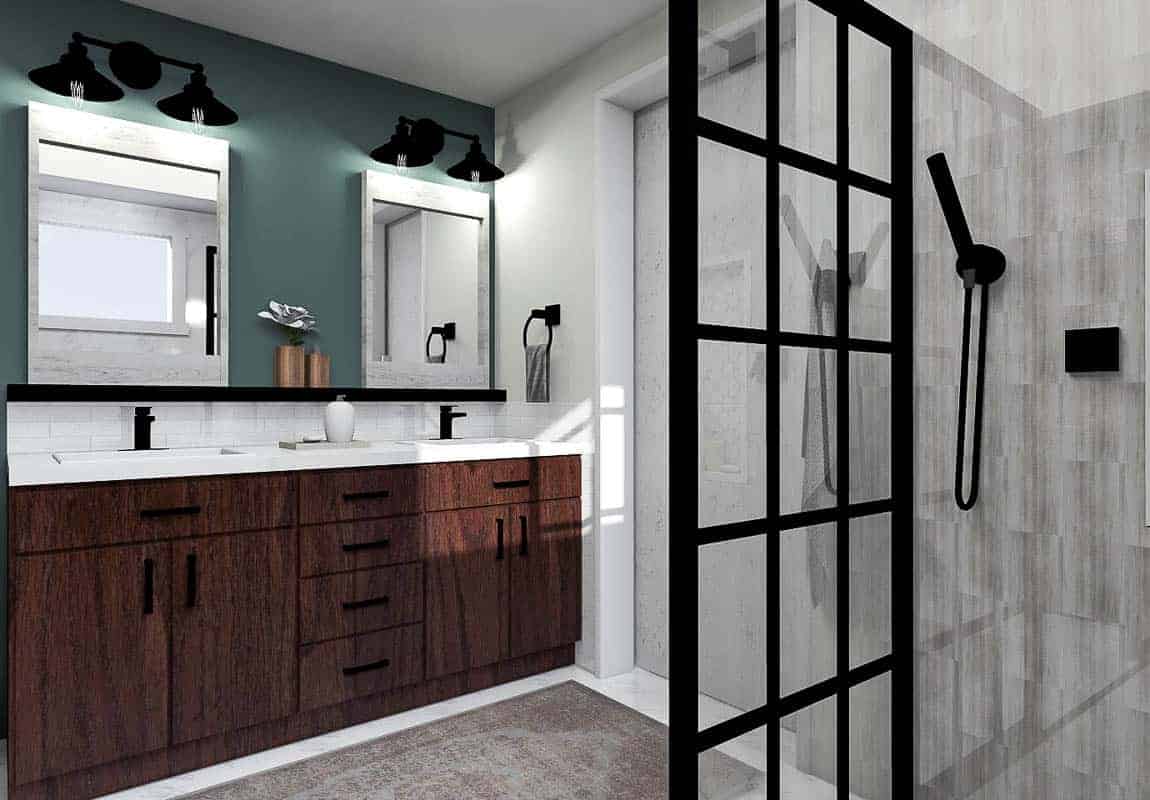
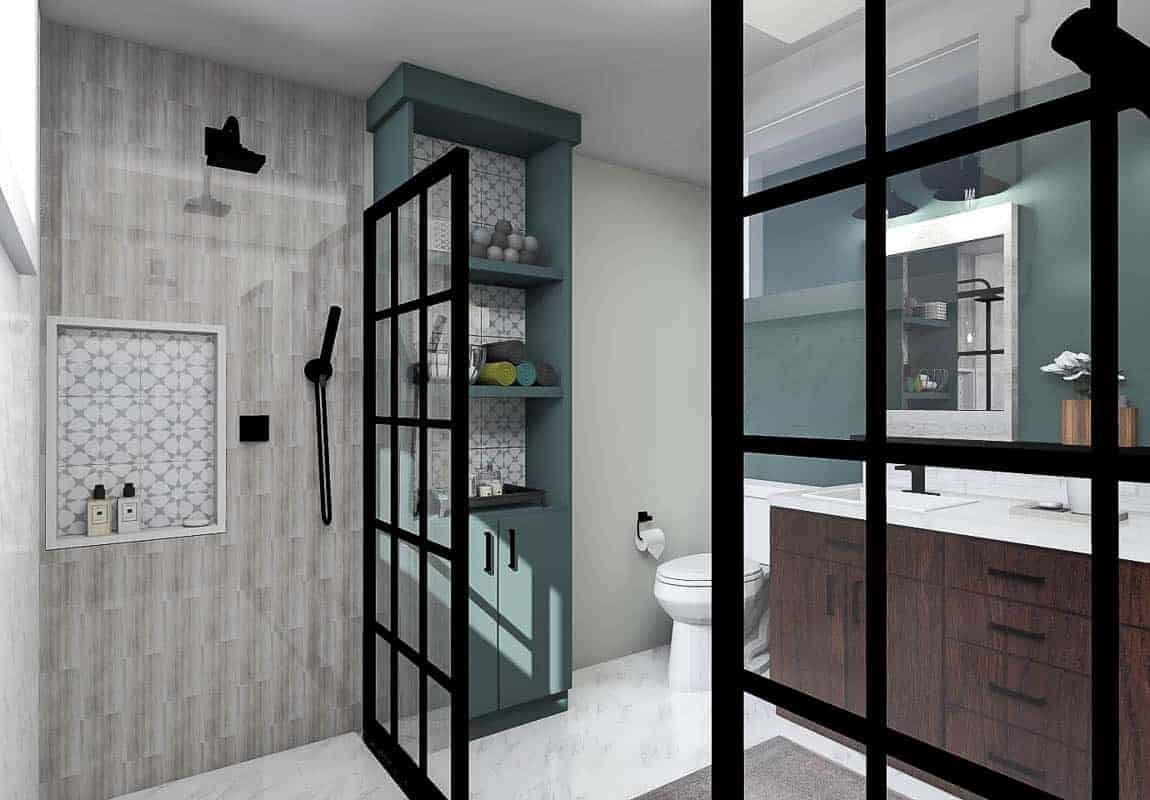
And for the grand finale….we have renderings!!
I knew with all of the reconfiguring and crazy ideas we had, it would be hard to describe things to you guys….so we made renderings. This is the first time we’ve ever had them made and, oh my goodness, I’m obsessed.
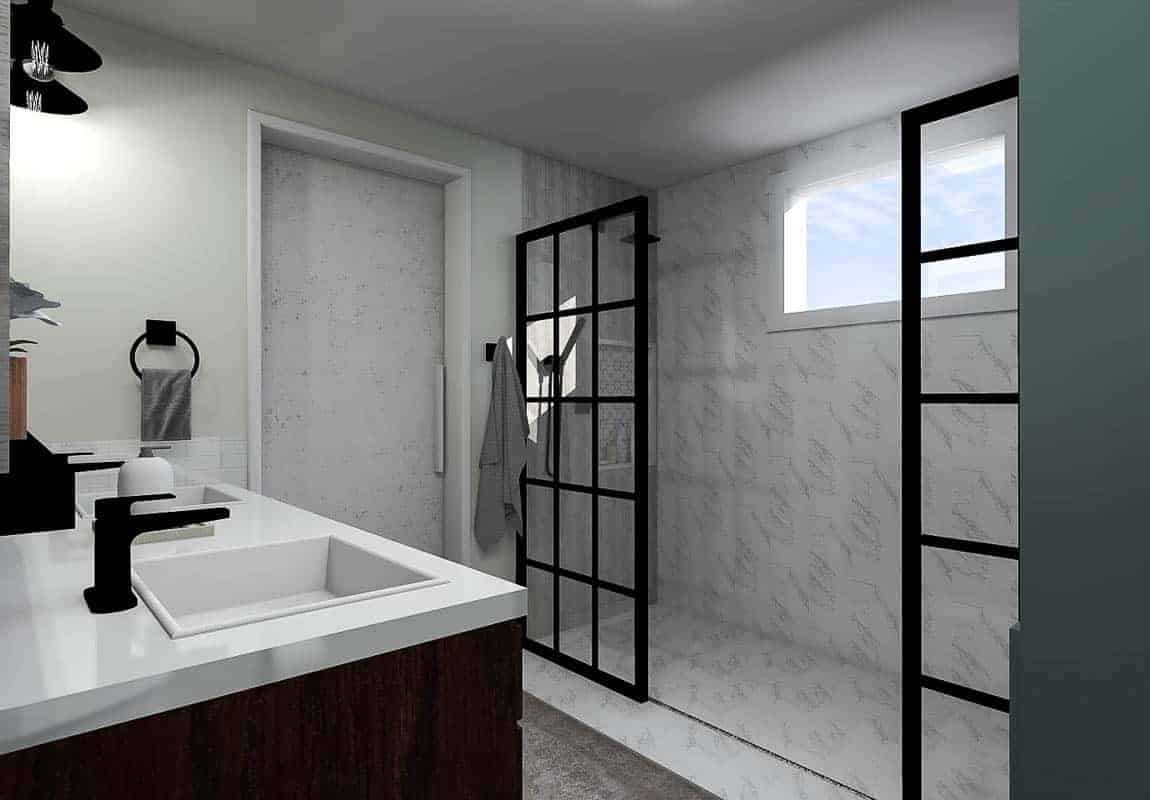
It really helps me visualize to see it all laid out like this! And I think, most importantly, I’m able to SHOW you guys what is going on in my head rather than just telling you… what do you think? Are the renderings worth it? Are you as excited about this modern bathroom design as I am?!
But….of course, as with any renovations…things are in an ever constant state of change. The day that the renderings were finalized, Logan and I changed things again. Just small changes here and there as we double checked measurements and rethought certain aspects.
Here’s what is changing from the renderings:
- Wider shower door panels – to prevent splashing on our curbless shower, we decided to go with a wider shower door panel (30 inch vs 24 inch)…..As a result, the small pony wall on the far side of the room in the corner of the shower changed from 12 inches to 10 inches in order to keep the window in the center (side note: I’m a big freak for symmetry)…which brings me to our next change…
- No more linen cabinet – We had originally designed a linen cabinet that was going to be 12 inches deep (the same size as that pony wall, which makes the window center). With the wider shower door panels and the smaller pony wall, we just thought that 10 inches was too small for a cabinet depth. So we are switching gears to a wooden laundry hamper (on wheels possibly?) that will have the accent tile inlayed on the front. The depth of the hamper will more flexible since it won’t be “built in”. Above the hamper, we’re going to install floating shelves.
- Shower niches moving to back wall – We’re moving the shower niches to the back wall. This is actually a change that was prompted by seeing the renderings where everything is drawn to scale (I seriously wish my design brain could dream to scale). We realized that the shower niches were going to the throw the faucet off to the side and it wouldn’t be centered under the shower head (remember….symmetry freak over here). I just couldn’t handle it. So, we are moving the shower niches to the back wall….which means we need to chisel out holes in the cinder block exterior wall….NBD, just add it to the to-do list. #pleasetellmeitsworthit
So, what do you guys think of our modern bathroom design? I’m SO excited to see this come to life and to take you guys along for the ride, as always.
UPDATE: We’re all done with the bathroom now, check out how it turned out here!
Want to see what kind of progress we made in Week 2?
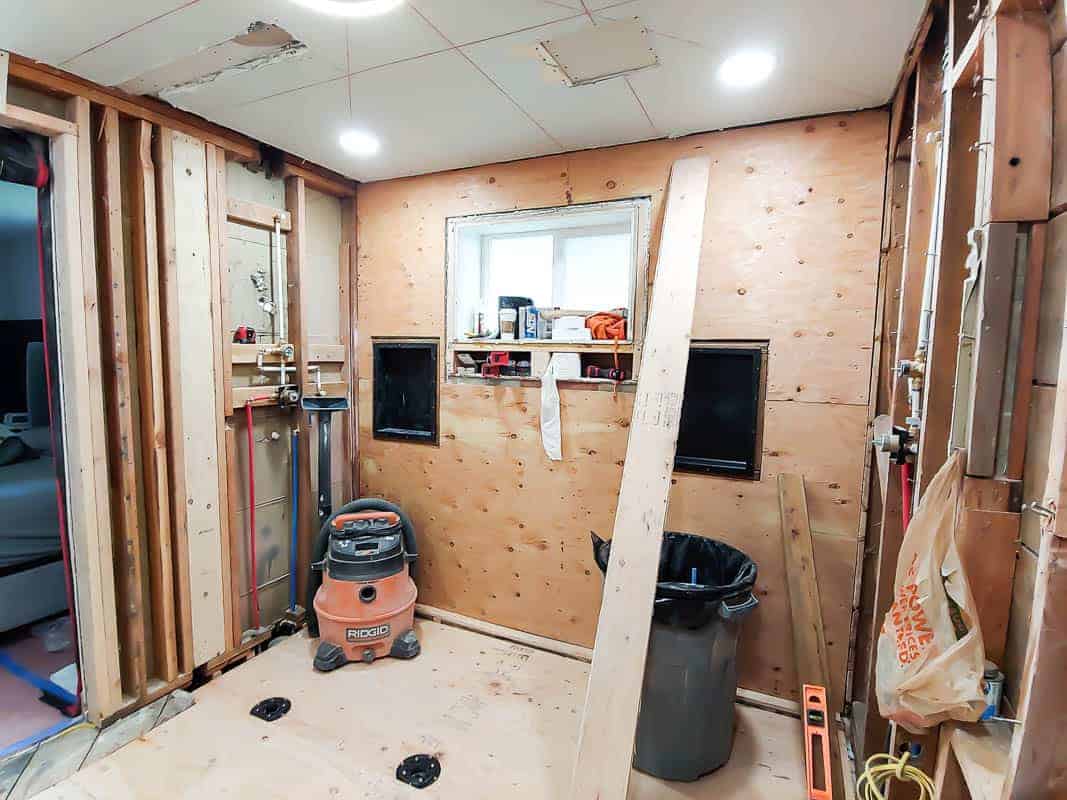
Ok, so this is how we started at the beginning of Week 2.
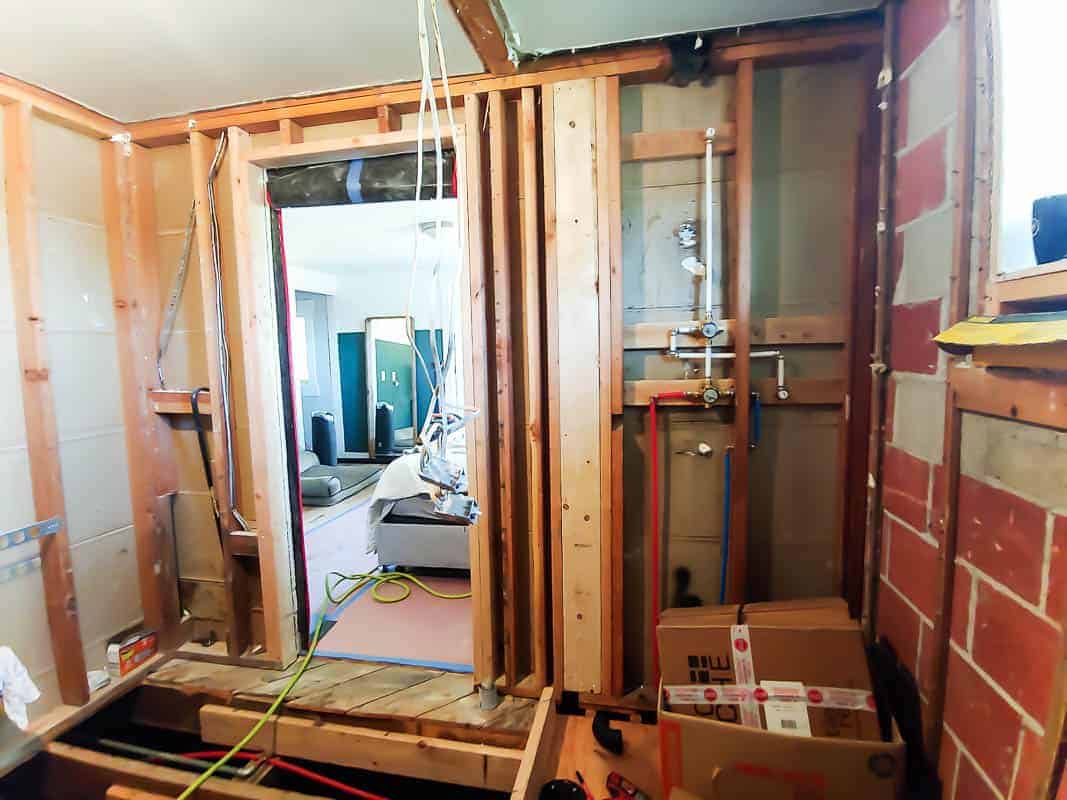
As you heard in the video, we were hoping to get all of the electrical done, put in the new subfloor, add insulation and sheetrock annnnndd start the shower pan.
We got a lot done, but we didn’t get ALL of that done. I’d say it was pretty ambitious anyway. We had to order a new size drain for the shower, so we couldn’t start on the shower pan because it is still in route. But fingers crossed, it will be here later today!
Here’s what we DID get done:
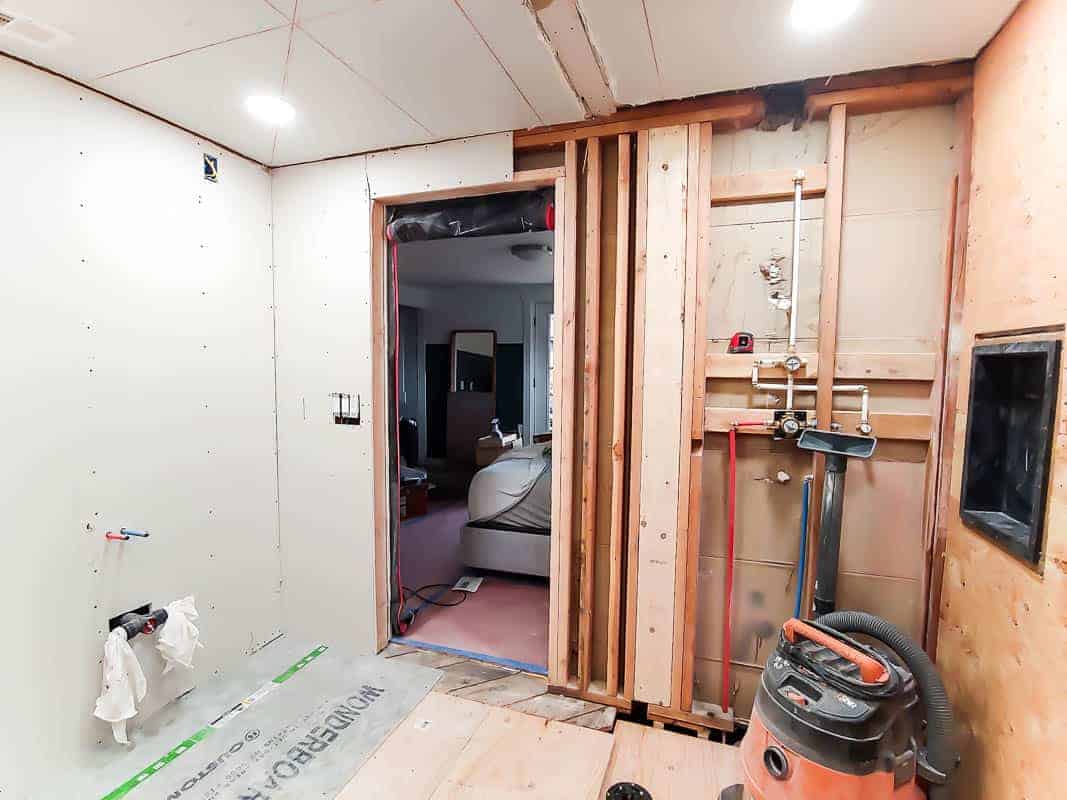
- New subfloor added – Woohoo…we don’t have to step over floor joists anymore!
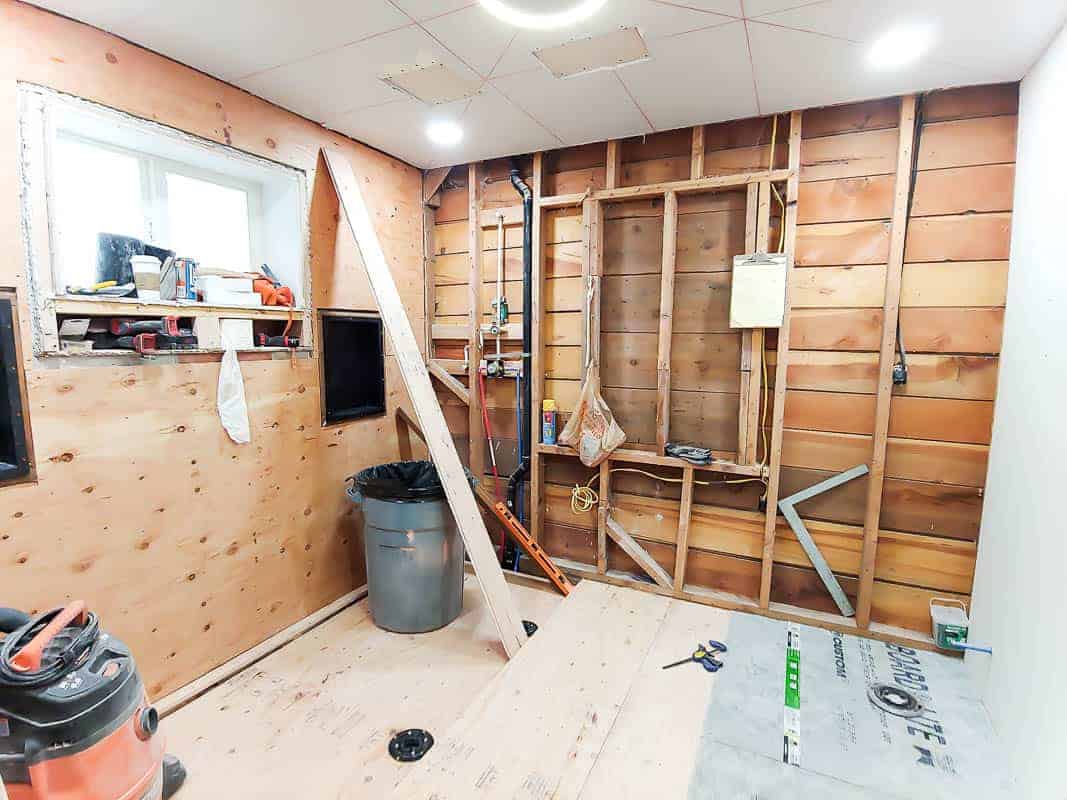
- Electrical done – We added 4 recessed lights, 1 bathroom exhaust fan (which has a bluetooth speaker and light), wiring ready for 2 vanity lights to be installed later and, of course, outlets. It was a lot of work and time spent up in the attic for Logan – but hopefully no more attic time the rest of this renovation.
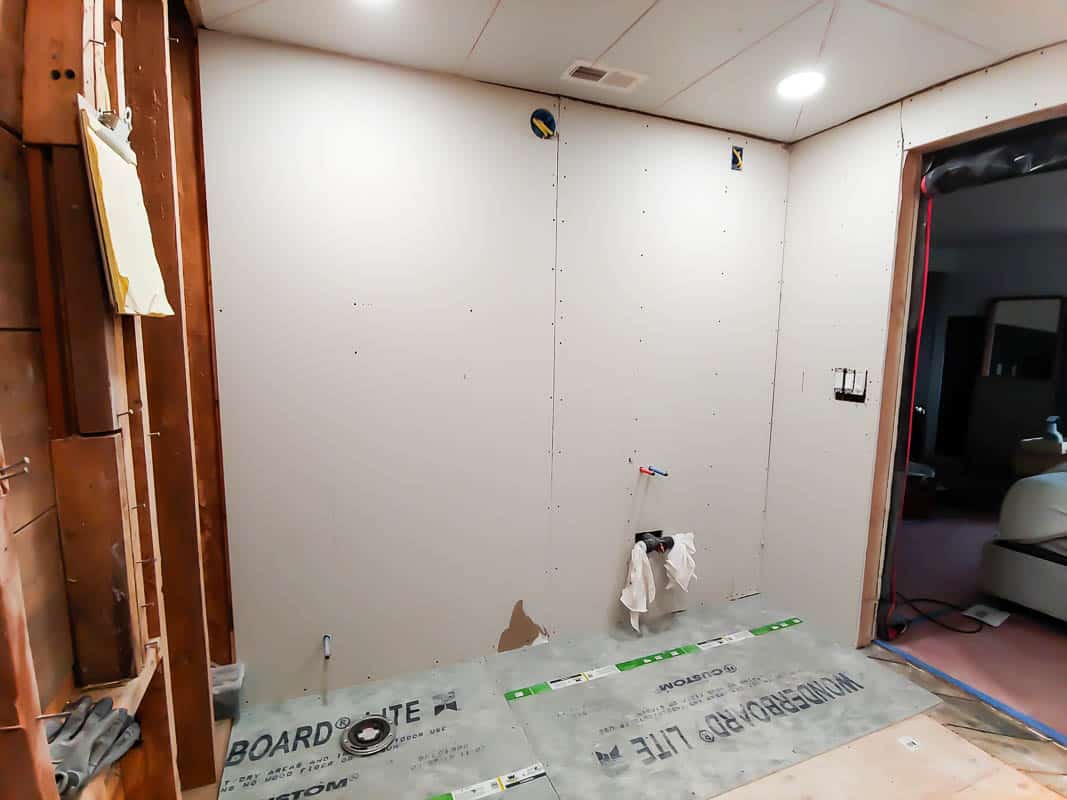
- Sheetrock up on one wall – We needed to have the vanity wall sheetrock up so the countertop company could come measure. We still need to finish the sheetrock on the other wall.
- Shower niche liners – One of the adjustments we made last week was deciding to move the shower niches to the back wall (rather than the sides of the shower so that the shower handles could stay centered). The sucky part of this change was that the back wall is our exterior wall and is made out of cinder block, so to install the shower niche liners, we had to chisel out a spot for them. We got that done this week too! Now they are ready for tile!
We’re feeling good about our progress and looking forward to the week ahead when we actually get see some tiling taking place (woohooooooo!). Can’t wait to continue to take you guys along for the ride.
Next week voting starts, so get those voting fingers ready! You can check out how all of the other awesome participants are coming along on their spaces here. We can’t WAIT to see how everyone’s turns out.
UPDATE: We’re all done with the bathroom now, check out how it turned out here!
Project list for our bathroom renovation:
Demo entire bathroomCover up doorway to hallwayOpen new doorway to master bedroomRough in new plumbing (toilet, showers, sinks)Add new subflooring- Create shower pan
Add recessed lightingAdd new vanity light electricalAdd bathroom exhaust fanInstall shower niche liners- Install insulation – in process
- Add sheetrock – in process
- Tape and texture drywall
- Paint walls
- Tile shower walls
- Install shower niches with accent tiles
- Tile around window and in windowsill
- Tile floor
- Install new toilet
- Relocate vanity
- Install new countertop
- Tile backsplash on vanity
- Install fixed shower door panels
- Install shower heads
- Build DIY laundry hamper
- Install floating shelves
- Build DIY barn door
- Install vanity lights
- Install trim and baseboards
- Install bathroom accessories
- Hang shelf for mirrors
- Hang mirrors
- Decorate!