Easy DIY Concrete Block Bench for Outdoor Seating

Need extra outdoor seating? Build this easy DIY bench with cement cinder blocks and 4x4 posts in less than 1 hour!
Thank you to DAP for sponsoring this guide on how to make a cinder block bench! All opinions are entirely my own. This post also contains affiliate links, but nothing that I wouldn’t recommend wholeheartedly. Read my full disclosure here.
In the last several months, we’ve been blessed with several family members moving to our town! It is so nice to have them closer, but it has turned into quite the group of people when we all get together now.
We noticed it big time on the 4th of July when we had everyone over for the day. We quickly realized that we needed more seating areas in our backyard, specifically near the fire pit on the paver patio where we mainly hang out.
That’s when it dawned on me.
Table of Contents
- What type of wood should you use on a DIY cinder block bench?
- What size of wood should you use on cinder block benches?
- Do you need to glue together concrete blocks on the bench?
- What should I use to glue cinder blocks together on a concrete block bench?
- Do you need to paint or do anything to the cement blocks first?
- Video tutorial for cinder block bench:
- Cinder block bench: Step-by-step tutorial
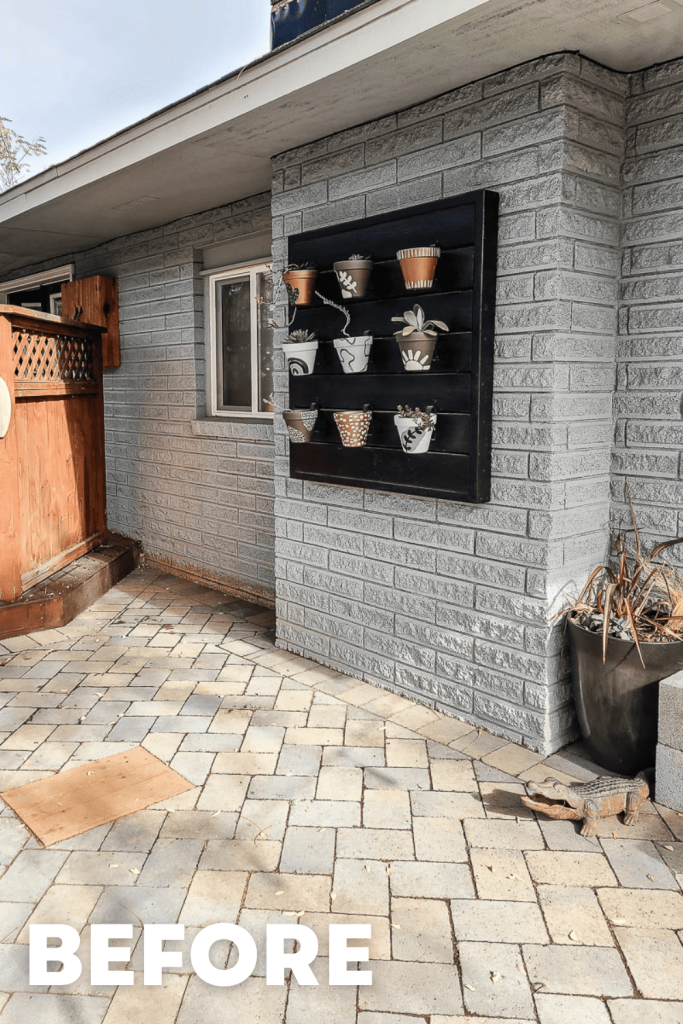
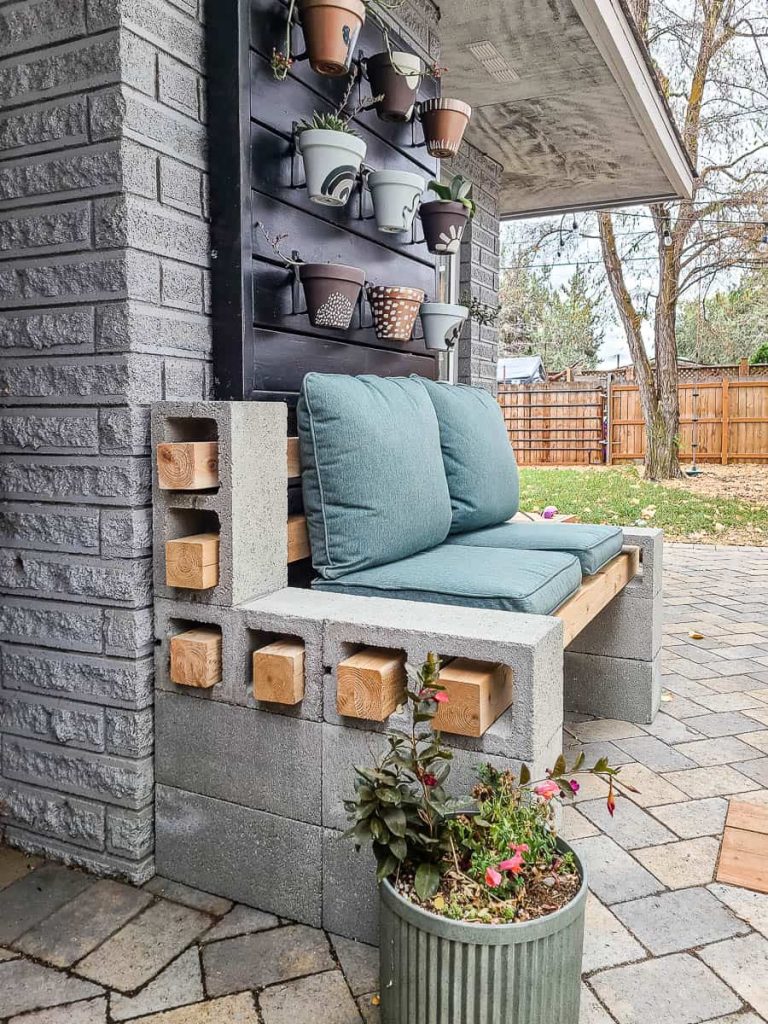
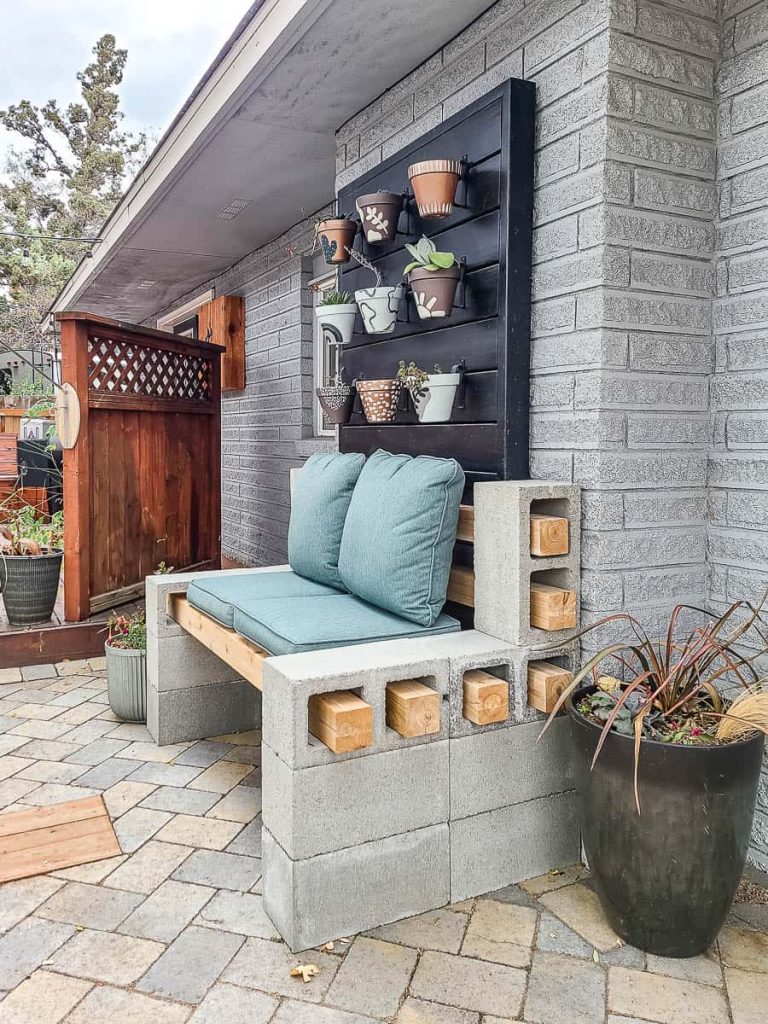
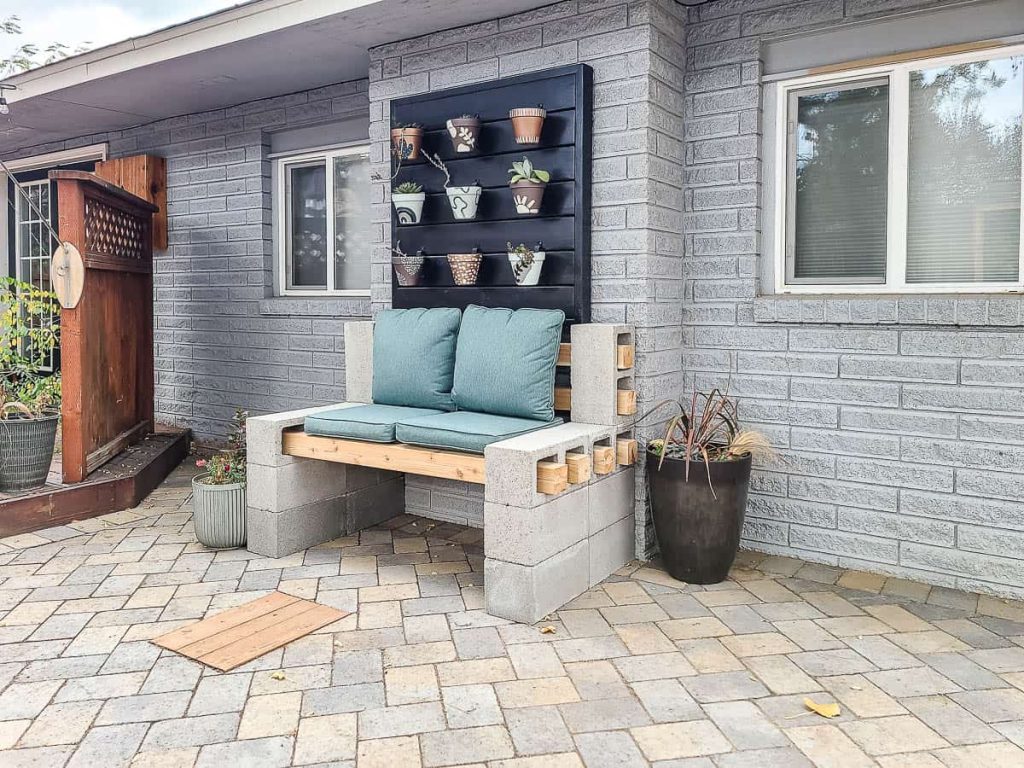
I could build a concrete block bench and put it in the open spot under our vertical plant wall along the edge of the house. Not only does this give us some extra seating, but it is a good spot for people to sit away from the fire if it is going and they don’t want to be right next to it.
It also opens up the seating on the paver patio and spreads things out a bit, which is great when you have a larger group of people.
I was seriously shocked when it came time to build the cinder block bench because it was so stinking easy! It’s a great way to create extra seating in your outdoor space on a budget! This great DIY project can be done in less than an hour!
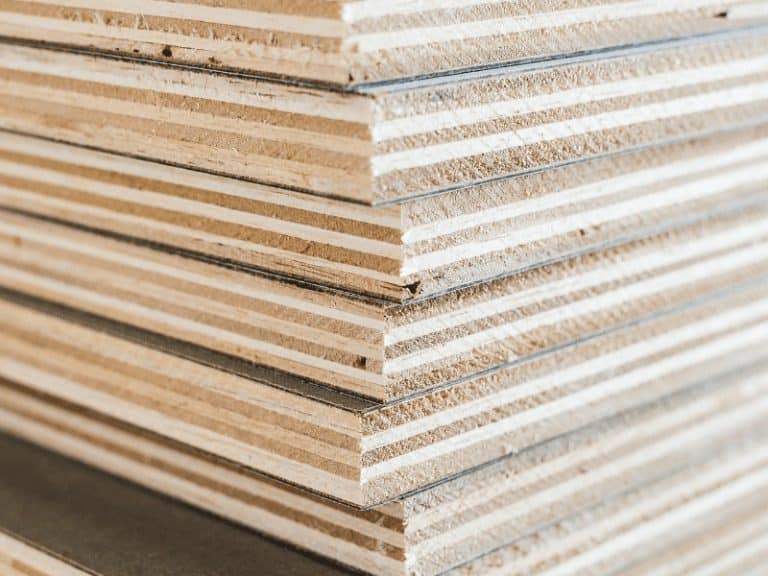
What type of wood should you use on a DIY cinder block bench?
You have a few options for the type of wood used on your cinder block bench. Since it is a project made for your outdoor area, you need to keep moisture in mind for the wood planks.
- Naturally moisture-resistant wood, like cedar – When it comes to building outdoor wood projects, like raised garden beds or outdoor fences, we almost always go with cedar. It’s a sturdy wood that can handle the outdoors without rotting. Cedar is also easy to find at home improvement stores. Redwood or teak are other options for outdoor projects. These types of woods will age naturally if left unstained, unsealed, and unpainted. Think of how a wood fence grays over time.
- Pressure-treated wood – Another option for outdoor wood projects is pressure-treated wood, which has gone through a process of coating the wood with preservatives to help prevent decay and rot. This type of wood is usually recommended for anything that makes ground contact outdoors. Pressure-treated wood will generally be cheaper than cedar lumber.
- Sealed or painted wood – Another option is to stain & seal or paint the wood you are using on your cinder block bench. Wood stain or paint will help prevent the wood from aging naturally and keep it looking good for longer! Here are some outdoor wood painting tips if you decide to go that route. Just be sure you use exterior paint! We’ve also had great results with this exterior stain and sealer on our firewood storage rack. We’ve also used boiled linseed oil on outdoor wood projects, like this DIY deck box, which barely changes the color but will protect the wood from sun and water.
What size of wood should you use on cinder block benches?
The holes on the inside of the cinder blocks are roughly 5 inches by 5 inches, so 4×4 pieces of wood seem like the best choice. They are nice and strong.
If you wanted to save a few bucks, you could probably get away with using two 2x4s stacked next to each other, but they wouldn’t be as strong as 4x4s.
Do you need to glue together concrete blocks on the bench?
Once the cinder blocks are set into place, truth be told – they are pretty secure because they are so heavy. But when we have kids and wild dogs, I can just imagine the bench getting bumped by 2 playing dogs or a kiddo (or kid-at-heart adult) jumping up onto the bench and having it topple over.
To avoid that, I would recommend gluing the concrete blocks together for your bench. Much better to be safe than sorry and it doesn’t add a lot of extra time or cost to the project!
What should I use to glue cinder blocks together on a concrete block bench?
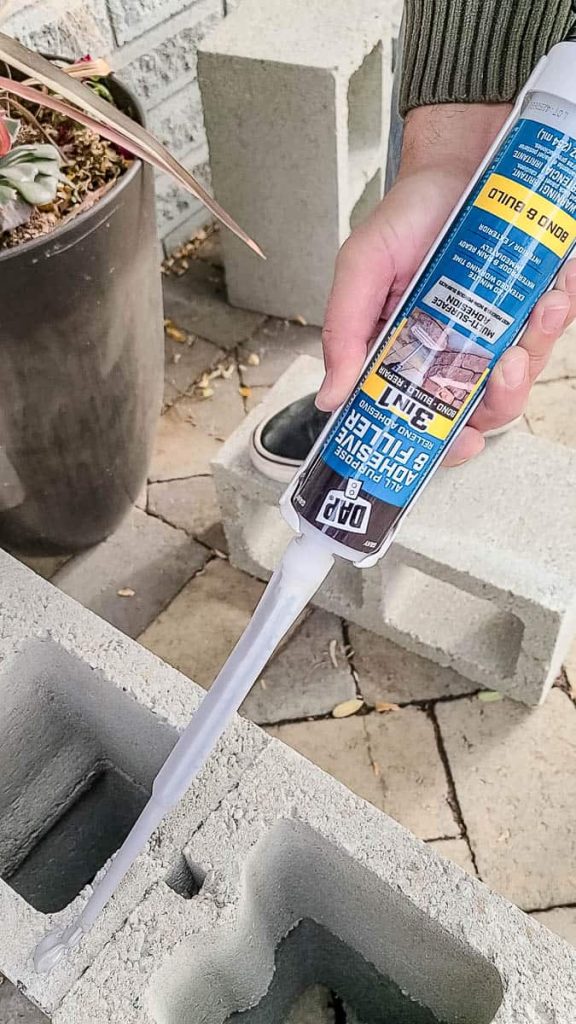
We used DAP’s All Purpose Adhesive & Filler and it worked like a charm. It’s a two-component epoxy product that has a nozzle that mixes it up as you squeeze it out, so you don’t have to worry about messy mixing.
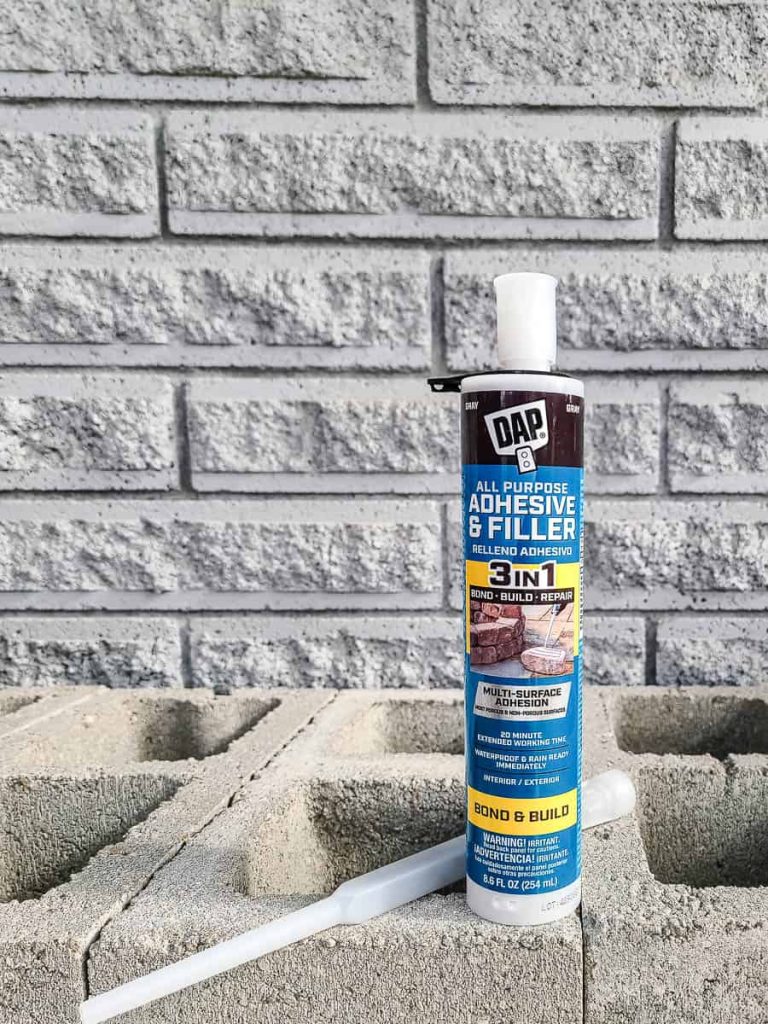
It has a 20-minute working time so you can slightly shift the cinder blocks around to square them up as needed.
The product is made for both indoors and outdoors and can even be used on wet or damp surfaces, which is nice because cement blocks can hold extra moisture.
I also liked that it was gray because if it accidentally squeezed out the side, it wasn’t noticeable – which may or may not have happened on our bench. 🙂
Do you need to paint or do anything to the cement blocks first?
You can totally use the cinder blocks as is without painting or sealing them. But keep in mind that cement is a porous material, so it will retain some moisture which is okay.
That’s why you want to make sure the wood that you use that is touching the cinder blocks is naturally moisture-resistant wood, like cedar, pressure-treated, or has been sealed.
If you want to change the color or look of the cement blocks or make them waterproof, you can paint them easily. Just be sure they are nice and clean, use a masonry primer first followed by masonry paint in several coats. Also, you want to coat the entire block (inside and bottom included) for best results.
You’ll probably find that a paint sprayer is a nice and easy way to paint the cinder blocks since there are so many nooks and crannies.
Video tutorial for cinder block bench:
If you love DIY videos, don’t forget to subscribe to our YouTube channel!
Cinder block bench: Step-by-step tutorial
Supplies for concrete block bench:
- DAP All Purpose Adhesive & Filler – buy it here
- Caulking gun – learn how to load a caulking gun here
- Measuring tape
- Square
- Concrete blocks (14)
- 4x4x8 wood posts (6) – we used these cedar ones
- Orbital sander with 80-grit sandpaper
- Circular saw or miter saw
- Patio cushions and pillows
- Extra scrap 2×4 and Sharpie to create layout guide (optional)
Step 1: Make a plan

We wanted our bench to be the exact same size as the jut-out from our house, so we created a layout board with a scrap 2×4 with marks showing where we should put the cinder blocks. We also measured the size of standard seat cushions and made sure they would fit too.
If you didn’t want to create the layout board, you can accomplish the same thing with painter’s tape on the ground.
Either way, be sure to come up with a plan for your concrete block bench before you start setting the cinder blocks into place. They are pretty heavy so, ideally, you only want to move them once.
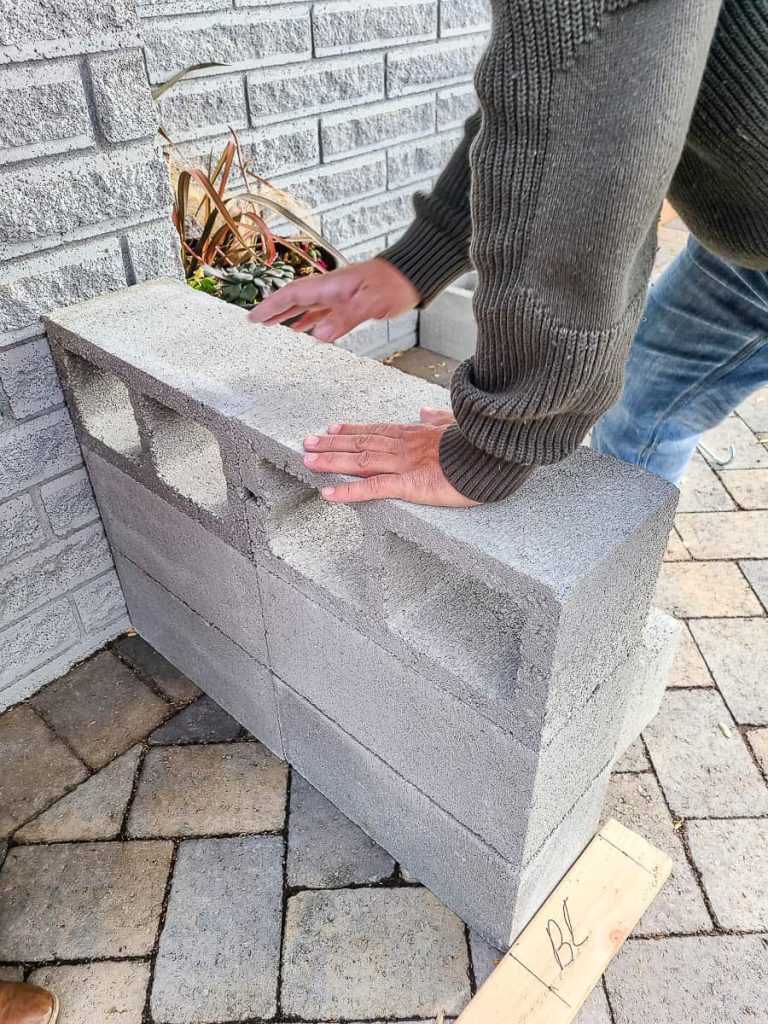
Step 2: Set and glue cinder blocks
Set your cinder blocks into the place where you will be putting your bench. Be sure they are nice and straight by checking with a square and tape measure.
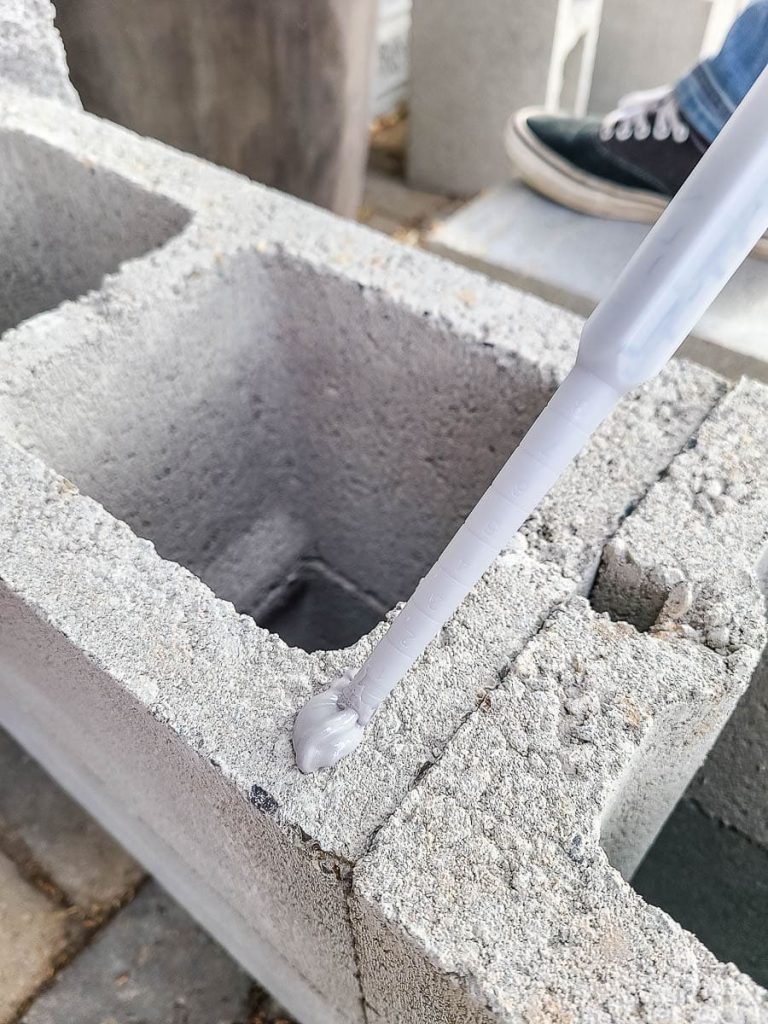
The first layer of cinder blocks will be two in a row on each side with the holes facing up. On the top edge of the cinder block, apply the adhesive in an even bead. Add a dollop of adhesive in between the two cinder blocks on the sides as well.
Next, add a second layer of concrete blocks with the holes facing up again. Then add more adhesive to the the top edge of the cinder blocks.
The third layer of cinder blocks is rotated so the holes are faced out instead so you can see them from the side of the bench.
For the fourth, and final, layer you are just adding one concrete block pointed up for the back of the cinderblock bench. Be sure you add adhesive to the bottom of the cinder block before placing it into its vertical position.
Step 3: Sand wood posts
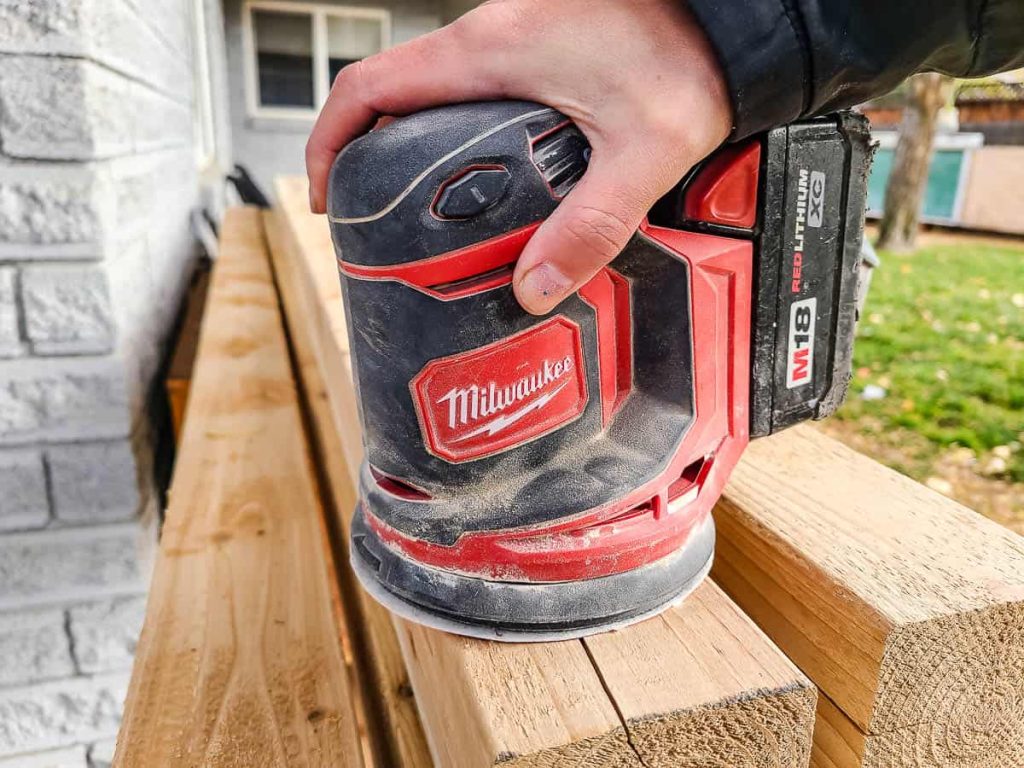
Now this step isn’t 100% necessary if you plan to use outdoor cushions on your bench. Chances are, that once the cushions are on your bench, you won’t ever really touch the wooden boards.
However, lightly sanding the boards with 80-grit sandpaper using an orbital sander doesn’t take much time and it makes the wood nice and smooth, so I think this is a step worth taking.
You are also a lot less likely to get a splinter when handling the wood if it has been sanded first.
Step 4: Cut wood to size
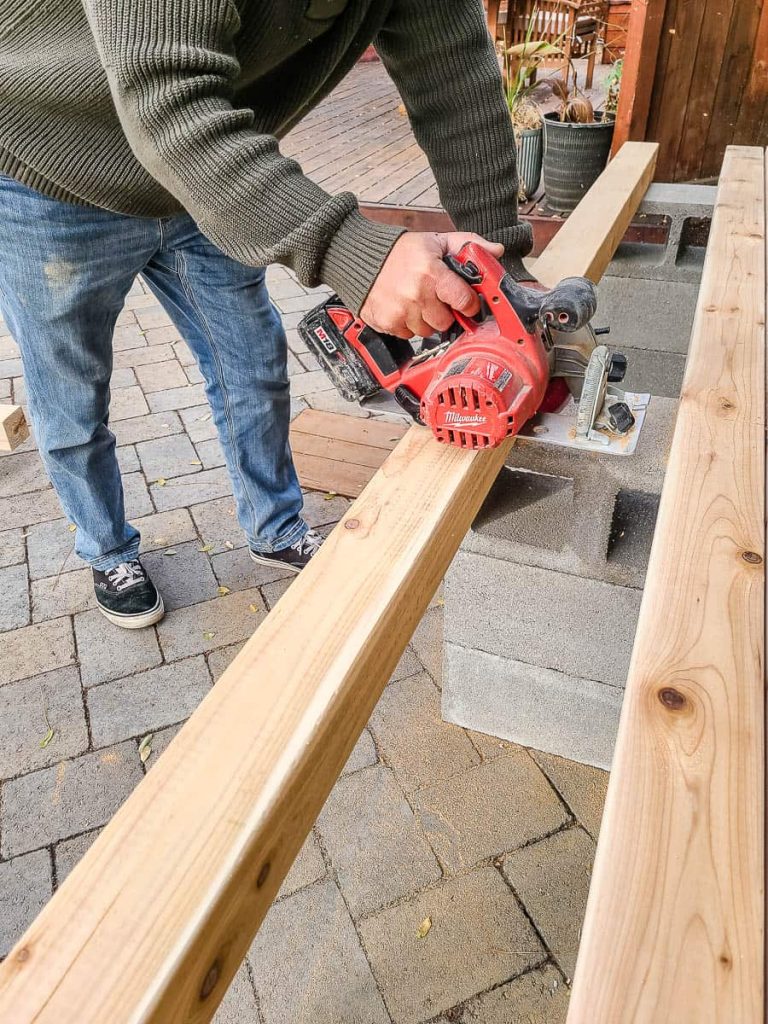
Next, cut the wood down to size using a circular saw or miter saw. Since we were using the circular saw, we needed to rotate the 4x4s a couple of times to cut all the way through.
We cut ours to 60″ lengths, but you could also longer. Keep in mind that if you do any shorter than 60″, you won’t be able to fit the standard-size patio cushions.
Want to make your bench longer? No worries, you can easily adjust the length of your bench by making the boards longer. If you don’t want to mess with cutting the wood at all, just keep them at the 8-foot length.
Step 5: Set wood into cinder blocks
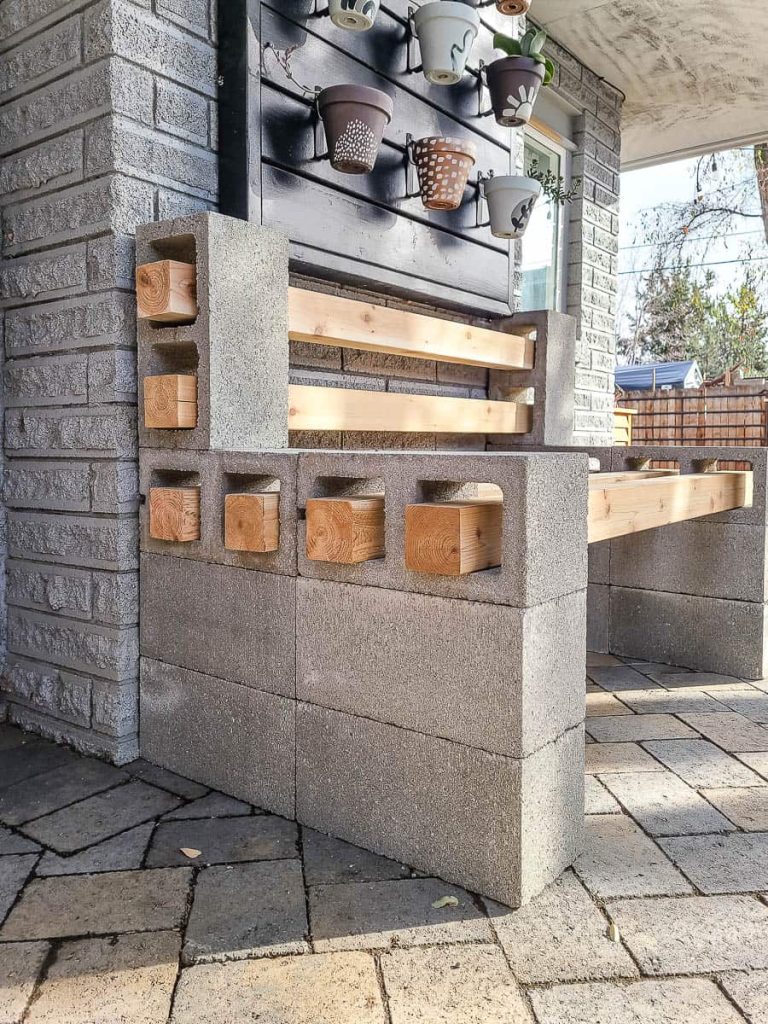
Next, you probably want to wait for the glue to dry before adding your wood to the cinder blocks. The instructions mention not using it for 24 hours. However, I just very carefully placed the wood into the cinder blocks and it was totally fine. I didn’t bump the blocks when I was putting in the wooden planks for the bench seat and back.
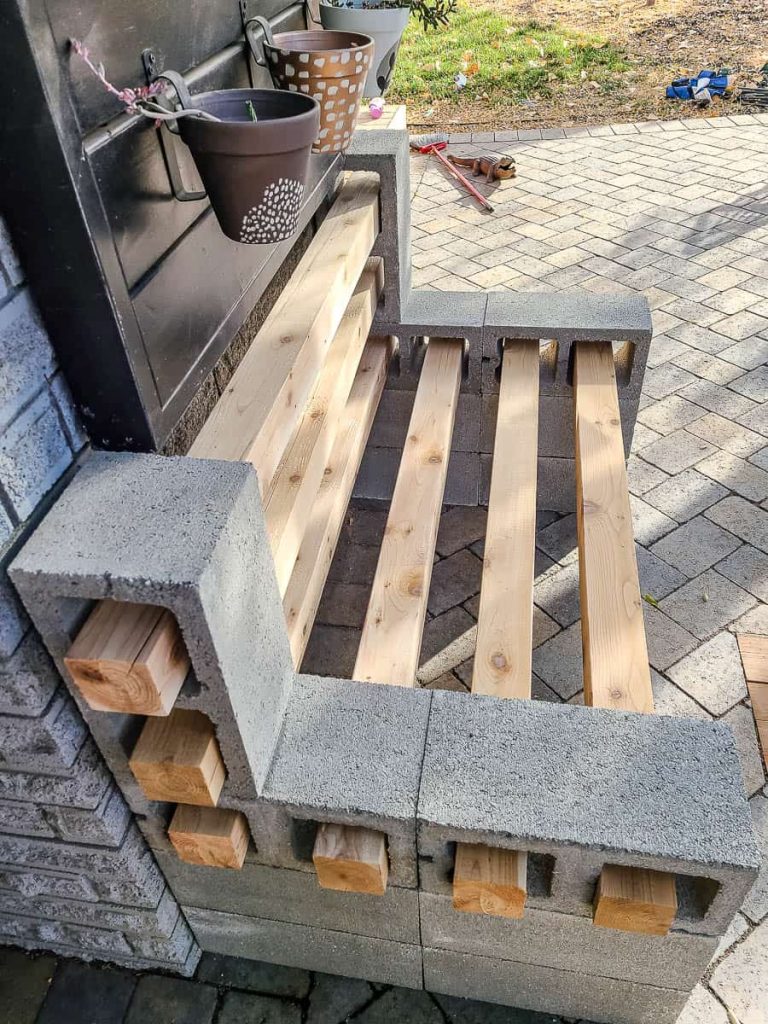
When I first saw how far the wood was spaced out, I thought it wasn’t going to work with the big gaps but once I tested it out by sitting down I realized the gaps were totally fine. I barely notice them when sitting down. They are not noticeable at all once you put the cushions down on the finished bench either!
Step 6: Add patio cushions and pillows
Lastly, add your patio cushions and pillows to the back. You may be able to find cushions and outdoor pillows on sale at the home improvement store at the end of the summer!
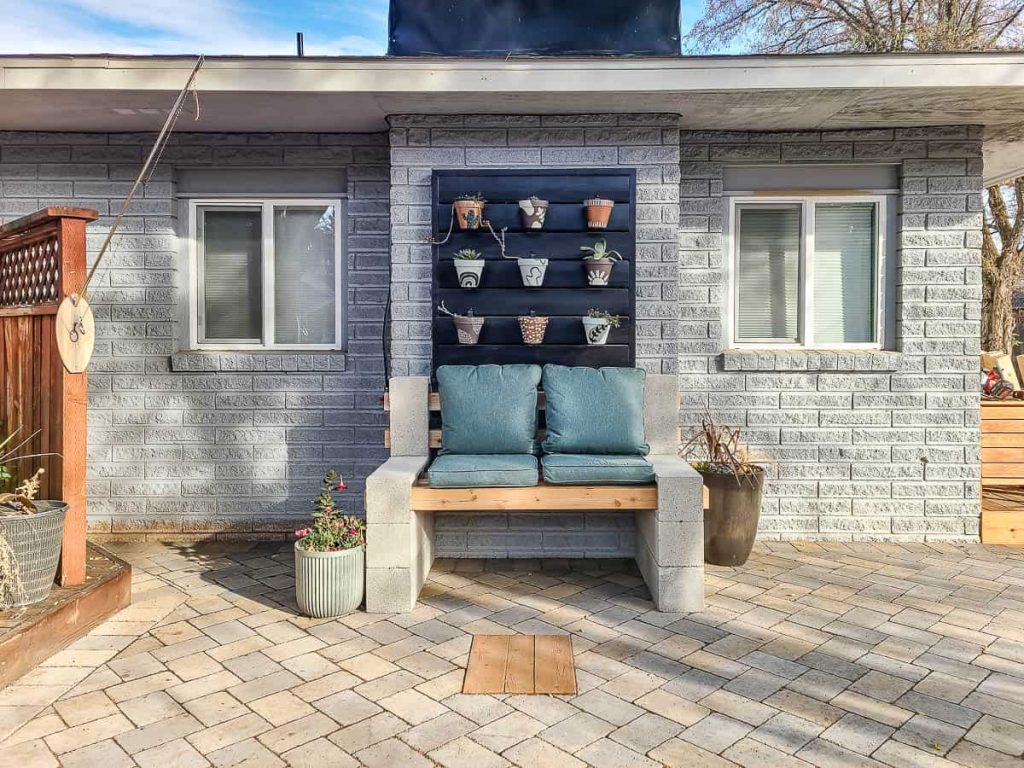
I just love how this beautiful bench turned out! The final product looks perfect in that open spot in our backyard on the paver patio. This extra seating will make a world of difference for our backyard gatherings with our extended family!
If you’re looking for inexpensive outdoor furniture, give this cinder block bench a try! You can build it in just an hour or two!
Where would you put a concrete block bench in your yard?
Let us know in the comments below!


I love the bench . Looks amazing and fairly easy to put together . Do you think it can be made with round posts instead of the square pieces of wood . I have several long treated round posts that would fit perfectly through the cinder blocks . . If not any ideas what I can do with the posts
Yes, you could totally use round posts as well! Just be sure you get a bench cushion since the round ones won’t be as comfy to sit on.