A few months ago we moved into our 2nd fixer upper. We’re so excited to get started on renovation projects, organizing and unpacking and, of course, decorating. You can read more about our full renovation plans for the new house here.
But before we completely move on to talking exclusively about the new home here on the blog, I thought it would be fun to take a little walk down memory lane and show you the dramatic transformations we made with our first fixer-upper!
There were a lot of things that we never ended up sharing on the blog, so today starts a two-part series giving you a detailed look into our house makeover!
We’re starting the exterior renovations first. Next, check out the interior renovations in this article with all the before and after home renovation pictures!
This post contains affiliate links, but nothing that I wouldn’t wholeheartedly recommend anyway! Read my full disclosure here.
Let’s start with the first thing you see when you drive up to the house…the front of the house! We knew when we moved into our first fixer-upper that we would definitely need to do some things to improve our curb appeal.
Unfortunately, a lot of those projects were bigger and had to be put off for a while because we had limited time and money for exterior renovations.
First of all, let’s start with the home’s exterior when we moved in…
Fixer Upper Exterior Makeover: Before Pictures of Our Fixer Upper


Ugh…. yuck. I still can’t believe how long we kept that horrible exterior paint color!
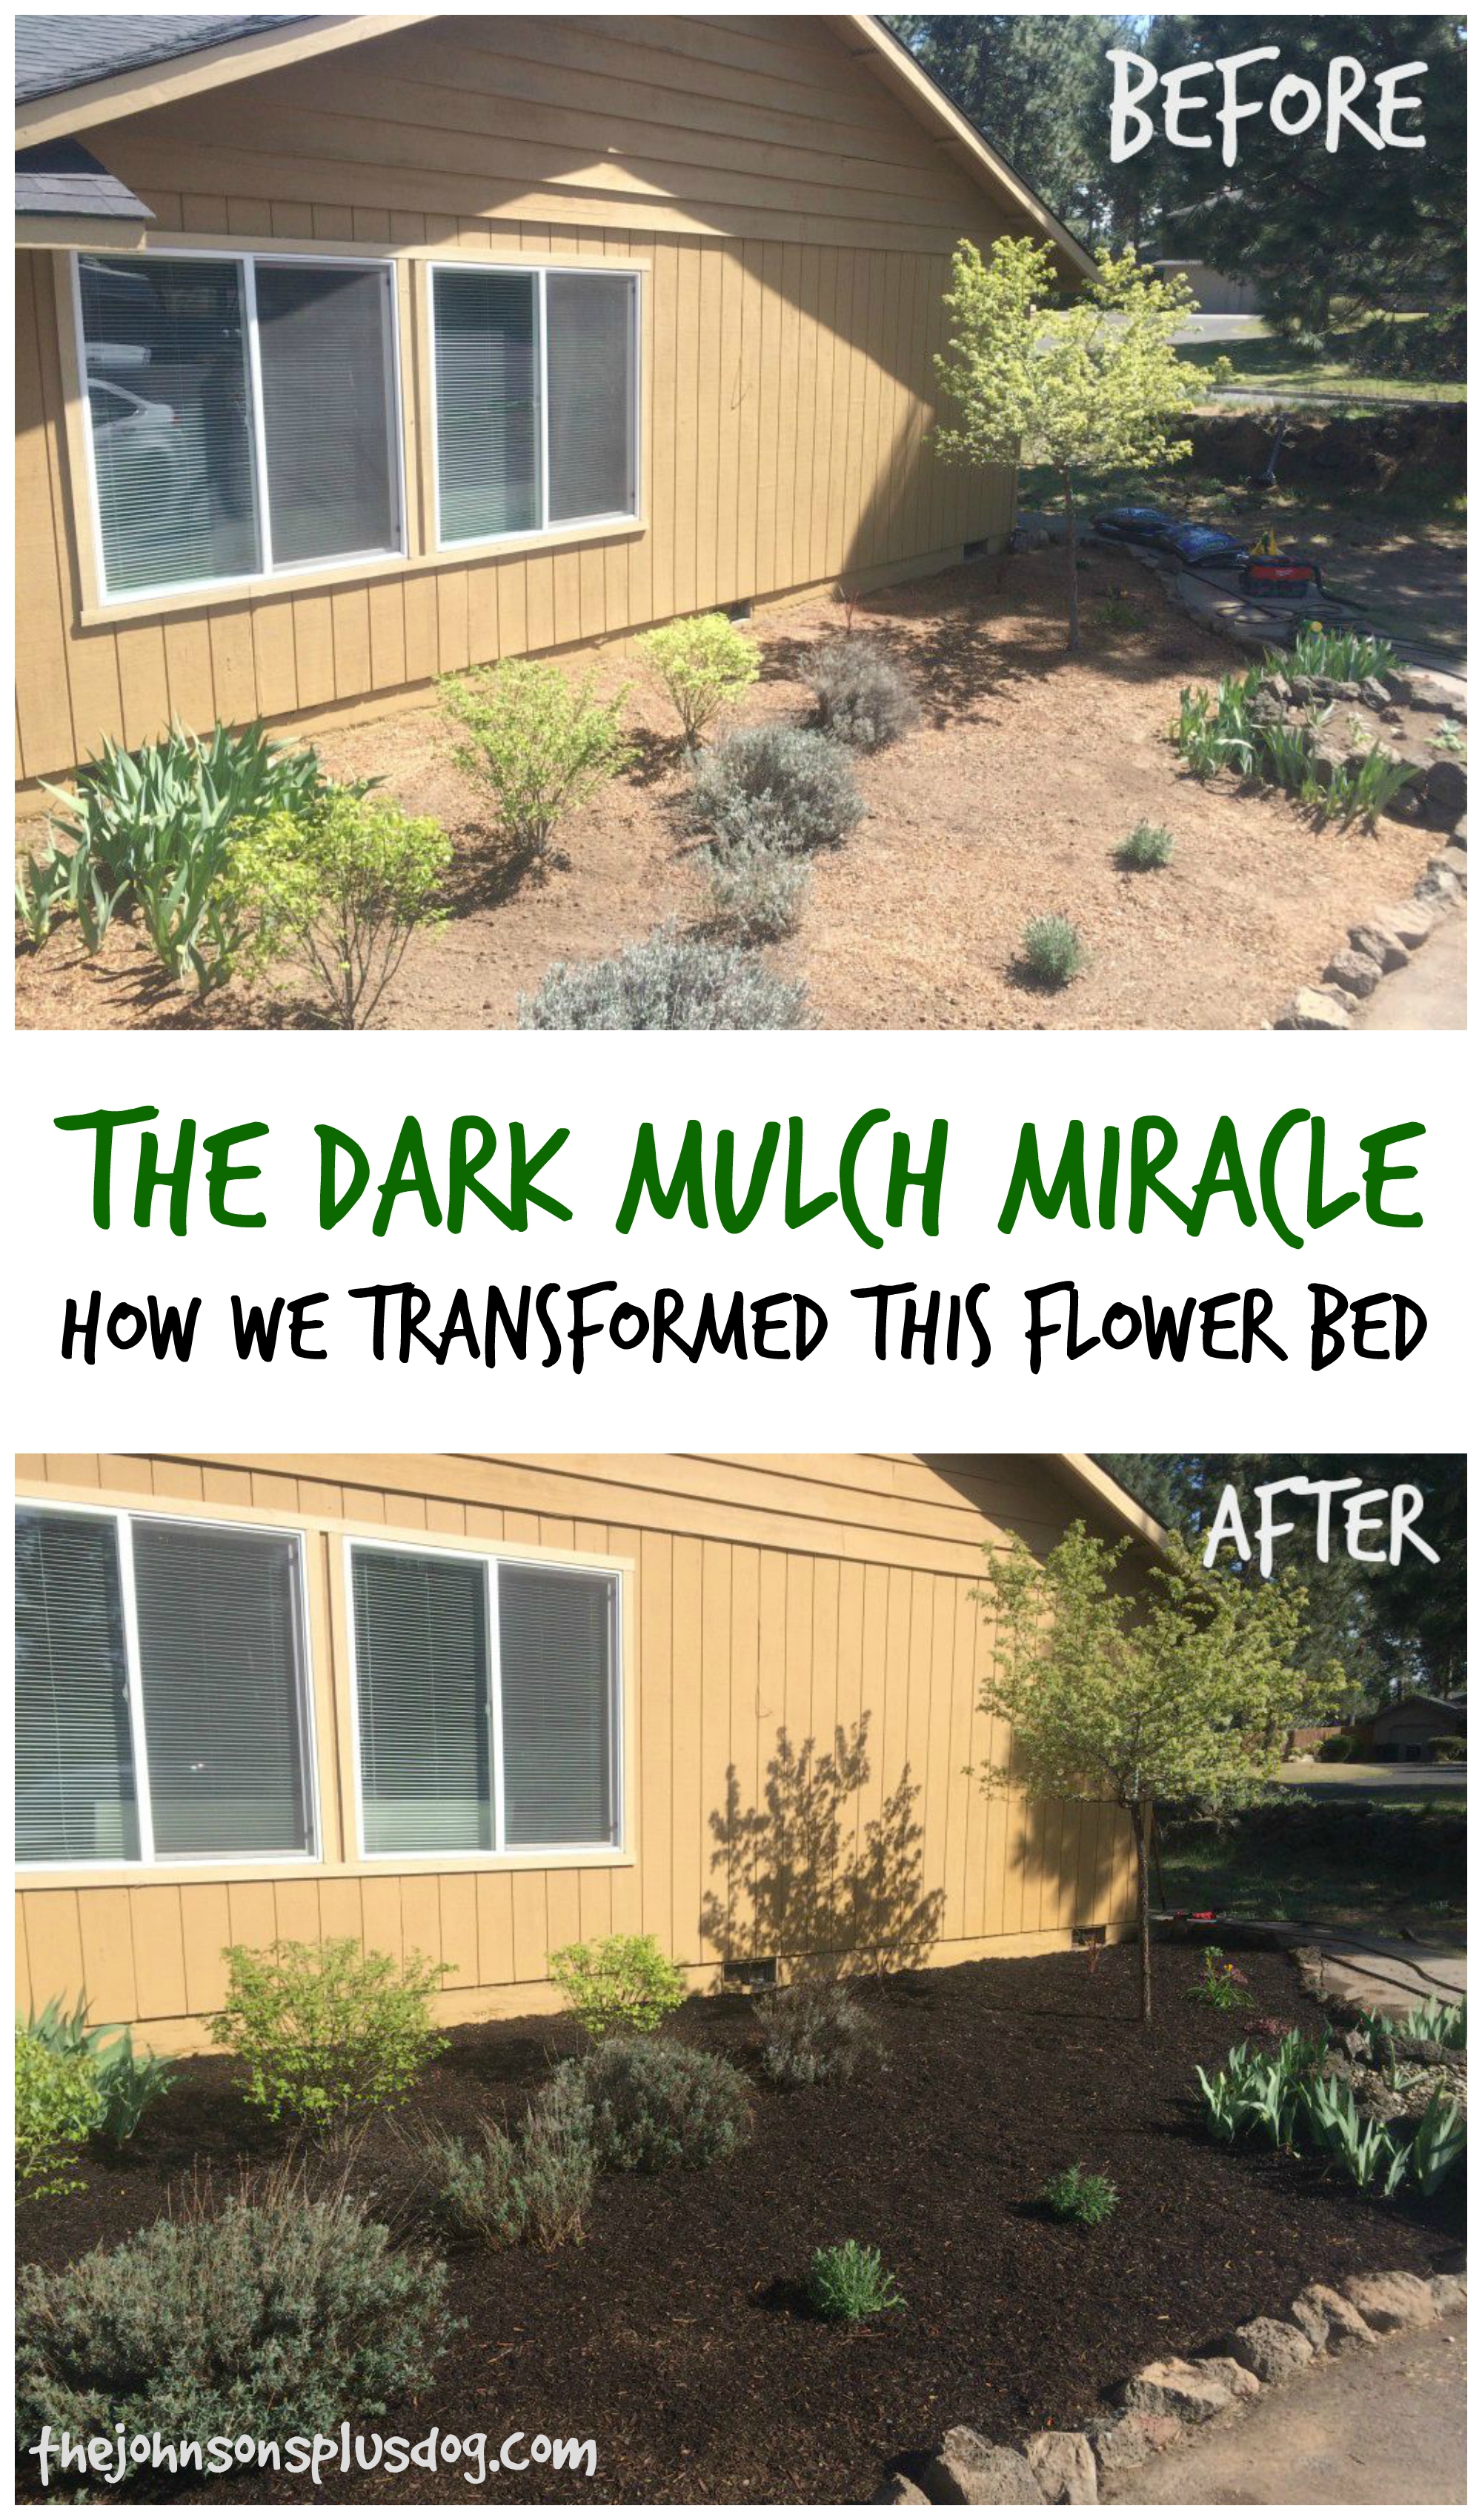
The First Fixer Upper Exterior Update: Flower Bed Makeover
One of the first things we did outside gave the front flower bed a little makeover with dark mulch. This was really as simple as adding some dark mulch and adding some new plants.
The dark mulch really makes a huge difference, right?!
Next, I planted some cute little succulents in one of the front flower beds too. Read more about how to create a succulent flower bed here.

If you’re wondering how those lasted through our harsh winters here in Central Oregon, the chicks and hens were the best. They were the only ones that survived being covered in snow for months (they actually lasted three winters!).
When we started thinking about our landscaping plans at the new house, we did a lot of research on high desert landscaping to make sure we were choosing plants and trees that were right for our climate.
Adding a Fence Around our First Fixer Upper
Even though we never ended up blogging about it, the next thing we did (and by that, I totally mean Logan because I was mostly out of town for this project) built a fence on the left side of the house.
The wood fence was necessary to keep Gannon contained….and to our hide our big, ugly backyard which was just a field of weeds at the time.
Then right before our son was born, Logan and his dad built the other half of the fence on the right side of the house. These pictures are on my actual due date!
Learn how to build a wood fence and add a fence gate here.


Painting the Fixer Upper Exterior: All New Paint Color!
The biggest transformation we saw during all of the before and after home renovations was definitely painting the exterior of our home.

I love this dark green paint color (which is Black Bamboo by Behr Paint) and how it contrasts with the white trim and lighter blue-green paint color on the front door.

We opted to DIY the exterior paint and learned so much, that we’ve summed up in these articles.
Read more about the exterior painting process in these posts:
- 9 Things To Do Before You Paint The Exterior Of Your Home
- 15 Things You Need For Painting Exterior of House
- Choosing Front Door Paint Colors (How To Paint A Door)
- Easy Way To Instantly Improve Curb Appeal – Painting Garage Door
- I Need To Paint My House Exterior! Answers To Your Paint Questions
Updating Our Fixer Upper Exterior: The Backyard Makeover
Now let’s move on and talk about all the improvements we made in the backyard. When we moved in, the backyard was a big field of weeds.


We quickly realized that even weeds had to be maintained! Logan seemed like he was out there all the time with the weed wacker just trying to prevent it from becoming too crazy.

We did a lot of dreaming about the possibilities in this backyard. A lot of them came to fruition and some of them still haven’t yet and some of them got completely booted as we changed our minds.
But since we own the house as a rental property now, we can still make improvements in the future to continue to add value to the fixer-upper. This was our backyard plan when we moved in:

We did add a paver patio to a portion of the yard. This was ALOT of work, but totally worth it.
We added a couple of trees (one to the backyard and one to the front).

Eventually, we rented a Caterpillar for a weekend and ripped out all of the weeds, and leveled everything in the backyard out. We also had about 8 cubic yards of gravel delivered that weekend!!

Updating Our Fixer Upper Exterior: Building Raised Garden Beds
On the side of the house, we got started by building three raised garden beds with cedar fence boards.


We then added a black tarp and landscape fabric to the ground and then covered it with gravel around the garden beds and in the back of the house.

A few more backyard updates to our fixer upper’s yard…
We gave our air conditioning unit a little makeover with a pallet wood AC cover.

We also made a more defined driveway on the opposite side of the house.

We also installed our own sprinkler system. Boy was that a lot of work! But totally worth it because we saved thousands of dollars by doing it ourselves.
Read about the planning portion of sprinklers here and the actual installation of the sprinkler system here.

Lastly, we planted grass from seed in both the front and back yard after we had the sprinkler system installed.

The Last Fixer Upper Exterior Update: Building a Backyard Shed
One of the last projects we did in our backyard was built this shed, which again we never ended up talking about here on the blog!
Logan built it using a lot of reclaimed materials to save money. He found a lot of free (or really cheap) building materials from Craigslist, but you would never guess by looking at it.


My favorite part of the shed was the door, which I gave a little boho paint makeover to. Didn’t it turn out so cute?!

I also love the skull I found at a flea market.

Painting the Fixer Upper’s Exterior Front Door: Boring Tan to Rich Green
Now back at the front of the house, let’s take a look at the entryway, which includes our front door. The front door got a big makeover when we did our exterior painting.
You’ll also notice that we removed the screen door. We pretty much did this right after we moved in…I hated it!!
Read more about how we chose the front door color (which by the way is In The Moment by Behr) and how to paint a door here.


I’m telling you, looking at before and after photos is one of the most rewarding parts of a house makeover. Our fixer upper exterior came SUCH a long way in the few short years we were living there and renovating.
Let’s take a quick closer look at these before and after pictures to really see the dramatic transformation of our house makeover.
Before & After Photos of Our Fixer Upper Exterior Makeover


Stay tuned for later this week when we take a tour of the amazing interior transformation from our house makeover of our first fixer upper! You’ll get to take a look to see what’s on the other side of the front door!
Looking for more info on our exterior house makeover?
- How To Plant Succulents
- DIY Raised Garden Beds Using Cedar Boards
- DIY Pallet AC Cover You Can Make In Just 45 Minutes
- Everything You Need To Know About Installing Your Own Sprinkler System (Part 1: Planning)
- Everything You Need To Know About Installing Your Own Sprinkler System (Part 2: Installing)
- 9 Things To Do Before You Paint The Exterior Of Your Home
- 15 Things You Need For Painting Exterior of House
- Choosing Front Door Paint Colors (and How To Paint A Door)
- Easy Way To Instantly Improve Curb Appeal & Painting Garage Door
- I Need To Paint My House Exterior! Answers To Your Paint Questions


