Our First Fixer Upper: Before and After Home Renovations (Picture Tour)

A few months ago we moved into our 2nd fixer-upper and we’ve been digging out the moving madness since. We’ve already started some renovation projects over here – like adding privacy to our bathroom window and installing a garbage disposal.
There are tons more projects coming up, but I felt like I left our first fixer-upper a little “unfinished” here on the blog.
Before we completely moved on talking about the new house, I wanted to take a look back at all of our before and after home renovations because there are A LOT of things you guys never got to see (P.S. I promise to be way better about sharing all of our projects on this house, mmkay?)
A couple of weeks ago, we looked closely at the exterior of the house and the backyard, which changed a TON while we were living there. You can check out the full details on the exterior house makeover here.
Our first fixer-upper looked like a completely different house when we moved out, so you’re in for a treat today! Come take a look at all of the big transformations we made on the interior of our first home.
Before and After Home Renovations Photos Tour: Table of Contents
This before and after home renovations post contains affiliate links, but nothing that I wouldn’t wholeheartedly recommend anyway! Read my full disclosure here.
Before and After Home Renovations – Photo Tour of Projects Throughout Our First Home
Before we hop into taking a look at the rooms one by one, I wanted to talk about some renovations that we made throughout the entire house so you guys have all the details.
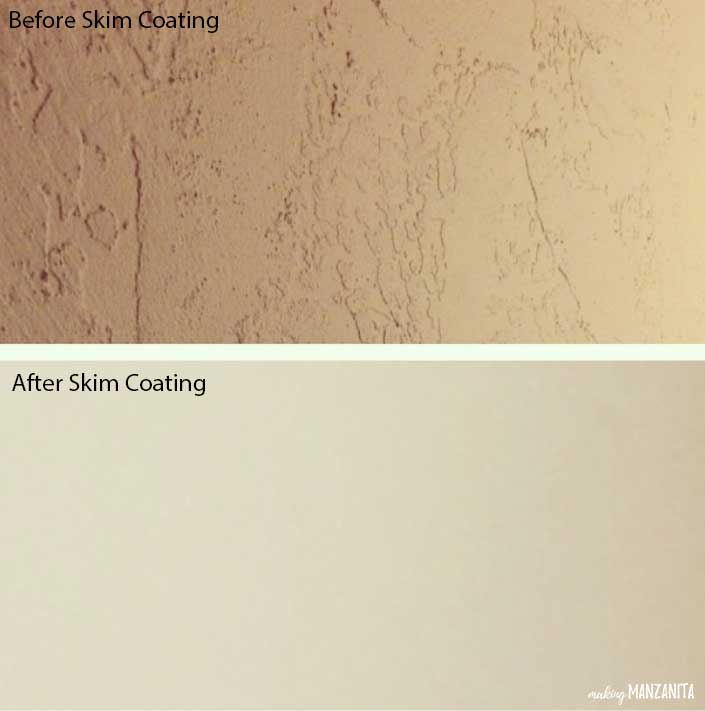
Skim Coating Walls
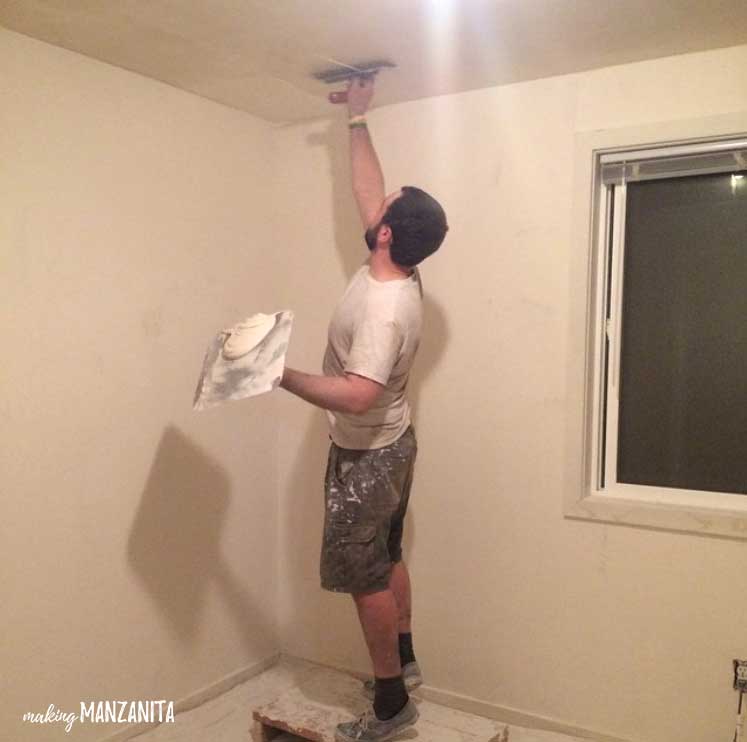
The most obvious changes we make throughout the whole home are the nice smooth walls. This was done by a process called skim coating and let me tell you…it was NOT EASY.
Logan spent nearly 9 months skim-coating the whole home while we were living there.
That horrible rough texture was something that was really important for us to change because we hated it. But we had no idea how much work the skim coating would actually be.
Logan did it all himself. It was hard work, time-consuming, and very laborious.
But when it was all done, we had nice smooth walls. The texture on the walls was so thick that it required multiple layers of drywall mud to be added and smoothed.
Looking back on this DIY, if we had known how intense this project was, we would have saved up and paid to have it done.
Painting Interior Walls
After the walls were smoothed, we painted every room. And we’ve summed up everything you need to know about how to paint a room for beginners here!
Our Favorite Fixer-Upper Paint Colors
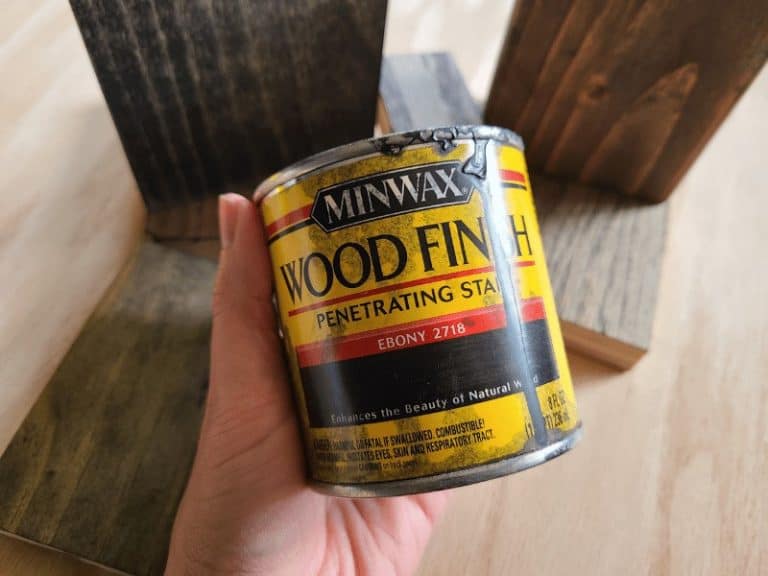
- For the wall paint color, we went with this dark gray color, which we love! Learn more about Fashion Gray by Behr in this article.
- The ceilings got white flat ceiling paint. Learn more about how to paint the ceiling with a roller.
- Our baseboards and trim were painted with Snowy Pine. Learn more about painting baseboards and trim here.
- For the bathrooms, we used Burnished Clay.

Related: Other Interior Painting Articles
- Choosing Front Door Paint Colors (& How To Paint A Door)
- Two Tone Walls in Bedroom: How To Paint Straight Lines
- Mountain Mural Tutorial (Featuring Behr Paint Colors Trends)
- Behr Chic Gray Paint Reveal (+ The Best Order of Painting A Room)
- Modern Sponge Painting | Semi Circle Pattern in Back of Locker Cabinets
- How To Paint An Arch Like A Pro
- A Basic Paint Sheen Guide for Interior and Exterior Surfaces
- How To Cut In Paint without Painter’s Tape
- How To Paint A Ceiling With A Roller
- Behr Fashion Gray | Paint Color Overview and Review
- How To Paint A Room For Beginners | Ultimate Guide
- Tips for Painting Baseboards and Trim
- Black Bamboo Behr | Paint Color Overview and Review
- Behr Meteorological | Paint Color Overview and Review
- Behr Falling Snow | Paint Color Overview and Review
- 16 Gorgeous Green Accent Walls
- Snowy Pine Behr Paint Overview
- In The Moment Behr Paint Color Overview
- 22 Front Door Paint Colors to Inspire You
- Master Bedroom Colors | 20 Great Paint Color Ideas with Pictures
- Behr Midnight in NY Paint Color Overview
- Graphic Charcoal Behr | Paint Color Overview and Review
- Do I need Primer Before Painting?
- How to Paint a Room Fast
- How To Clean Walls Before Painting
- Interior Painting Tools List – 17+ Must-Haves for Homeowners
- Cost to Paint a Room – DIY vs Hire Comparison
- How to Transform Walls with Just Paint: 20+ Wall Painting Ideas
Replacing Flooring
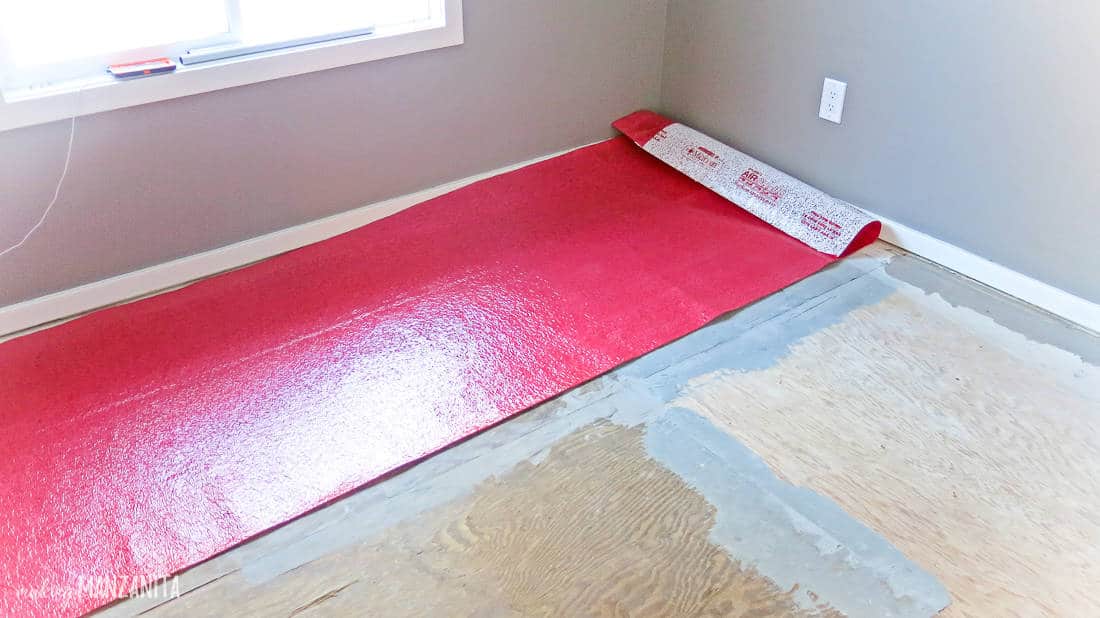
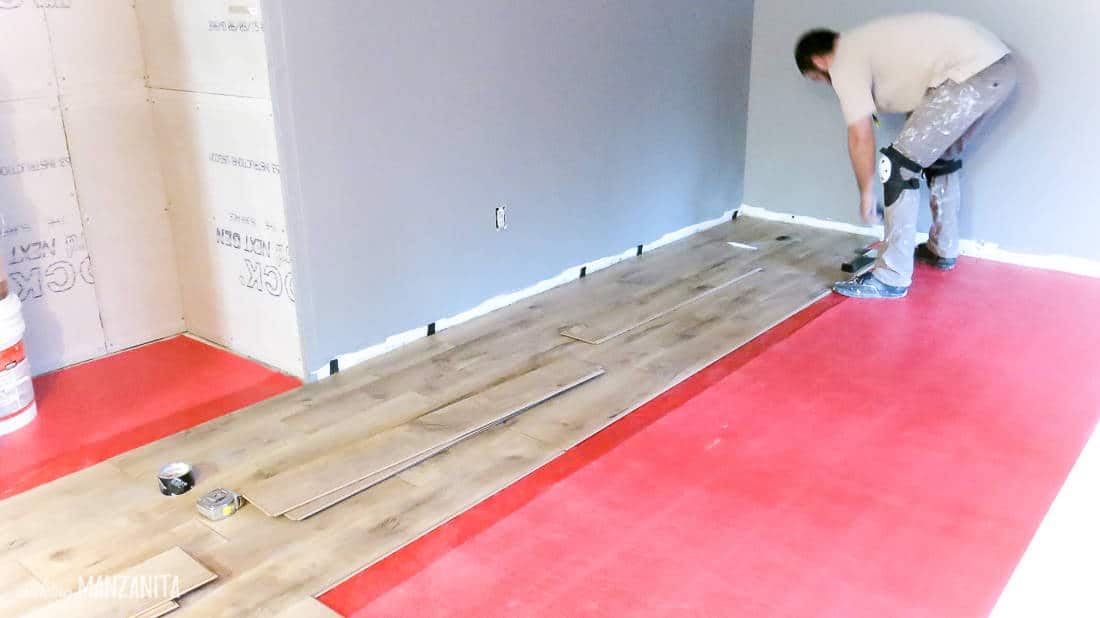
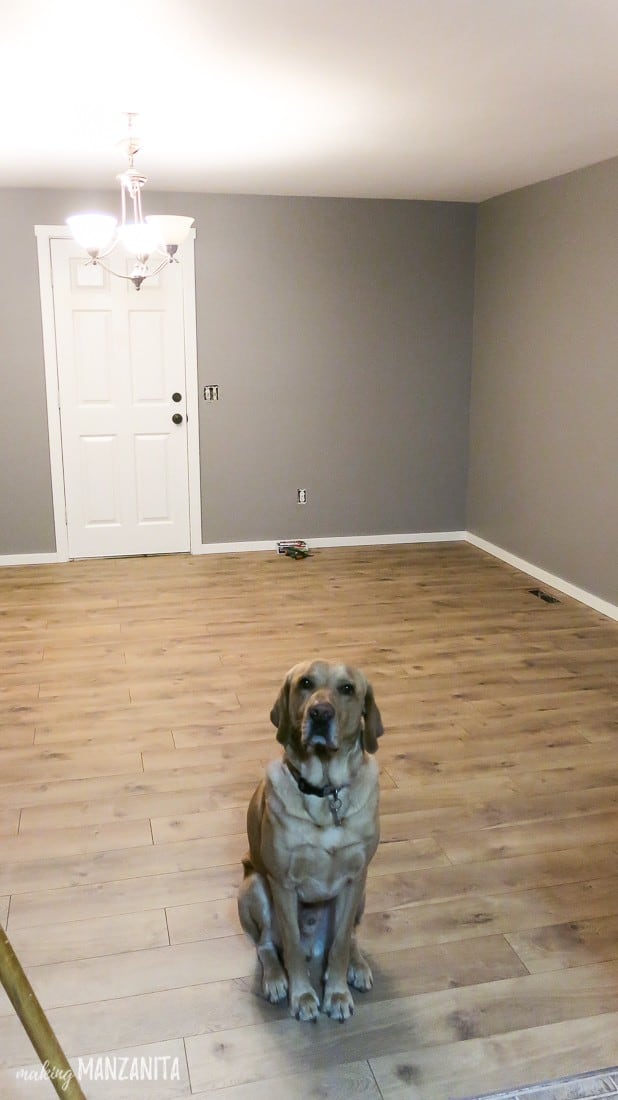
We also replaced the floors throughout the home with laminate hardwood.
It felt so good ripping out that gross carpet! As soon as I got pregnant with our first little one, I knew that it was something that we were going to have to do before the baby came.
I just couldn’t imagine letting a little baby crawl around on the gross carpet that had been there for years before we purchased the home.
We got the laminate hardwood on sale at Costco. It’s the brand Harmonics and the color is Camden Oak. Although it is not sold online, you may be able to find it in stock at your local store. Here’s another very similar option sold at Home Depot.
For a step-by-step, learn how to install laminate flooring here.
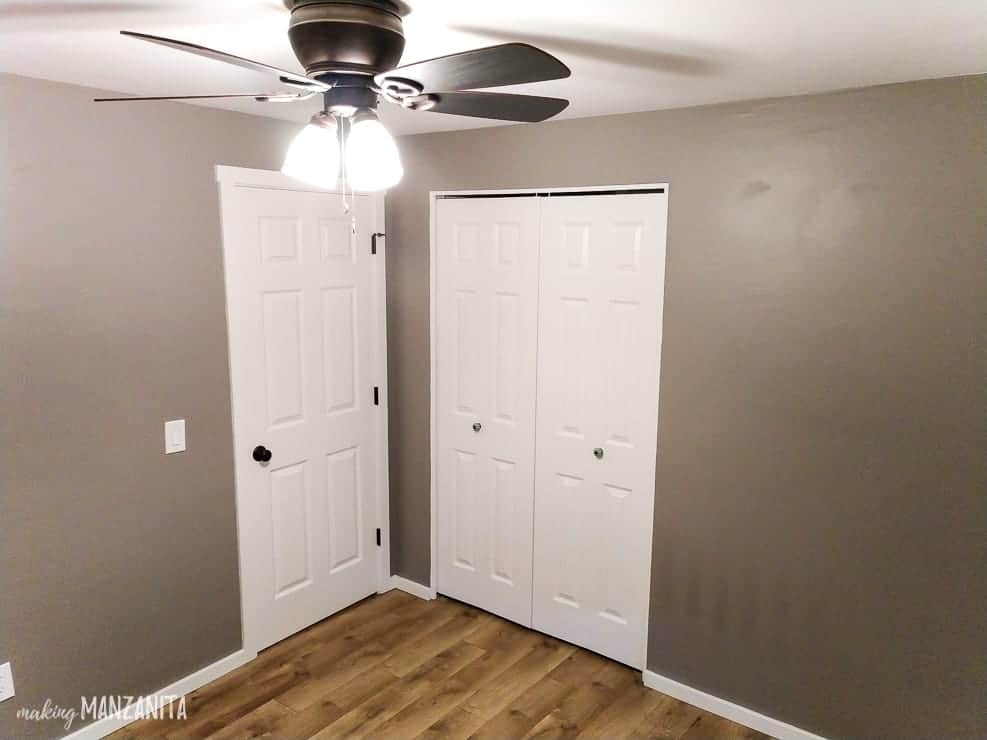
Replacing Lighting and Adding Ceiling Fans
We knew we wanted to add ceiling fans in the bedrooms and living room.
When we were looking for ceiling fans, we were surprised to have trouble finding fans in the same style/model that were sold in two different sizes (for larger rooms and smaller bedrooms).
We wanted the fans to match throughout. We ended up with fans from Hampton Bay. This exact model is no longer sold, but a lot of the other styles of ceiling fans that Hampton Bay makes in both large and small sizes.

We also replaced ugly “boob” lights with these awesome budget-friendly flush mount lights in the hallway and entryway. We also found matching pendants for our kitchen.
For more inspiration, check out these flush mount light options!
Replacing Door Hardware
Something that made a big difference during our fixer-upper renovation was replacing all of the interior door handles and hinges. It seemed like something so simple, but it was shocking.
We went with something classic with this oil-rubbed bronze knob.
Adding Tamper Resistant Outlets and Light switches
A very subtle change that we made was bringing in new light switches and adding tamper-resistant outlets (a no-brainer if you’ve got little ones).
I was surprised how it instantly made the room feel “new” with fresh white switches.
This is something that can easily be done yourself. There’s not much electrical work involved. Here’s a simple tutorial for how to change an outlet.
Replacing Blinds
The blinds were so gross when we moved in, we ripped them out instantly. We decided to go with a cellular shade from Blinds.com and loved them! We had blackout shades in the bedrooms and light filtering everywhere else.
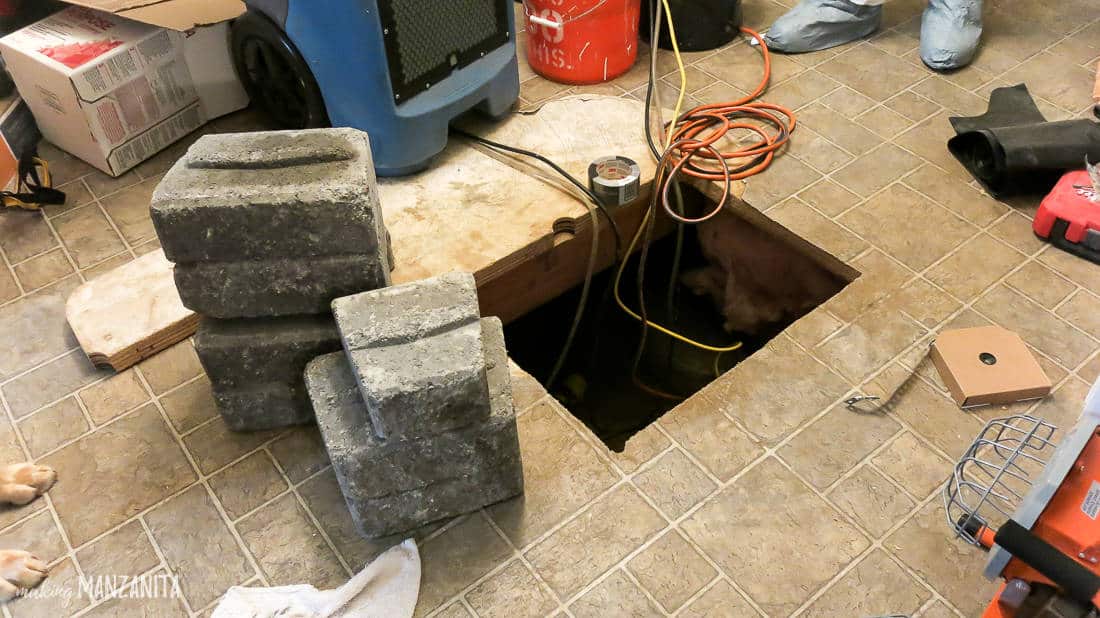
Adding Vapor Barrier In Crawl Space
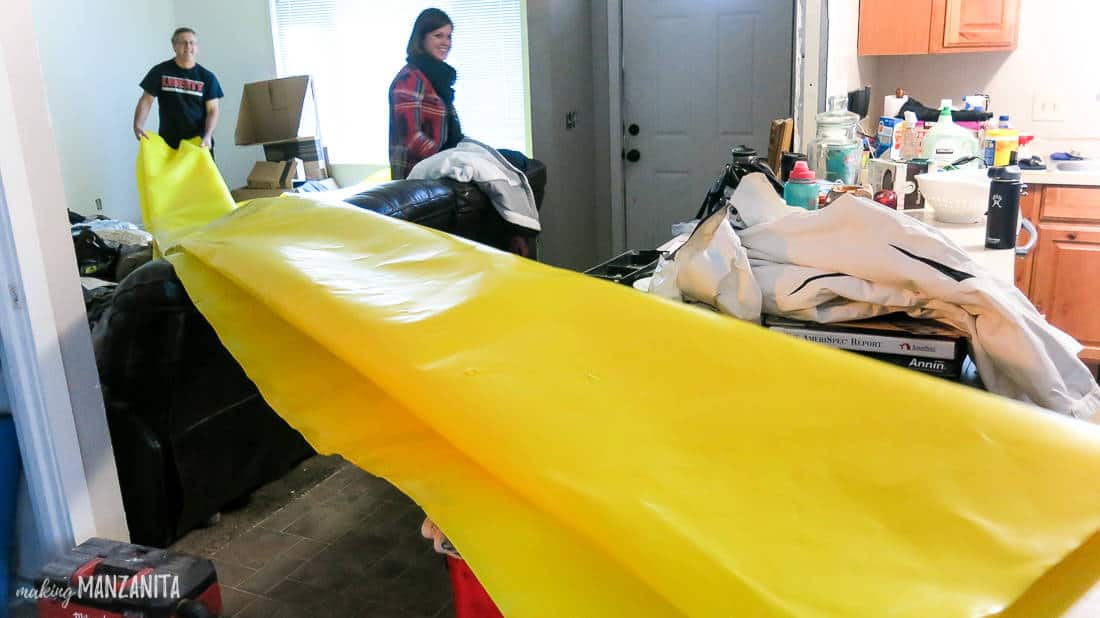
One kind of “not fun” project we had to do was add a vapor barrier in our crawl space.
When we were buying the home, we learned in the home inspection that there were some issues with drainage around the house, which had inevitably led to some moisture issues under the home.
We remedied the drainage issues by installing a french drain around the house and then adding vent wells.
Luckily the moisture issue under the home wasn’t too bad, but we had to cut a huge hole in our floor.
Then we cleaned it up, aired it out for days with commercial-grade dehumidifiers, and once it was all dry, we added a HUGE vapor barrier (which is essentially a plastic sheet that you lay on the ground to prevent any moisture coming from the ground to get in crawl space and/or home).
It wasn’t a fun job, but we were lucky that Logan’s dad was in town to help out.

Before and After Home Renovations Room By Room
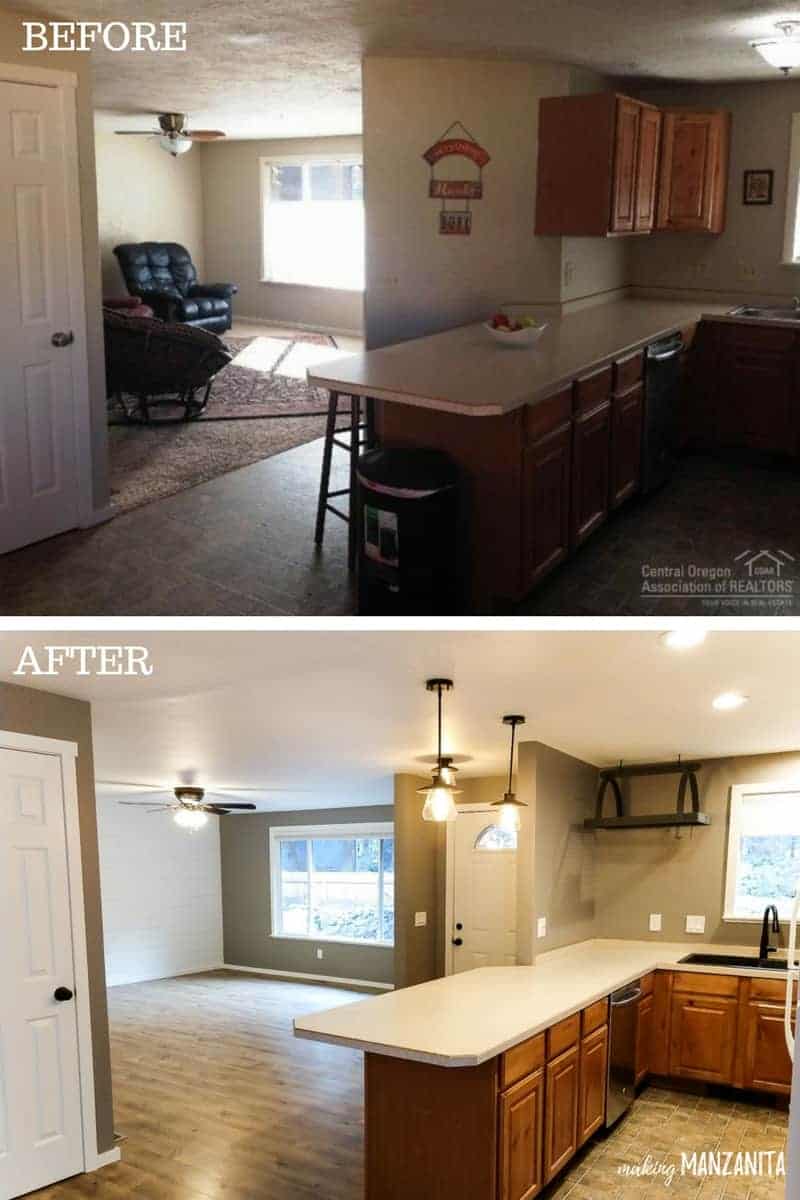
The Entryway Before & After
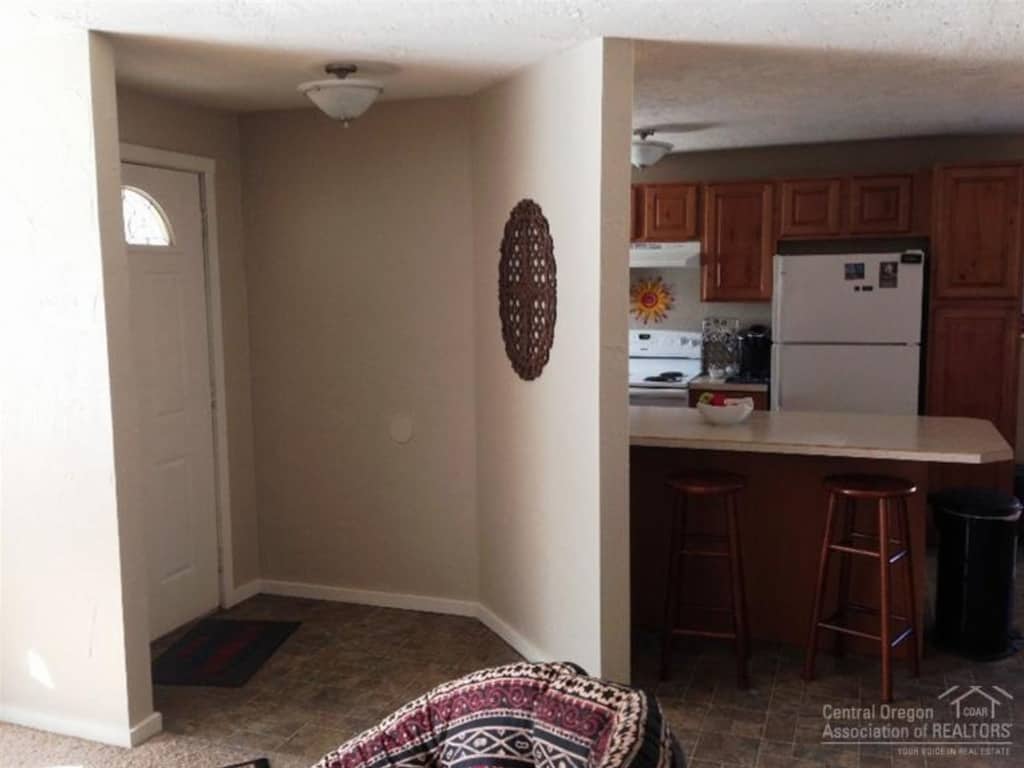
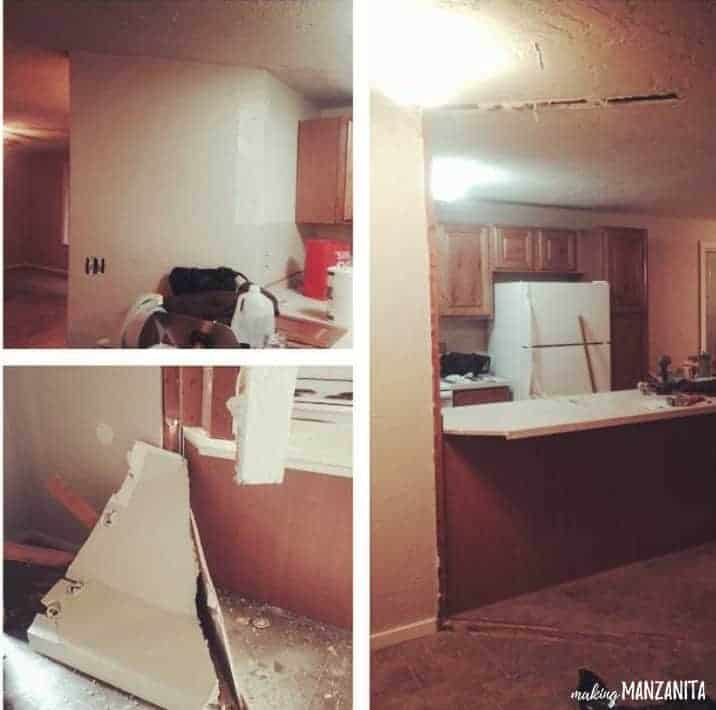
When we moved into this home, the first thing you saw when you opened the front door was this awkward diagonal wall. To the right of the front door is the large living room with an awesome huge window, and to the left is the kitchen.
All the weird wall did was make the entryway feel closed off and small and broke the line of sight from the kitchen into the living room.
We knocked this wall down within the first few weeks of living here. It just HAD to go!
What a big difference that made, right?!
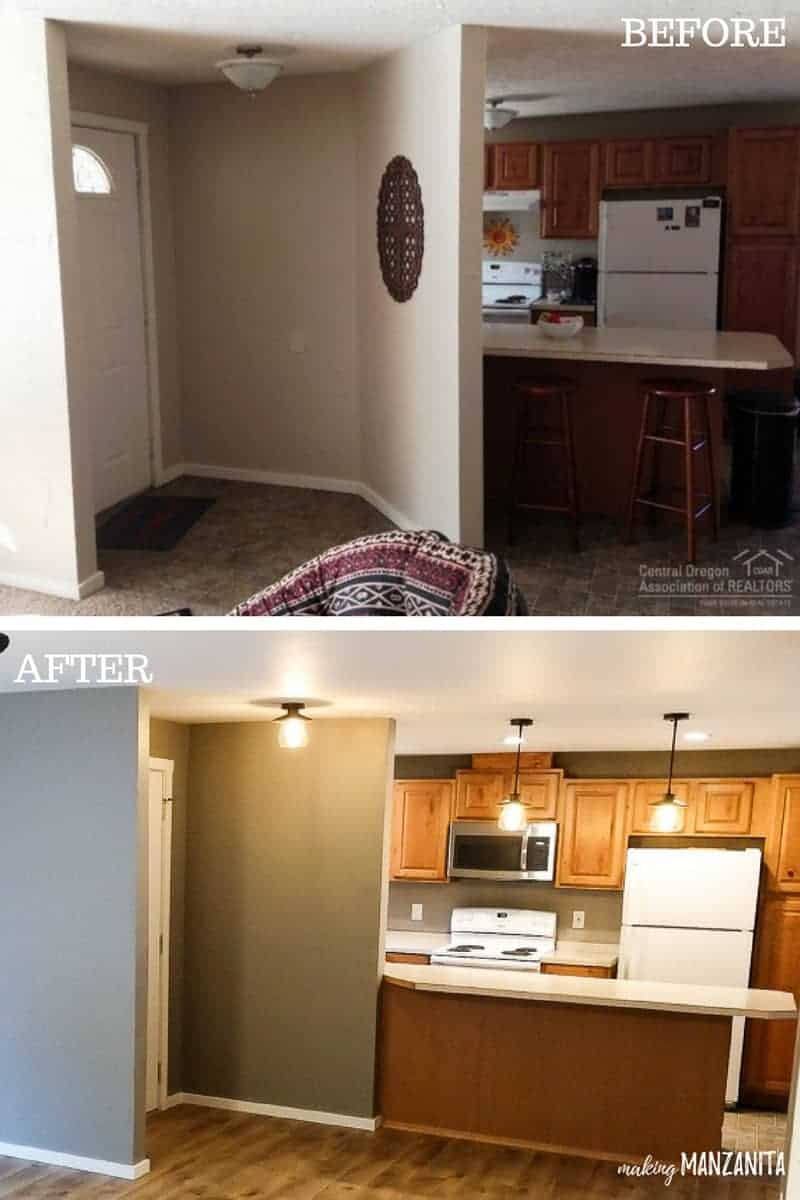
We also swapped the ugly “boob” light out for this oil-rubbed bronze semi-flush light in the entryway.
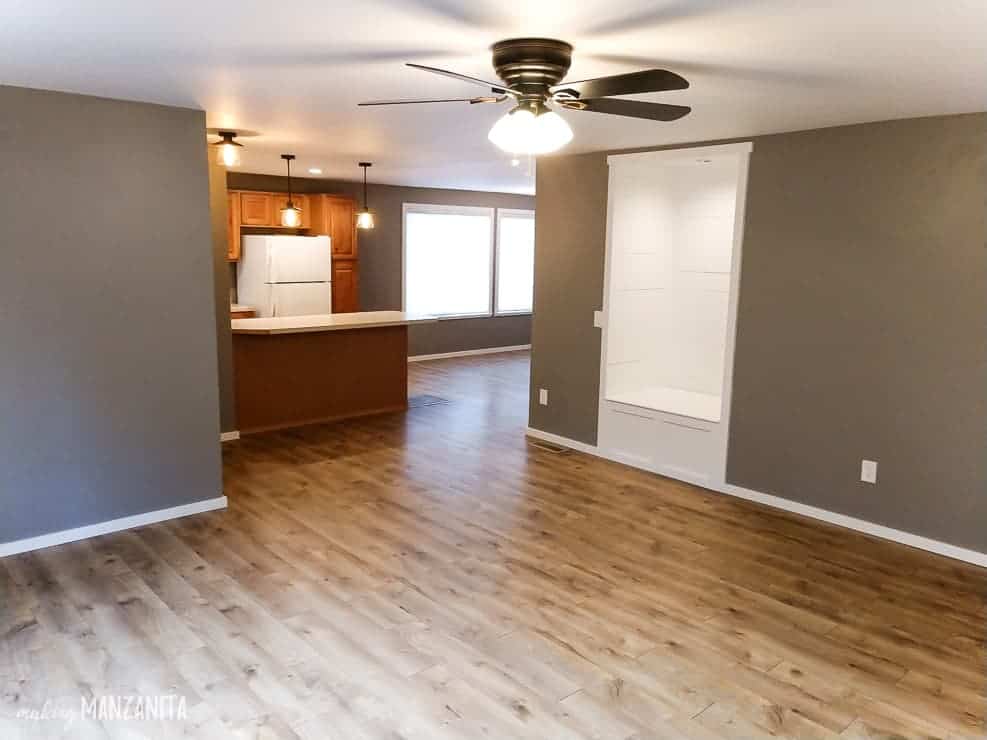
The Living Room Before & After
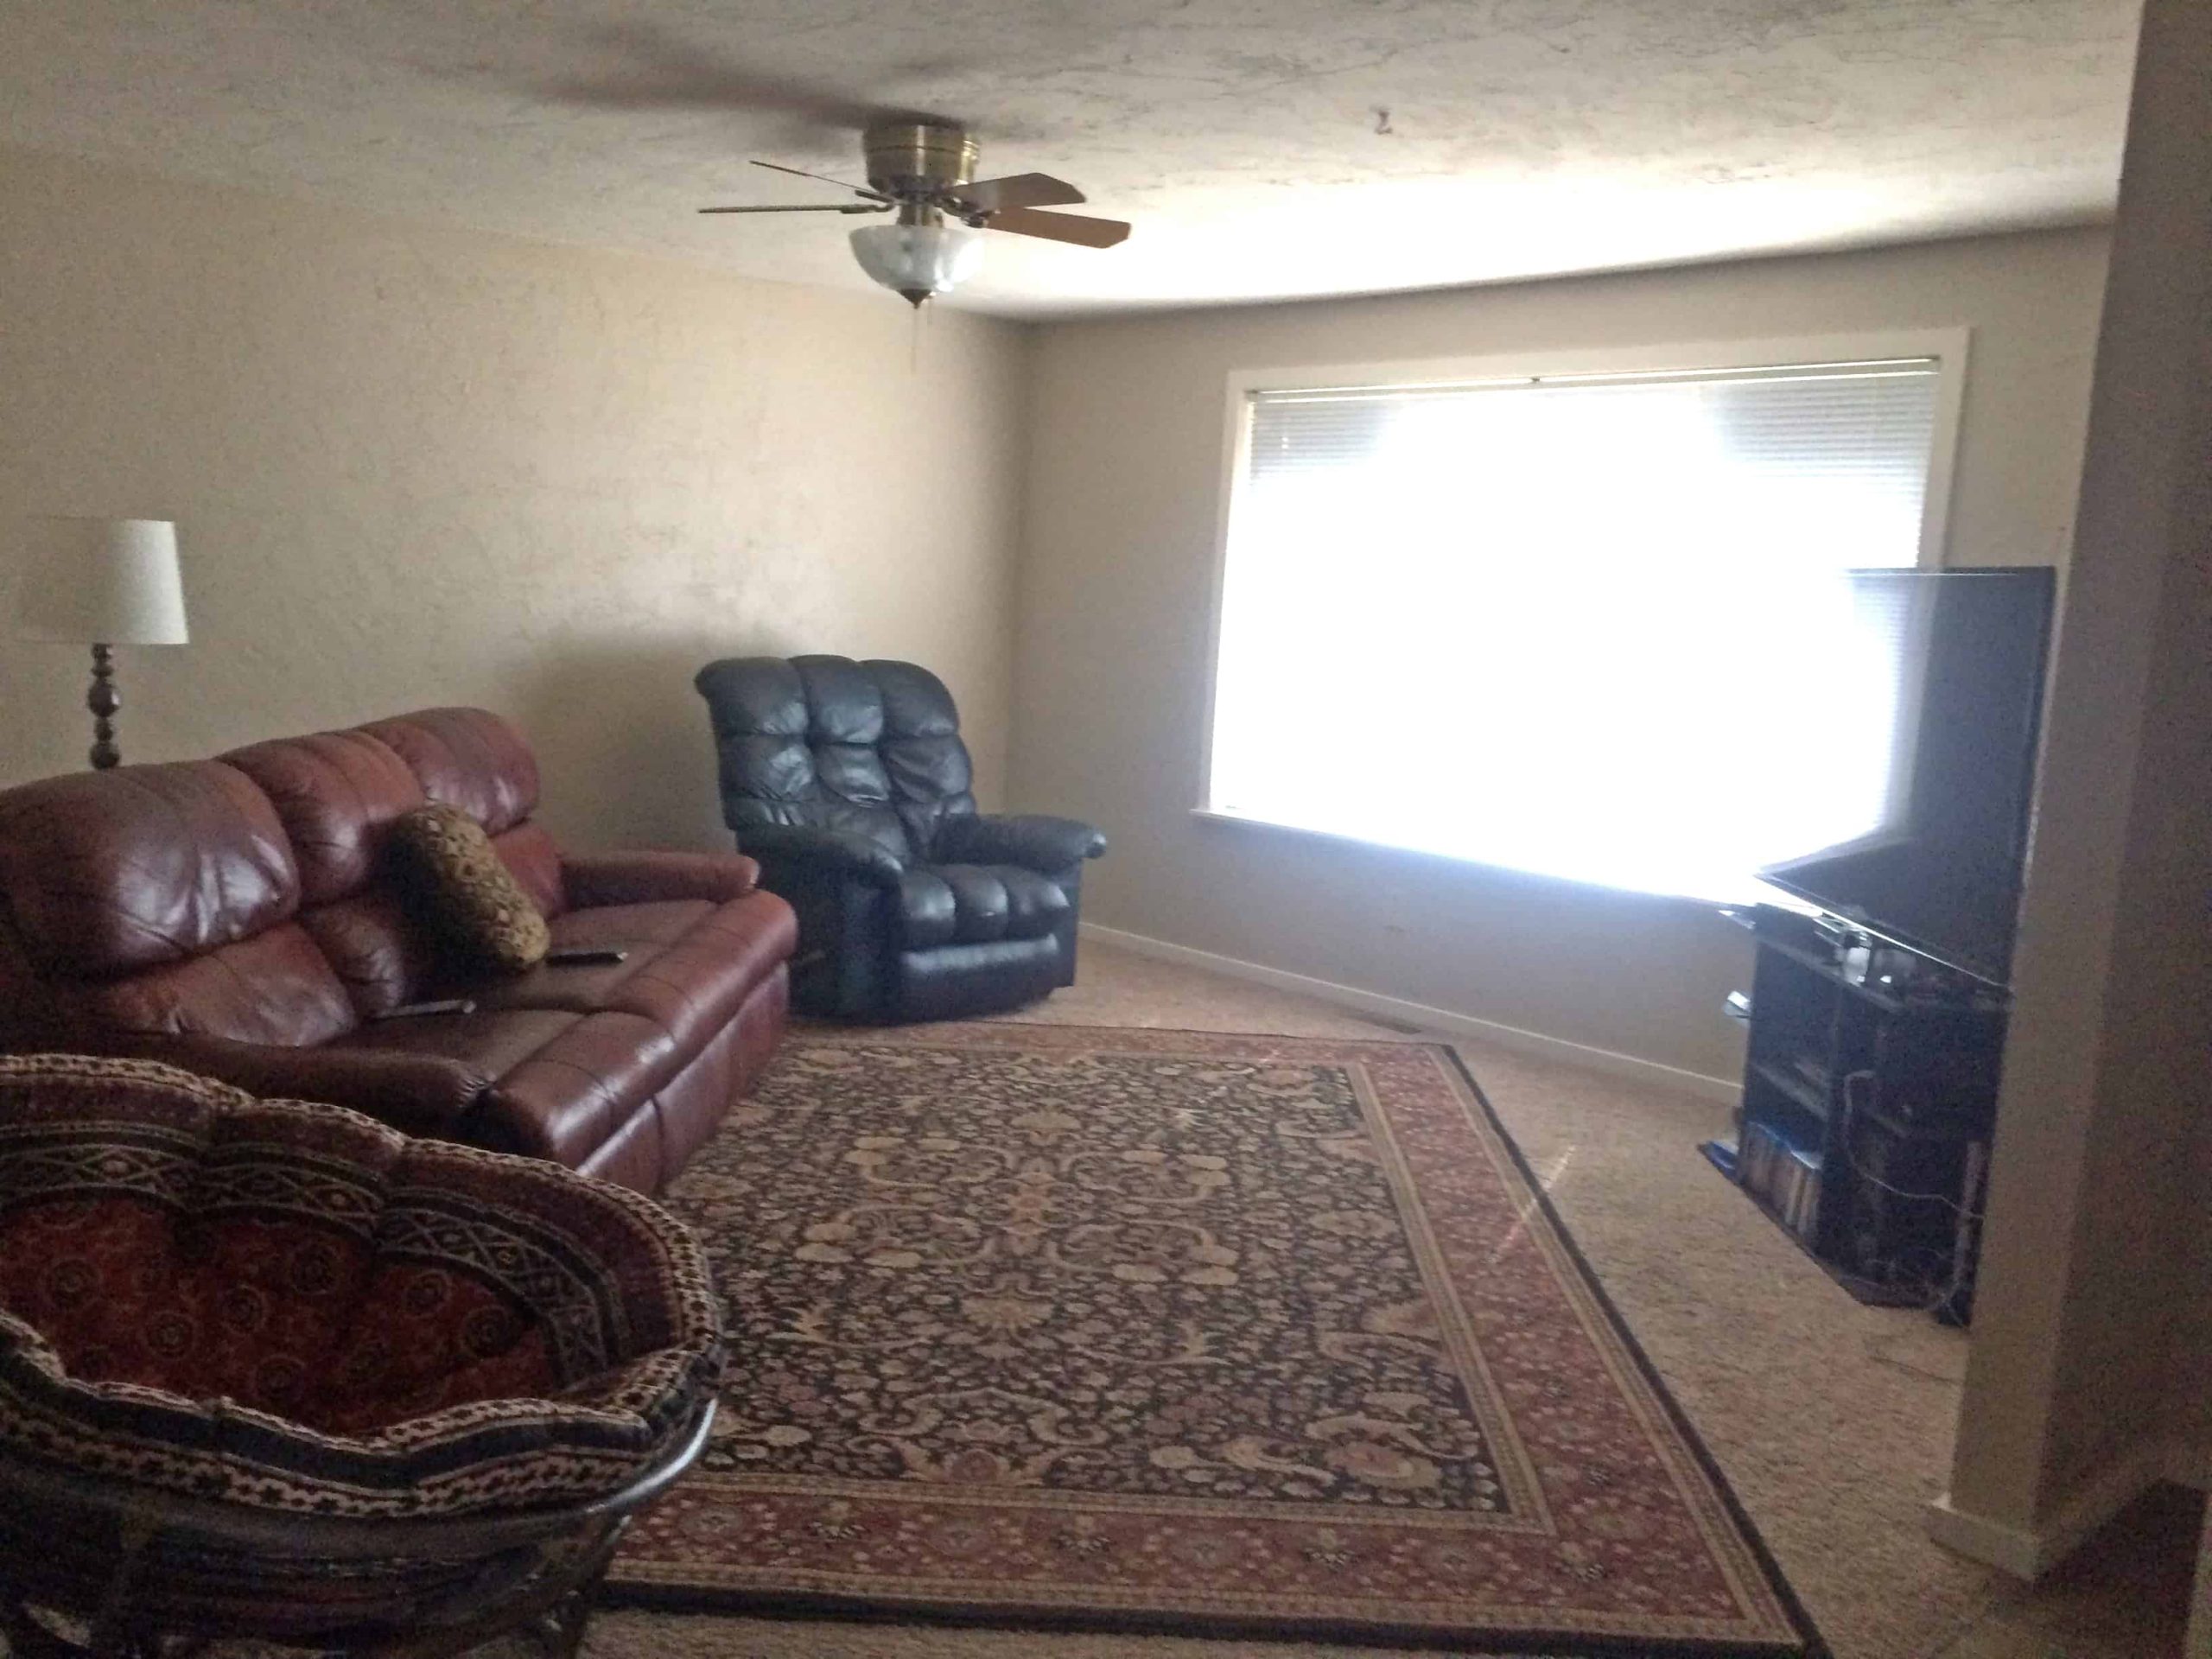
This is what the living room looked like when we purchased the house. We loved that the living room is large and open to the entryway and kitchen.
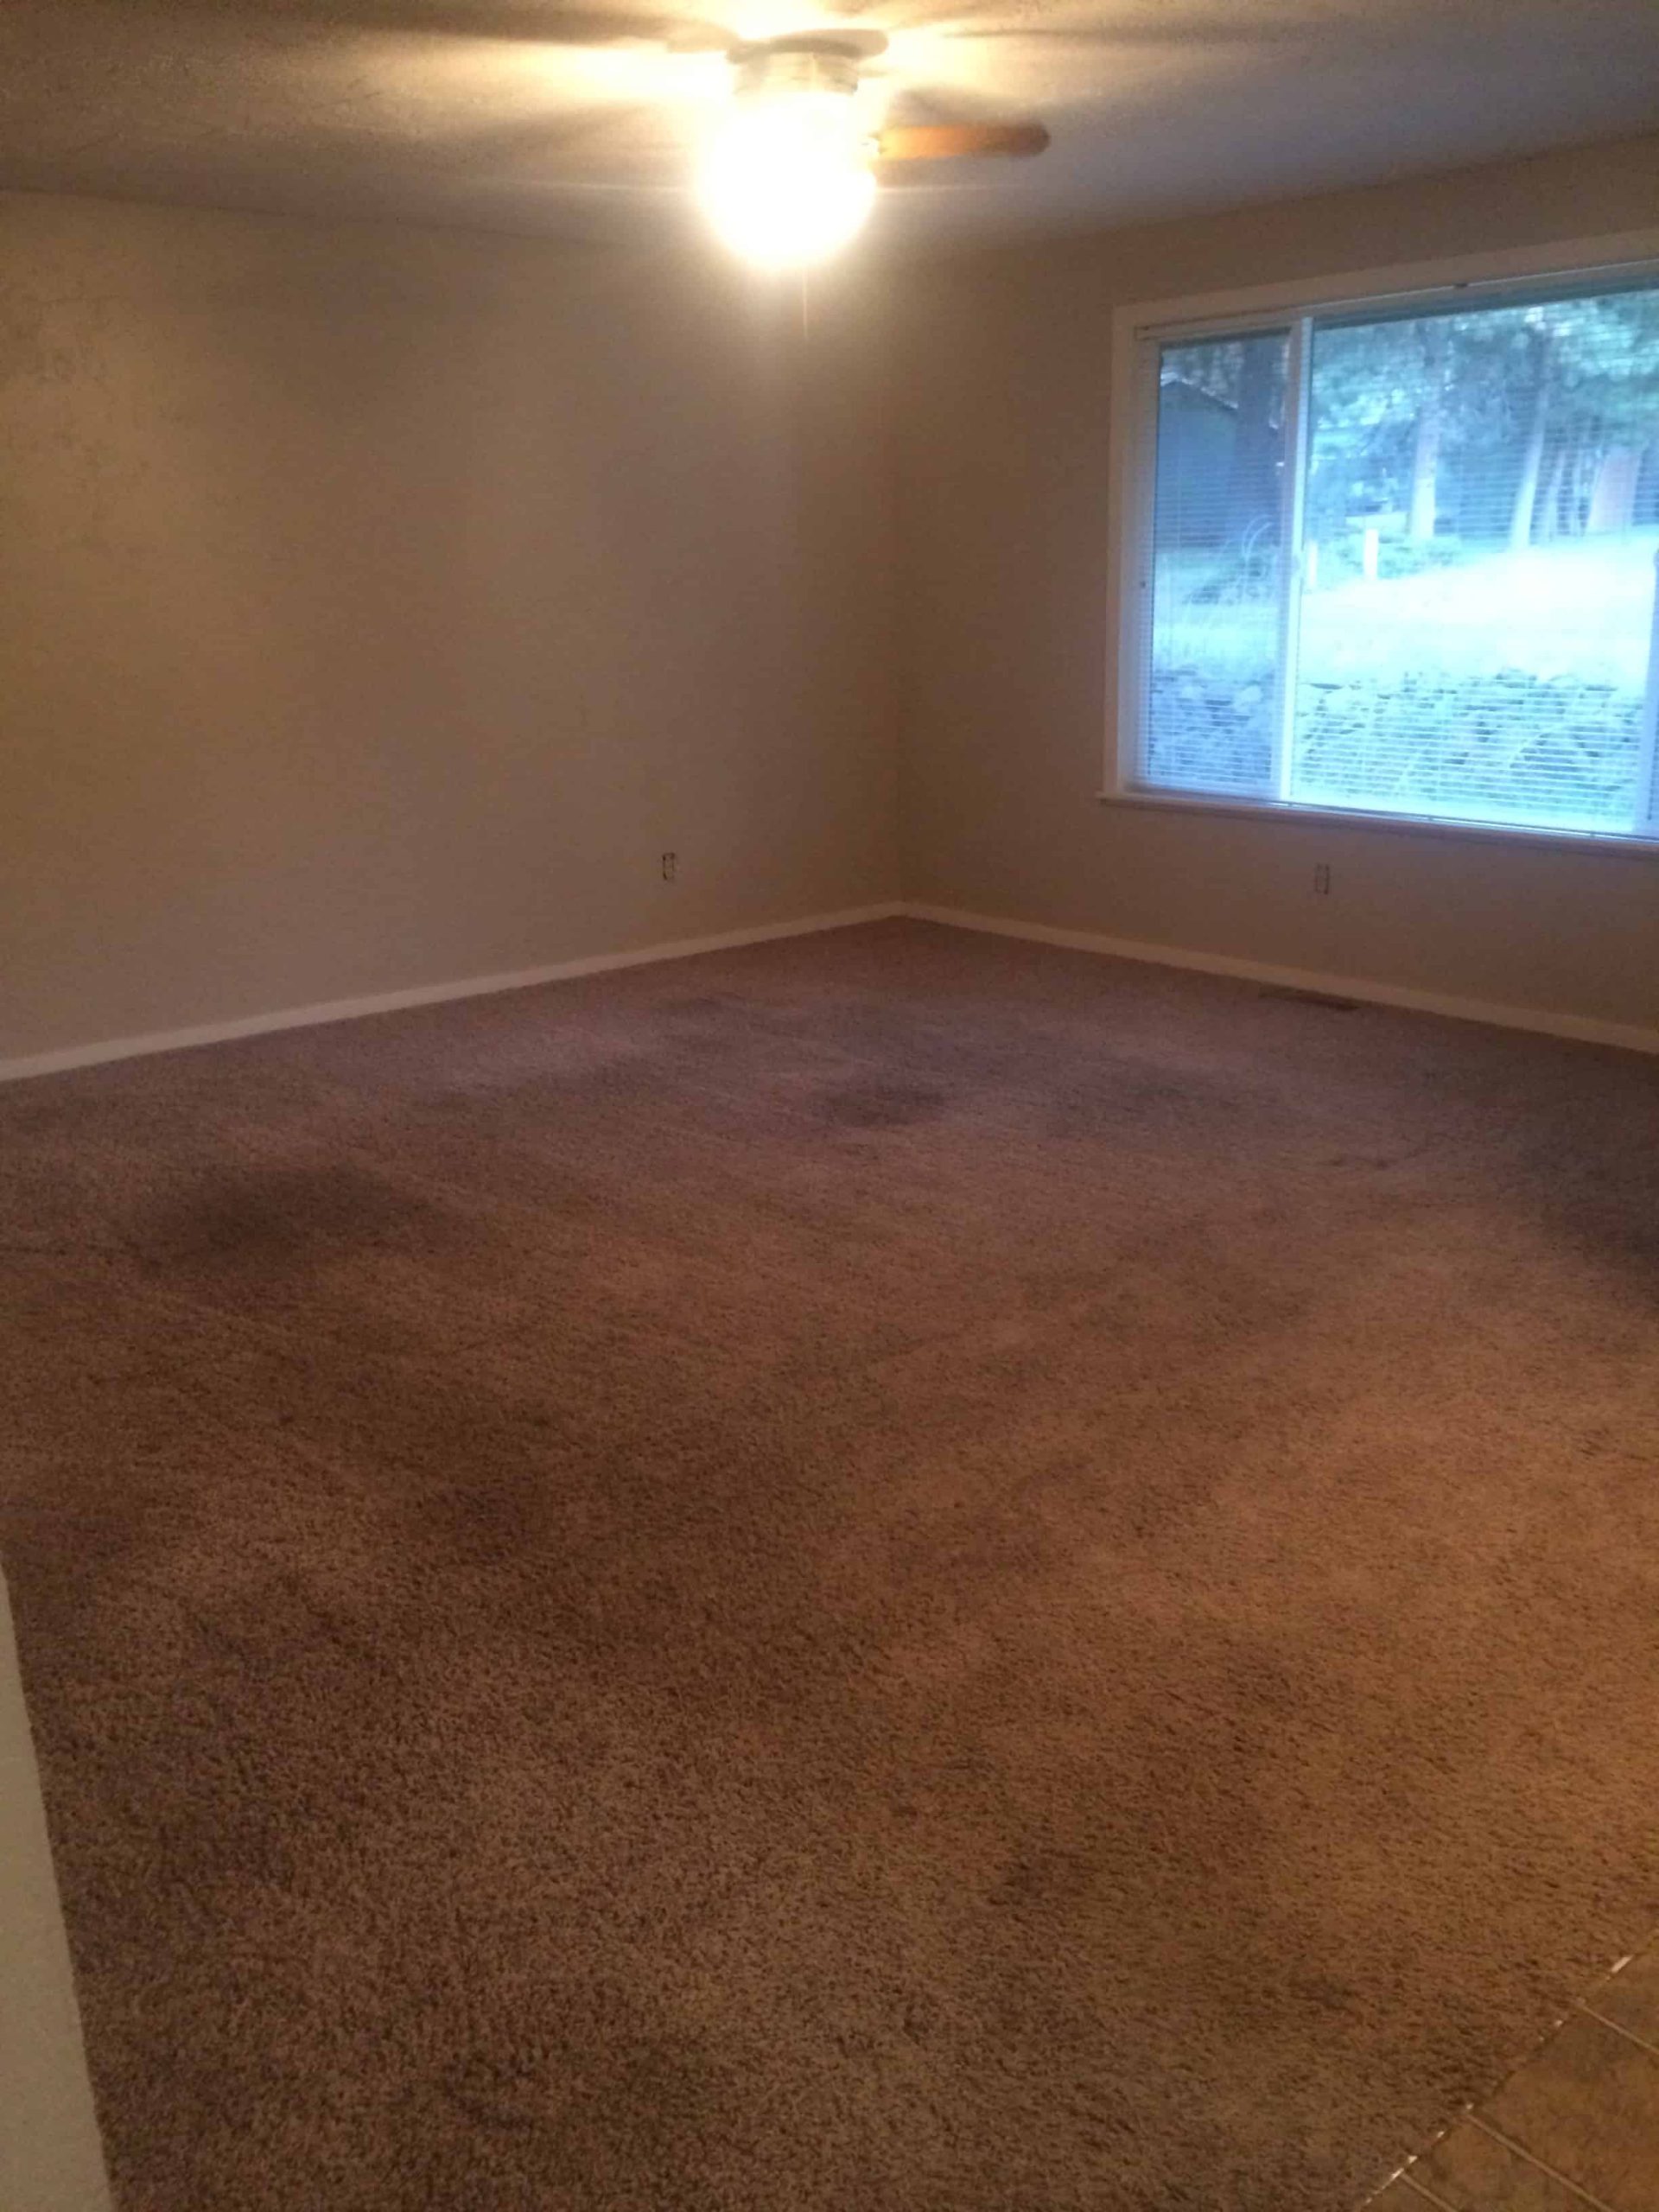
Of course, the walls got smoothed and painted this gray color and the gross carpet was pulled out and replaced with laminate hardwood.
I wanted a little more farmhouse in this living room, so we added this awesome accent wall with shiplap that we made from plywood (and got a new awesome gray sectional – check out these awesome gray sectionals under $1000 for some ideas if you’re wanting something like this).

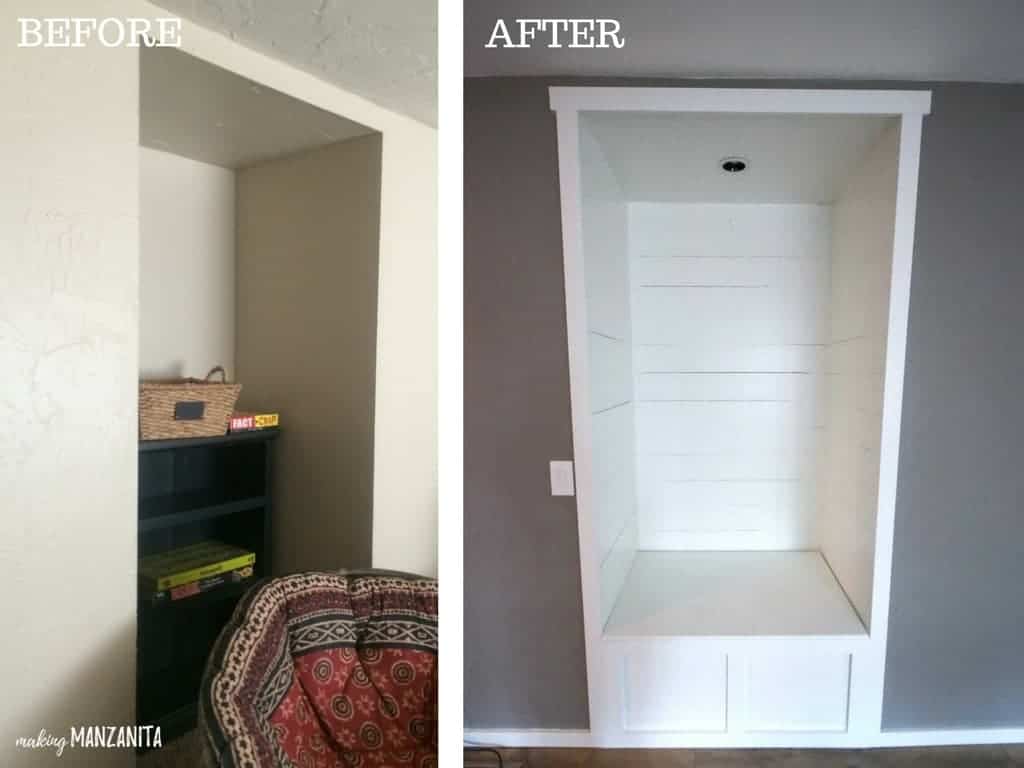
The weird little “cubby” you see pictured here was where a fireplace used to be that was removed some years ago. We transformed this alcove into a farmhouse-style reading nook with storage.
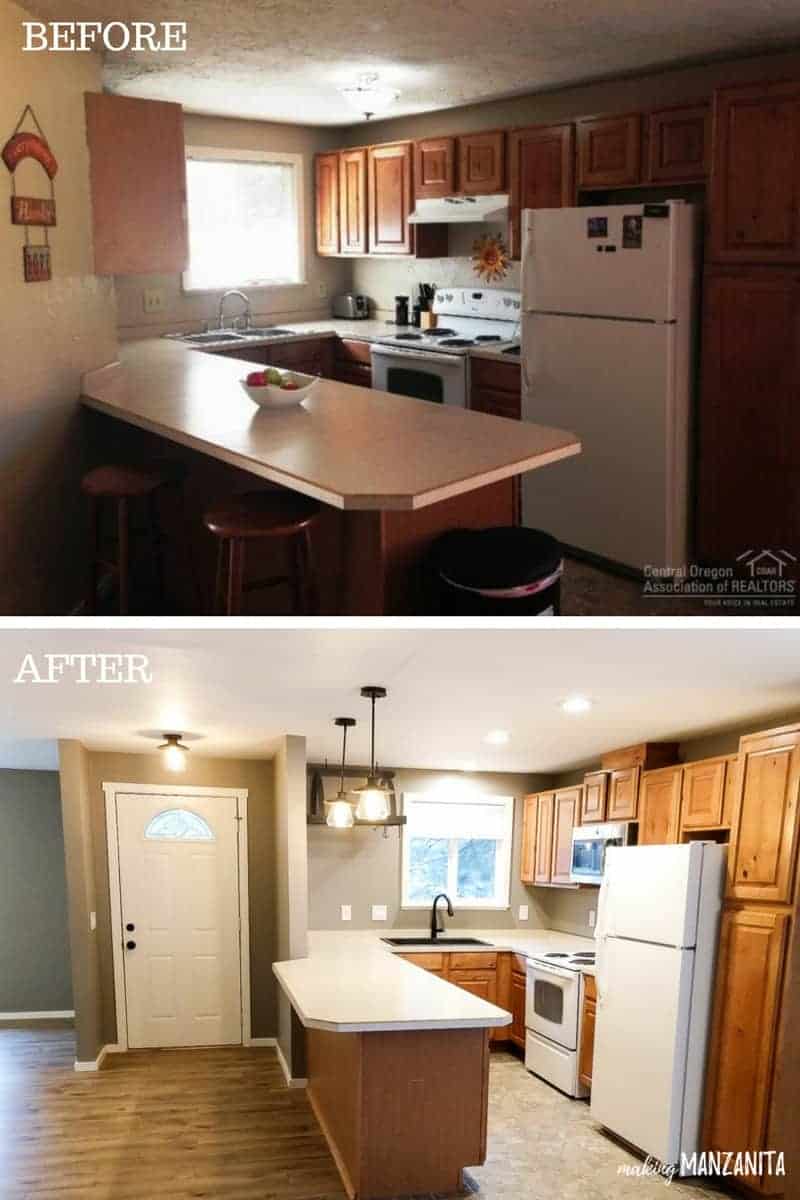
The Kitchen Before & After
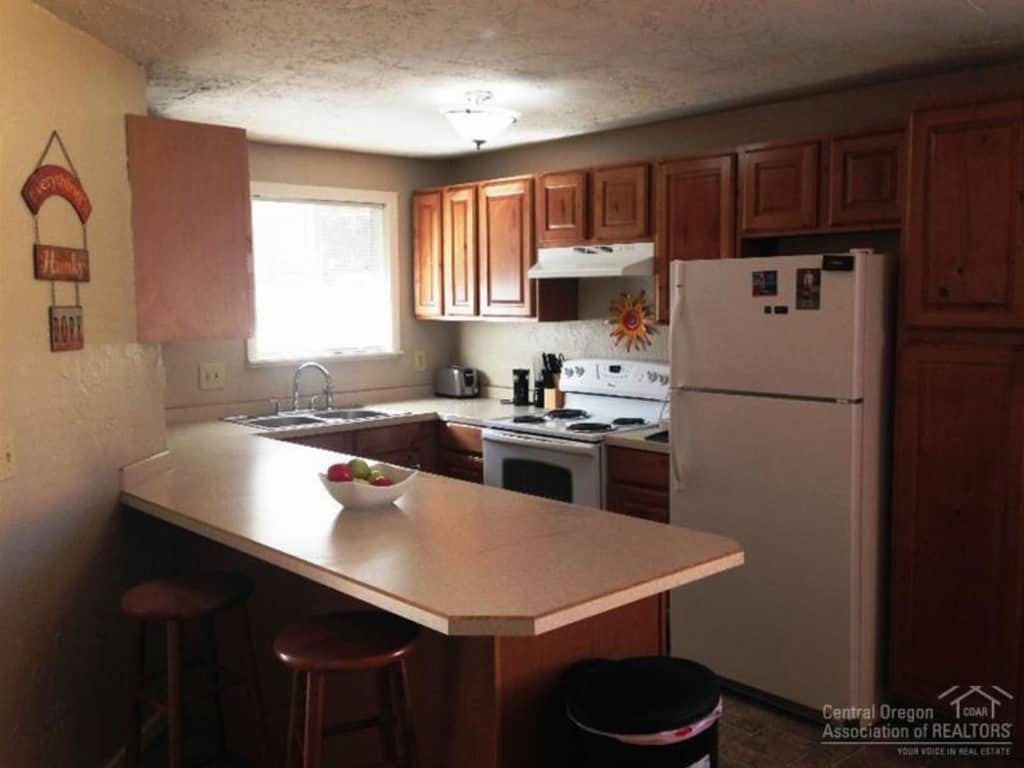
For being an old 70’s fixer-upper, the kitchen was in decent shape when we moved in. Cabinets are nearly spotless and the appliances were all in decent shape.
The kitchen countertops were a bit bland and not necessarily my style, but they are in great shape, so we didn’t touch them!
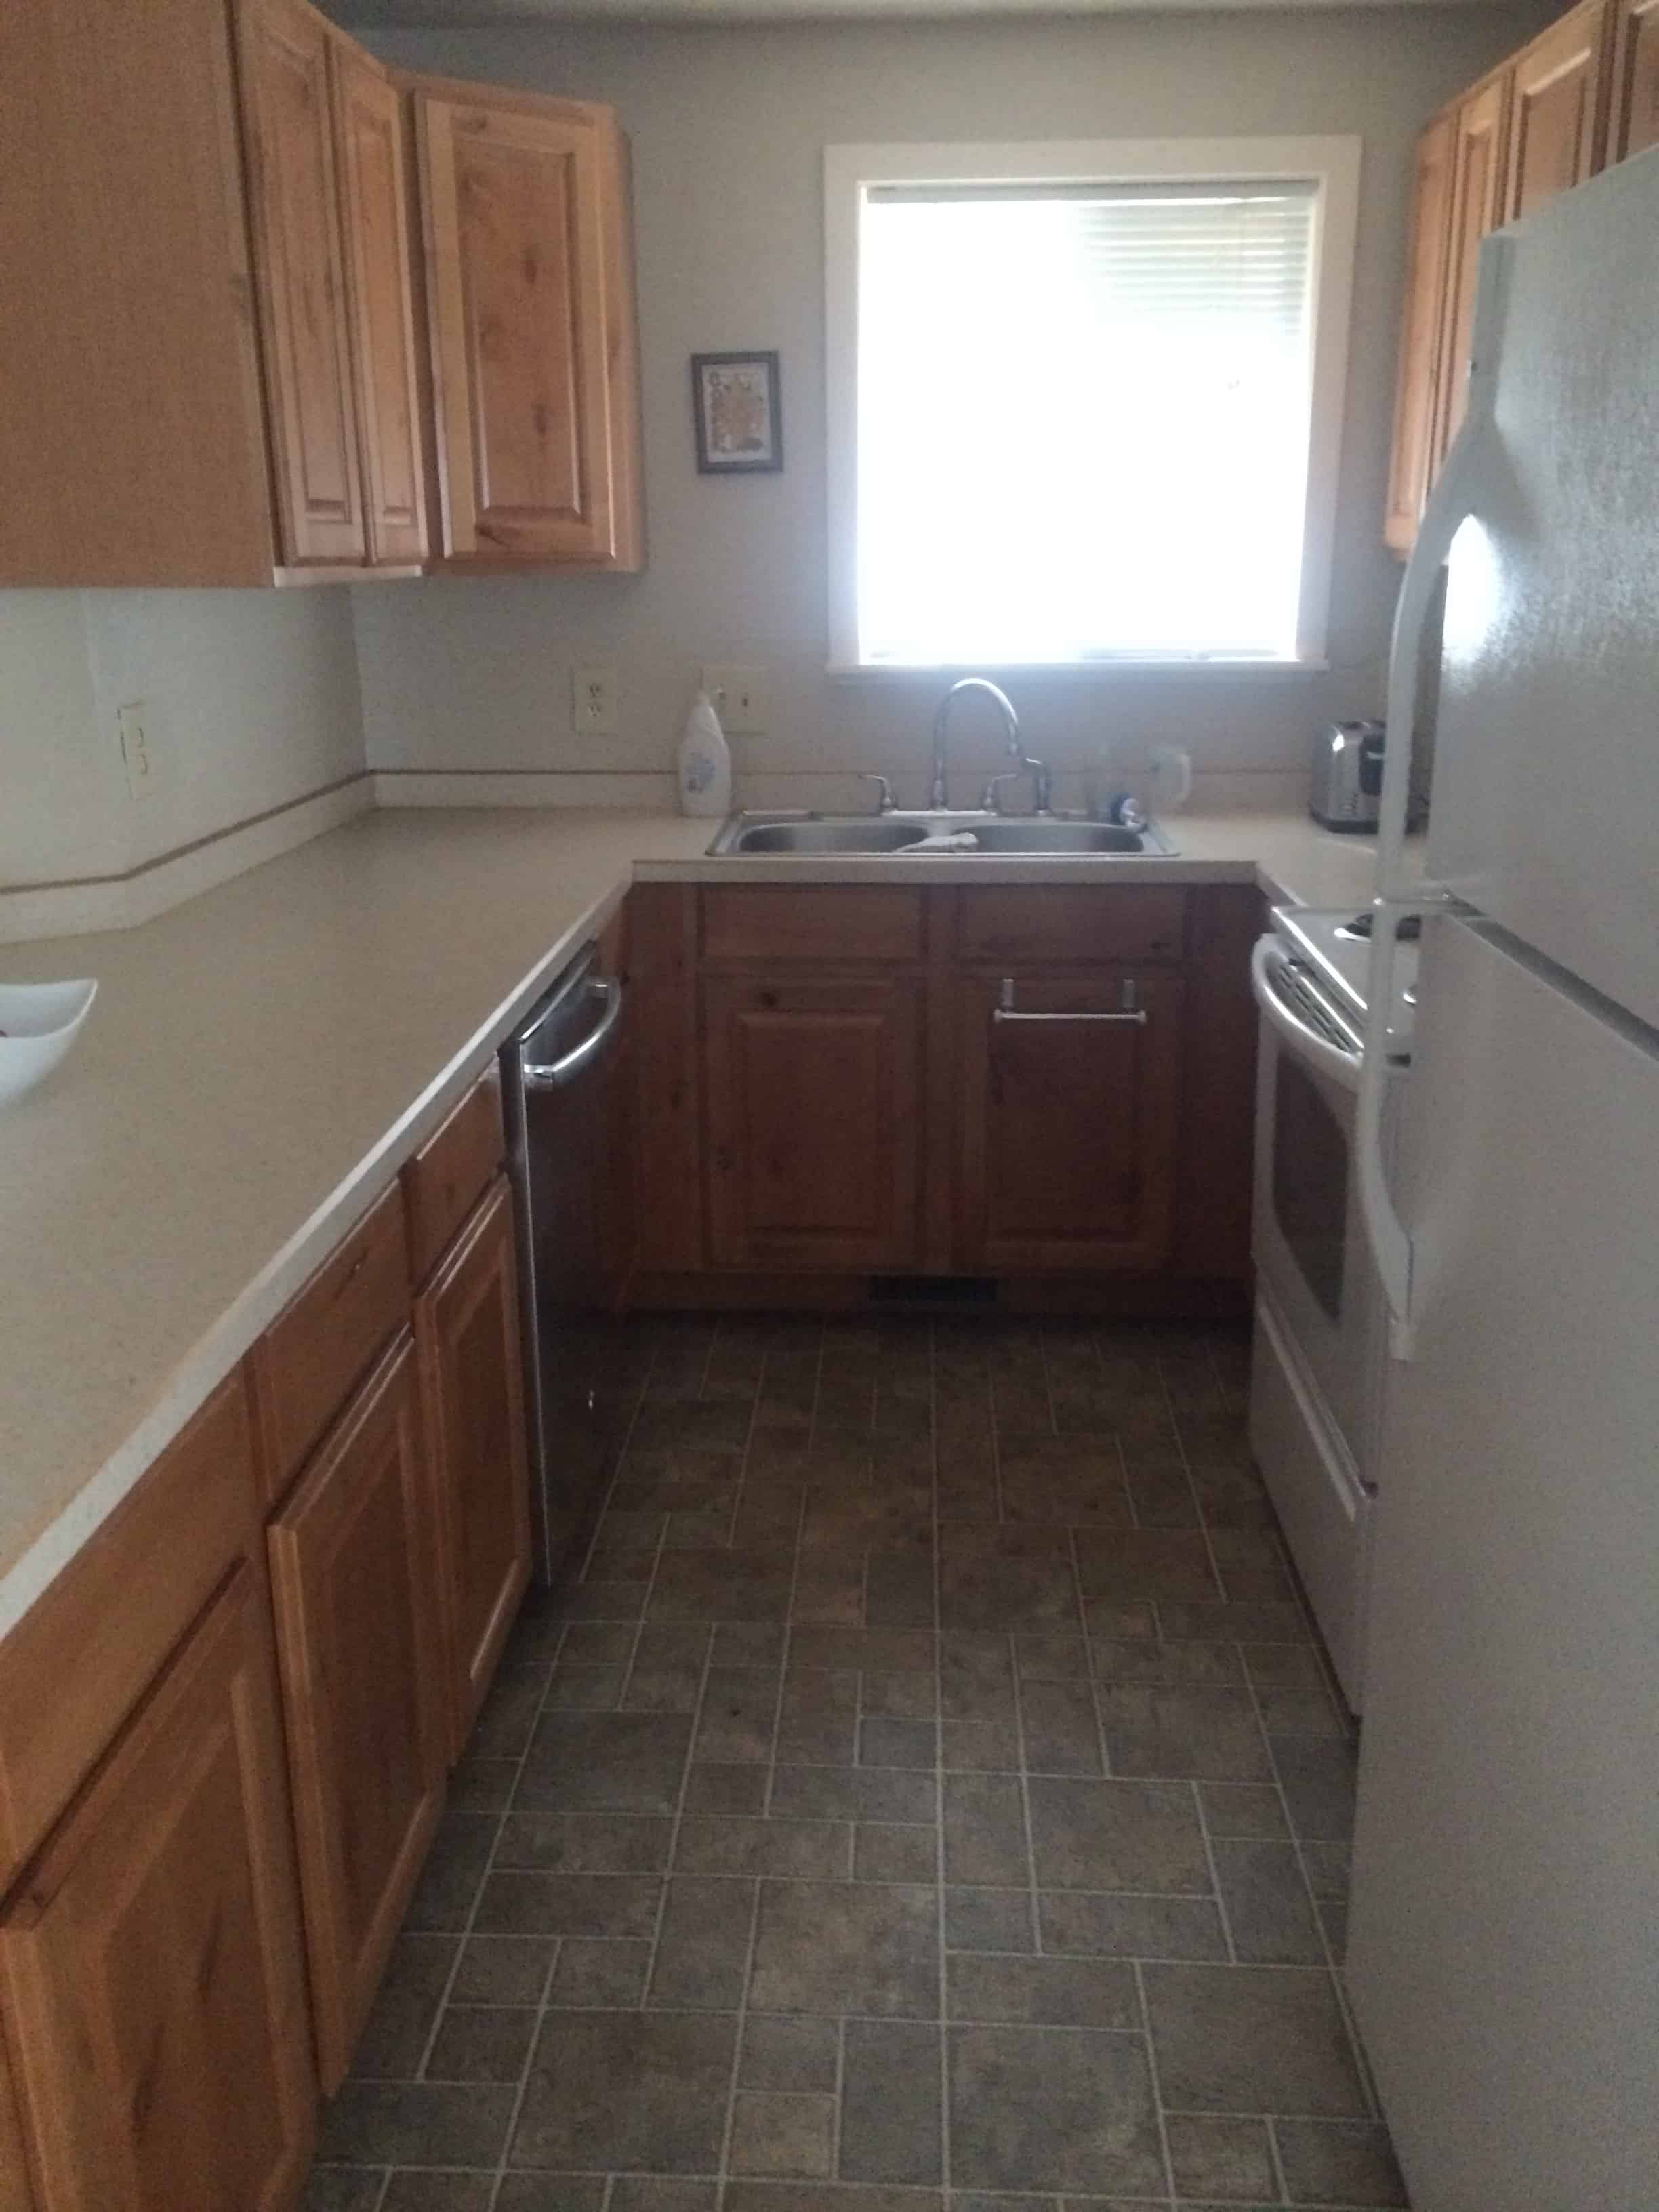
After we knocked out the wall near the front door (see above), we ripped out the upper corner cabinet. It wasn’t very efficient. Those deep corner cabinets never are!
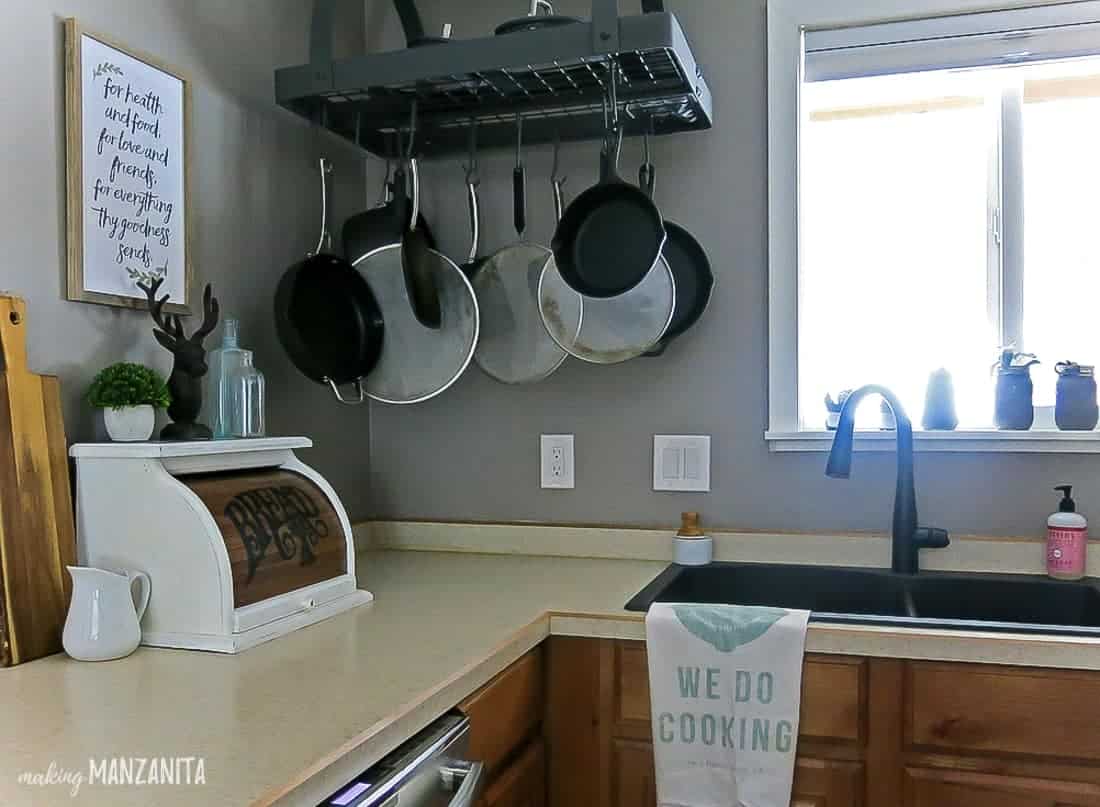
And it really made the area feel a lot smaller. We got it out of there and added this hanging pot rack, which I LOVE!
The vintage bread box is the perfect touch for some extra countertop storage. and Yes, we actually store bread in here!
We replaced the kitchen sink with a black matte style and added this show-stopping faucet. We also installed a microwave above the oven.
Kitchens can be EXPENSIVE to renovate, so we were happy that we didn’t need to do much in the kitchen.
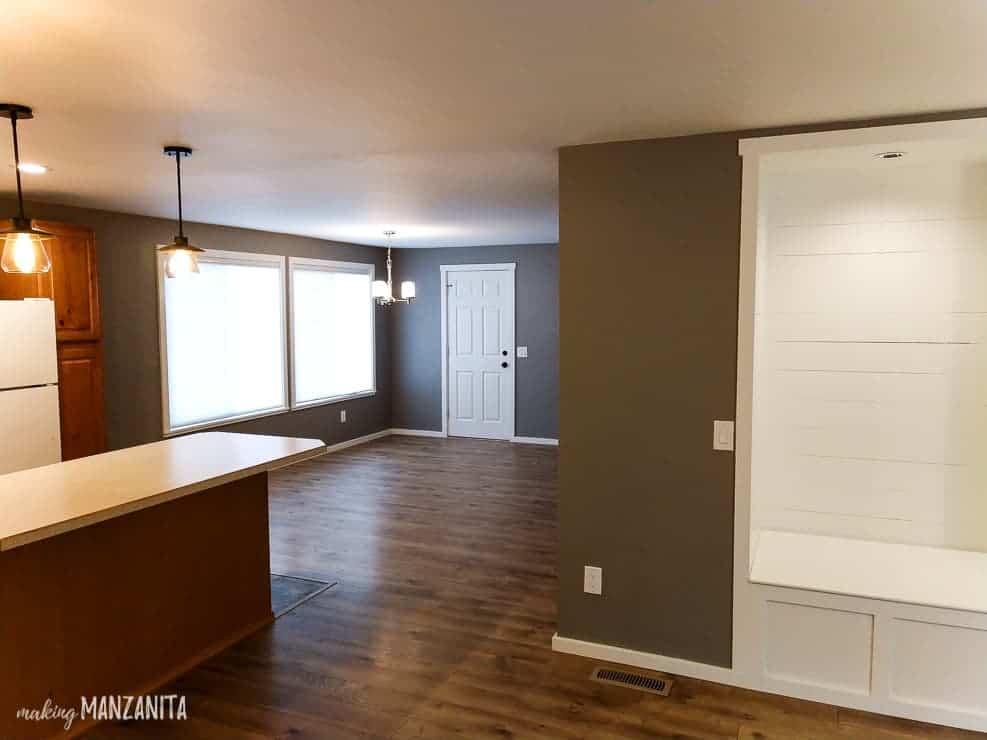
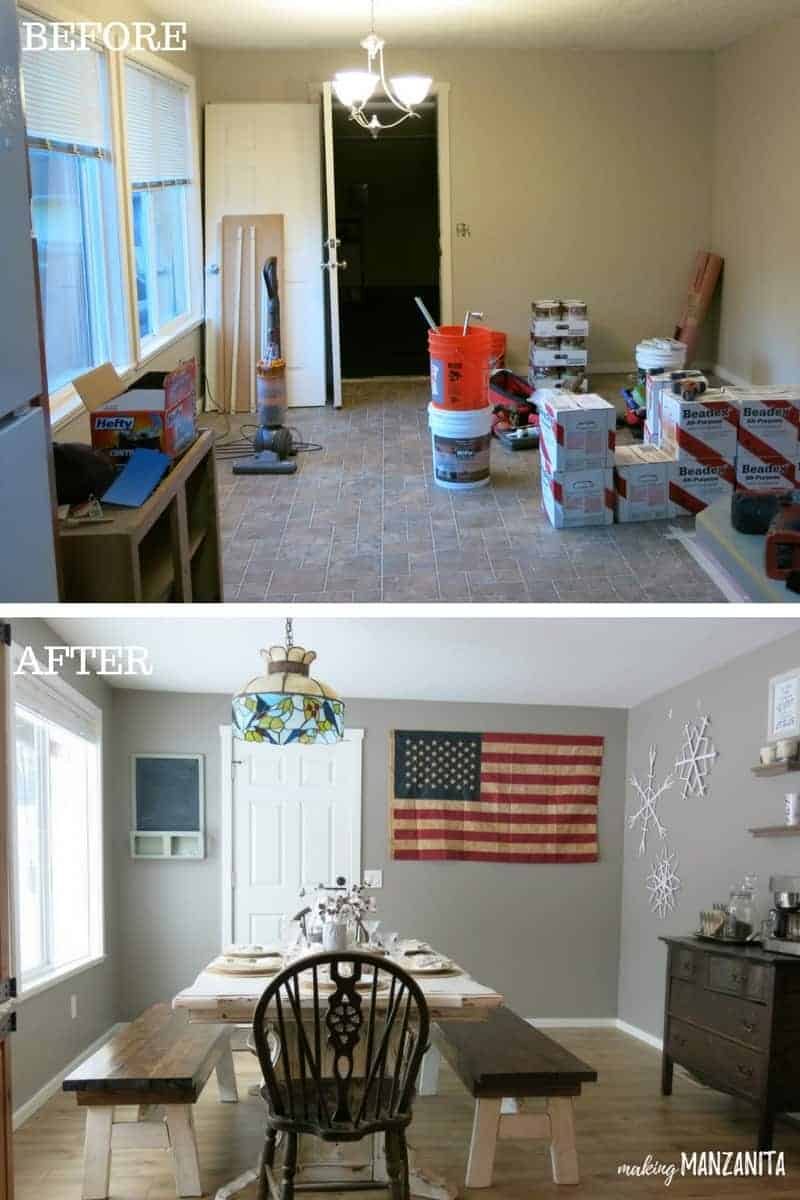
The Dining Room Before & After
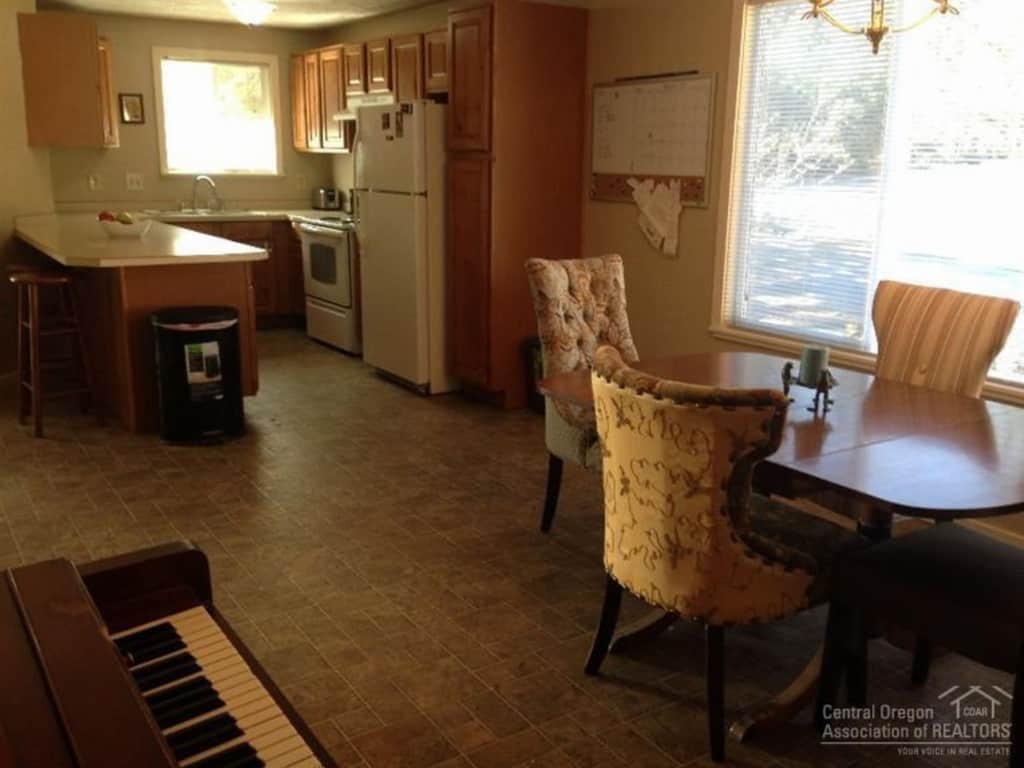
The kitchen opens up directly into the dining area, which has a door to the garage (and provides the only access to the backyard).
The main projects we did in the dining room were smoothing and painting the walls and replacing the flooring.
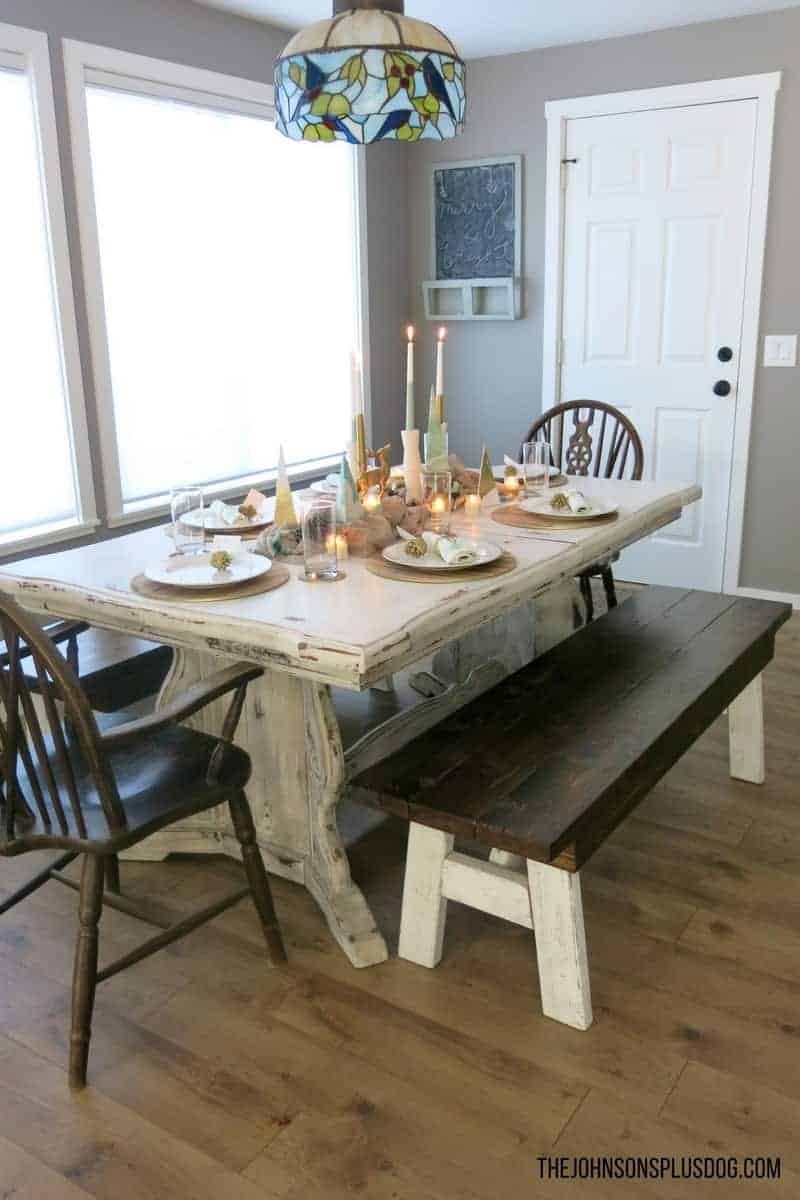
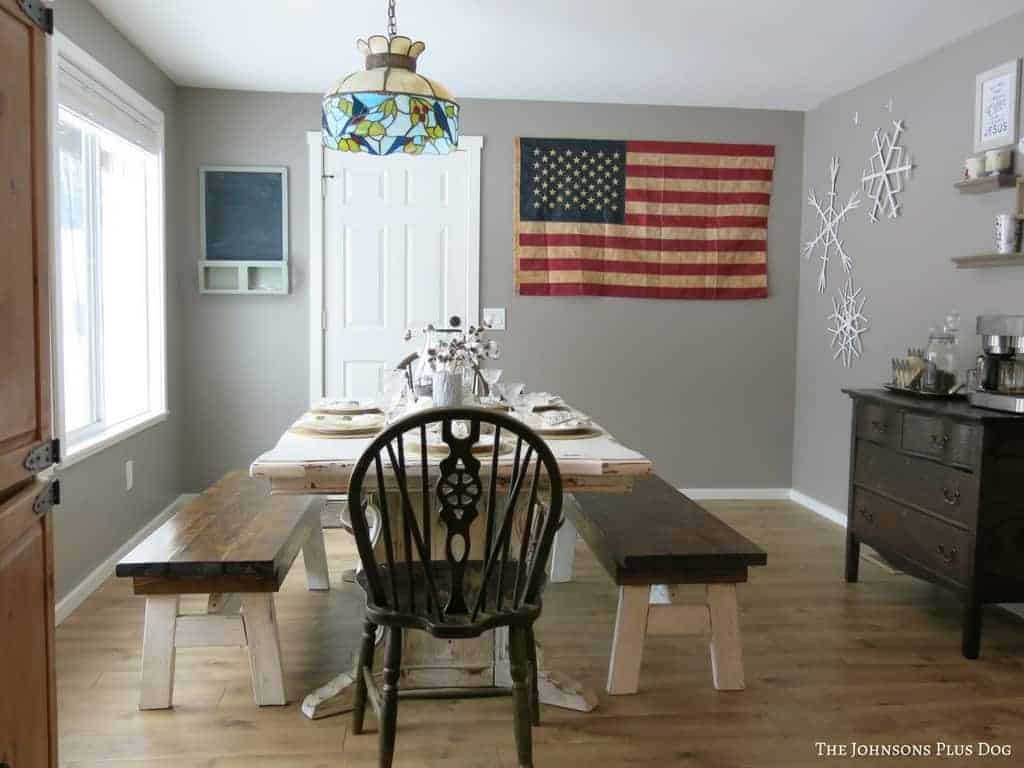
I scored the farmhouse-style table at a thrift store for only $185, and it was already painted like that, which I loved. Logan built the farmhouse benches.

We made this vintage dresser into a coffee bar, which I loved!! Read more about how this DIY coffee station came together here.
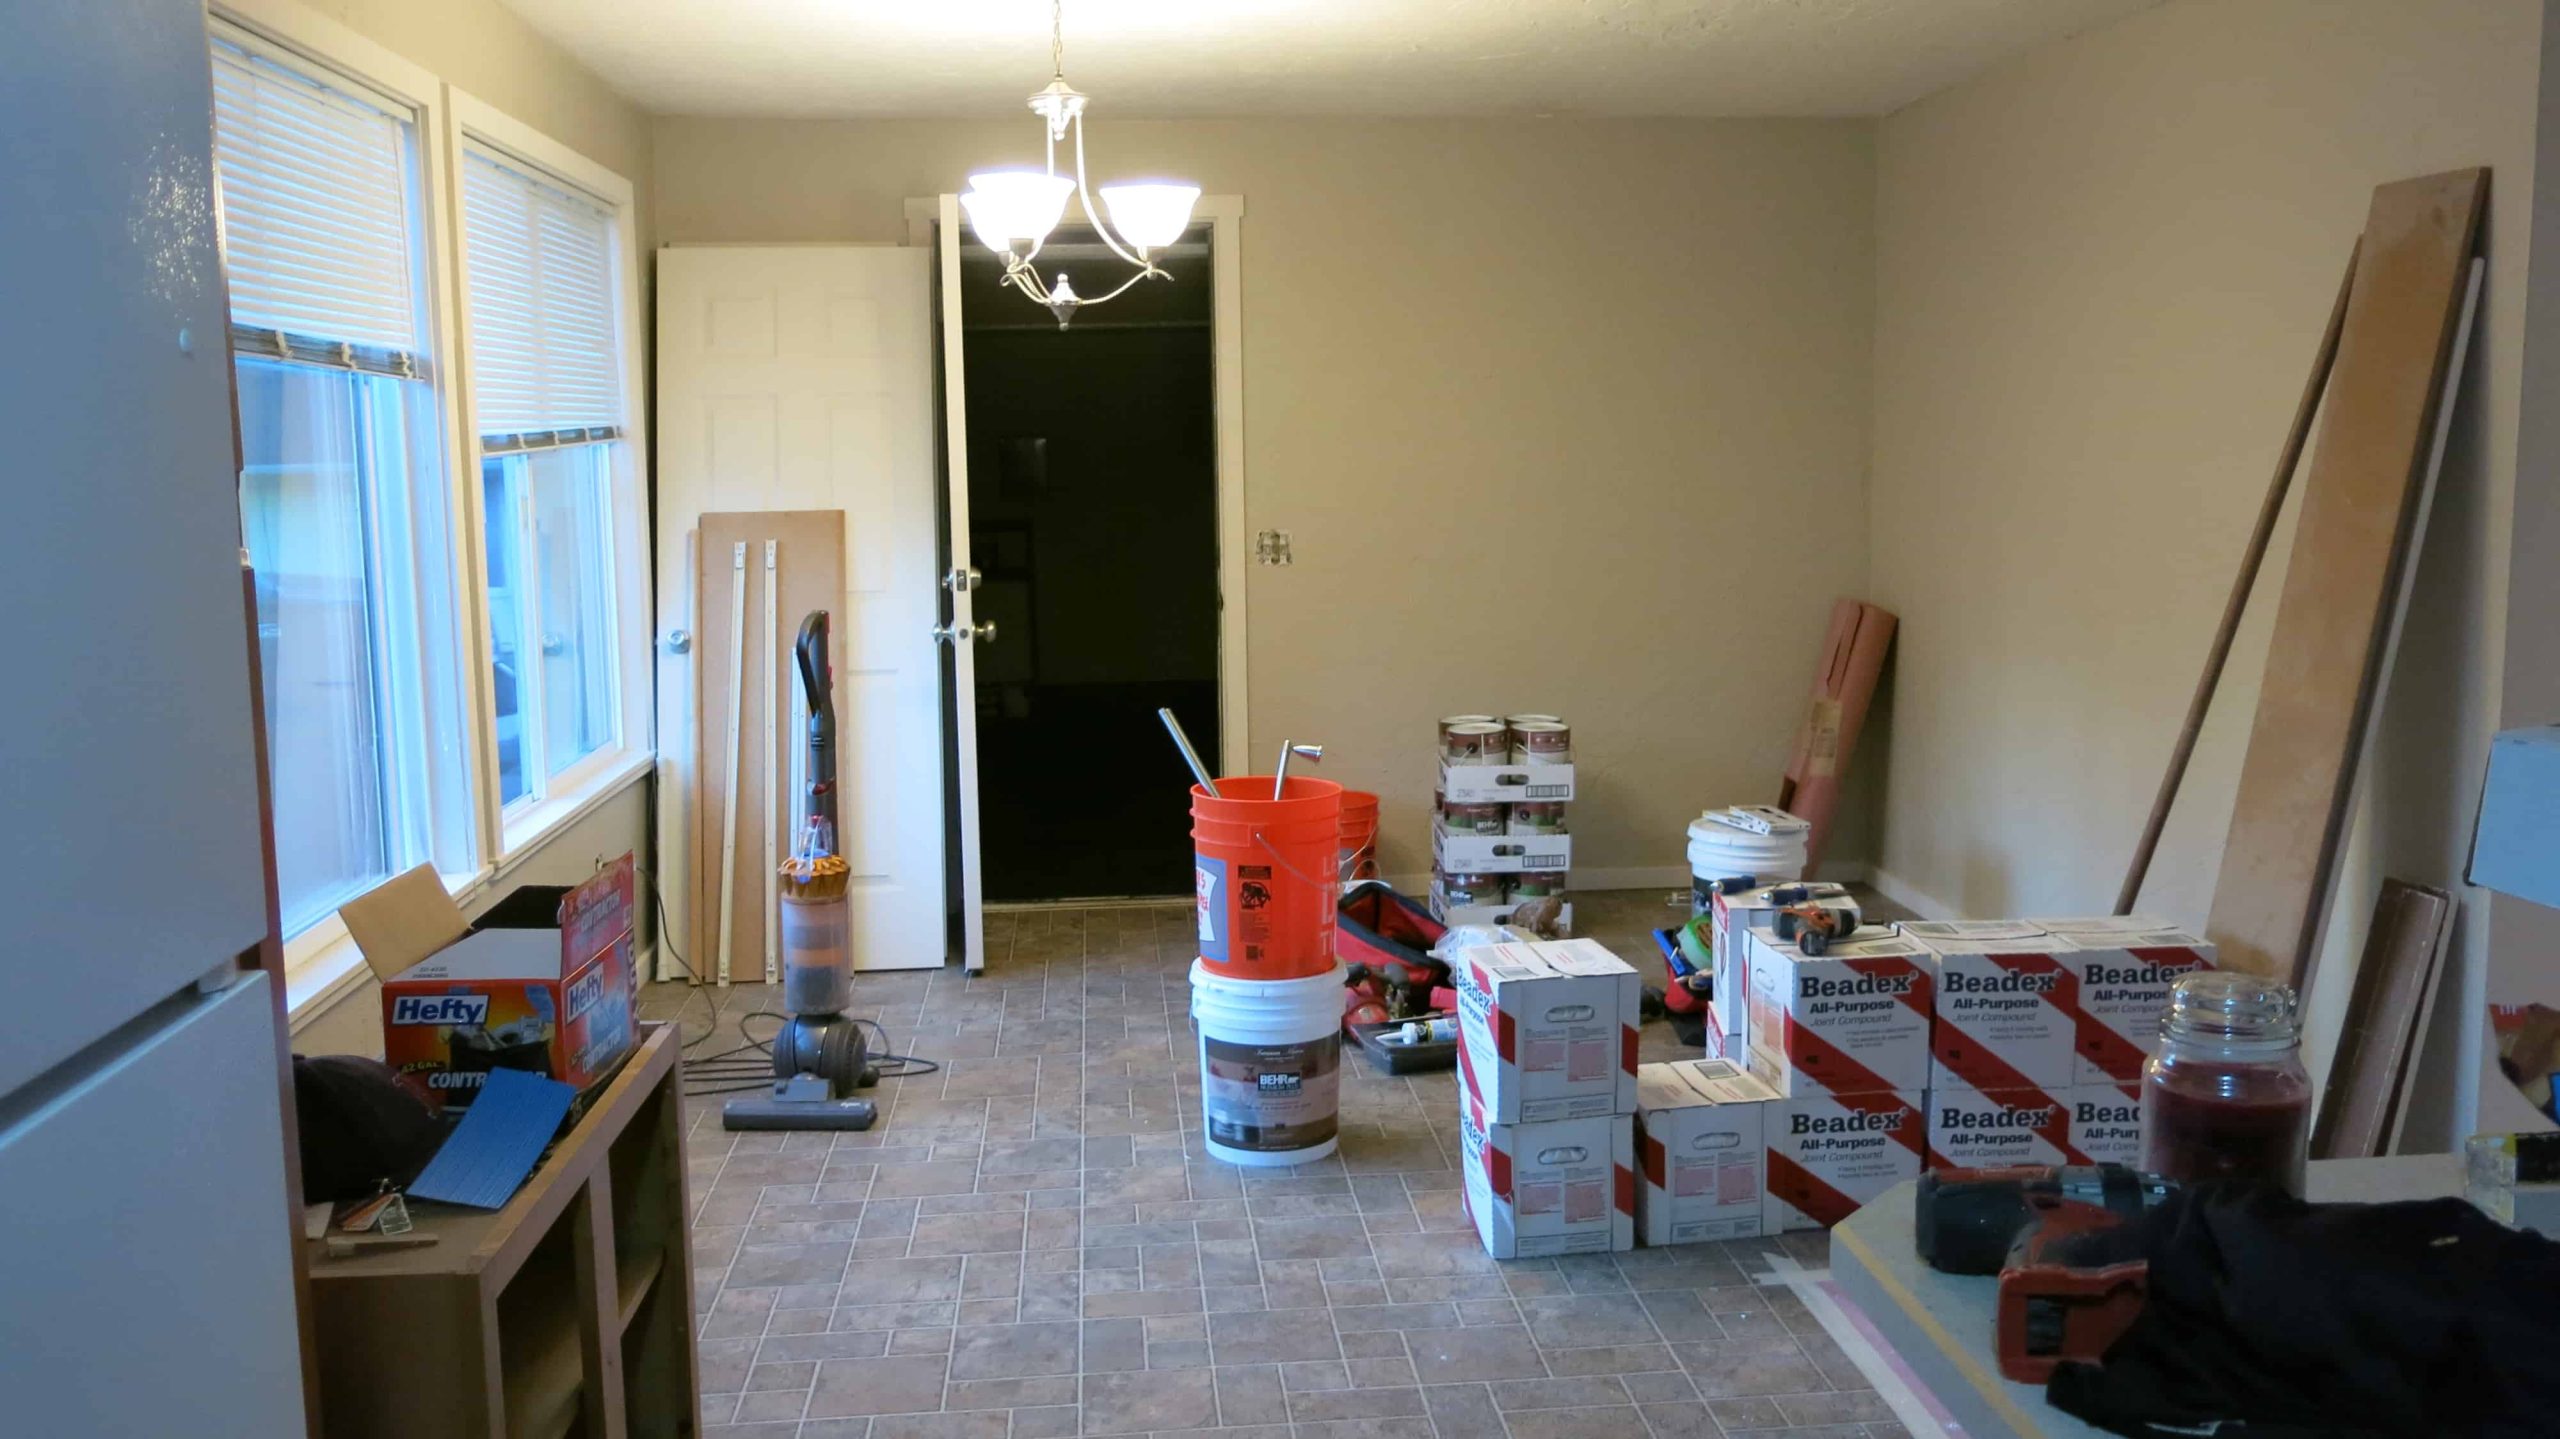
This photo is really more of a “during” and after, rather than a before and after pic!
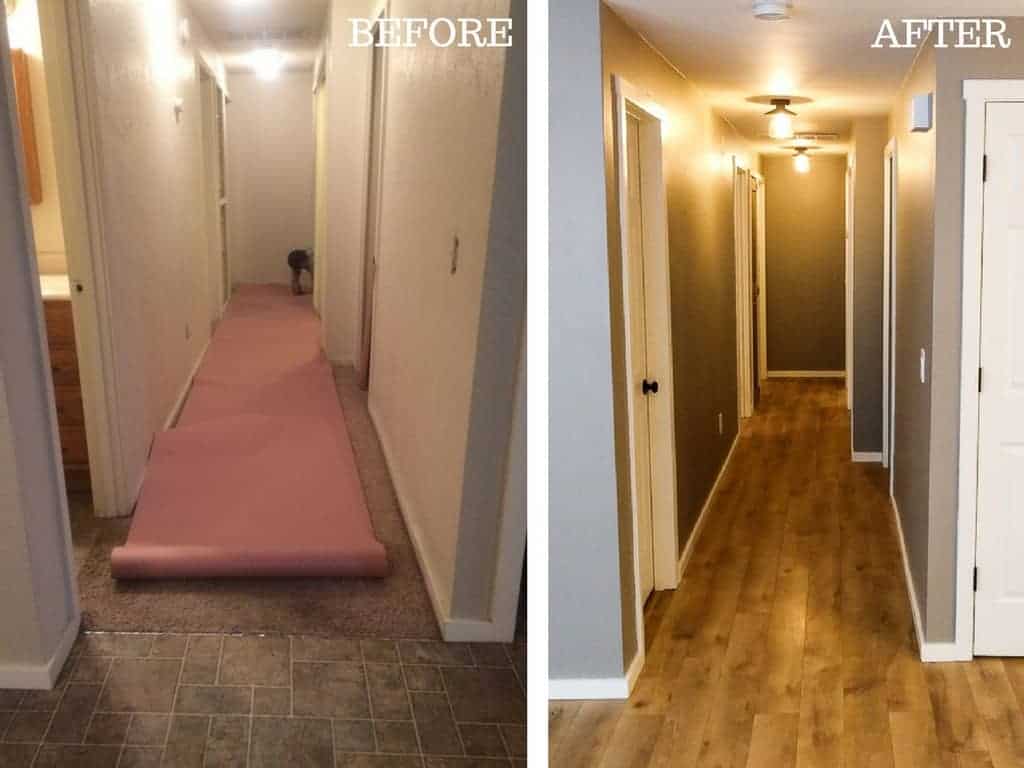
The Hallway Before & After
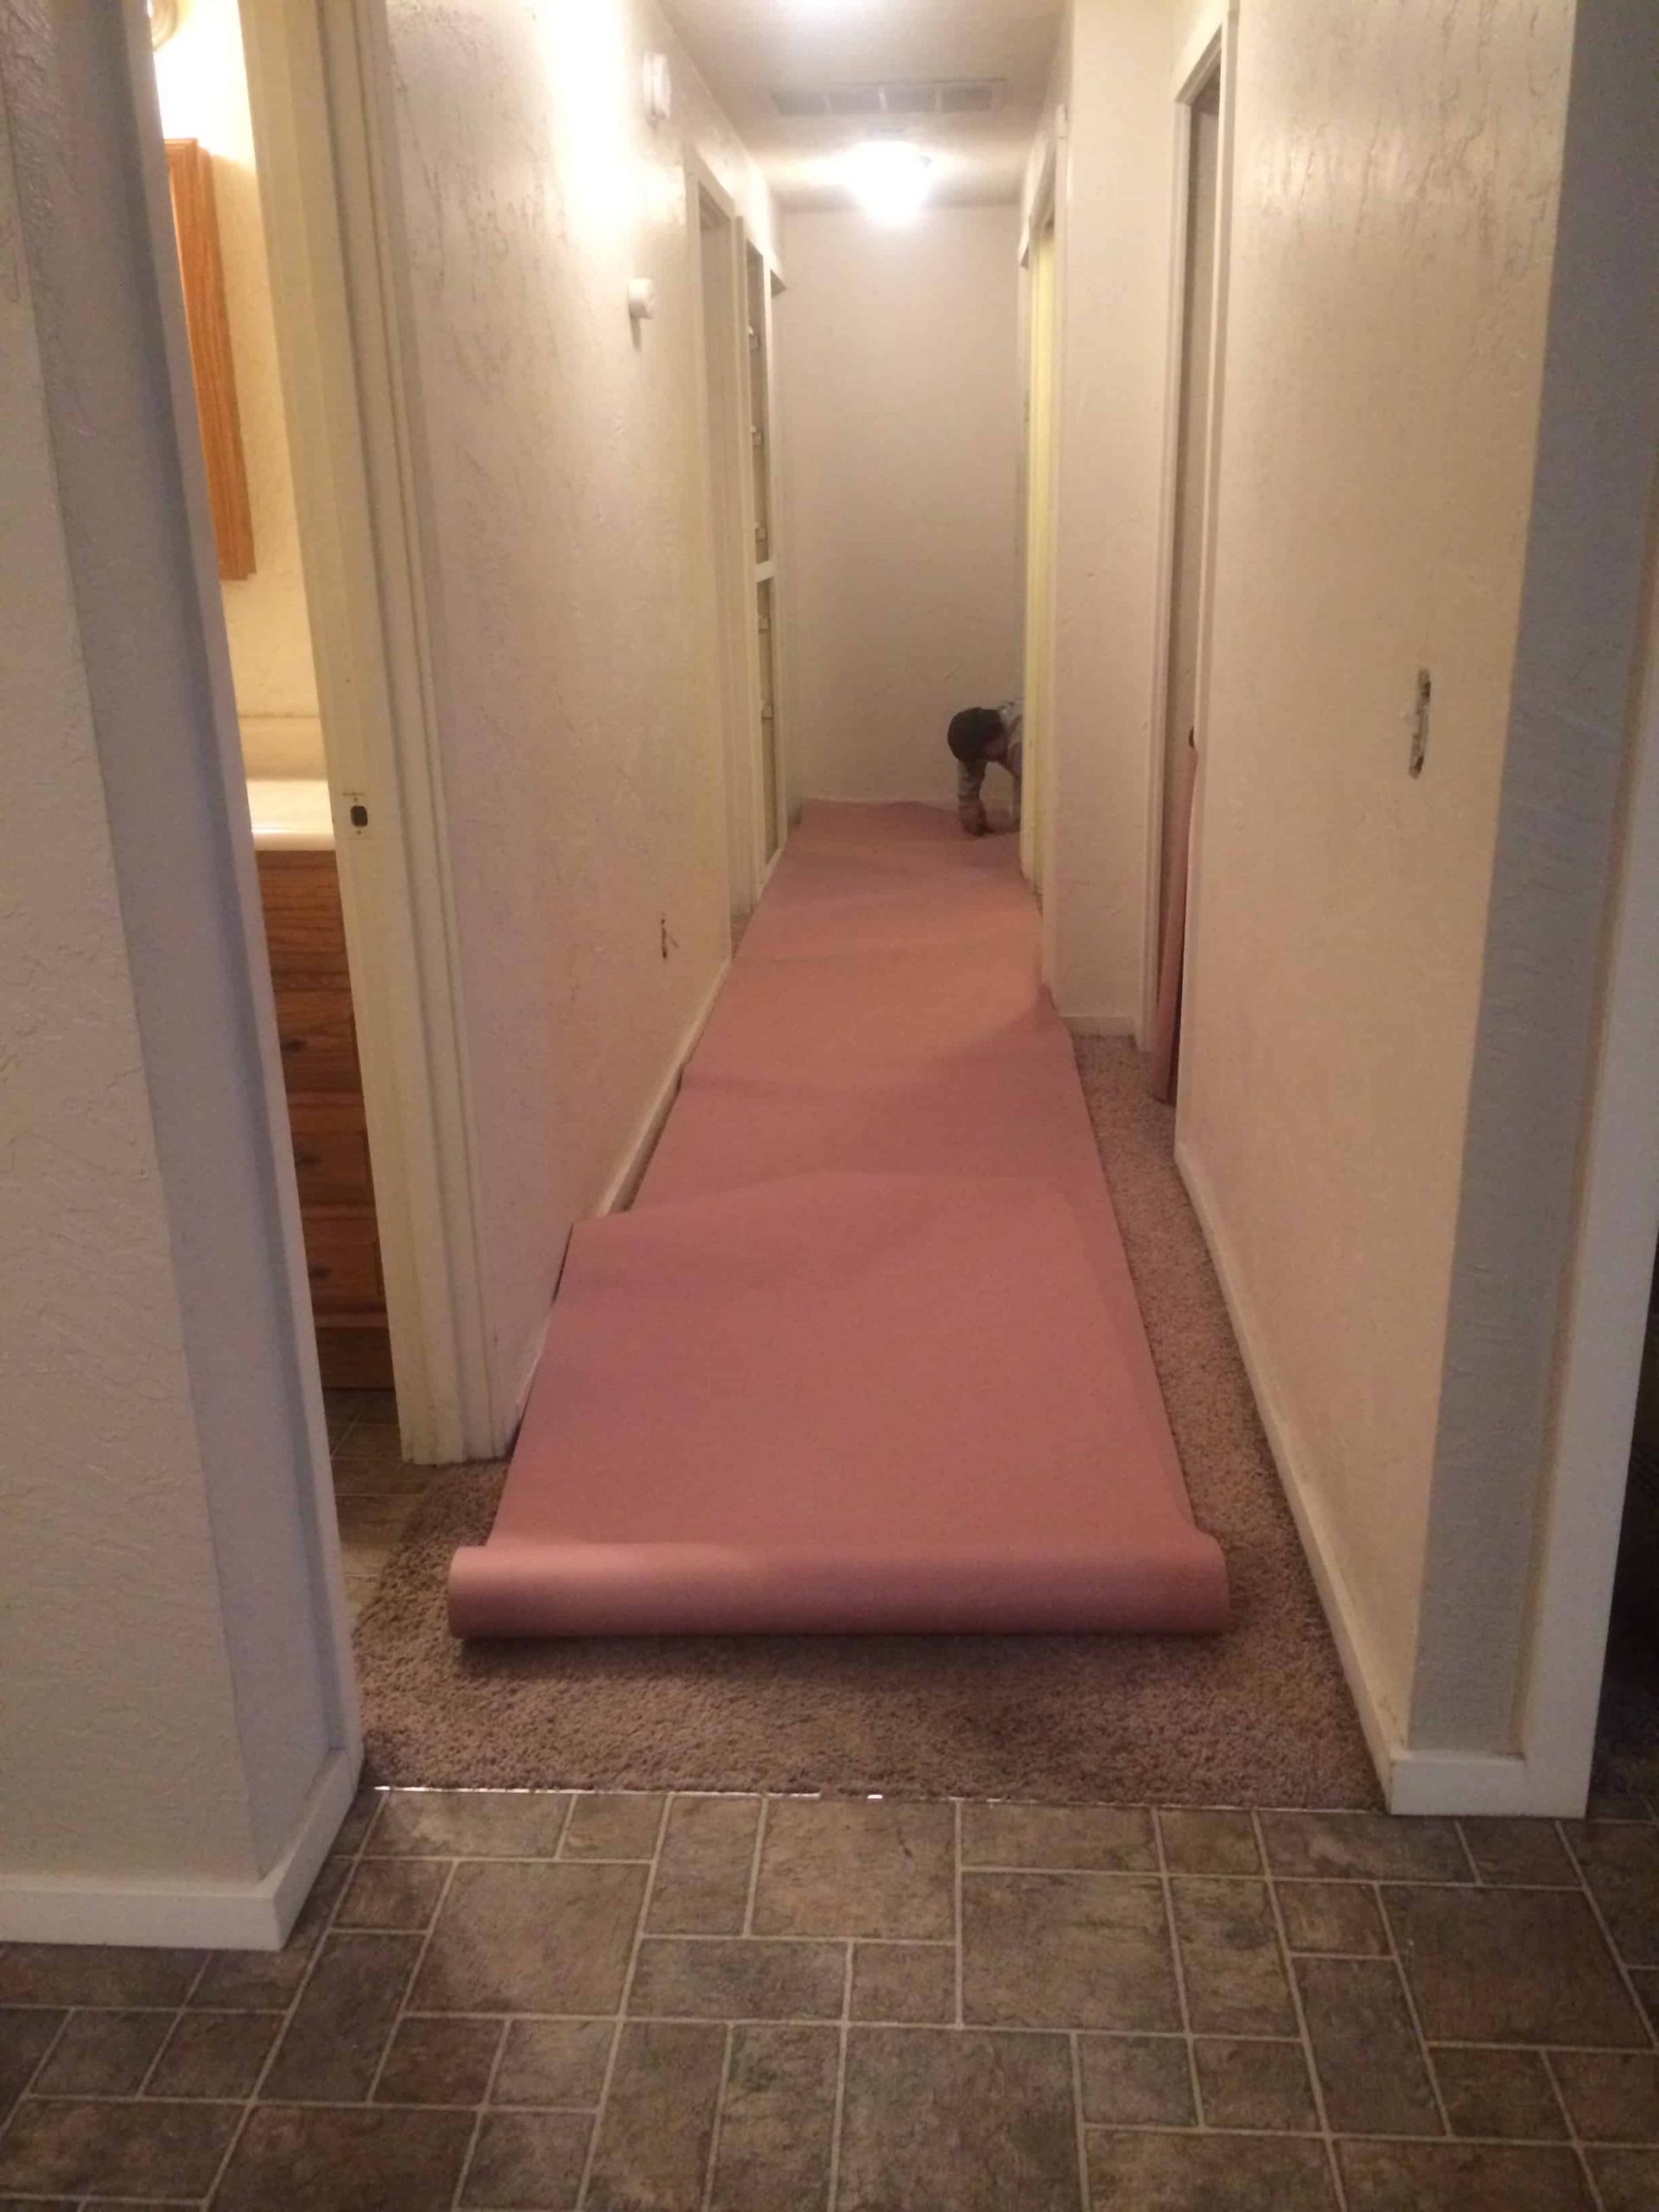
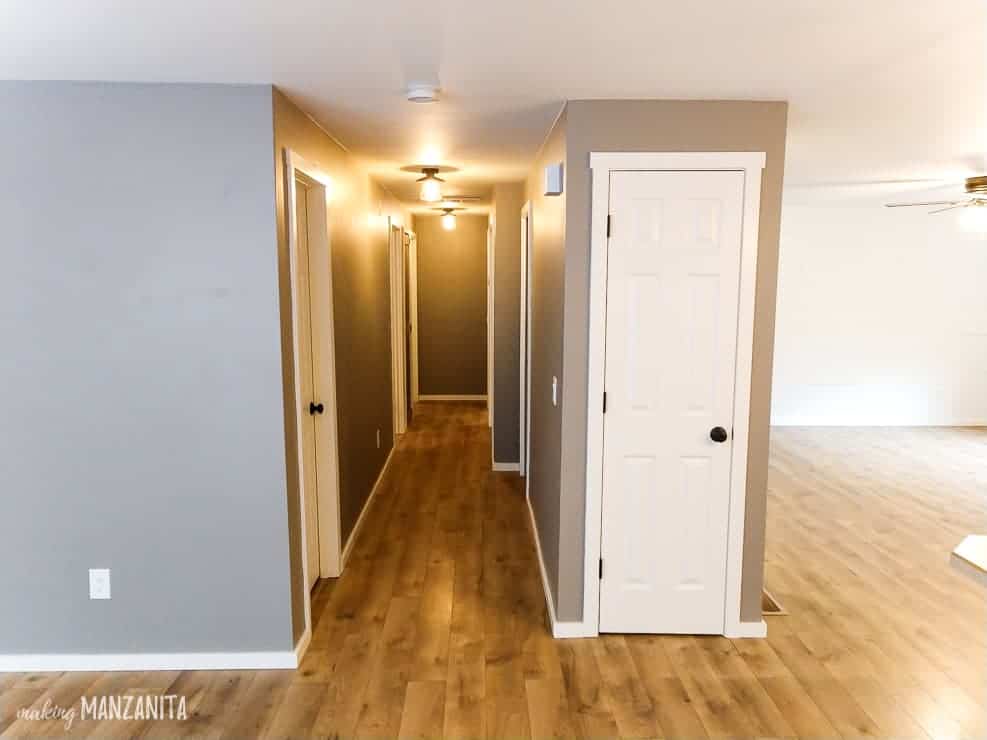
From the dining room, if you turn to your right, you’ll be walking down the hallway.
This is the only photo I have of the hallway before things started getting crazy with the renovations.
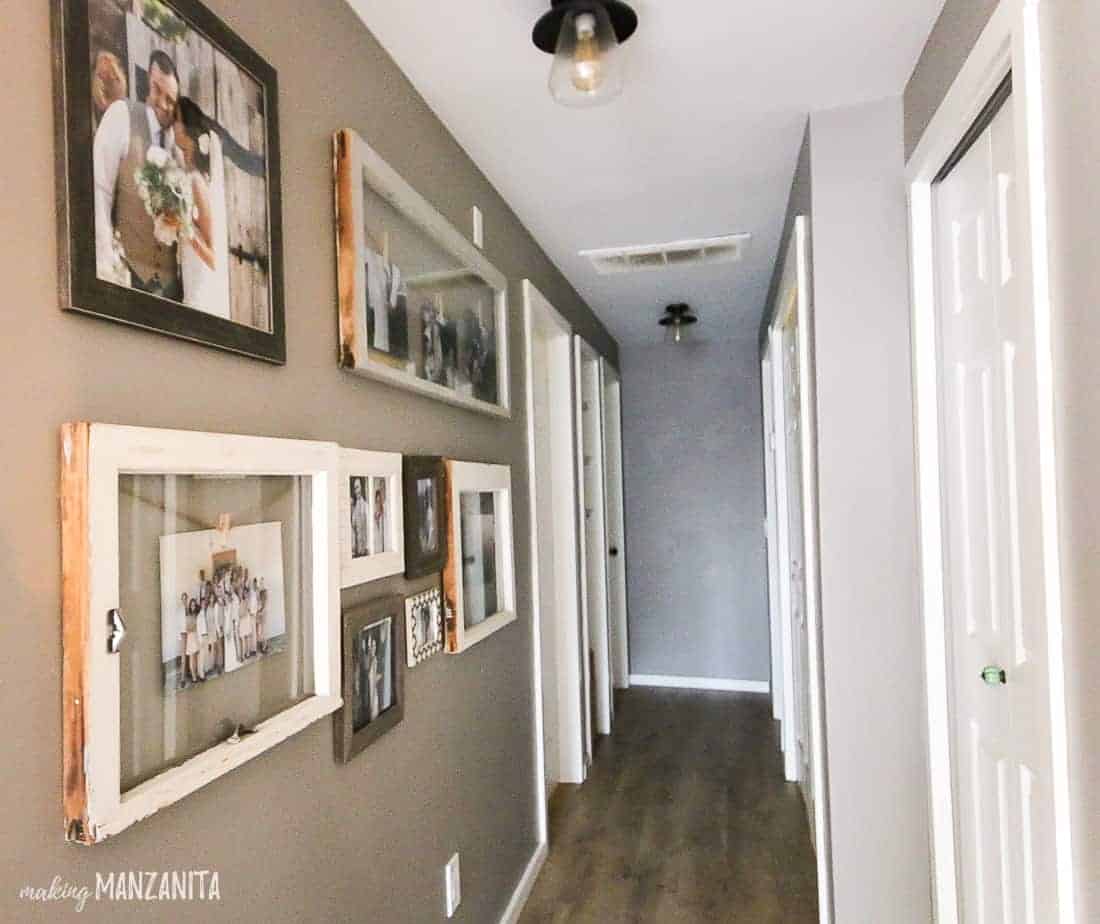
The hallway has new lights, flooring, and nice smooth walls.
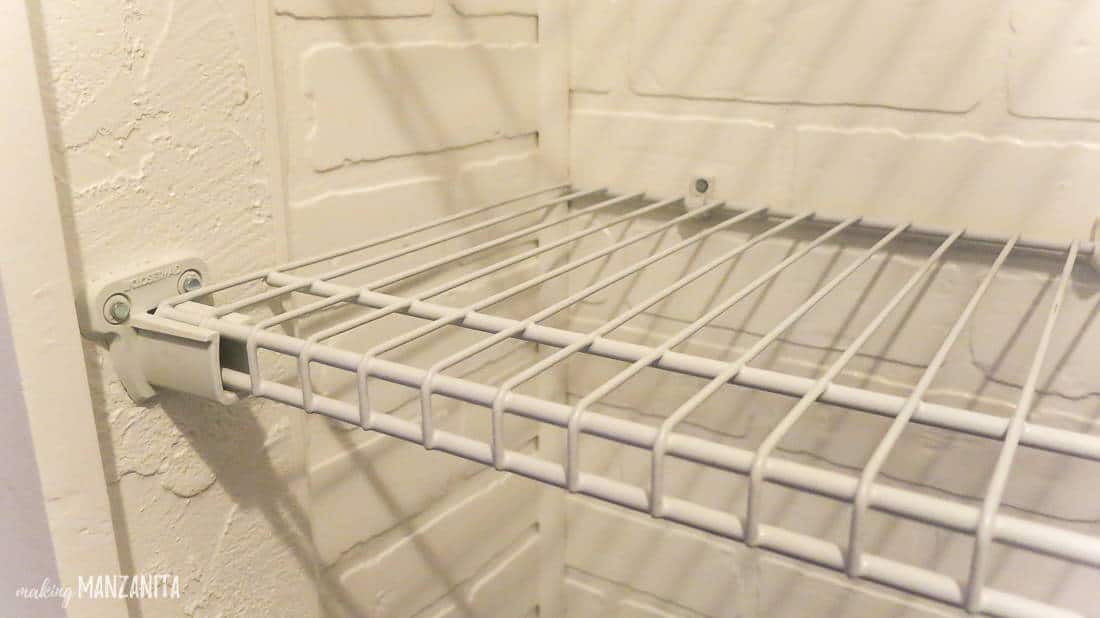
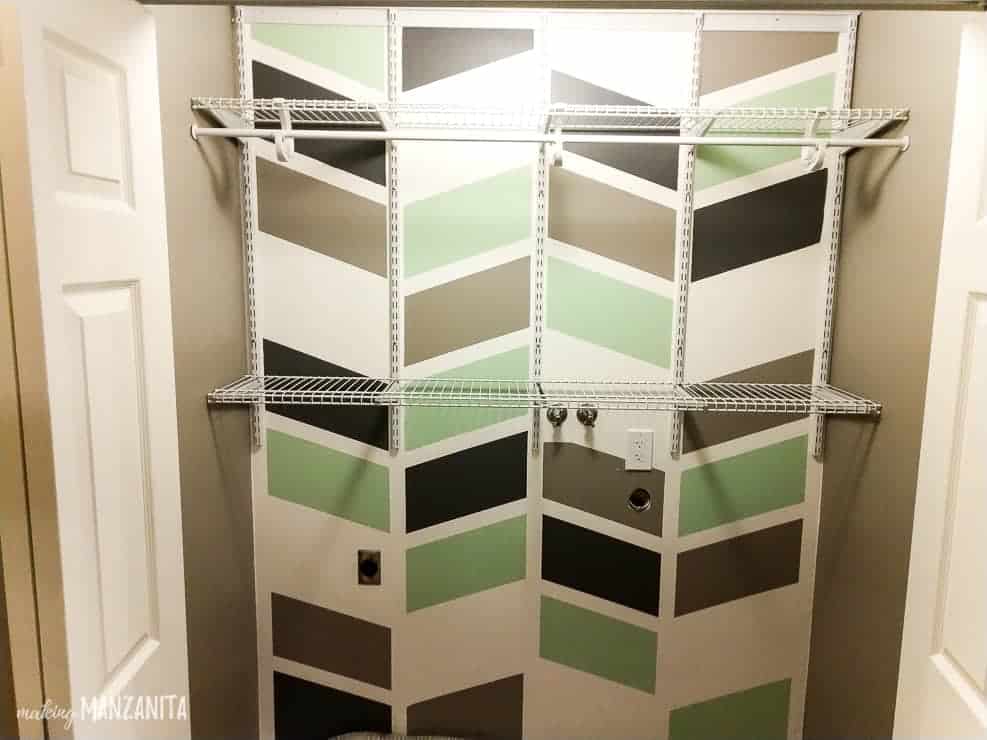
We also swapped out the old wooden shelving in the closets and laundry for wire shelves.
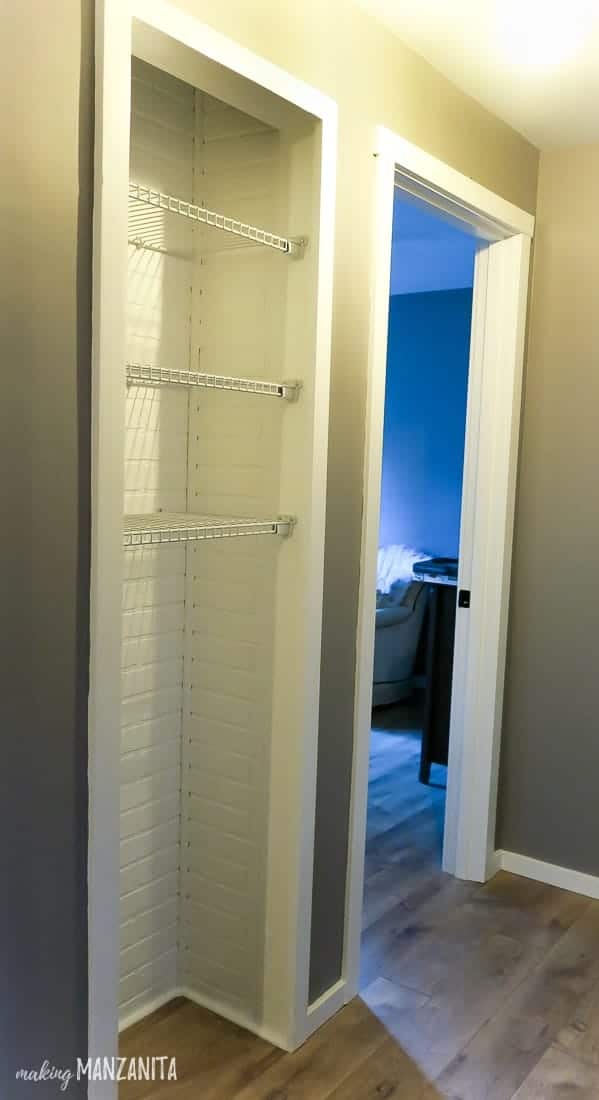
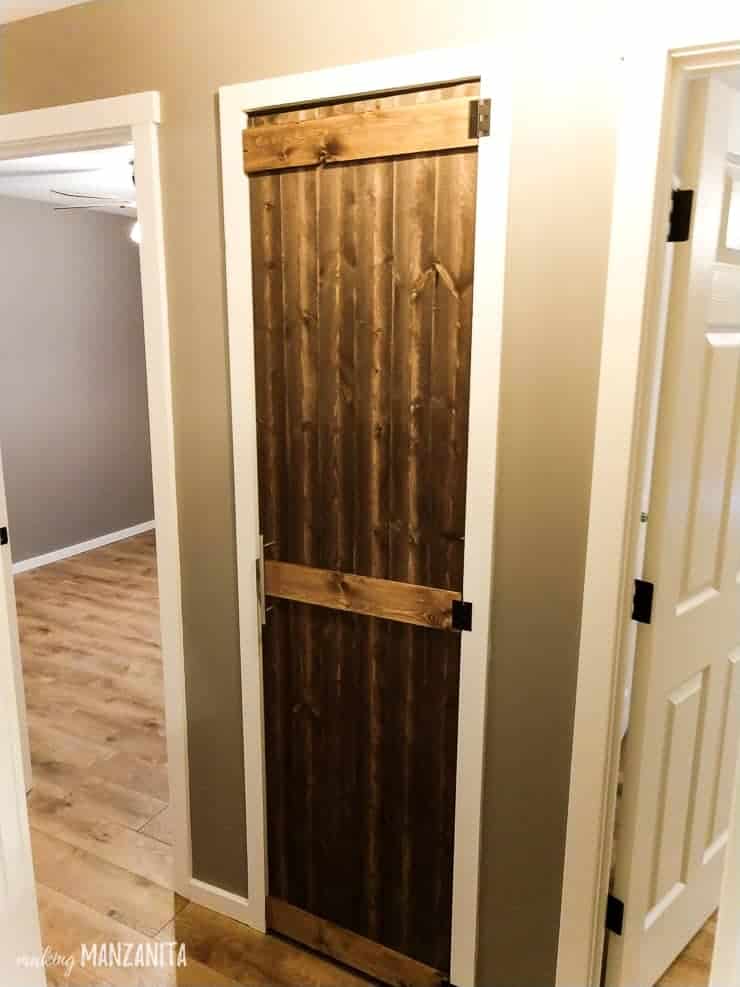
We turned one of the hallway cabinets into a cleaning closet.
After removing the door fronts, we added a faux brick panel to the wall painted white and added wire shelving.
It was the perfect little spot for our cleaning supplies and our vacuum.
This stayed open the entire time we lived there, but we ended up building a wood door for the cleaning closet when we moved out.
Also in the hallway is our laundry room. We added the wire shelving and painted the colorful accent wall.
Here’s a little before and after of the hallway.
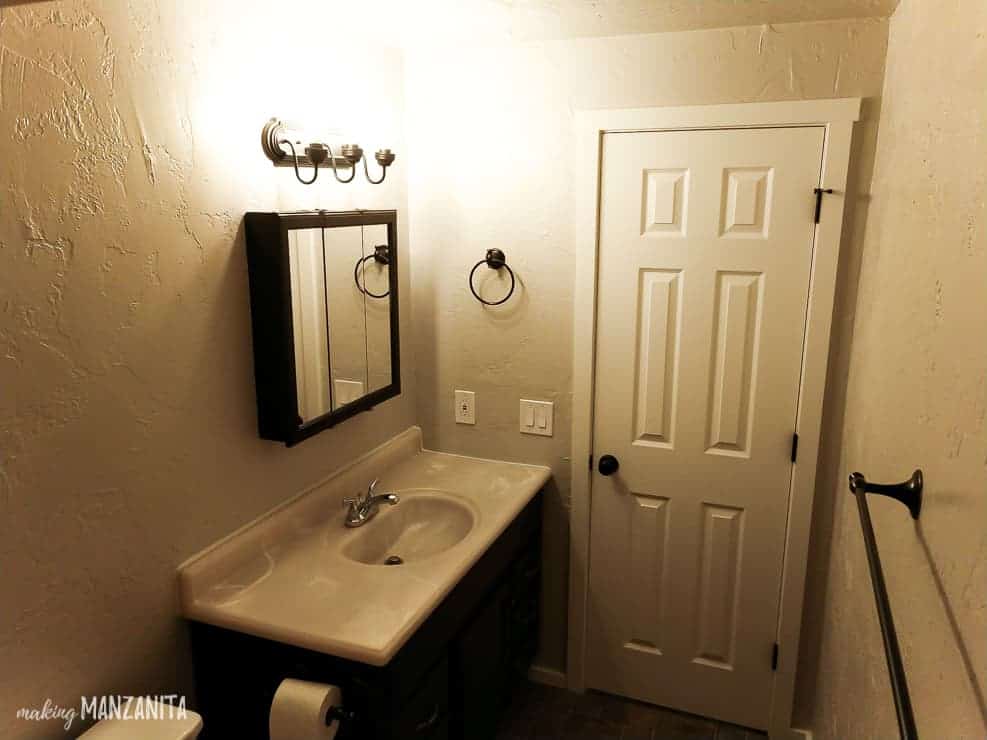
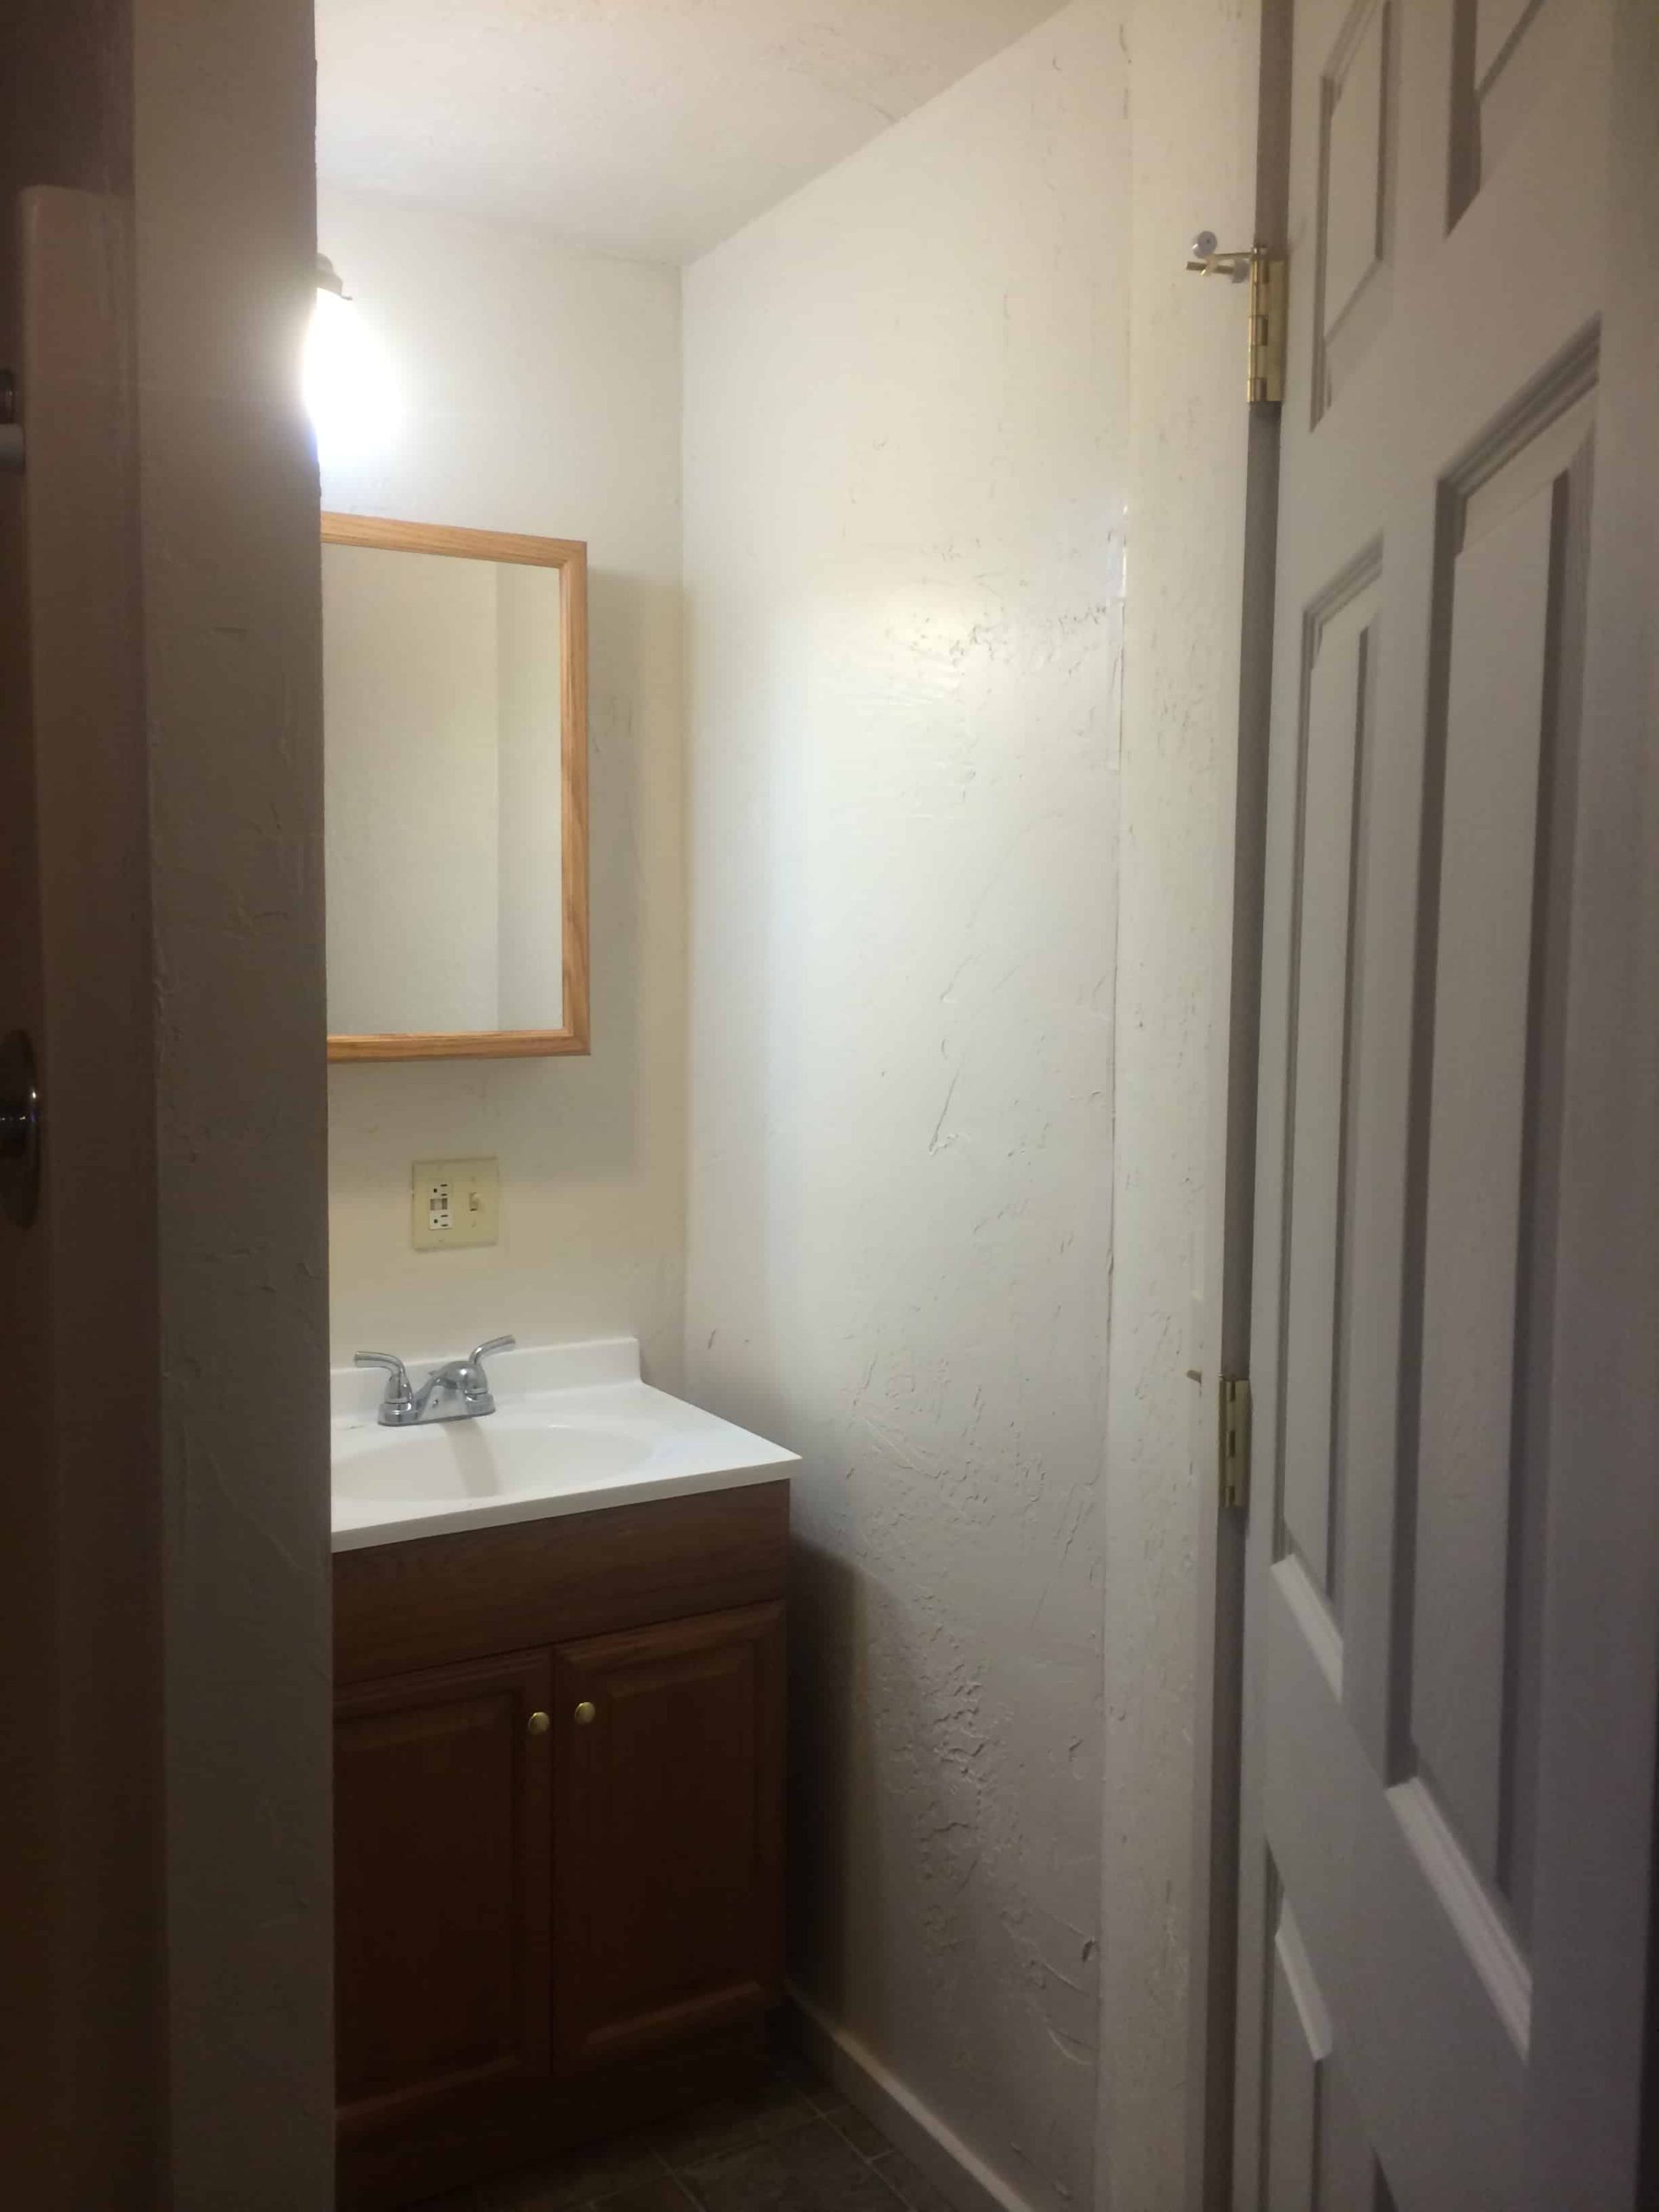
First Bathroom Before & After
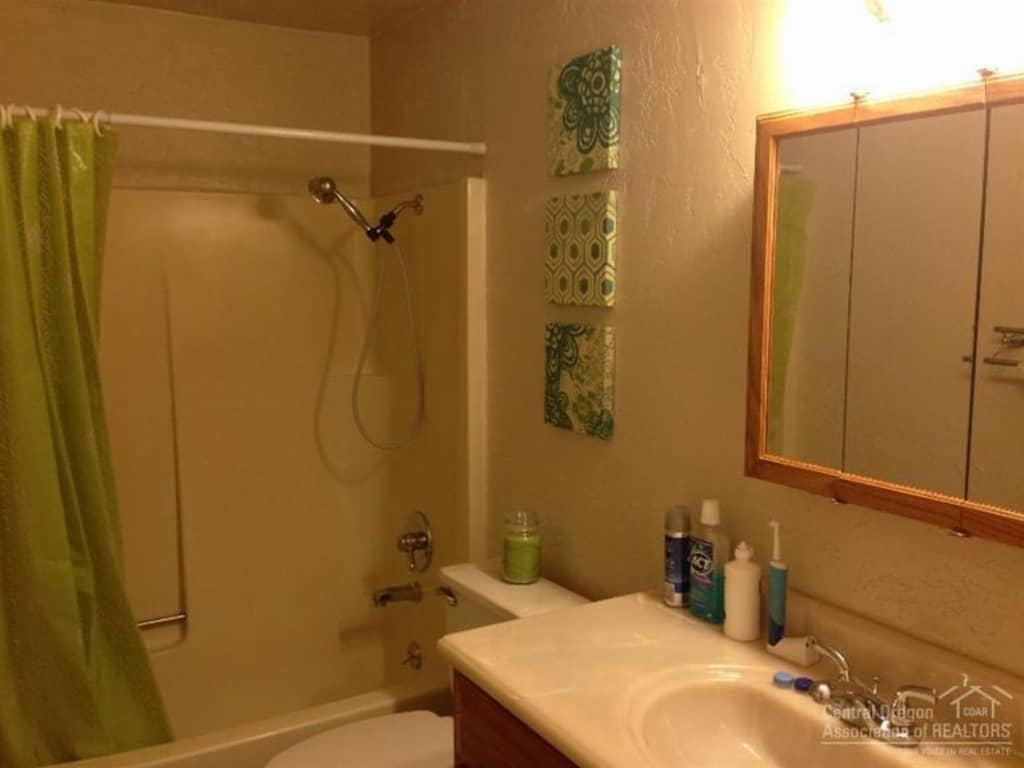
As you start walking down the hallway from the dining room, you’ll first approach the front bathroom, which is the first door on your left.
This was the only room in the house that did not get skim-coated. We were SO TIRED of it by the end, and we had learned that small spaces were the hardest for skim coating.
Since we eventually planned some bigger renovations in this bathroom, we left the texture on the walls and just painted it.
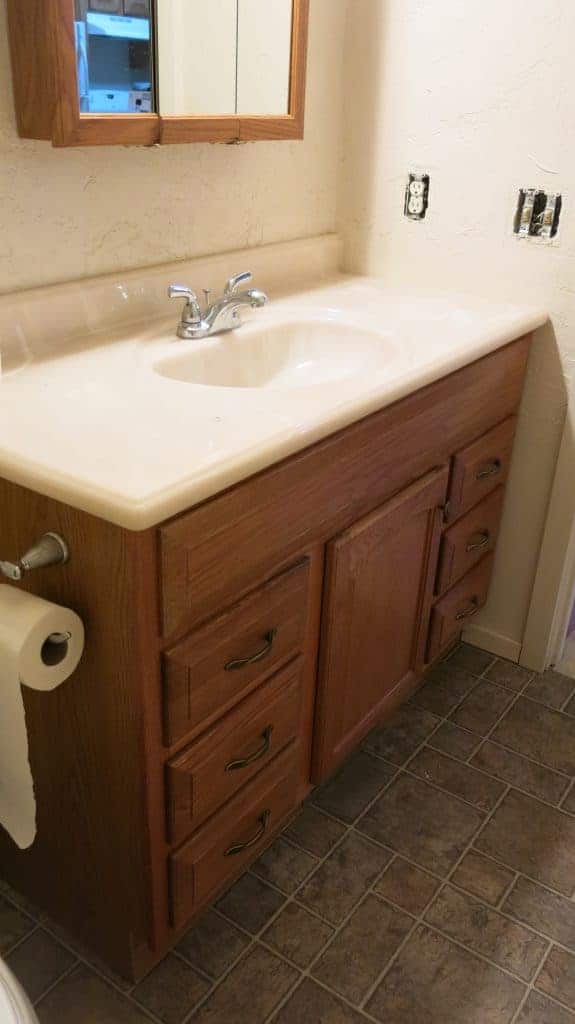
We really didn’t do anything to this bathroom until shortly after we moved out,
Logan painted the mirror and the vanity, which needed some love. He used a Behr Premium Plus Interior paint in semi-gloss sheen for this.
We also gave the light in here a little farmhouse makeover with some simple spray paint and new light bulbs. Read more about that easy DIY light makeover here.
Home Office (First Bedroom) Before & After

This is the only photo I have of the front bedroom because we had to start renovating in there immediately!
We had about 2 weeks of overlap until we needed to move in and I needed to have a move-in ready office because I work from home.
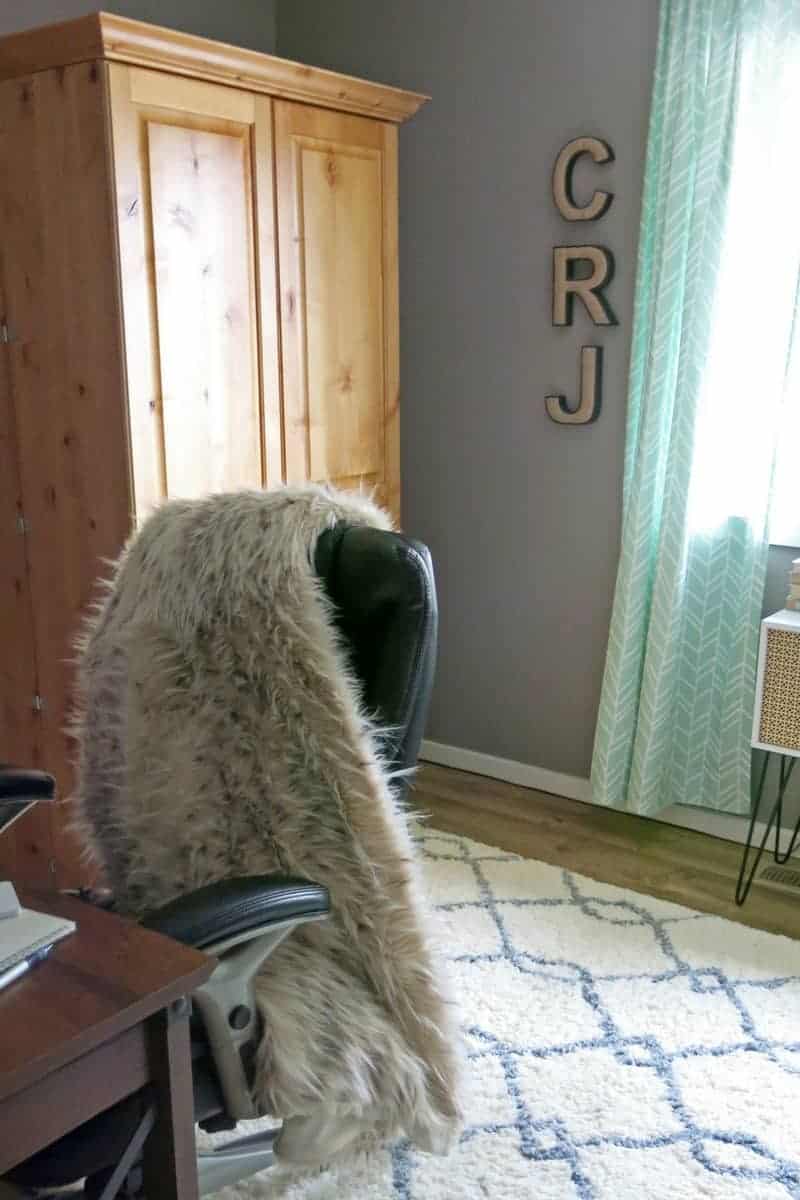
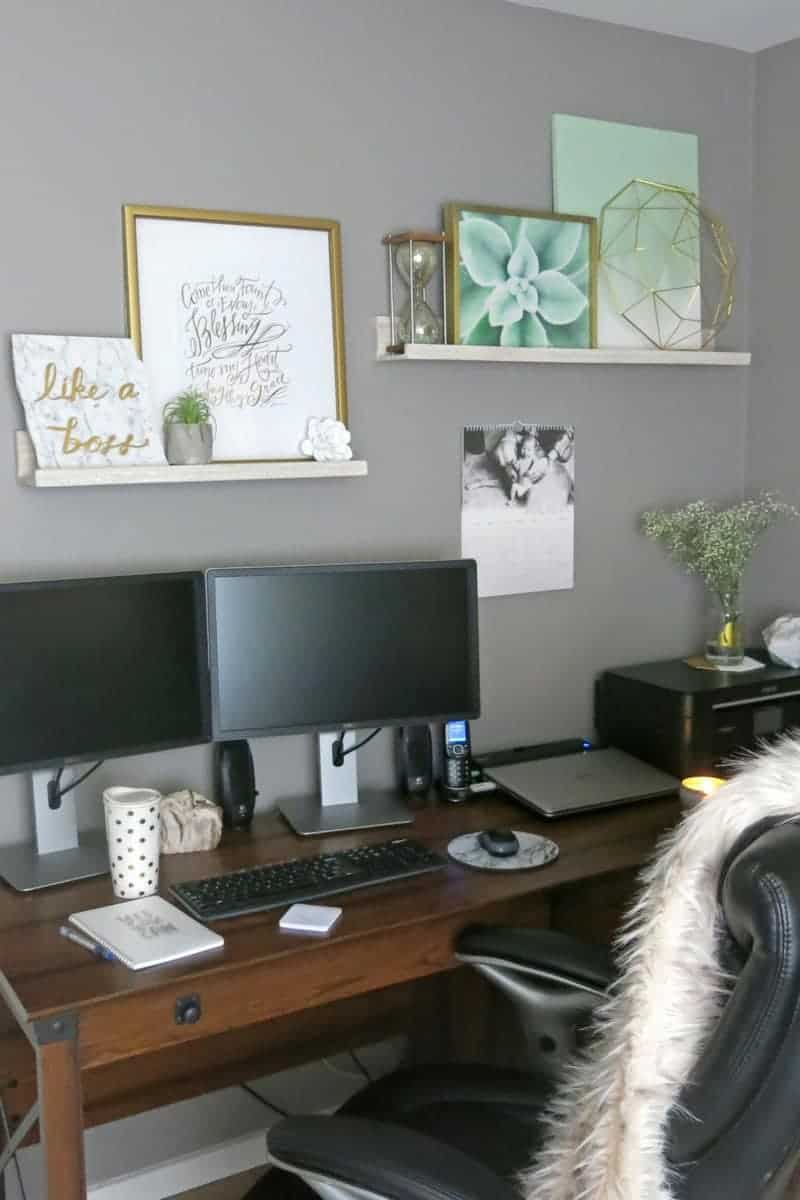
The room eventually got a big makeover when I turned it into this modern marble & gold home office. You can check out the full details on this modern marble and gold office here.
Nursery (Second Bedroom) Before & After
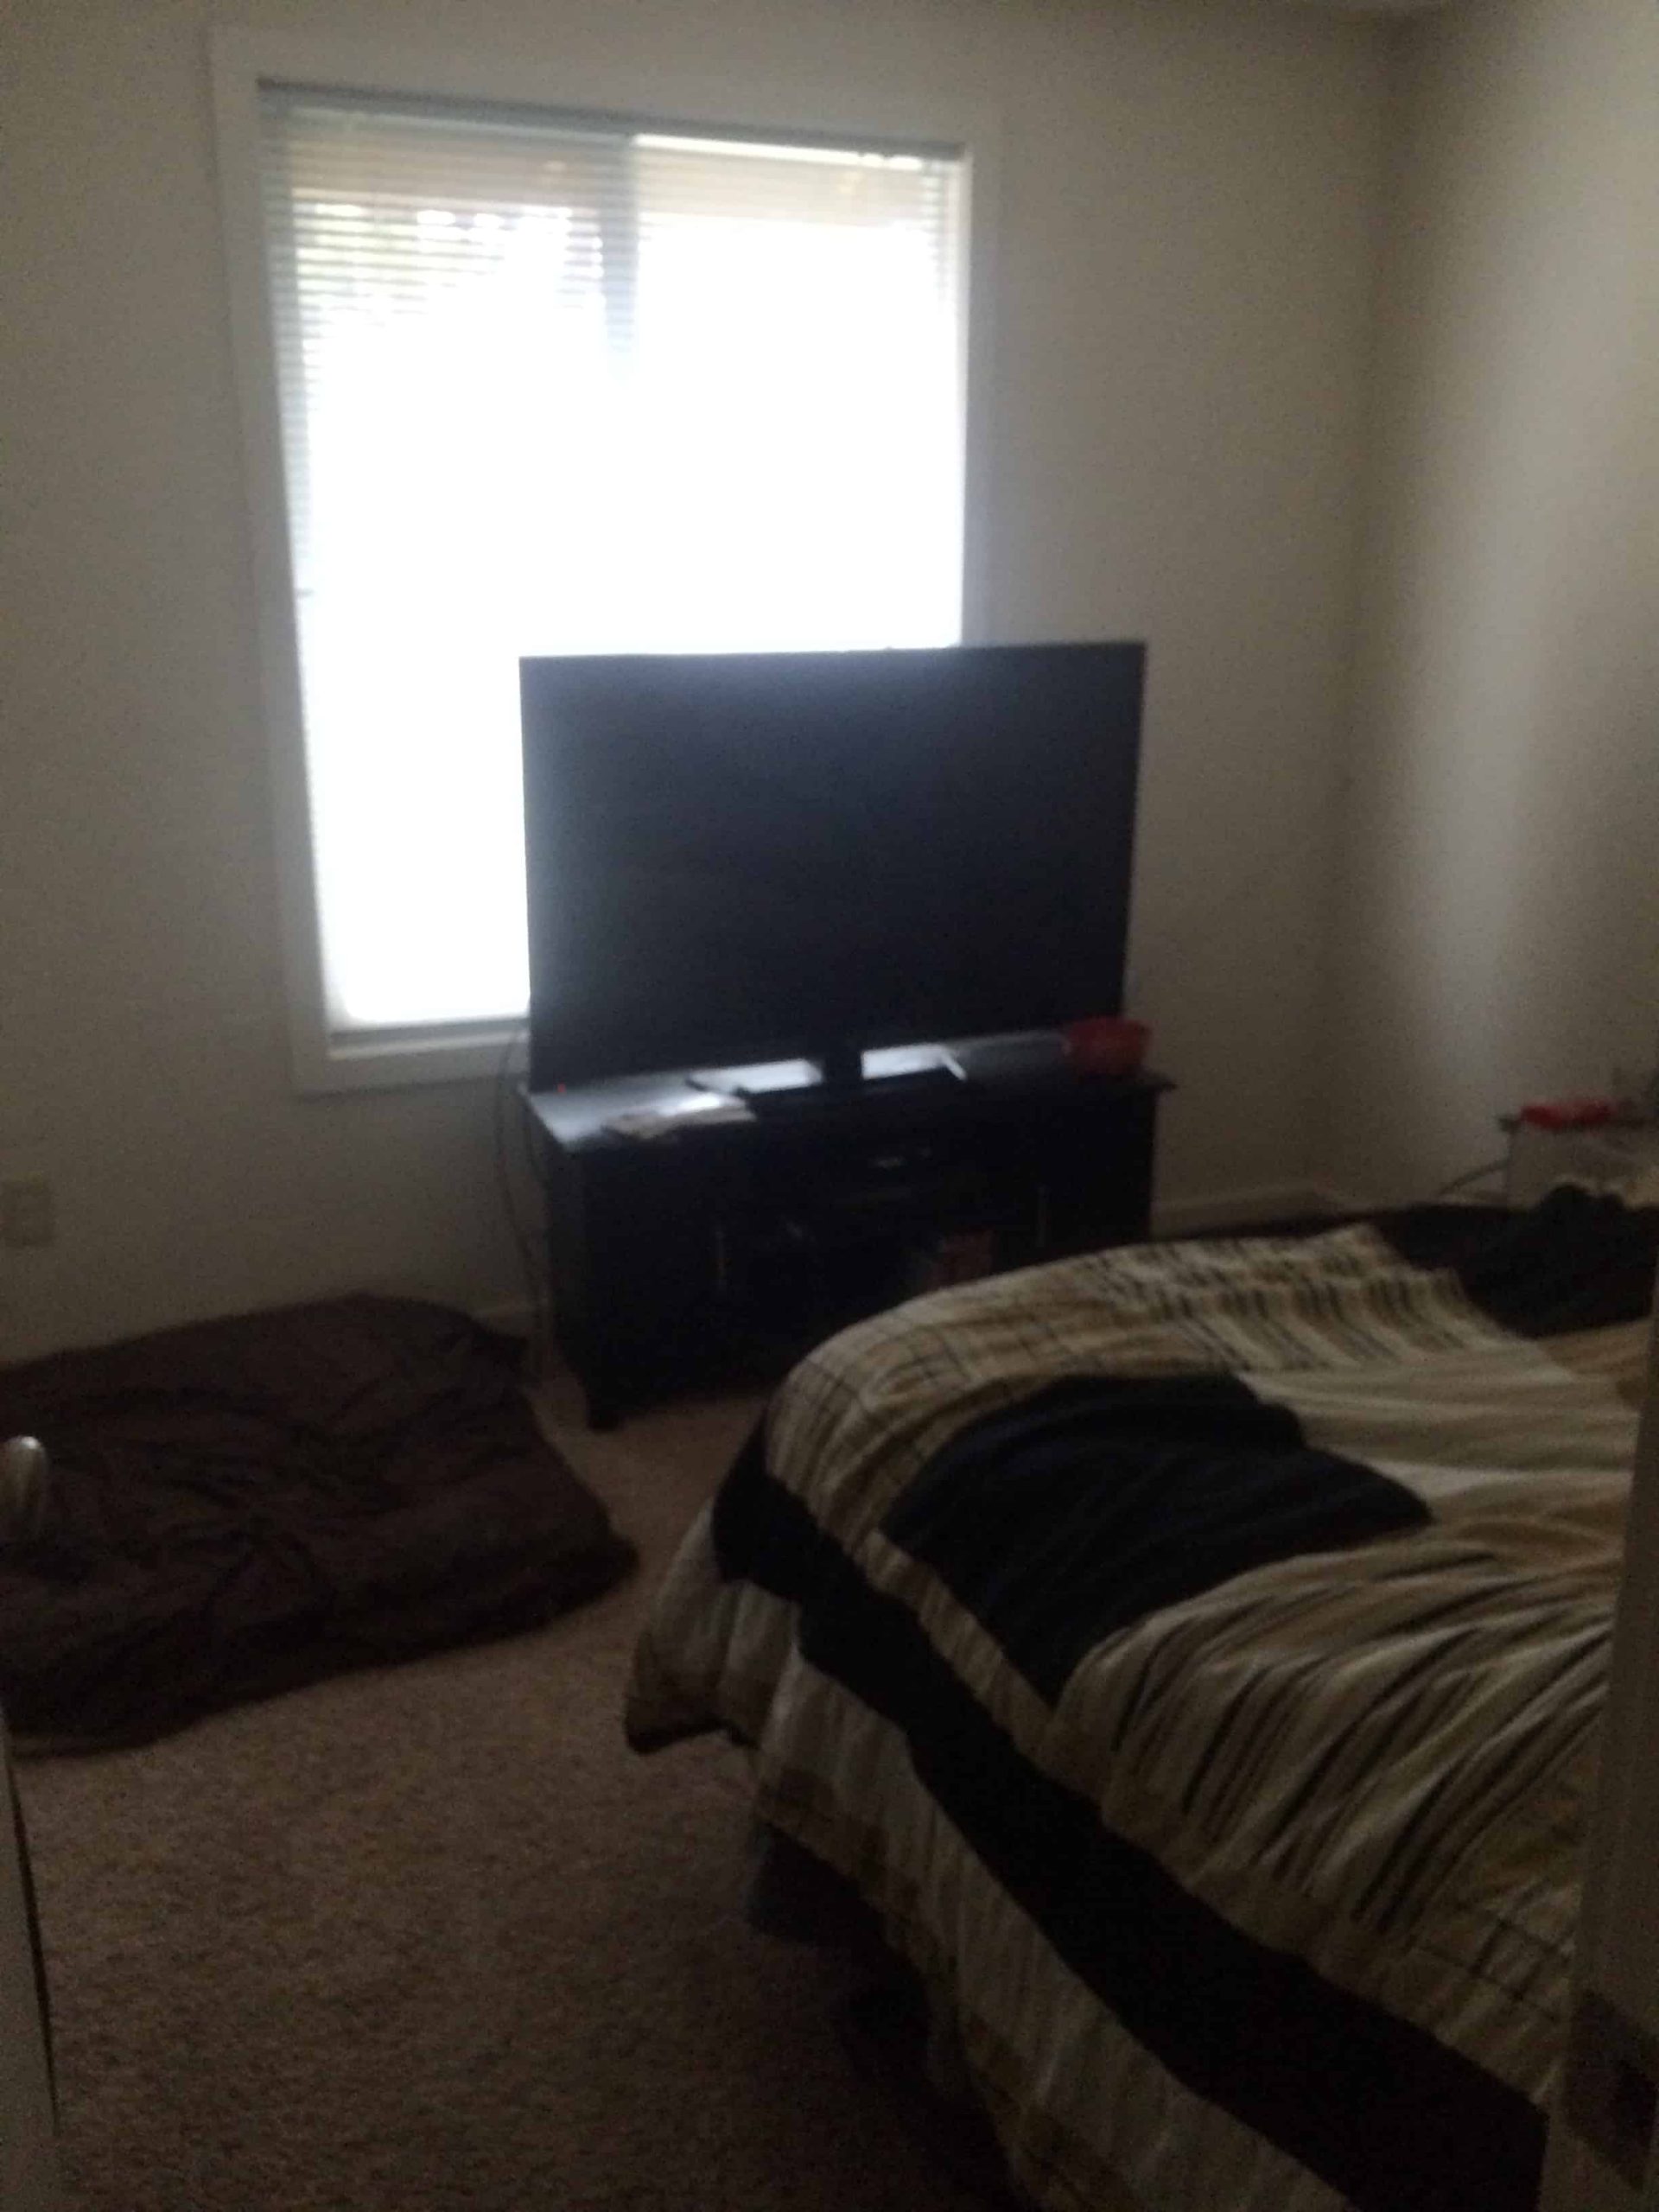
This bedroom is essentially the same as the front bedroom but flip-flopped.
This room was a “holding ground” during the major renovations of the house. At one point, this little room served as our bedroom (while we were working on the master) and then also served as our living room (while we were working on that).
Can you believe we were able to fit 2 recliners, an entertainment center, a TV, and even a small table where we put a mini Christmas tree for our first Christmas in this house?!
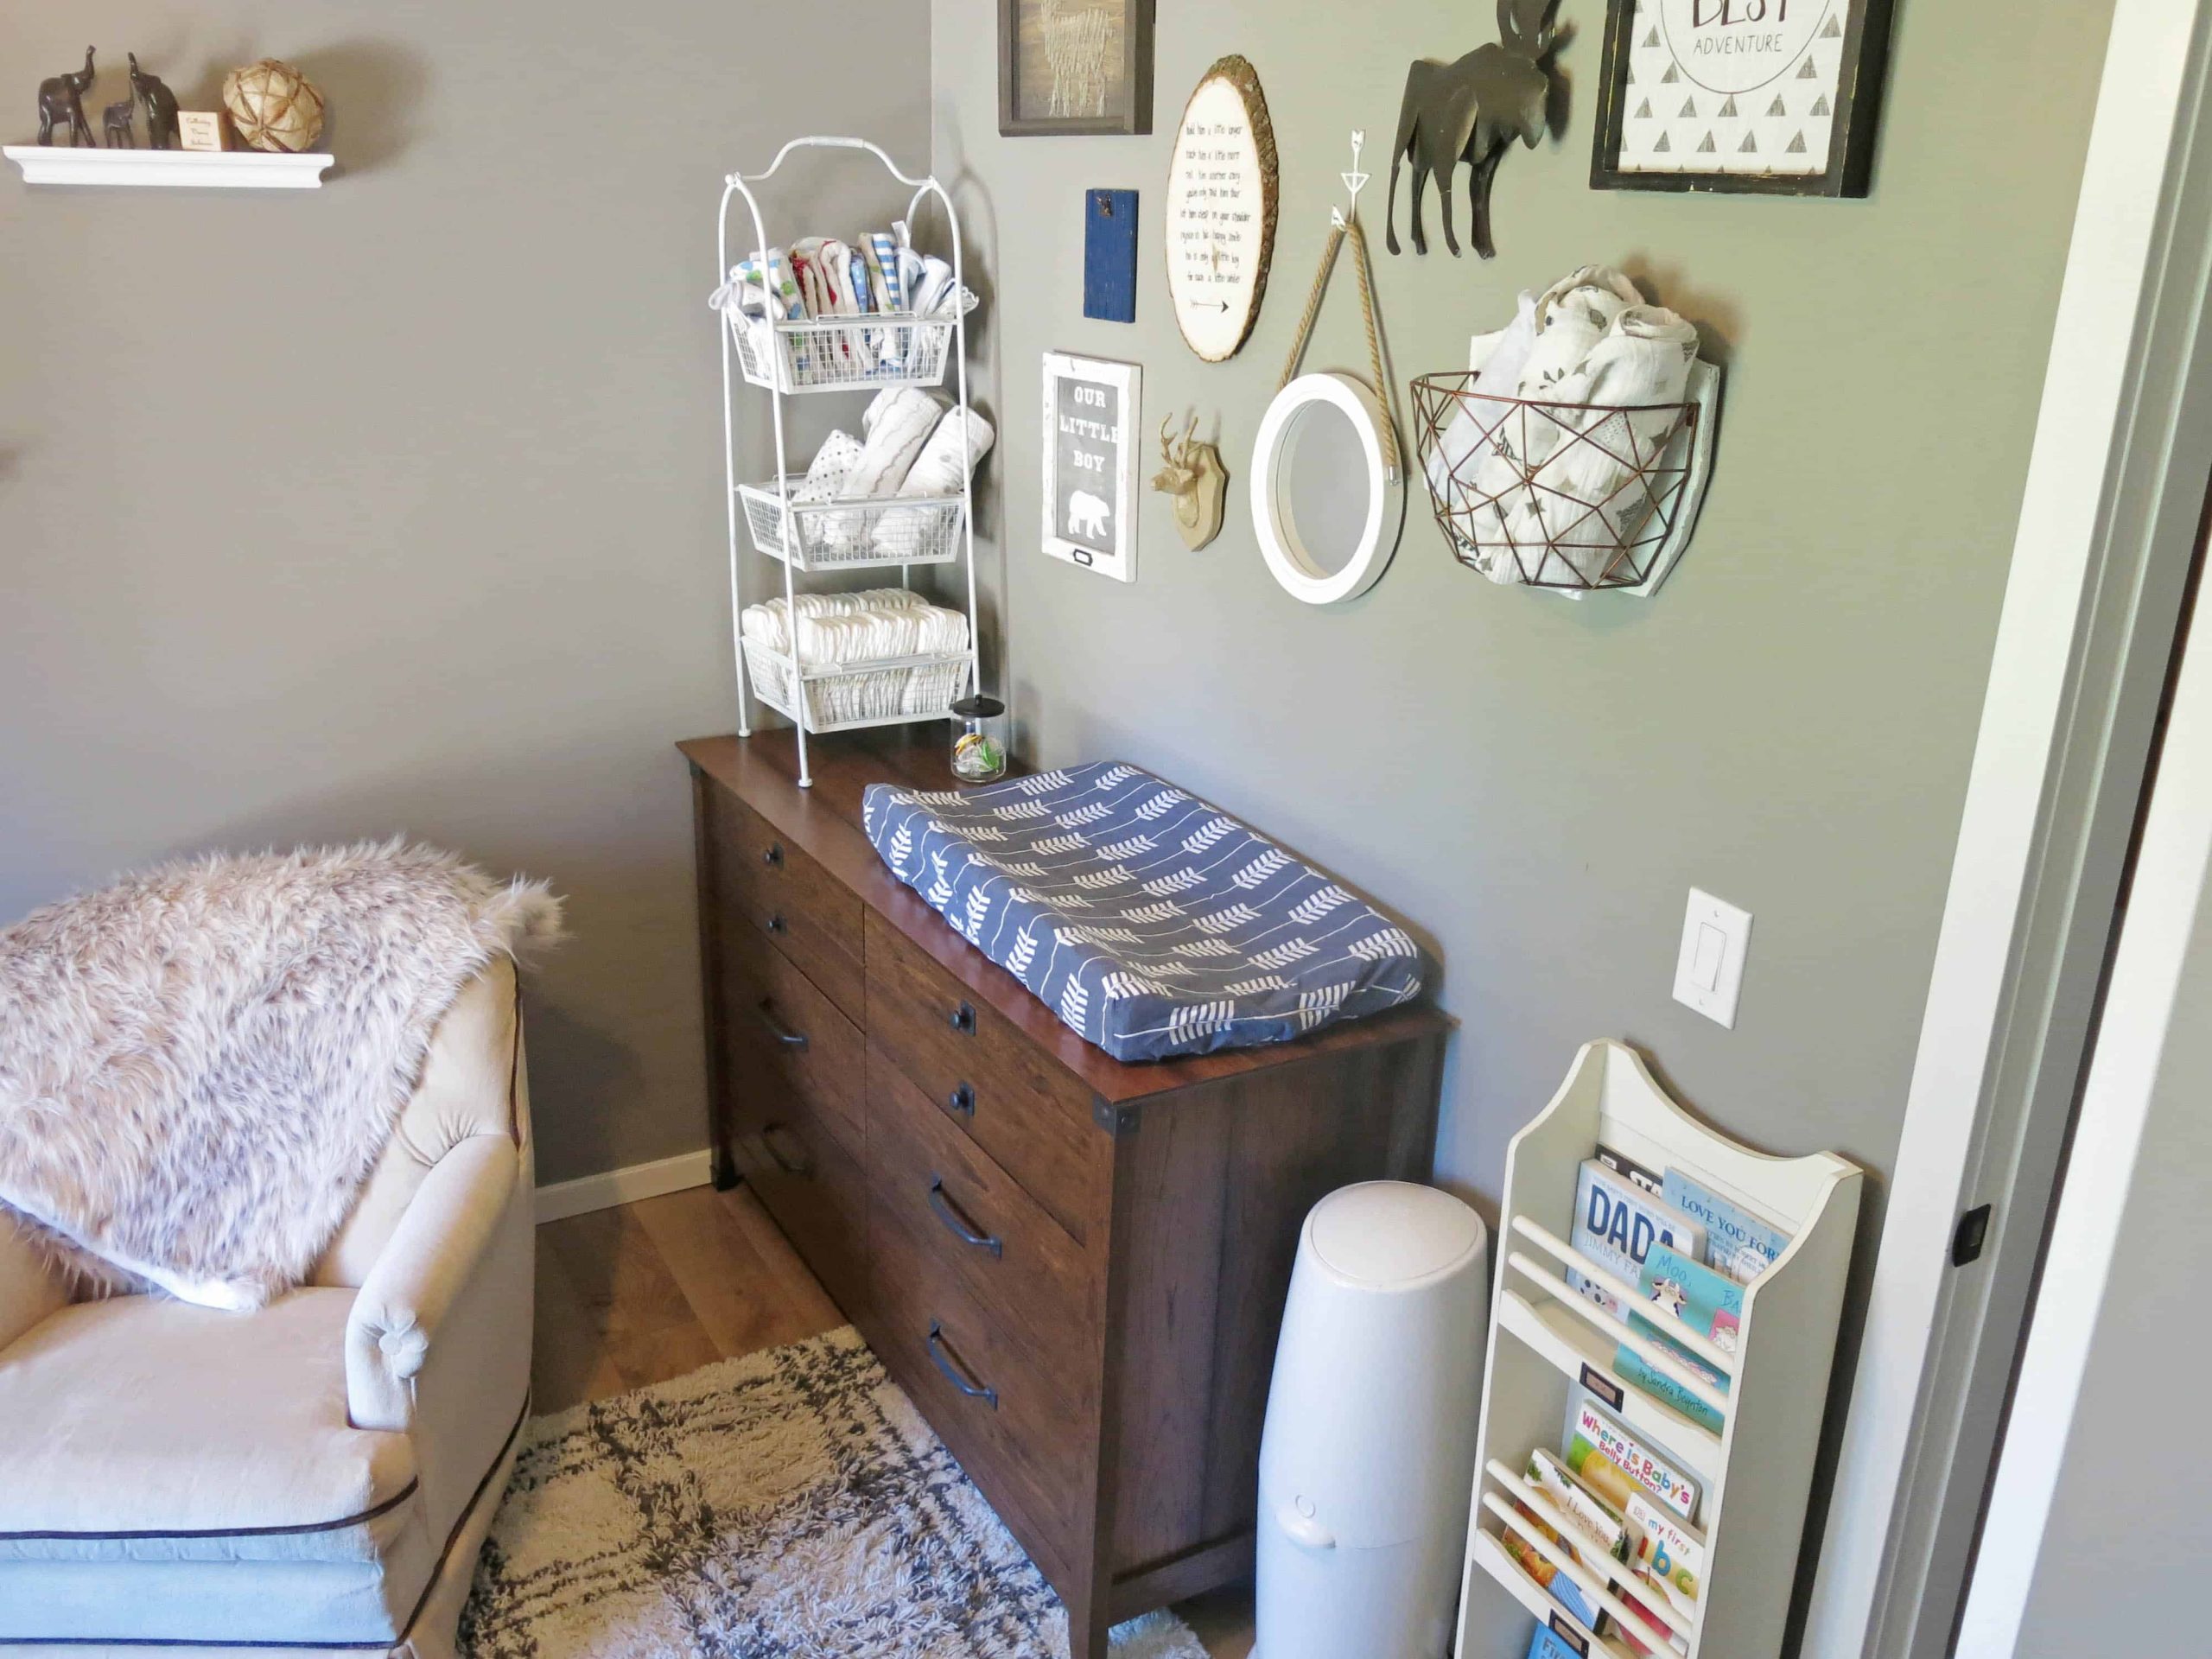
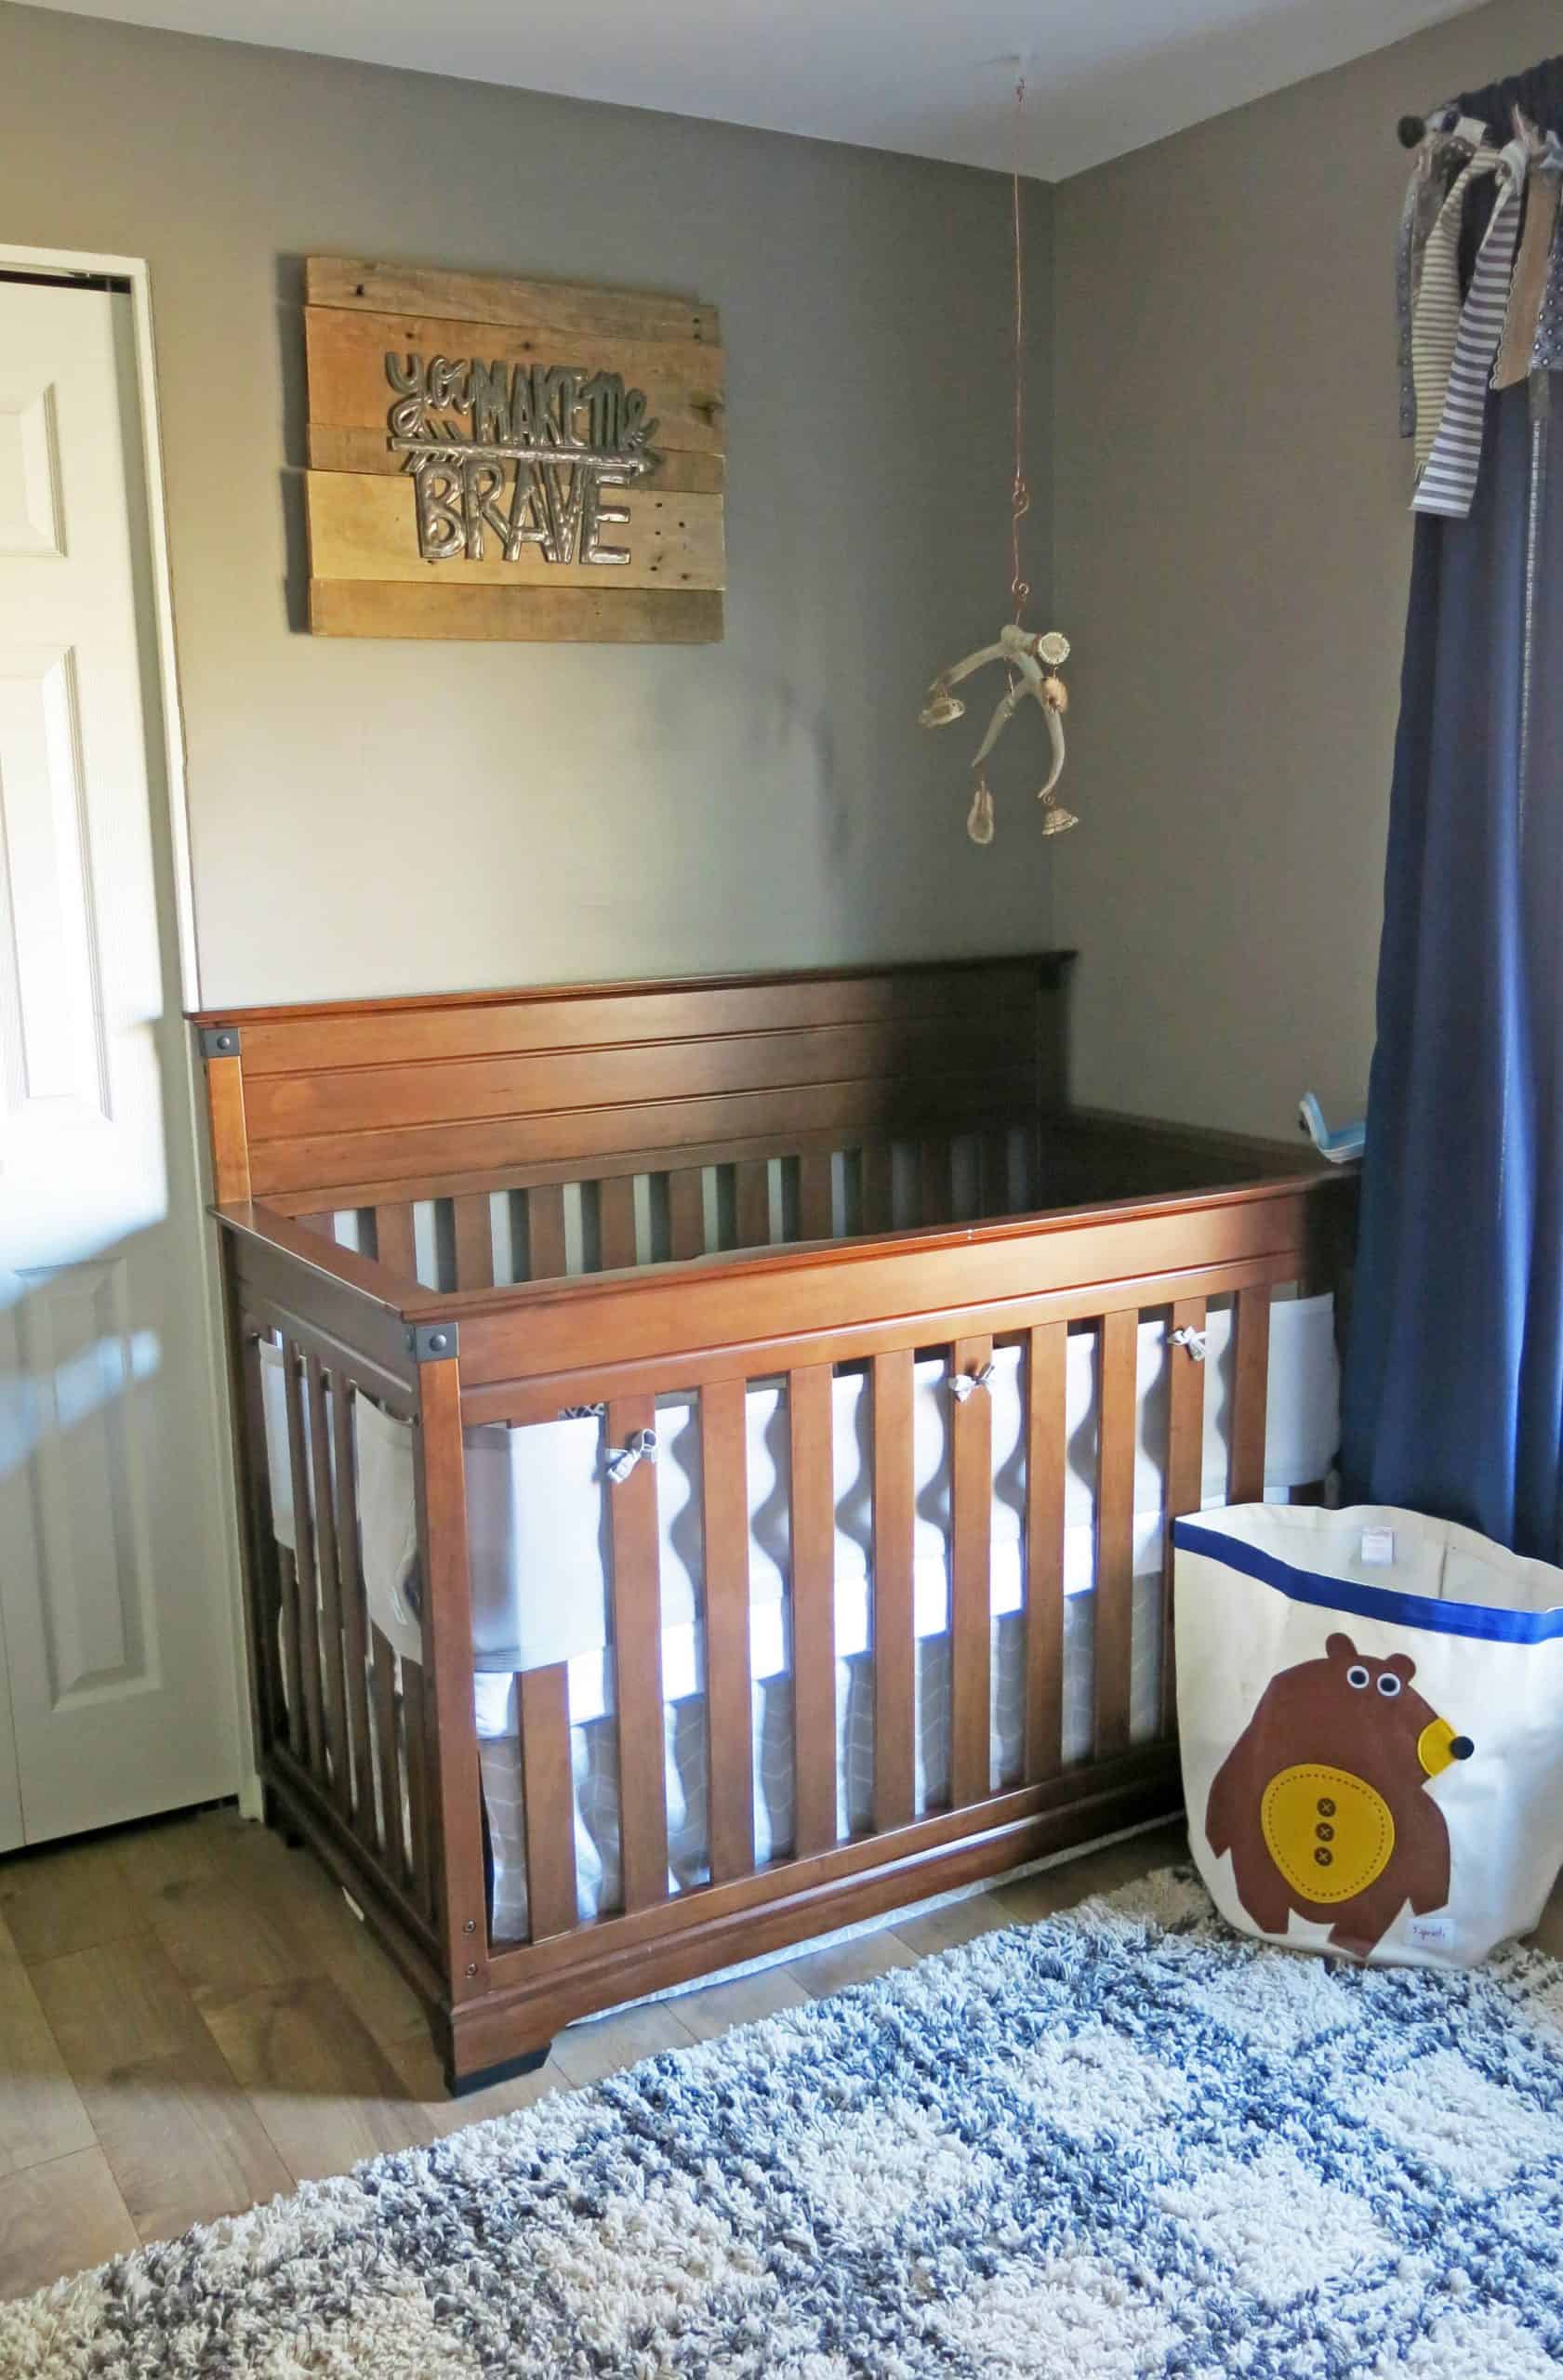
Eventually, though, this room was completely transformed into an adorable little rustic woodland nursery for our son.
Master Bedroom Before & After
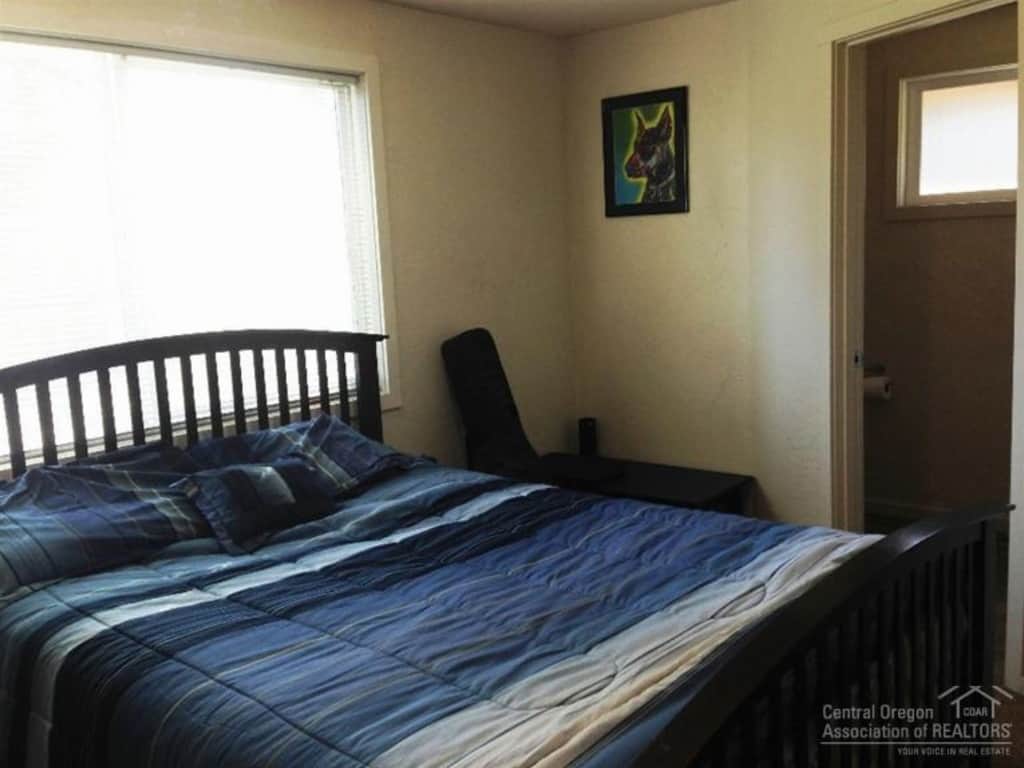
This is what the master bedroom looked like when we were purchasing the home. This room has so many weird angles.
The door on the other side of the bed shown here leads to an uber-small bathroom (more to come on that next).
This room got smooth-painted walls and new flooring, and we positioned our bed to go on the opposite wall, which I think made a big difference in the overall layout.
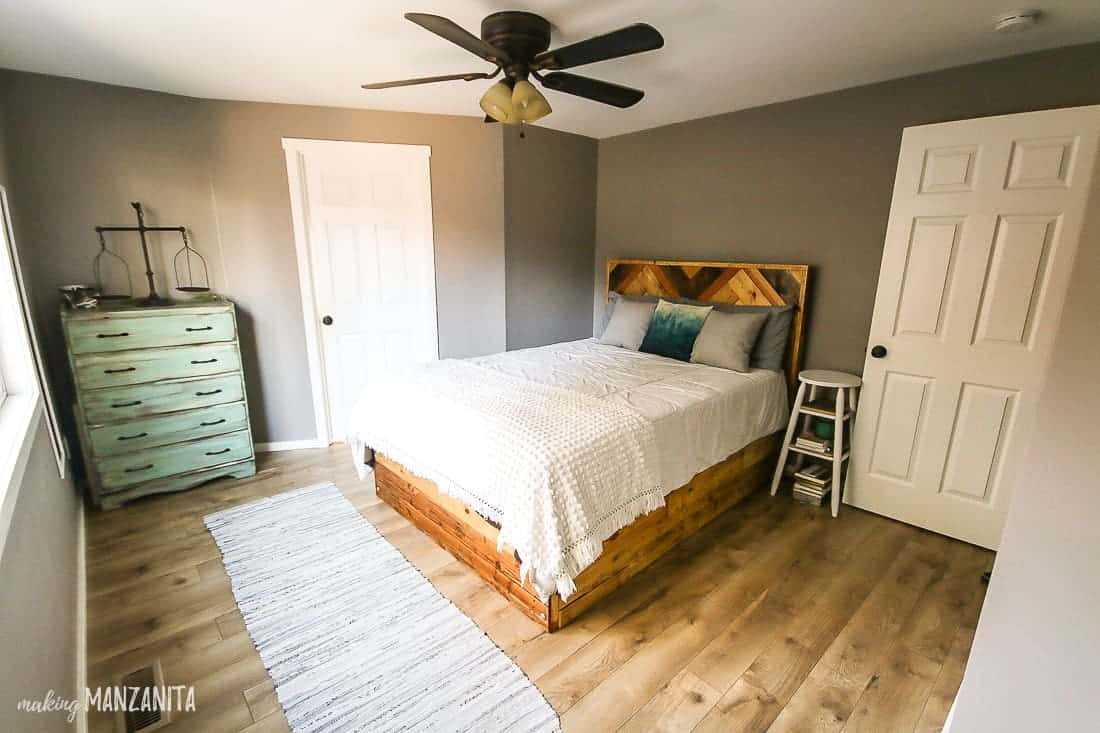
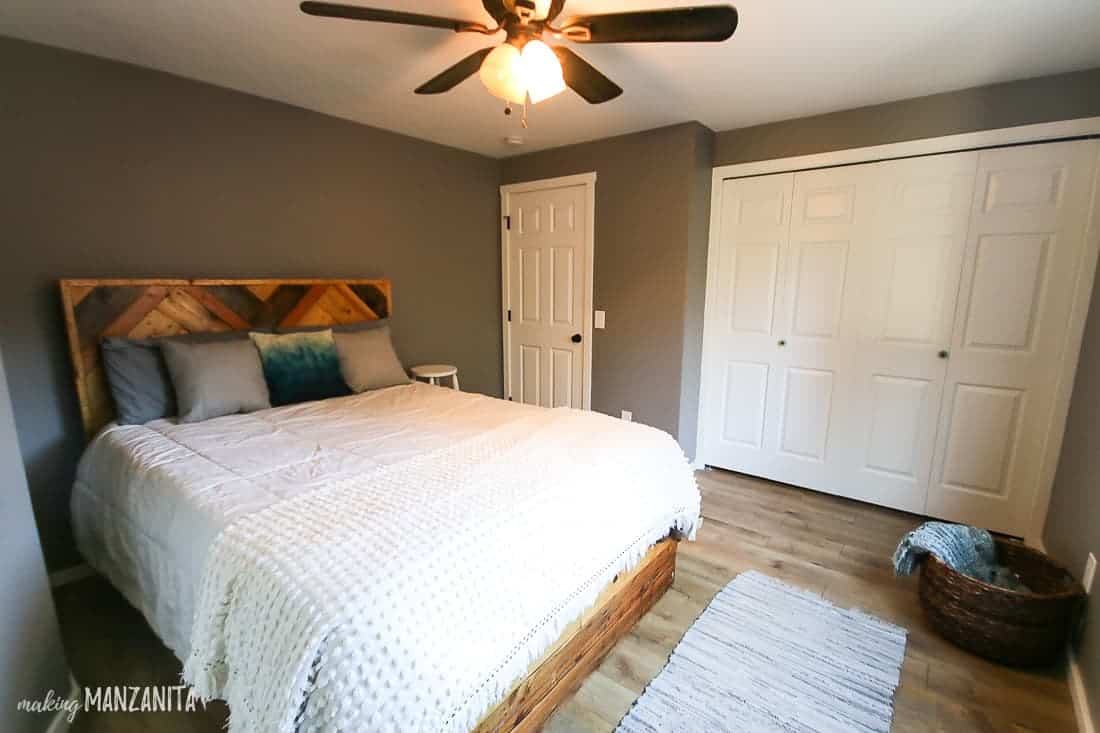
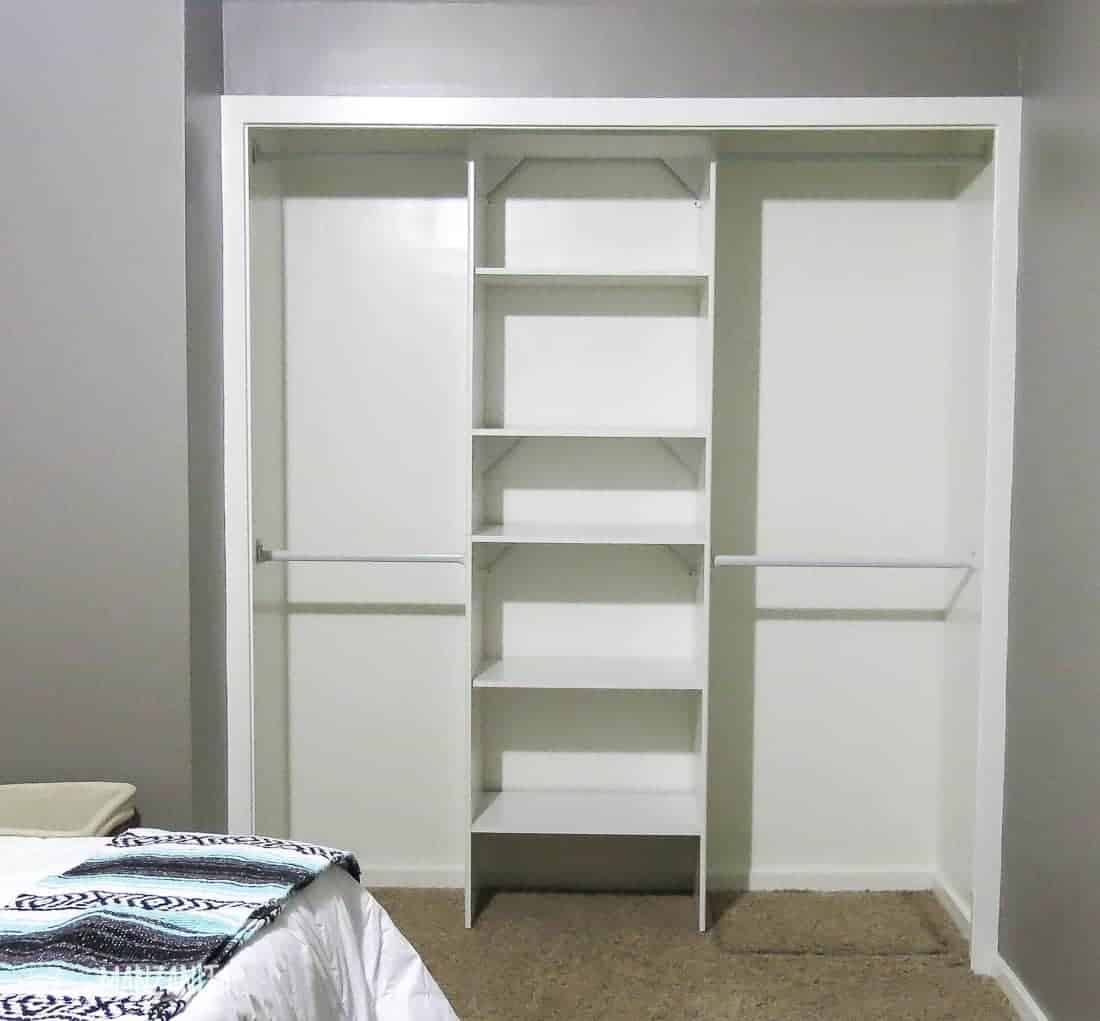
We also installed new closet systems in the bedrooms, which helped make the small master closet more efficient.
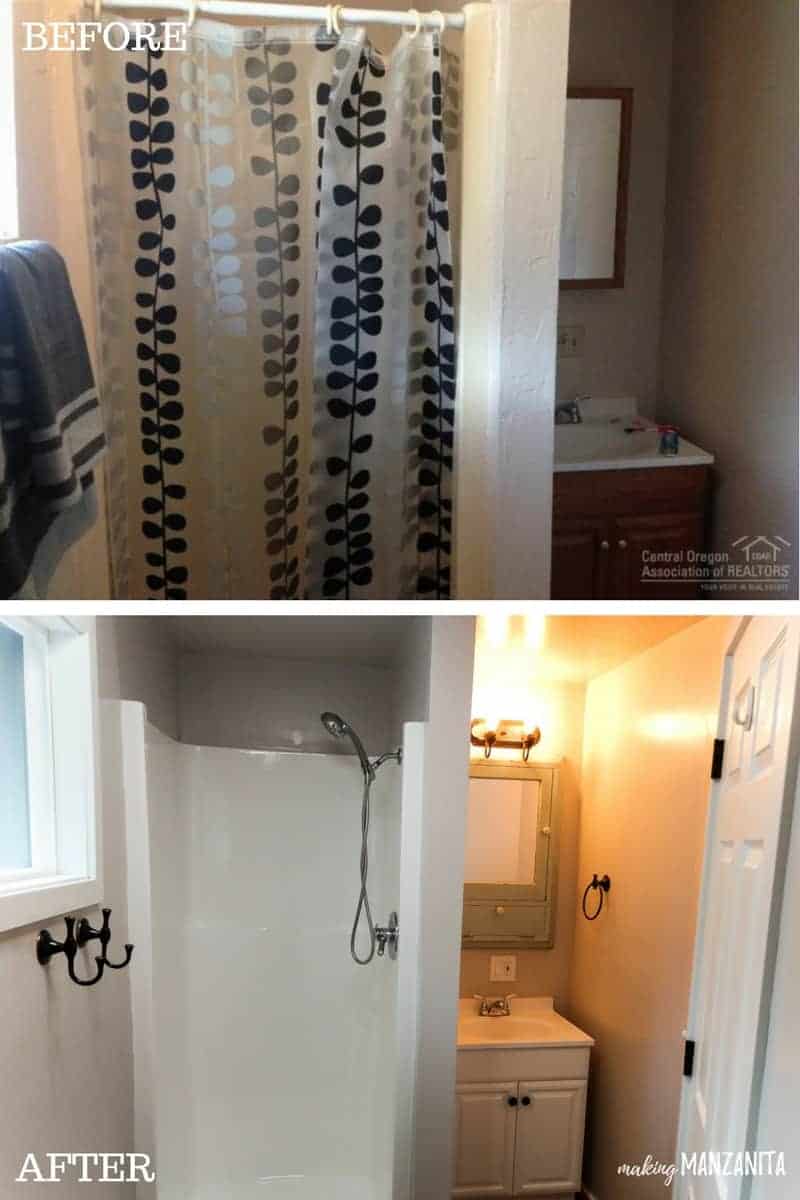
Master Bathroom Before & After
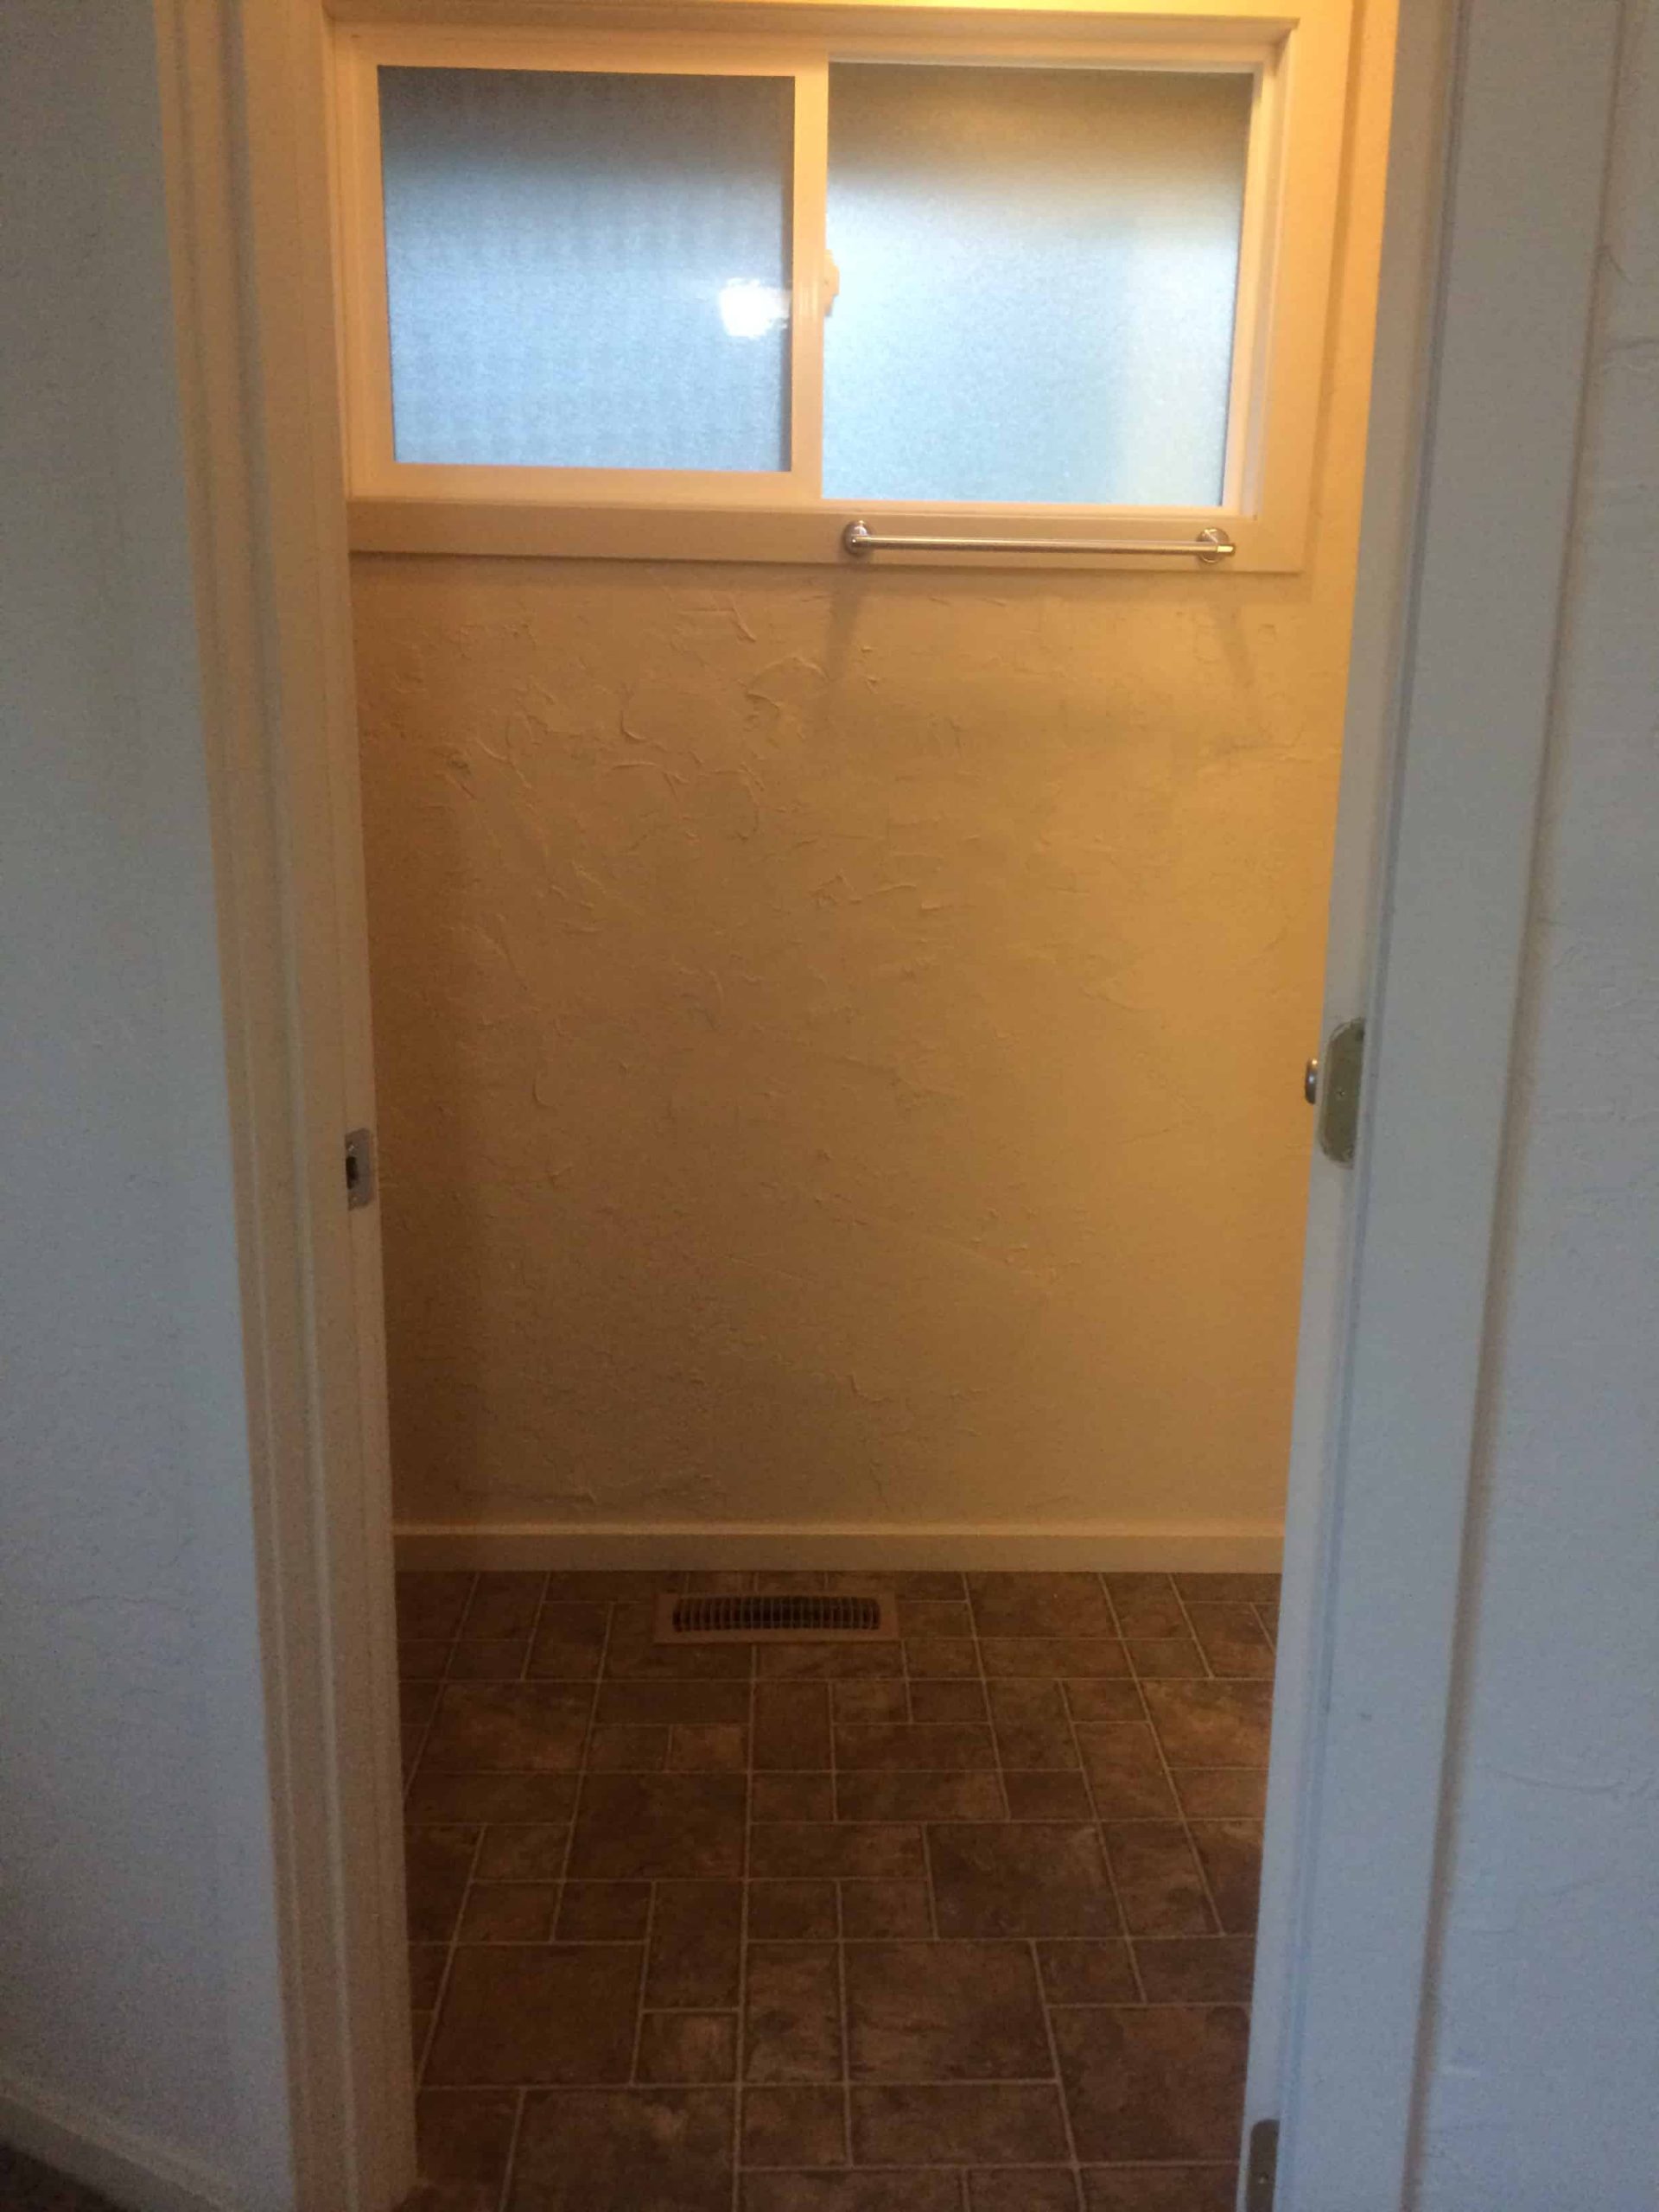
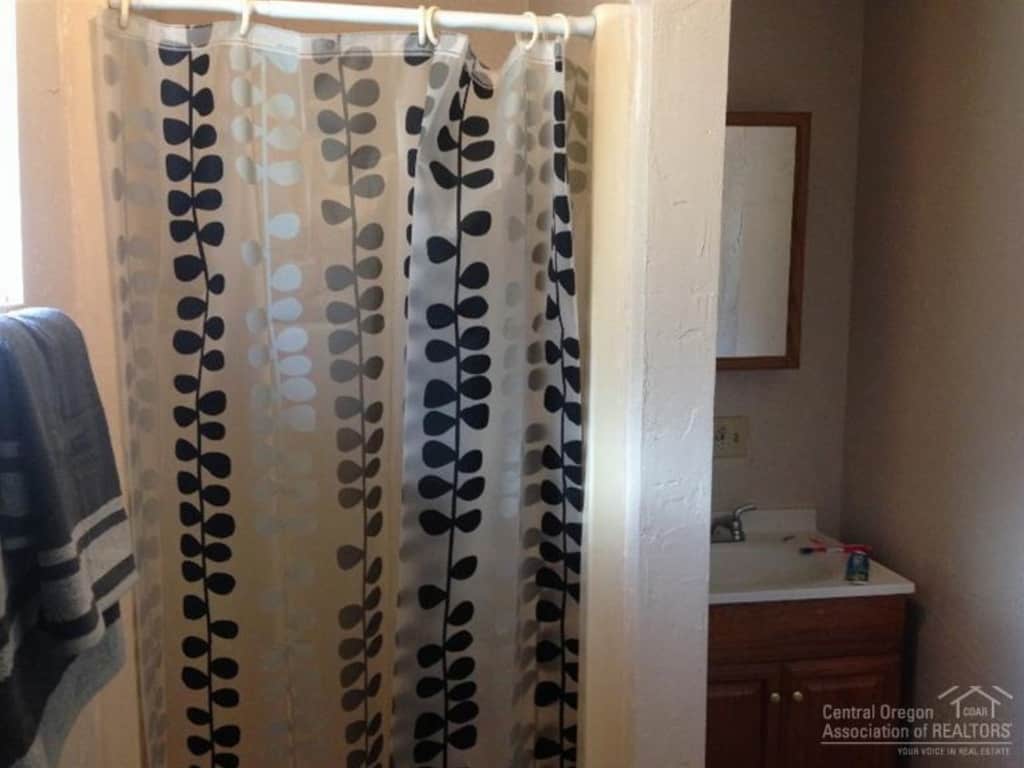
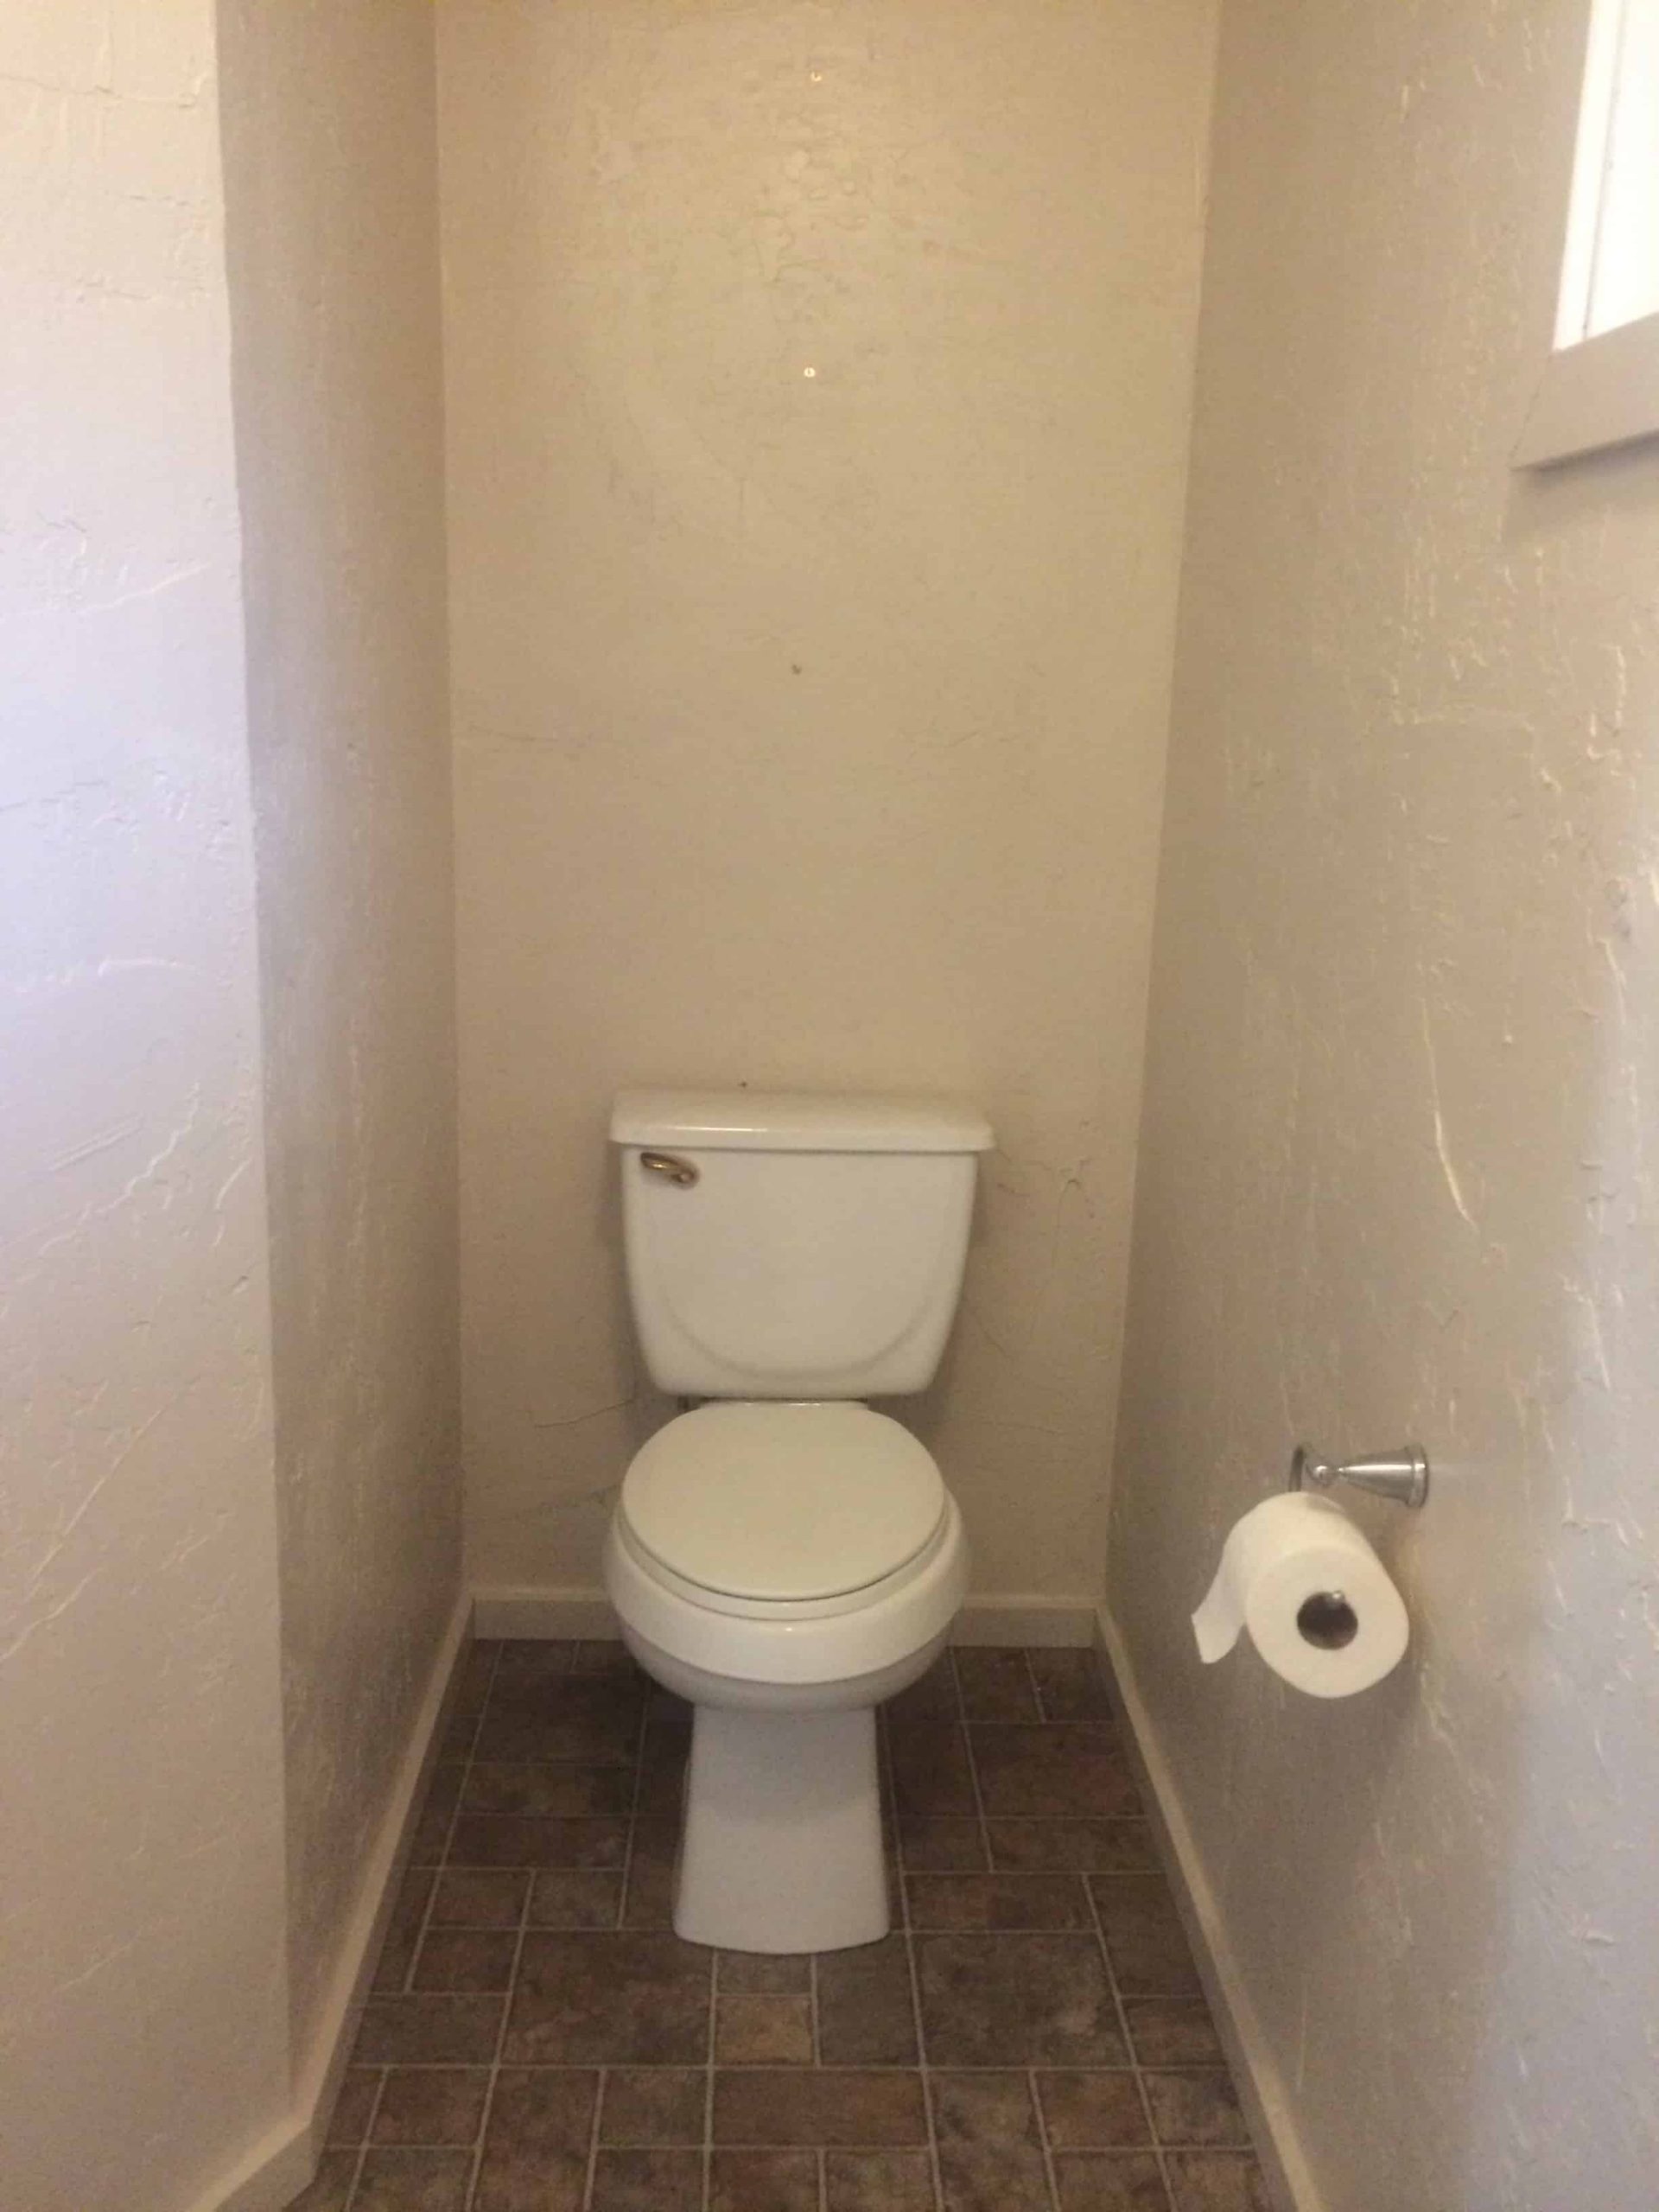
Smakward… it’s the perfect new word to describe this master bathroom. A subtle blend of all things SMALL and AWKWARD. Update: Check out our farmhouse master bathroom reveal!
This room got the most “iconic” renovation in the entire house due to a video that went viral on Facebook (over 20M views, what!!?!).
The bathroom was also featured on Apartment Therapy. The renovations in here continue to be some of my most popular posts, so I know you guys love this renovation.
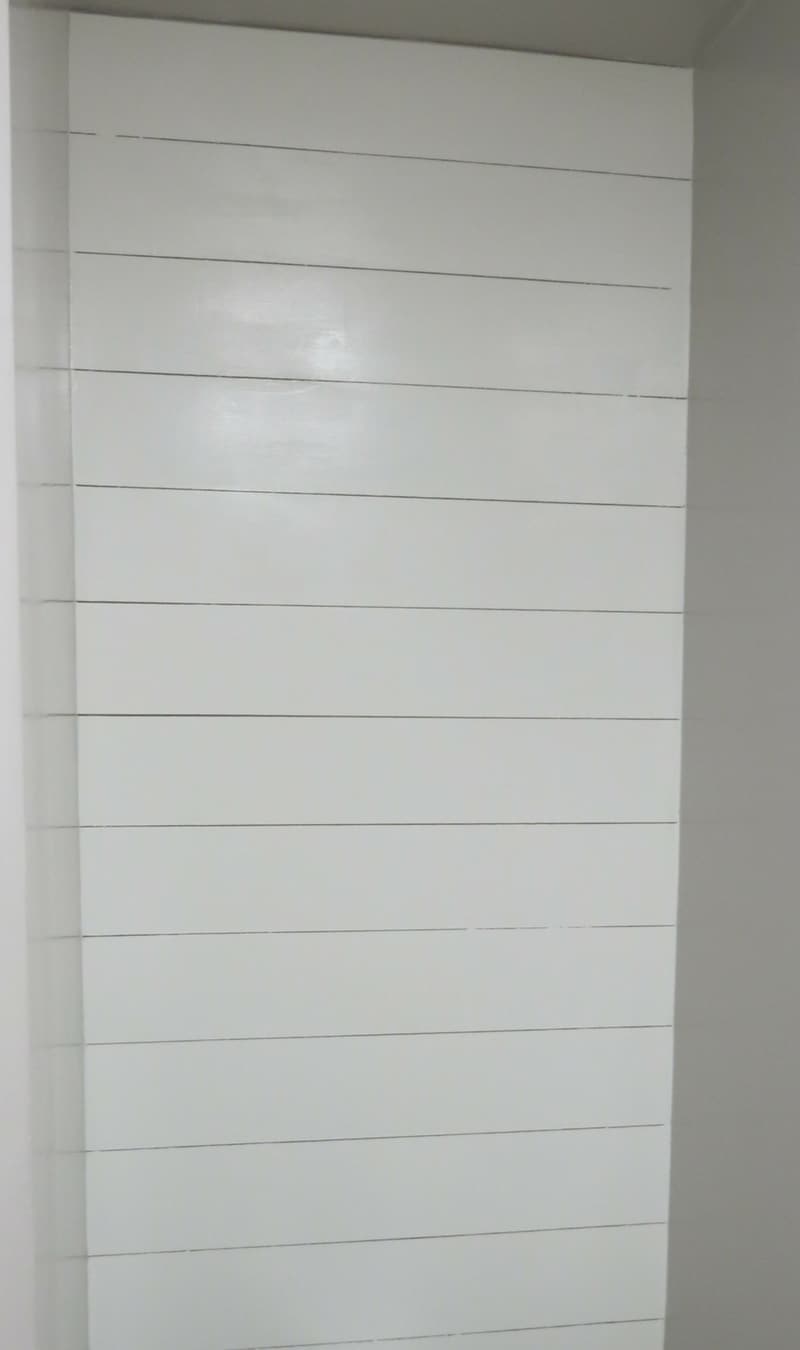
We started the bathroom renovation by installing this easy faux shiplap wall. Read the full shiplap wall tutorial here.
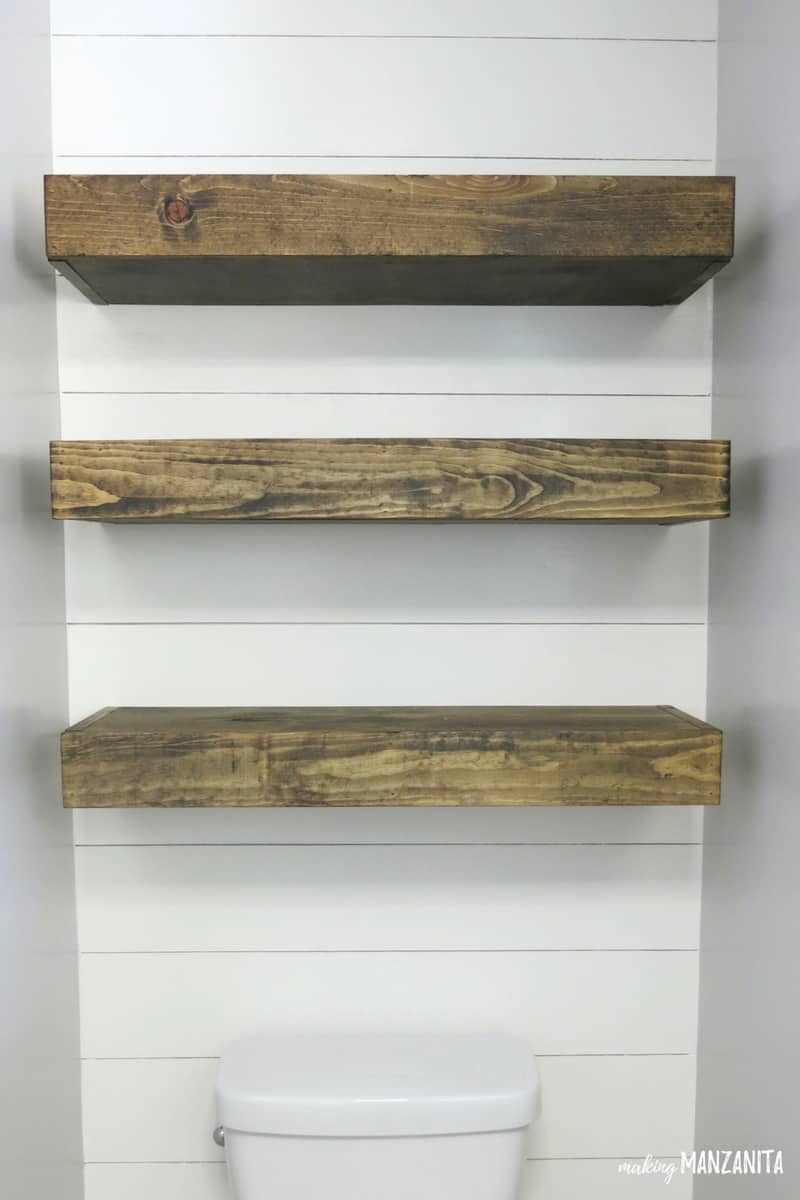
Then we built these fun floating shelves to add some extra bathroom storage space (and, of course, a cute place to decorate!). Read how to build bathroom floating shelves here.
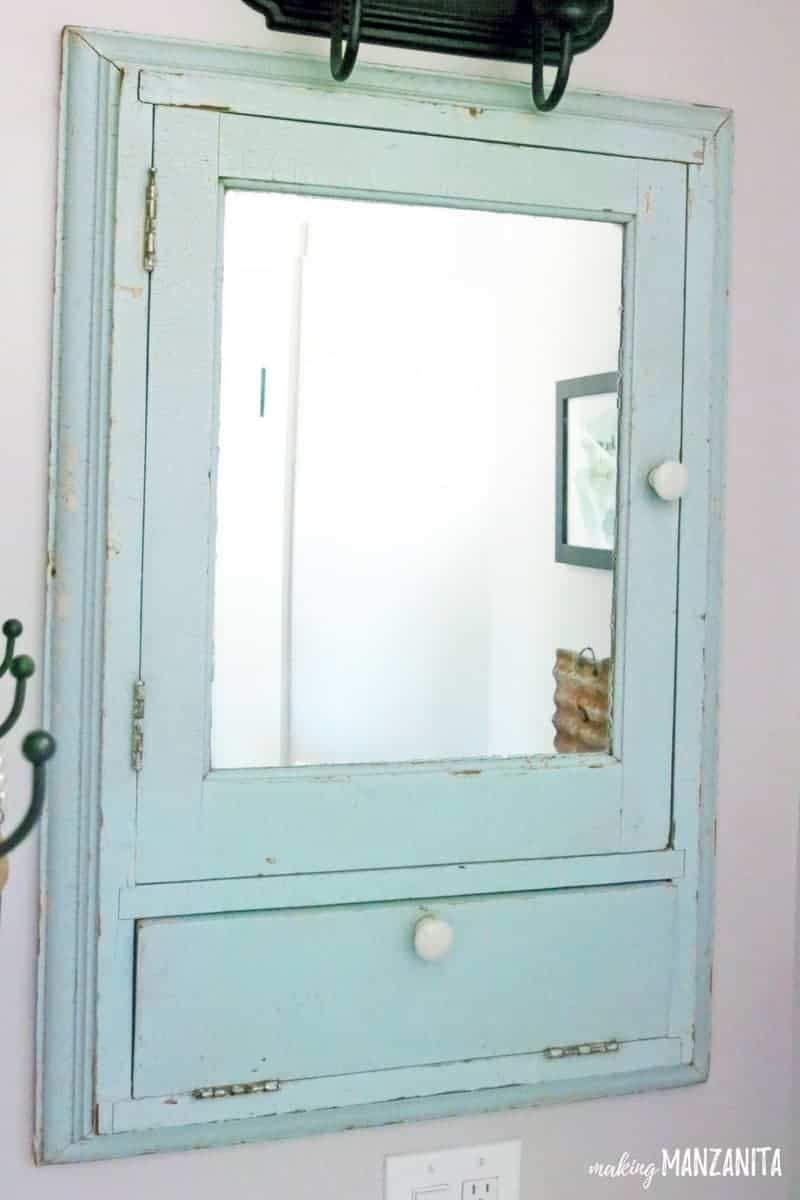
We installed a vintage medicine cabinet to give the room some major farmhouse charm.
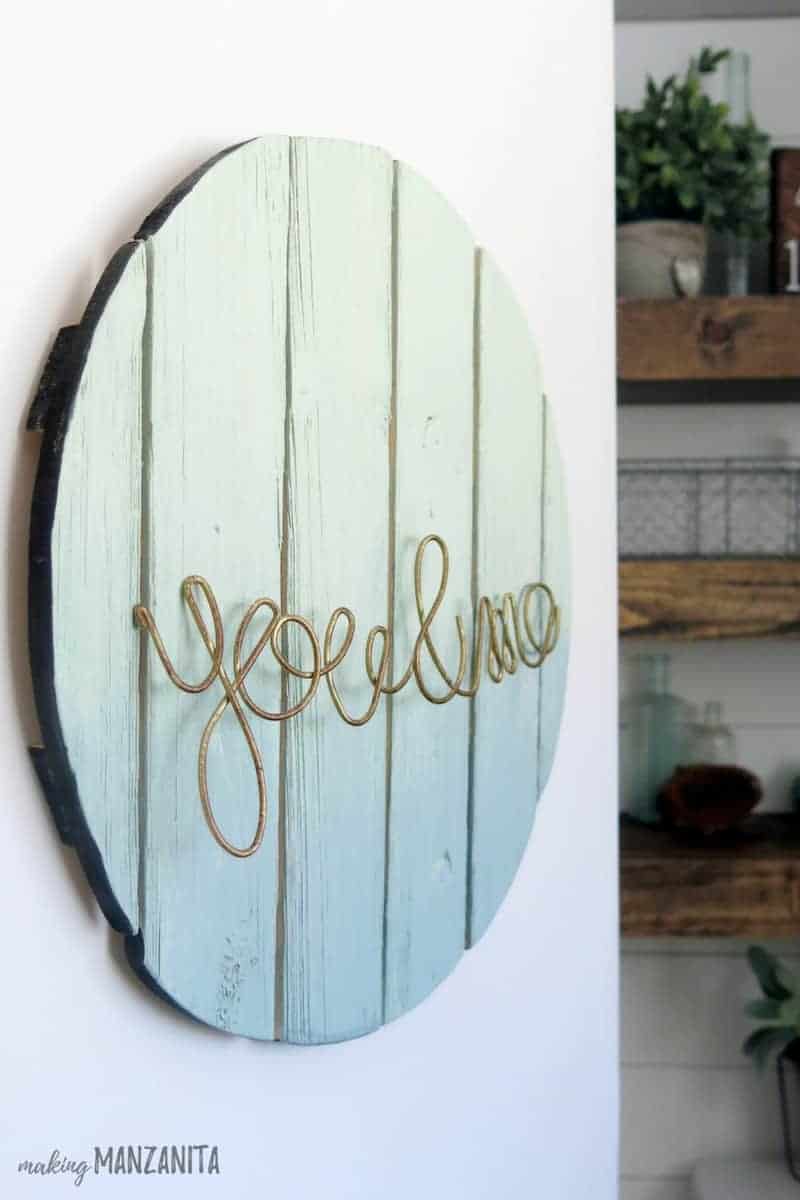
I had fun making some smaller DIY projects for the bathroom, like this ombre painted wood sign…
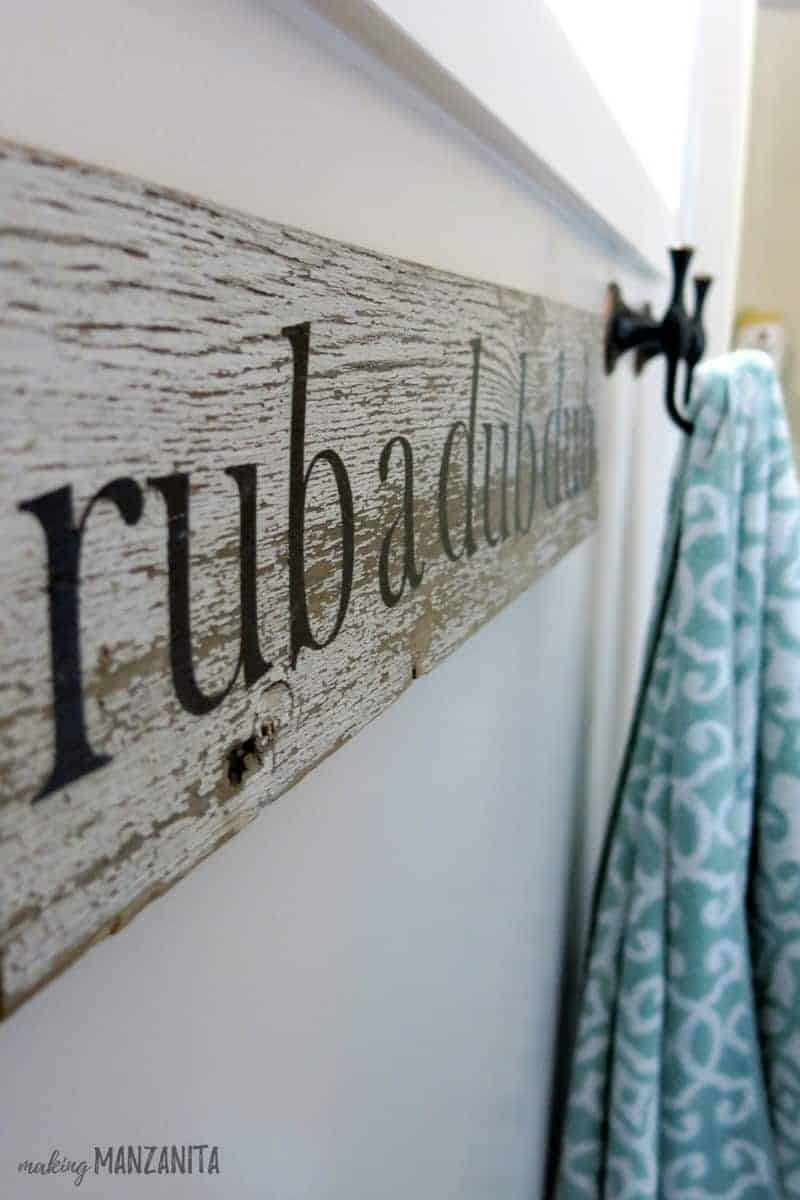
…and this adorable chippy paint rub-a-dub-dub sign.
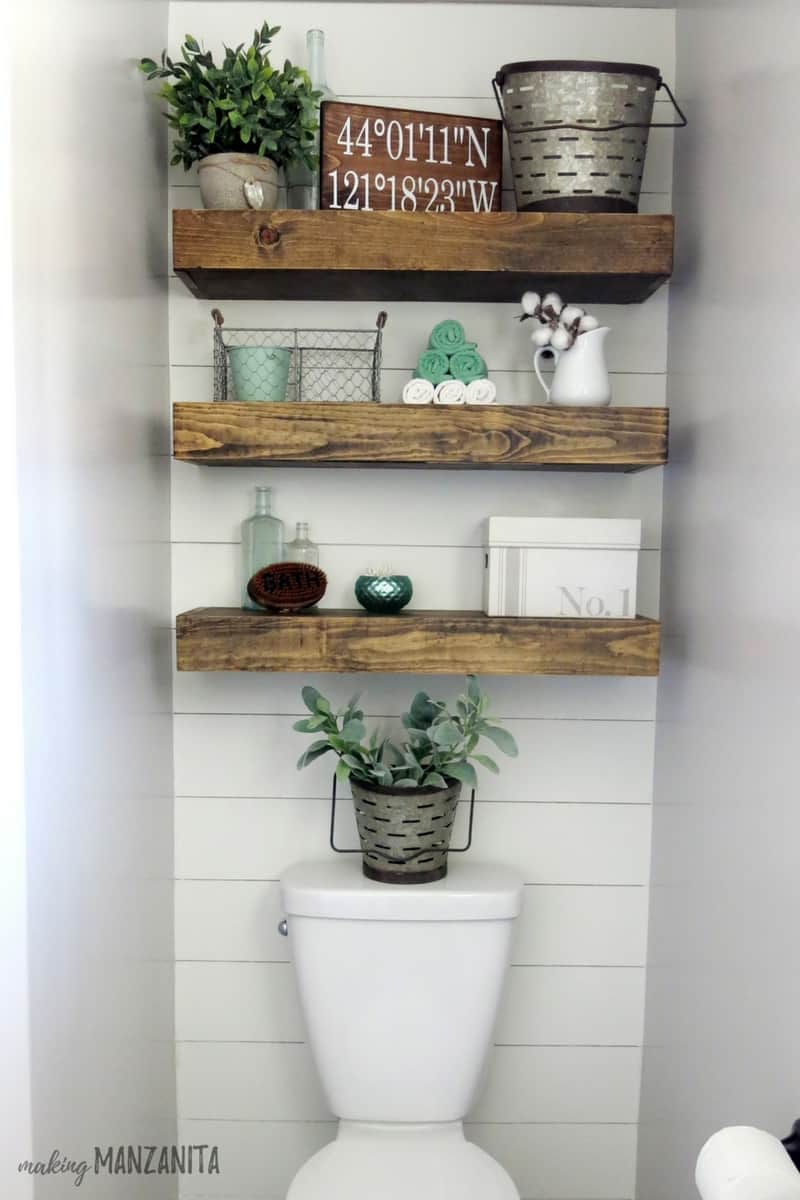
If you’re looking for tons more details on the farmhouse master bathroom renovation, check out the full bathroom reveal here.
Shortly after we moved out, Logan painted the wood vanity white, which was a long time coming.
I was totally saying…man, why didn’t we just do that earlier!? It looks great and fits in better with the farmhouse feel of the bathroom. He also did some painting in the shower and made it a nice bright white – looks so fresh!
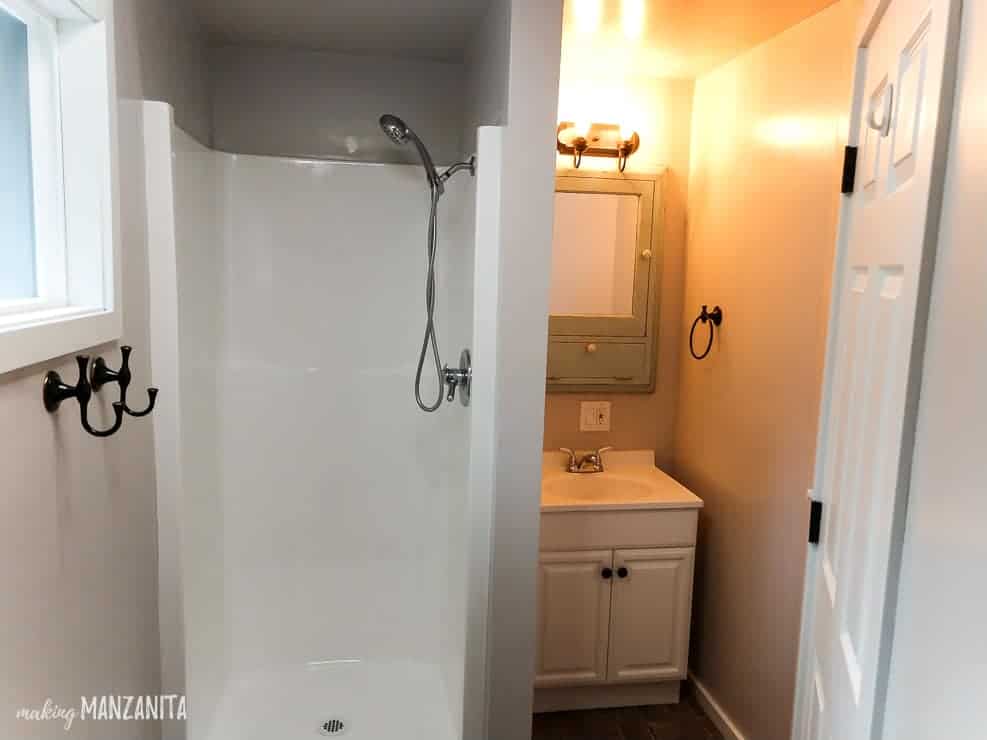
I was so sad to leave behind this bathroom, which I ended up falling in love with.

Whew….I know that was A LOT of information and A LOT of photos. But this before and after home renovations post was about three years in the making.
Taking a look back and really how far we came in our first fixer-upper makes me so happy and proud. A lot of people thought we were crazy for taking on a big project like this, but we’re so glad we did!
By DIYing almost every improvement, we saved THOUSANDS upon THOUSANDS of dollars and built a ton of equity in the home as well (since the market has gone up considerably here since we purchased).
With the improvements we made and the rise of the market, we were able to retain this home and turn it into a cash-flowing rental property before buying our 2nd fixer-upper.
We were very blessed to be able to do this, but a lot of it was due to the hard work, blood, sweat, and tears that we poured into this home over the past three years.
I’m so glad we decided to take one last look back at the before and after home renovations because I feel like I have a little closure now! It’s safe to say that we’ve closed the chapter on our first fixer-upper and can’t wait to get going on the renovations for our next place, which has already started!
1st Fixer Upper Project List
- How To Paint A Room For Beginners | Ultimate Guide
- How To Paint A Ceiling With A Roller
- Removing Baseboards: Tips and Tricks
- See all painting articles here!
- How To Install Laminate Flooring on Concrete
- How To Change An Outlet or Light Switch
- How To Make A Plywood Shiplap Wall
- Built in Reading Nook Bench in Shiplap Alcove
- How to Create a DIY Coffee Station at Home
- Marble and Gold Office Room Reveal
- Baby Girl Nursery Reveal with Boho Farmhouse Style
- Farmhouse Master Bathroom Reveal
- See all the exterior projects here!