Exterior Paint Prep: 10 Things To Do Before Painting Your Exterior

If you’re reading this, chances are you have decided to take on an exterior painting project yourself. It’s a big DIY project, so my hats are off to you.
Many things need to be considered and completed before you just start painting the exterior of your home. Planning and preparation are essential for painting the exterior of your home.
Even if you plan to hire professional painting contractors, you may be able to save some money by doing the exterior paint prep yourself. Ask the vendor when you get the quote if that is an option!
Today I’m going to walk you through our entire exterior paint prep process. And because everything is better in a list format, we’re narrowing it down to 10 things you need to do before you paint the exterior of your home.
Related – Other Exterior Painting Posts:
- 15 Things You Need For Painting Exterior of House
- Choosing Front Door Paint Colors (& How To Paint A Door)
- Easy Way To Instantly Improve Curb Appeal – Painting Garage Door
- I Need To Paint My House Exterior! Answers To Your Paint Questions
- A Basic Paint Sheen Guide for Interior and Exterior Surfaces
- Our First Fixer Upper Exterior Makeover Tour
- BEHR Designer Collection: New Collection Of Fool-Proof Paint Colors for Your Home
- The Best White Exterior Paint Colors for Houses
- 22 Front Door Paint Colors to Inspire You
We recently decided to take on painting the exterior of our home and boy was it needed! We had put it off for FAR TOO long.
After learning so much while we were painting the exterior of our home, we can’t wait to share it all with you and show you the VERY dramatic transformation soon (UPDATE: See how the fresh coat of paint turned out here!!)
Here’s the hideous before…
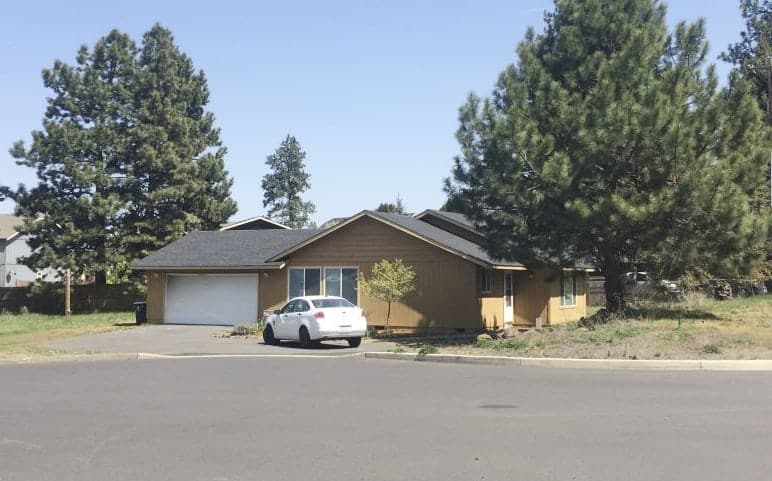
From the moment we moved in, I’ve wanted to paint our home’s exterior. But, there were a lot of other projects that were prioritized ahead of this. So we’ve been staring at this horrible paint color for way too long.
This exterior paint prep post contains affiliate links, but nothing that I wouldn’t wholeheartedly recommend anyway! Read my full disclosure here.
Are you ready to see 10 things to do before you paint the exterior of your home?
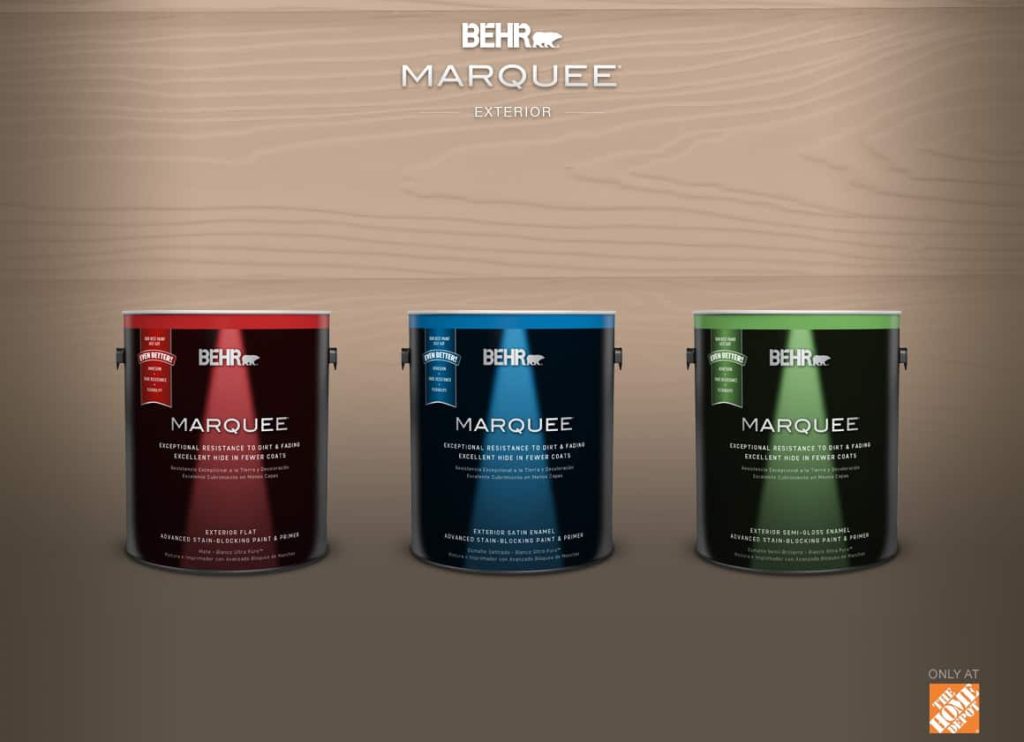
1. Choose your exterior paint type.
We decided to go with Behr’s Marquee line, with is their “best of the best” line. We have always been huge Behr paint fans and loved the way our interior paint turned out.
If you’re going to go with Behr, here’s a great breakdown of their different exterior paint lines so you can compare what works best for your home improvement project.
UPDATE: Since writing this article, Behr has released a new higher-quality line called Dynasty. It is now Behr’s most advanced exterior paint ever and offers a 10-year color fade protection (when you use one of their neutral fade-protected colors) and has both rain resistance after 60 minutes and can be applied in lower temperatures. That’s a game-changer!
2. Choose your exterior paint color.
This is the fun part…or for some, maybe it’s the overwhelming part. Long before we started thinking about when we were going to paint the exterior, we were thinking about exterior paint colors.
We go on a lot of walks around our neighborhood regularly. One thing that we were looking for was colors that were used on other homes. Before we went to the paint store to get samples, we had it narrowed down to a few shades we wanted to test.
Many of the homes surrounding ours are newer and more of a craftsman style with earthy paint tones. We wanted to choose something that would be dramatic, earthy, more modern, and fit in better with our neighborhood.
We had seen a dark green with a tan trim combination on some other homes nearby and loved the way it looked.
By choosing a white trim, we got the more dramatic high-contrast look we were going for.
After testing a few different colors, we landed on Behr Black Bamboo for the home’s siding, Behr In The Moment for the front door, and Palais White for the fascia, garage door, door frames, and window frames.
Further Reading – Need more help choosing paint colors? Check out the BEHR Designer Collection for a set of 30 fool-proof colors.
3. Check the weather.
This step is not to be overlooked. The weather must be good when you are planning on painting the exterior of your home. Before you plan the painting day, check for the right conditions.
You can’t paint in the rain, so don’t even try.
You also shouldn’t paint in direct sunlight, so that may require some planning on which sides to start first based on the way the sun hits your house.
The perfect weather for painting the exterior of your home is a little cloudy, but no moisture or rain.
4. Get a babysitter.
No…but seriously…. painting the exterior of your home is hard work. Don’t make it harder while juggling your little ones.
Unless they are old enough to help out, get some extra help for childcare during your exterior paint project.
I got off easy when we were painting our home because my brother had just moved here and helped Logan with a majority of the hard work, so I stayed inside with our little one.
5. Gather your tools.
If you’re wondering what the heck kind of supplies you need for painting your exterior, don’t worry. I have you covered with a whole post of 15 things you need when painting your exterior.
From painter’s tape to roller covers, there are several things you’ll need to have on hand for your exterior house painting. Make a list of things you’ll need to buy and get it all at once before you start painting. That will save you so much time running back and forth to the store.
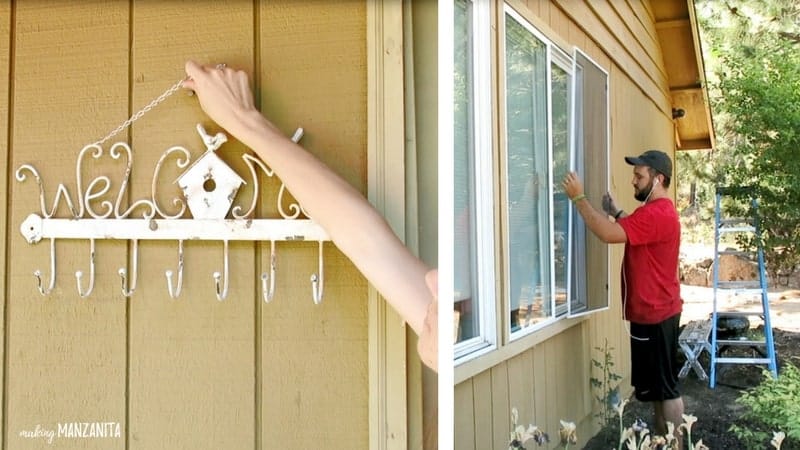
6. Remove anything attached to your exterior.
Window screens, shutters, exterior lights, welcome signs, address signs, those cute little planter boxes under your window….remove it all!
For best results, you want to be sure that you paint behind all of these in case you (or someone that buys your house later) want to remove these.
It’s also great to be able to clean behind these things…which brings us to our next thing to do before on your exterior paint prep list…
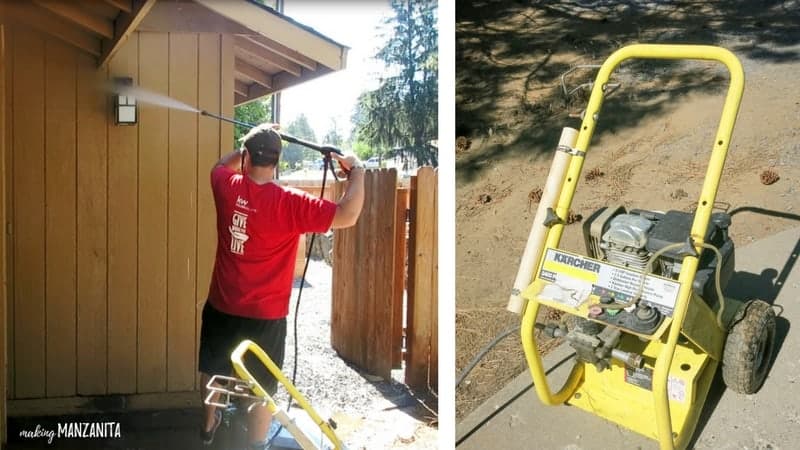
7. Pressure wash the entire house.
If you’re thinking….”I don’t have a pressure washer, can’t I just use my hose?”…well, you can.
But, it’s not going to work that well. And getting a clean surface to paint on is very important for paint adhesion.
You can rent a pressure washer from Home Depot or ask around and see if you have any of your friends and family have one you could borrow for the weekend.
When power washing your home, start at the top and work your way down toward the ground.
After you are done pressure washing, check around all of the windows and doors for any water that may have leaked in, and wipe it up quickly.
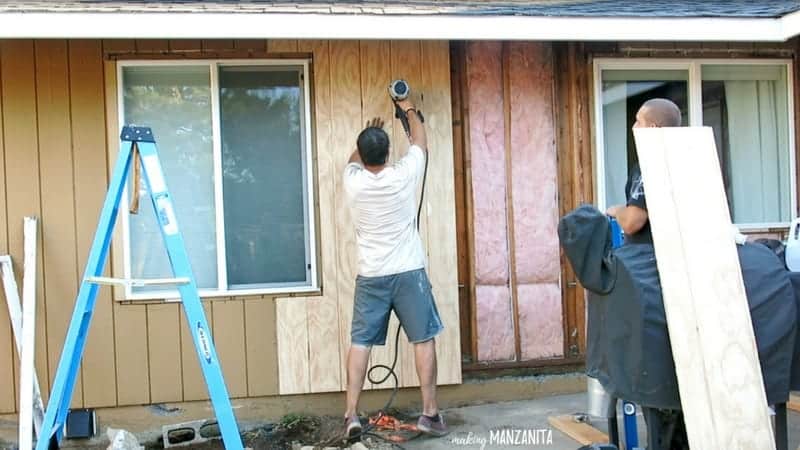
8. Replace any rotted siding or fascia boards.
If your home has been sitting and crying for a new coat of paint for a while, chances are that you may have some warped siding or even rotted fascia boards. It is very common in older homes or ones that weren’t prepped properly.
Take the extra time to replace all of that now, instead of just covering it up with paint.
You’ll be happy when your paint job lasts A LOT longer on fresh surfaces versus rotted wood that’s not going to last much longer.
As you can see from the photo above, we had a big chunk of siding that needed to be replaced on the backside of our house.
Keep in mind that any new boards or siding (basically any bare wood) need a coat of primer before painting. Learn more about when you do and don’t need to use primer before paint in this article.
9. Sand or scrape chipped paint surfaces.
There may be areas of your exterior surface that have chipped or peeling paint. I know ours had plenty.
Be sure to sand these down the loose paint with a hand sander or random orbit sander with 60 or 80-grit sandpaper, so you are painting on a smooth surface. Alternatively, you could scrape this chipped paint as well.
10. Caulk around window casings and doors.
Exterior caulking is super important to seal your home’s heat and cooling and protect it from water damage. Reapplying caulk around your window frames and doors is the final step of getting your exterior prepped for paint.
Looking for the best exterior caulk to use on windows, doors, siding, or trim? Be sure that you’re buying a sealant that is made for exteriors, first of all! Flexibility is the most important thing when working with exterior caulk because, with the temperature changes, you need the caulk to flex to avoid cracking and shrinking.
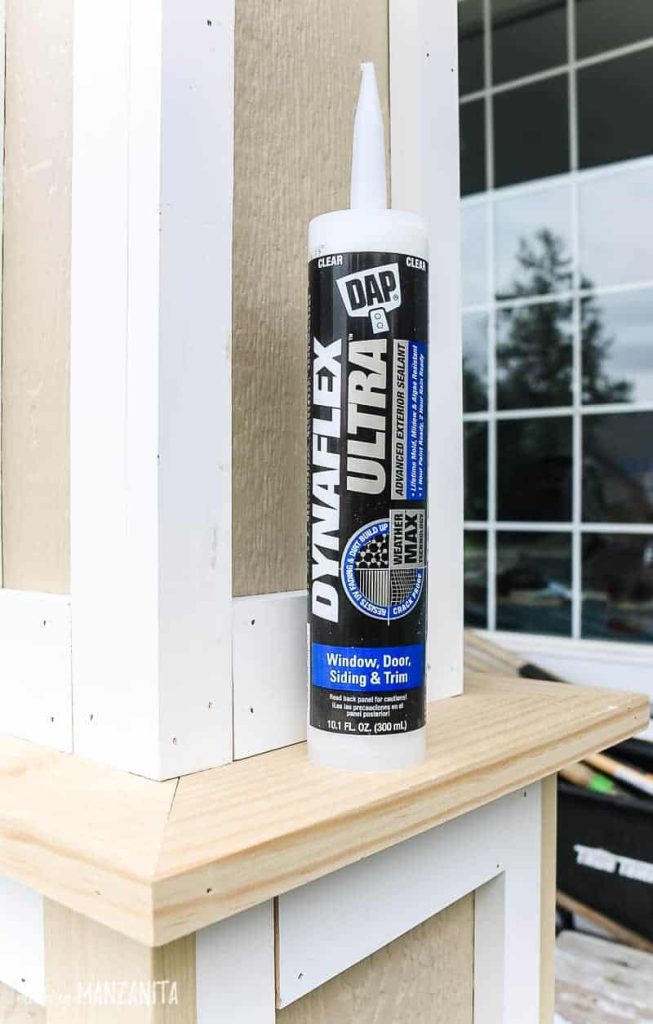
Our favorite exterior high quality caulk is DAP’s Dynaflex Ultra advanced exterior sealant. It’s a durable, 100% waterproof seal that stands up to the exterior elements.
If you are planning to paint your exterior, there is some definite prep work that shouldn’t be overlooked.
By making sure you are prepared with the right paint, color, tools, weather forecast, and children-free, you will be ready to tackle this DIY painting project.
The first few steps of making sure the surface you are painting is clean and chipped paint-free are essential for a long-lasting successful exterior paint job.
These 10 things to do before you paint the exterior of your home take the guesswork out of where to start.

You made a great point about having a pressure washer to make sure that dirt has been washed off from the surface before painting. One of my pet peeves is when a paintbrush collects dirt and just smudges it all over while painting. I wonder how professionals do jobs like this without much hassle.
My brother has been preparing his beach house for the second round of vacation stayovers and I want to help him out. I found it really useful how you stated that pressure washing a house before getting an exterior coat of paint is a good idea because the beach house usually gets a lot of sand blown onto it from the wind so this might make a lot of uneven and rough surfaces while painting. Once we find a pressure washer we can borrow, we’ll be sure to get some help from a painting contractor. Thank you for the article!
You made a great point when you said it’d be a good idea to replace any rotting or broken boards on a building before painting it. I’ve been looking into renovating our family’s old lakehouse and giving it a new shade of paint. I assume there may be some rotting boards around it since it has been in disrepair for a few years now so having those replaced before hiring an exterior painting service should be the first thing I do.