Easy DIY Tapestry Frame | 6 Simple Steps To Create Fabric Wall Art!

Large-scale art is impressive, but it is so expensive to buy! Make your own by creating a DIY tapestry frame using 1x2 lumber.
Thank you to Arrow Fastener for sponsoring this DIY tapestry frame project! All opinions are entirely my own. This post also contains affiliate links, but nothing that I wouldn’t recommend wholeheartedly. Read my full disclosure here.
When I was planning our modern bohemian living room design, I knew I wanted to incorporate some sort of large-scale wall art – but the prices on large-scale art give me serious sticker shock.
So I did what I normally – figure out how to DIY it for cheaper, of course!
Table of Contents
Want to see more of our living room renovation?
- Modern Bohemian Living Room Mood Board & Layout (our next renovation!) – you are here!
- Removing Baseboards: Tips and Tricks
- How To Remove Carpet Tack Strips – 2 Easy Ways!
- How To Install Laminate Flooring on Concrete
- How To Fill Nail Holes in Wall
- How To Paint A Room For Beginners | Ultimate Guide
- Laying Large Format Tiles | Tile Entryway Reveal
- Easy DIY Tapestry Frame | 6 Simple Steps To Create Fabric Wall Art!
- DIY Slat Wall | Easy Modern Wood Accent Wall Idea
- Faux Concrete Wall Panels Behind Fireplace (No tools required!)
- Modern Boho Living Room Reveal
Now, I love a good gallery wall…don’t get me wrong. Gallery walls (like this grid gallery wall) or picture ledge shelves are great ways to showcase collections and pull together a whole vibe with a mix of themed prints and other decorations.
But there is just something special about the extravagant-ness of large scale art, am I right? It really helps to anchor the room and serve as a focal point.
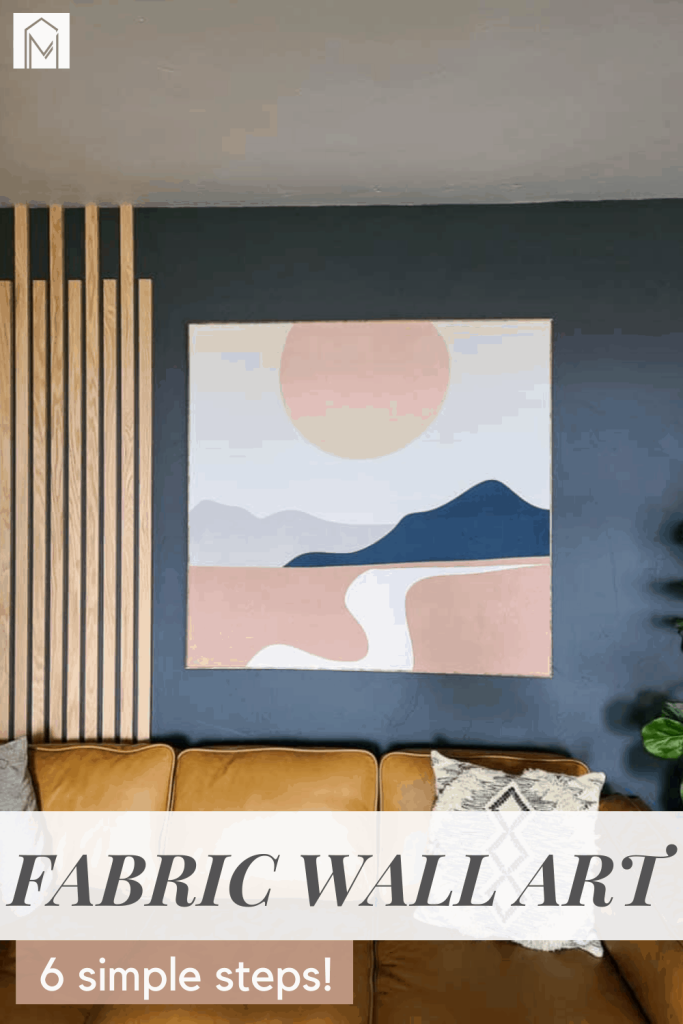
So if you’re looking for a cheap DIY solution for large-scale art – you’re going to love today’s tutorial! We are creating a DIY tapestry frame. The fabric wall art seriously turns out SO cool!
DIY tapestry frame – video tutorial
If you love DIY videos, be sure to subscribe to our YouTube channel!
How to build a tapestry frame – step by step guide
Supplies for tapestry frame:
- Tape measure
- 1 1/2″ wide strips of wood – could make your own by ripping down plywood with a table saw or use 1×2 lumber
- Miter saw
- Arrow pneumatic brad nailer
- 1 1/2″ brad nails
- Corner clamps
- Square that goes with corner clamps
- Wood glue
- Tapestry
- Iron
- Arrow electric stapler
- 5/8″ staples
- Lattice wood strips
- Orbital sander with 220 grit sandpaper
- Wood stain
- Polyurethane
- Stain rag
- 5/8″ brad nails
Step 1. Get tapestry
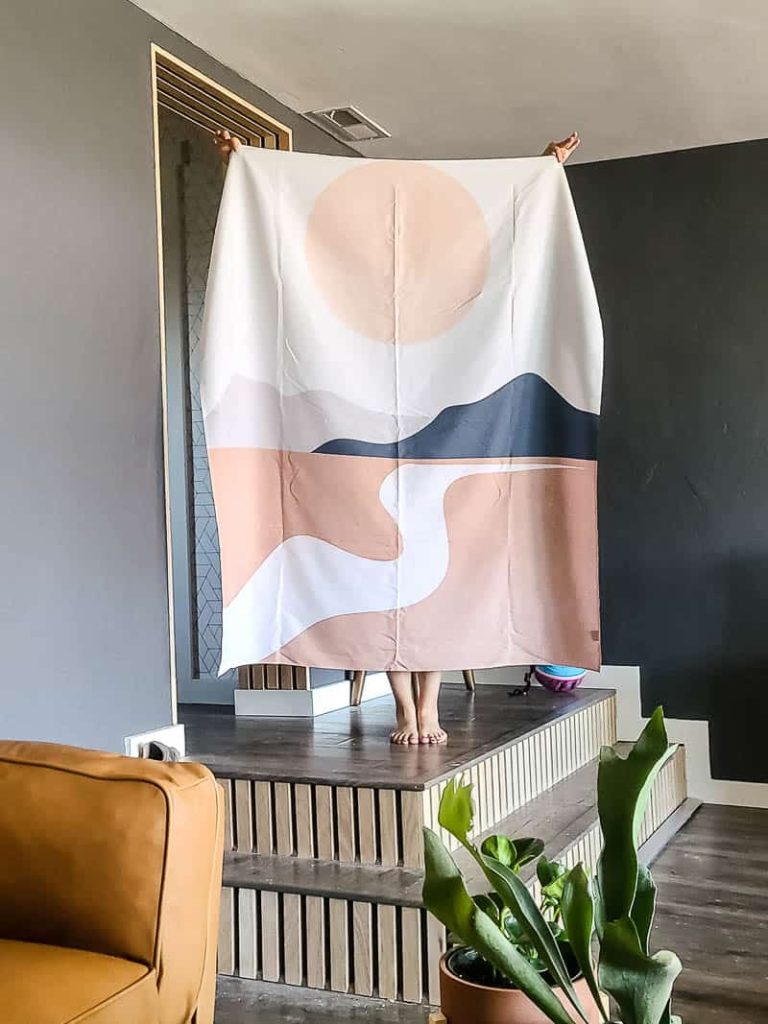
In order to make a tapestry frame, you need to start with a tapestry of course! If you can’t find a good tapestry you like, you could totally do the same thing using a fun patterned fabric or even a shower curtain!
There are several places you can find affordable large scale tapestries online:
- Etsy
- Society 6 – this is where we got our tapestry!
- Pottery Barn Teen – surprisingly great prices too!
- Amazon
Step 2. Cut wood and assemble structure
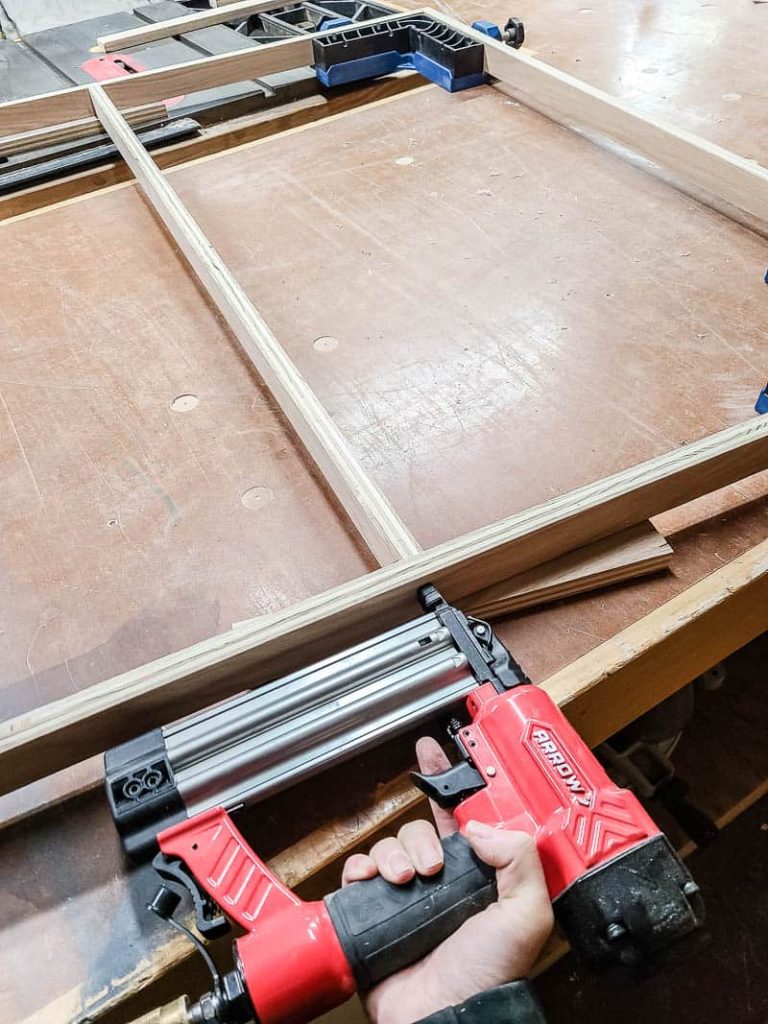
For the wood on the structure, you want to use something about 1 1/2″ inches wide. We used leftover wood slats from our DIY slat wall that we just finished, but if you need to buy this – you could use 1×2 stock lumber.
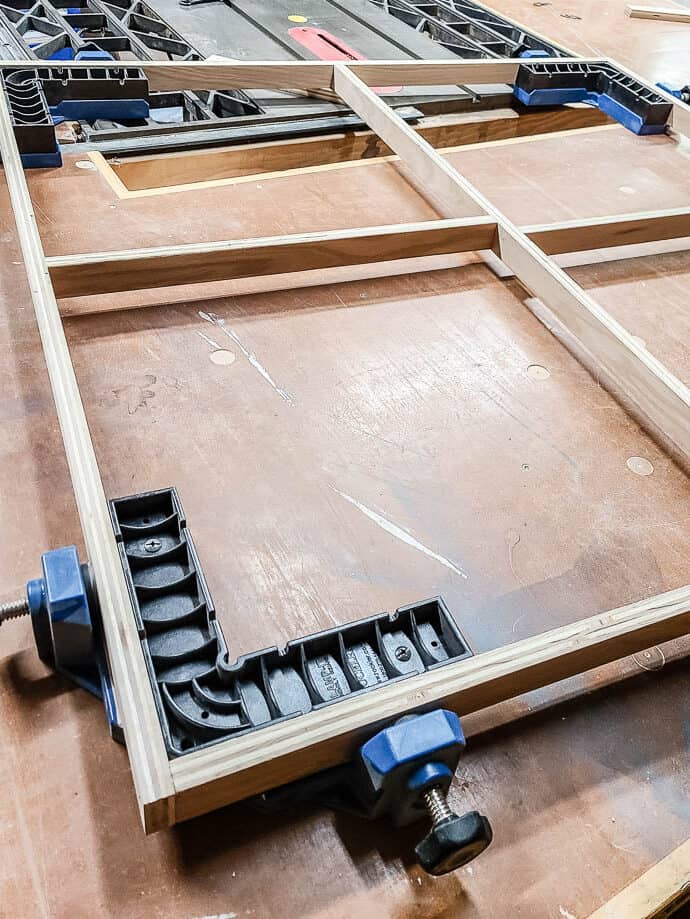
Start by cutting your wood down to size for your structure. I built the structure for our tapestry to measurement approximately 45″ by 45″. I also added some center supports to the middle of the structure.
Holding everything in place with corner clamps makes the whole process go easier. But if you don’t have corner clamps, you would just want a 2nd person to help you hold everything square while you nail the structure together for the tapestry.
Use a little bit of wood glue at the joints and secure with 1 1/2″ brad nails using Arrow’s brad nail gun. It made this step quick and easy.
Step 3. Press tapestry
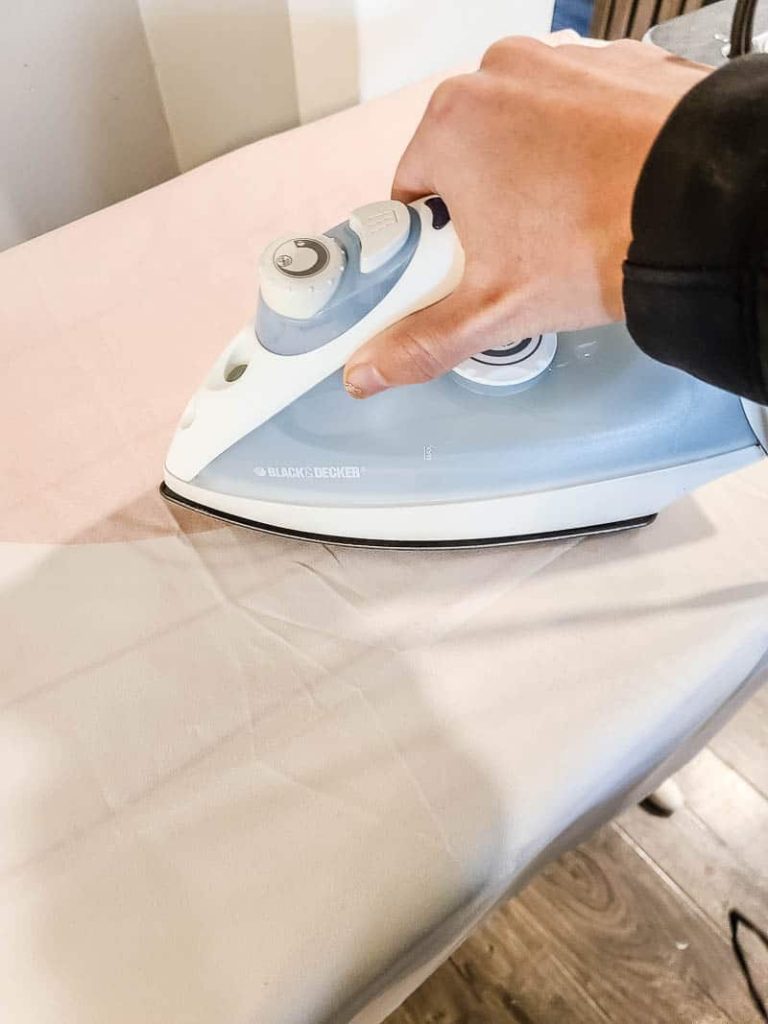
Next, you want to get your tapestry nice and flat. I pressed ours with an iron to get all the wrinkles out from shipping.
Step 4. Staple tapestry to structure
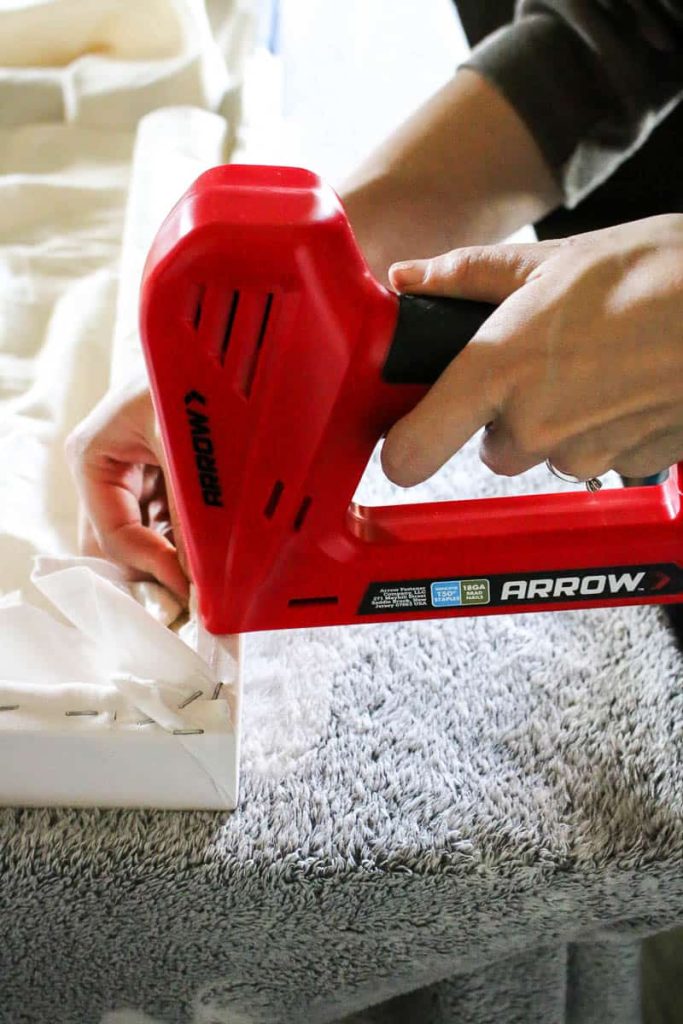
We found that our tapestry was a little see-through and you could see the wood through it. So we added a layer of plain white muslin fabric to the structure first. Repeat the same steps to add the tapestry to the structure after you get the white fabric added.
Using Arrow’s electrical stapler and 5/8″ staples, pull the fabric tight around the structure and staple on the back. We added staples every couple of inches and held it really tight while stapling.
It helps to have two people of this step. One to hold nice and taut and one to add the staples.
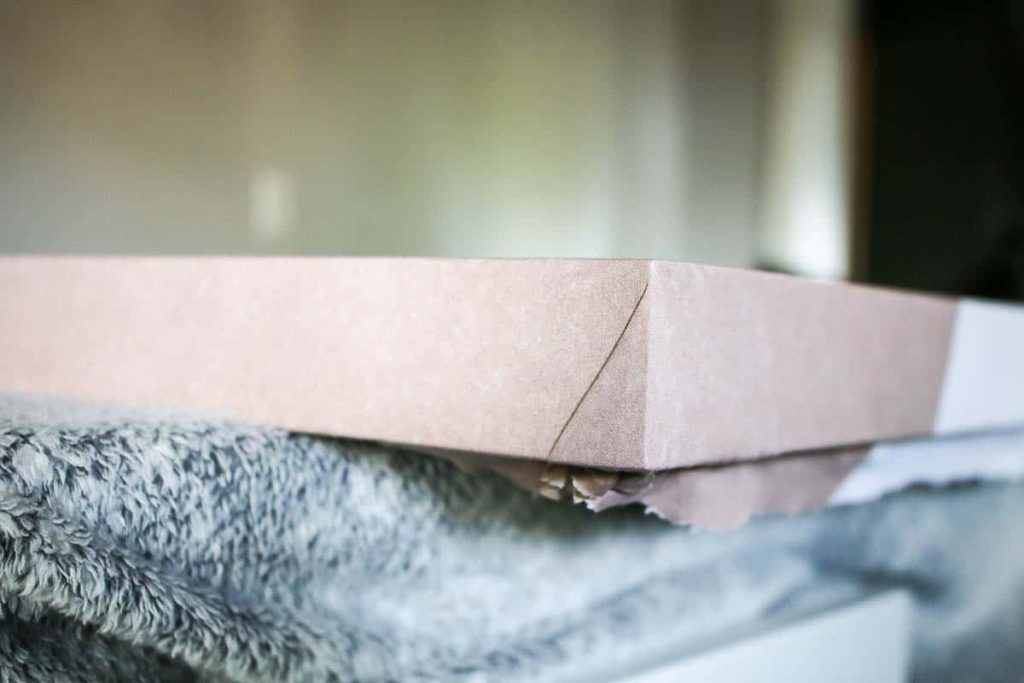
On the corners of the tapestry, take your time to get the tapestry folded nicely so it lays as flat as possible. Hold tight and add several staples to the back at the corners to hold the fold into place.
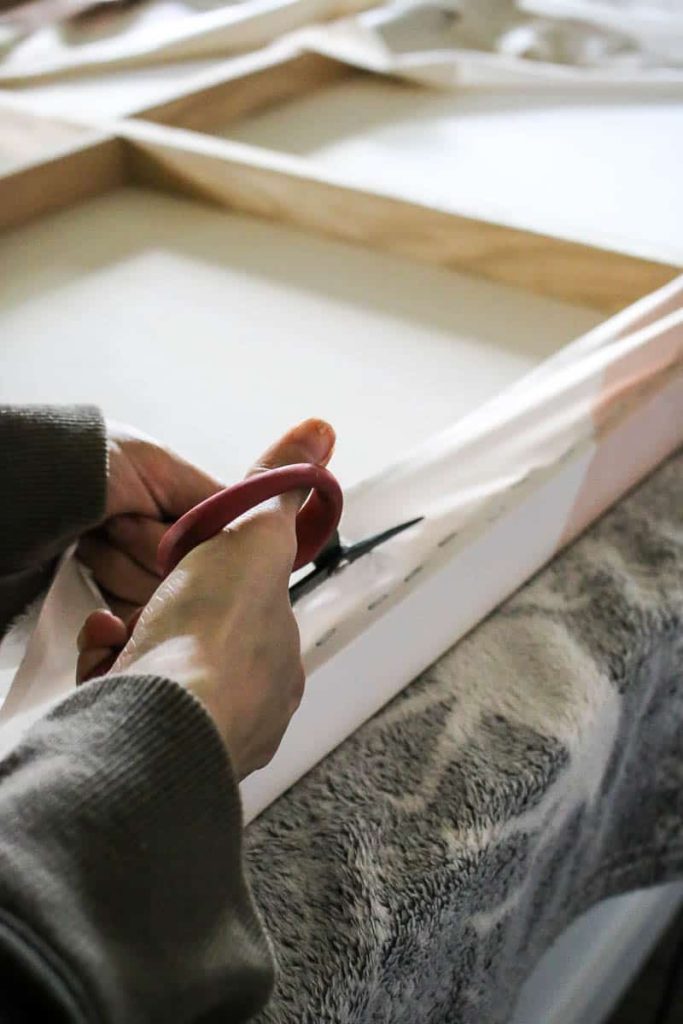
Cut off the excess tapestry on the back with scissors.
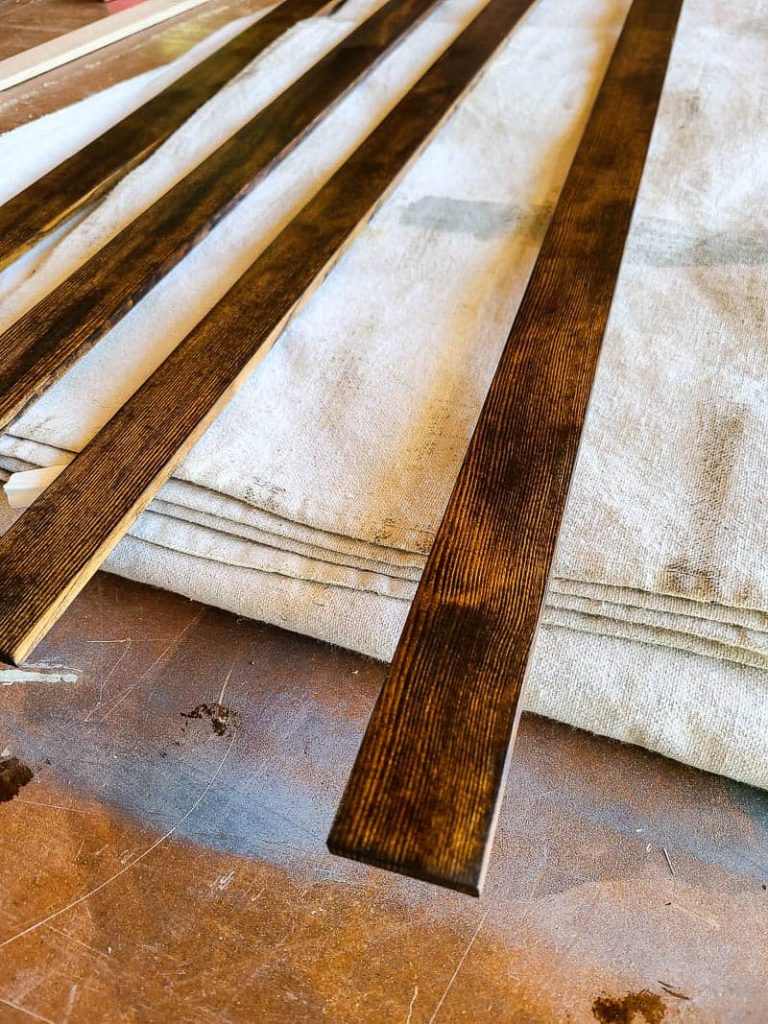
Step 5. Create wood frame pieces
You could totally stop here if you just wanted a tapestry that looks like a canvas, but I wanted to add a wood frame to the edges!
We used inexpensive and lightweight lattice wood strips to make the frame. They are approximately 1.5″ wide, so they were roughly the same size as my 1×2 tapestry structure. They were actually slightly smaller, but I liked having that little edge of the tapestry around the frame.
Once the wood frame pieces are cut, lightly sand the pieces so they are smooth. Finish by applying wood stain and sealing with Polyurethane. Let dry.
If you’re trying to decide whether to use polyurethane vs polycrylic for your project, check out this article with an overview of each.
Step 6. Wrap edges with wood strips to frame it out
Hold the wood strips up to the edge of the tapestry structure and nail into place using Arrow’s brad nail gun with 5/8″ brad nails. Add a nail every 8 inches or so along the edge of the tapestry frame.
DIY Tapestry Frame: After pictures

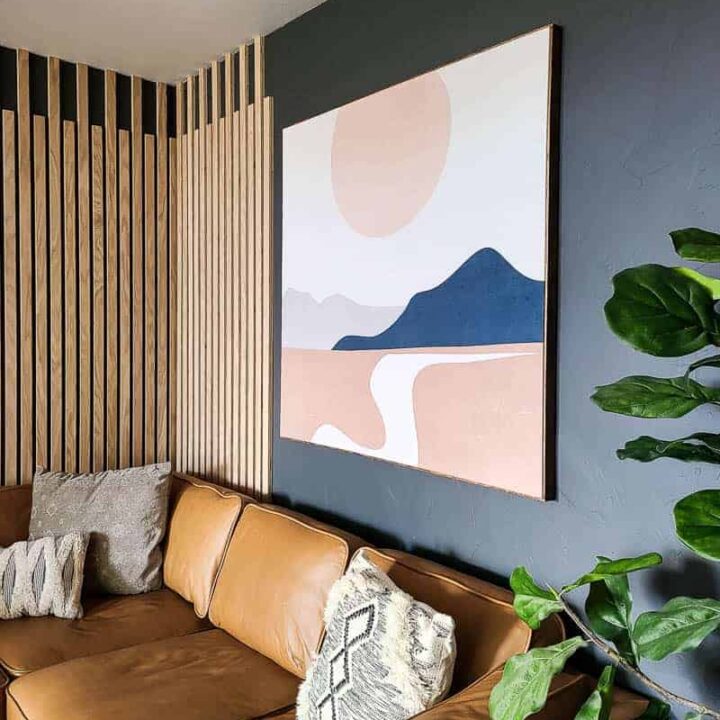
Ta DA! Large-scale art like this costs a pretty penny, so I’m so glad we were able to find a way to DIY it for much cheaper!
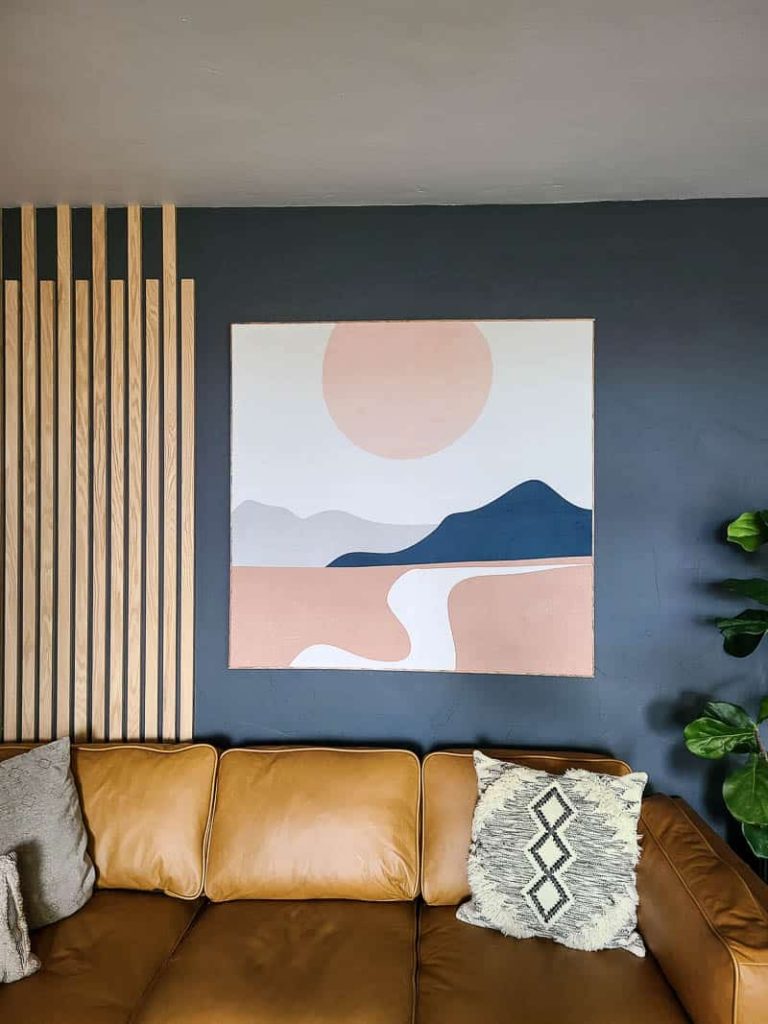
I love the simple touch that the thin pieces of wood added to the edges of the tapestry frame – it really frames things out well and makes it feel expensive.
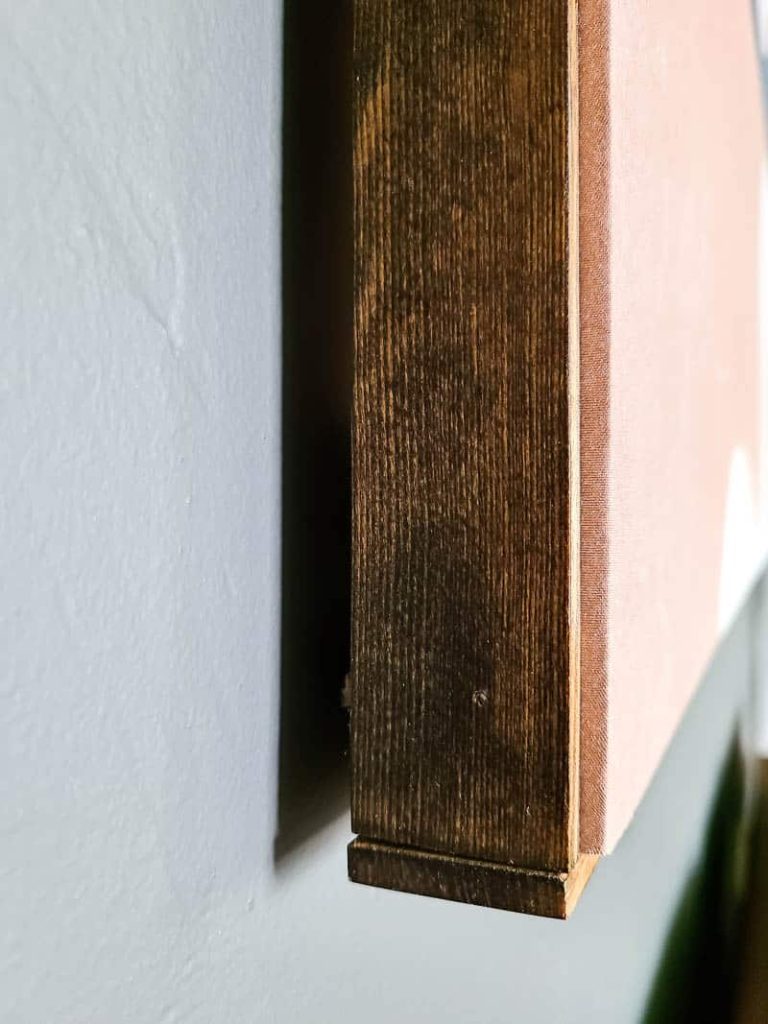
The holes from the 18 gauge brad nailer are pretty dang small, we didn’t even bother to fill them because you can barely see them!
I put it on this wall above our sectional couch because it’s now the first thing you see when you walk into the room (and our front door)!
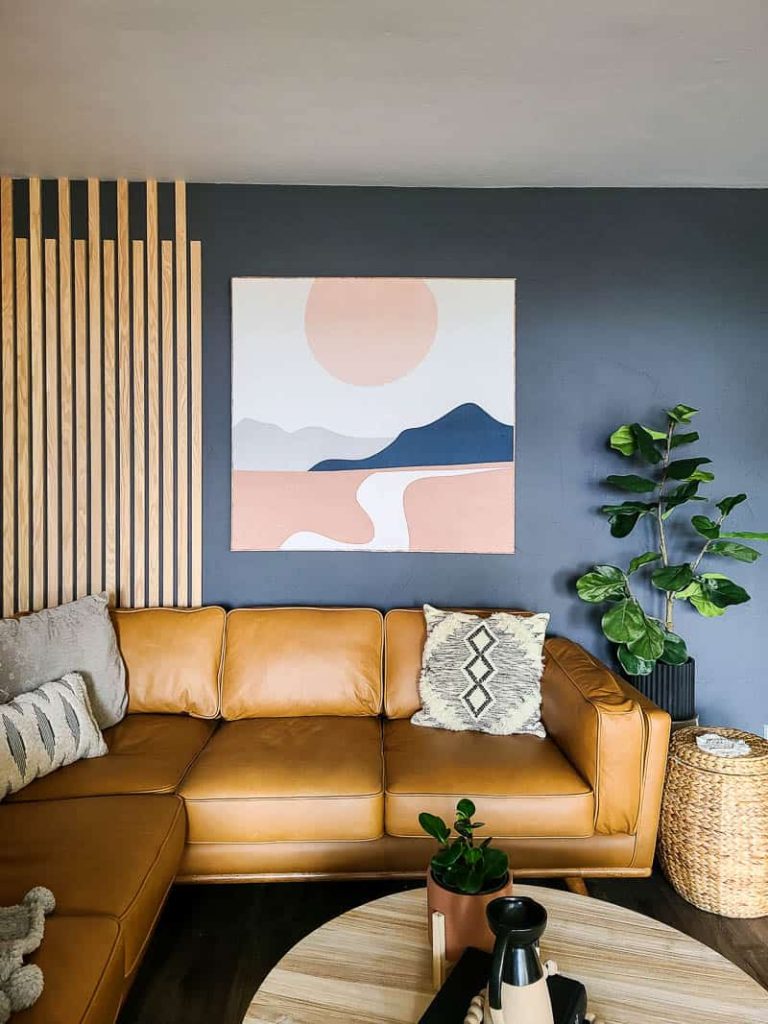
I love the splash of color that the framed tapestry art adds to the walls and it totally looks like expensive art, don’t you think?
Our living room makeover is seriously comin’ together now, don’t you think!? We’ve got the furniture in and decor starting to go on the walls. We are also almost ready to reveal the whole space to you! Stay tuned for the big reveal! (UPDATE: Check out how the finished modern boho living room turned out here.)
What tapestry would you use for your fabric wall art?
Let us know in the comments below!
How To Make A Easy DIY Tapestry Frame
Large scale art is impressive, but it is so expensive to buy! Make your own by creating a DIY tapestry frame using 1x2 lumber.
Materials
- 1 1/2" wide strips of wood (1x2 lumber)
- 1 1/2" brad nails
- Wood glue
- Tapestry
- 5/8" staples
- Lattice wood strips
- 220 grid sandpaper
- Wood stain
- Polyurethane
- 5/8" brad nails
Tools
- Tape measure
- Miter saw
- Arrow pneumatic brad nailer
- Corner clamps (or square)
- Iron
- Arrow electric stapler
- Orbital sander
- Stain rags
Instructions
- Get tapestry. You could also use a shower curtain!
- Cut wood and assemble structure. Use a little wood glue at the joints and secure with 1 1/2" brad nails using Arrow's brand nail gun.
- Press tapestry.
- Staple tapestry to structure with Arrow's electrical stapler.
- Create wood frame pieces.
- Wrap edges with wood strips to frame it out.
Notes
There are several places you can find affordable large scale tapestries online:
- Etsy
- Society 6 – this is where we got our tapestry!
- Pottery Barn Teen – surprisingly great prices too!
- Amazon


Great job! Love the wood frame! I did a similar version several years ago. I bought a blanket/tapestry from amazon intending to use it as a blanket. That is until I received it in the mail. It is gorgeous and I felt as if it should be a tapestry on the wall. I built a frame and added cross bars to the backside as the size was like 80 x 60 or something like that. I stapled it to the wood by wrapping it around the wood but after I got it on the wall you could see the cross bar wood through it. I took it down and used some old roller shades and attached them to the frame first and then put the picture back over top and re-stapled. It looks gorgeous! Everyone that comes through the door compliments it. I wish I could show it to you but I don’t see options to post pictures here. I’ve had it for about 4 or 5 years now and although I really love it still, I’m going to get the smaller version of it and make a smaller frame so to free up some wall space for other things I want done there.
What a great idea!! So many ways to modify this idea.
Love it indeed! Great job!
I also am intrigued by the short pieces of wood you used around the stairs you were standing on. How creative that is! Love it!
Thank you! That’s a little sneak peek of our living room makeover, which will be revealed very soon!
thanks for this tutorial! I have huge walls and needed some large scale art on a budget. Followed everything as you described except I used a pocket jig for the joints for some added stability and made mine a little bigger roughly 45 x 55
Awesome, so glad you found this helpful!