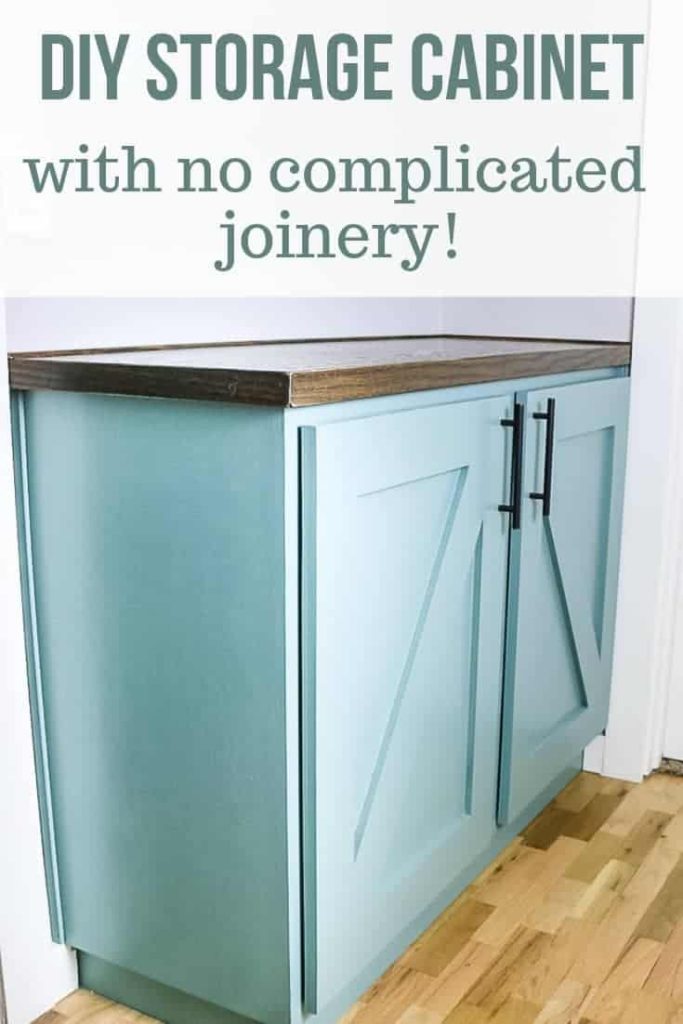
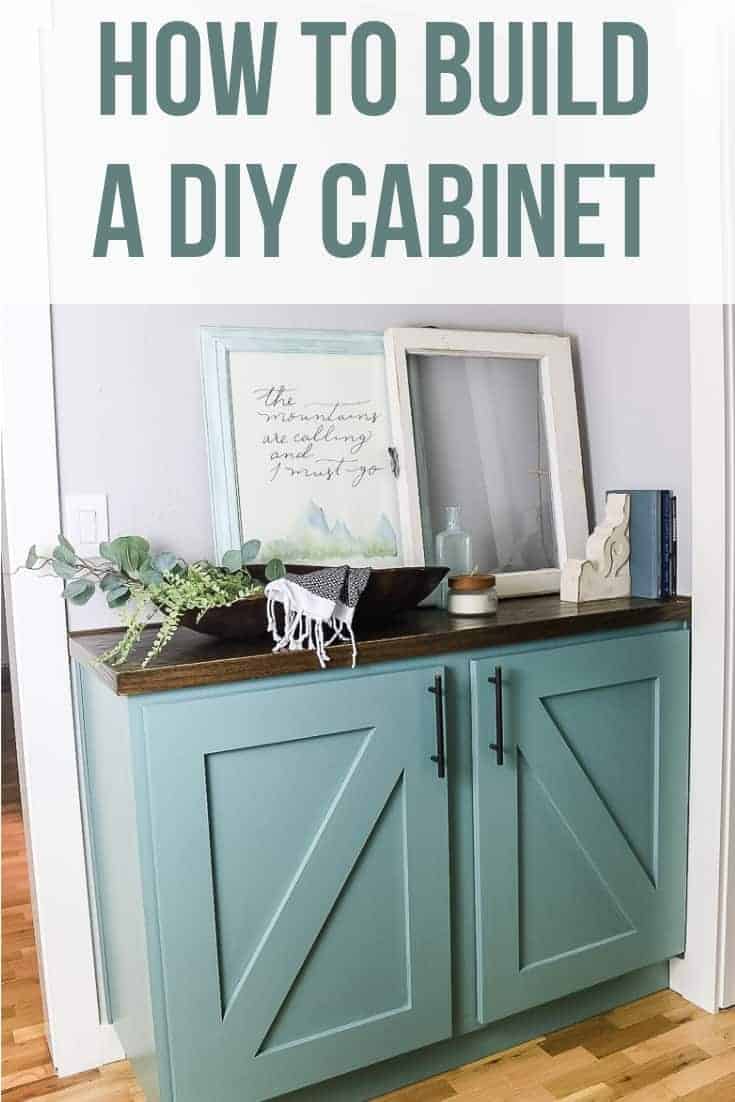
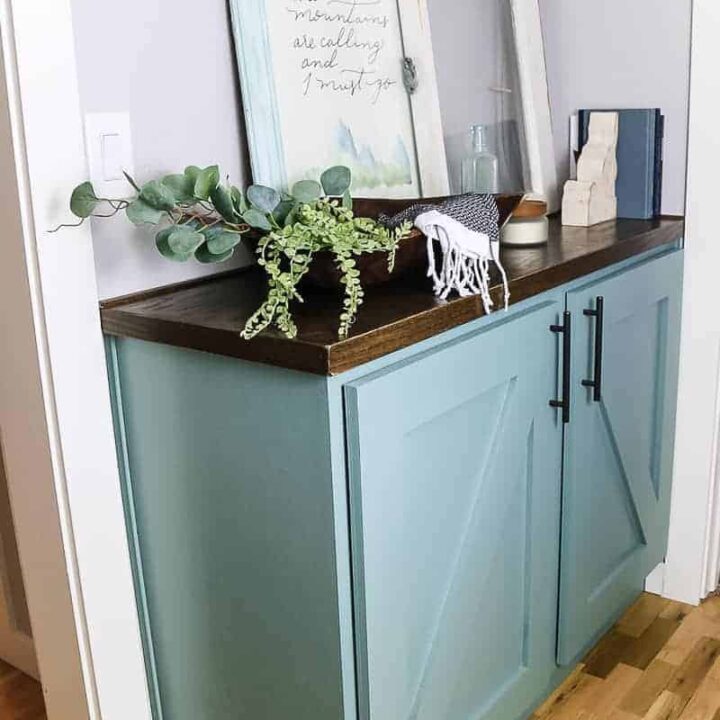
How To Build A Hallway Cabinet (with no complicated joinery!)

Thank you to Rockler for sponsoring this post! All opinions are entirely my own. This post also contains affiliate links, but nothing that I wouldn’t recommend wholeheartedly. Read my full disclosure here.
One of the many things we need to fix while renovating our 2nd fixer upper was our storage issue. And what I mean by this is the LACK OF STORAGE.
We have no linen cabinets, no coat closets, zero storage in our 2nd bathroom, and limited storage in the kitchen.
We definitely have done some work this year with storage in the kitchen by getting our spice cabinet organized and adding this banquette bench with storage!
Table of Contents
- Before picture
- Watch video
- Supply list
- #1: Plan cabinet finish
- #2: Design hallway cabinet
- #3: Cut wood
- #4: Drill shelf pin holes
- #5: Assemble
- #6: Add front face
- #7: Build cabinet doors
- #8: Make and attach countertop
- #9: Attach toe kick base
- #10: Paint and seal
- #11: Finish countertop
- #12: Secure in place
- #13: Add hinges and hardware
- After pictures
We’ve searched this house high and low for additional spaces that are underutilized where we can add creative storage that looks like it is meant to be there.
A section of our hallway is way wider than it needed to be and, of course, wasn’t being used at all.
Before Picture
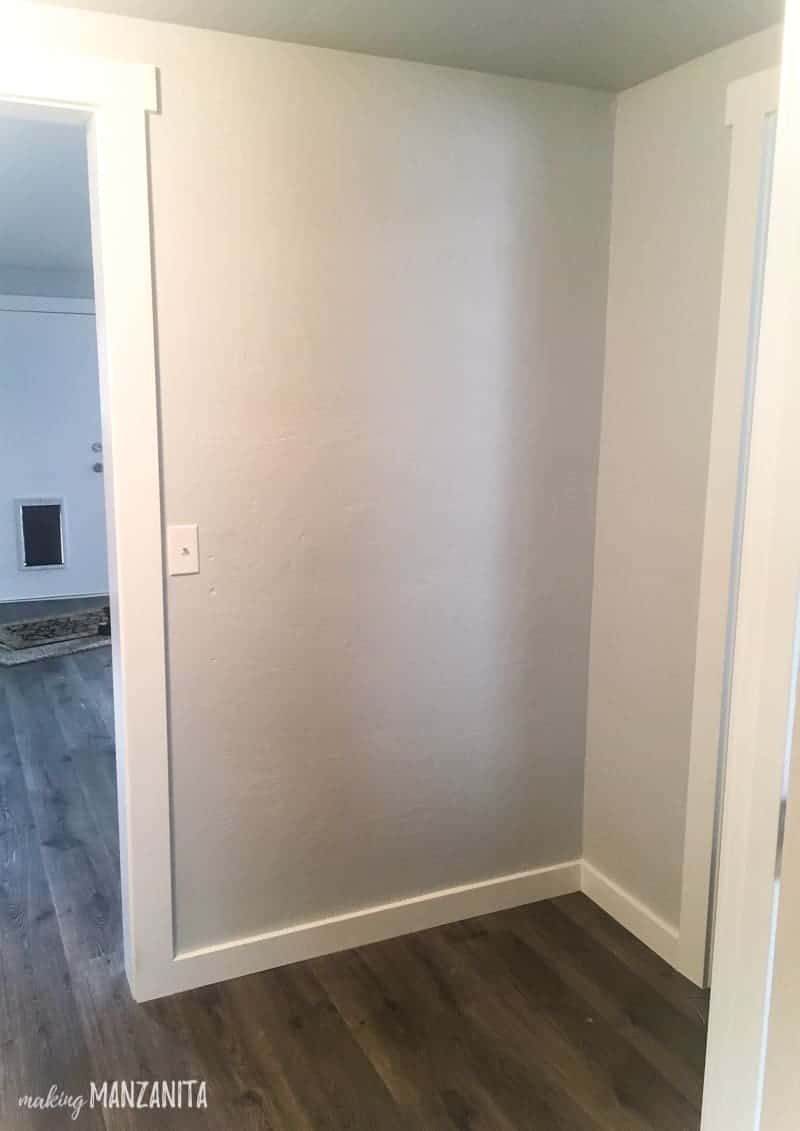
See what I mean?
Bingo! Let’s build a hallway cabinet.
That’s really how this idea was born. Our original plan was to build the cabinet all the way to the ceiling, which – yes, would have been more storage…
But, when we were planning out the hallway cabinet, we both agreed that a floor-to-ceiling cabinet would really narrow the hallway and make it feel like a bit of a “tunnel”.
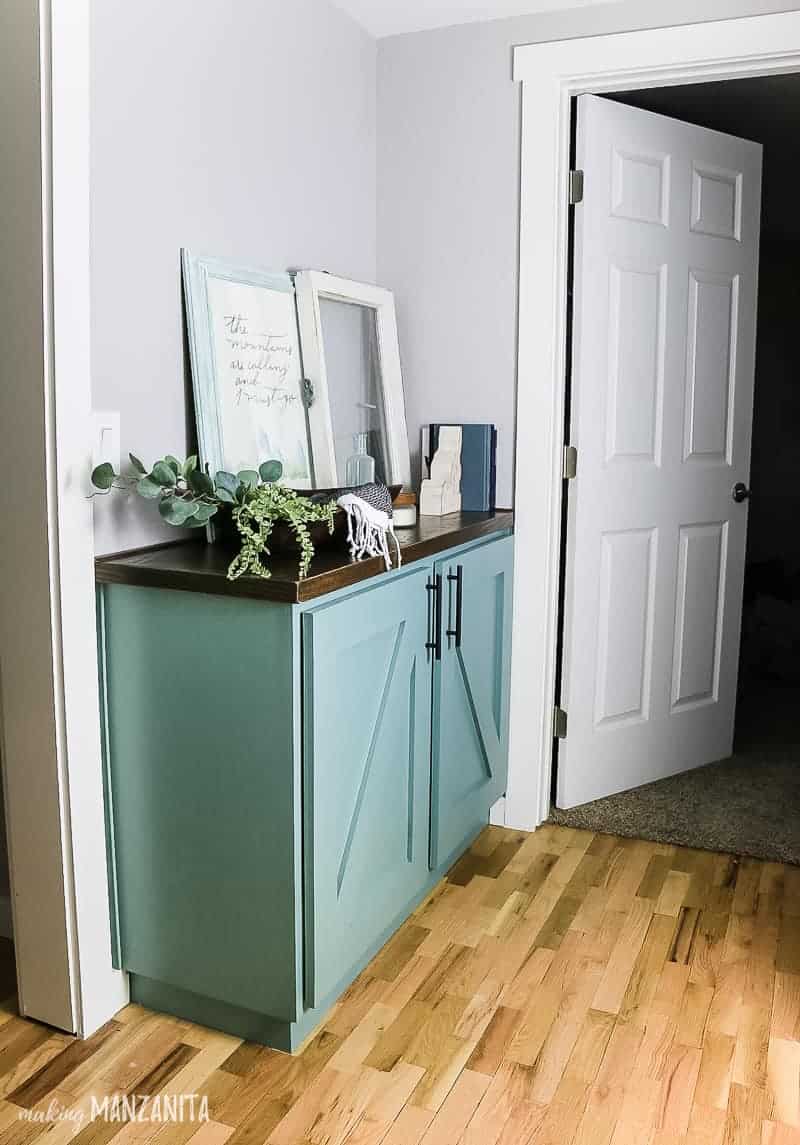
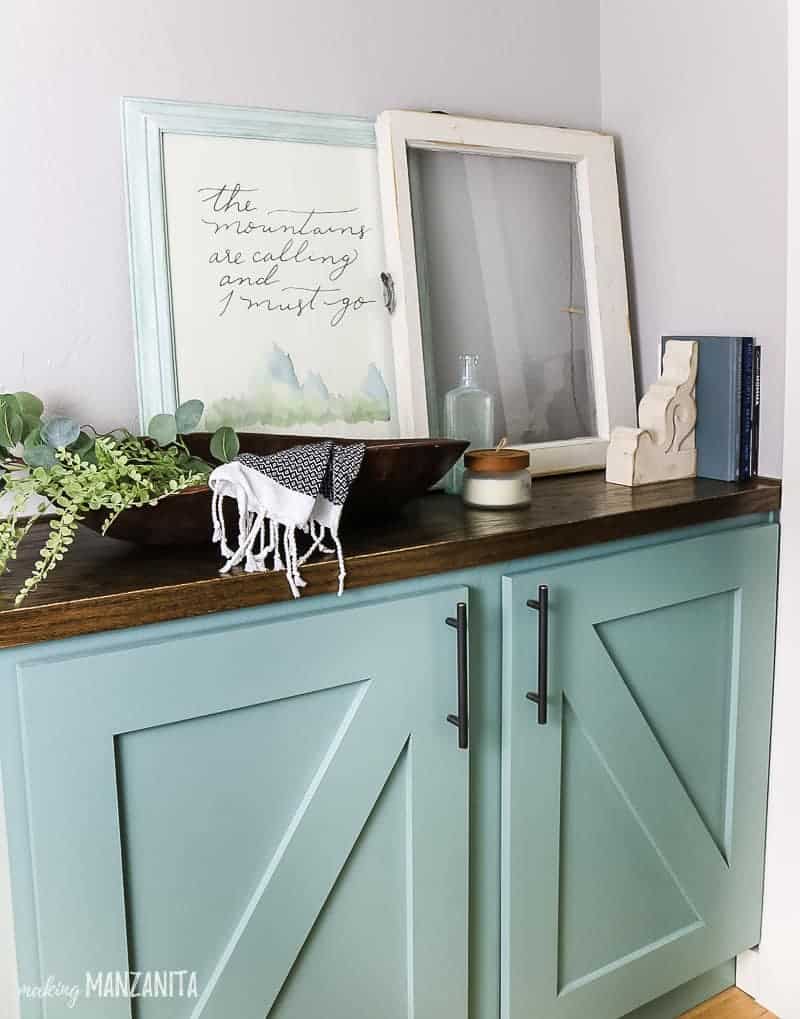
We settled on a base cabinet built to look like it is built-in. We do plan on adding shelves above the cabinet later, but for now…I’m LOVING the way it turned out.
Are you ready to see how to build this hallway cabinet??
If you love DIY videos, be sure to subscribe to my YouTube channel so you don’t miss any!
Supplies needed to build a hallway cabinet:
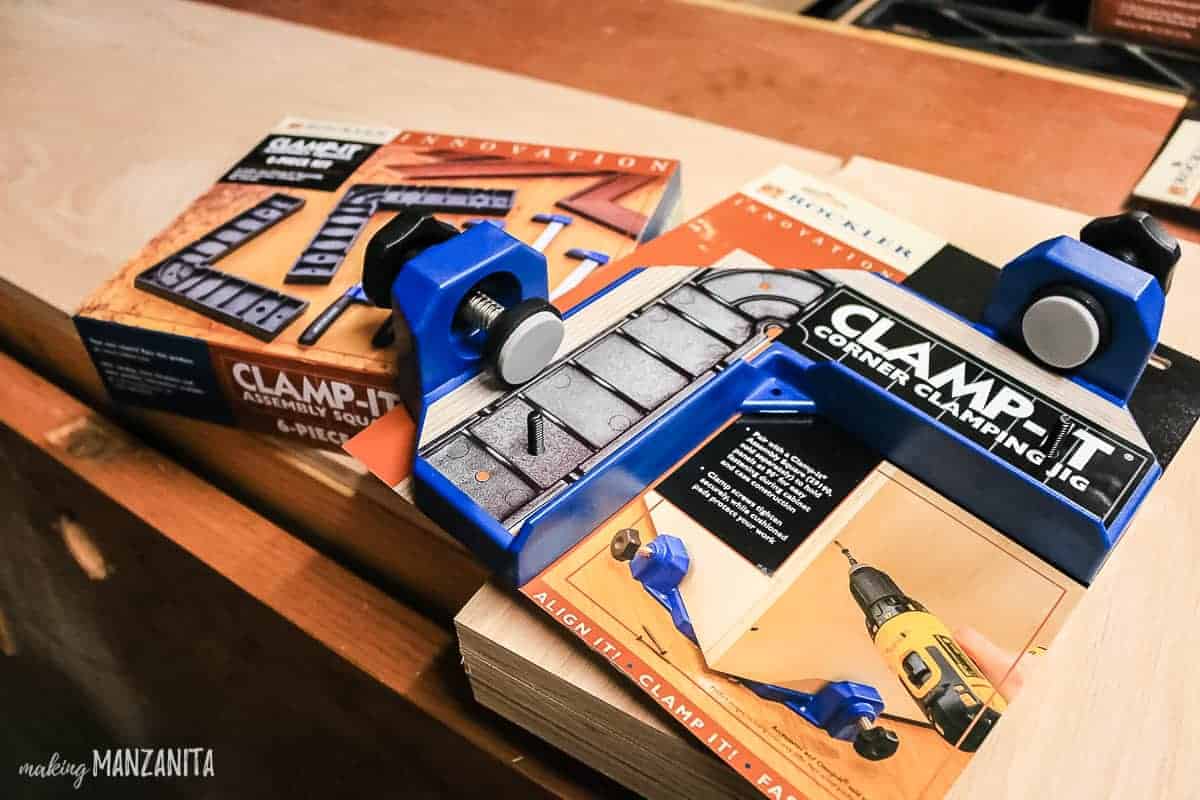
- Rockler Clamp-It® Corner Clamping Jig & Assembly Square
- Rockler Pro Shelf Drilling Jig & Drill Bit
- Rockler Bench Cookies & Finishing Cones
- Plywood
- 1/4″ Underlayment Plywood – used for back of cabinet
- Table Saw
- Construction Screws
- Impact Driver
- Brad Nailer
- 1 1/2 Brad Nails
- Wood Glue
- 1/2″ MDF Panel – used for the top and trim on doors
- 1/4″ MDF Panel – used for back of doors
- Construction Adhesive
- Caulk Gun
- Clamps
- Orbital Sander
- Oak Trim
- Wood Stain
- Wood Filler
- Paint – learn more about the paint color “In The Moment” here
- Paint Roller
- Paint Tray
- Sealer
- Hinges
- Hardware
How to Build a Hallway Cabinet Step-by-Step
1. Plan your hallway cabinet finish.
First, you need to decide if you are going to paint or stain your hallway cabinet. Staining is usually more expensive and time-consuming because you’ll need a nicer wood or wood veneer to stain.
Although staining is a little more complicated – you get the look of a real wood cabinet.
For our hallway cabinet, however, we decided to paint it. This was mostly time constraints with our other projects this year (like this farmhouse bathroom that we completely built out from scratch in just six weeks).
I also love the pop of color that the paint adds to our cabinet!
We did choose to stain the top, which really brings the rich wood tones. I love the contrast!
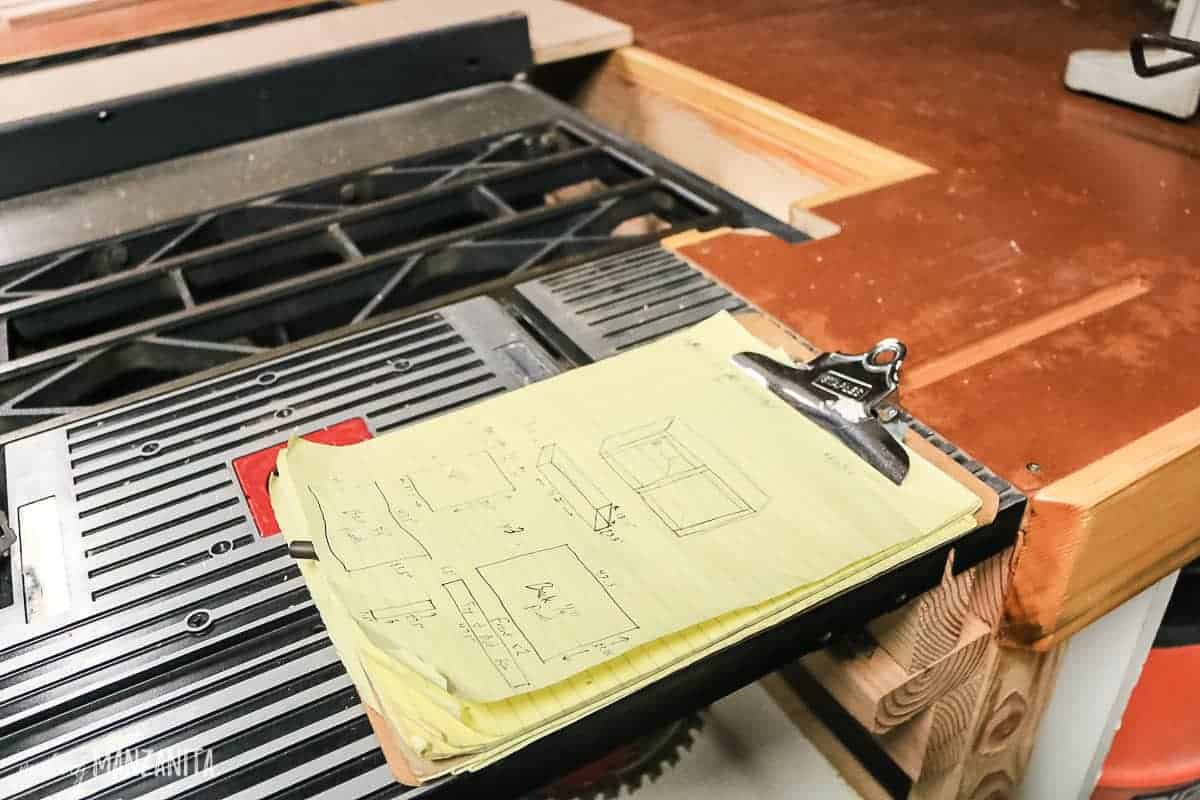
2. Design your hallway cabinet.
For any woodworking build, it all starts with a good design and plan. You definitely want to measure the space that your cabinet will fit in a few times just so you don’t mess that part up!
This hallway cabinet build is really a lot more simple than other cabinetry that you’ll see because it has NO complicated joinery.
Since we decided to paint the hallway cabinet, Logan elected to skip all of the normal dado and rabbet cuts you would normally do when building a cabinet.
If you are staining, however, you must do these cuts. Here’s a great tutorial about building a cabinet with the dado and rabbet cuts.
If your cabinet will be a “built-in” like ours, be sure to check your walls first to make sure they are square. If they aren’t, you’ll need to account for any adjustments needed in your cabinet design.
Be sure that the wood grain of the cabinet vertical pieces runs vertical and the horizontal pieces run horizontally if you decide to stain your cabinet rather than paint.
We didn’t worry about this because the cabinet was getting painted. This allowed us to use up some scrap pieces of plywood.
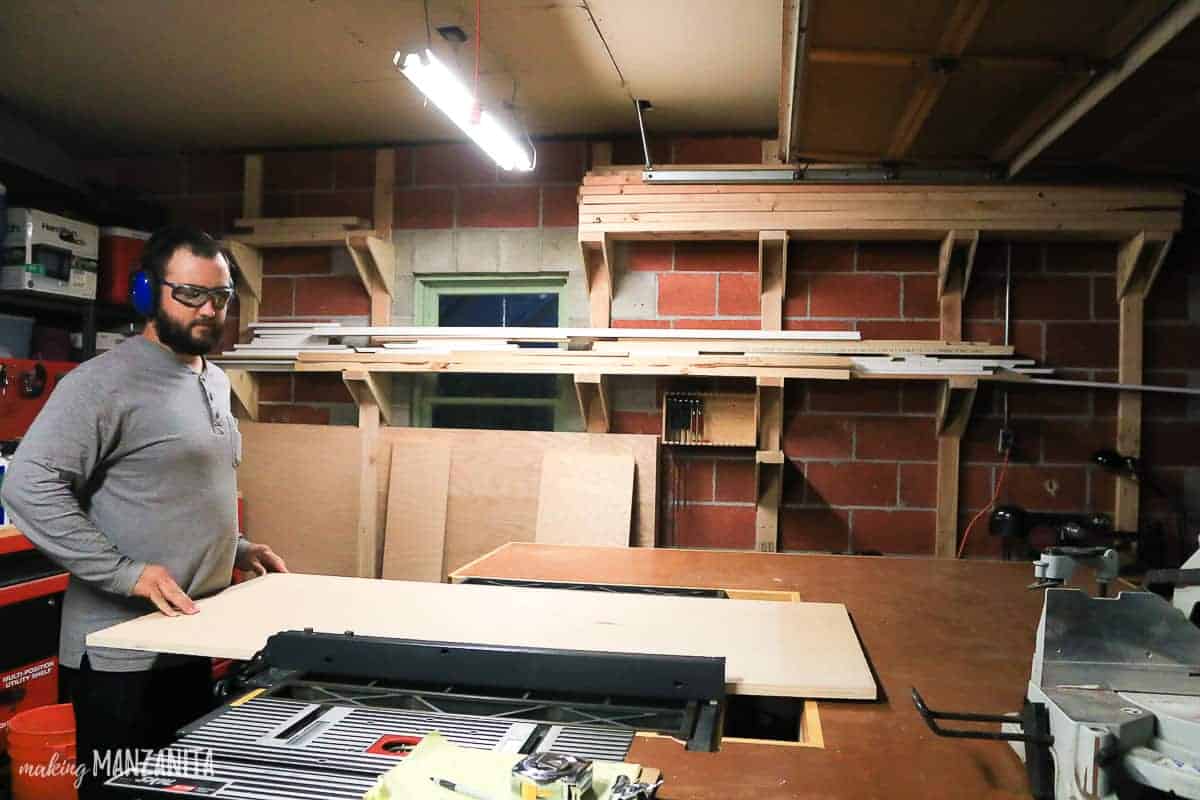
3. Cut wood for hallway cabinet.
Now that design is done, you’ll start by getting all of your wood pieces for your cabinet cut on the table saw.
If you are staining, don’t forget to do your dado and rabbet cuts here.
Also, don’t forget to cut in notches for your toe-kick unless you are setting your cabinet on a base as we did.
Ours was pretty simple because we essentially built a box for the cabinet and then set it on top of the base.
Give everything light sanding before assembling.
Don’t forget to cut the plywood pieces for the inside shelves too!
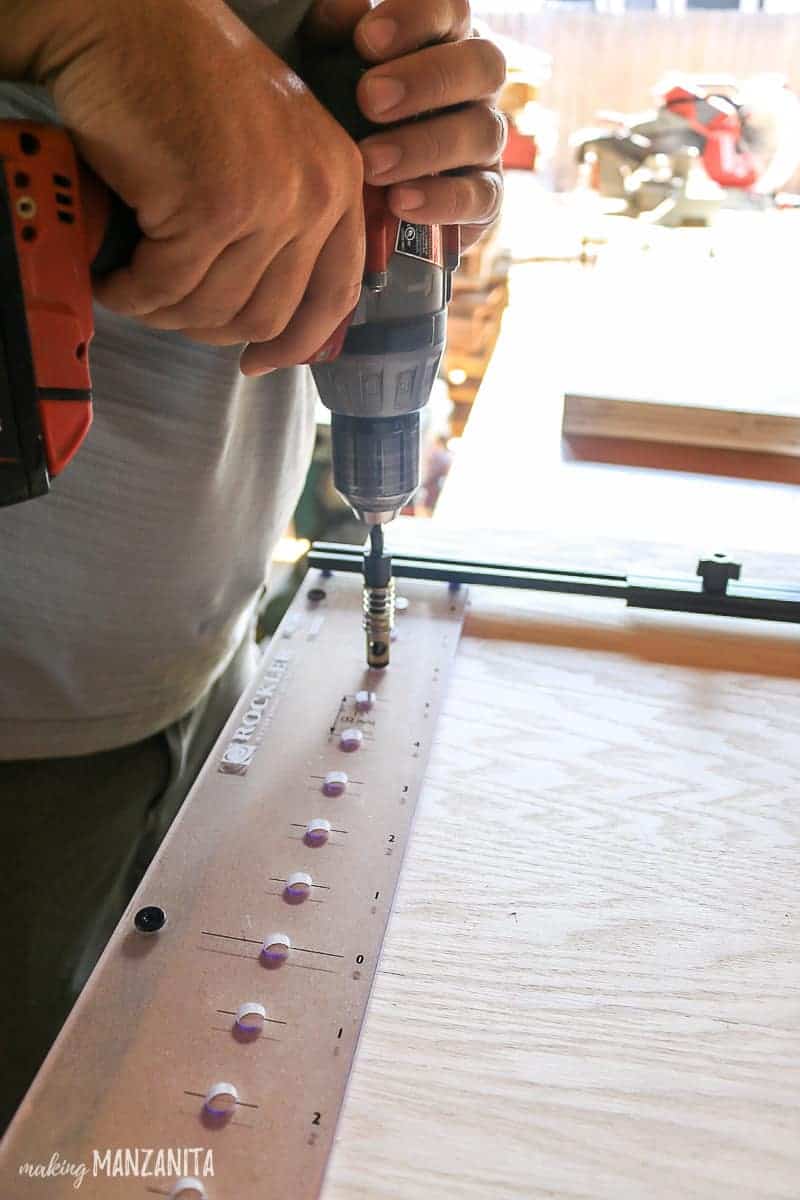
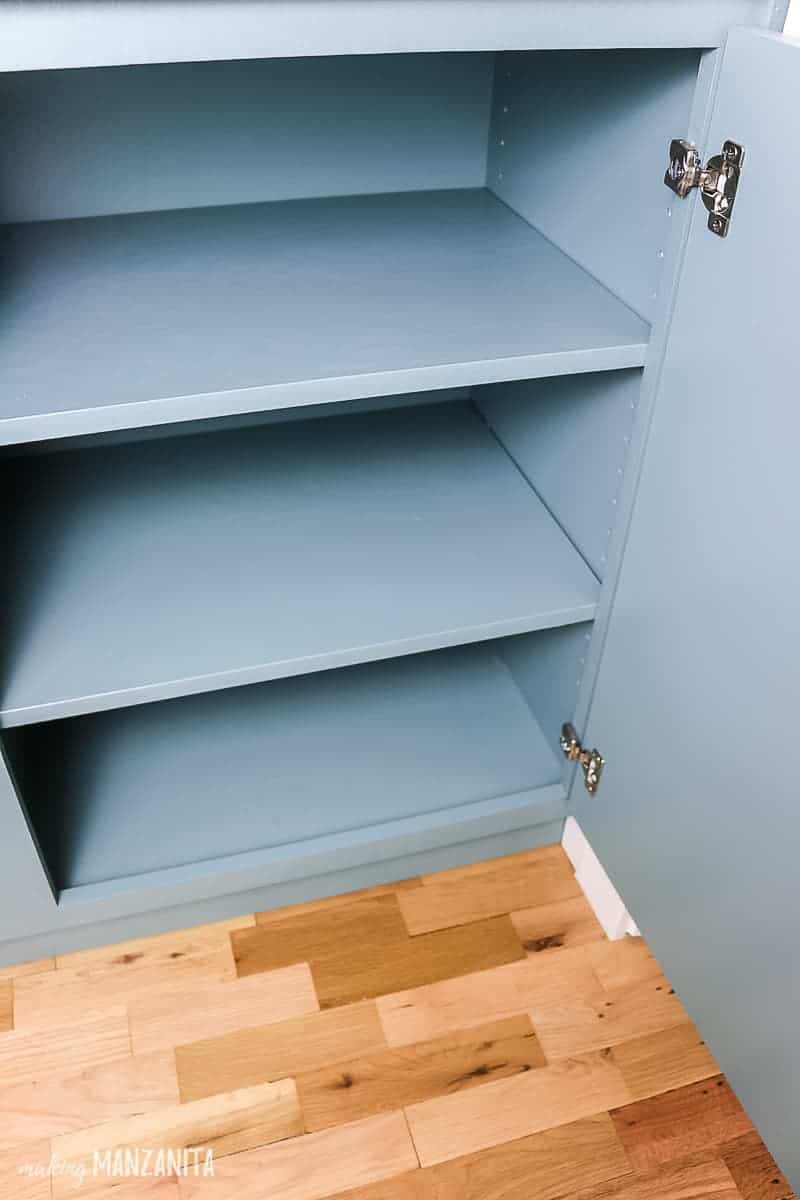
4. Drill shelf pin holes.
Rockler’s Pro Shelf Drilling Jig makes drilling the shelf pin holes a complete breeze! You just attach it to the plywood piece and drill all of your pin holes at once using the Drilling Bit. Couldn’t be more simple!
This definitely saved us time and eliminated the possibility of misaligned shelves, which would have been a major bummer.
If you are planning on adding shelves to your hallway cabinet, why not make them adjustable? This way your shelves will be perfect for whatever you need them for in the future.
Definitely be sure to your drill the holes on the vertical pieces before you assemble the cabinet.
You’ll see on the left side of our cabinet, that we have our printer there now…but if we ever wanted to move it in the future, we could easily adjust the height of the shelves. We did build a third shelf that’s sitting at the bottom of the cabinet in case we want three on the left side in the future.
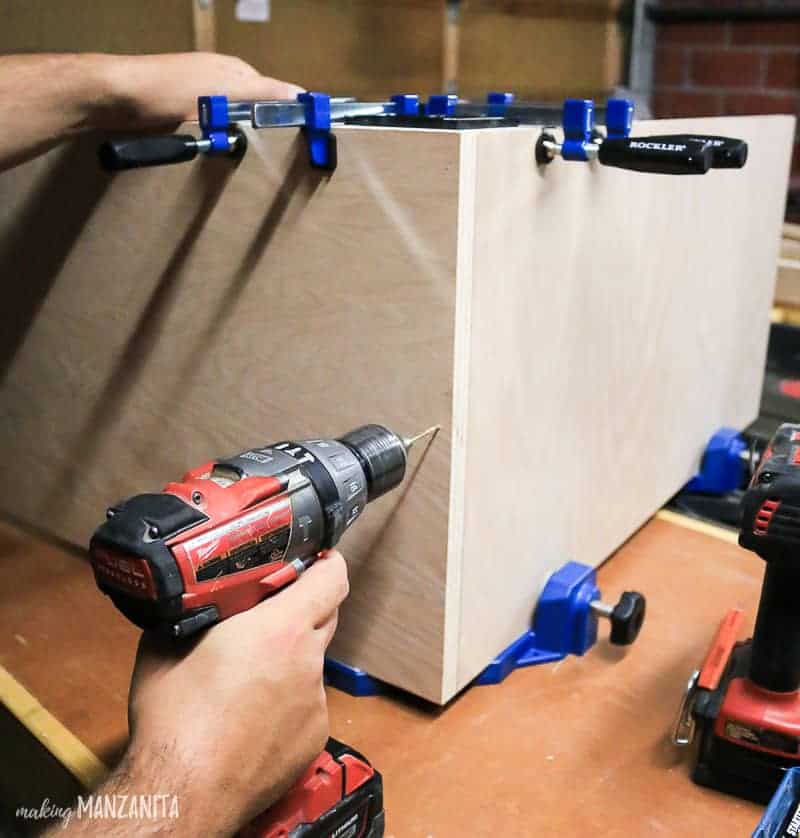
5. Assemble the hallway cabinet.
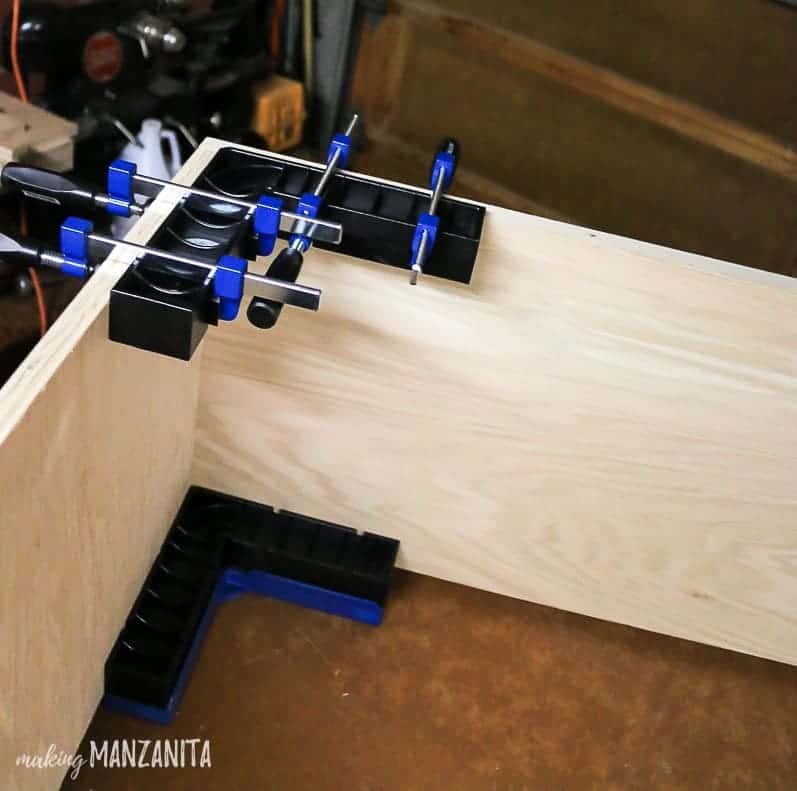
Start by assembling your pieces on a completely level surface. If you don’t use a level surface, you will have a heck of a time trying to square up your cabinet.
Armed with a level surface and Rockler’s Clamp-It Corner Clamping Jig, it really makes it easy to square up the corners of the cabinet base.
These attach to the two pieces of wood to hold them together and create a square corner while you screw everything in place.
Once the corner clamping jigs are on, you can screw the corners of the cabinet with an Impact Driver and Construction Screws.
For the back of the cabinet, we simply attached a sheet of 1/4” plywood.
We knew that we would be trimming things out where the cabinet touches the wall, which would cover the edge of the back – so we didn’t bother with a rabbet cut there.
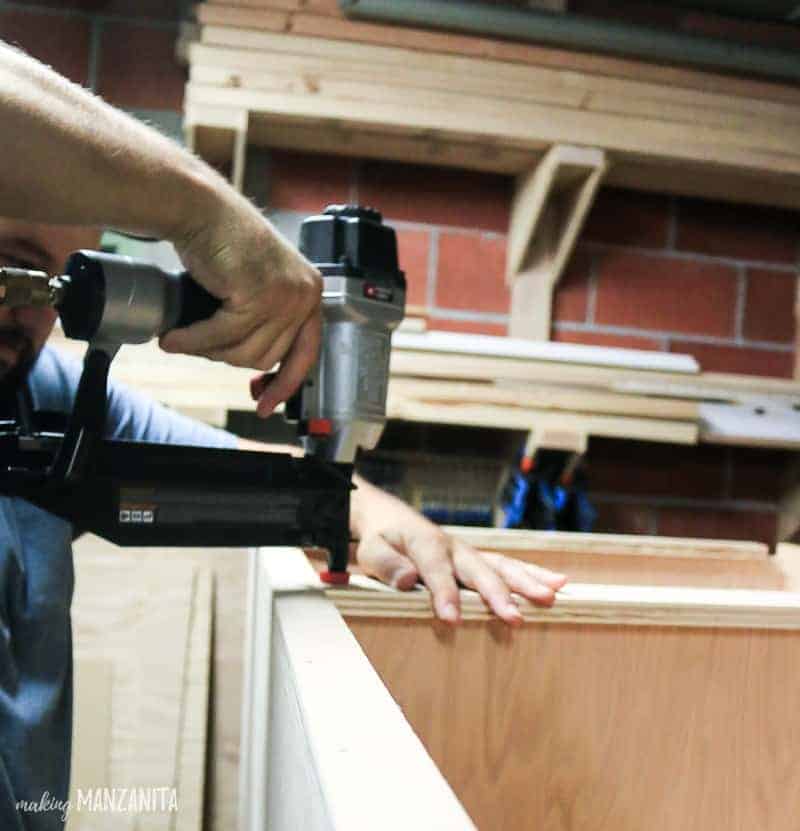
6. Add cabinet front face.
Since we were painting the hallway cabinet, we were able to use extra plywood for the front face of the cabinet.
If you’re not painting your cabinet, you would need to use trim pieces here – which gets costly pretty quickly!
Cut your pieces down to size and attach them to the cabinet with a thin bead of wood glue and a nail gun.
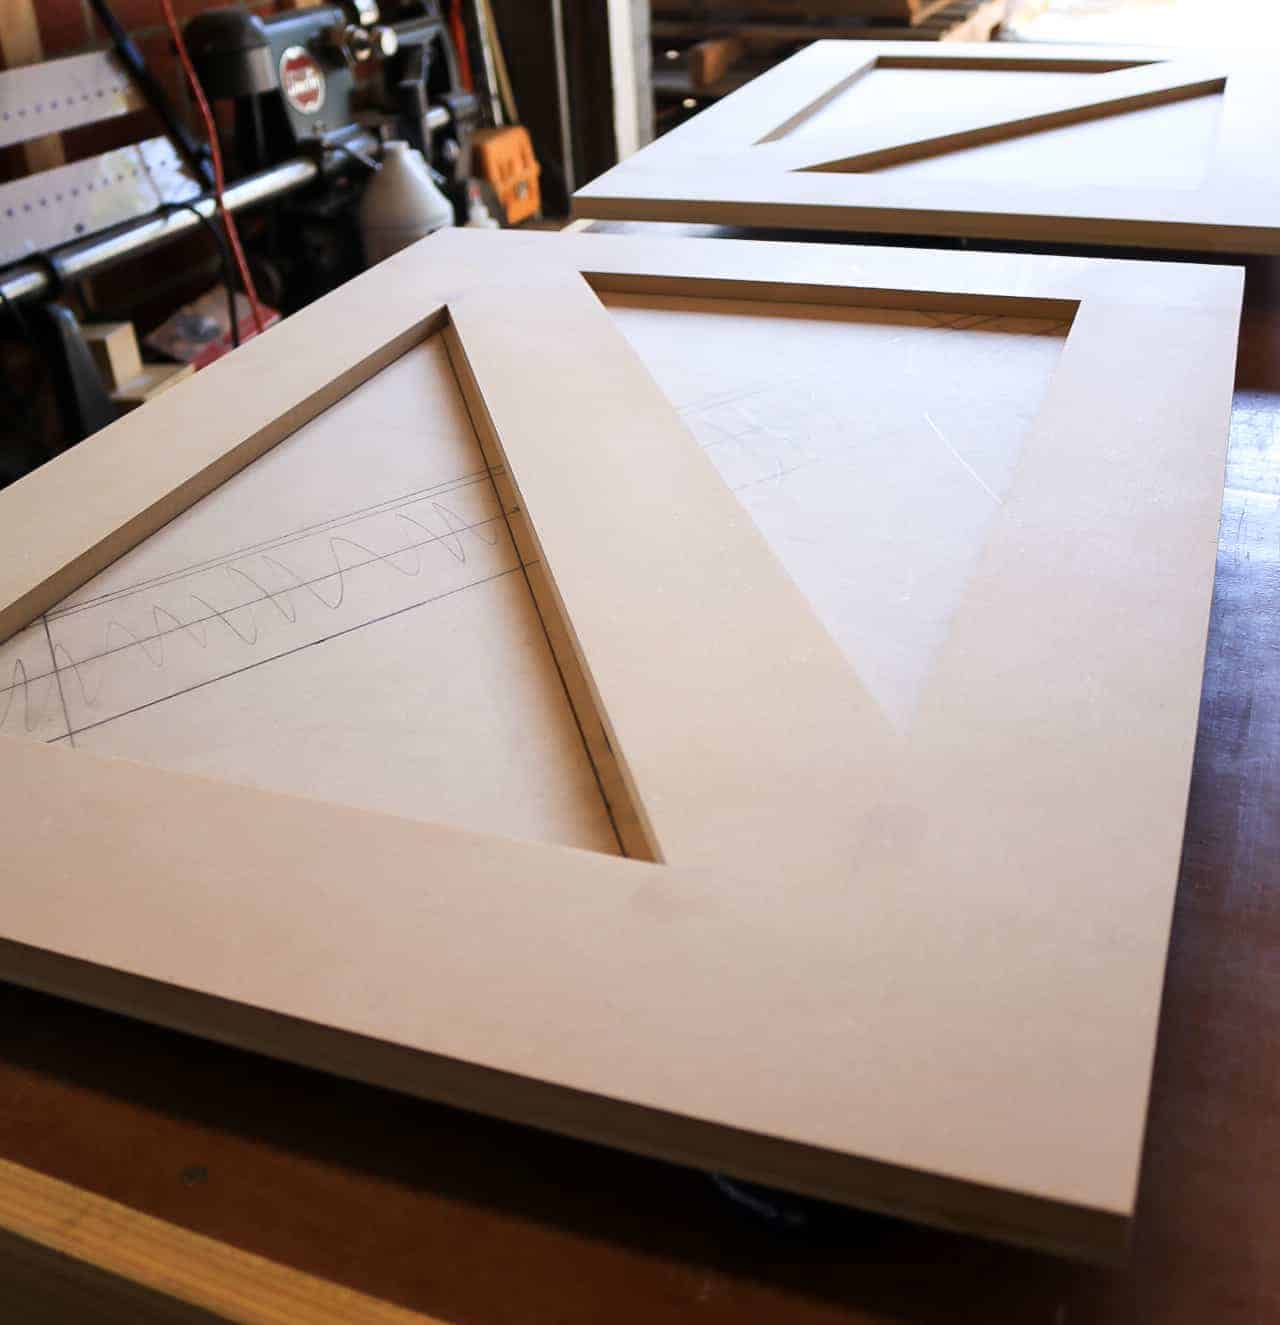
7. Build cabinet doors.
Before you start to stain or paint your cabinet, go ahead and start building your doors.
We were looking for a really budget-friendly way to build cabinet doors and this certainly was cheap!
We ended up creating a cabinet door that used 1/2″ MDF as trim pieces to create an interesting door front design and attached that to a piece of 1/4″ MDF.
If you’re wondering, MDF wood is an engineered wood that is much cheaper than real wood. You can’t use it if you’re staining – but it works great for painted projects.
This was the simplest and cheapest way for us to build the doors with the scrap we had on hand.
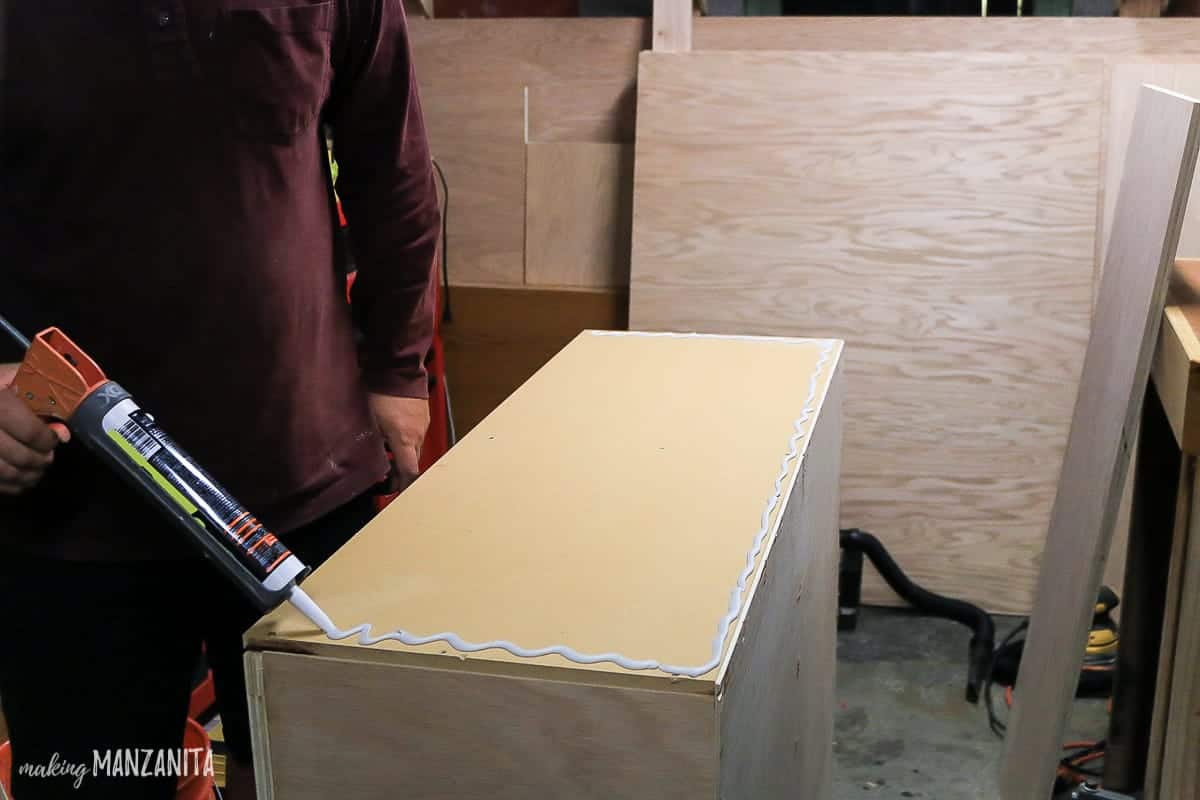
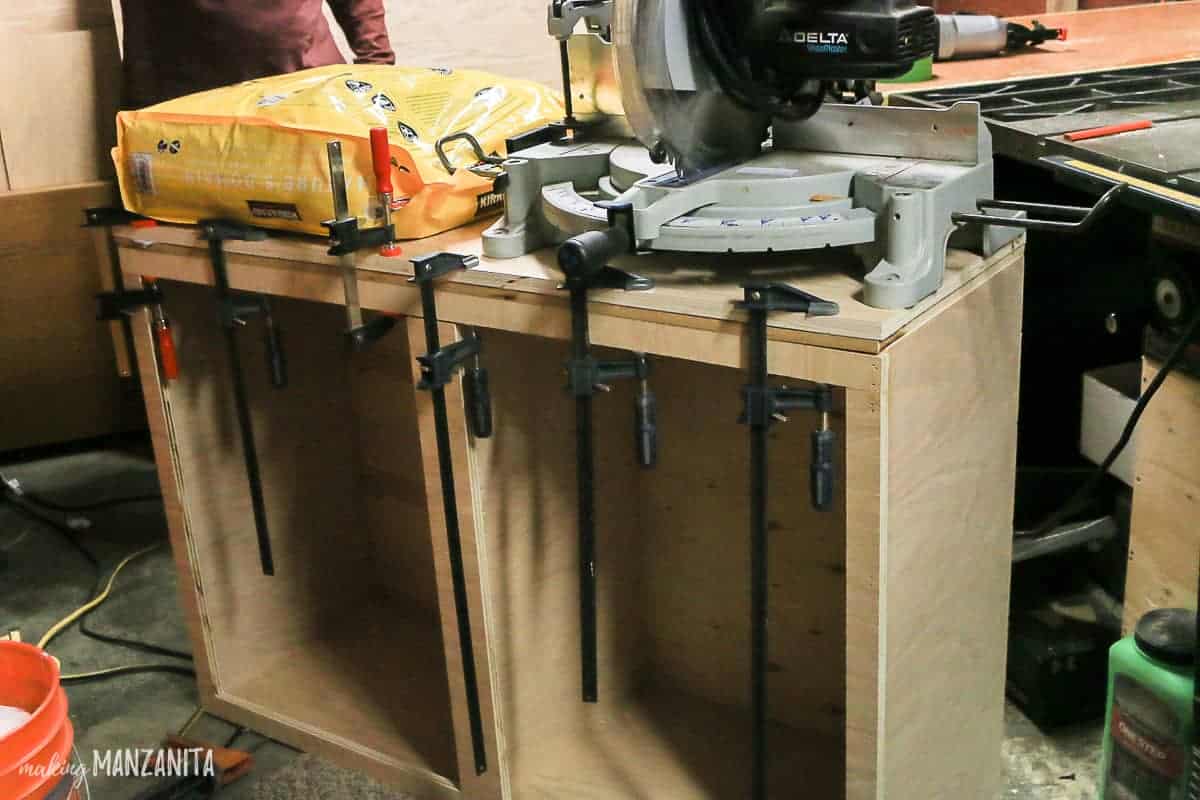
8. Make and attach the countertop.
With your hallway cabinet assembled, it’s time to focus on that countertop.
You’ll see that Logan made a countertop by adding some oak veneer plywood to a 1/2” MDF panel with construction adhesive and trimmed with 1″x2″ oak trim.
The MDF panel was screwed to the cabinet first.
Let the construction adhesive set and dry overnight with some heavy things on top of the countertop and some clamps added to the front.
This was a really easy and pretty cheap way to build the countertop of our hallway cabinet.
9. Attach toe kick base.
For the toe kick, we made a separate box that was approximately 3.5″ tall and measured 1″ smaller than the cabinet. The toe kick was screwed in the cabinet from the bottom.
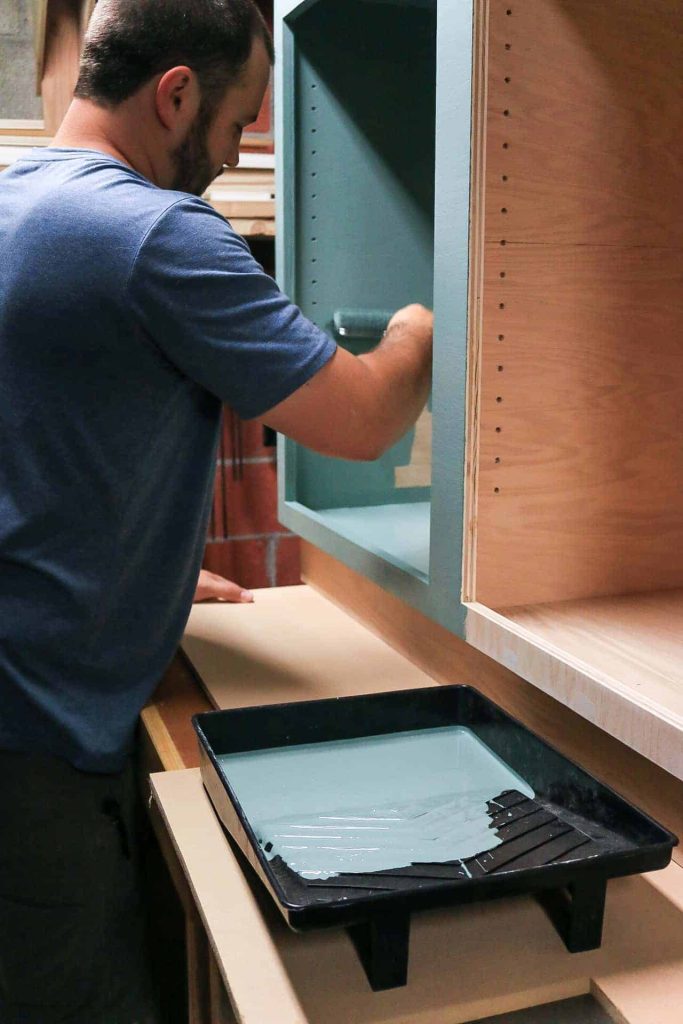
10. Paint and seal hallway cabinet.
We had some leftover paint from this project and this one. I swear, this gallon of paint is the gift that just keeps giving. Good thing I am absolutely in LOVE with the color, which is Behr’s In The Moment.
We simply rolled the paint on the base cabinet with a paint roller. We started with the inside of the cabinet and then moved on to the front and outside.
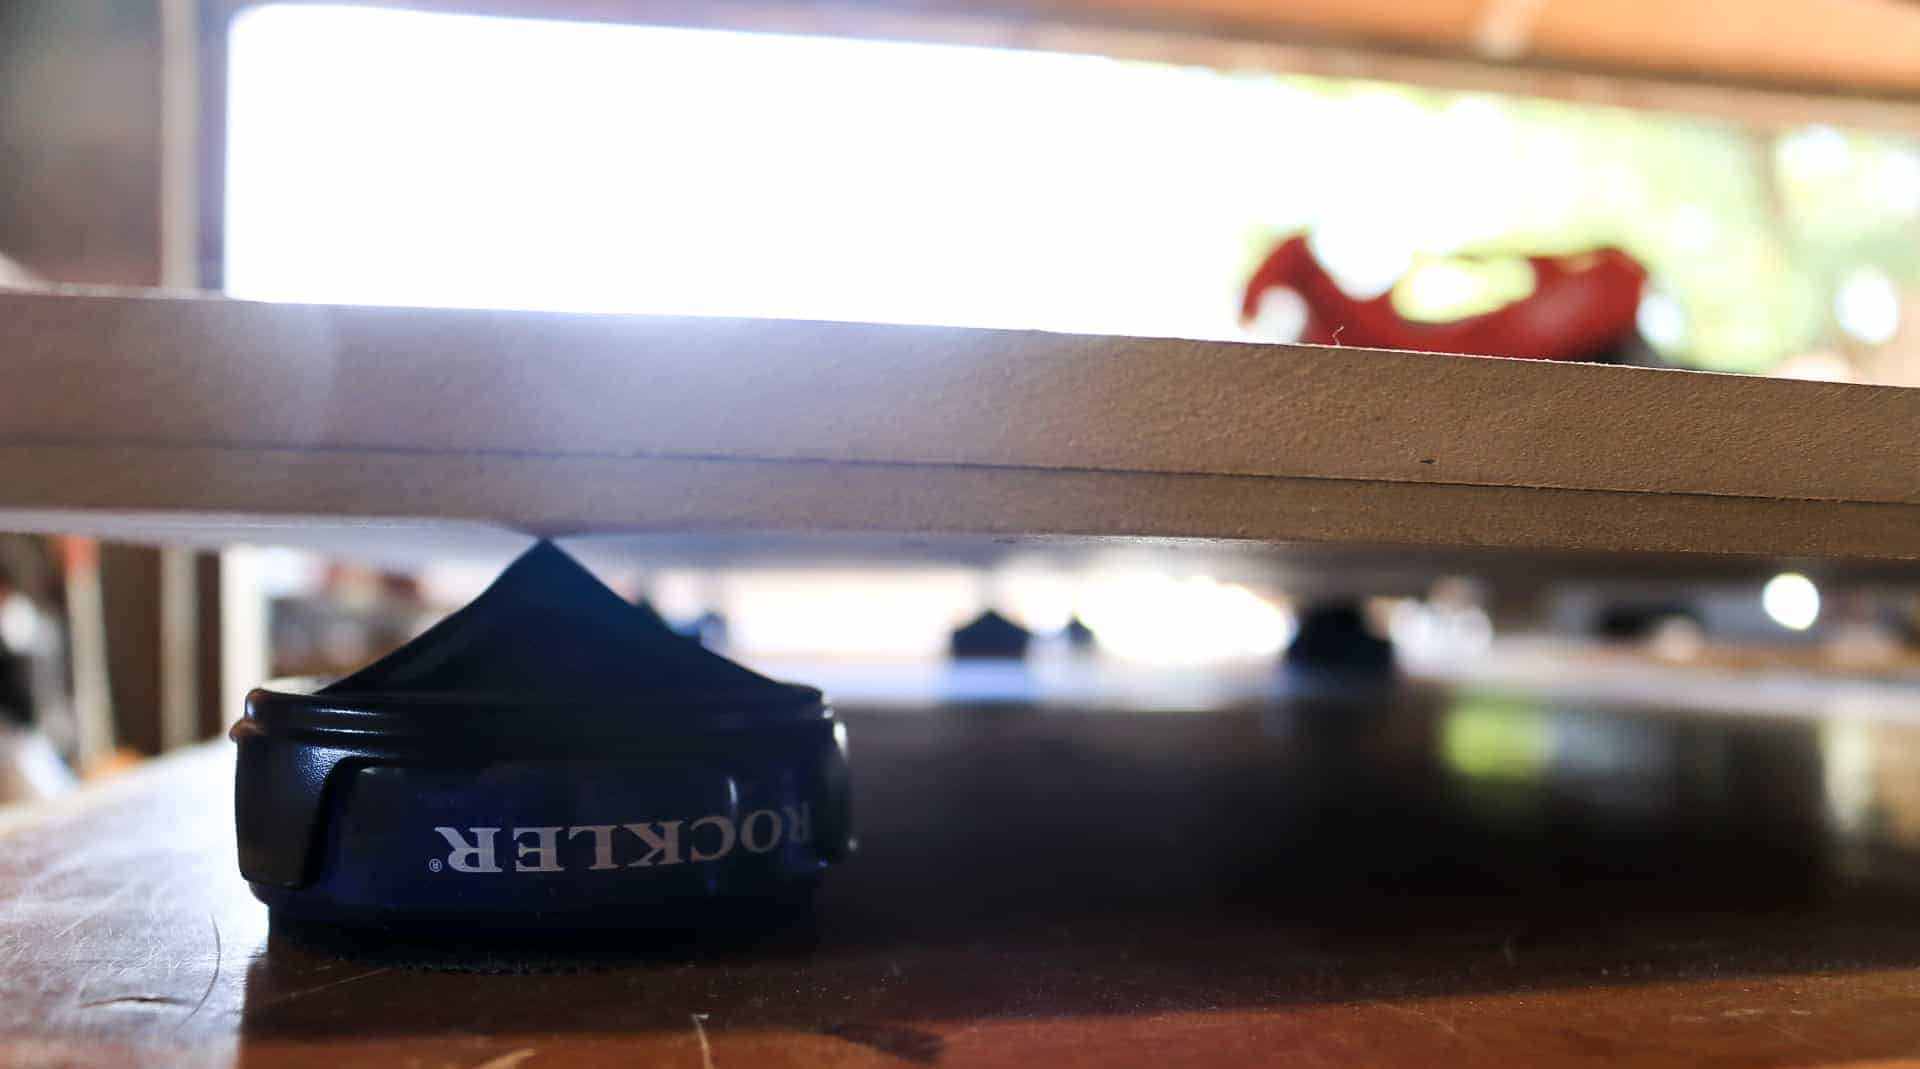
Rockler’s little bench cookies, combined with the finishing cones, make it really easy to paint flat pieces of wood, like the doors and shelves.
After the paint has dried completely, finish by sealing the hallway cabinet with polyurethane.
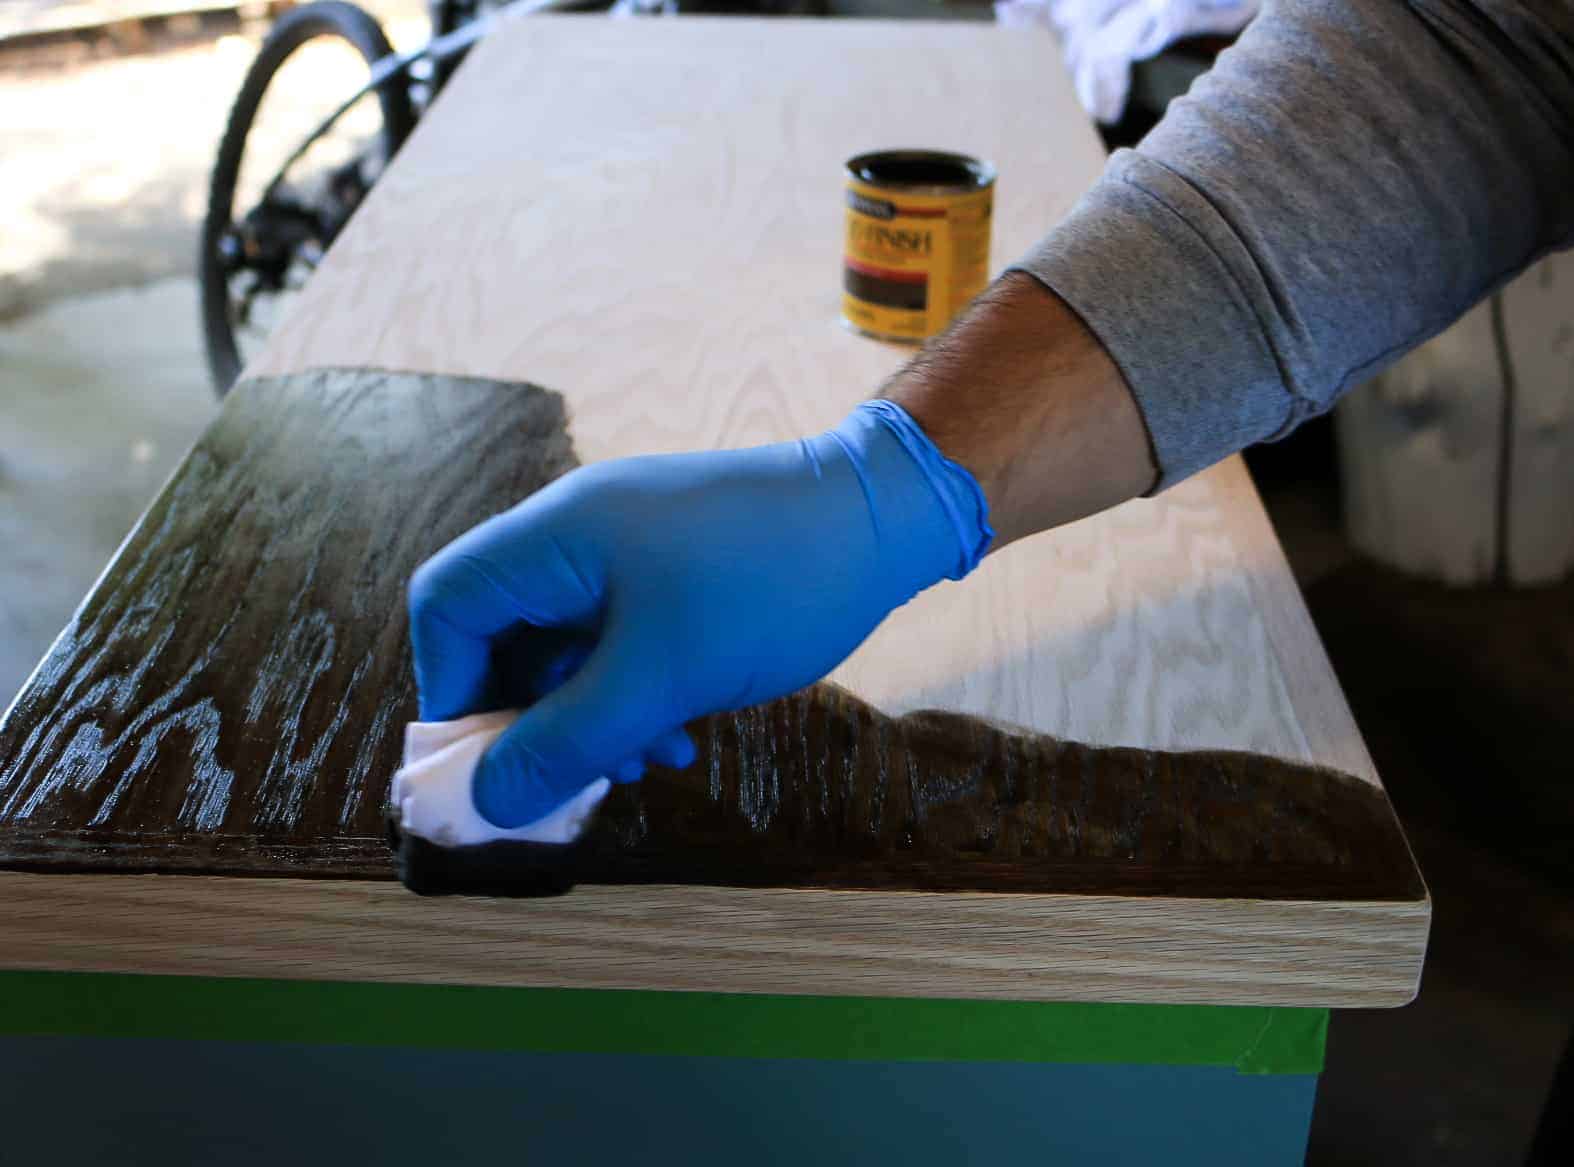
11. Add trim, stain, and seal the countertop.
Since we elected to paint the cabinet we waited to install the oak trim around the edges of the plywood countertop until after we painted. This way we didn’t have to tape anything off while we painted.
After painting the hallway cabinet, attach the oak trim to the edges of the top with a nail gun, sand, and fill any blemishes and nail holes with wood filler, then stain the entire top with this stain.
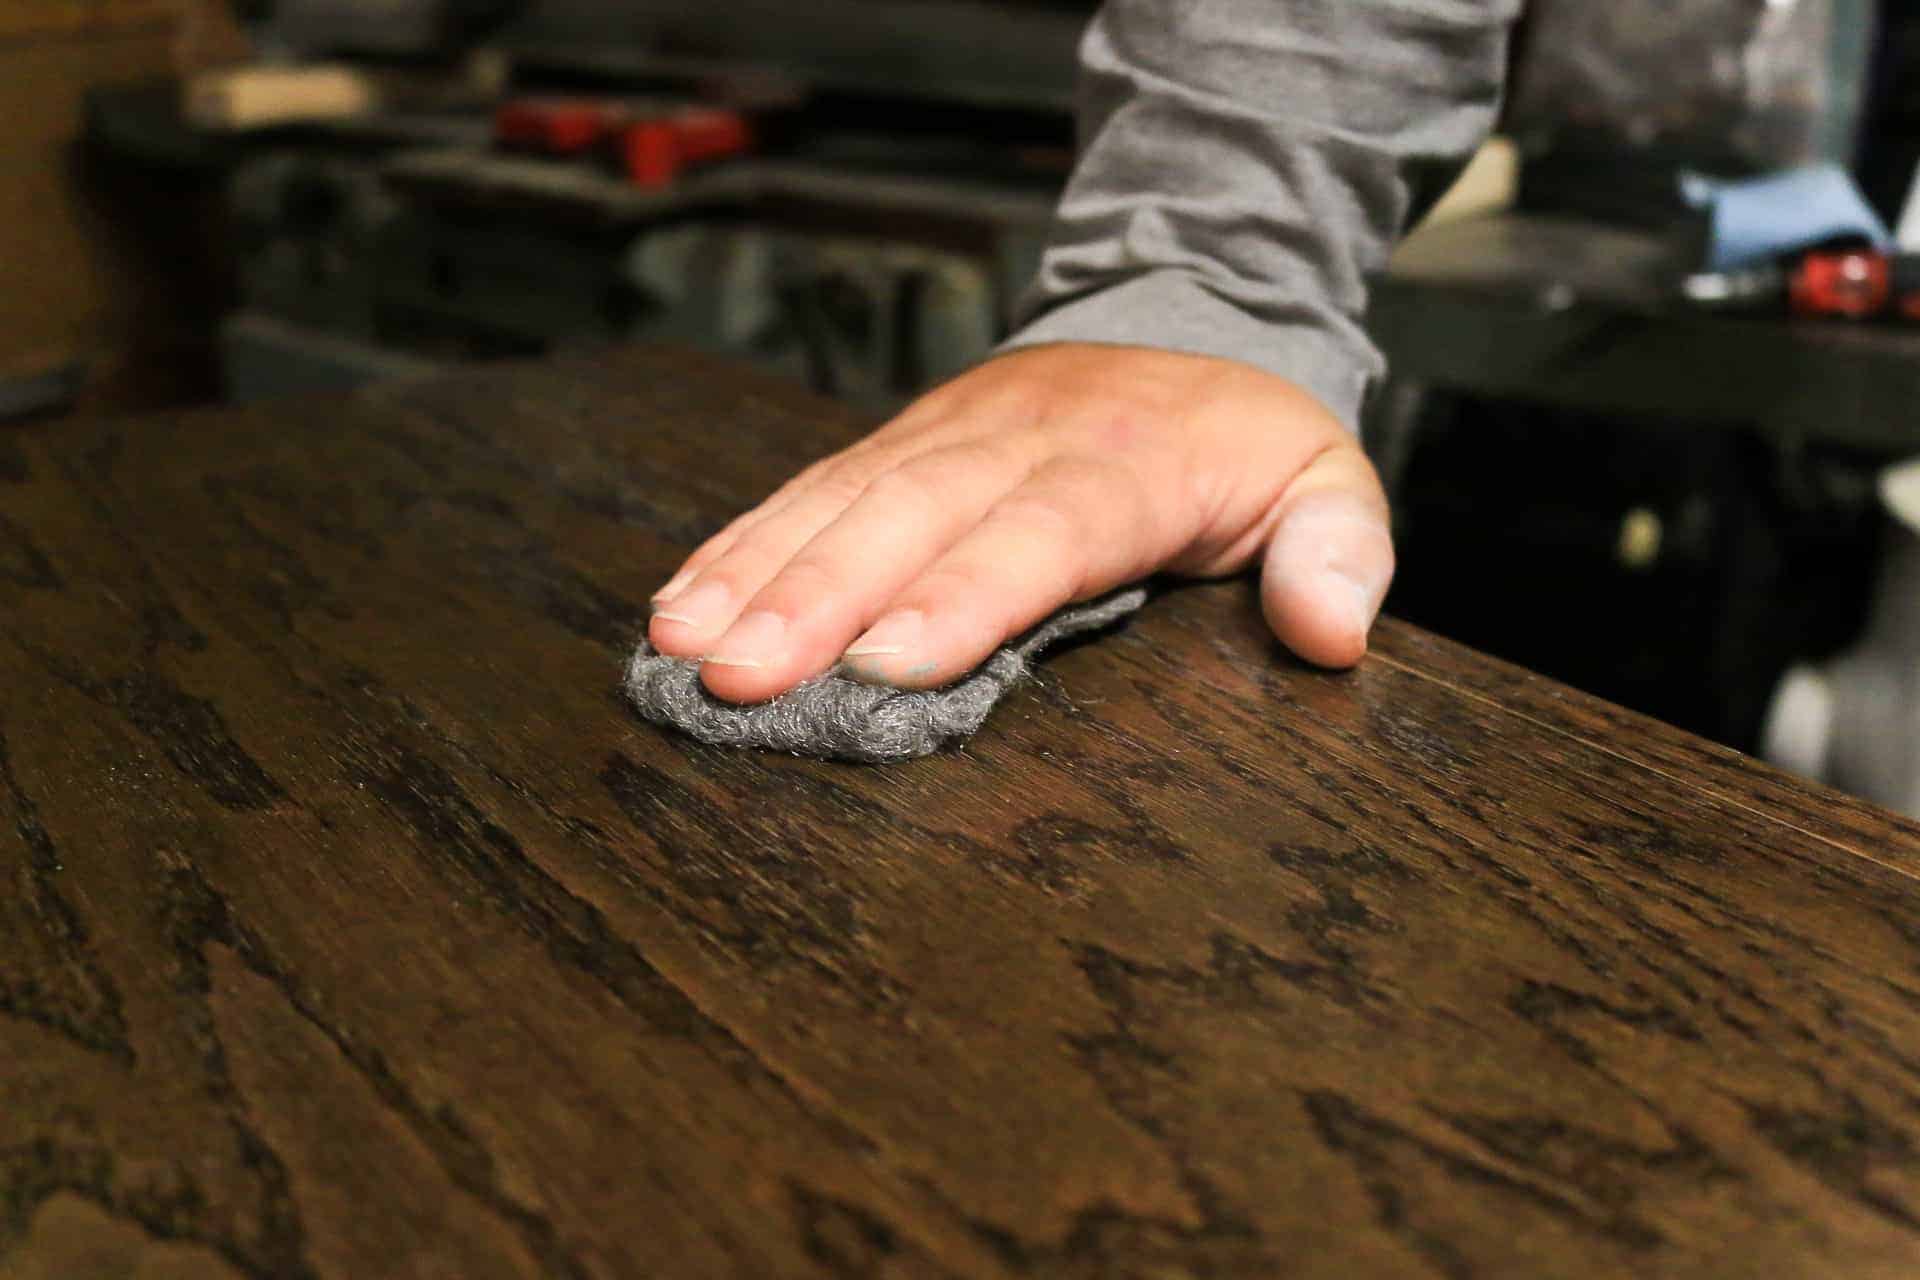
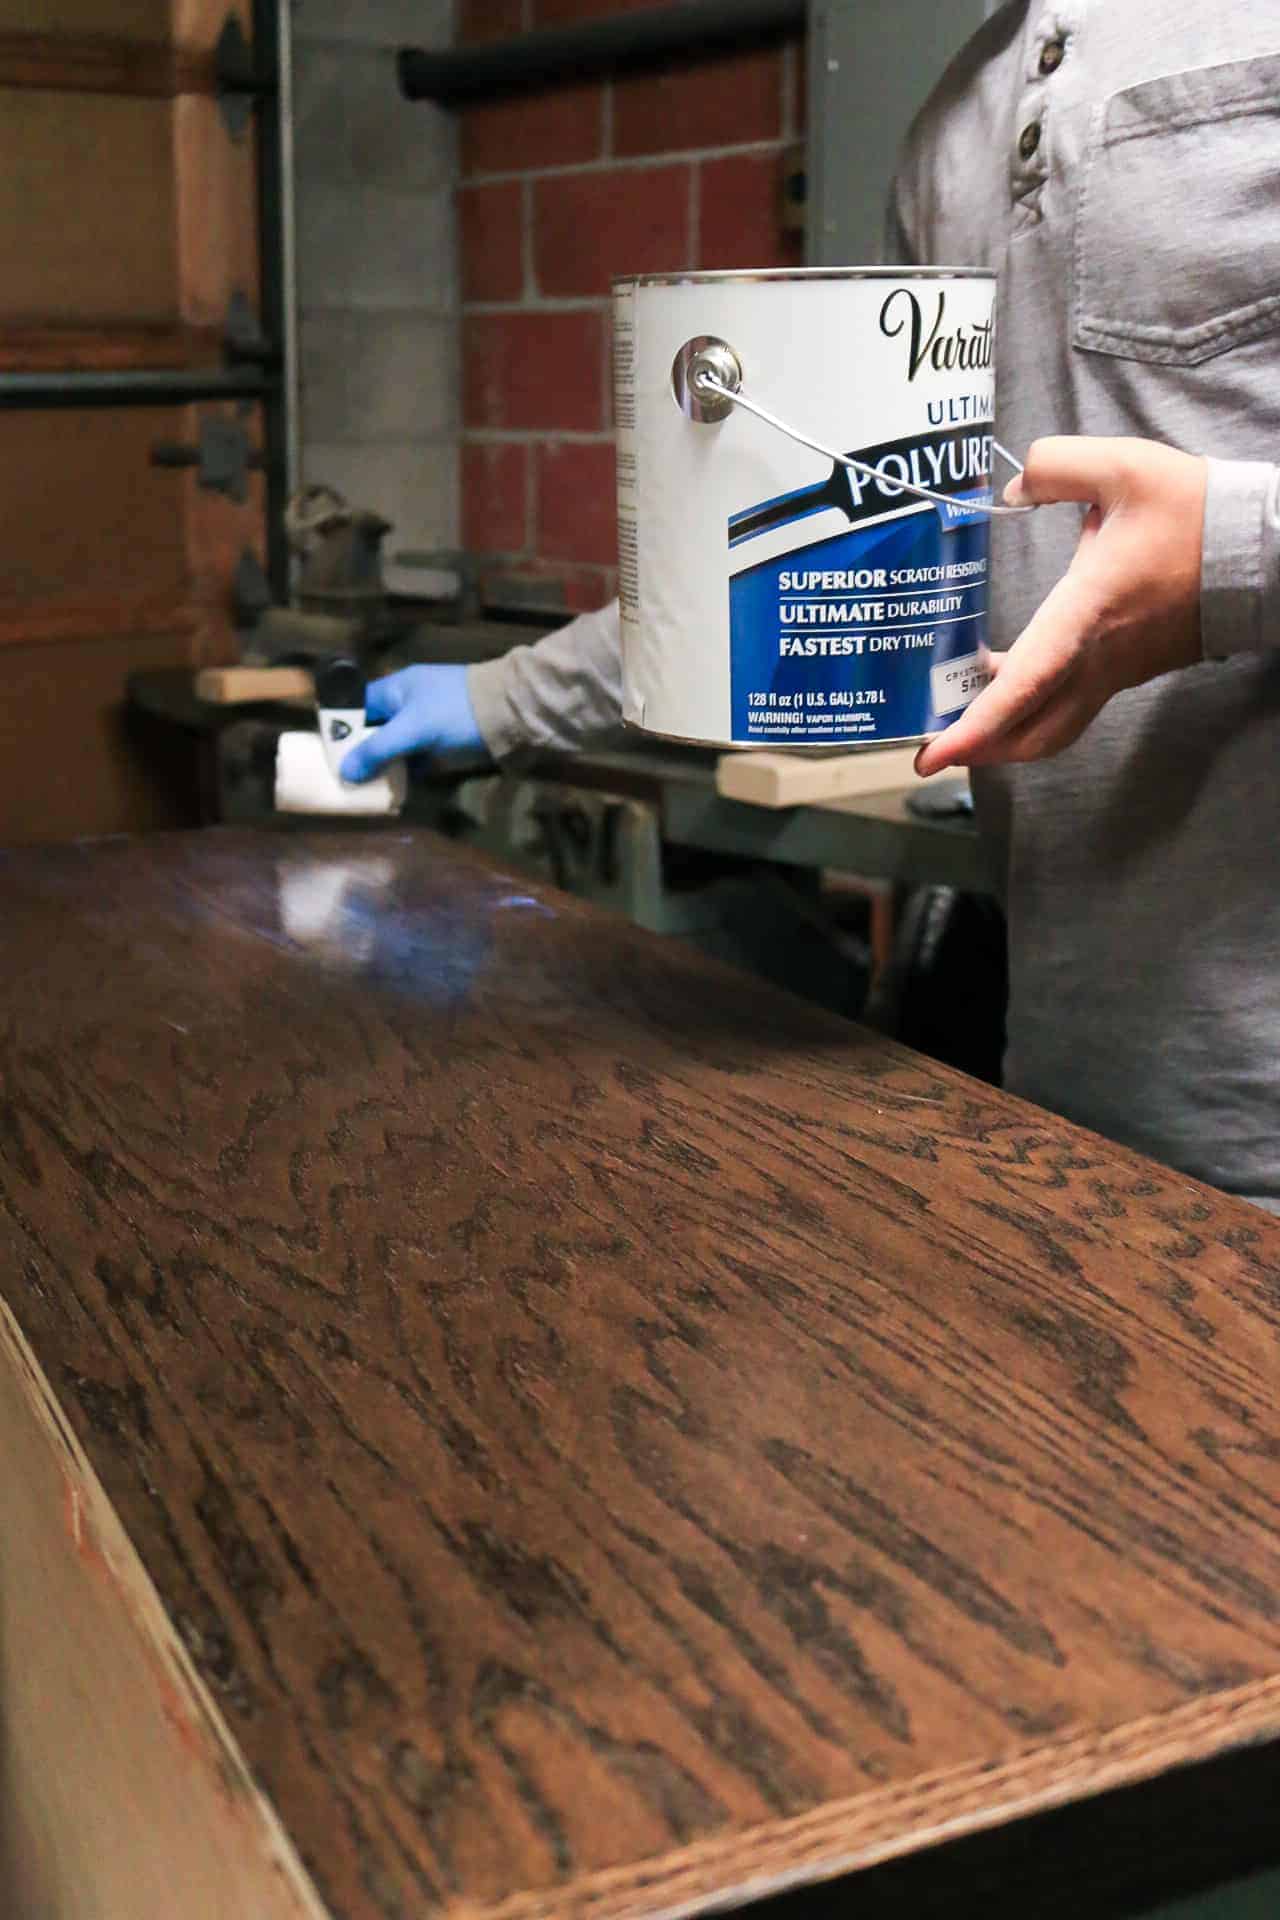
Lastly, seal the countertop with the same polyurethane. Be sure to rub the area with steel wool in between coats of polyurethane.
If you’re trying to decide whether to use polyurethane vs polycrylic for your project, check out this article with an overview of each.

12. Secure cabinet in place.
With everything painted, stained, and a protective coat added, it’s time to secure your cabinet in place.
We secured our cabinet to the wall by using construction screws.
To finish it off, we attached a few trim pieces to the tops and sides to cover any gaps from texture and uneven walls. This helps create a great finished look.
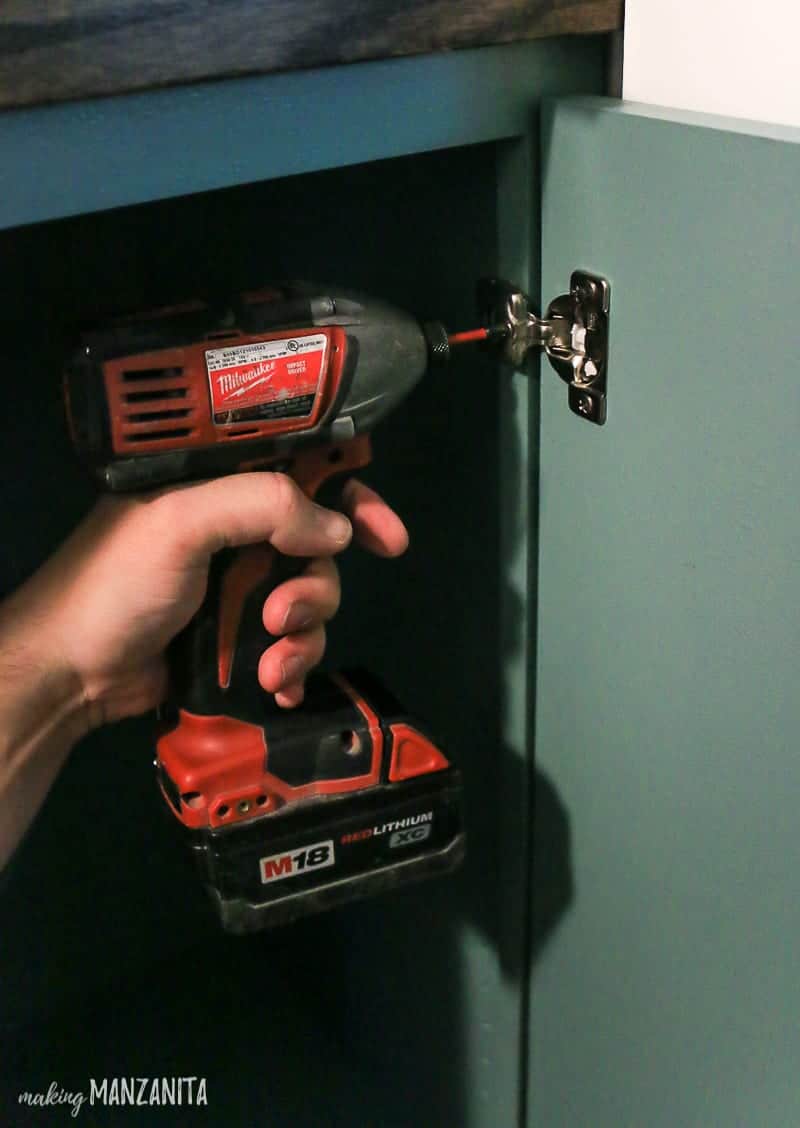
13. Add hardware and hinges.
The last step is to add hinges for the cabinet doors and add hardware.
We used these hinges that required us to use a Forstner bit to drill a hole 1/2″ deep in the door. Be sure you pick hinges with the right overlay for your cabinet.
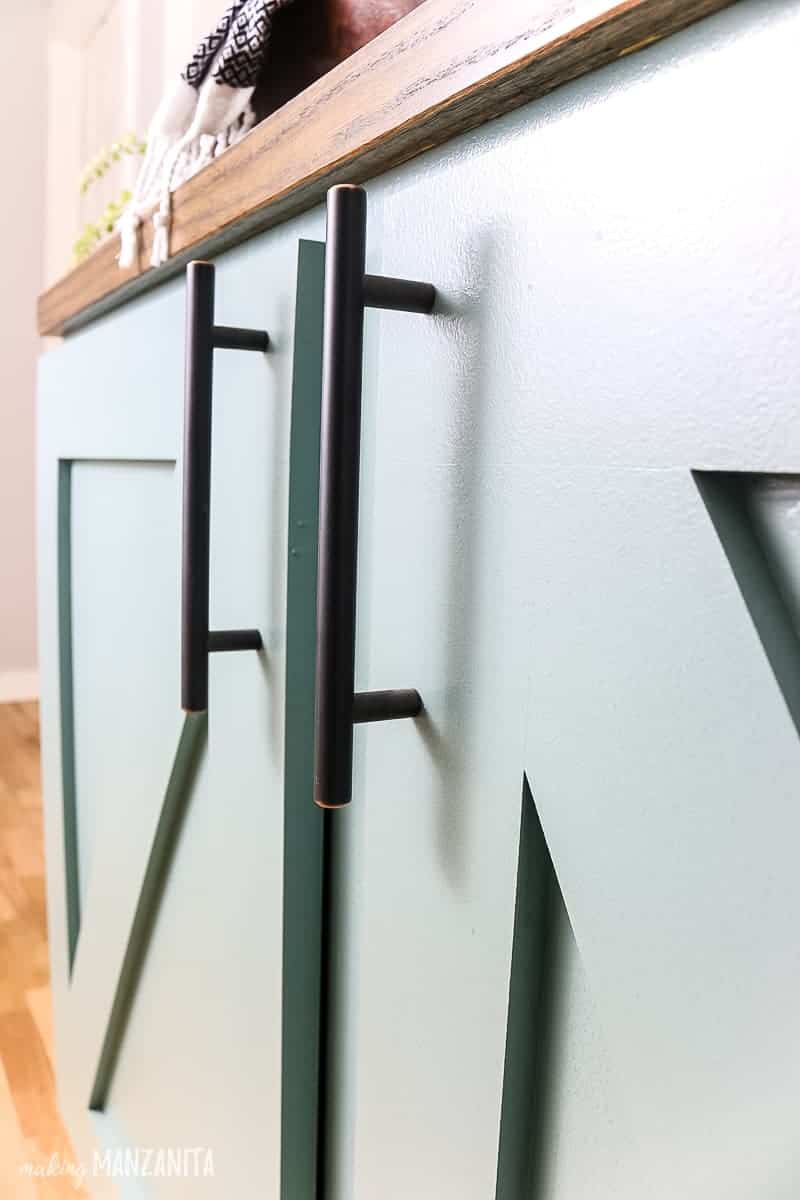
The hardware we added to the door fronts matched the cabinet hardware in our kitchen and we love it!
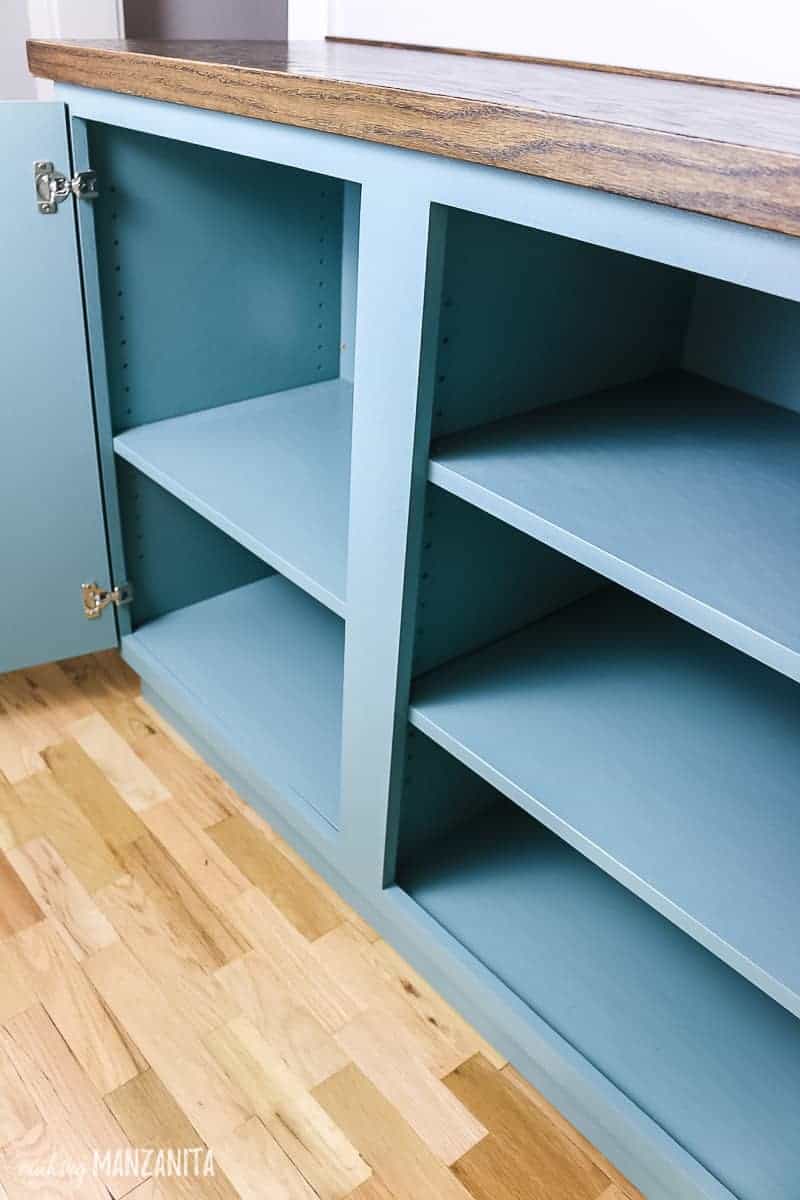
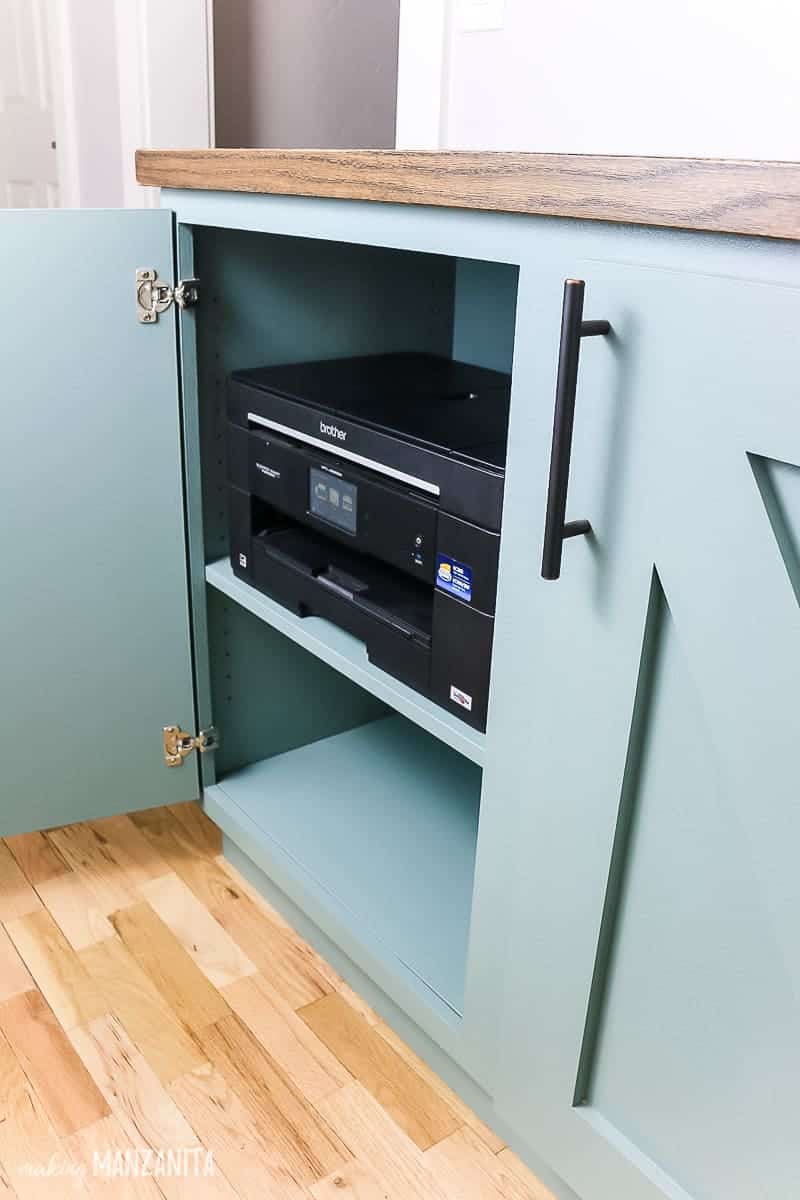
Not only does this hallway cabinet add lots of storage for towels, toilet paper and sheets like any other linen cabinet would provide…..
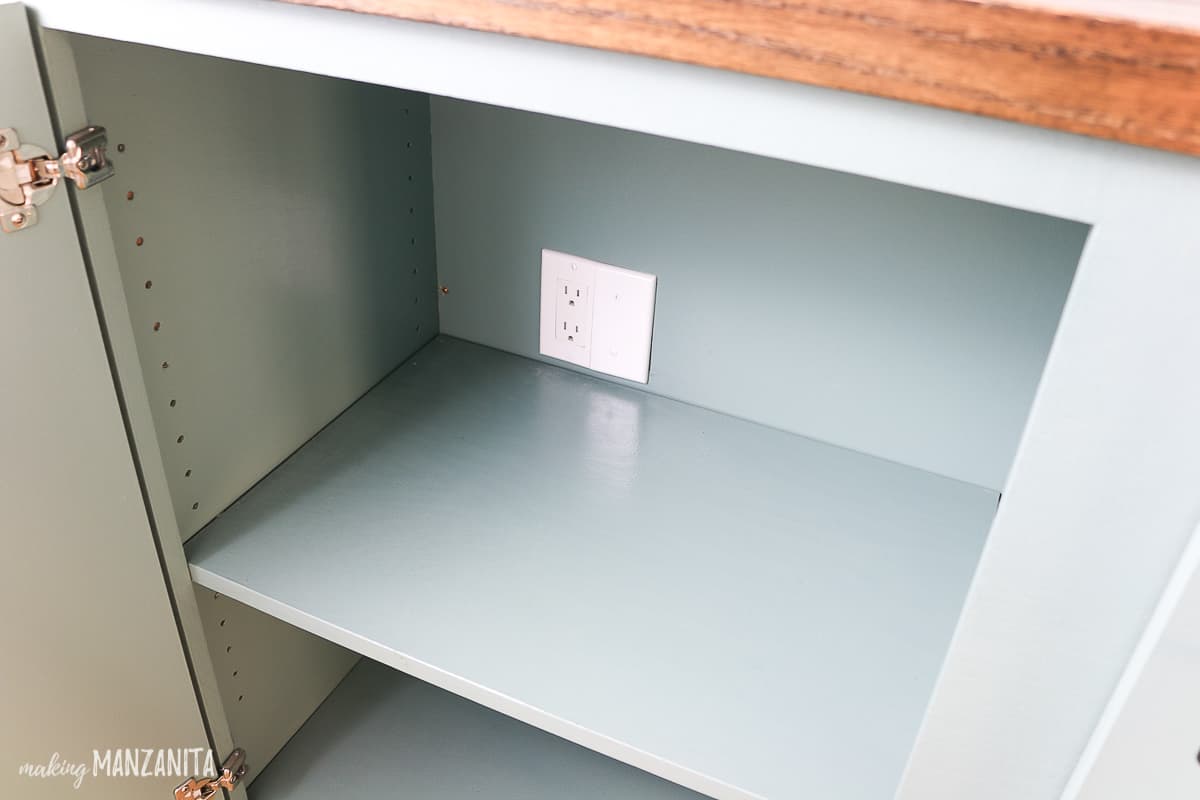
but this cabinet ALSO stores our printer because we added an outlet to the back.
Another pain point in this house was what to do with our printer, so this solves that problem too!
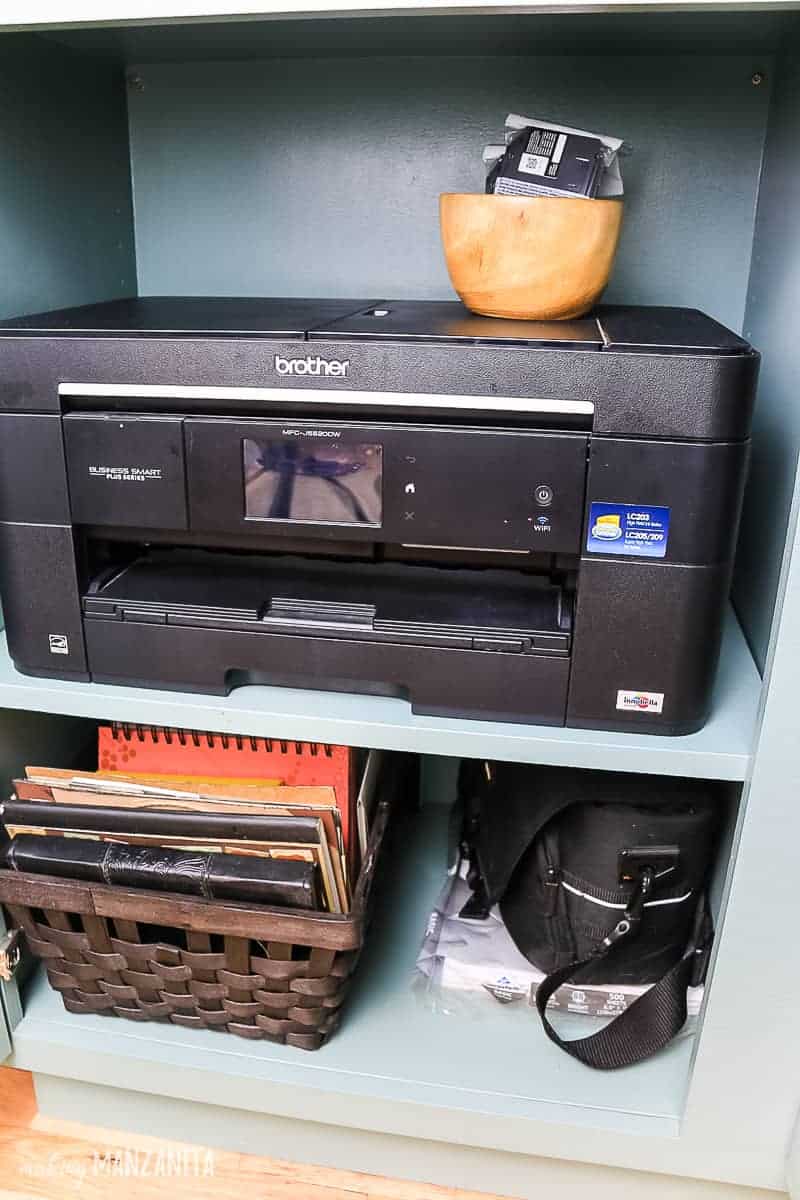
I even have a spot for a bunch of photo albums on the bottom shelf under the printer (in the black basket).
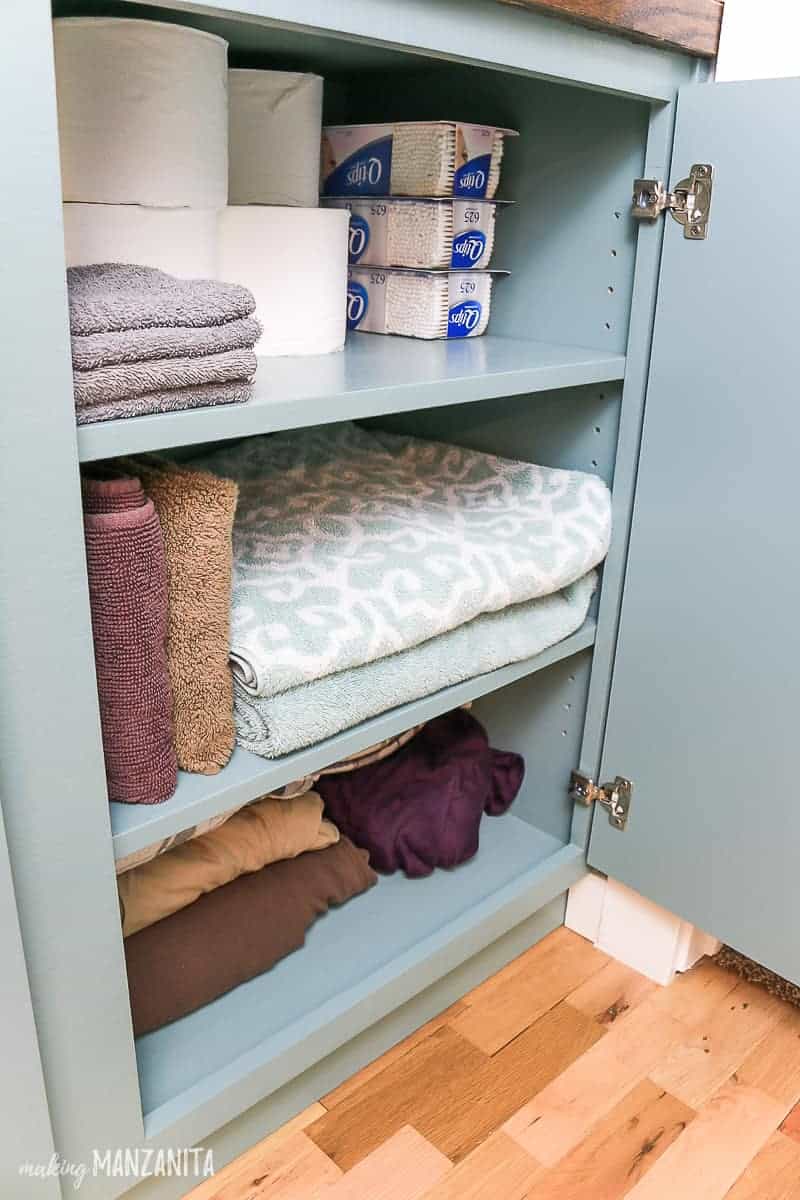
The other side of the hallway cabinet holds extra towels, sheets, rolls of toilet paper and Q-tips.
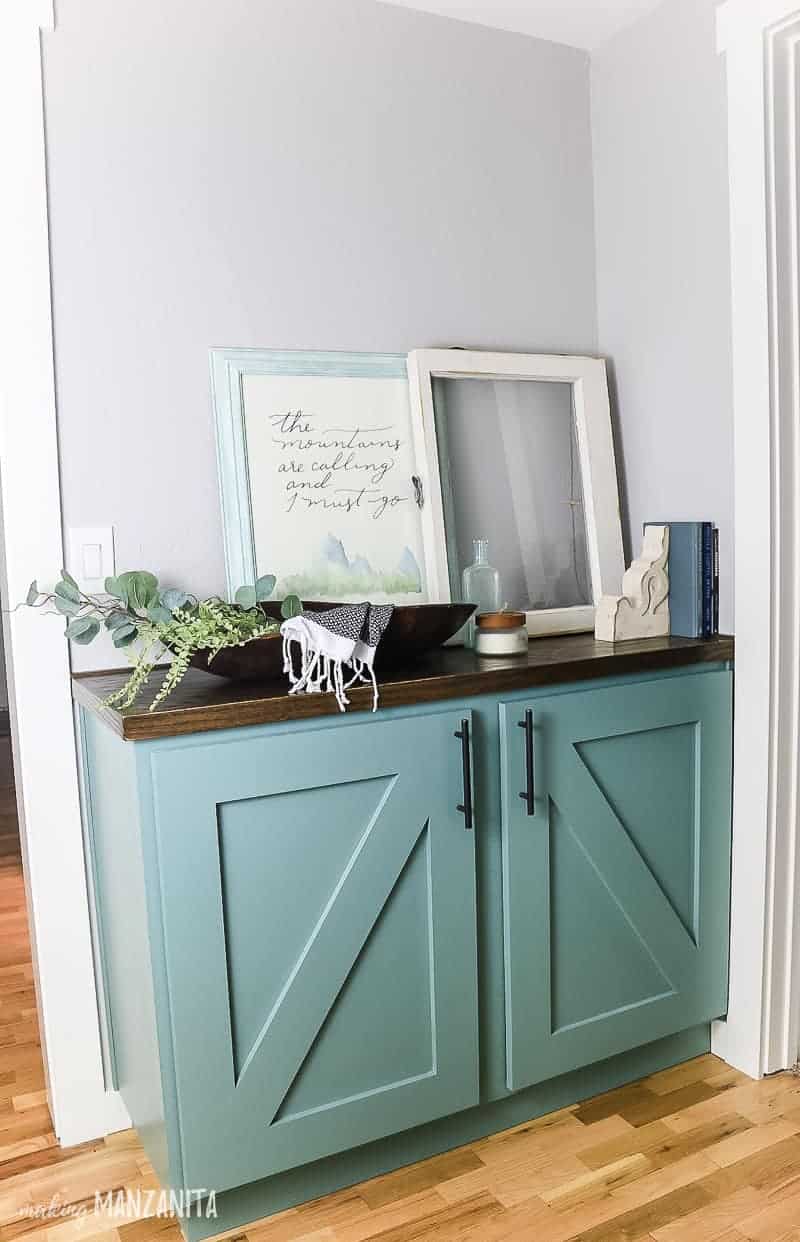
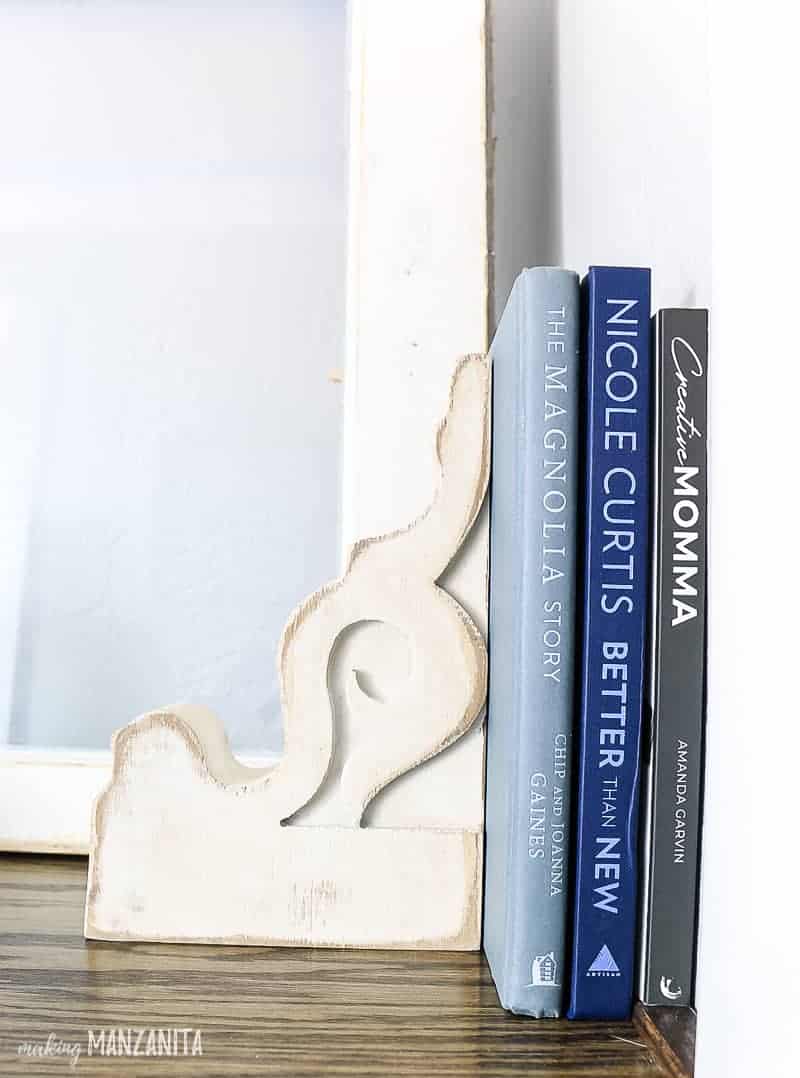
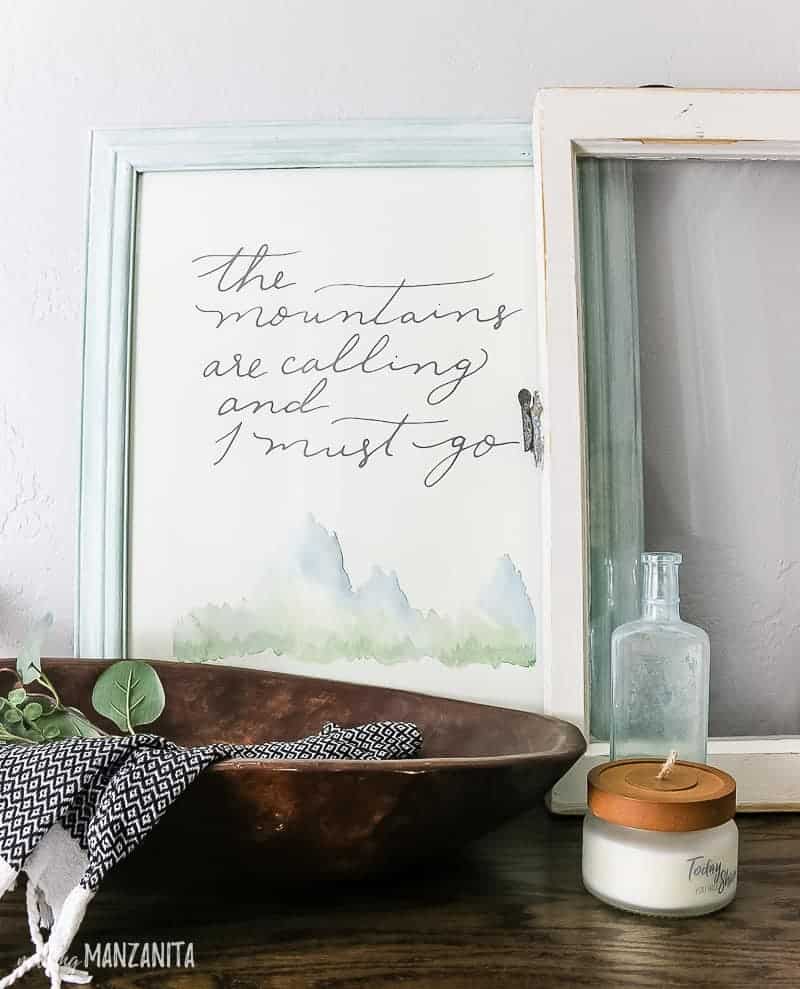
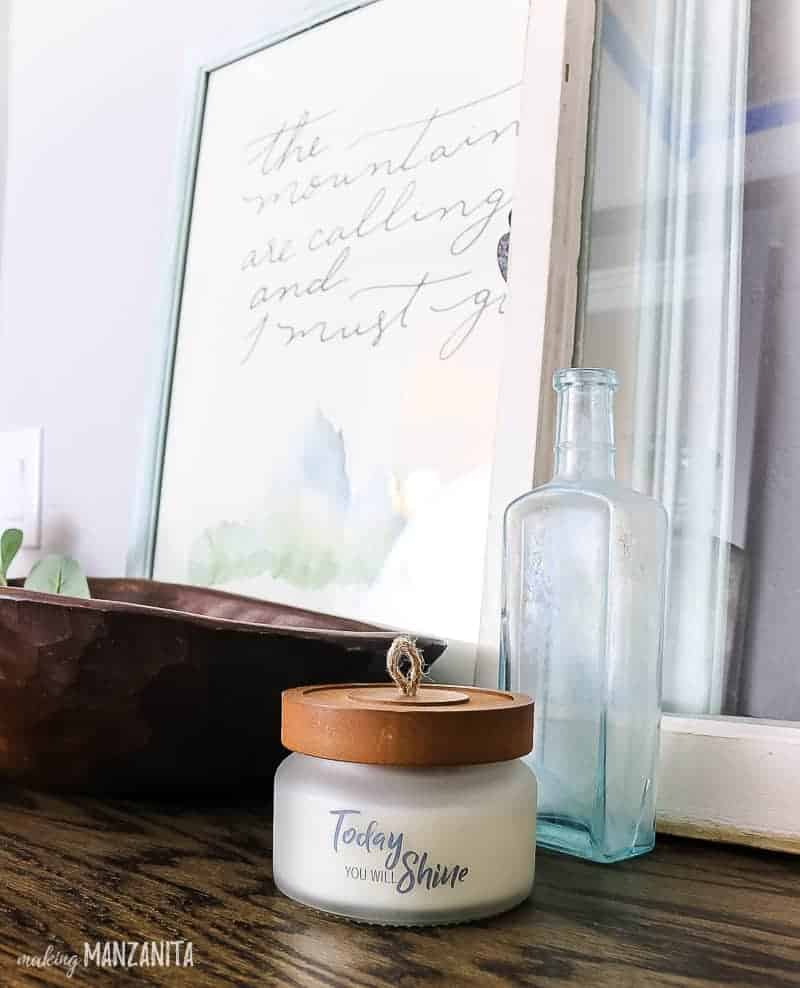
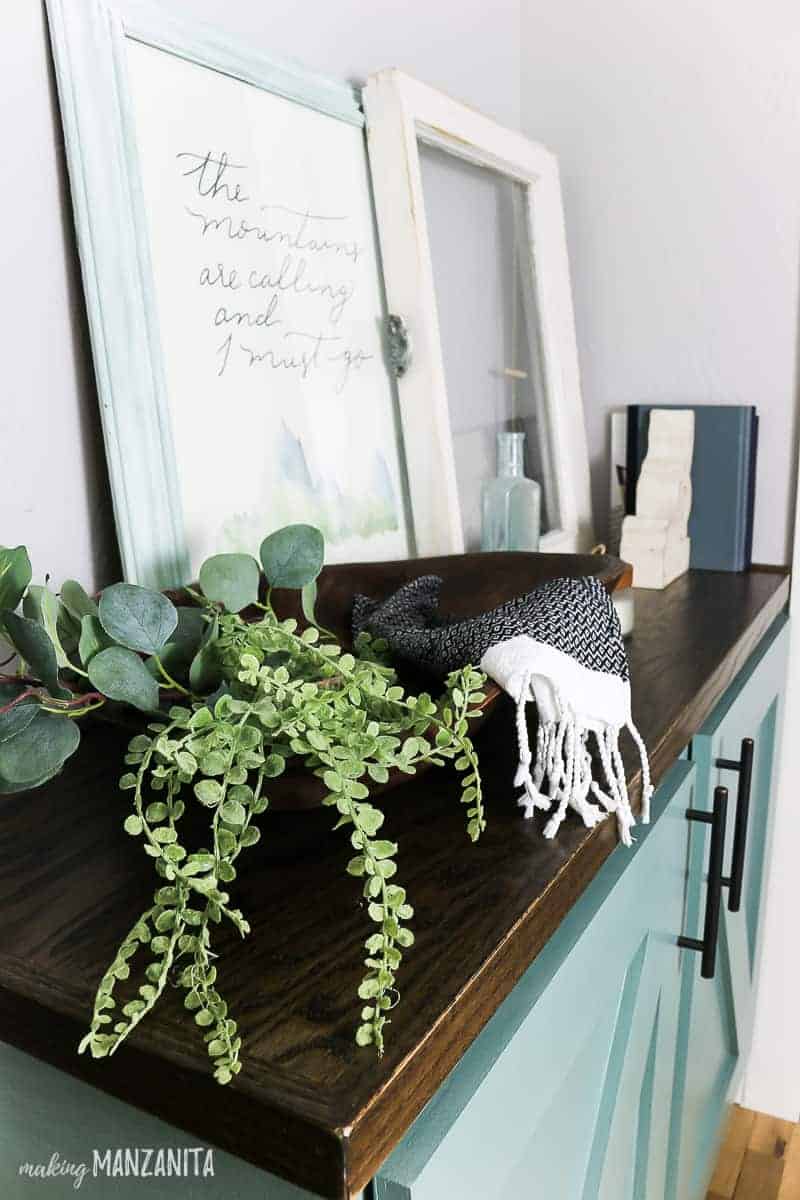
I had a lot of fun styling the top of the cabinet with books, a wooden dough bowl, and some art paired with a vintage window!
I’m loving the extra storage we added by building this cabinet for our hallway! Finally, I place to put our printer, extra toilet paper, towels, and sheets.
We designed this cabinet build with a beginning woodworker in mind because it doesn’t have any of the complicated cuts for joinery.
We were able to make a simple cabinet base without complicated joinery because we painted it, which really simplified things.
Even if you’ve never built a cabinet before, this is a great one to start on! Armed with Rockler’s awesome tools like the Clamp-It Corner Clamp and the Pro Shelf Drilling Jig, you’ll be able to build a cabinet like this.
What would you store in a hallway cabinet at your house??
Let me know in the comments below!
How To Build A Hallway Cabinet
Need to add some extra storage for your home? Here's how to build a DIY hallway cabinet, complete with adjustable shelves, farmhouse style doors, and extra room for even more decor!
Materials
- Plywood
- 1/4" Underlayment Plywood (used for back of cabinet)
- 1 1/2 Brad Nails
- 1/2" MDF Panel (used for the top and trim on doors)
- 1/4" MDF Panel (used for back of doors)
- Construction Adhesive
- Wood Glue
- Oak Trim
- Wood Stain
- Wood Filler
- Paint
- Sealer
- Hinges
- Hardware
- Construction screws
Tools
- Rockler Clamp-It Corner Clamping Jig
- Rockler Clamp-It Assembly Square
- Rocker Pro Shelf Drilling Jig
- Rockler Shelving Jig Drill Bit (1/4")
- Table Saw
- Impact Driver
- Brad Nailer
- Caulk gun
- Clamps
- Orbital sander
- Paint roller
- Paint tray
- Rockler Bench Cookies
- Rockler Bench Cookie Cones
Instructions
- Plan your hallway cabinet finish.
- Design your hallway cabinet.
- Cut wood.
- Drill shelf pin holes.
- Assemble hallway cabinet.
- Add cabinet front face.
- Build cabinet doors.
- Make and attach countertop.
- Paint and seal hallway cabinet.
- Add trim, stain and seal countertop.
- Secure cabinet in place.
- Add hardware and hinges.
Related: Want to see more woodworking projects and articles?
- DIY Mudroom Lockers With Doors
- Easy DIY Grill Utensil Holder
- How to Find Free or Cheap Lumber for Woodworking Projects
- Plywood Buying Guide
- Filling Holes and Gaps – Do I use caulk, wood filler, or spackle?
- DIY Cookbook Stand
- Simple Wooden Farmhouse Style Centerpiece
- How Long Does Wood Stain Take To Dry?
- How To Get Wood Stain Off Skin
- How To Finish Plywood Edges Like A Pro
- DIY Behind the Couch Table with Outlet
- Easy DIY Bedside Table Plans
- 12+ DIY Bed Frame Ideas You Can Make Yourself


That looked way to complicated for me. Cutting and screwing, etc. Looked nice. Thought it was going to be something easy. Nope. Fooled again by what the heading said.
Sorry Suzanne, I definitely didn’t mean to be misleading here 🙁 When we were building this cabinet, we tried to remove one of the more complicated aspects of cabinet building – which is joinery. But using a simple “butt joint” (there is no simpler way to join to pieces of wood) it really takes a lot of the hard work out of what would normally be a pretty complicated building process.
Gorgeous cabinet and excited to attempt making it. Can you give me the dimensions please?
Brent Nussbaumer
Clarksville, TN
Hi Brent, so sorry for the delay in our response. We’re just seeing this comment! The Hallway cabinet is roughly: 4′ 1/4″ W X 3′ H X 17 1/4″ D(with a 3.5″ x 3.5″ toe kick all around base)
It’s late and maybe my brain is foggy, but those dimensions aren’t making sense. I assumed that it was around 4 ft long but if it’s 7 ft there’s no way it’s 4 ft deep. If my original assumption is correct then is ‘7 1/4″ the depth? That also seems to shallow to hold your printer.
Can you clarify?
Hi Robin! So sorry about that typo, we’ve fixed it now. It’s 17 1/4″ deep, which was built to both fit our printer and fit within the existing door which is next to it. The printer is only 12″ inches deep so it fits in nicely.
What are the dimensions for your cabinet? I love it!
Hi There Tracy – sorry for the delay in our response. We’re just seeing this comment. The Hallway cabinet is roughly: 4′ 1/4″ W X 3′ H X 17 1/4″ D (with a 3.5″ x 3.5″ toe kick all around base)
What paint color was used?
The paint color is “In The Moment” by Behr.
I think I missed it, but where is the steps for the toe kick? The pictures go from a box, to the trim, and the picture of the top all of a sudden has a toe kick. How far in to you cut the toe kick?
Hi there! Yes, I just realized the step for the toe kick wasn’t there, I’ve updated. The toe kick was a completely separately piece that we built (essentially a small box). It measured approximately 3.5″ tall and was 1″ smaller than the cabinet.
Was this post removed? I only see comments!
Hi Amy! Not sure why you’re not seeing the post. Everything looks fine on my end. Is this the URL you’re viewing? https://www.makingmanzanita.com/hallway-cabinet/
Did you have any swelling issues painting the MDF? Or did you use some kind of primer?
We didn’t have any issues with the MDF swelling. We used a high quality paint + primer – Behr Paint Marquee line.
Hi
I have the Winter 2021 issue of Country Sampler Farmhouse, you diy a laundry room. Can you tell me where you purchased the sink?
Thanks
Sue
Hi Sue! Welcome 🙂 Thanks for reaching out. We were lucky enough to find the farmhouse sink at our local Habitat for Humanity ReStore, but I’ve included a direct link to the same sink in the blog post for that cabinet, which can be found here: https://www.makingmanzanita.com/farmhouse-sink-cabinet/
For your convenience, here’s the link to the sink: https://amzn.to/2Rriewa
It looks like the door panel was cut out and not pieced together. Can you tell me a little more about that? A step by step
Yes, because we decided to paint our cabinet allowed us to use MDF panels for most of the build since we didn’t have to worry about the stain or the edges. We ended up creating the cabinet doors with 1/2″ MDF as trim pieces to create an interesting door front design and attached that to a panel piece of 1/4″ MDF. We attached them with construction adhesive and nailed them into place with the nail gun.